How to Use the Markup Calculator

Marking up your materials and services ensures you are making the necessary profits on your work. With Houzz Pro you can set the target markup for each item in your estimates, proposals, invoices, or change orders, ensuring you get paid exactly what you deserve. Once you set the markup, our system's in-document calculator will automatically calculate the correct unit price and margin (if applicable) for you based off the existing unit cost.
Margin and markup both measure profit, but from different starting points. Margin is profit as a percentage of your selling price; markup is profit as a percentage of your cost.
To learn more about setting margin (not to be confused with markup) check out How to Calculate Margin.
View & Set Markup in Documents
Once you’ve created a document you will see each item listed in the Items section with its cost, quantity, and other details, including markup.
If you don't see the markup column, you need to enable it. Click the Customize button at the top of the items section and toggle on Markup.
To set the markup percentage, simply click in the column for the line item you want to edit and type in your desired markup. Click the checkmark or hit enter/return on your keyboard to save the number.
Note: The Unit Price and Margin will adjust automatically based on the markup amount entered.

You can also click the calculator icon in the Markup column to adjust the Markup. This will also show Unit Cost, Margin, Unit Price and MSRP in a single, consolidated view.
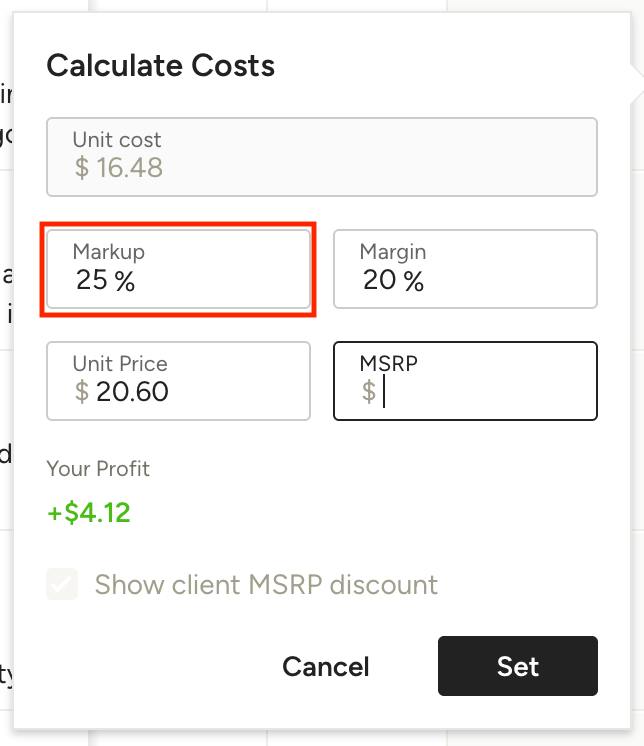
In the calculator, input the desired markup amount in the Markup field. This will automatically adjust the Unit Price and Margin based on the Unit Cost that is indicated on the item. Alternatively, if you want the Unit Price or Margin to be a specific number, you can set those and the Markup will automatically adjust accordingly.
You will be able to see your profit on the item towards the bottom of the calculator as well.
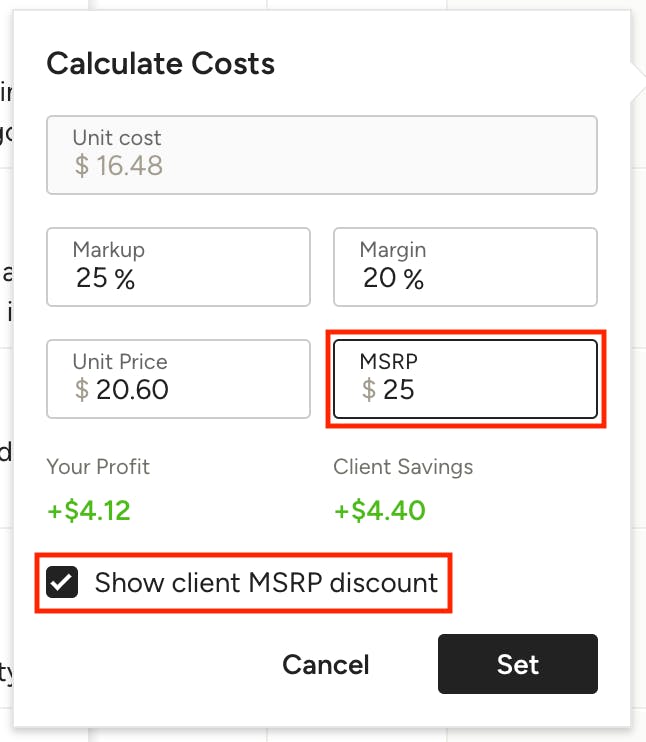
If you want to know the client's savings, there is the option to enter the MSRP amount. Once entered, you will see the Client Savings value below. To show this detail to the client, make sure the checkbox next to “Show client MSRP discount” is selected.

Once you’ve completed these details, click Set and your item will appear with the markup.
The total per item and the all-encompassing total will update according to the markup you set.
Looking to set a default markup percentage for all items? Check out this article to learn how: Set One Markup for All Items on a Document
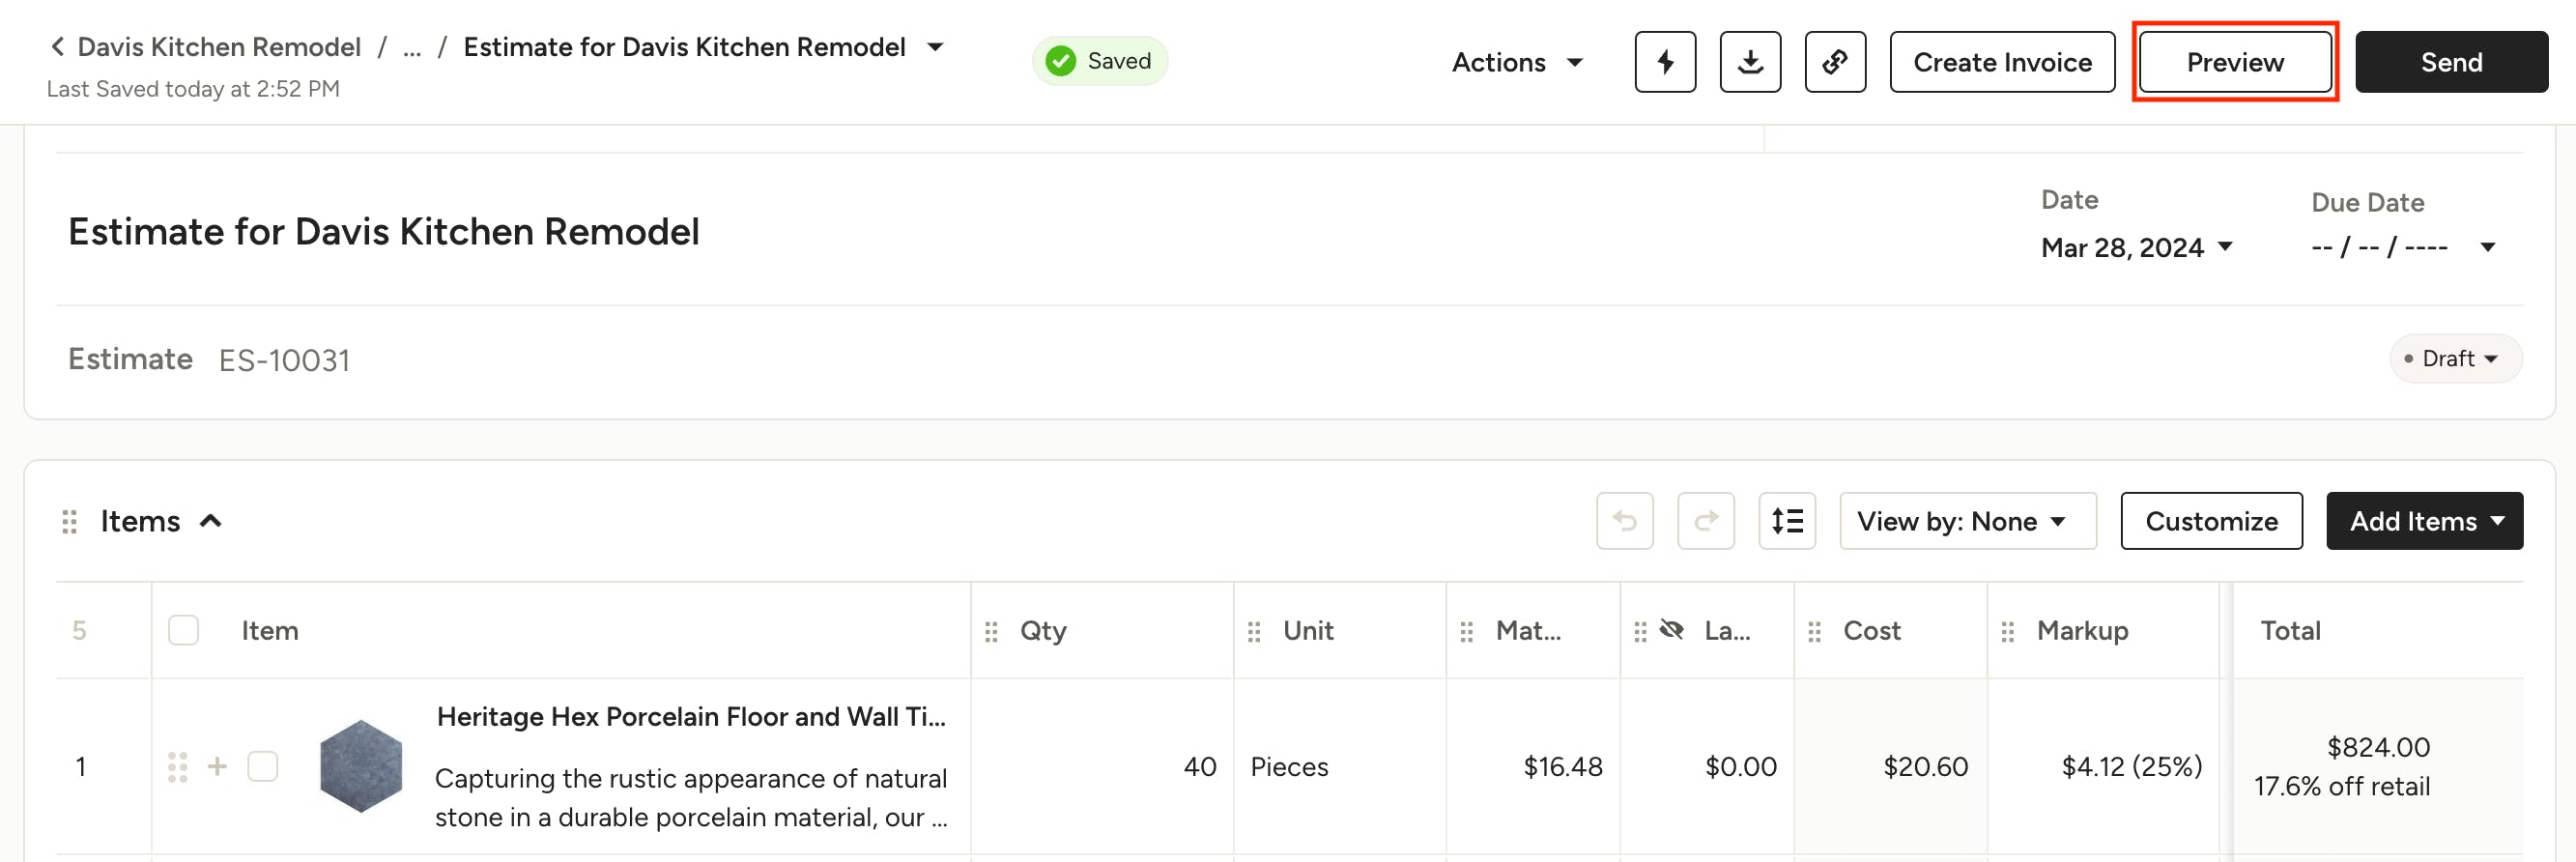
Showing Markup Breakdown to the Client
If you want to show the markup breakdown to your client, click Preview in the top right of the document.
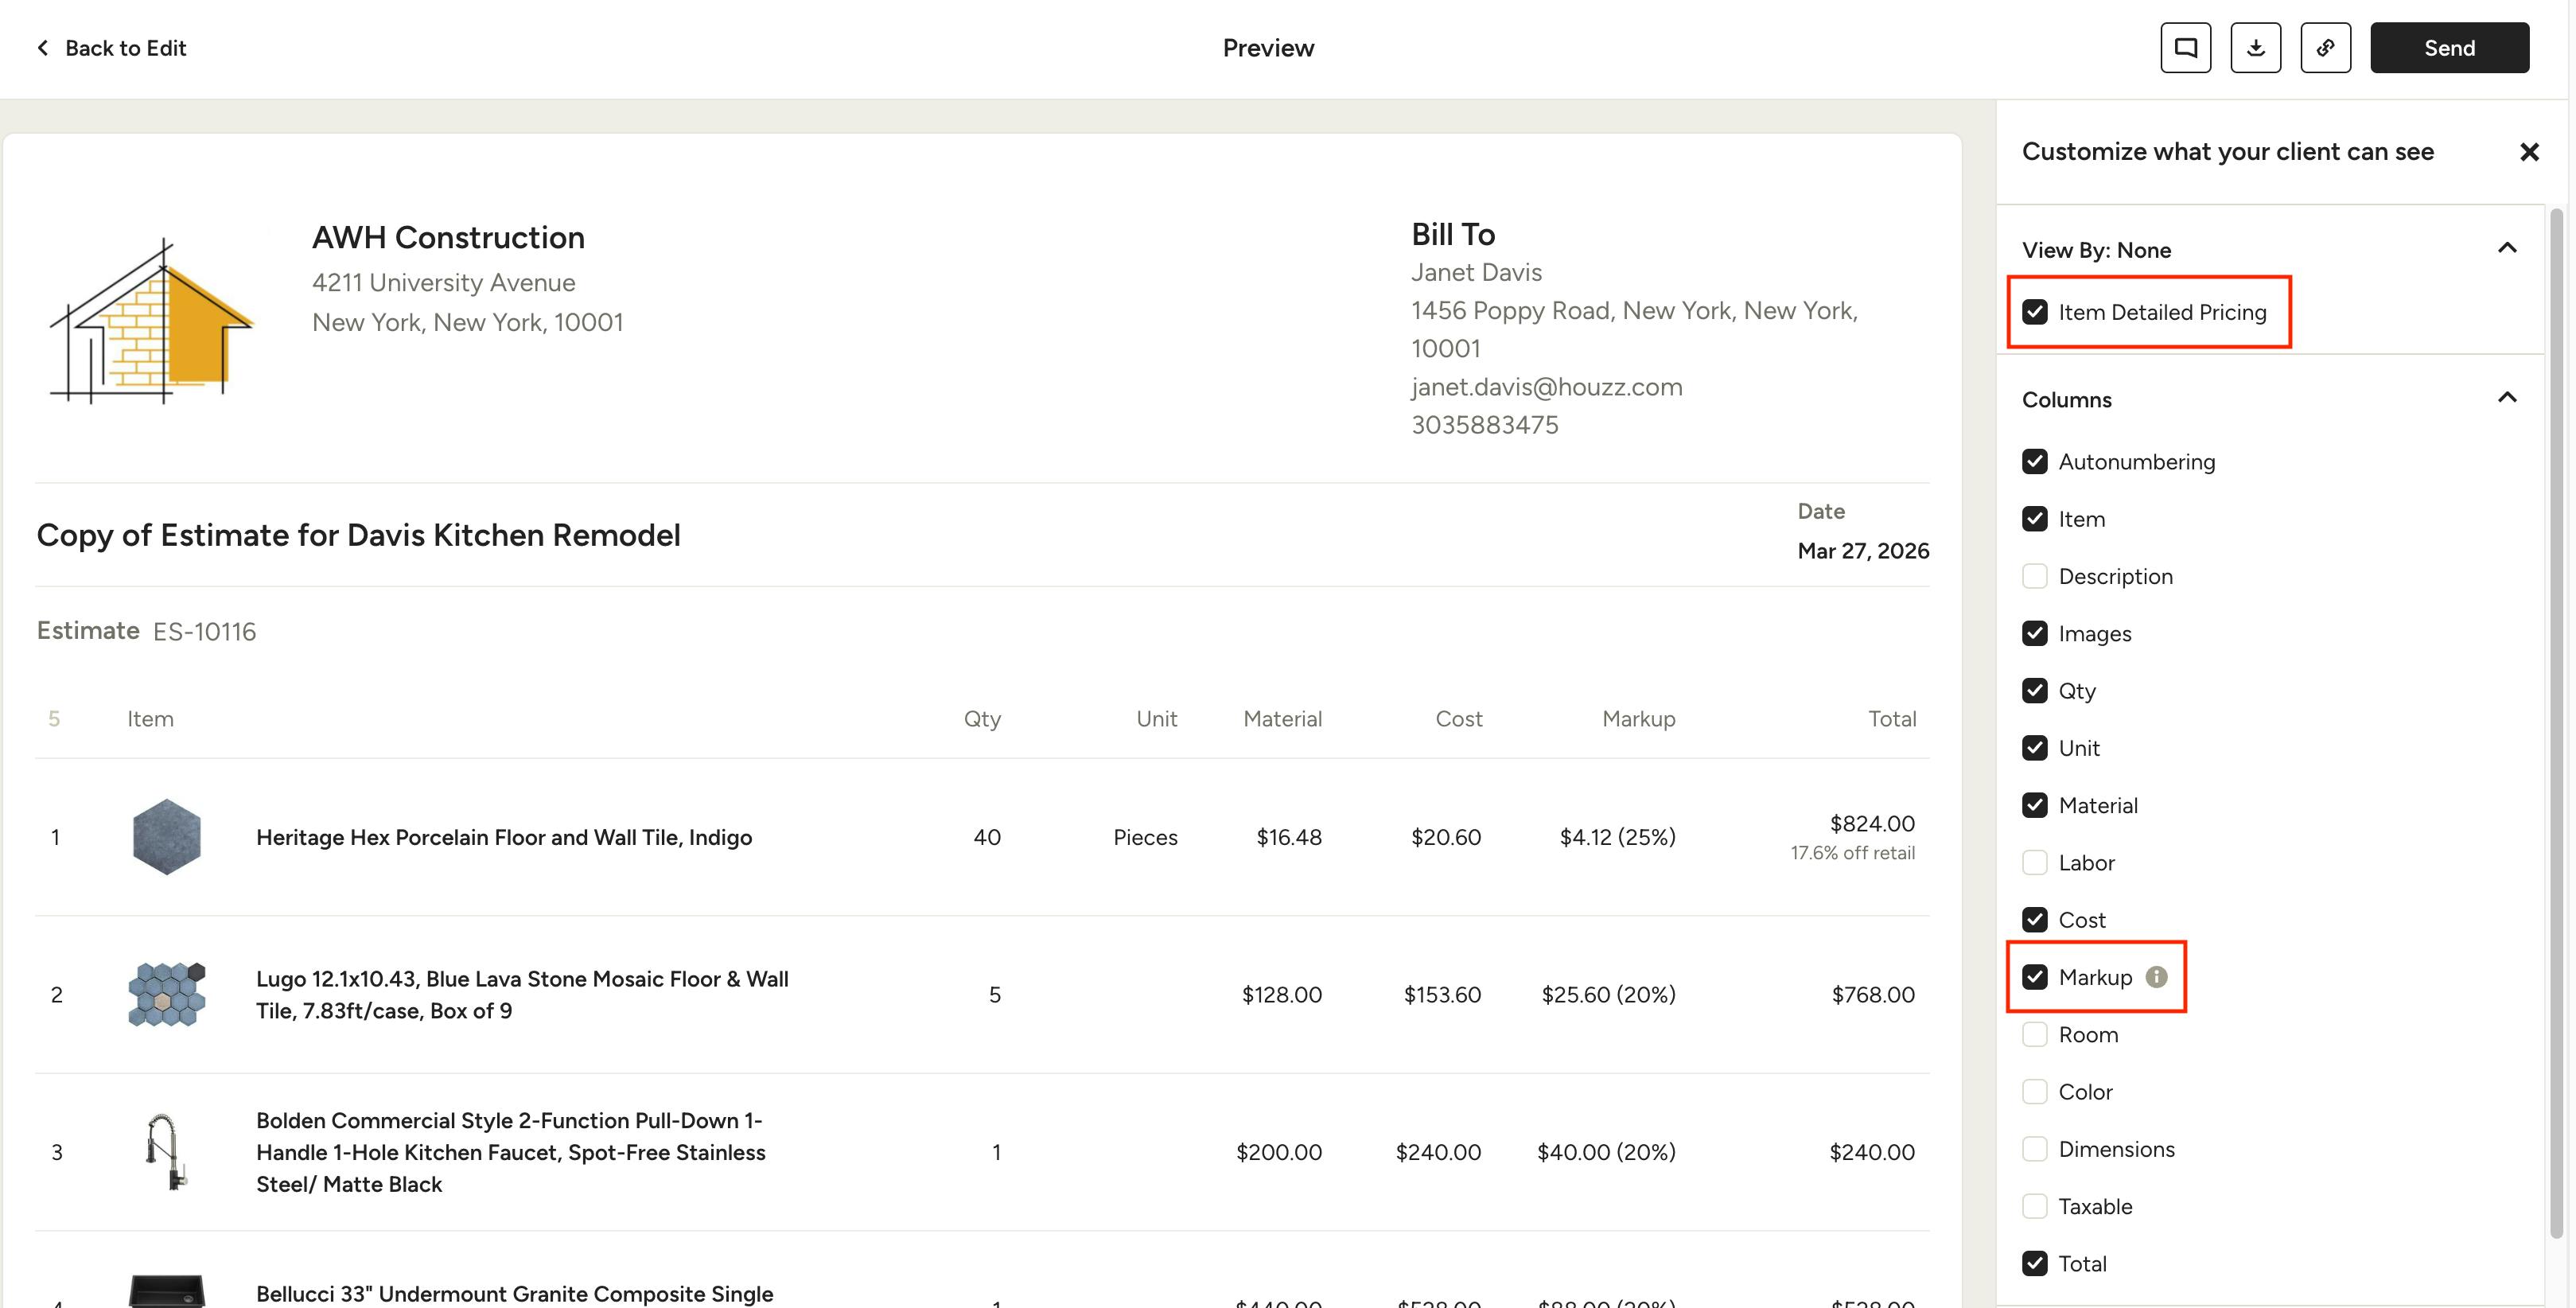
In the Settings under "Customize what your client can see" on the right, make sure “Item Detailed Pricing” and "Markup" are selected. This will also show the MSRP discount, if you selected to show it in the markup calculator.
This example shows how the markup will appear to your client, if you made it accessible for them to view:

View Unit Price (Unit Cost + Markup)
To easily see the combined unit cost and markup for line items, you can enable the Unit Price column in edit mode. Note that for build pros, Unit Price is only available if you have "Customize Your Cost Type" set in your Cost Breakdown Options, which you can learn more about in this article.
To view Unit Price in edit mode, click the Customize button at the top of your line items section.
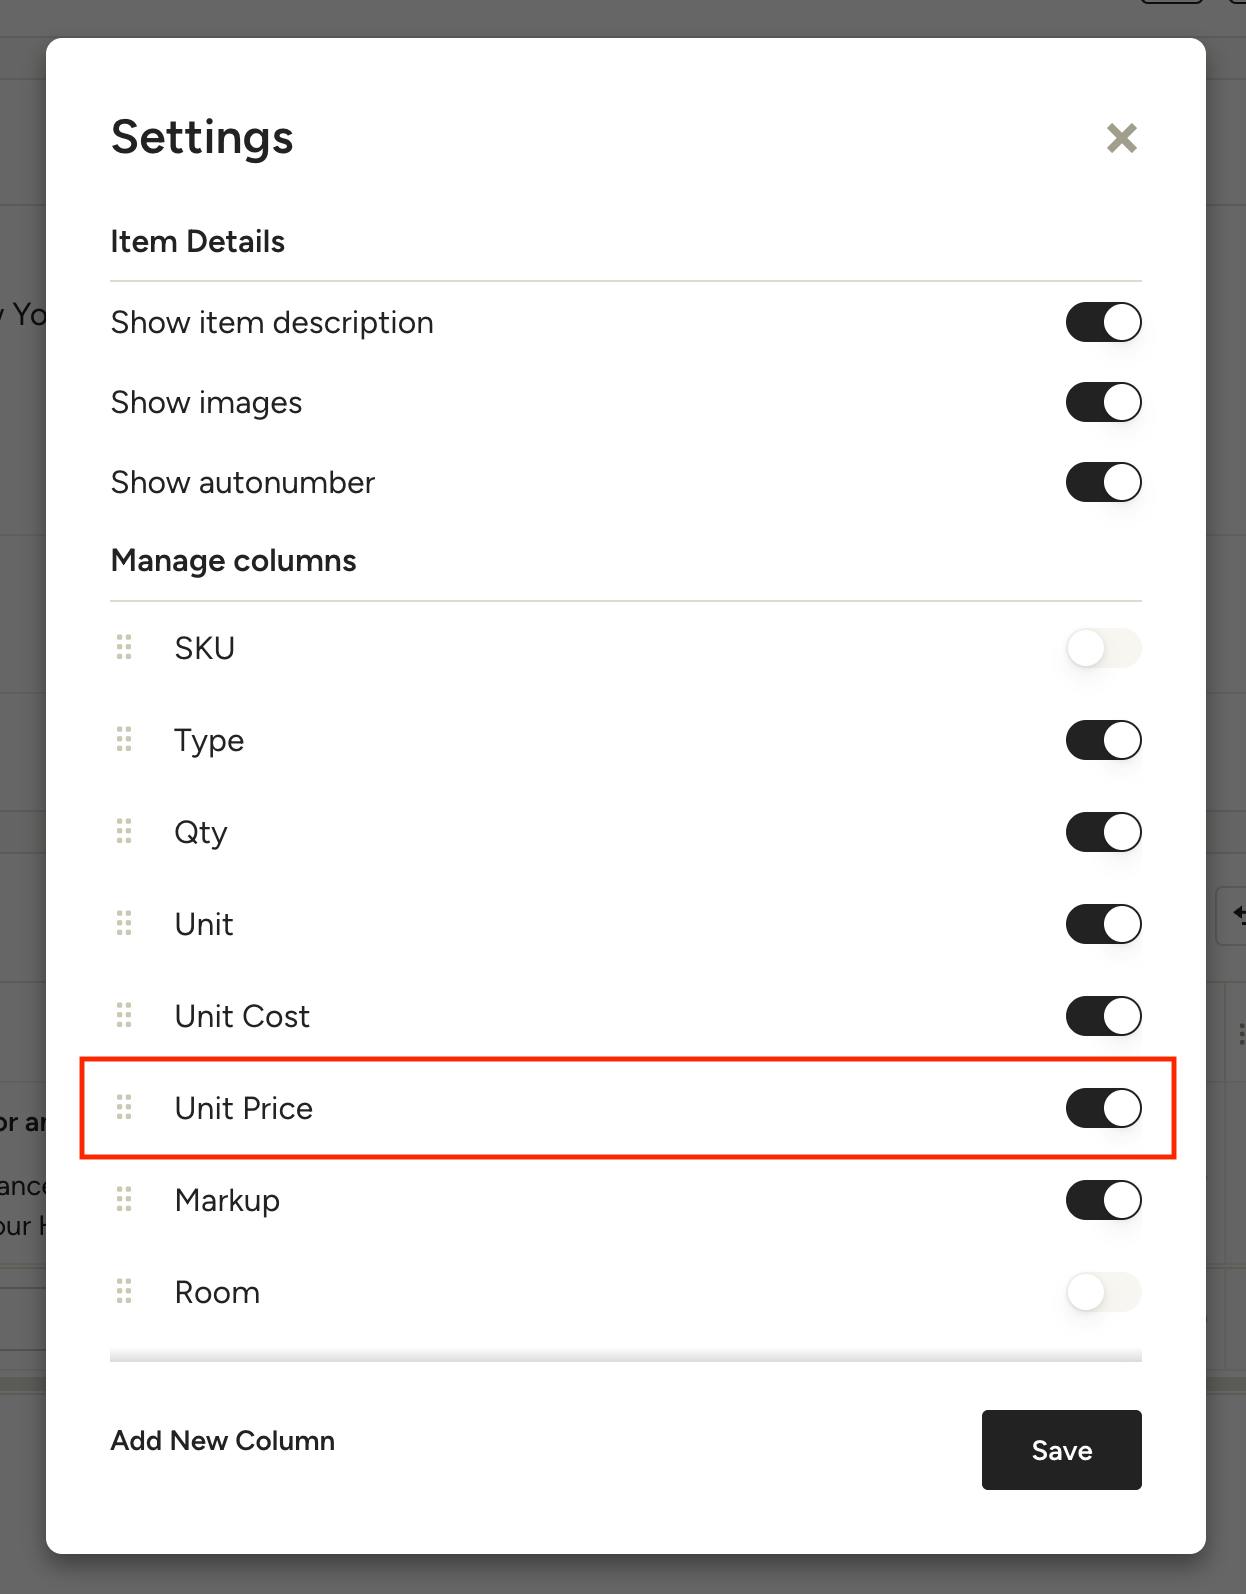
In the column settings, toggle on Unit Price, then click Save.

You will now see a Unit Price column, which combines the Unit Cost + Markup.
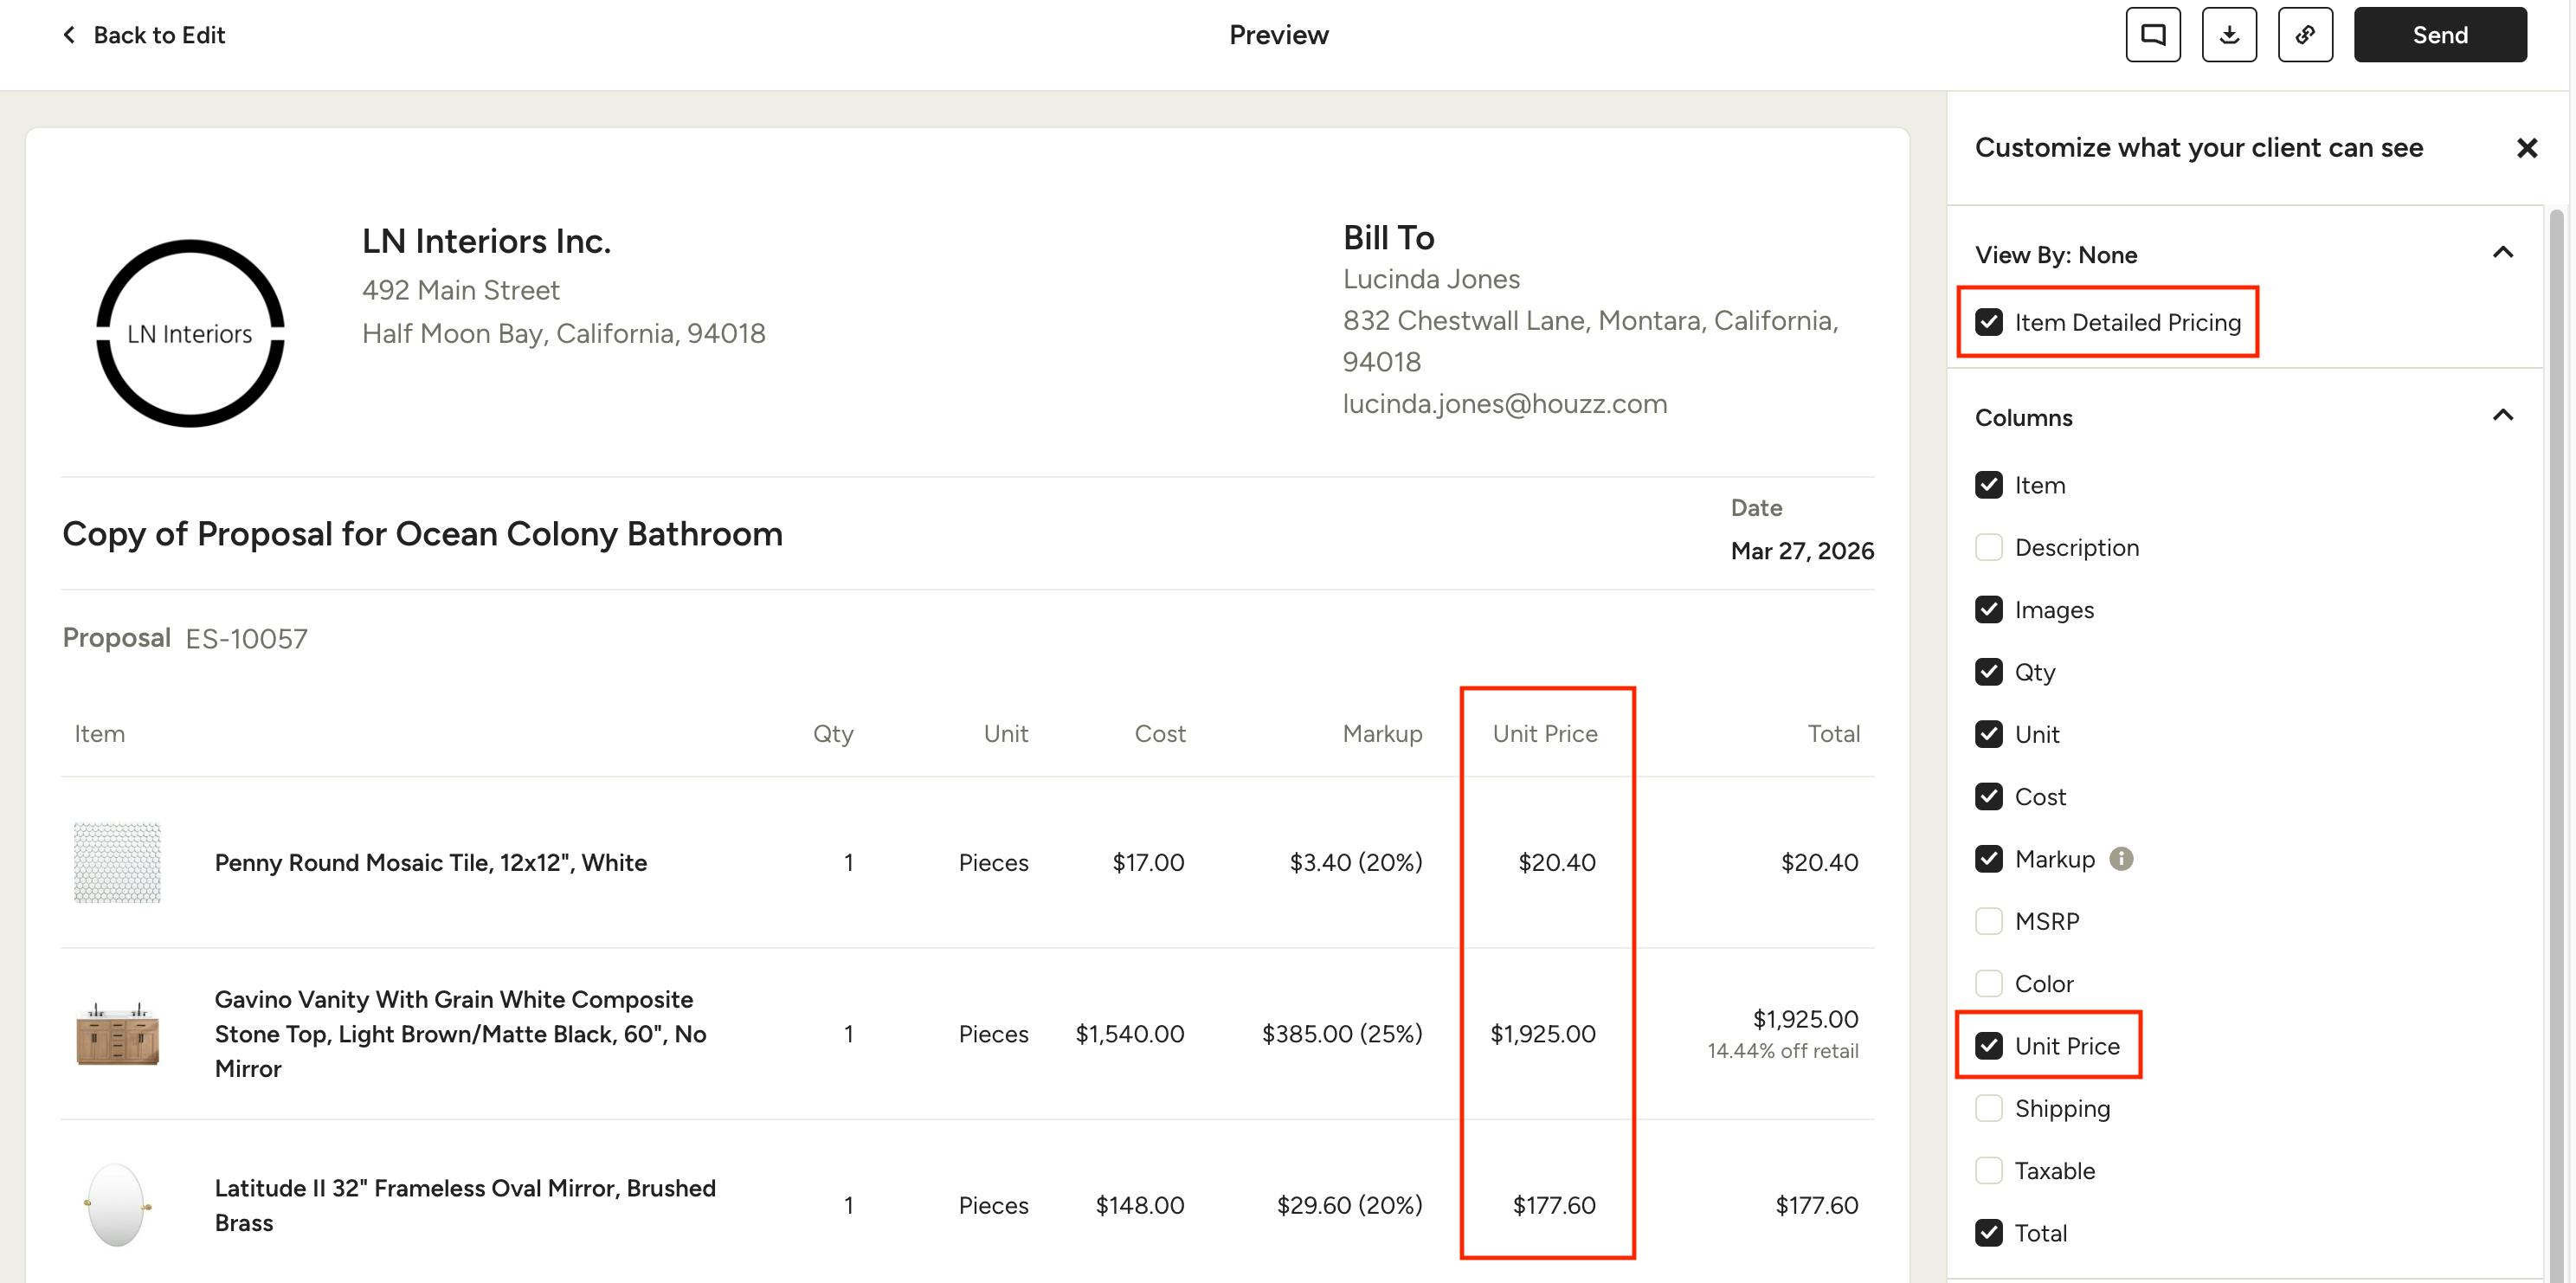
To show Unit Price to your client, preview the document and make sure “Item Detailed Pricing” and "Unit Price" are selected from the options on the right side.