How to Log a Payment
Logging payments in Houzz Pro helps you keep track of all the money you receive from clients. It's a great way to organize payments for your records and accurately reflect your business financials within financial reports.
This is a helpful feature if you receive a payment outside of Houzz or don't use online payments. If you use Houzz Pro online payments, you do not need to manually log payments — they will automatically log when the client pays online. Read How to Set Up Online Payments to learn more.
You can log a payment on approved and unapproved estimates, proposals, invoices and change orders. Depending on the amount received, you can log a full payment, a partial payment, or an overpayment. In order to log a payment, you will need to have scheduled payments set up on the estimate, proposal, invoice, or change order.
Log Full Payment
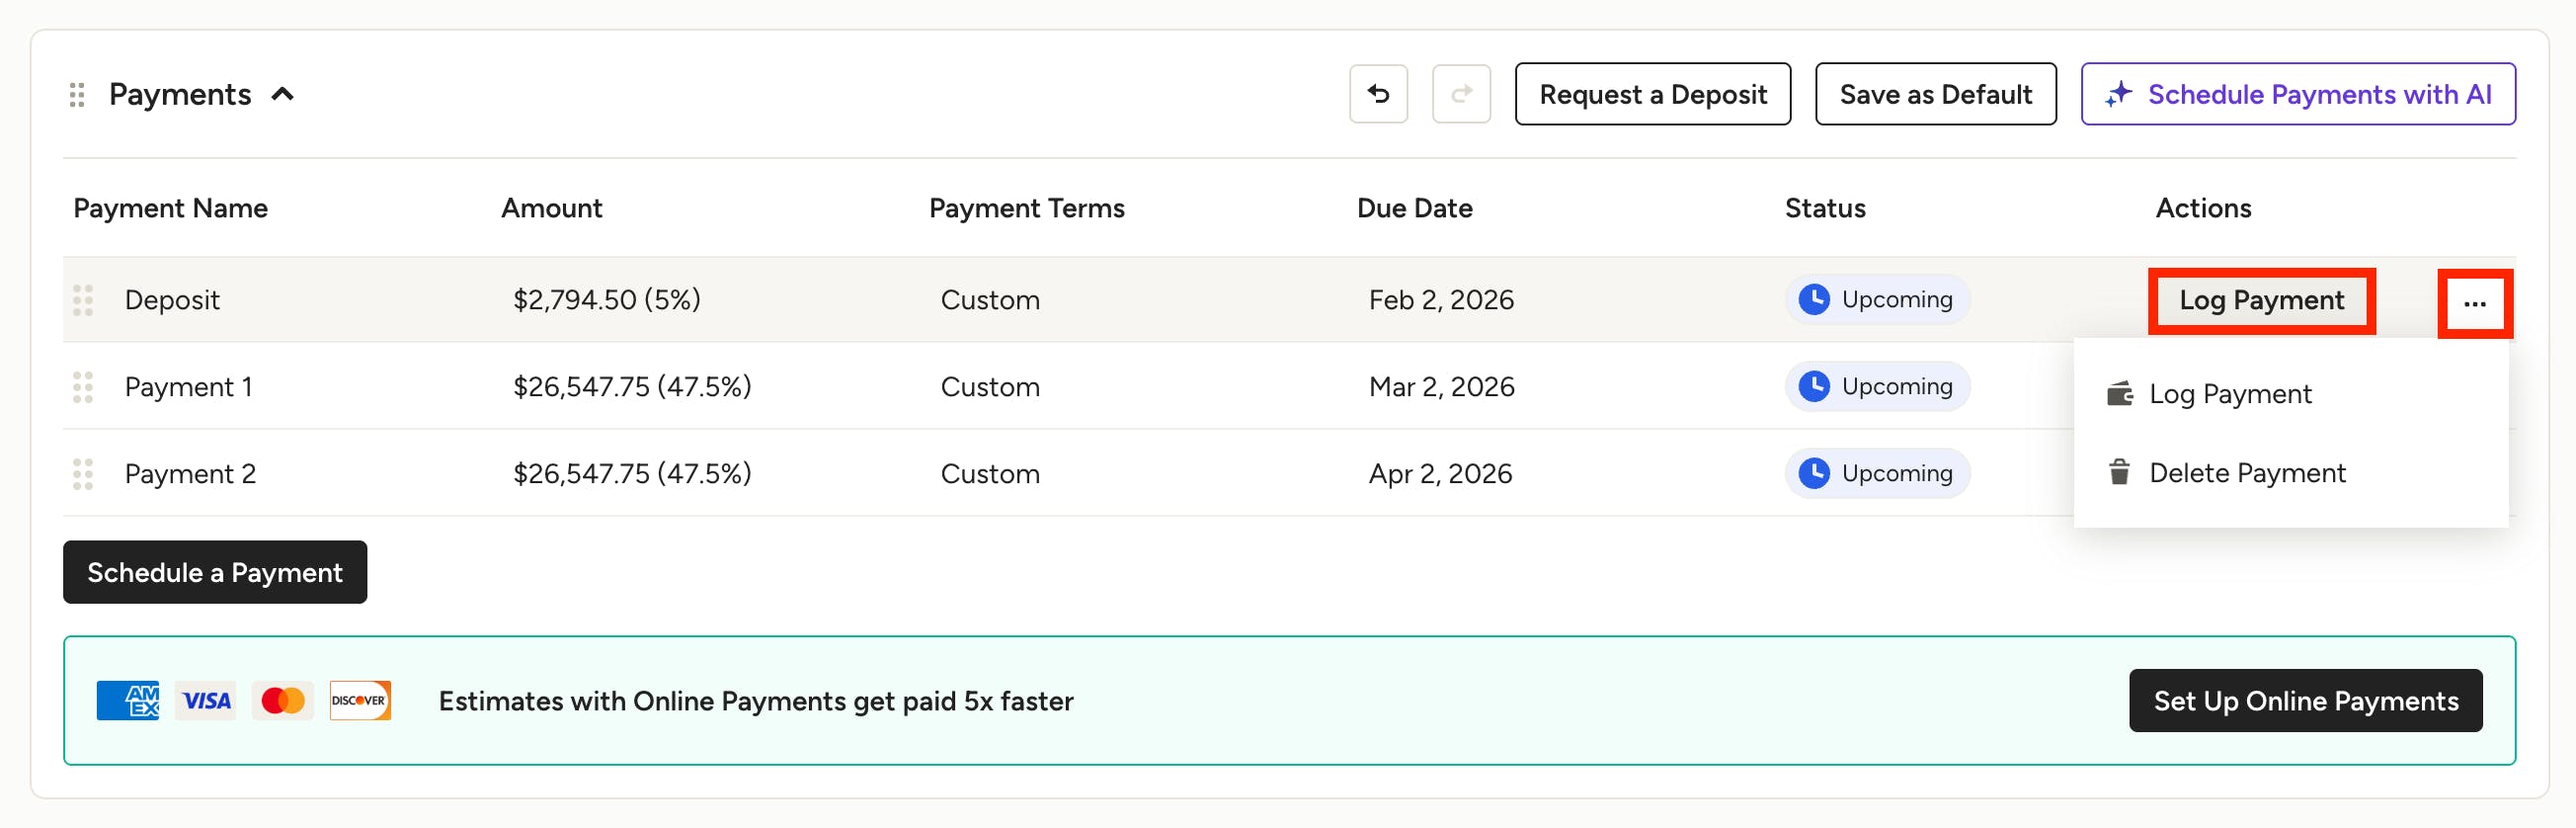
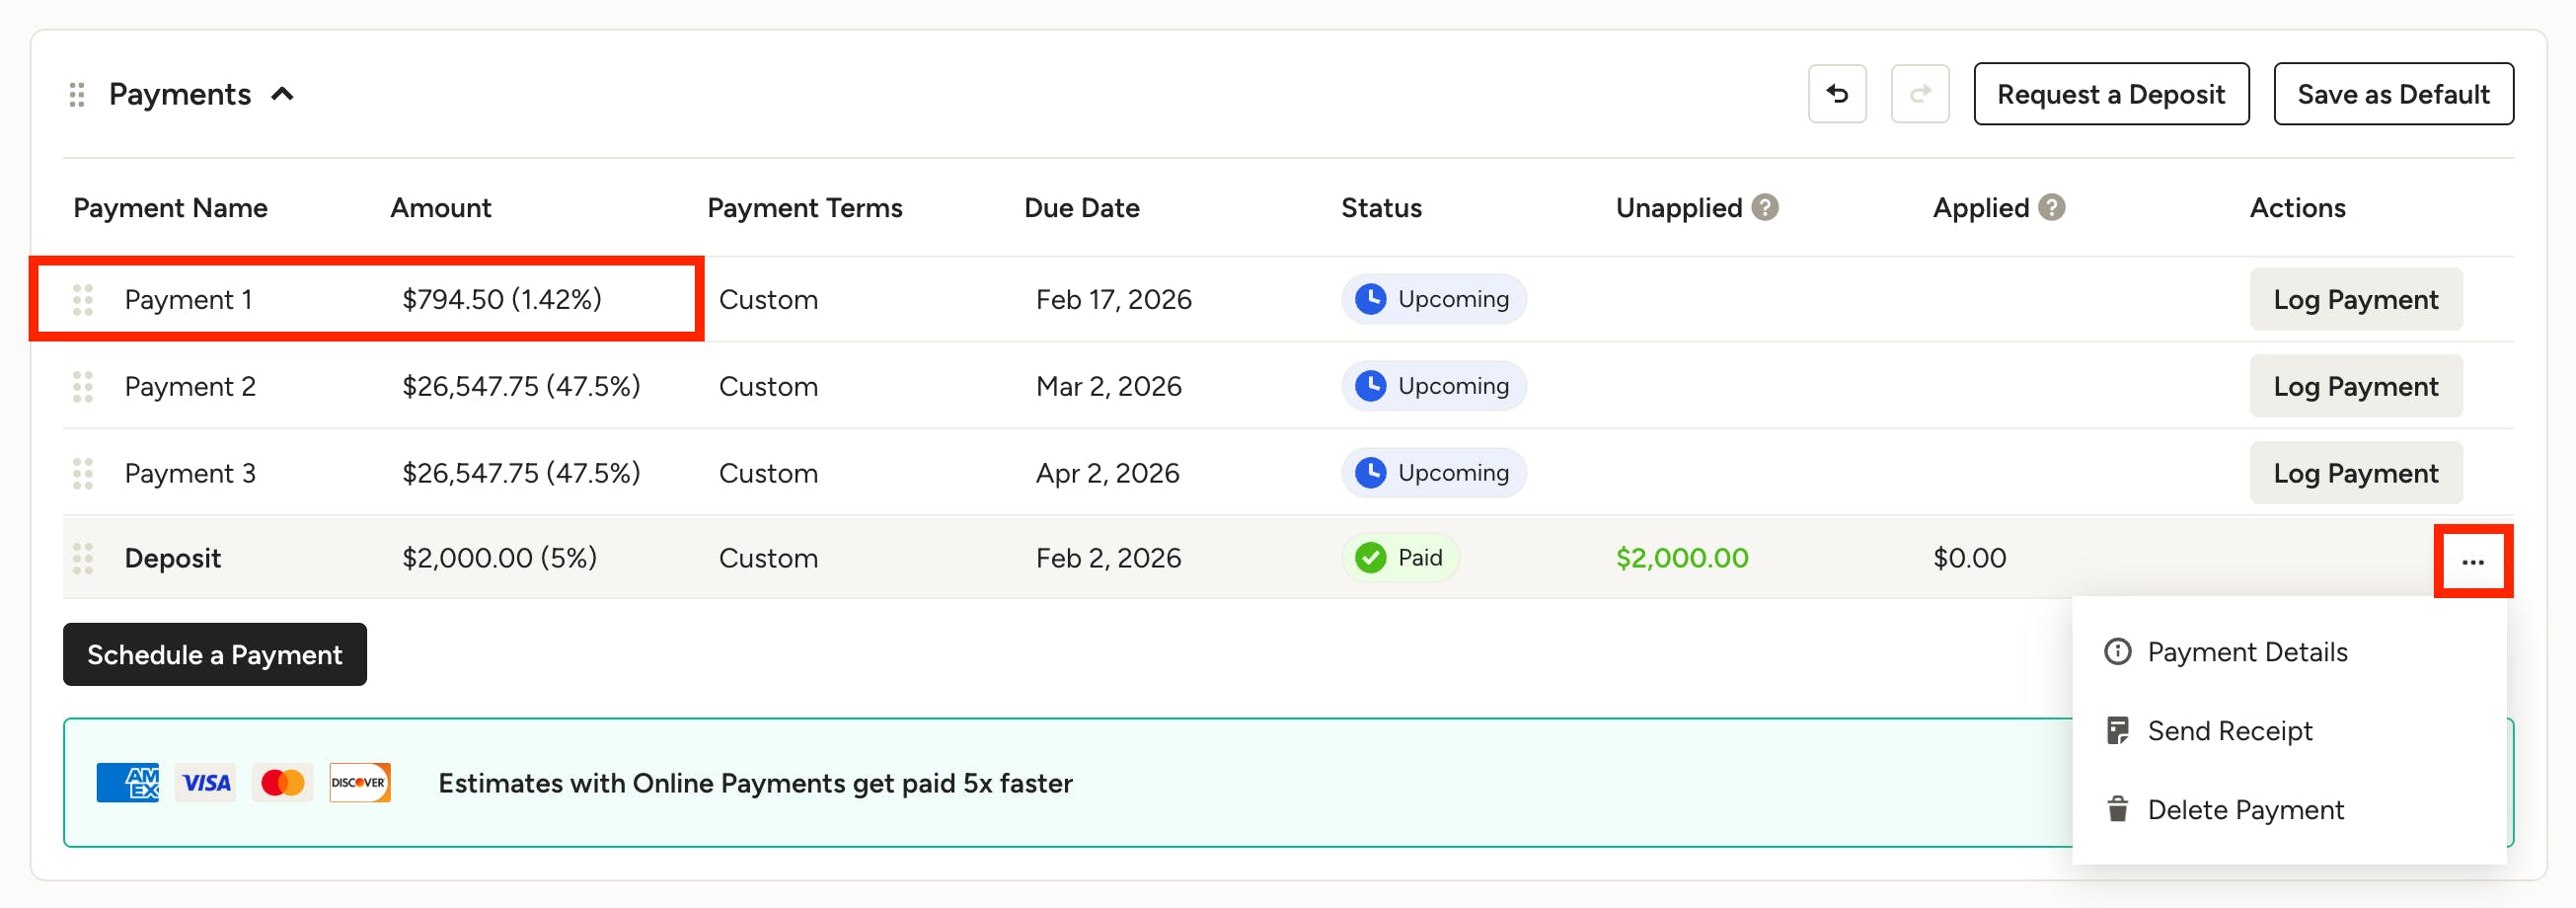
To log a payment that is the full amount of a scheduled payment, open up the relevant document and scroll down to the Payments section.
Click the Log Payment button to input payment details. You can also select the three dots to the right of the payment and select Log Payment.
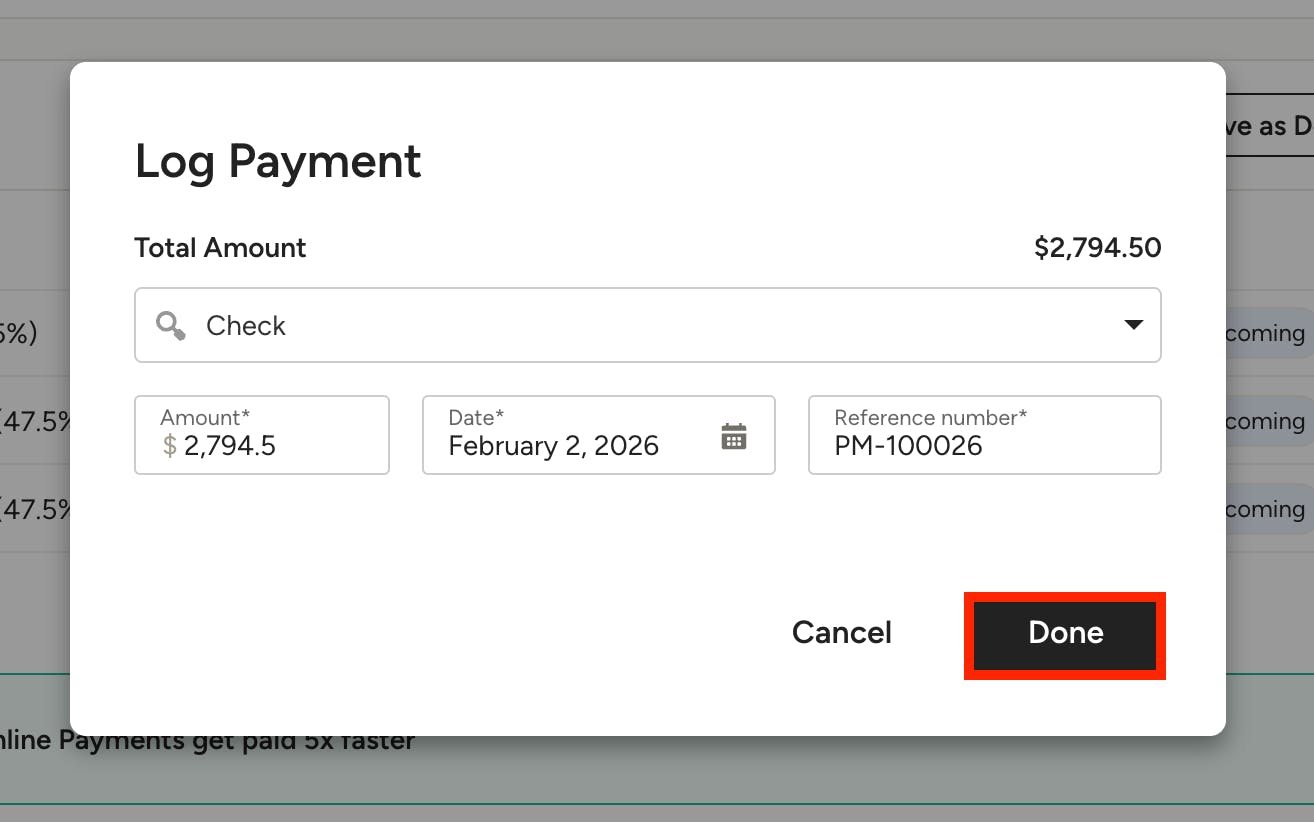
Input the relevant payment information. This includes payment method, payment amount, payment date, and reference number if needed. Payment methods listed include ACH/bank transfer, cash, check, credit card, Venmo and Zelle. By default, the payment amount will be for the total amount of the scheduled payment.
Click Done once complete.
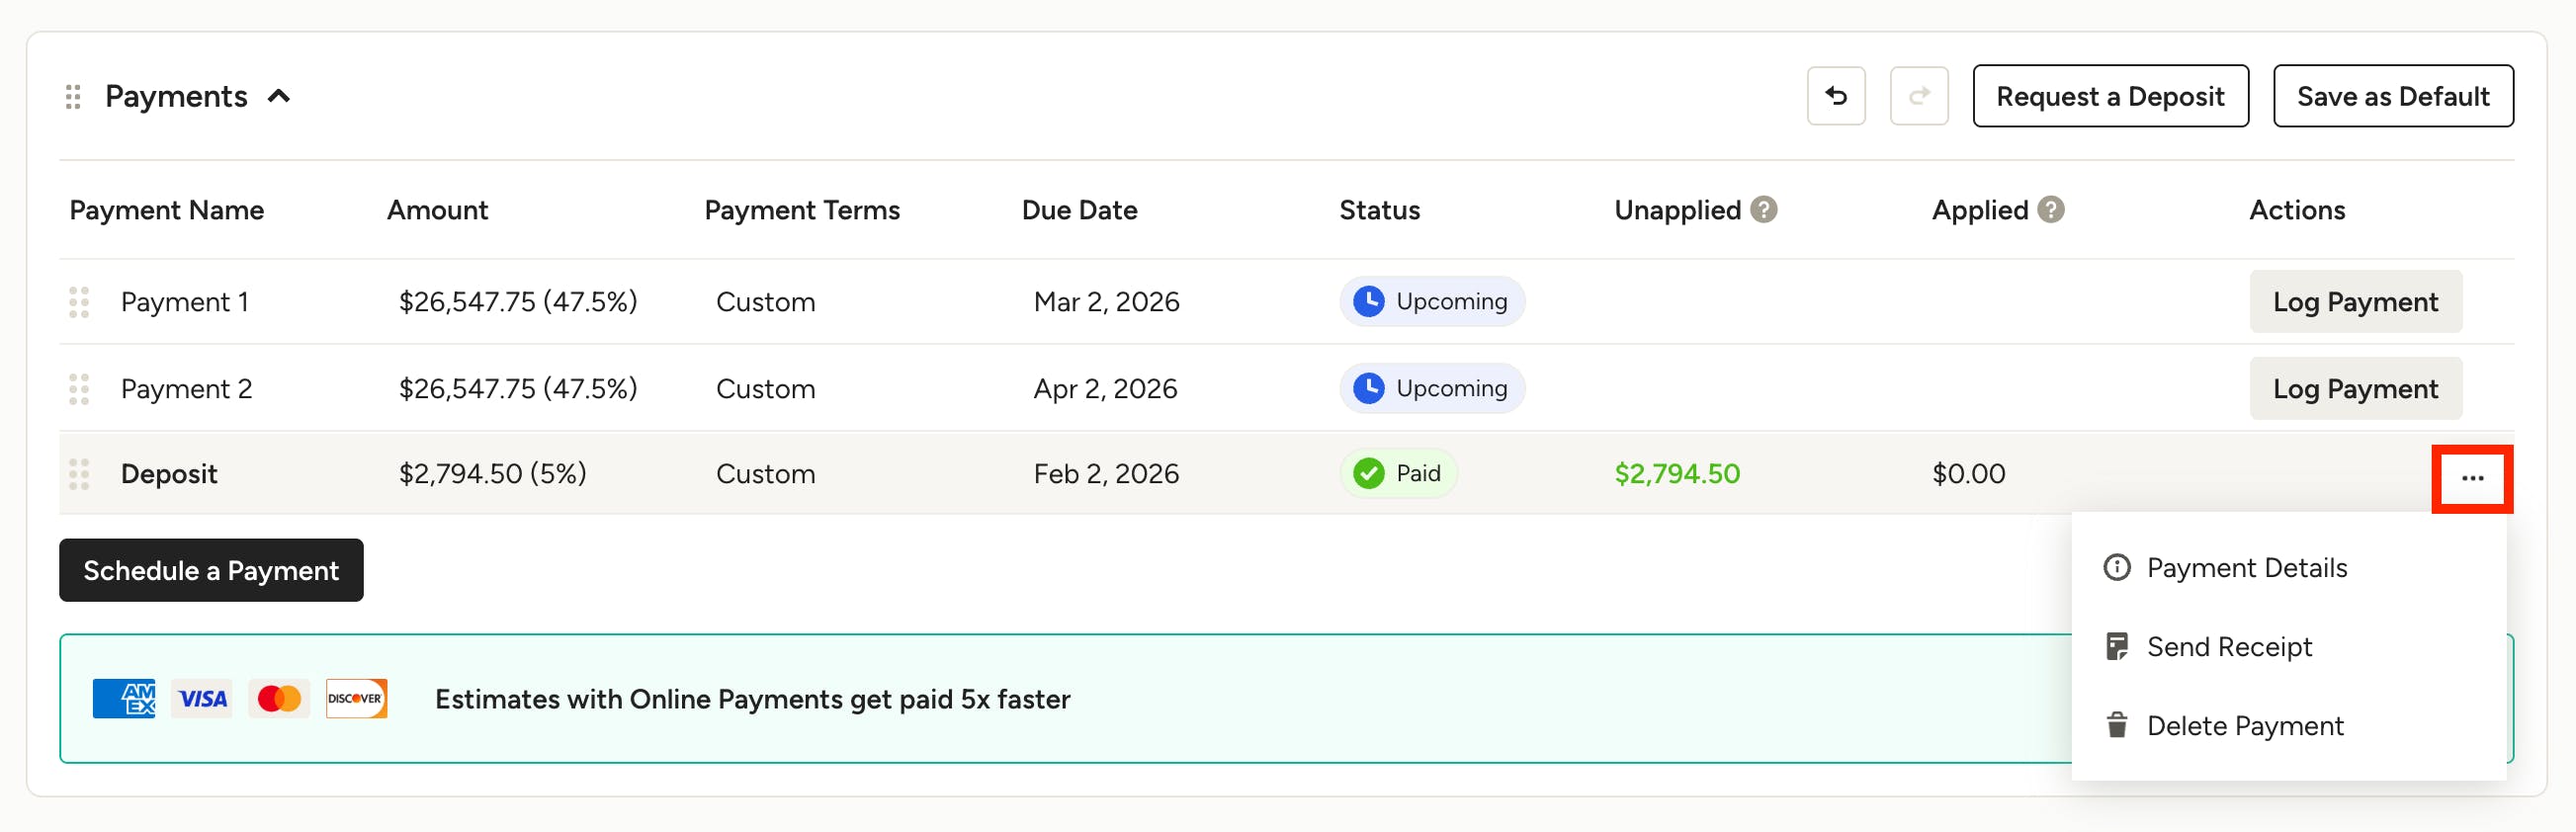
Your payment schedule will update to show that the payment has been paid. If you select the three dots to the right of the payment, you will be able to view payment details, send your client a receipt, or delete that payment if needed.
Log Partial Payment
If you only receive a portion of a scheduled payment and not the full amount, you can still log the partial payment, and the payment schedule will adjust.
To start, open up the relevant document, scroll down to the Payments section, then select Log Payment (as shown above).
Input the relevant payment information, including payment method, payment amount, payment date, and reference number if needed.
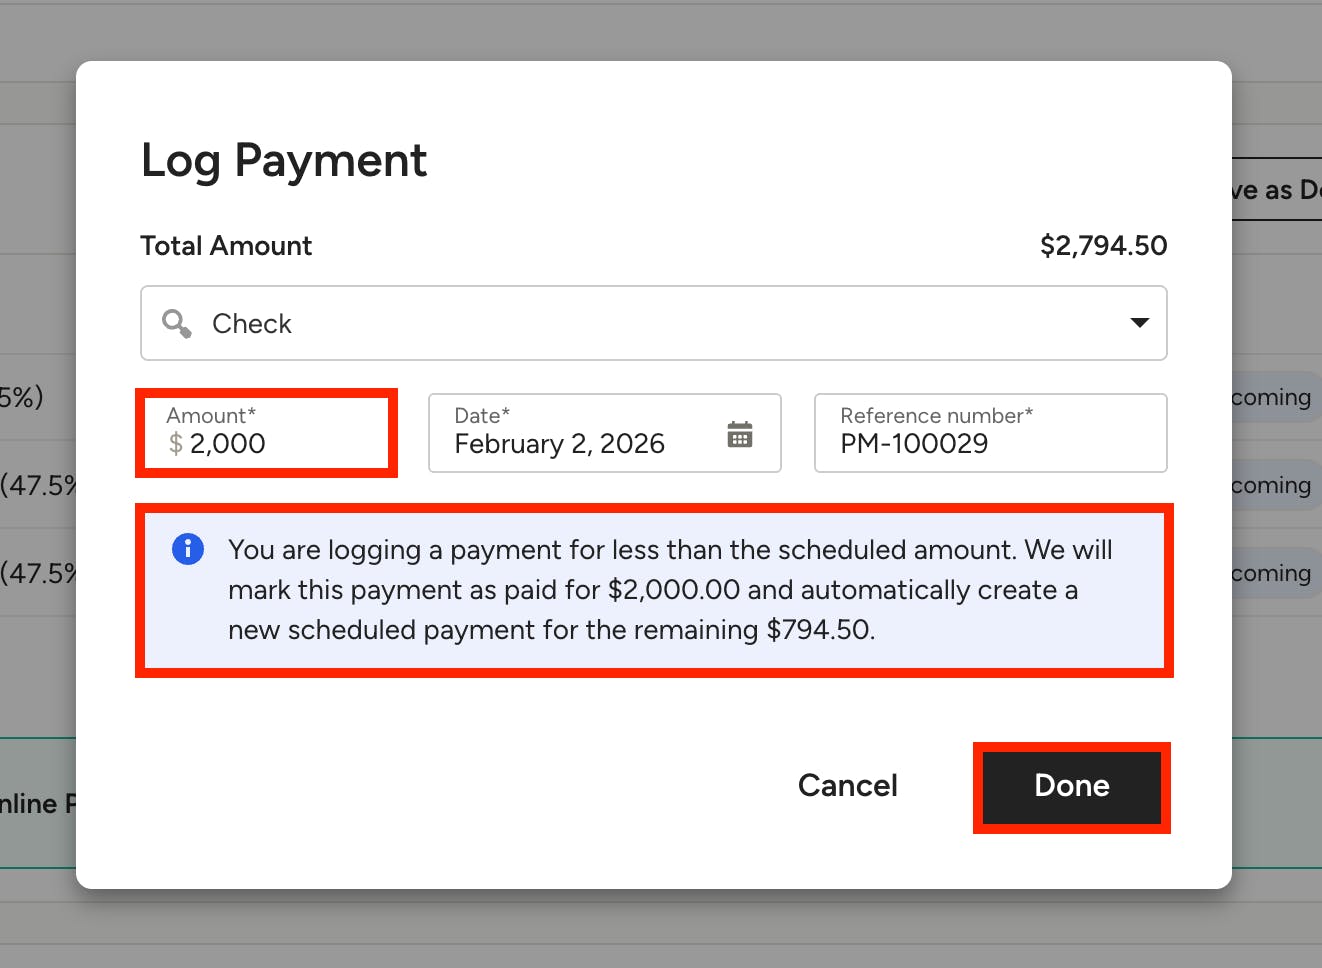
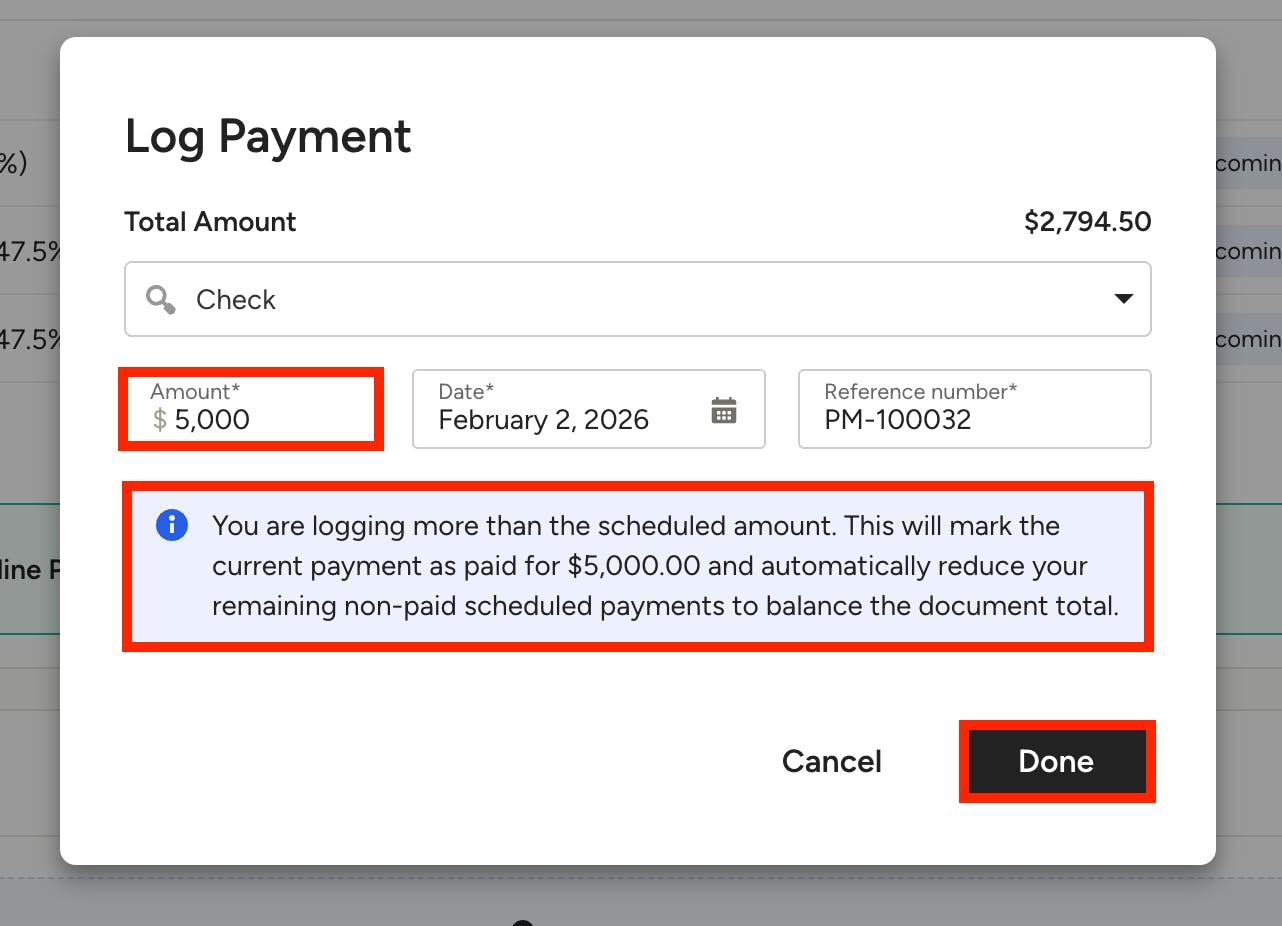
By default, the payment amount will be for the total amount of the scheduled payment. To log a partial payment, type in the actual payment amount in the Amount text box. A notice will appear that you are logging less than the scheduled amount, and that a new payment will be added for the remaining amount. Click Done once complete.
Your payment schedule will update to show that the partial payment has been paid, and a new payment will be added for the remaining amount. You can edit that payment's name, due date and more.
If you select the three dots to the right of the paid payment, you will be able to view payment details, send your client a receipt, or delete that payment if needed.
Log Overpayment
If you receive more than the full amount for a scheduled payment, you can still log the overpayment, and your document will reduce the amount due in your remaining payments.
To start, open up the relevant document, scroll down to the Payments section, then select Log Payment (as shown above).
Input the relevant payment information, including payment method, payment amount, payment date, and reference number if needed.
By default, the payment amount will be for the total amount of the scheduled payment. To log an overpayment, type in the actual payment amount in the Amount text box. A notice will appear that you are logging more than the scheduled amount, and that the difference will automatically reduce your remaining payments. Click Done once complete.
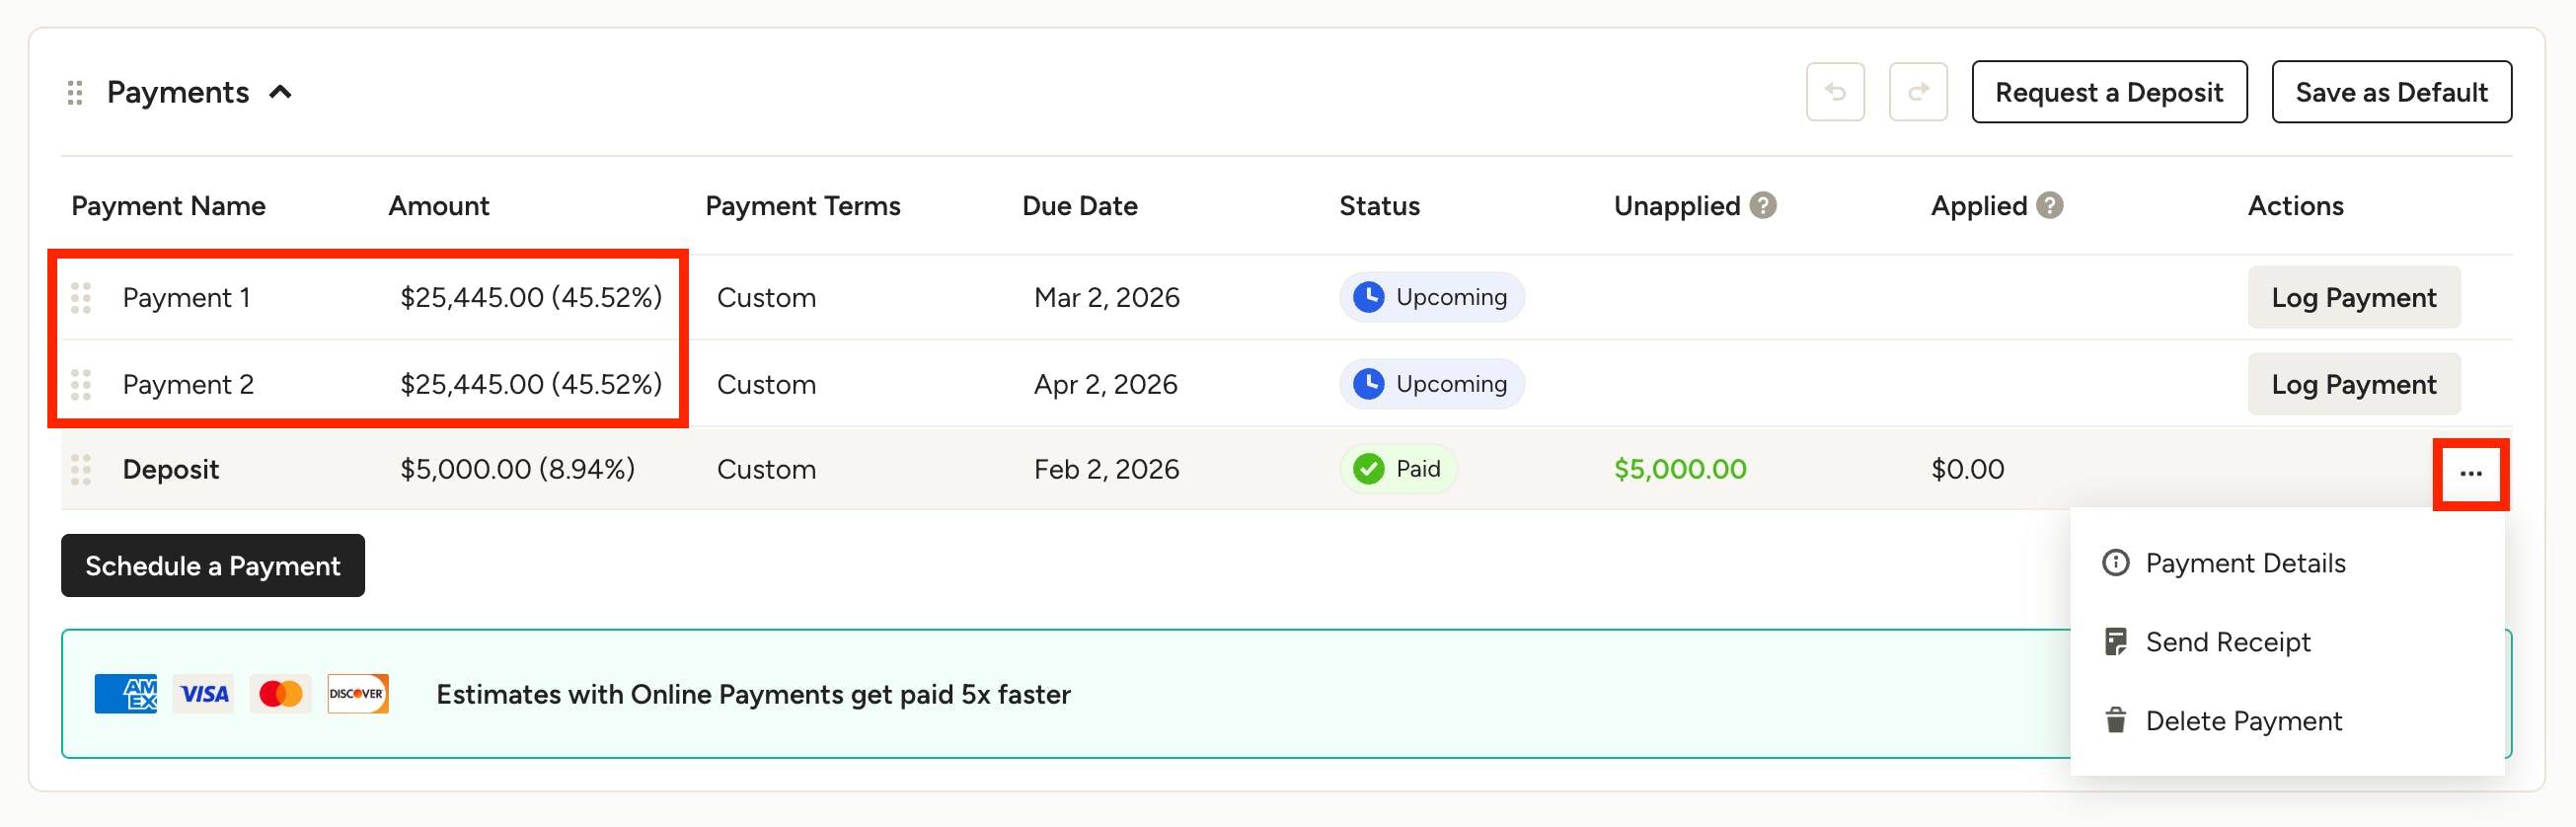
Your payment schedule will update to show that the overpayment has been applied, and the existing payments will decrease to show the updated remaining amount due.
If you select the three dots to the right of the paid payment, you will be able to view payment details, send your client a receipt, or delete that payment if needed.
Create Credit for Overpayment
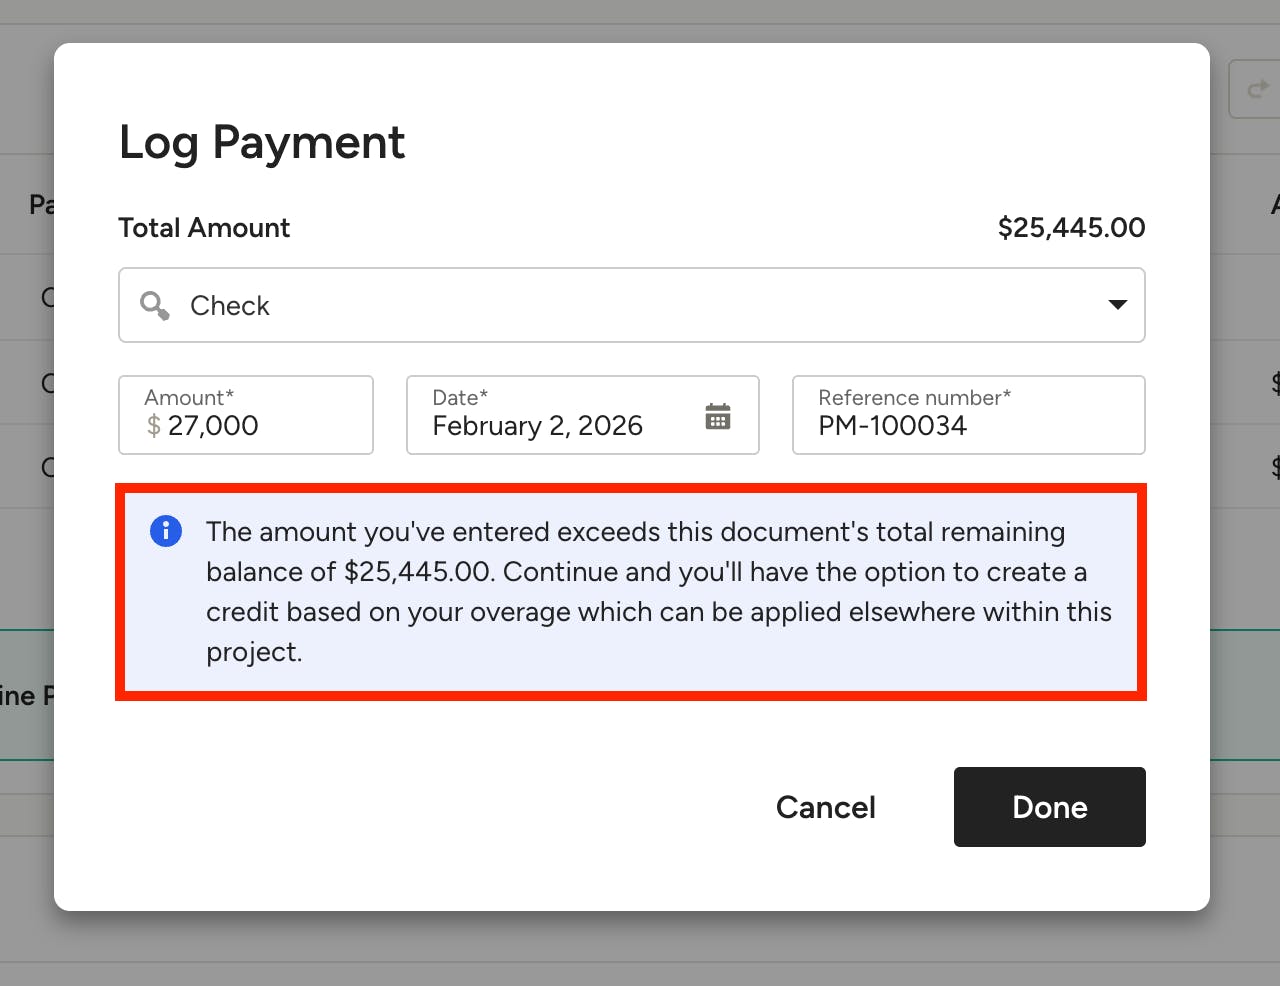
If you receive an overpayment that exceeds the document's remaining balance, you will see a notice stating that you will have the option to create a credit based on the overage that can be applied elsewhere in the project.
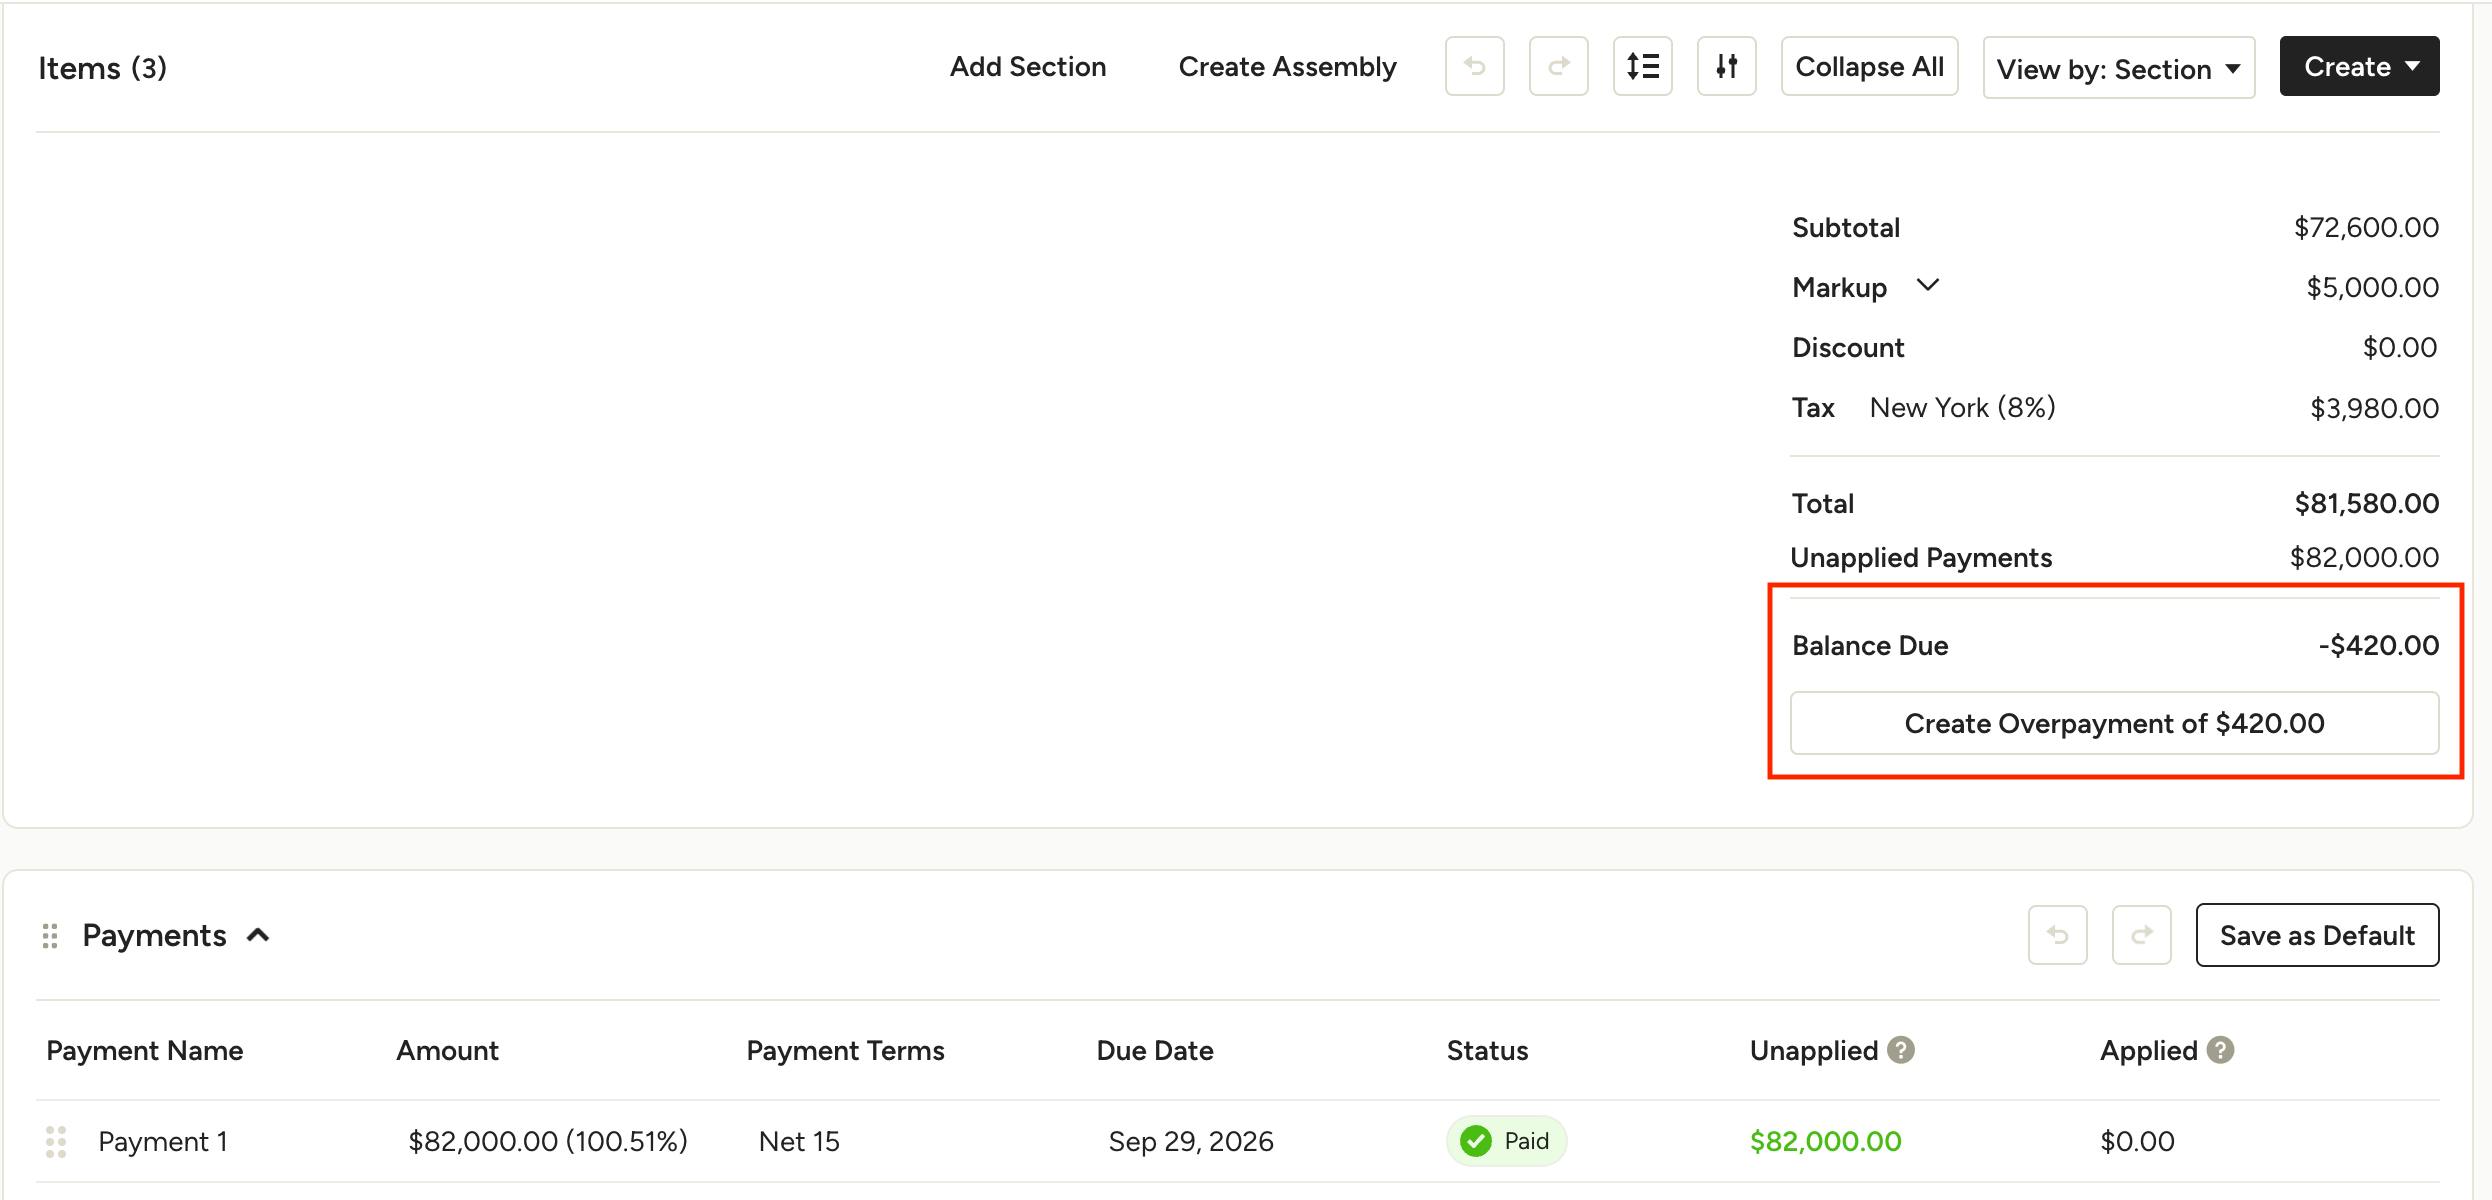
Once added, the subtotal of your document will include a new Create Overpayment button, and it will show a negative balance due.
Click Create Overpayment to create a new overpayment to be used later in this project.
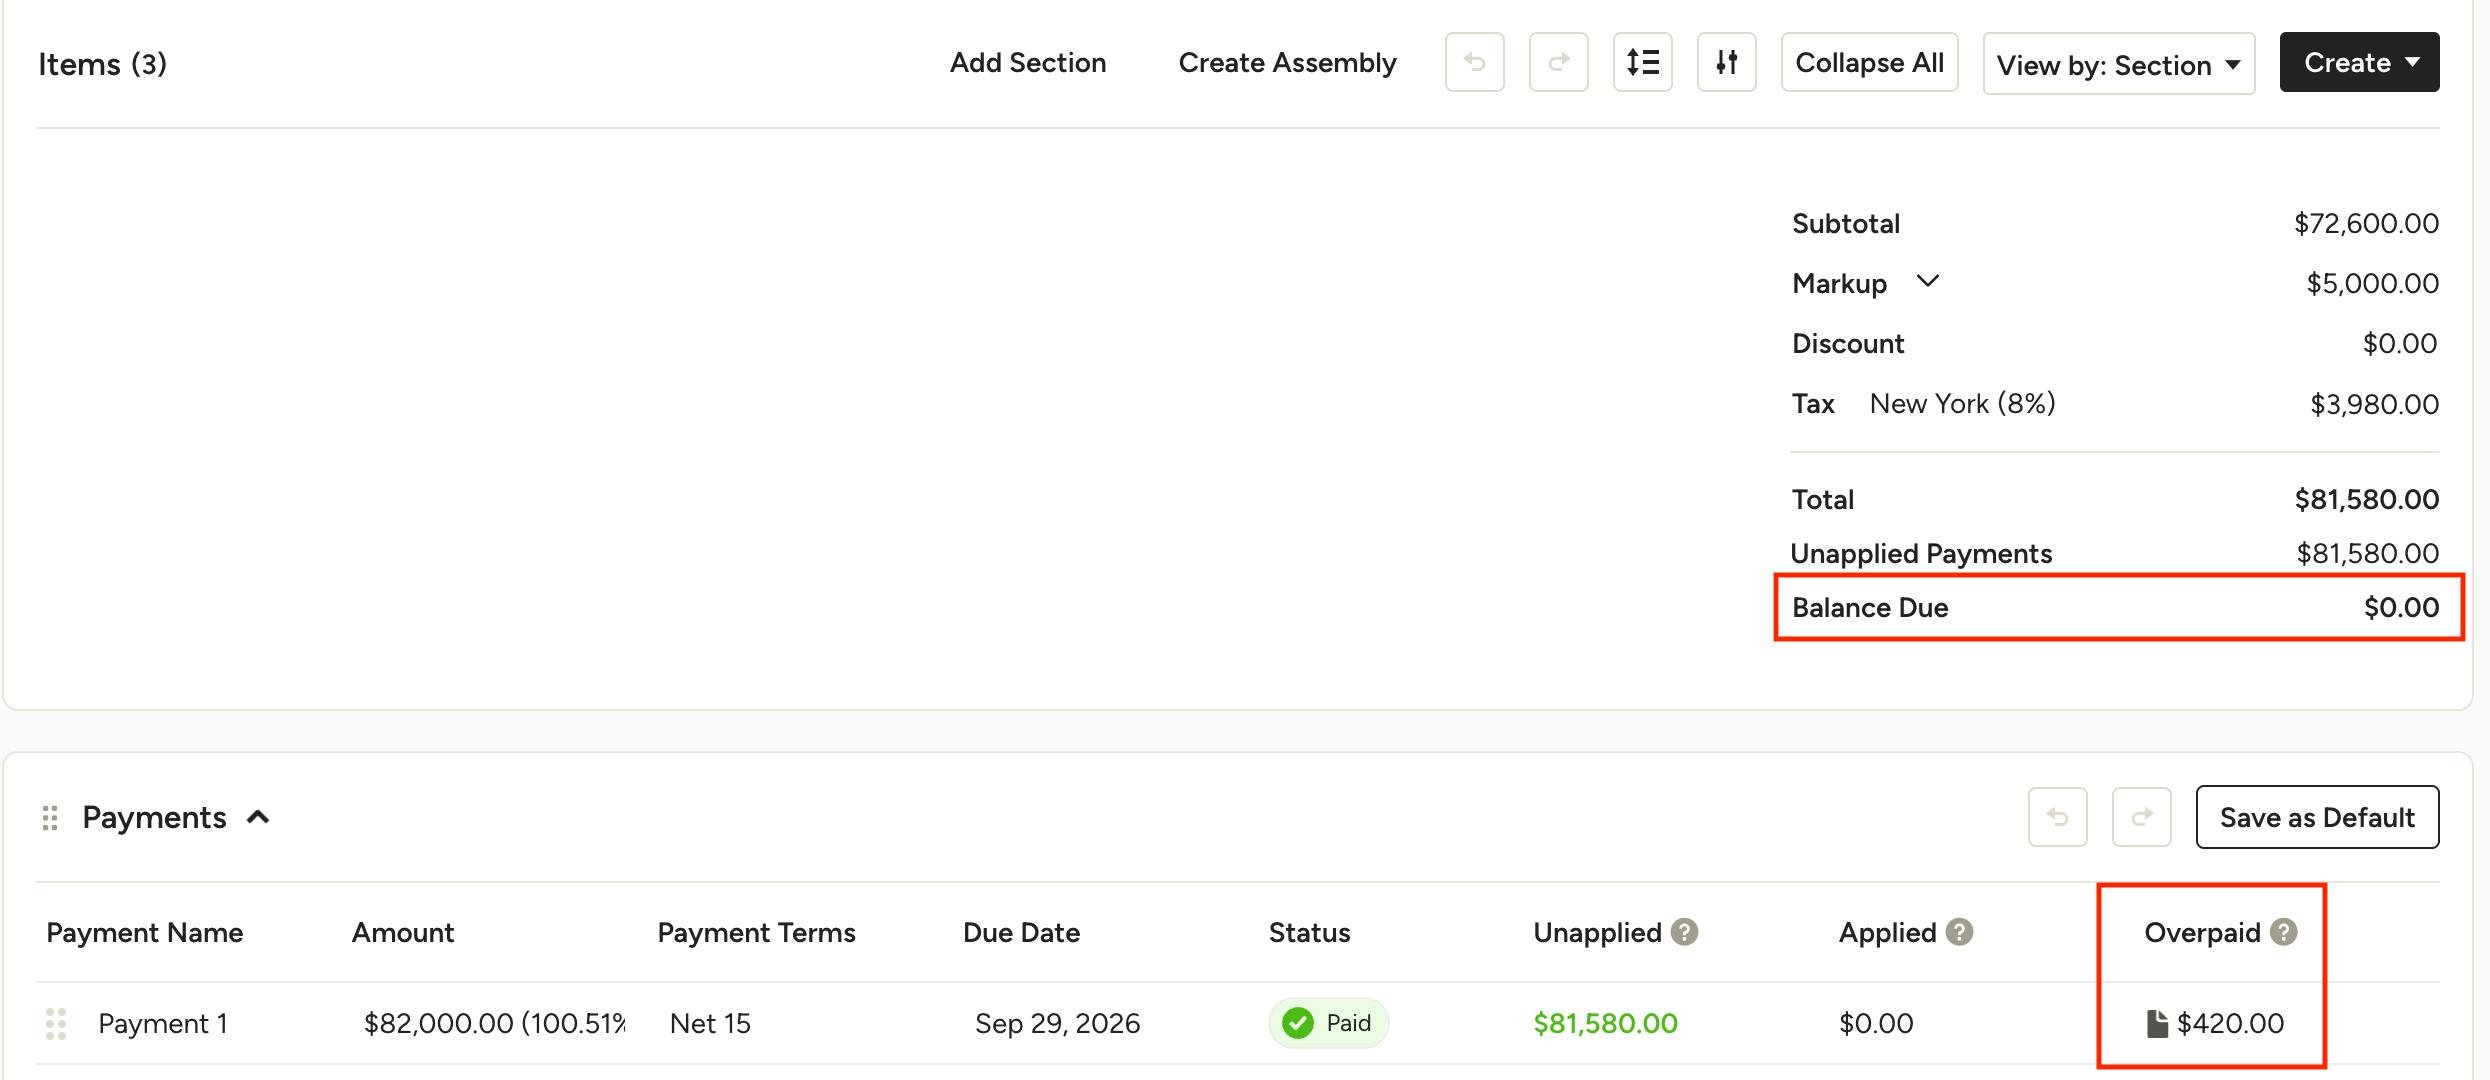
Once an overpayment is created, it will appear in the payment schedule of your document under Overpaid, and the balance due will go back to $0.
Read How to Create Overpayments to learn more about applying an overpayment credit to other documents within that project.