How to Edit the Contact Form on Your Houzz Website
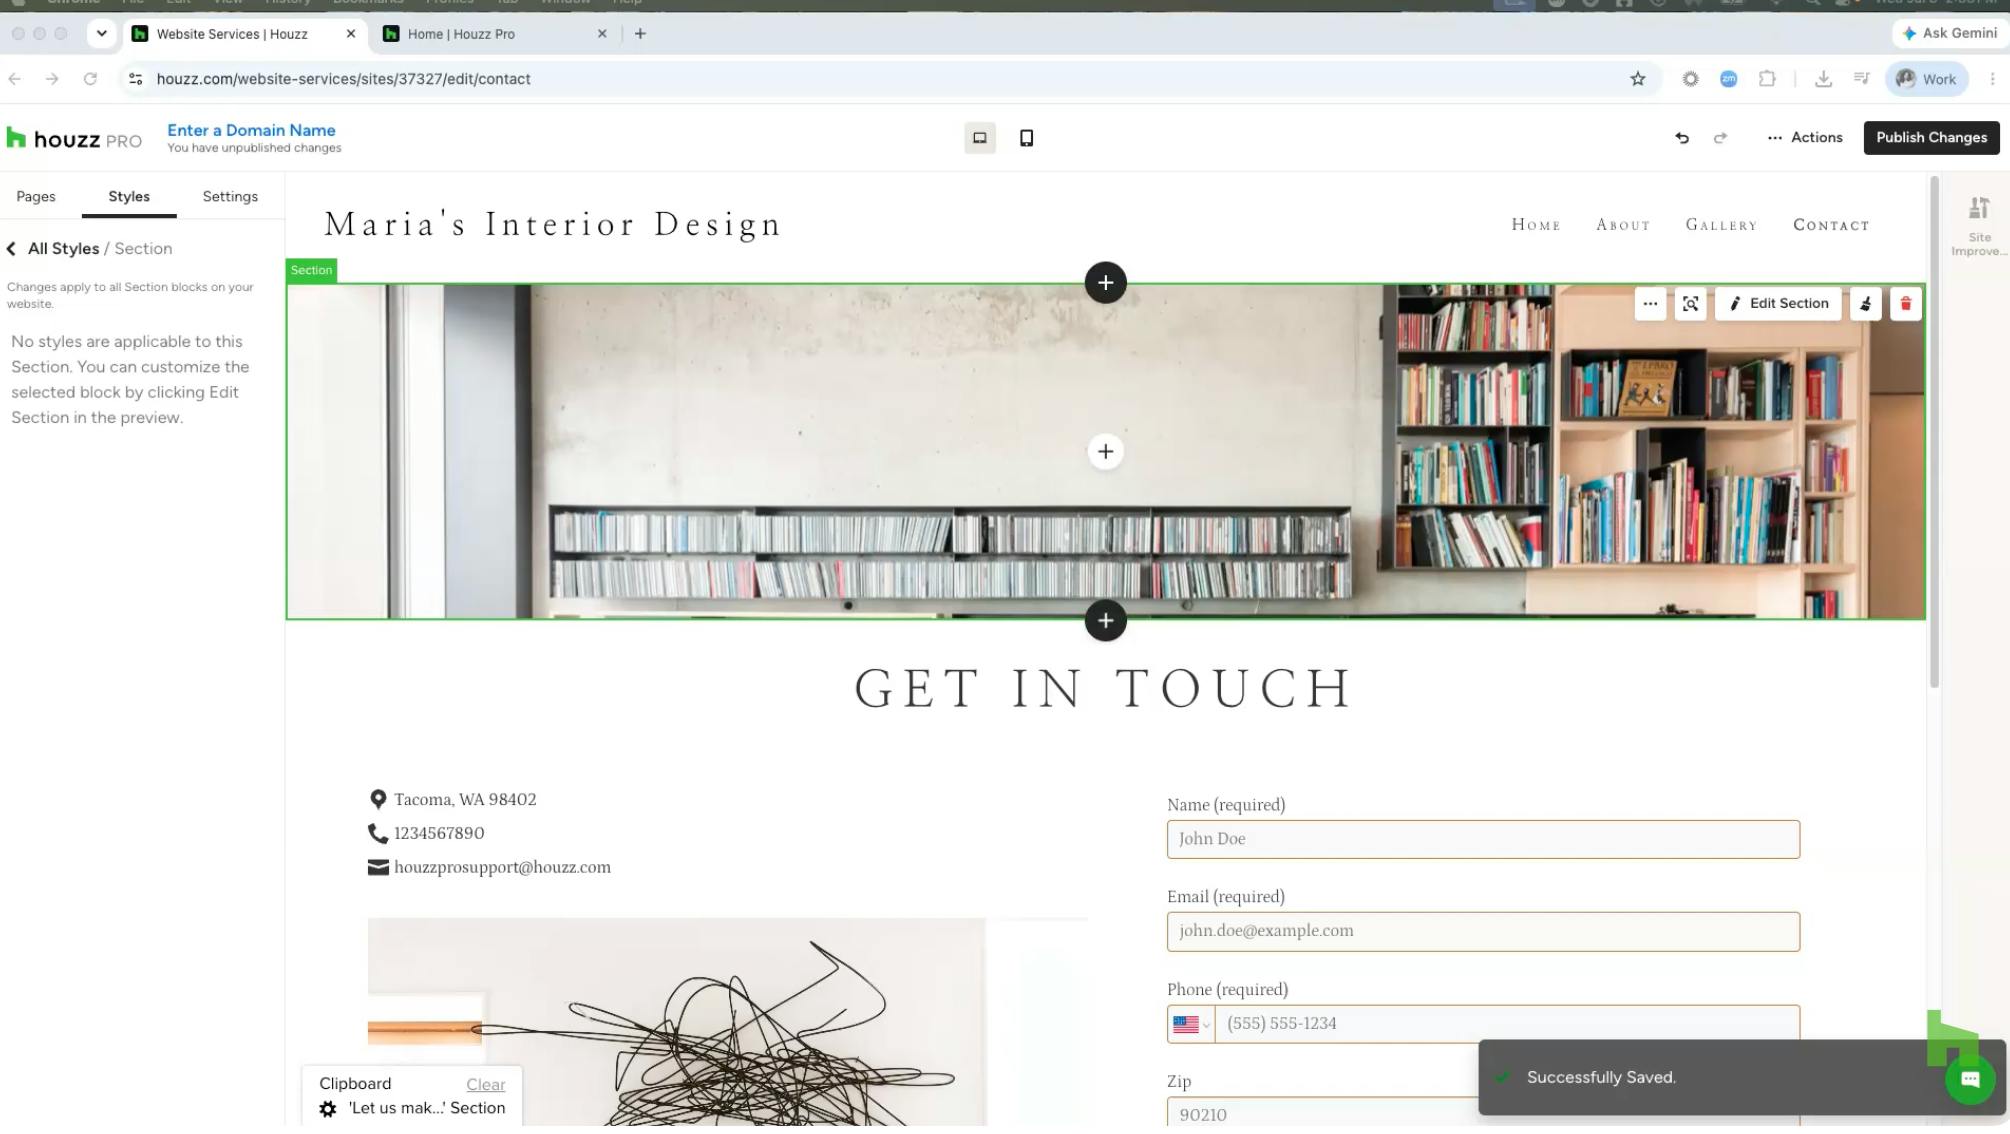
Contact forms are an effective way to gather information from potential leads. Your Houzz Pro website offers two options:
The Basic Contact Form includes standard fields for the customer's name, email address, phone number, ZIP code, and message — plus the option to add simple short-answer questions.
The Custom Contact Form gives you full flexibility to build questions with short answers, long answers, single choice, and multiple choice options.
Watch the video below or read step-by-step instructions to learn more.
Access the Contact Form
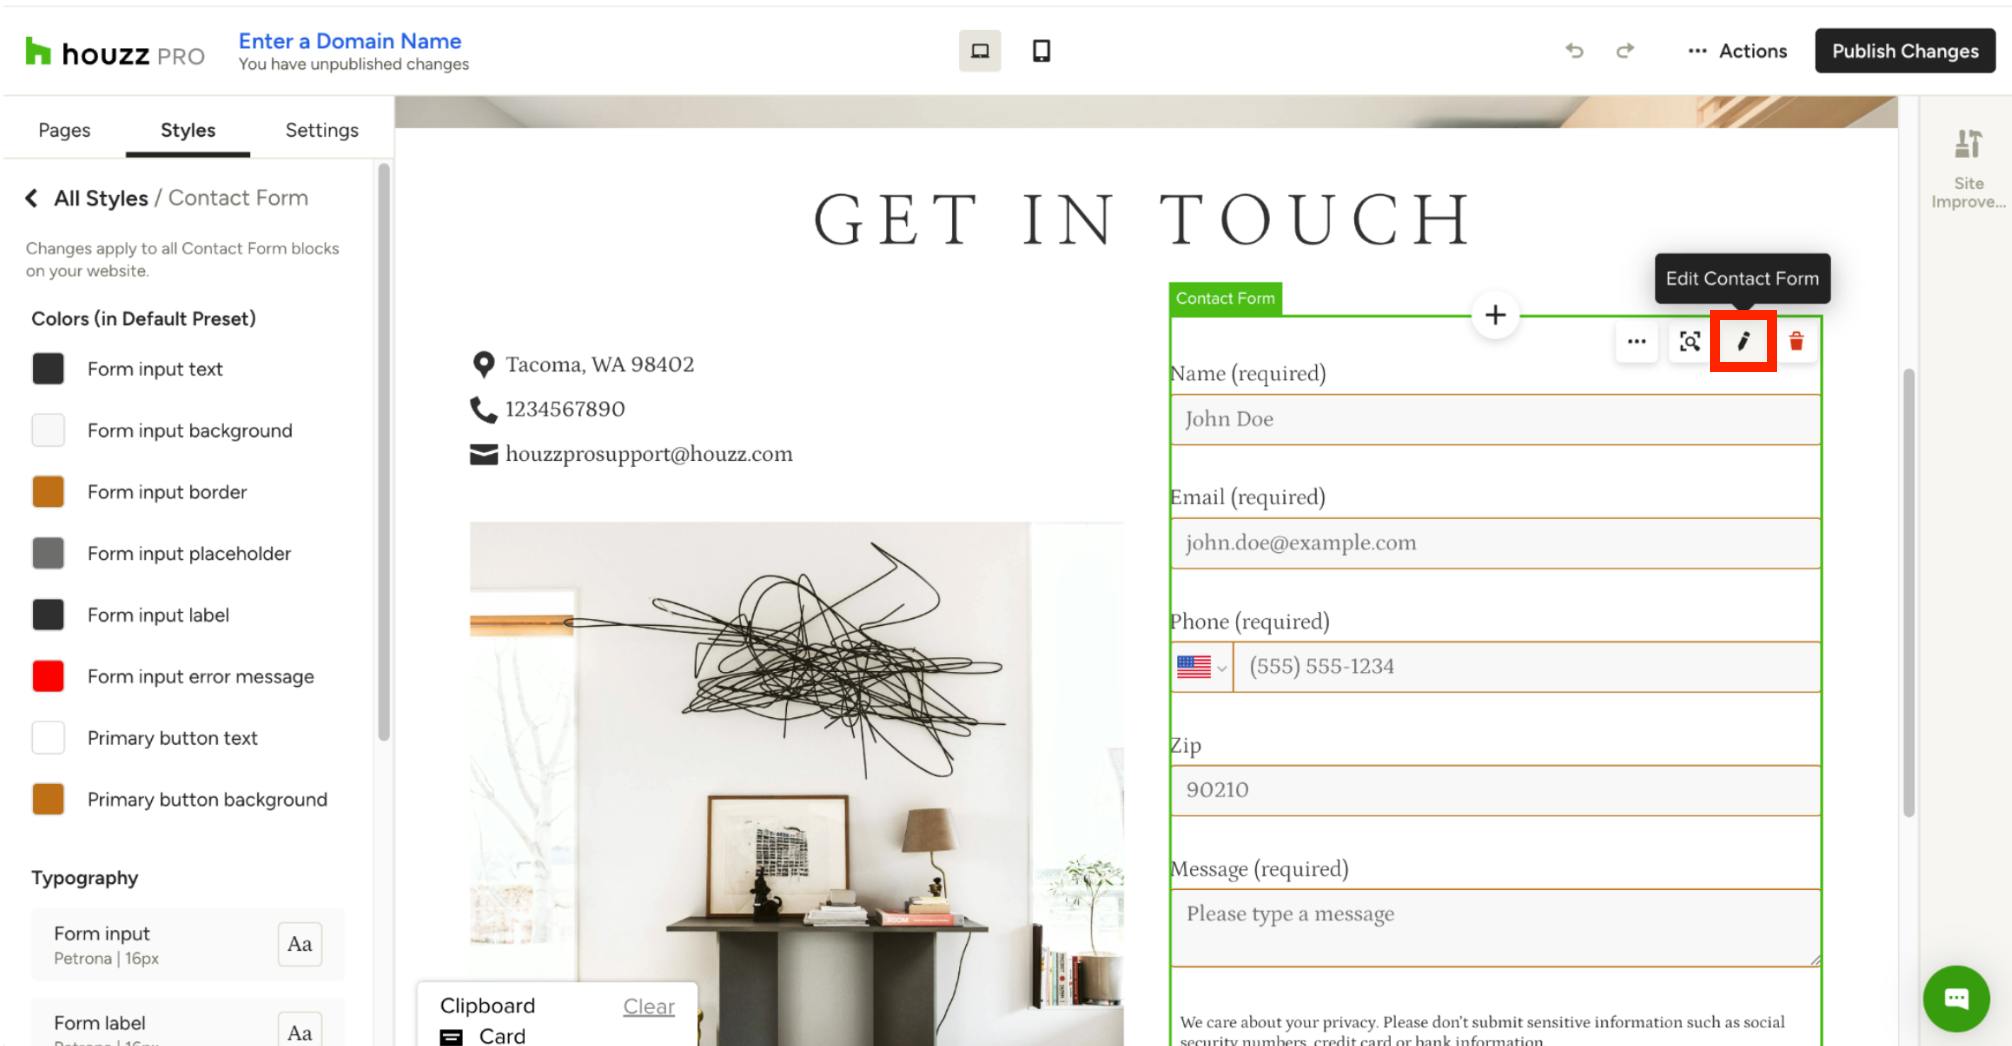
To make changes to your Houzz Pro contact form in your website editor, go to the page with the contact form. Click the contact form to highlight it, then select the pencil icon to edit the form.
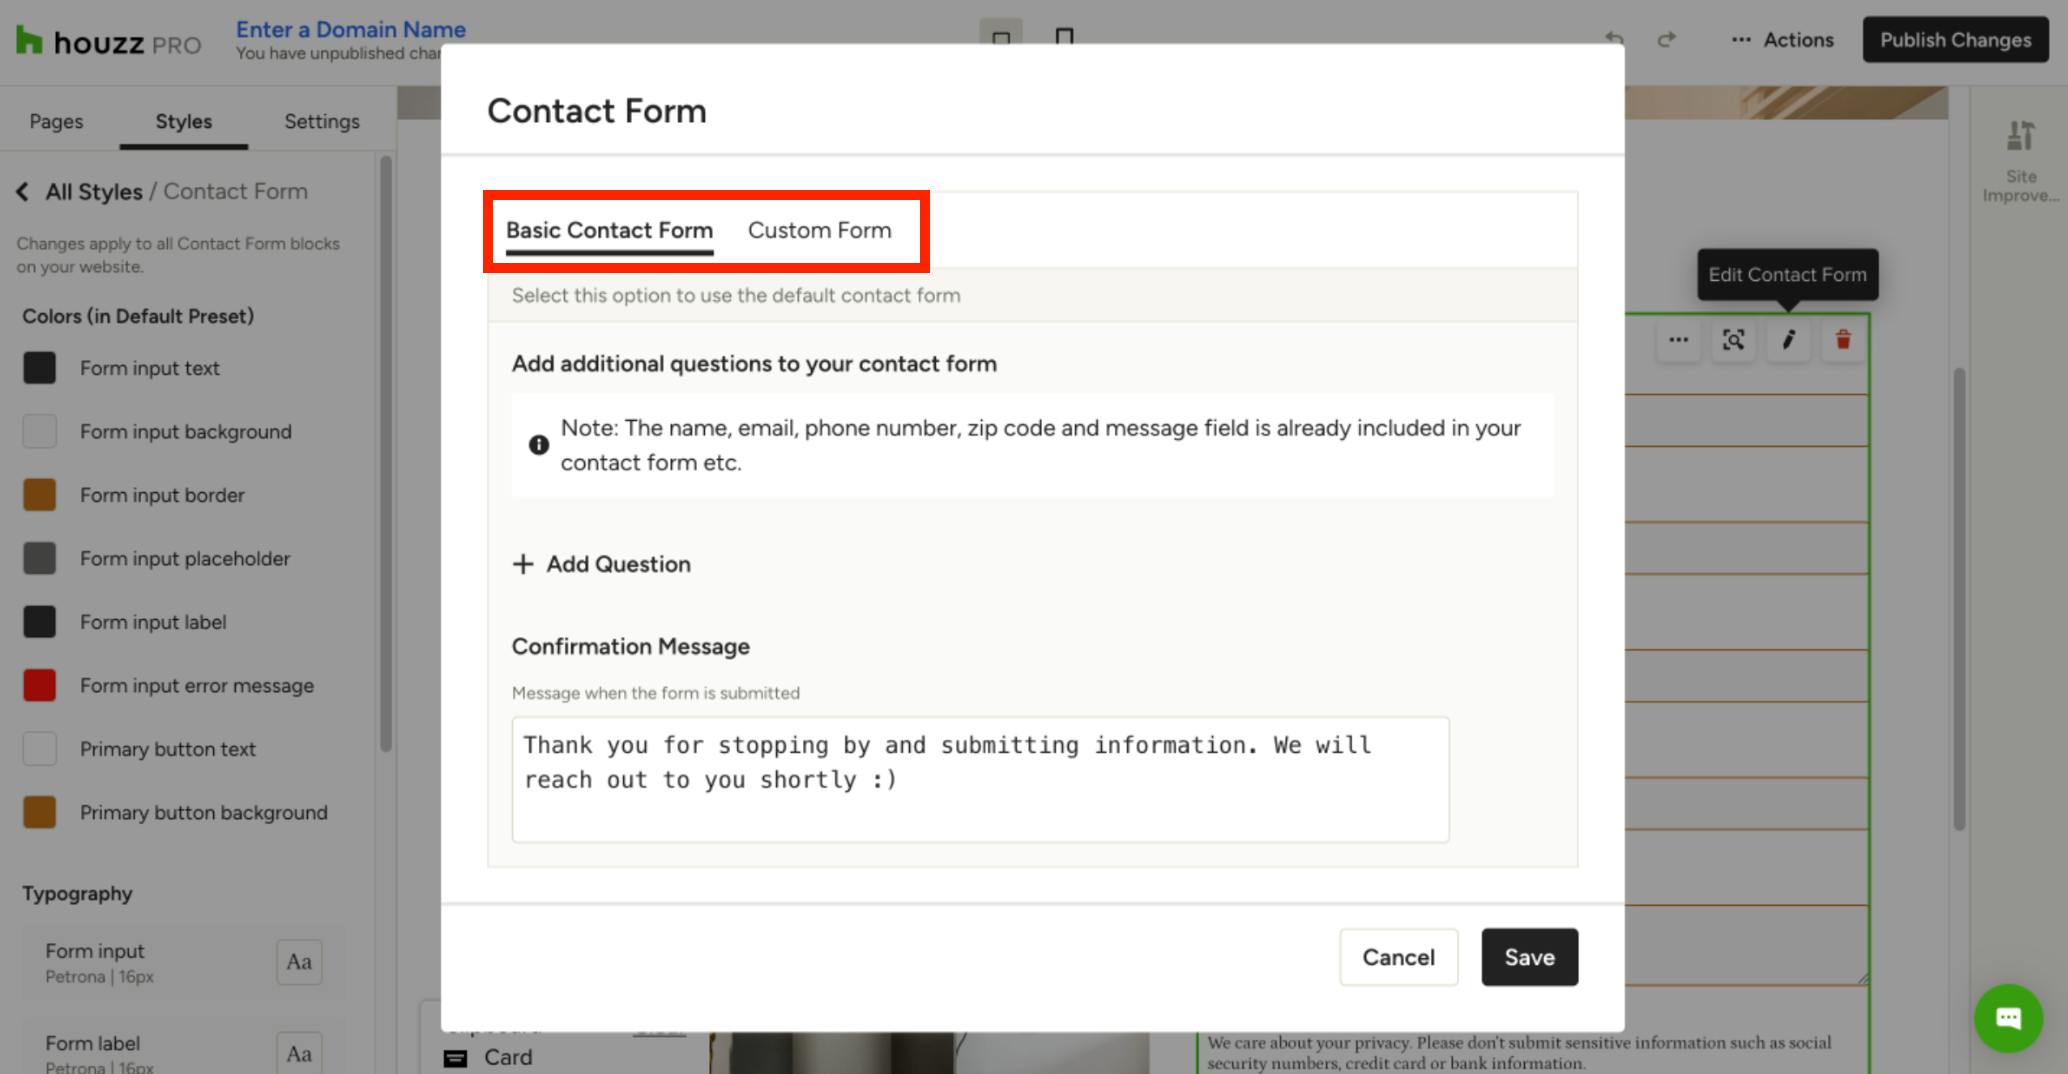
A new pop-up screen will appear. You can choose between the Basic Contact Form or the Custom Form at the top.
Basic Contact Form
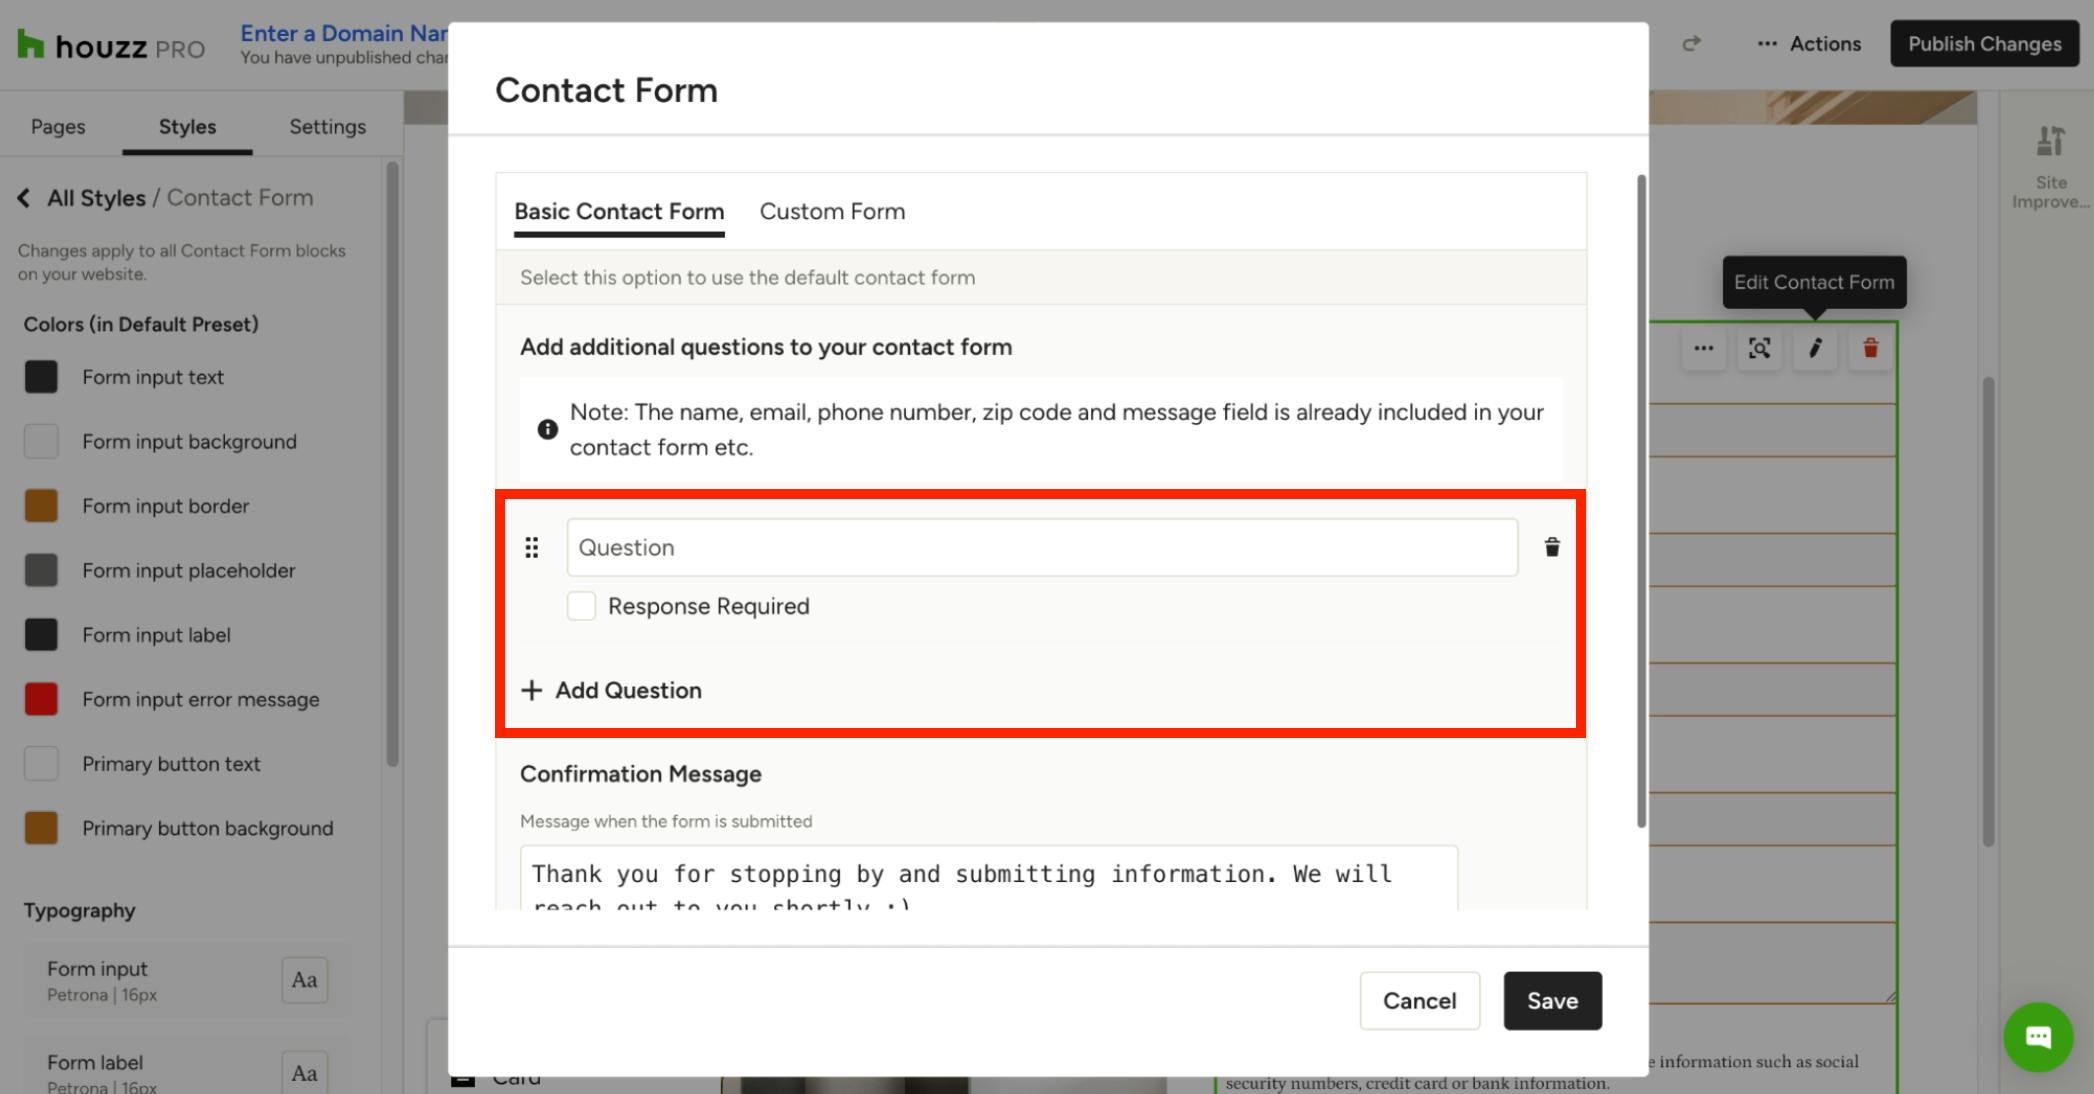
The basic contact form is the default form. It will allow you to add short answer questions in addition to the default fields included — Name, Email, Phone, Zip Code, Message, and Confirmation Message (the message homeowners see after submission).
Select Add Question to create a new short answer question, then type your question in the open text box. To make the question mandatory, check the box next to Response Required.
You can then add, delete, or reorder questions. Click Add Question again if you need to add more questions. To delete a question, click the trash can icon next to it. To reorder questions, click the six dots icon to the left of the question and drag it to the desired spot.
Under Confirmation Message, you can set the message that appears to customers after they submit the form.
Once ready, be sure to click Save and Publish to apply your updates.
Please Note: If you have multiple forms on your website, customizing one contact form will not automatically update other forms.
Custom Contact Form
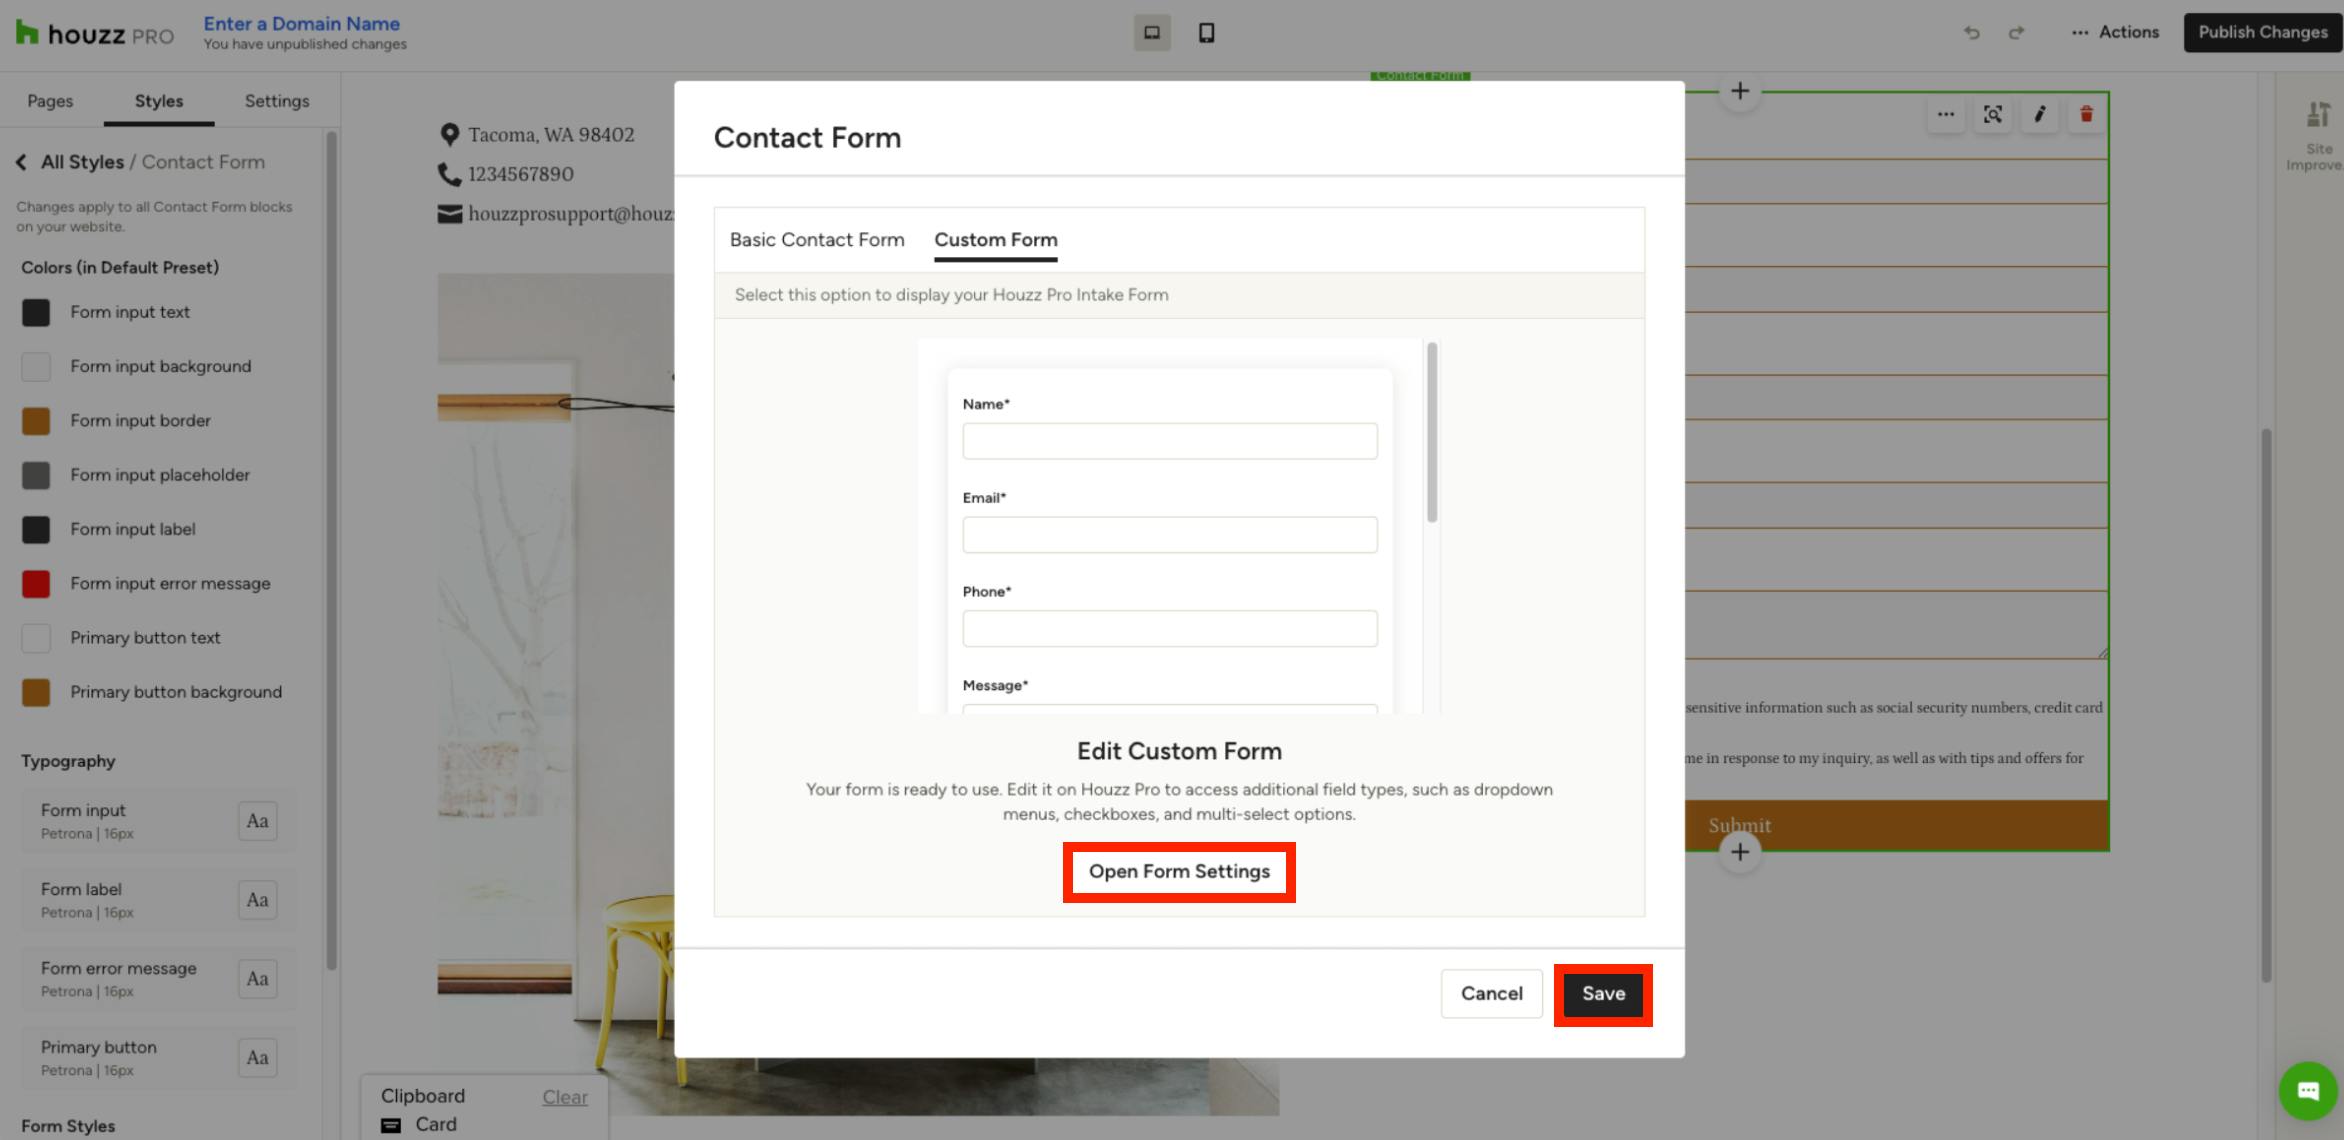
The custom contact form has more flexibility for question types and formatting — you can fully make it your own. To use this form, select the Custom Form tab at the top.
If you have already created a form, you can select Open Form Settings to edit. Read How to Use the Lead Contact Form to learn more about the editing process.
If you are happy with your form, select Save.
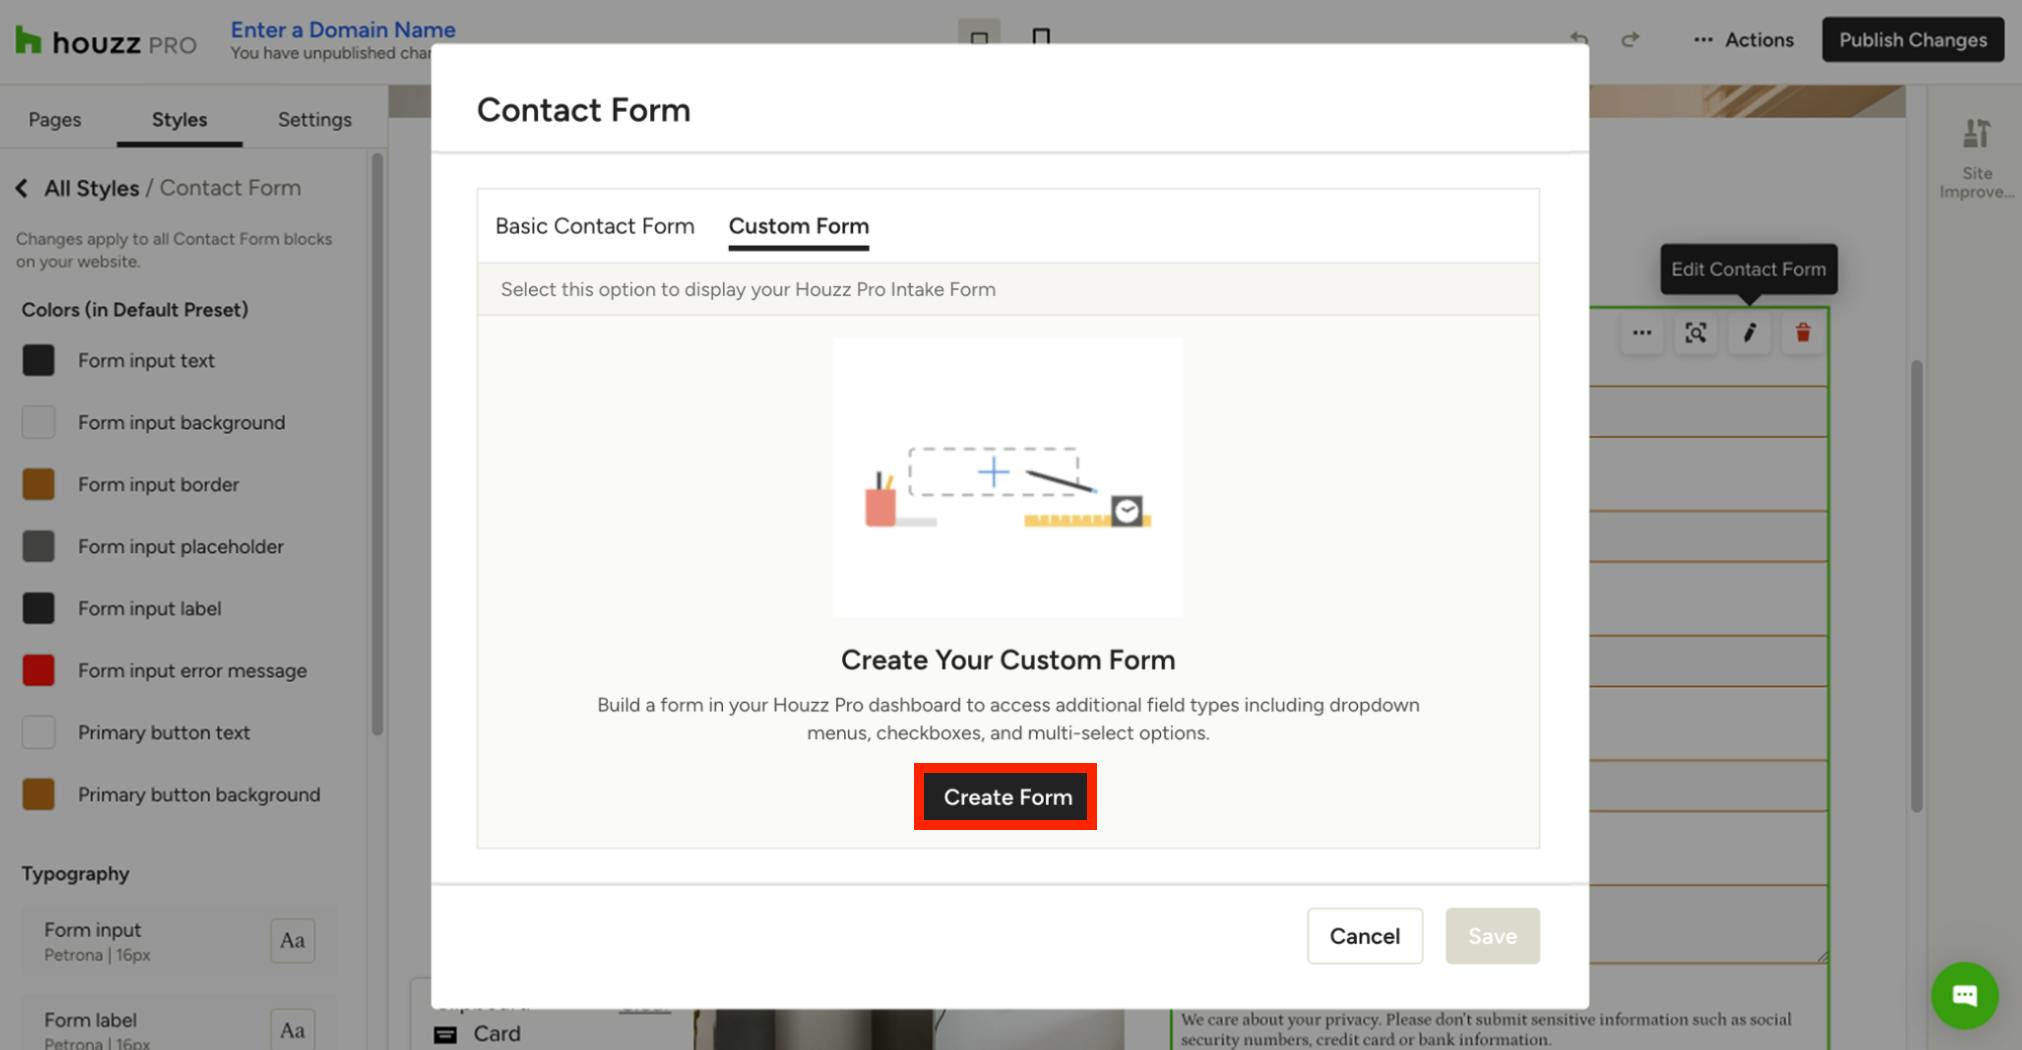
If you have not created a custom form yet, you will need to create one. Click Create Form to go to the custom form editor. Read How to Use the Lead Contact Form to learn more about adding, deleting and editing questions as you create your form.
Best Practices for Custom Fields
Whether you're customizing your basic form or building one from scratch, these tips will help you get the most out of it.
- Keep it simple: Don't overcrowd your contact form with too many custom fields. Only include essential fields that are necessary for addressing customer inquiries effectively. Too many fields can overwhelm users and lead to fewer form completions.
- Use clear labels: Make sure the labels for each field are straightforward and easy to understand. Use plain language and avoid technical jargon.
- Ask project-specific questions: Use your contact form to gather important details about your clients' preferences, objectives, project specifications, and scope. Incorporating project-specific questions can maximize the potential of your contact form.
View Contact Form Responses
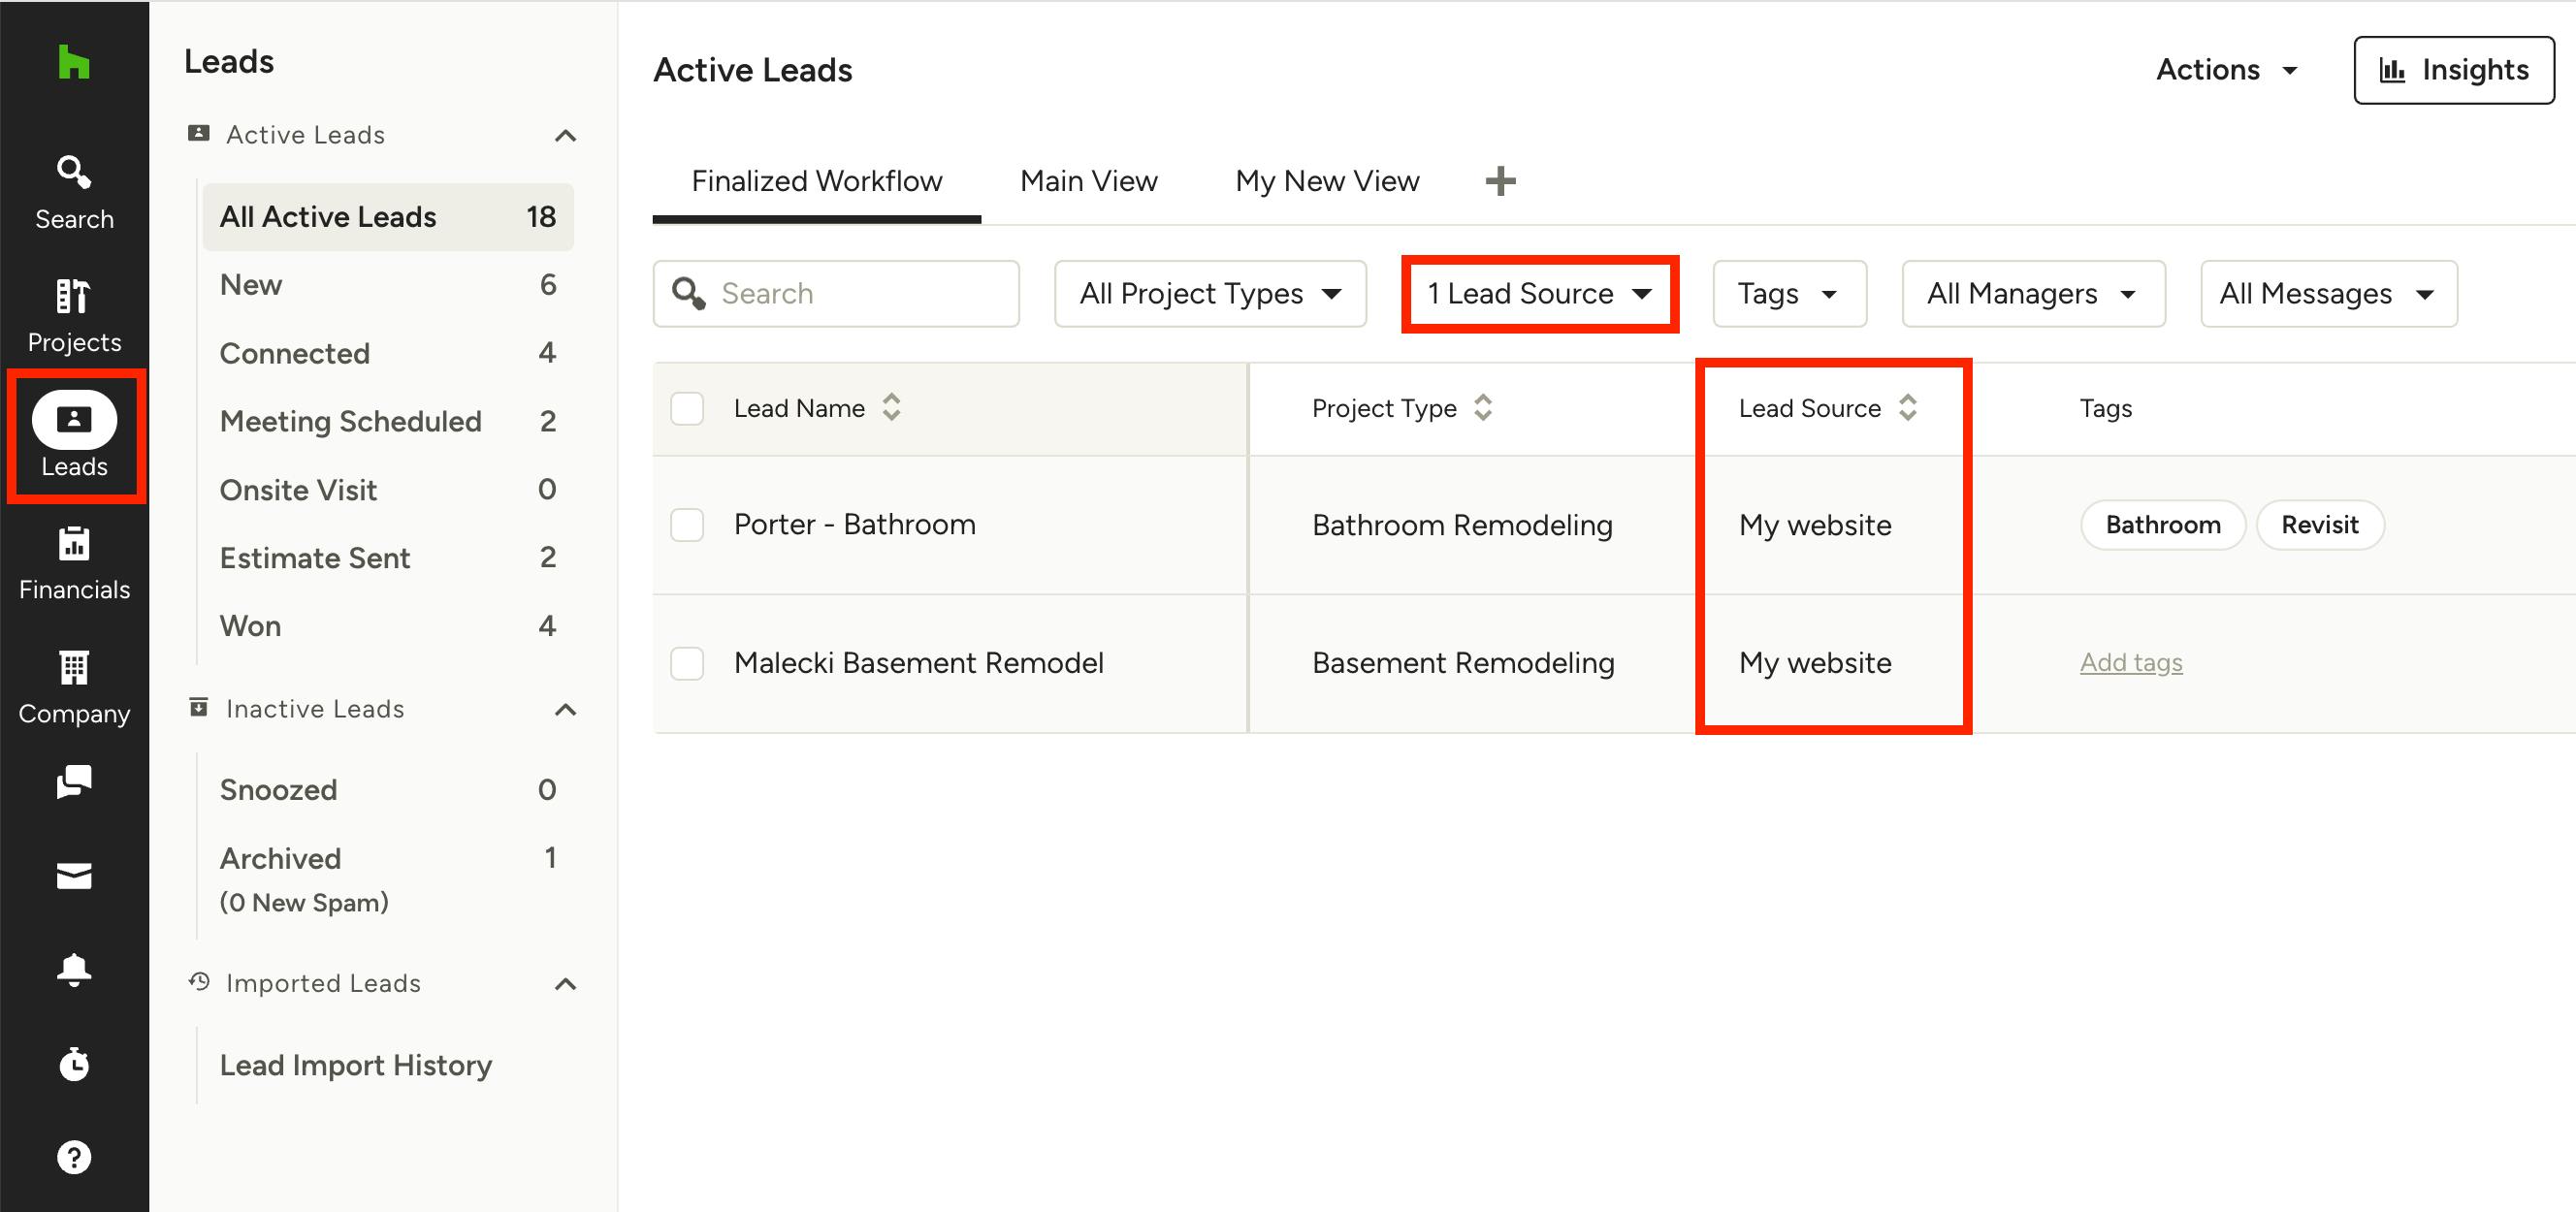
When someone fills out your contact form, you'll find the submission within the Leads section of Houzz Pro. You will also receive an email notifying you of a new lead.
To view responses, go to Houzz Pro, then click the Leads icon from the left navigation. Use the Lead Source filter at the top to only see leads from My Website — these will be all your contact form submissions.
Please Note: If a submission is marked as spam, it will instead appear under Archived in the left menu.
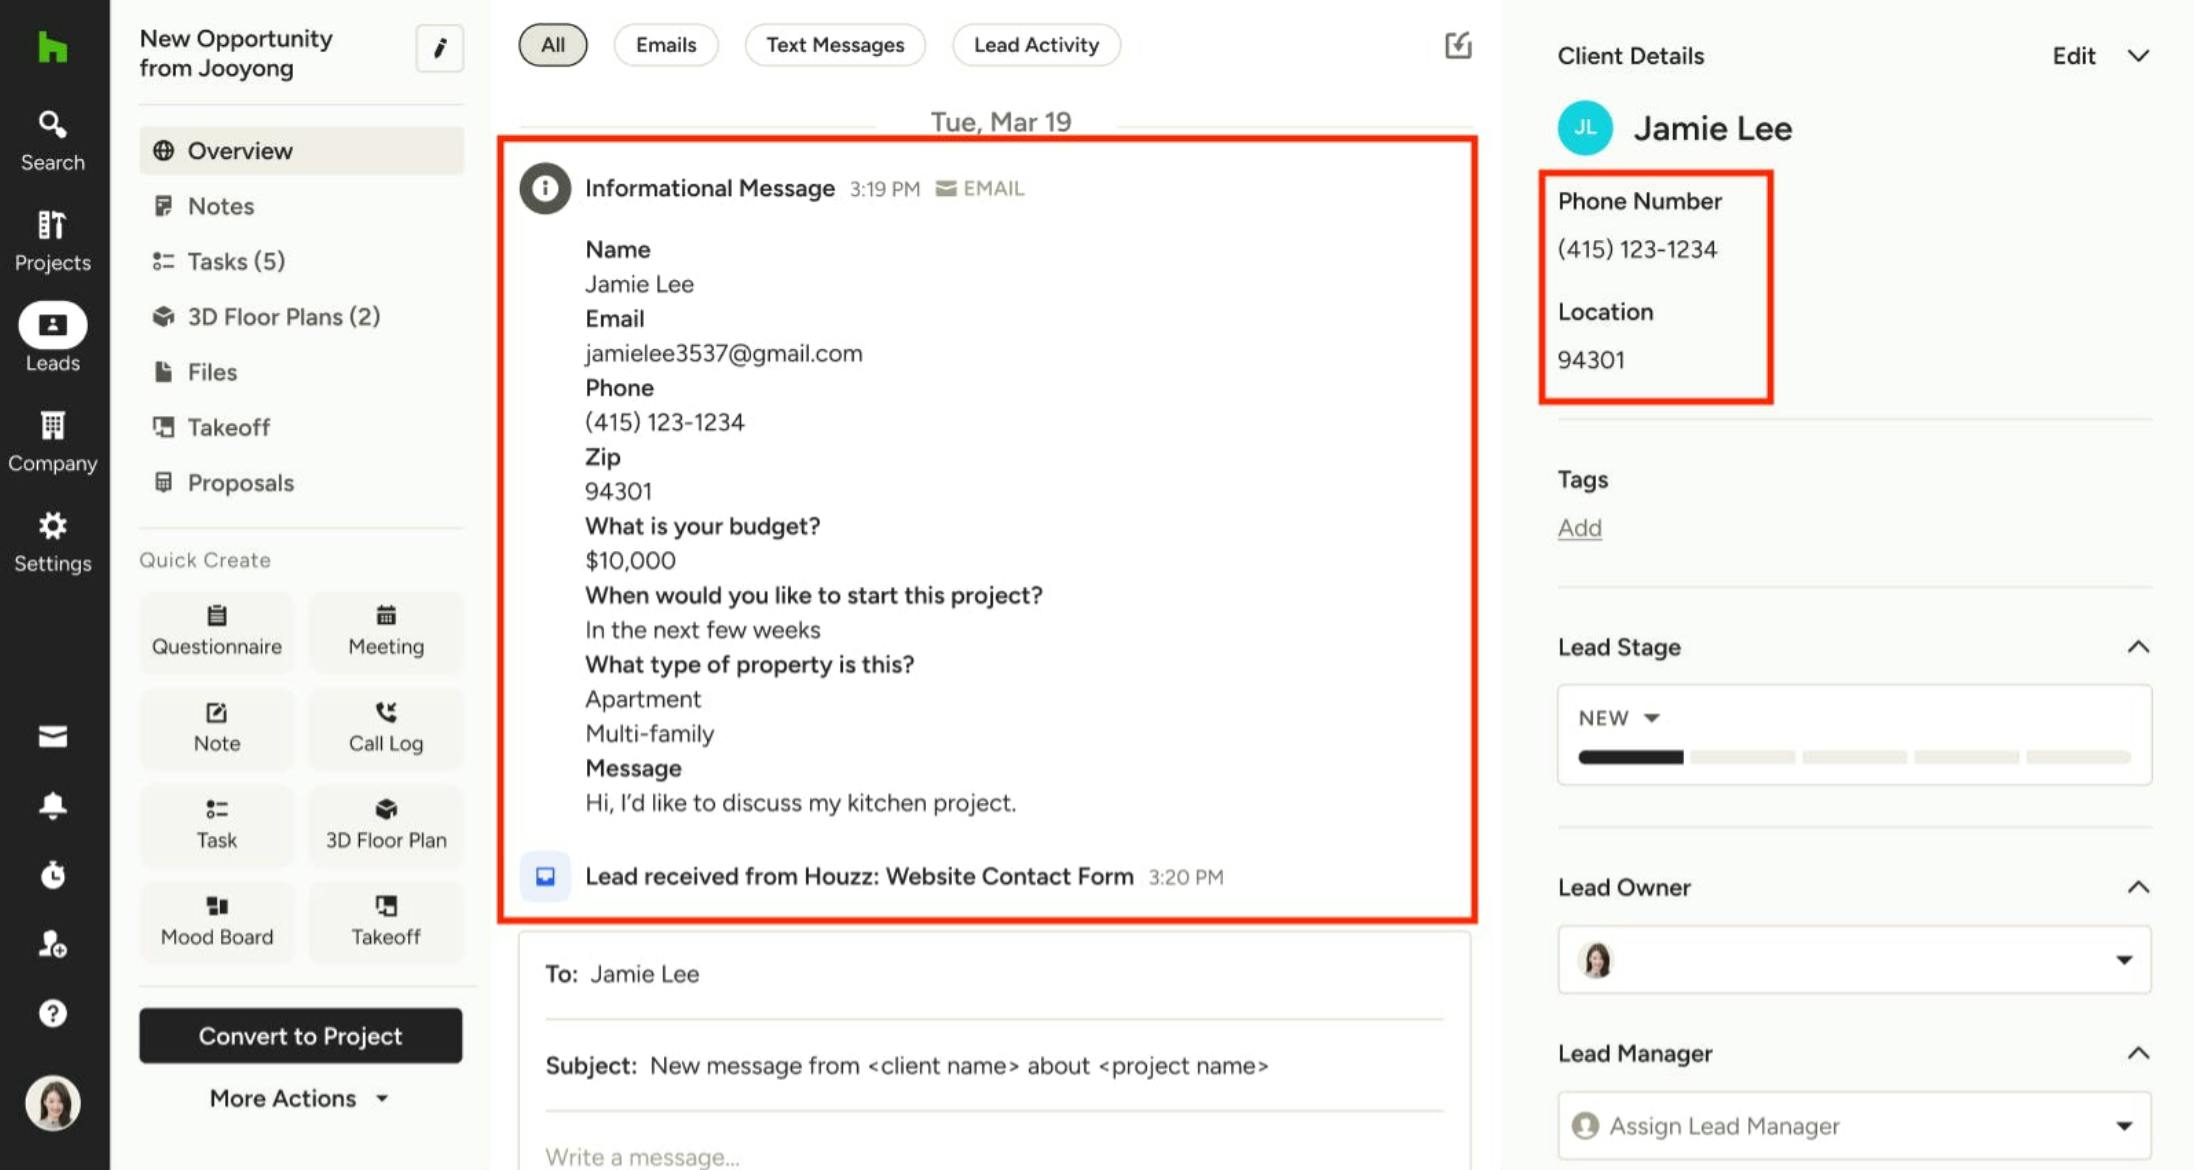
When you click on the lead, the lead details will appear (as shown below).
More Website Services Resources
How to Add Content to Your Houzz Website
How to Use the Settings Tab For Your Houzz Website
How to Use the Styles Tab For Your Houzz Website
How to Use the Pages Tab For Your Houzz Website
How to Edit the Projects Page on Your Houzz Website