How to Add Wall Finishes to Your 3D Floor Plan
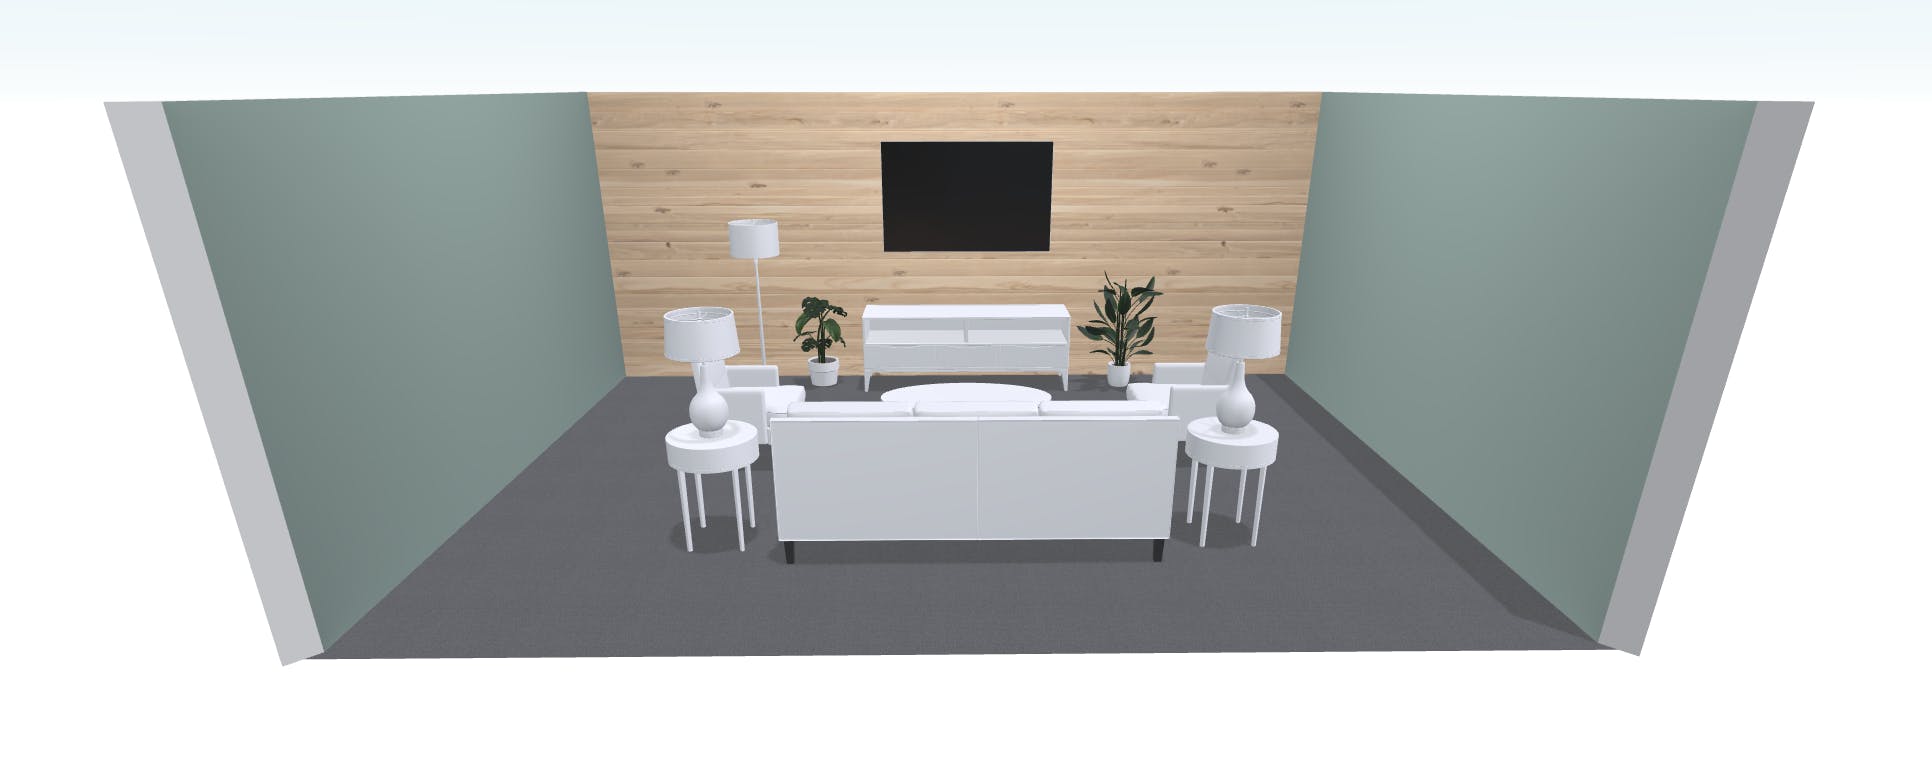
Wall finishes and treatments play a crucial role in presenting your overall vision to your client or lead. Paint, wallpaper, tile, shiplap and more can be added to your 3D floor plans in just a few clicks — you can even import your own custom finish to get the exact look you need.
Customizing your floor plans take them to the next level and help you close leads faster and move projects forward. Let's take a look at how to add wall finishes — including partial wall treatments — that will wow your audience.
To start, you will need to open an existing 3D floor plan or create a new floor plan. Read How to Create a 3D Floor Plan to learn more about getting started.
Next, you'll need to build out your walls, if you haven't already done so. Use the Draw Wall tool in the toolbar at the top of your screen. How to Create Accurate Wall Lengths provides more details on how to build out the walls for your project or lead.
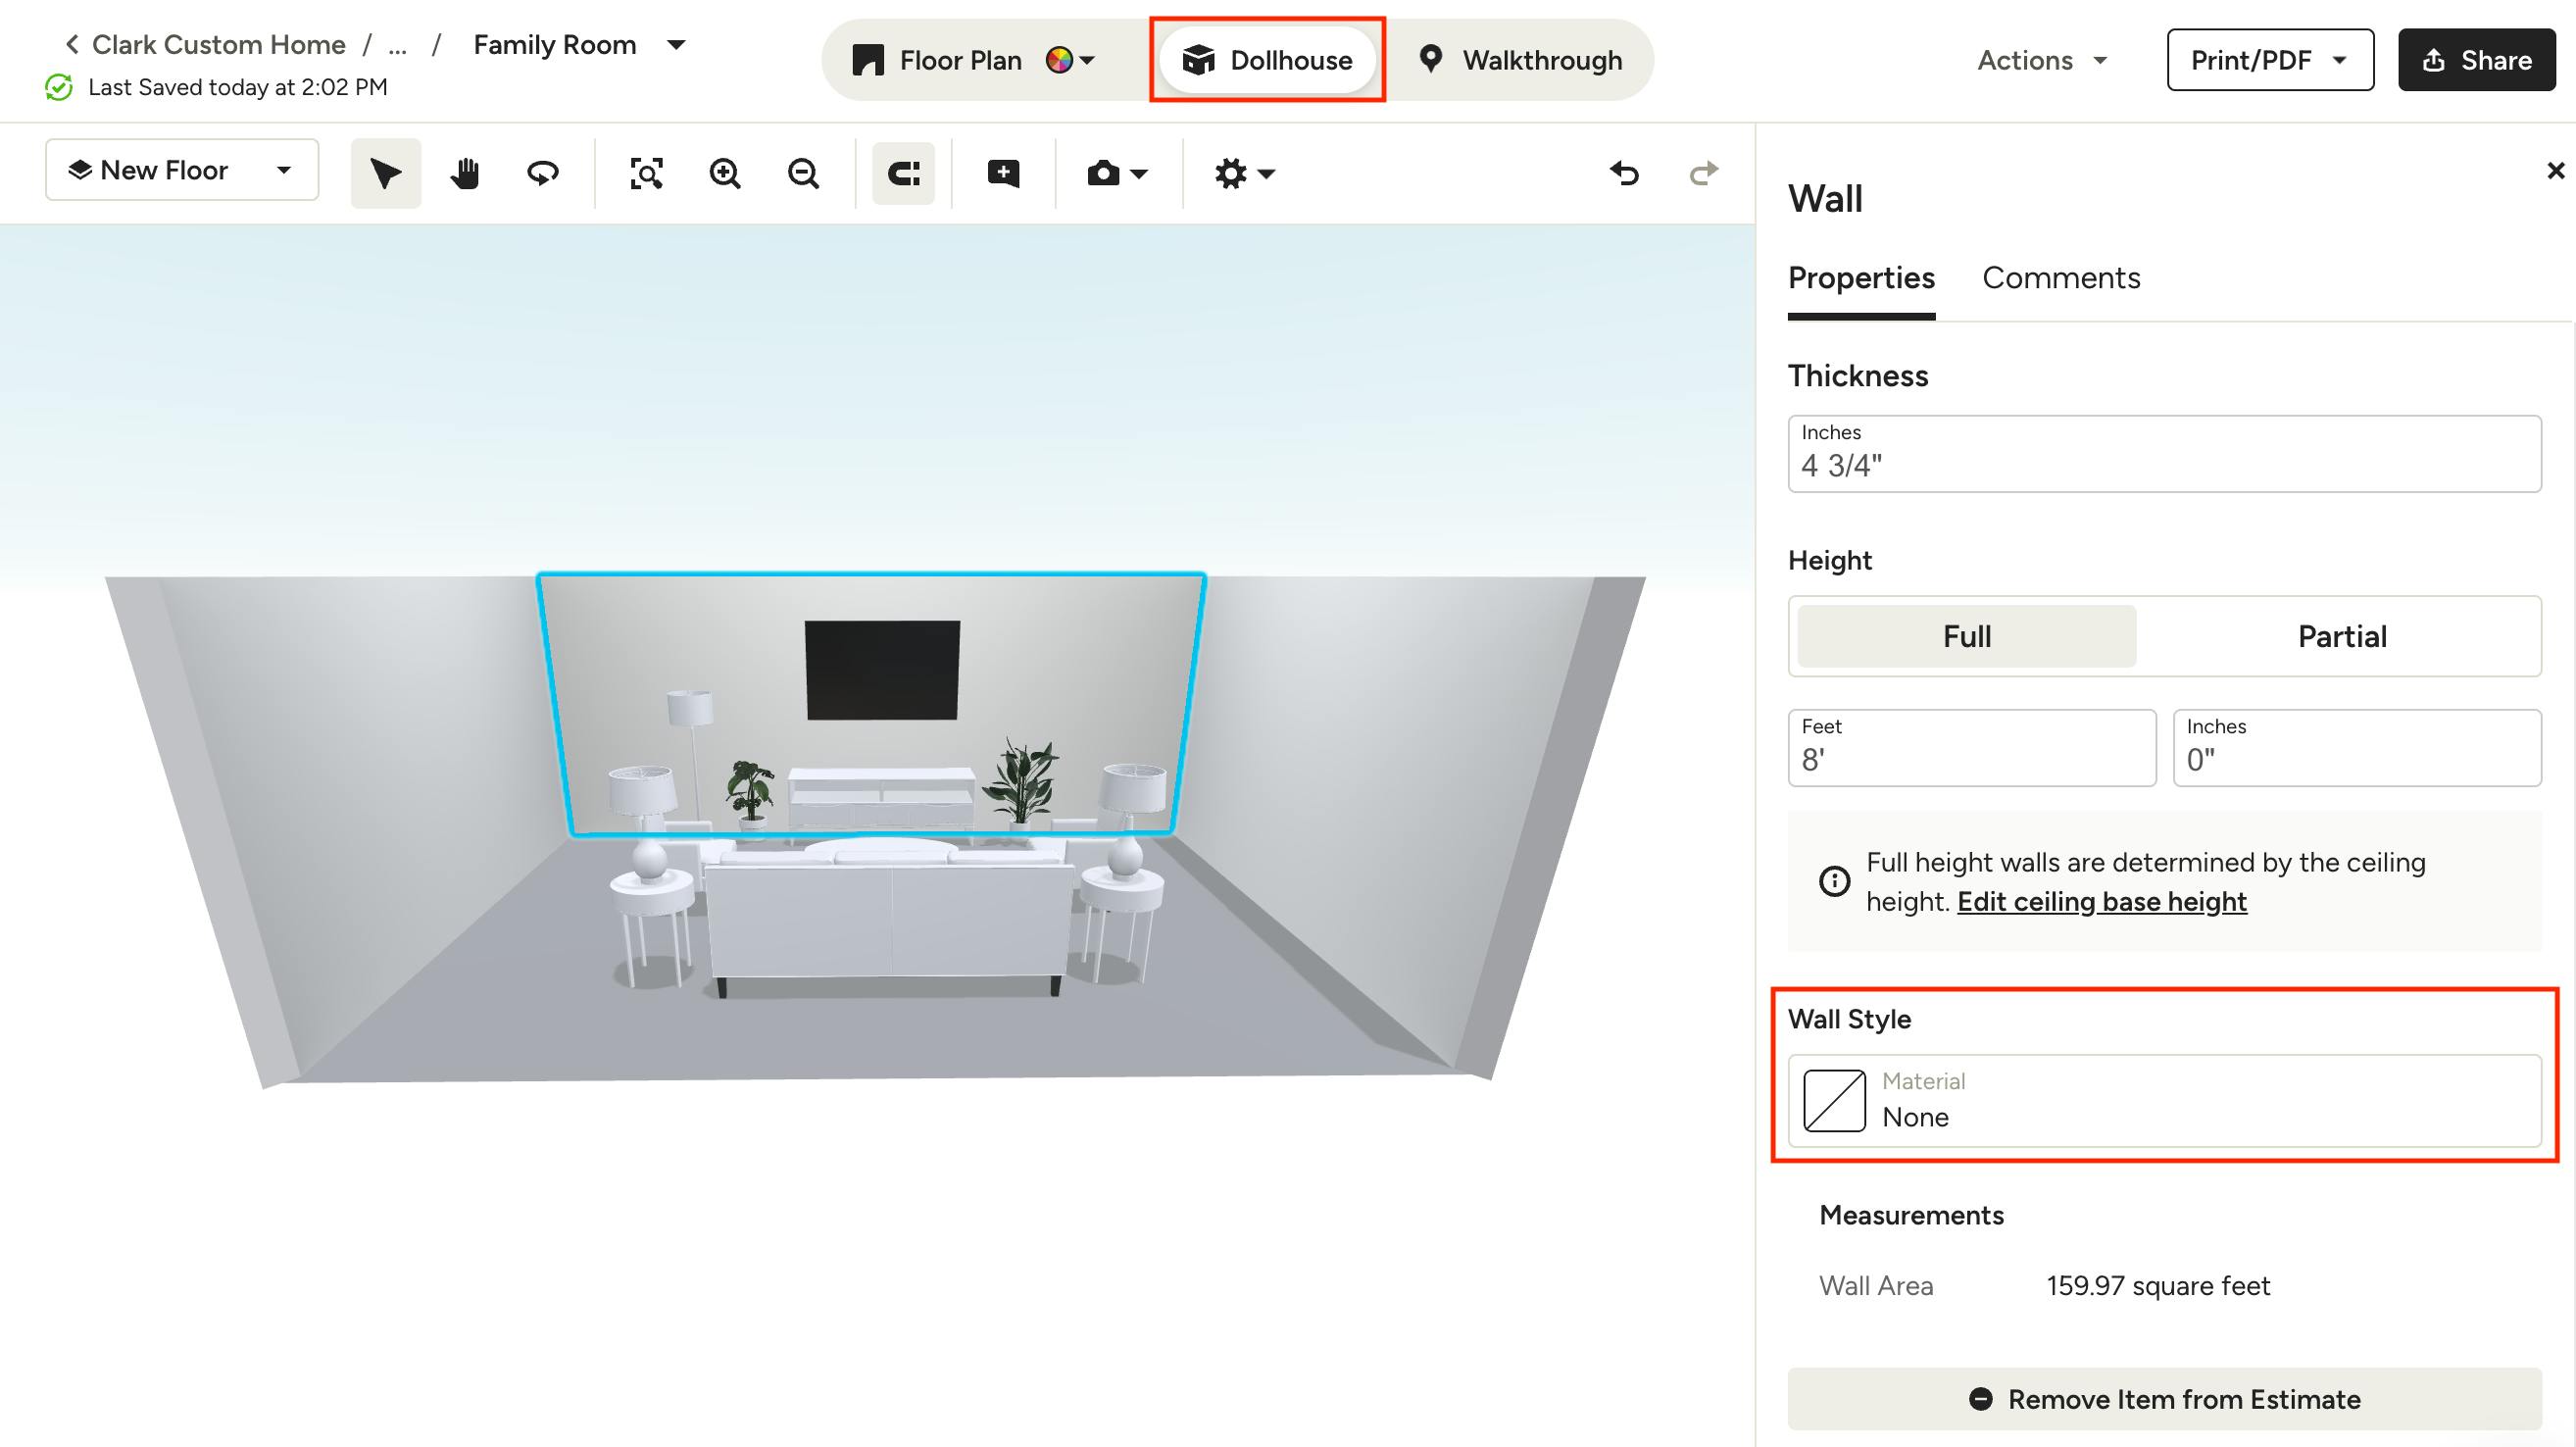
Once your walls are in place, switch to Dollhouse mode at the top of your plan to be able to select finishes for your walls.
To add a wall finish, simply click on the wall in the space. A new menu on the right side of your screen will appear with the wall properties. Click the material selector under Wall Style to pull up your finish options.
Pro tip: Apply a finish to multiple walls by holding down the Shift key and selecting walls, then choosing the desired finish.
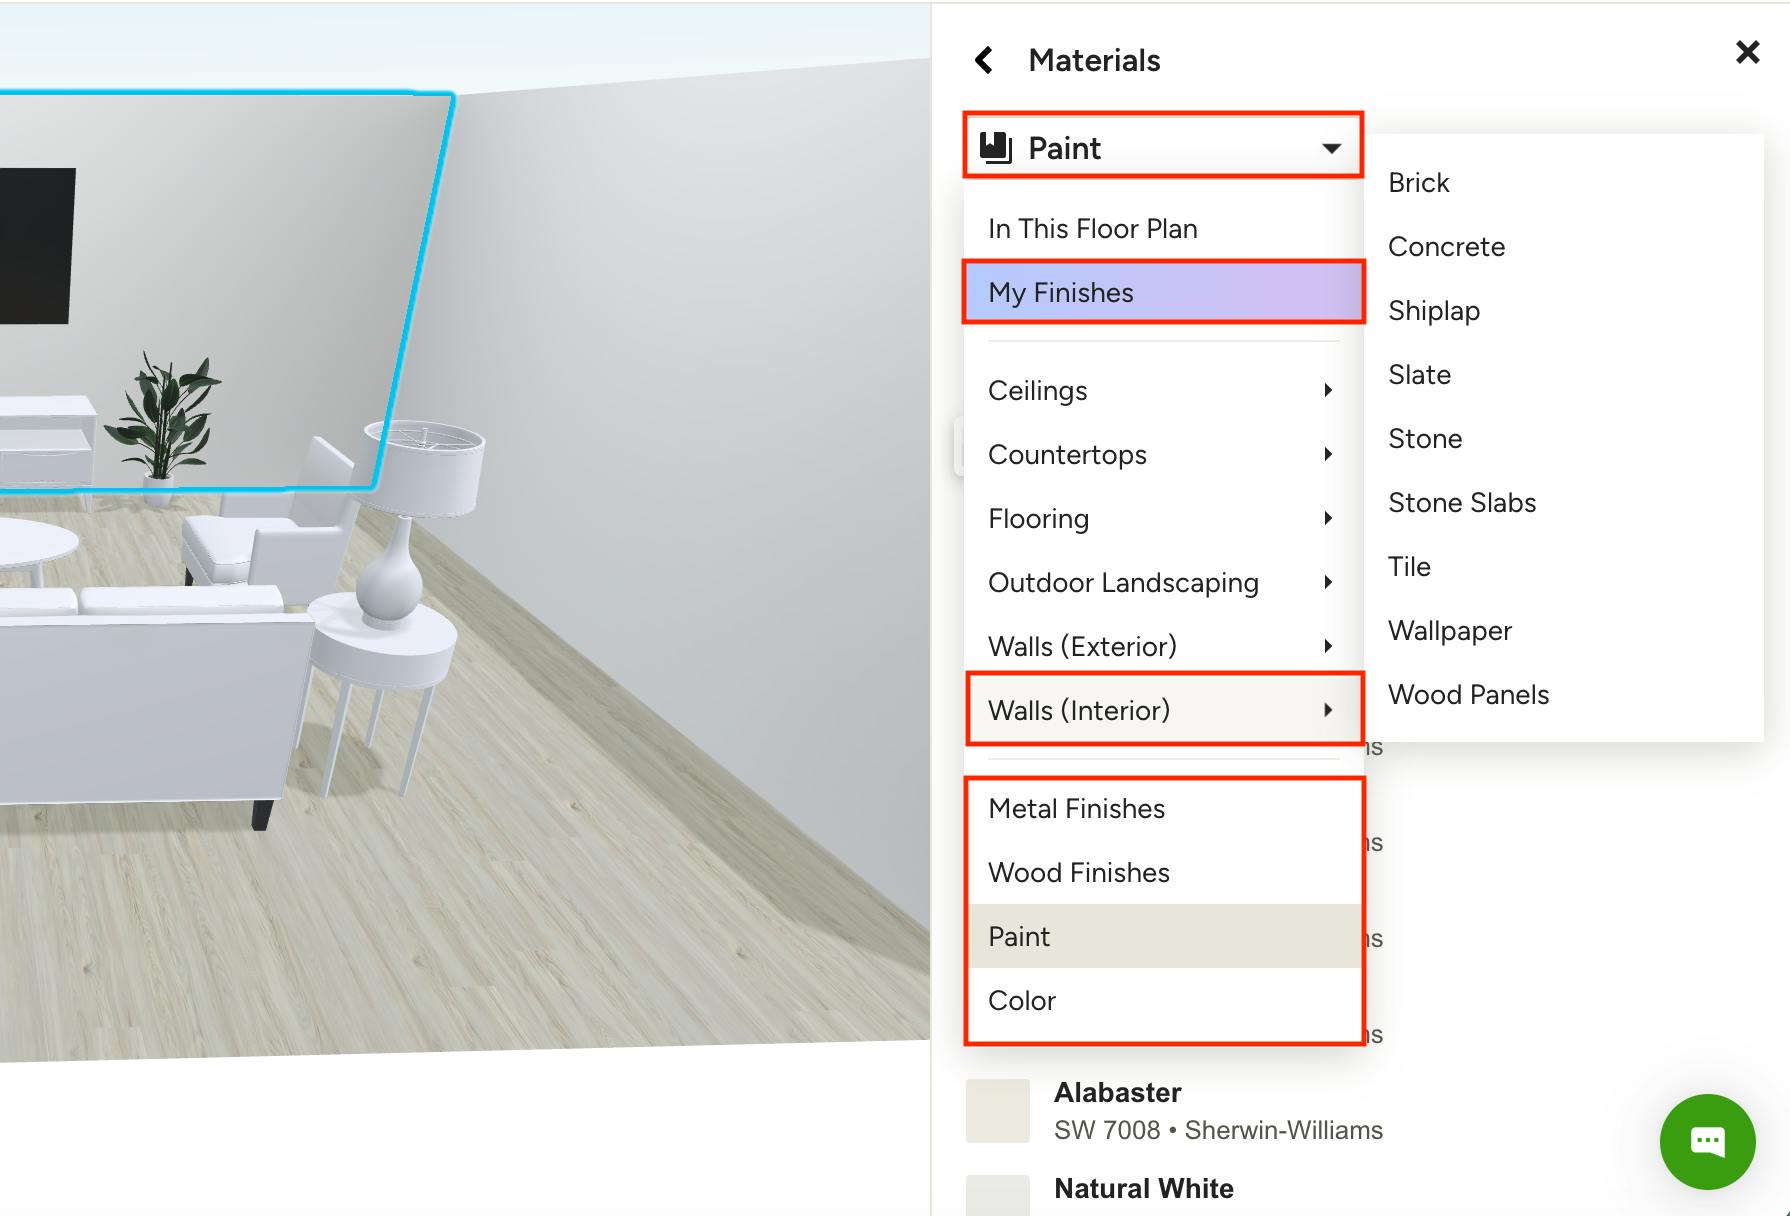
You will then be able to browse our Materials Library in the right menu. Use the dropdown at the top to narrow down your options. You'll find popular paint colors by Sherwin-Williams and Benjamin Moore, as well as the ability to select your own color, wood finish or metal finish. To add a wall treatment, use the Walls (Interior) menu. Here, you'll find everything from shiplap to stone, tile, wallpaper, wood slats, and more.
Under My Finishes, you have the option to select from custom finishes you have already added to your 3D floor plan, or you can add a new finish. To learn about adding custom finishes, read How to Add Custom Finishes to Your 3D Floor Plan.
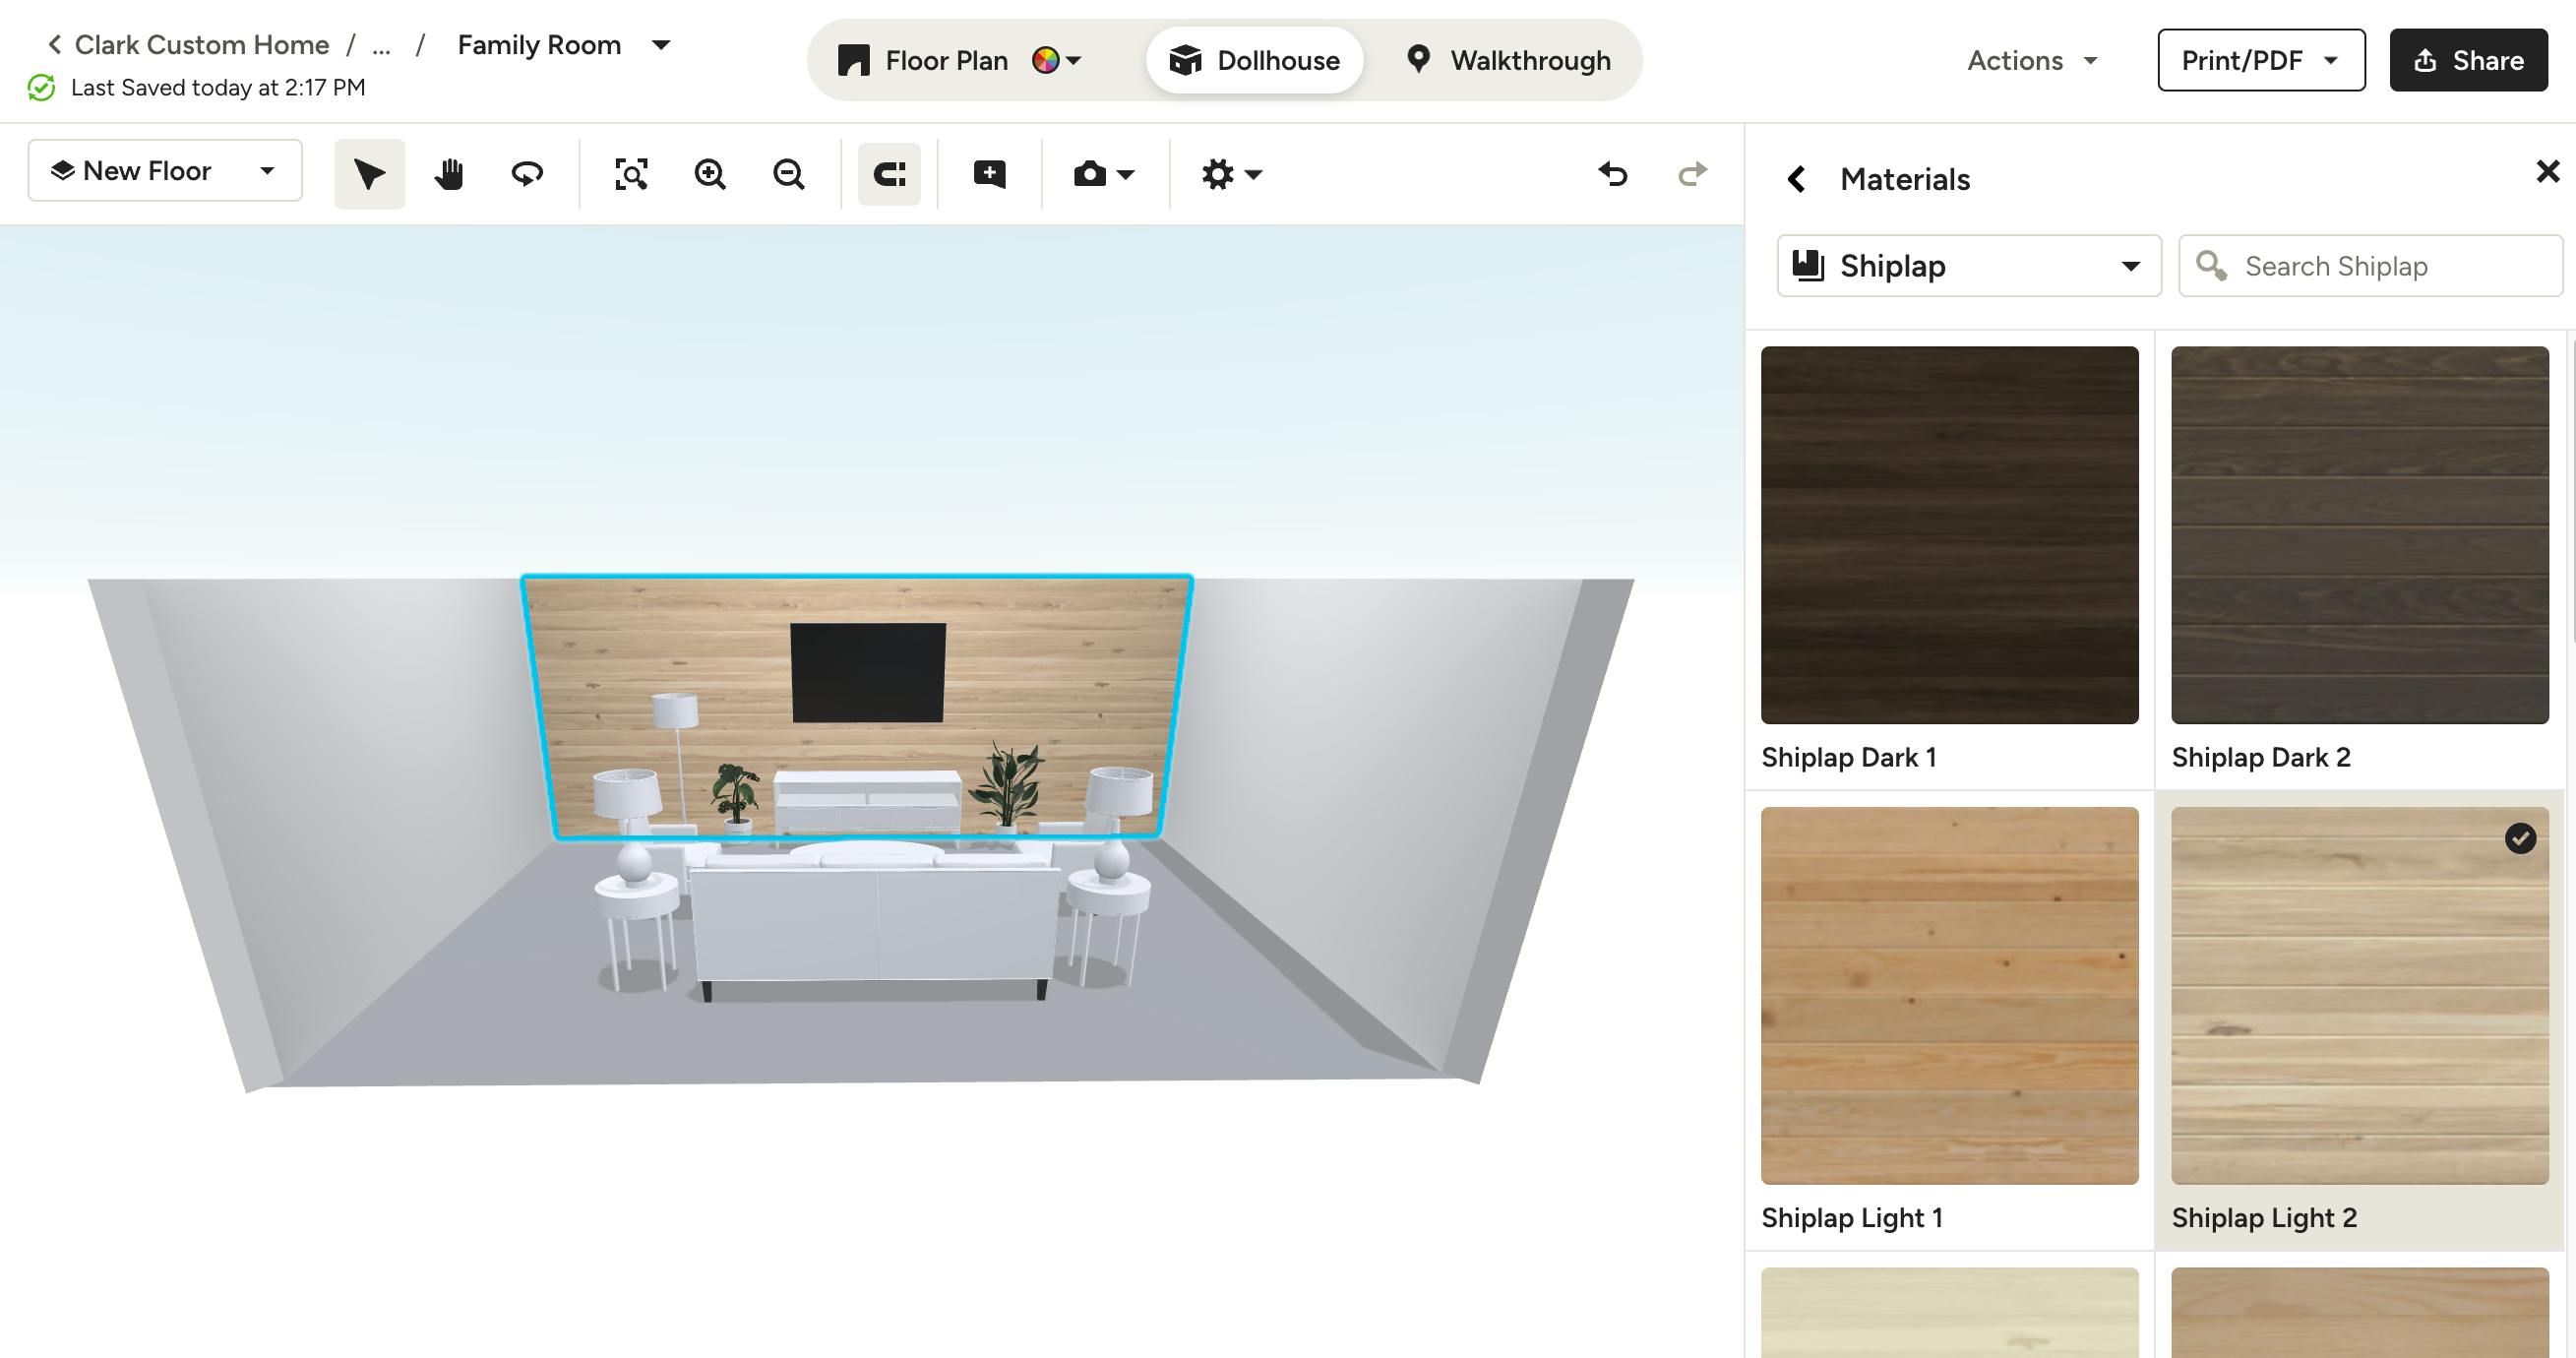
Once you make a selection from the menu, it will appear on your floor plan.
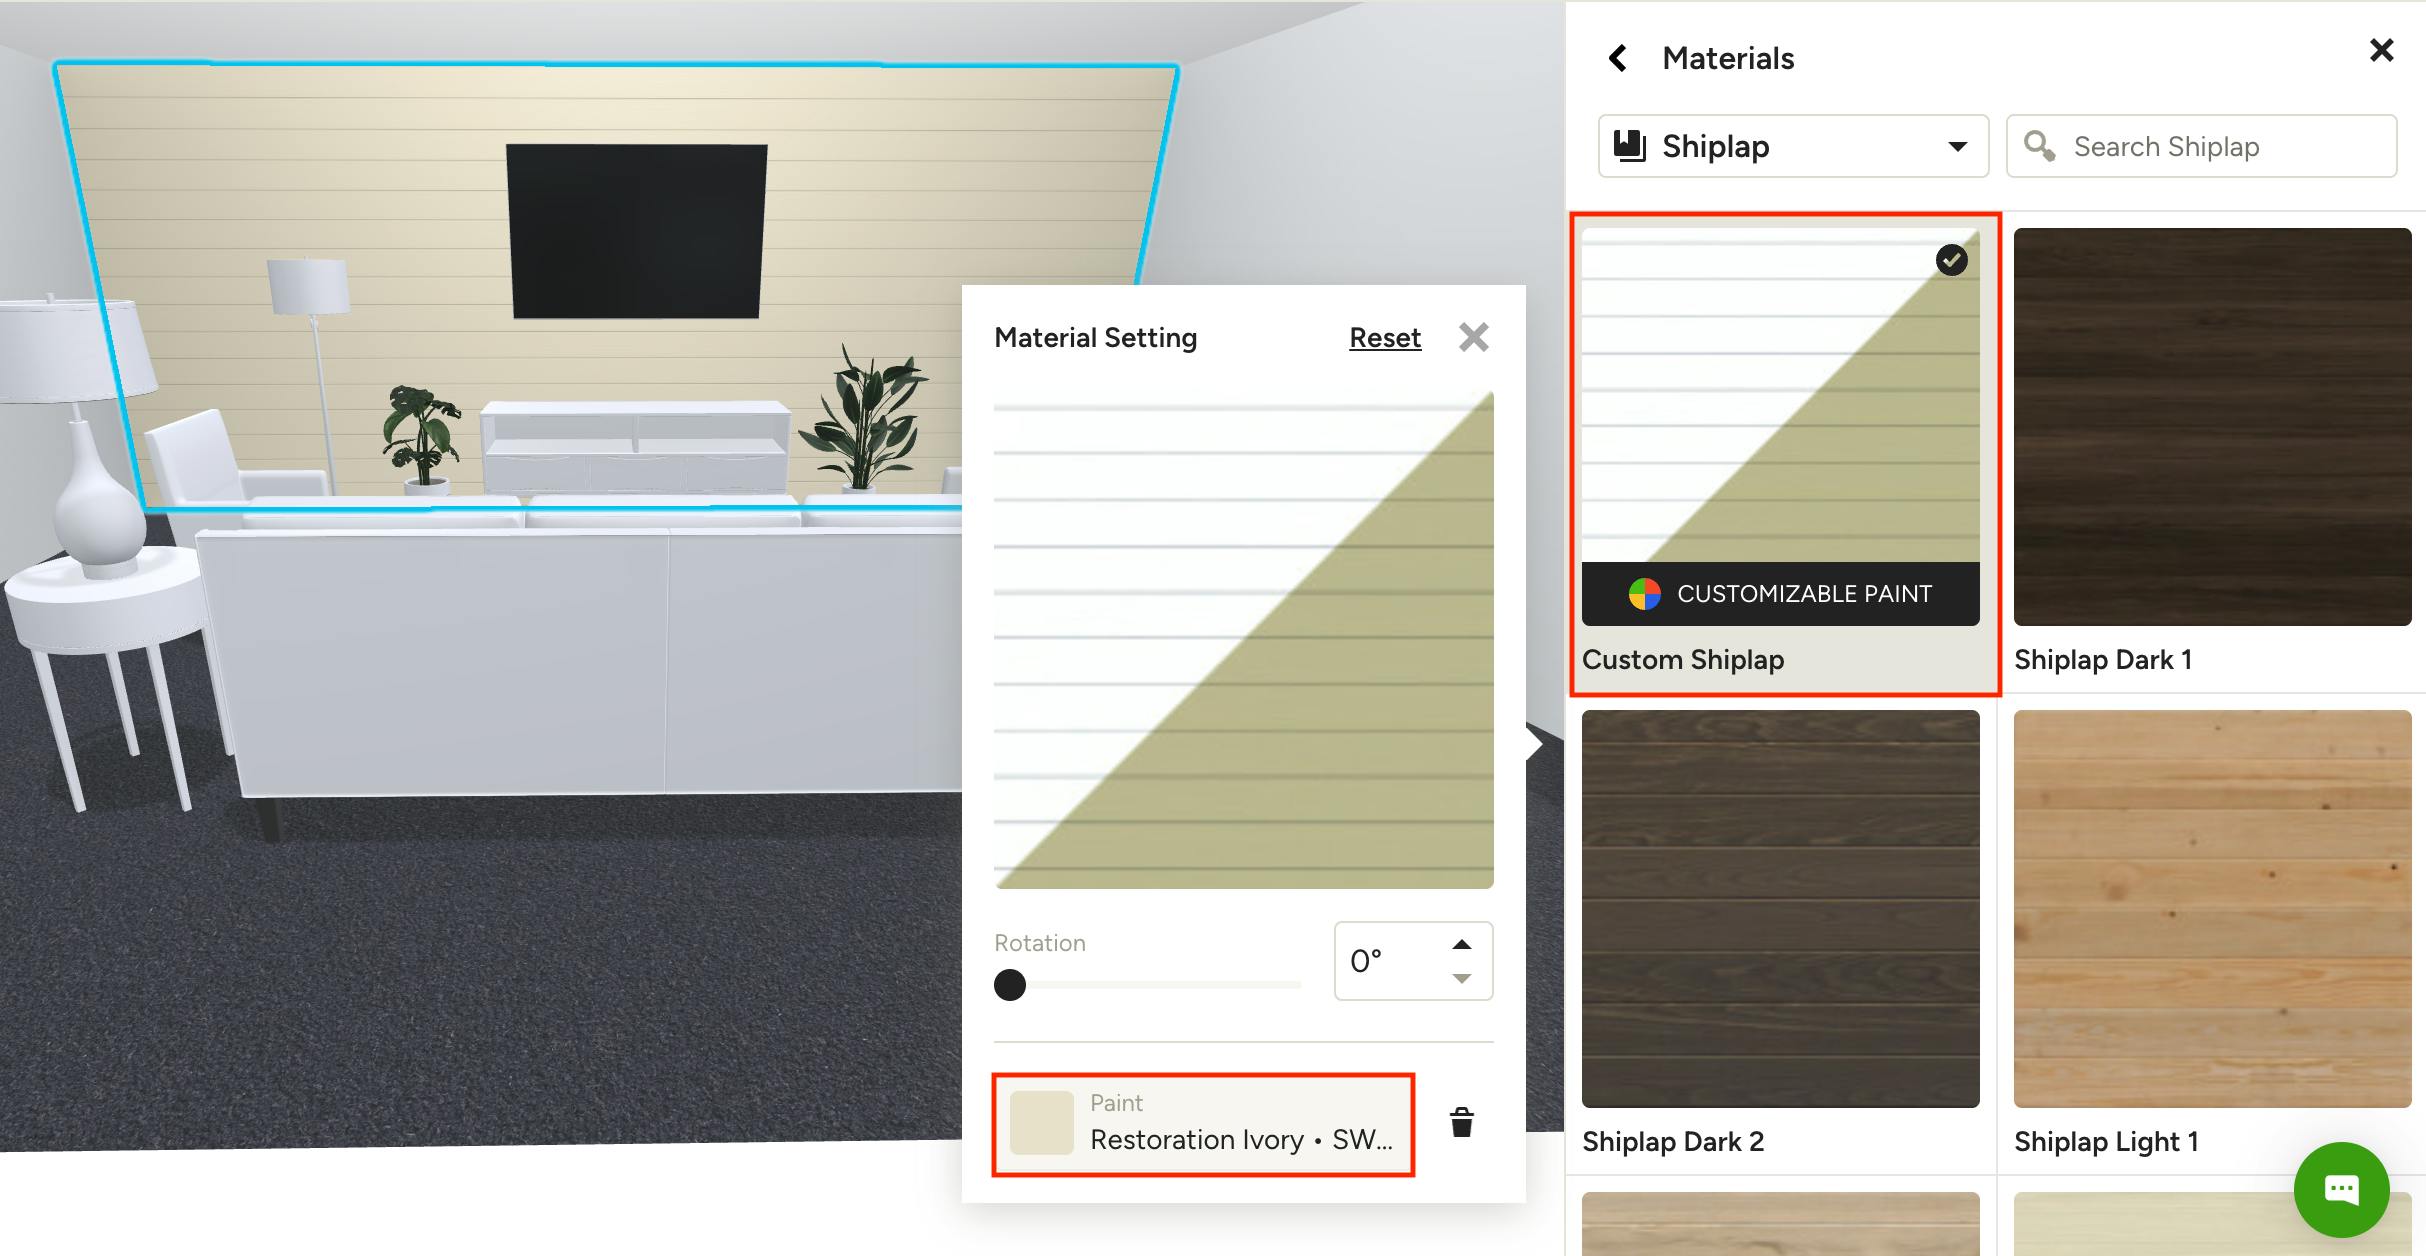
If you would like to customize the wall material color instead of selecting from the available options, you can select one of the Customizable Paint options at the top of applicable materials list (as shown below). You will then be able to choose from our extensive paint list to find the perfect color.
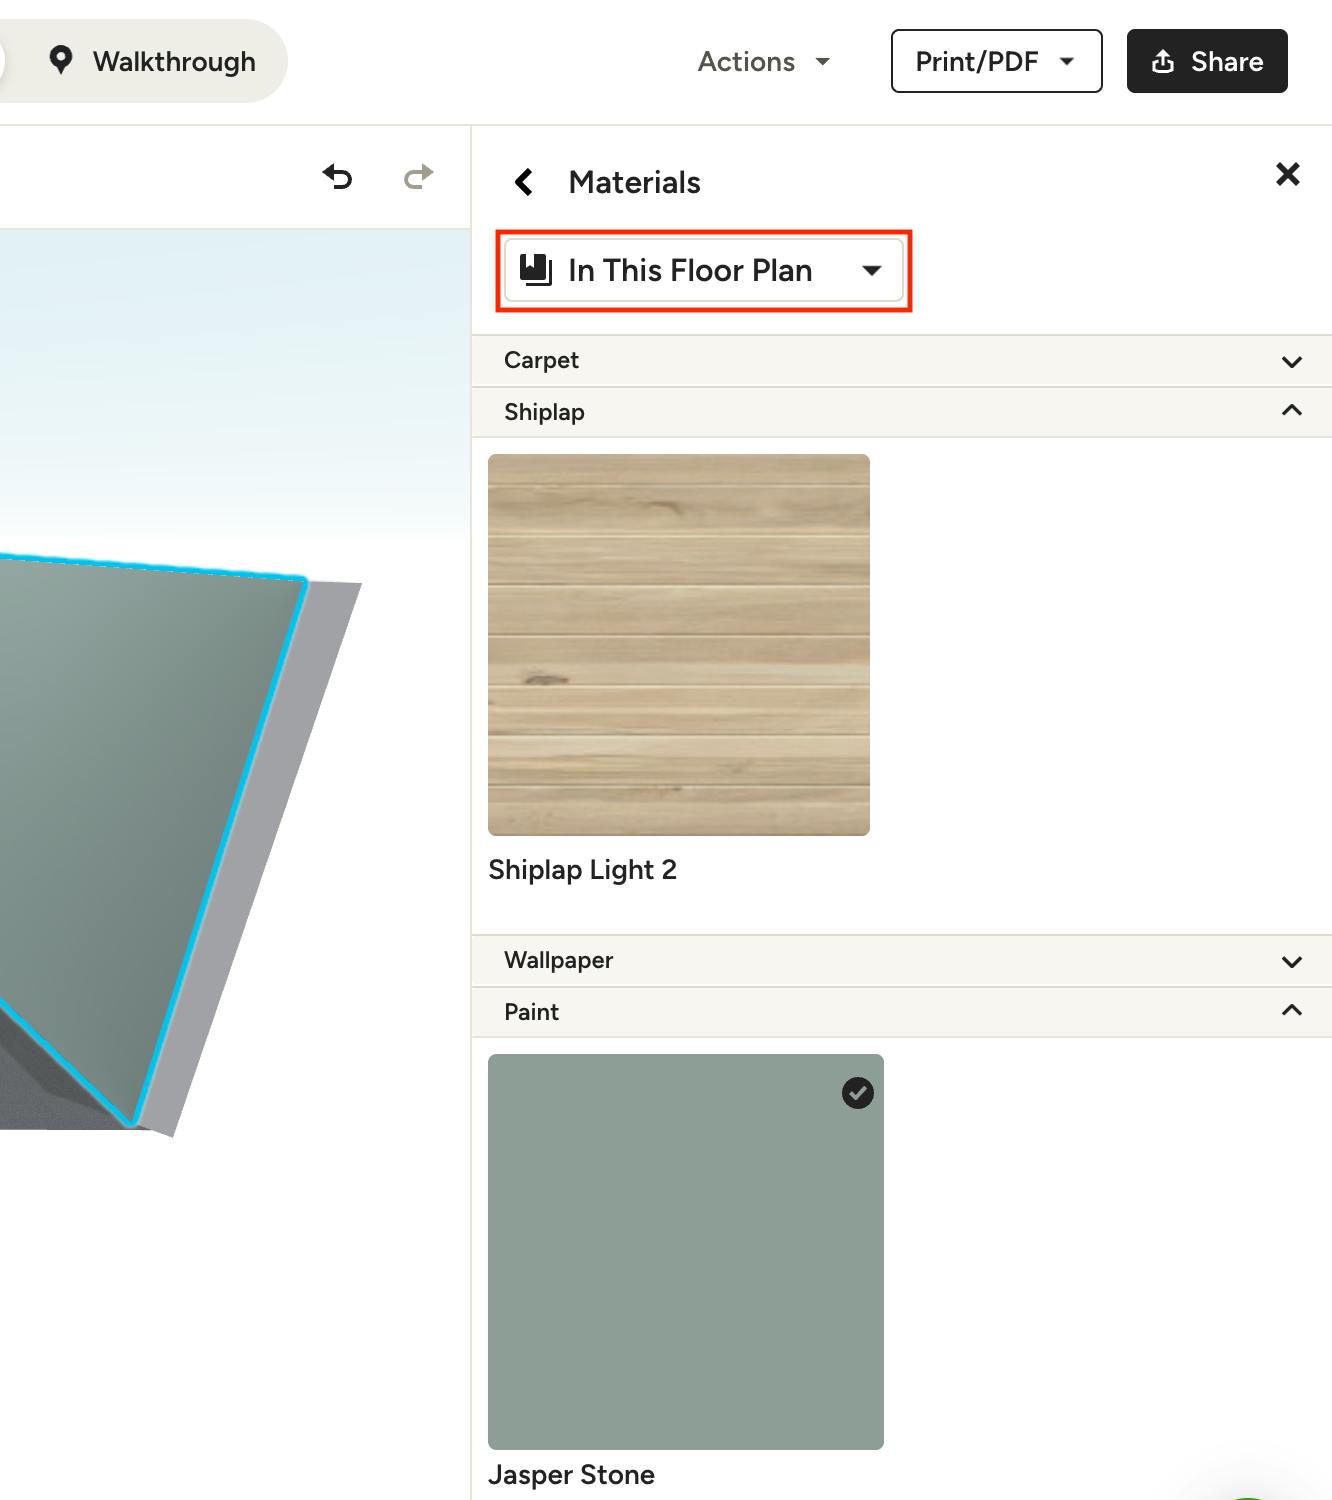
To quickly find a material that you've already used in the current floor plan, select In This Floor Plan from the materials dropdown. You'll see all the materials recently used in the floor plan categorized by type for easy access to use over and over again.
Change Wall Finishes
If you already have a wall finish in place — either from a template or your own design — you can easily change it if needed. Just click on the wall(s), and select the current material selection under Wall Style in the right menu. The Materials Library will appear so you can make your changes.
Material Settings
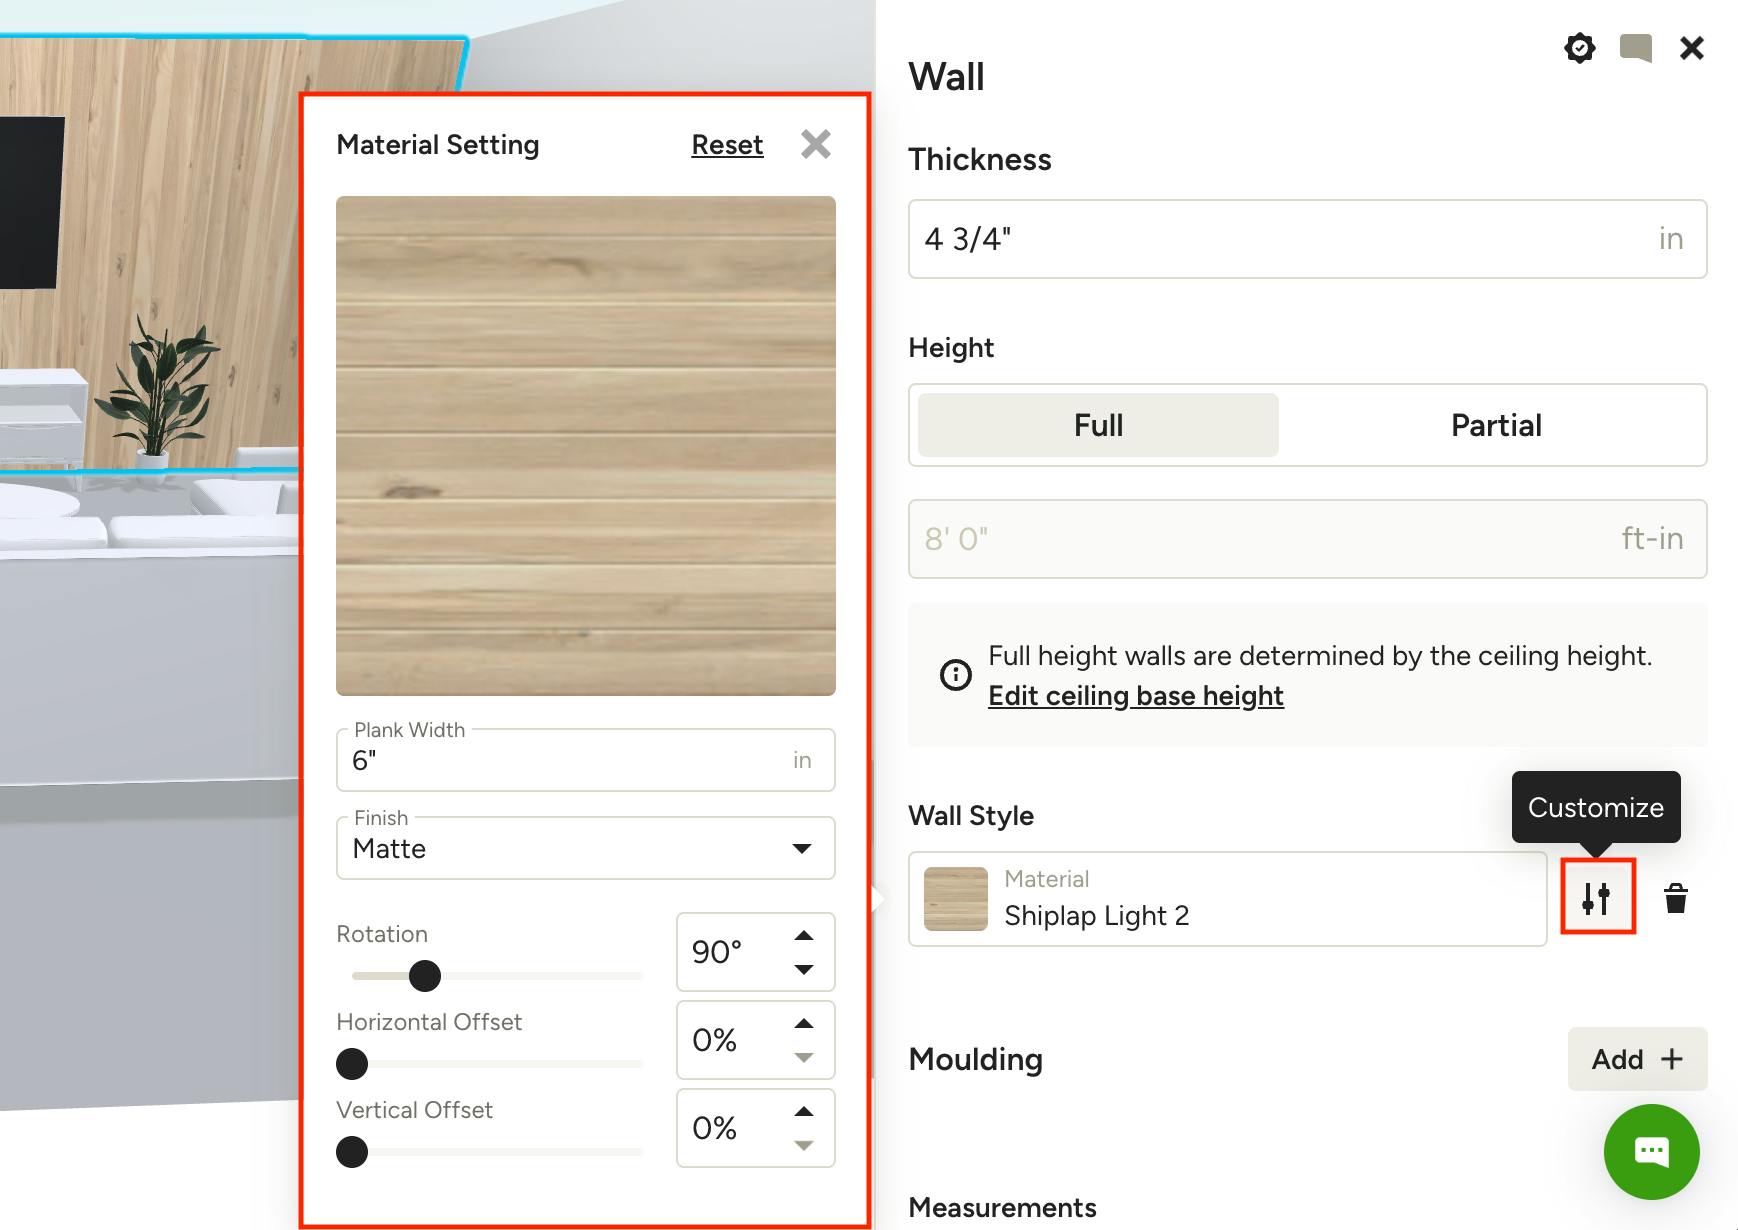
To change the settings of a material applied to your wall(s), click the customize icon next to the material in the Wall Style section of the right panel. If you're still in the Materials Library, exit out using the X in the top right. Once your Material Settings are open, you can change the following (where applicable):
- Dimensions: Adjust the dimensions of the individual pieces of the material. This includes length and width, for materials like tile or brick, and plank width, for materials like shiplap.
- Finish: Choose from Matte, Semi-Gloss or High Gloss.
- Rotation: Adjust the angle of rotation using the slider or by typing in a degree.
- Horizontal Offset: Adjust where the material starts or ends by shifting it horizontally (left or right).
- Vertical Offset: Adjust where the material starts or ends by shifting it vertically (up or down).
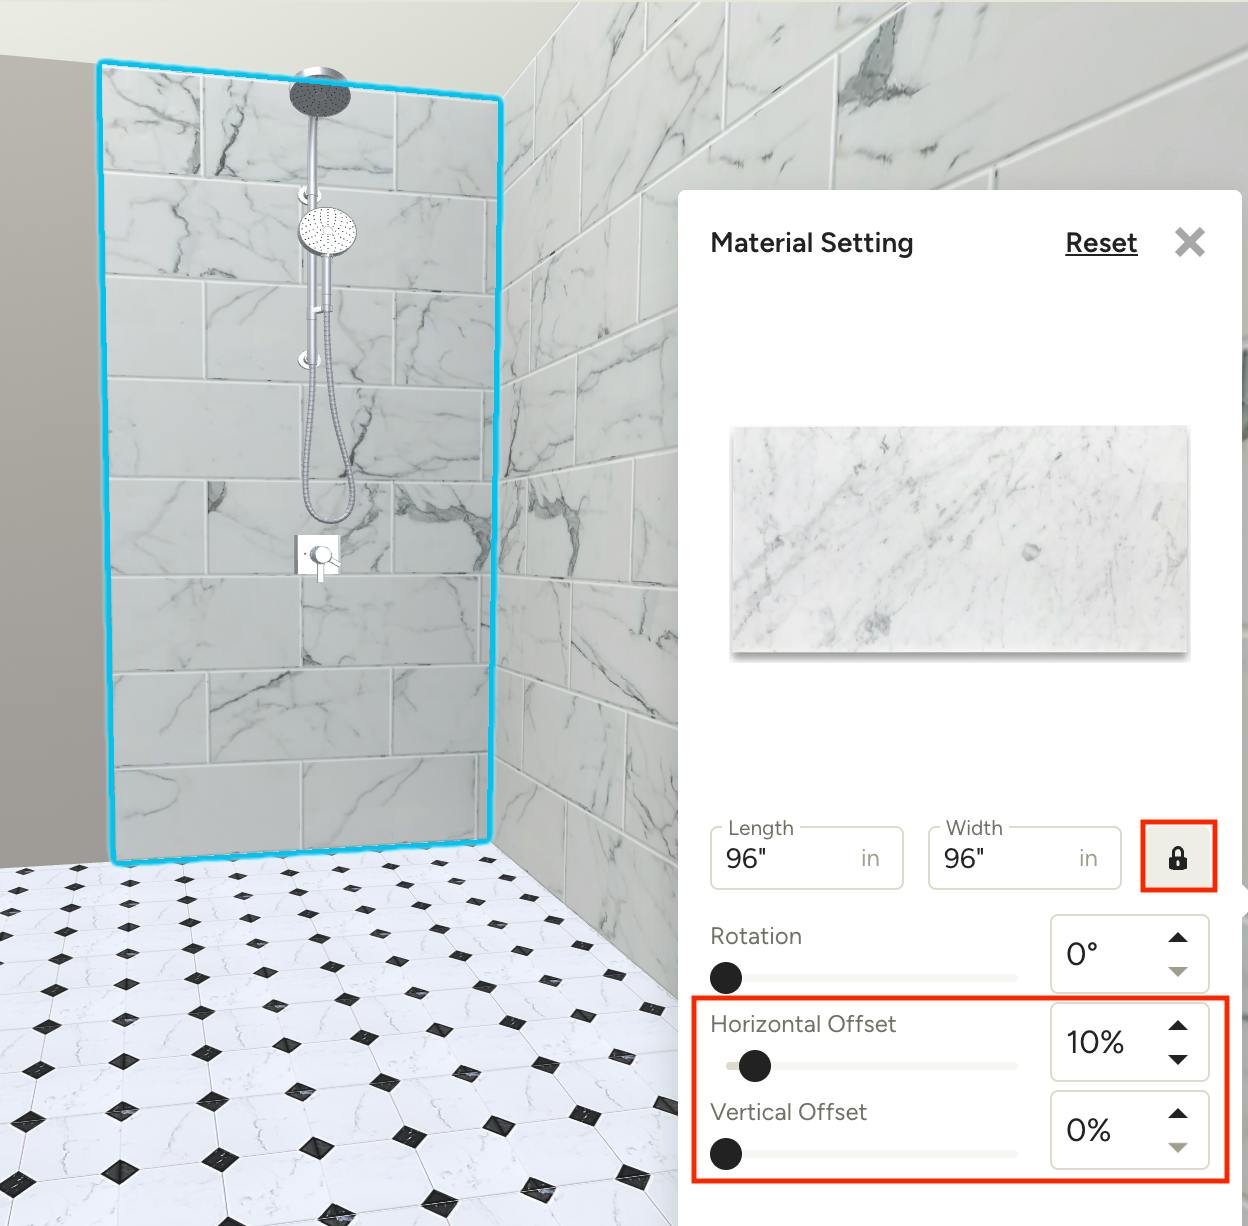
For materials with length and width settings, the aspect ratio is locked by default. This means if you adjust one measurement, the other will automatically adjust accordingly to maintain the original, uniform shape of the material. To allow non-uniform scaling of materials, click the lock to the right so it's unlocked, then make adjustments as desired.
Pro tip: To present a truly professional and accurate design to your client, use the horizontal and vertical offset settings to line up your materials correctly, especially tile in bathrooms and kitchens.
Remove Wall Finishes
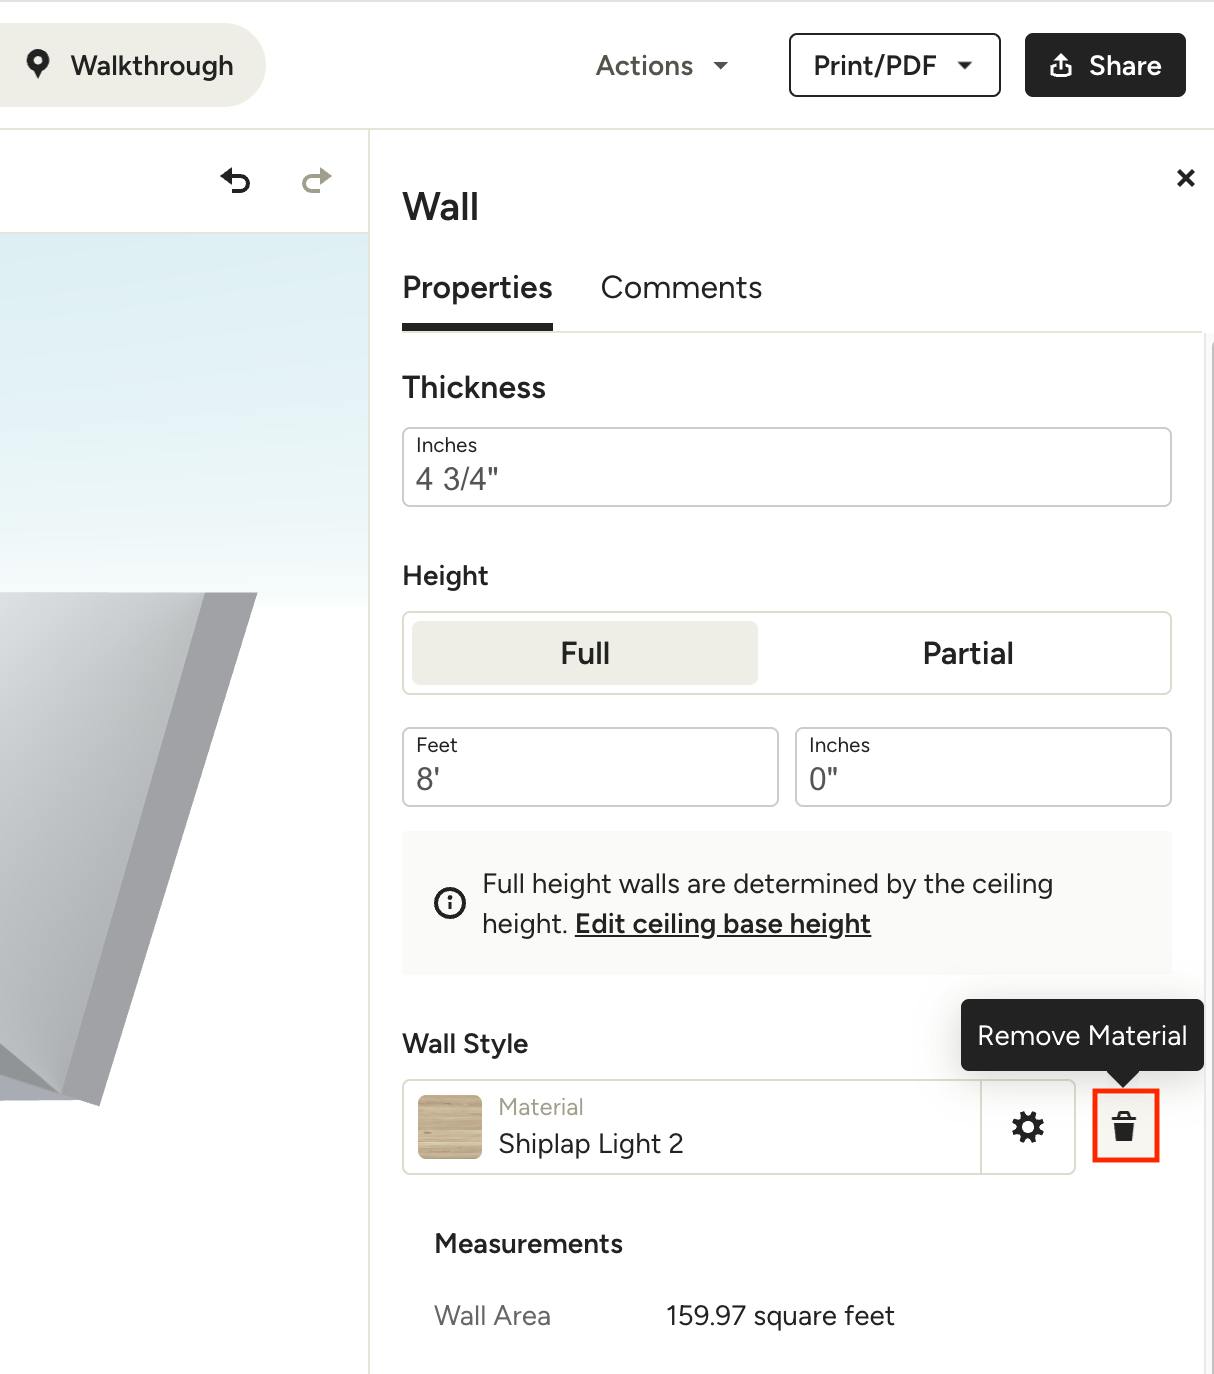
If you would like to go back to a blank wall with no finish applied, click directly on the wall within your 3D grid, then click the trashcan icon to the right of the material in the Wall Style section of the right panel.
Add Partial Wall Treatments
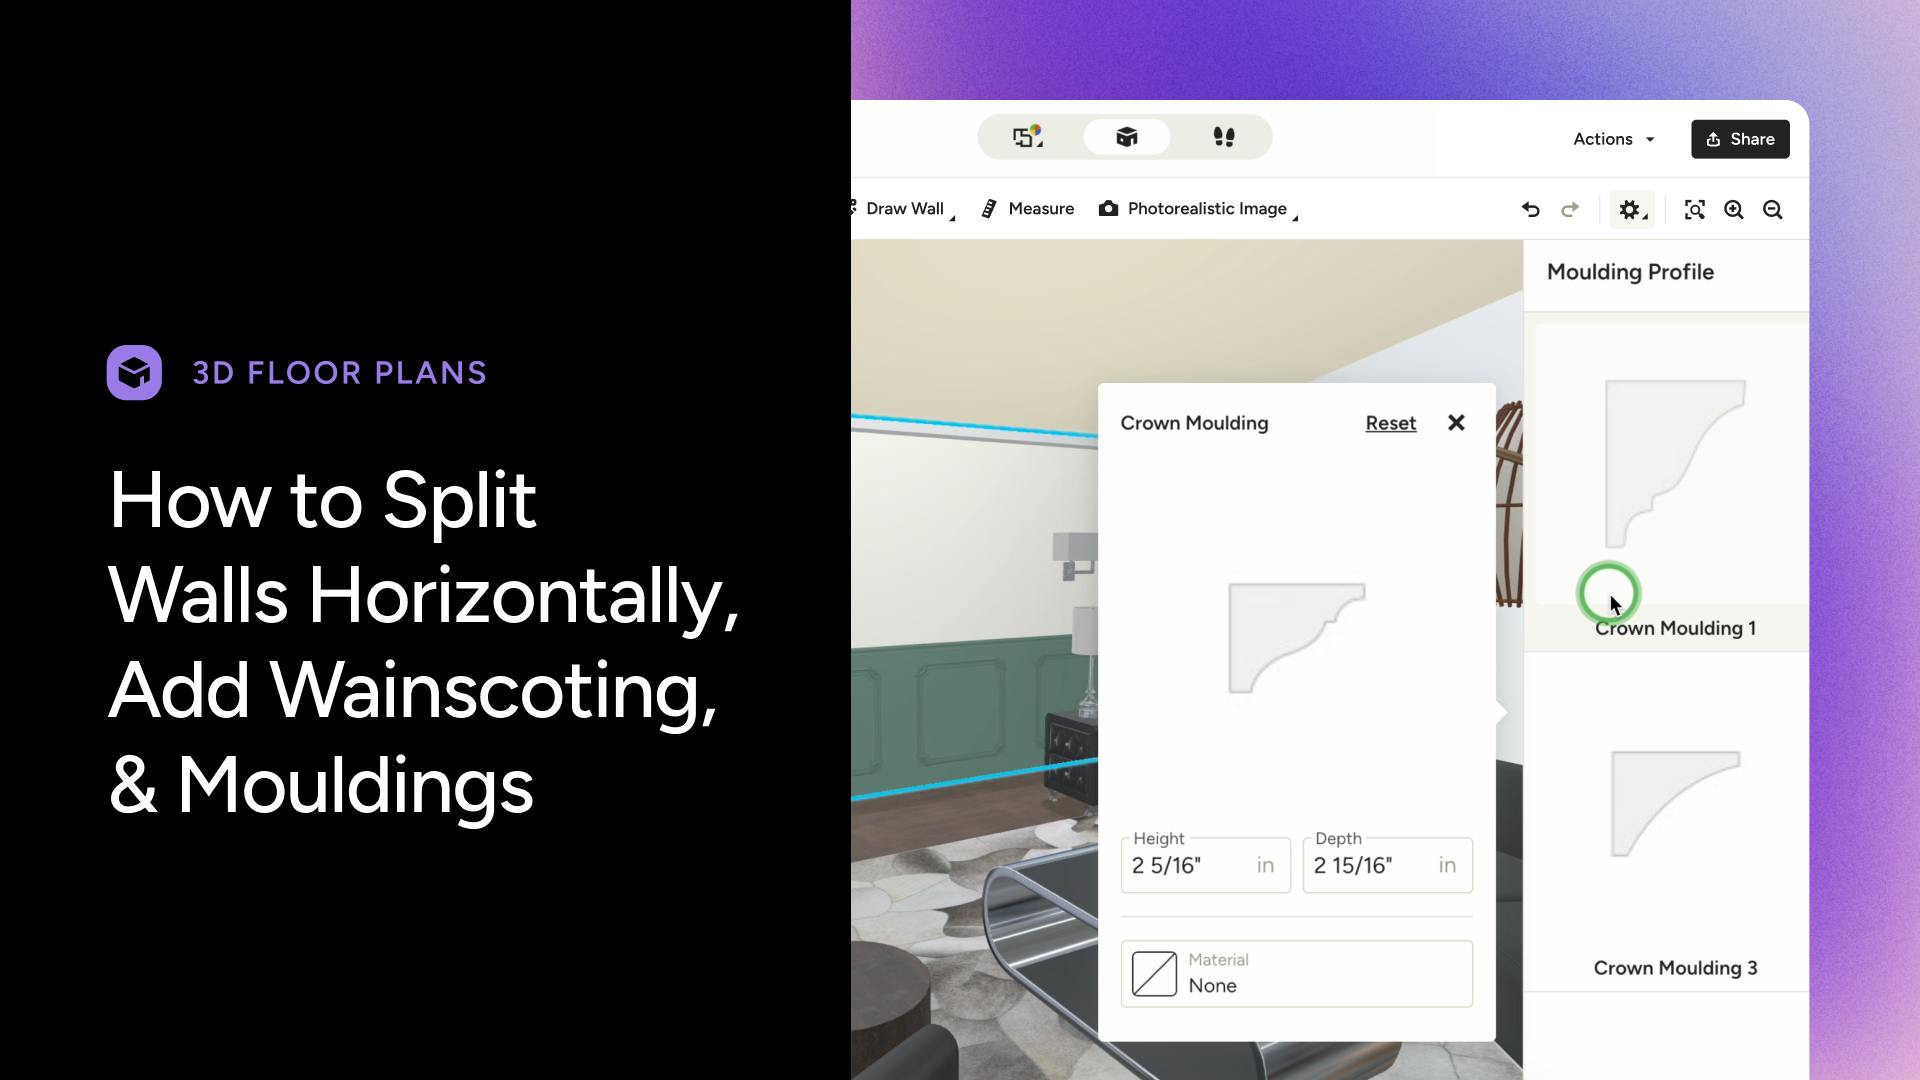
You can add finishes to specific portions of your walls, giving you more control over the look and feel of the space so you can more accurately represent your vision to your client or lead. If you're looking to apply tile or wallpaper on half of a wall, for example, watch this video or follow the detailed steps below:
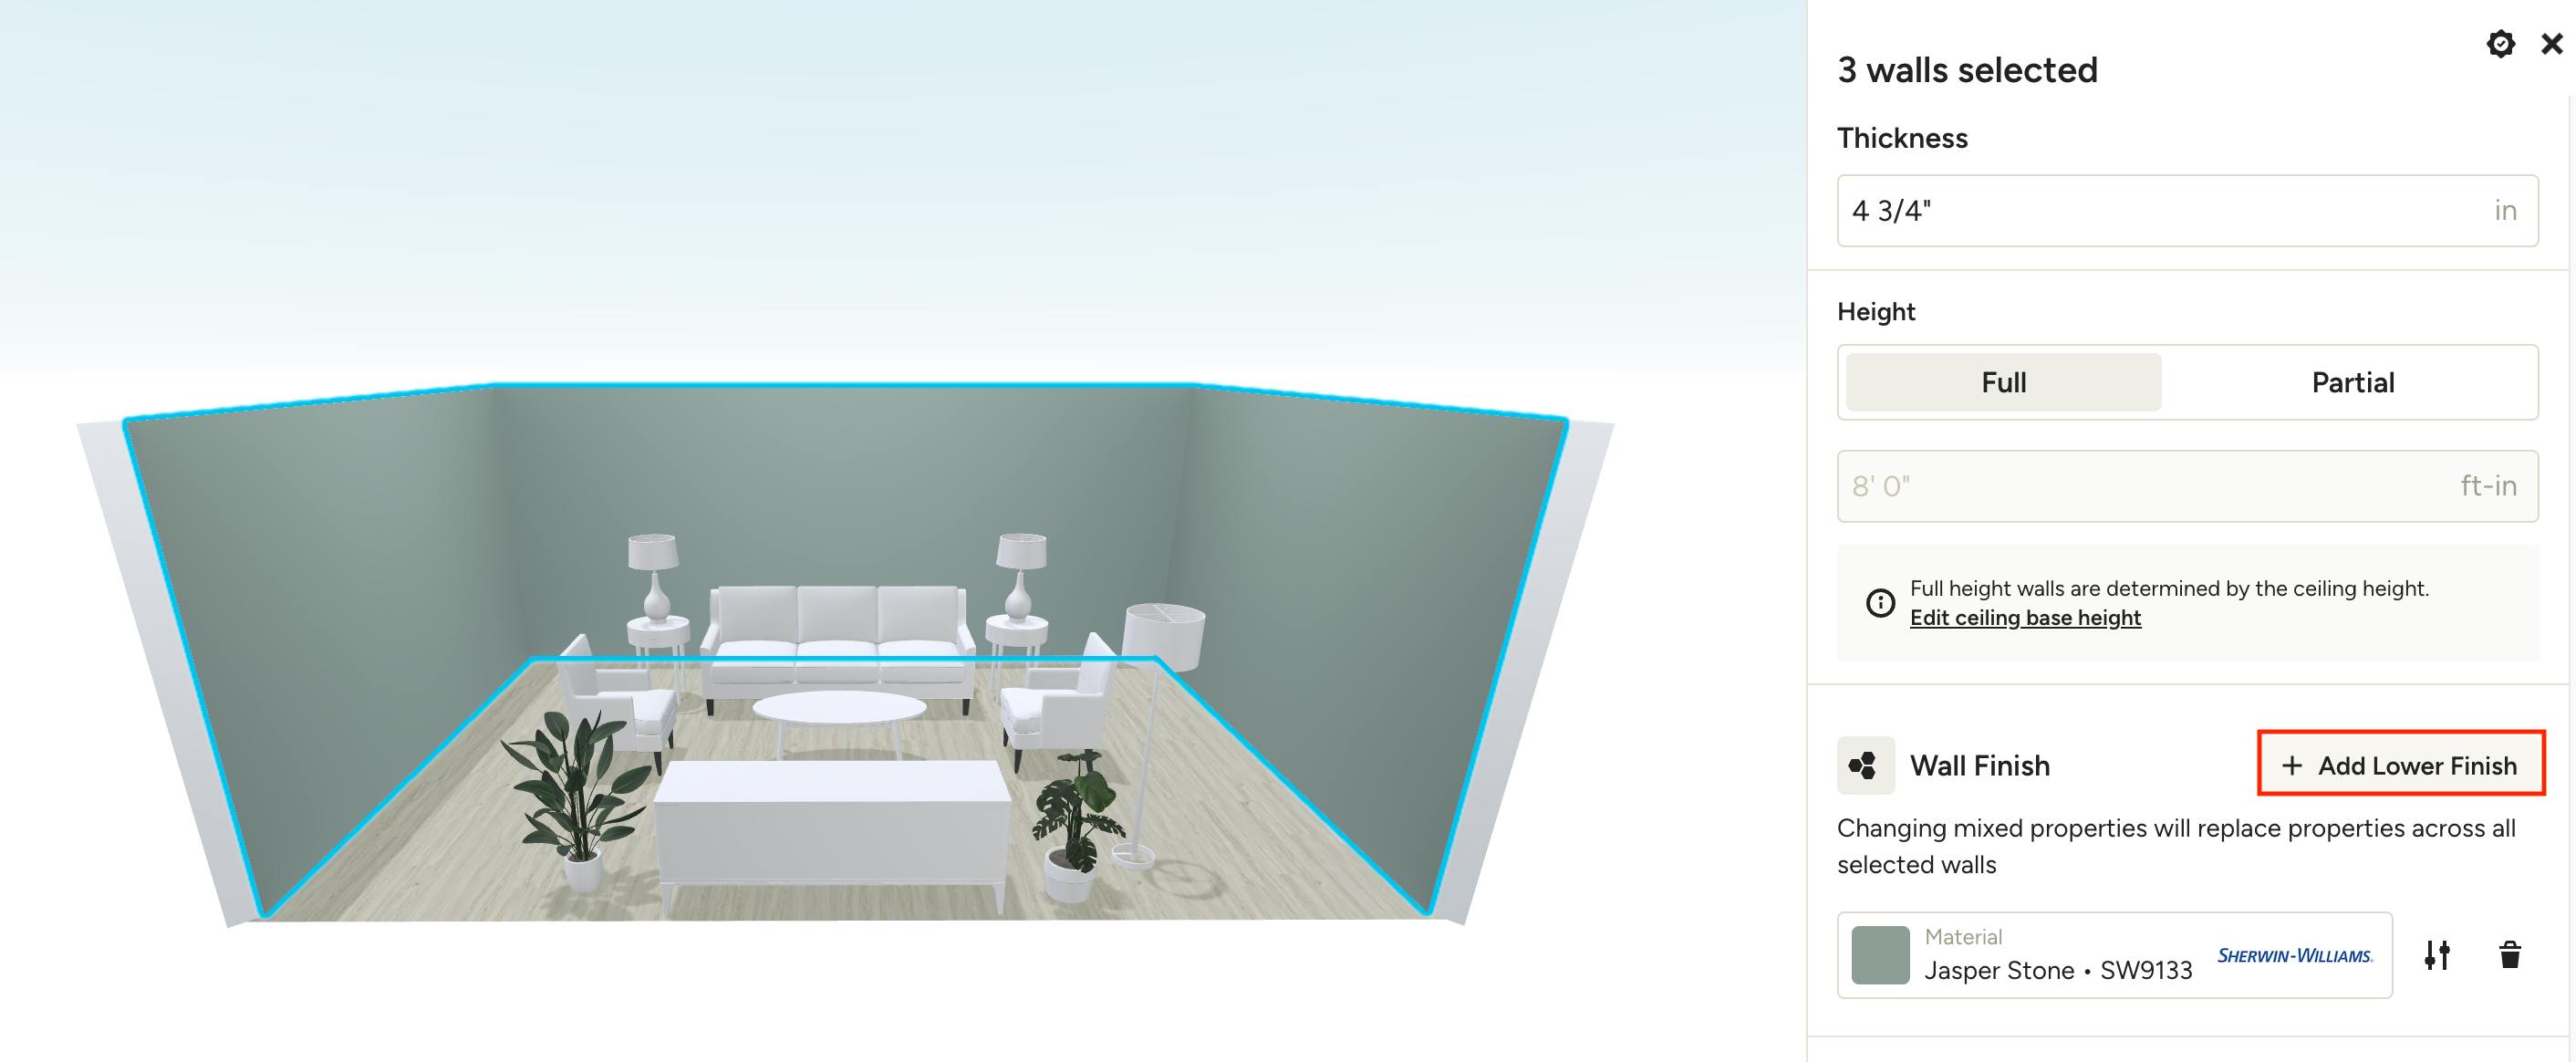
Start by applying your desired wall treatment for the top portion of the wall, like wallpaper or paint, to the entire wall as detailed in the steps above.
Next, you'll apply the finish for the lower portion of the wall. Select the wall(s) that you want to apply a partial wall treatment, then click + Add Lower Finish in the Wall options on the right.
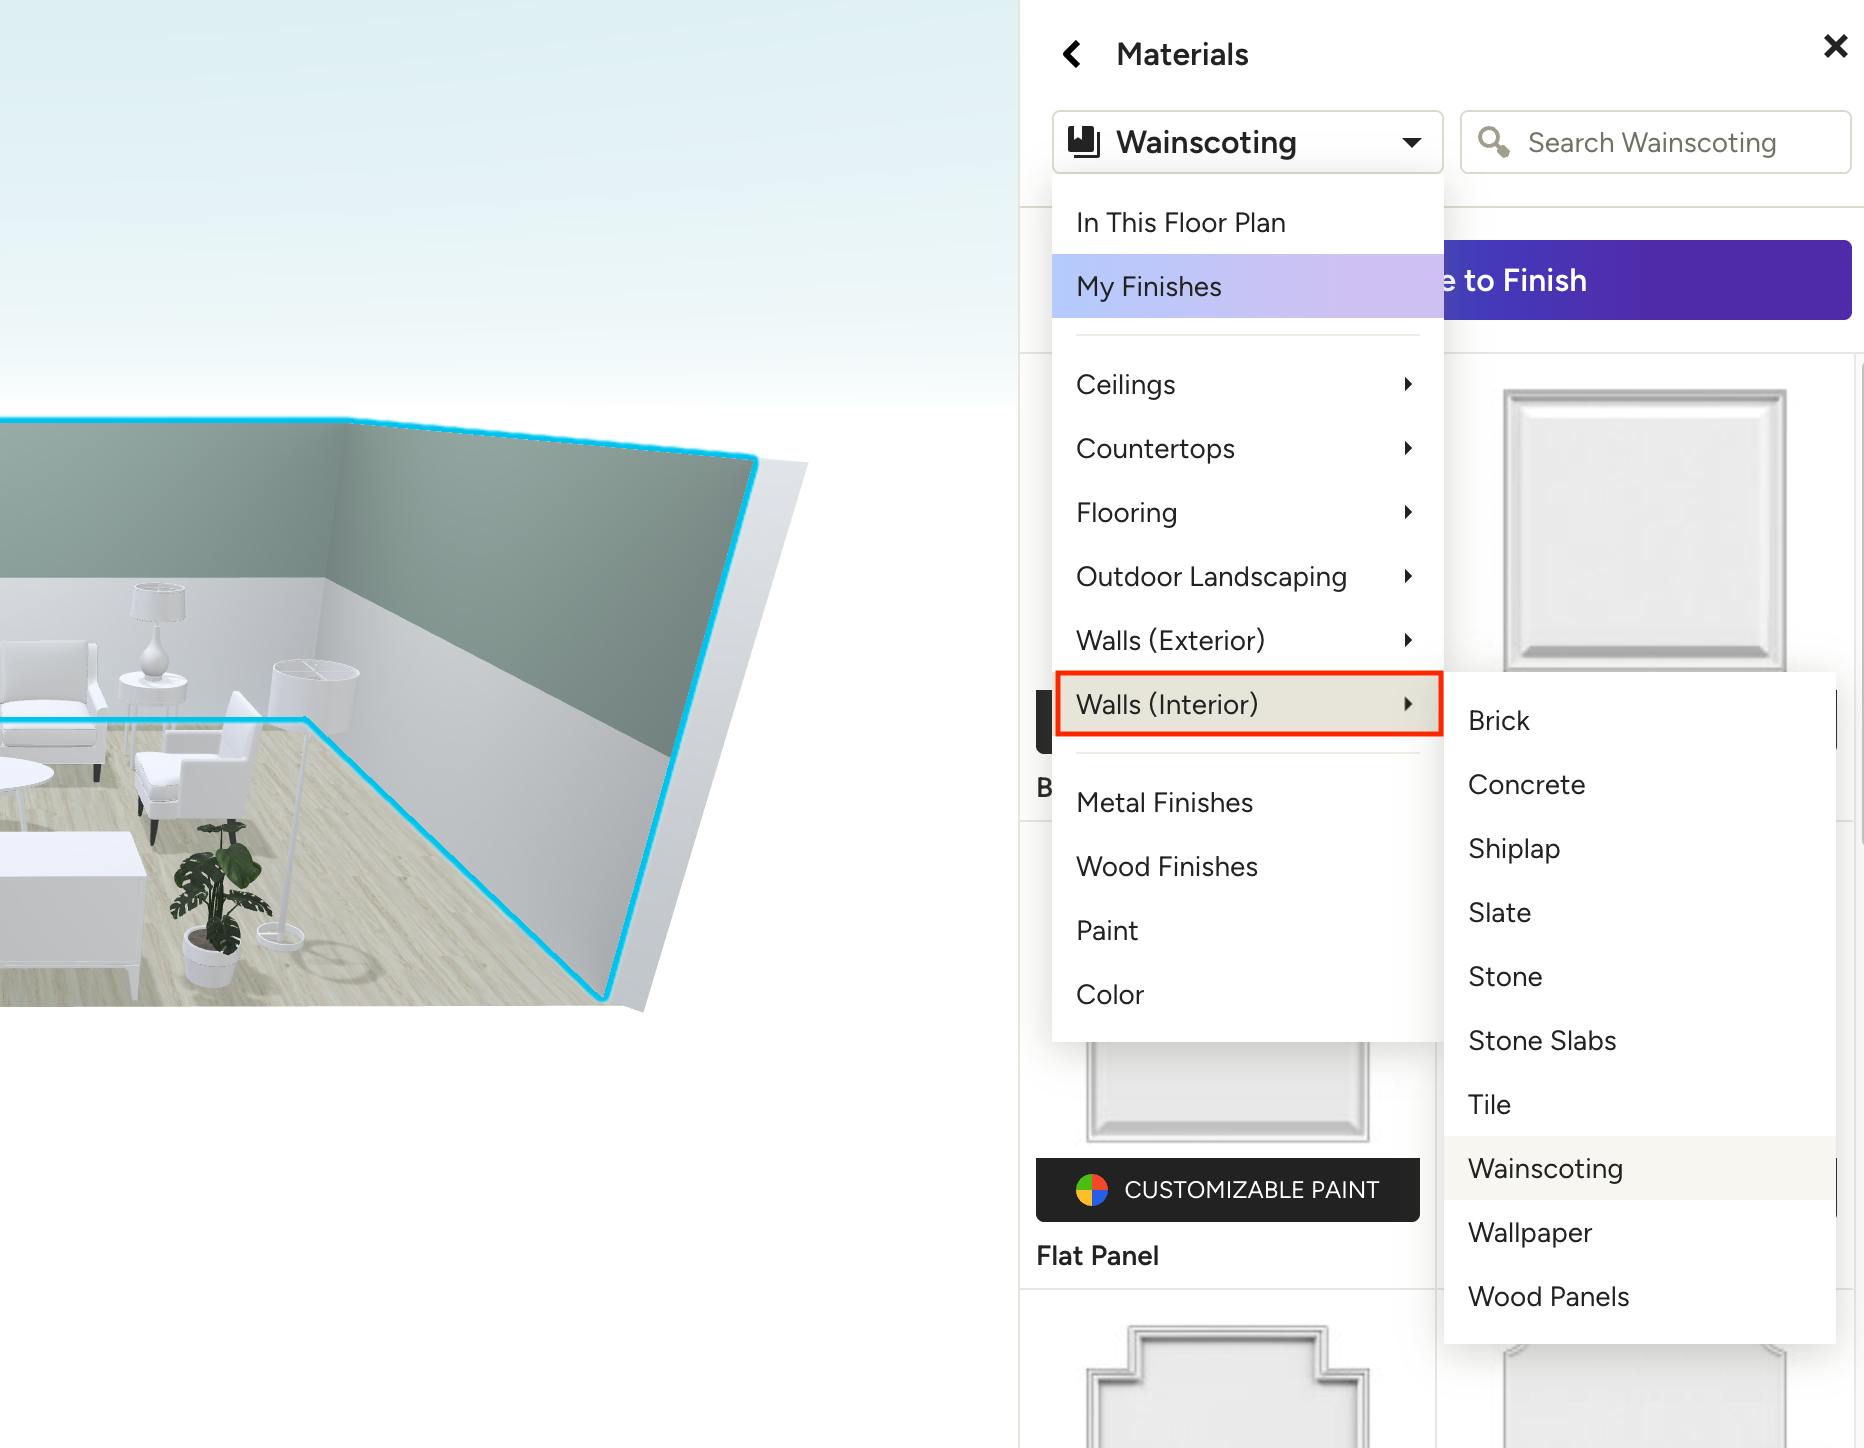
You will then be able to browse our Materials Library in the right menu. Use the dropdown at the top to narrow down your options. Under the Walls (Interior) menu, you'll find everything from shiplap to stone, tile, wallpaper, wood slats, wainscoting and more.
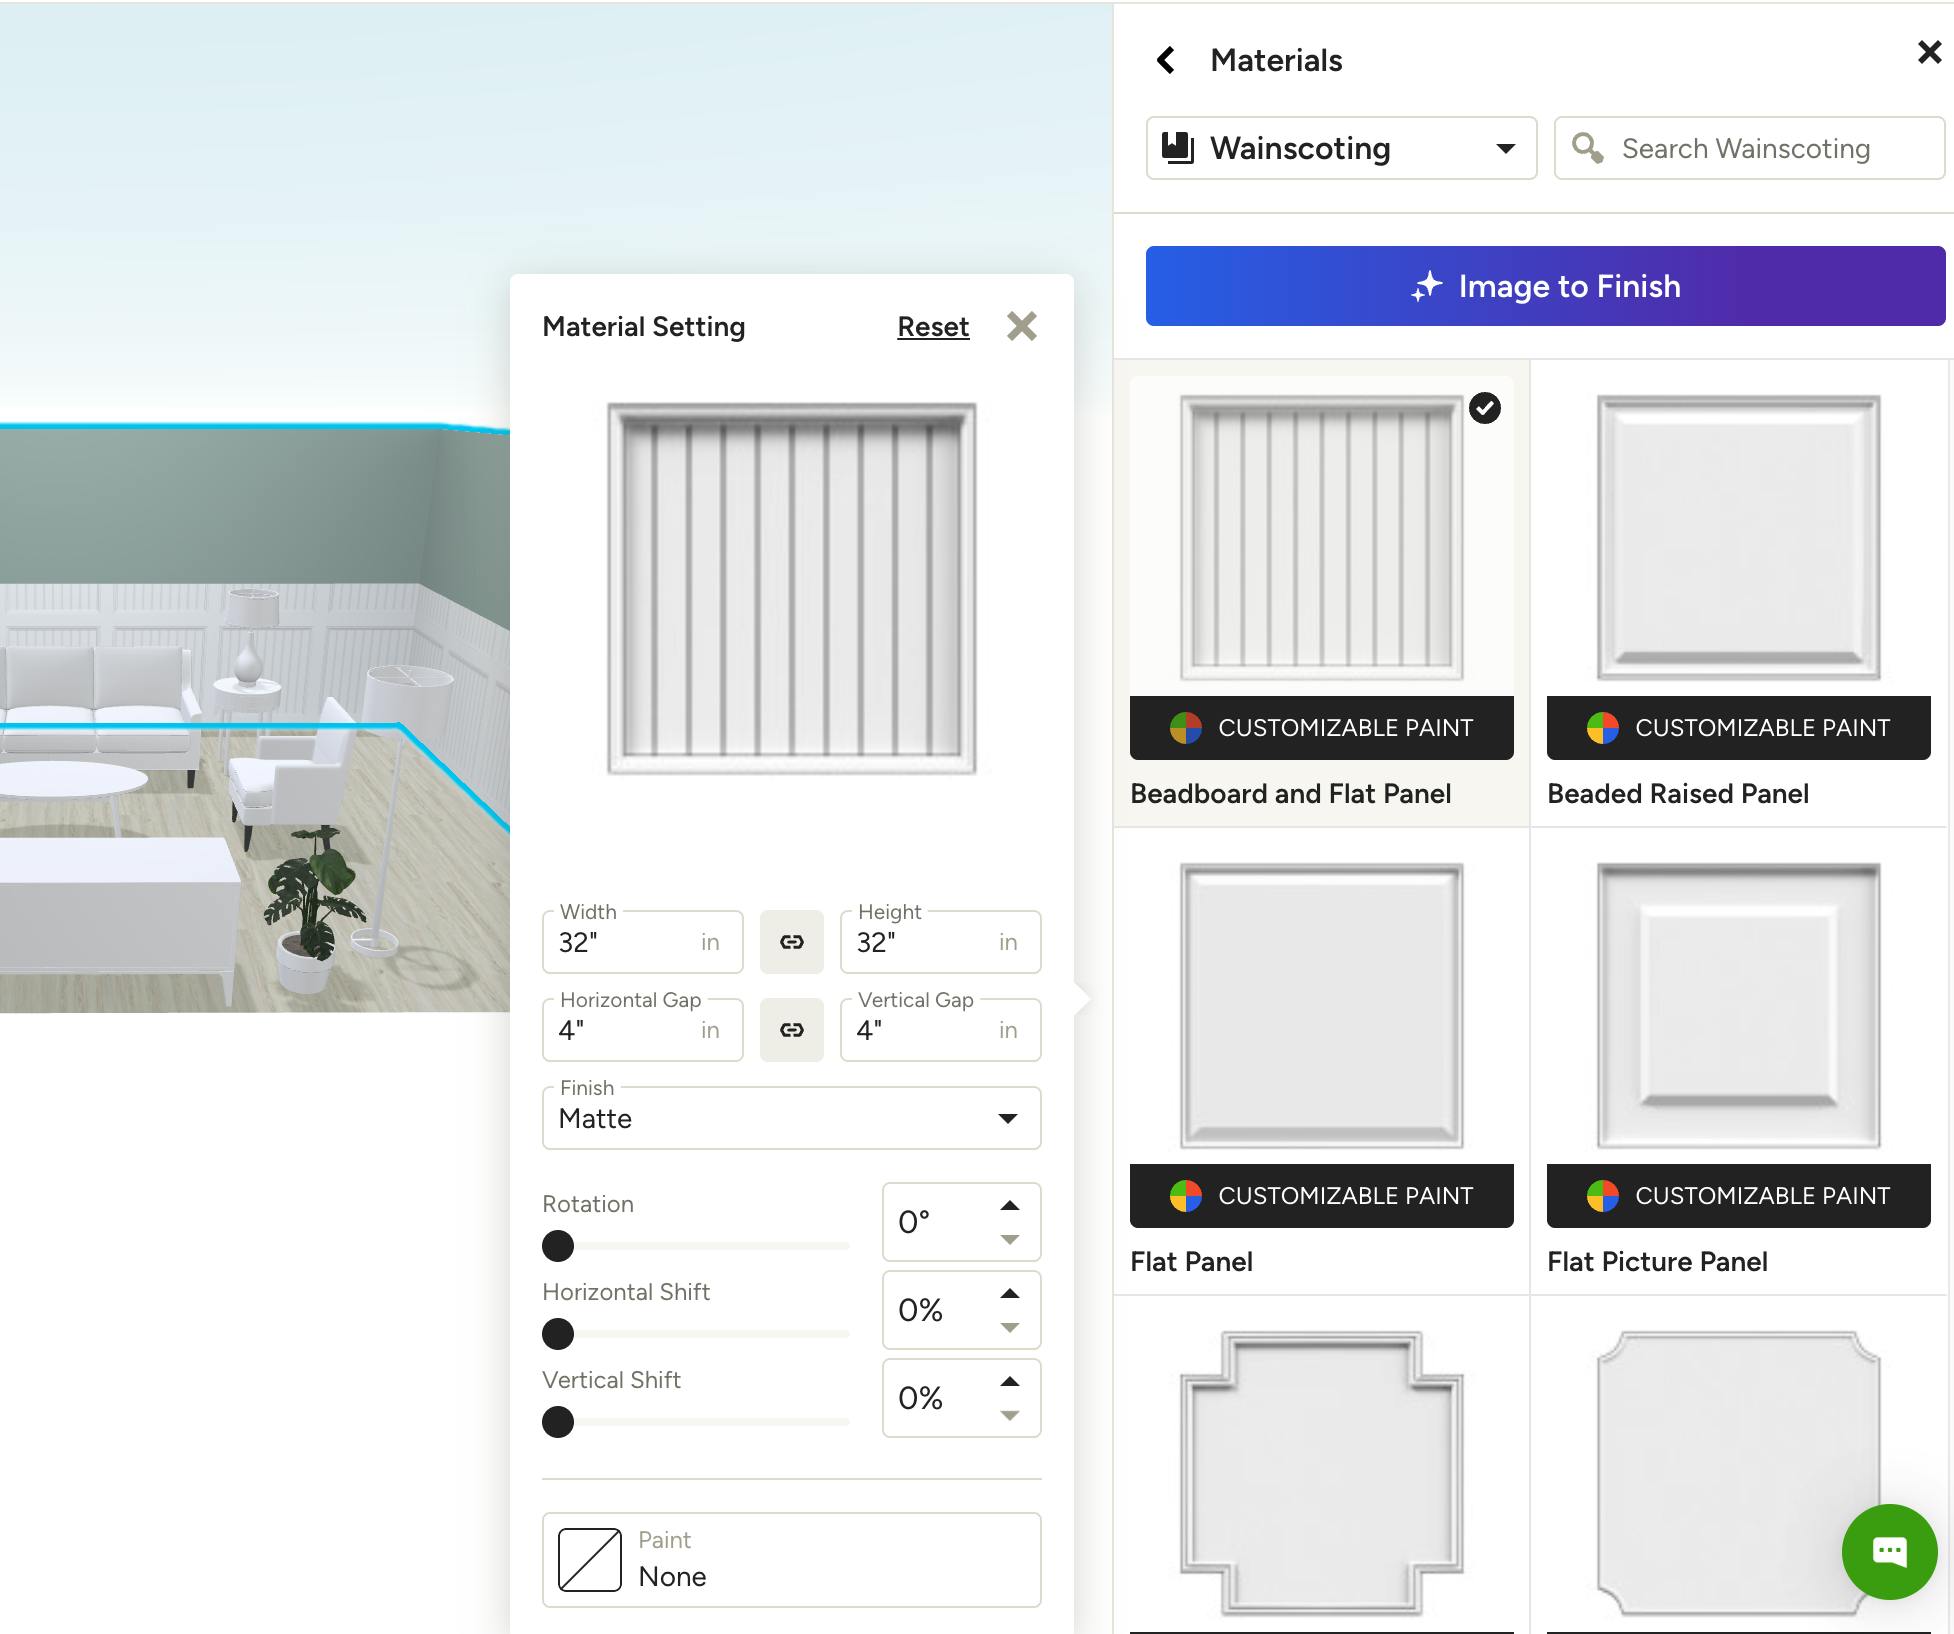
Once you make your material selection, adjust the Material Settings that are specific to your selection — you will be able to adjust the height of the wall split in the next step.
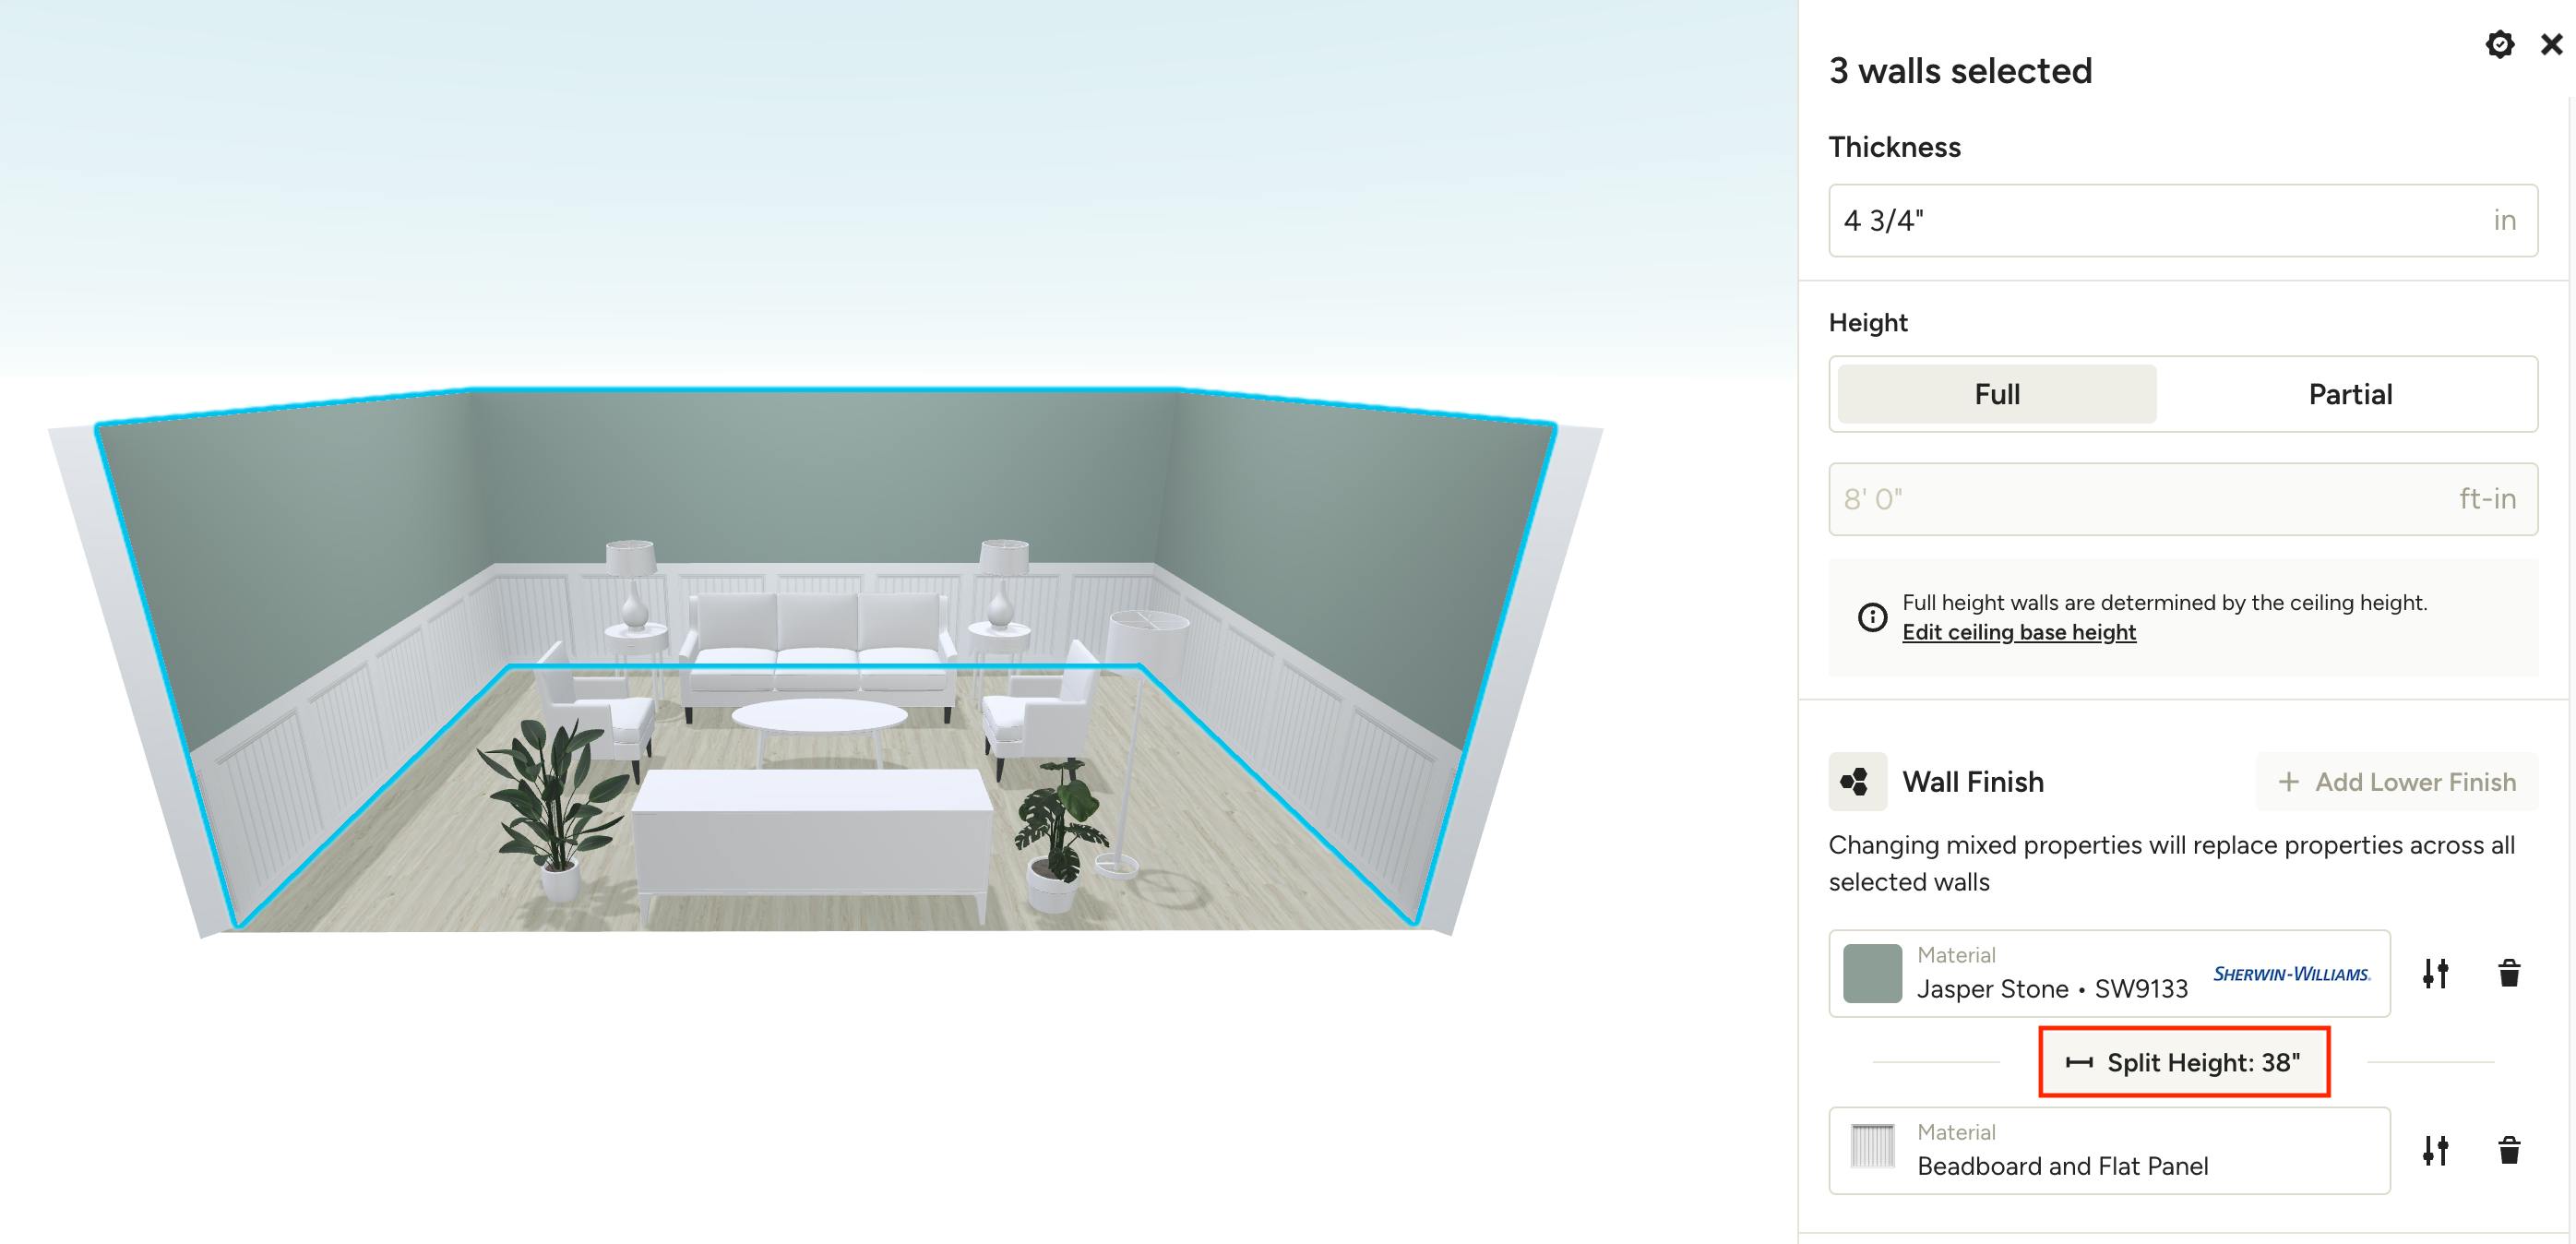
Once your material settings are as you want them, click the X in the top right of the Materials Library to go back to the main Wall options panel. Here you will see both wall finishes, separated by the Split Height measurement. Click Split Height to adjust the height of the lower wall finish — your partial wall treatment will adjust accordingly.
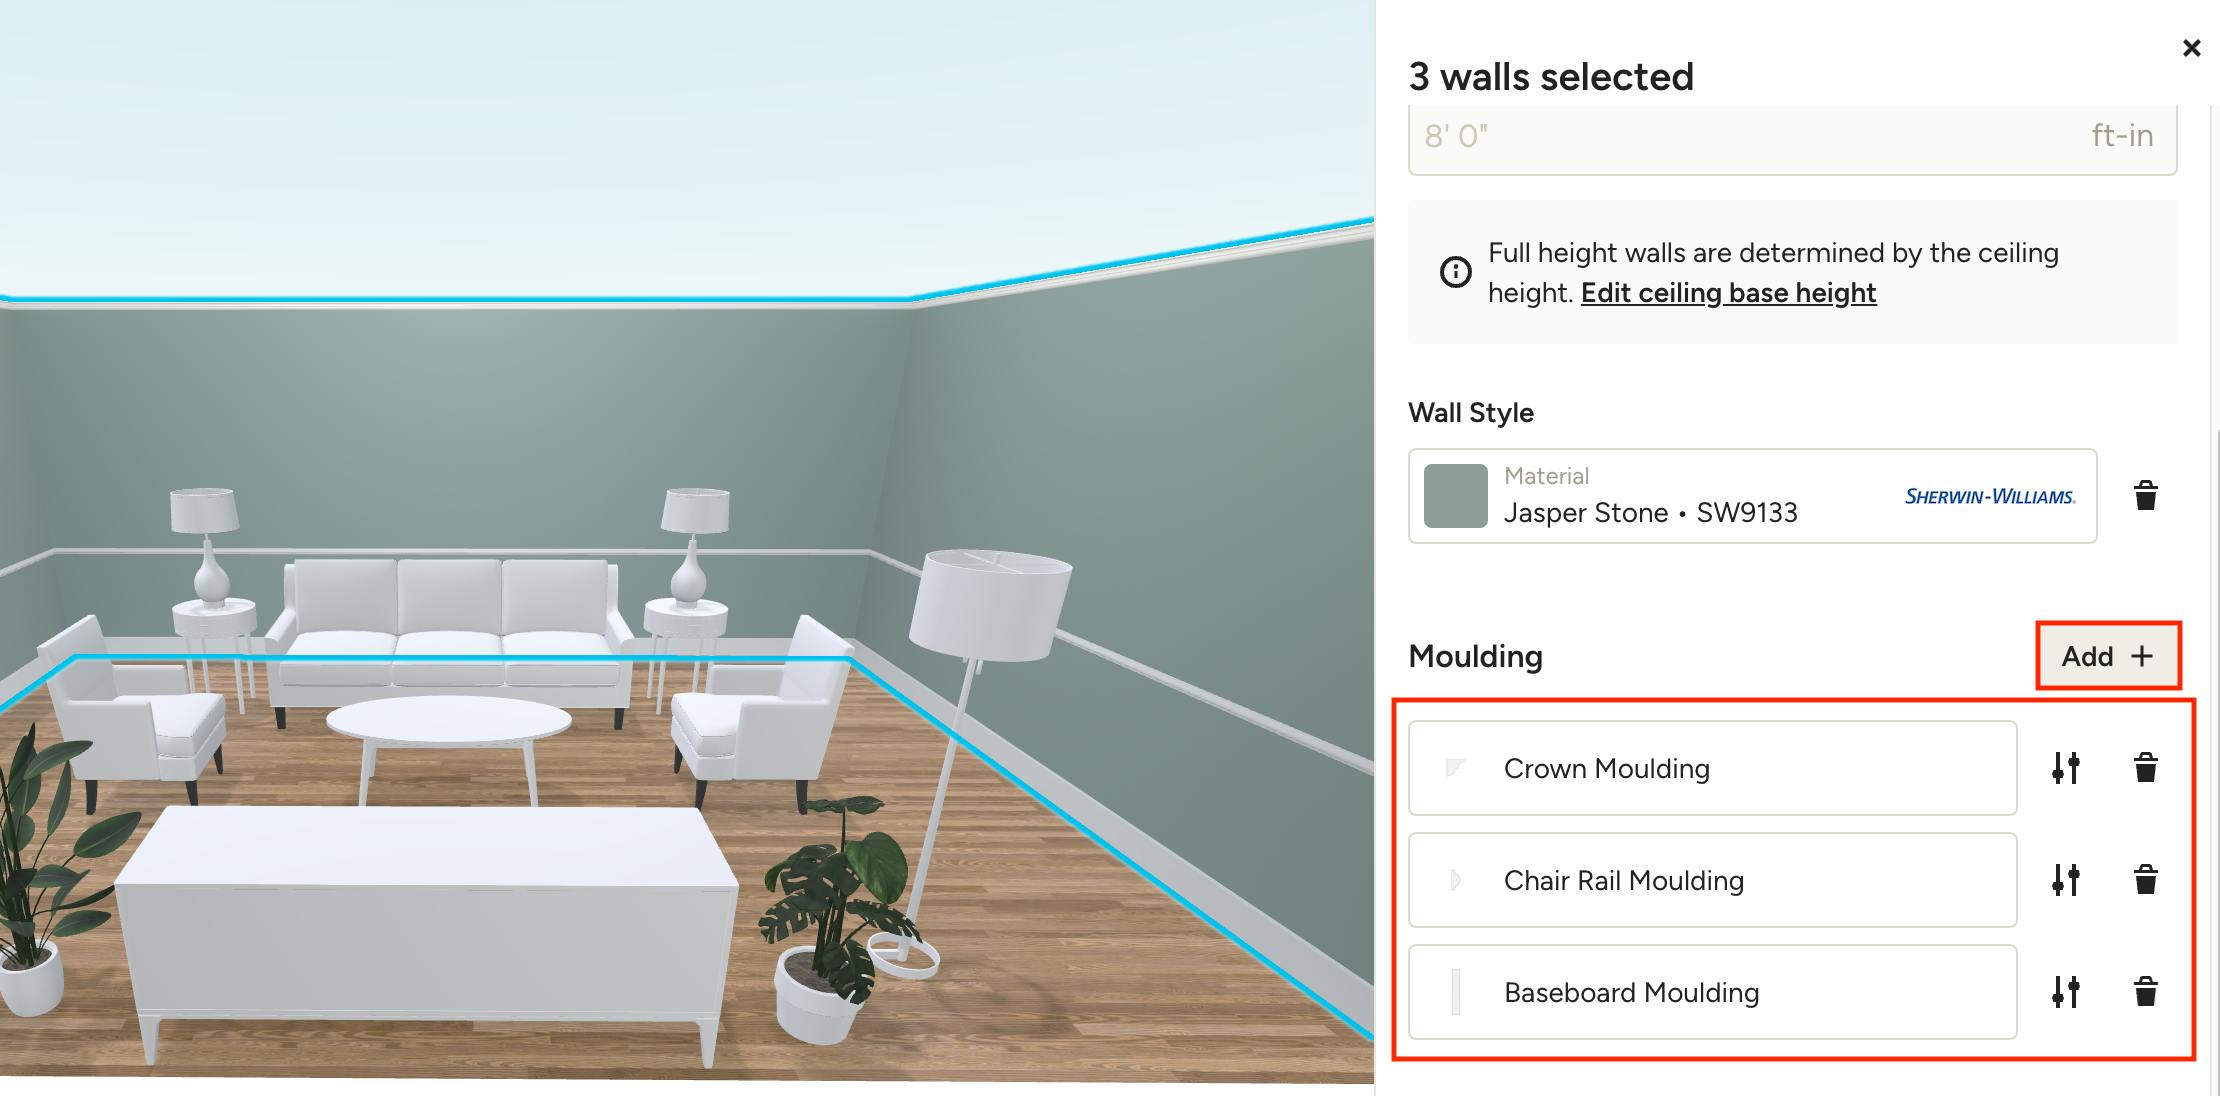
Add Wall Moulding
To make your walls look complete, add moulding as the finishing touch. Choose from crown moulding, baseboards, chair rail or picture rail and customize each type to your exact needs. You can quickly apply moulding to an entire room, or apply to specific walls as needed. Learn more about the process in How to Add Moulding to Your 3D Floor Plan.