How to Create Accurate Wall Lengths, Angles, and Connections
When you create a new floor plan, precise wall measurements and angles are key to ensure that it is accurate and actionable. The Houzz Pro 3D Floor Planner makes it easy to create and connect walls, adjust to a precise measurement or angle, and even change the measurement unit you prefer.
Let's go over all the adjustments you can make to your wall measurements and angles within your 3D floor plan.
Draw Walls
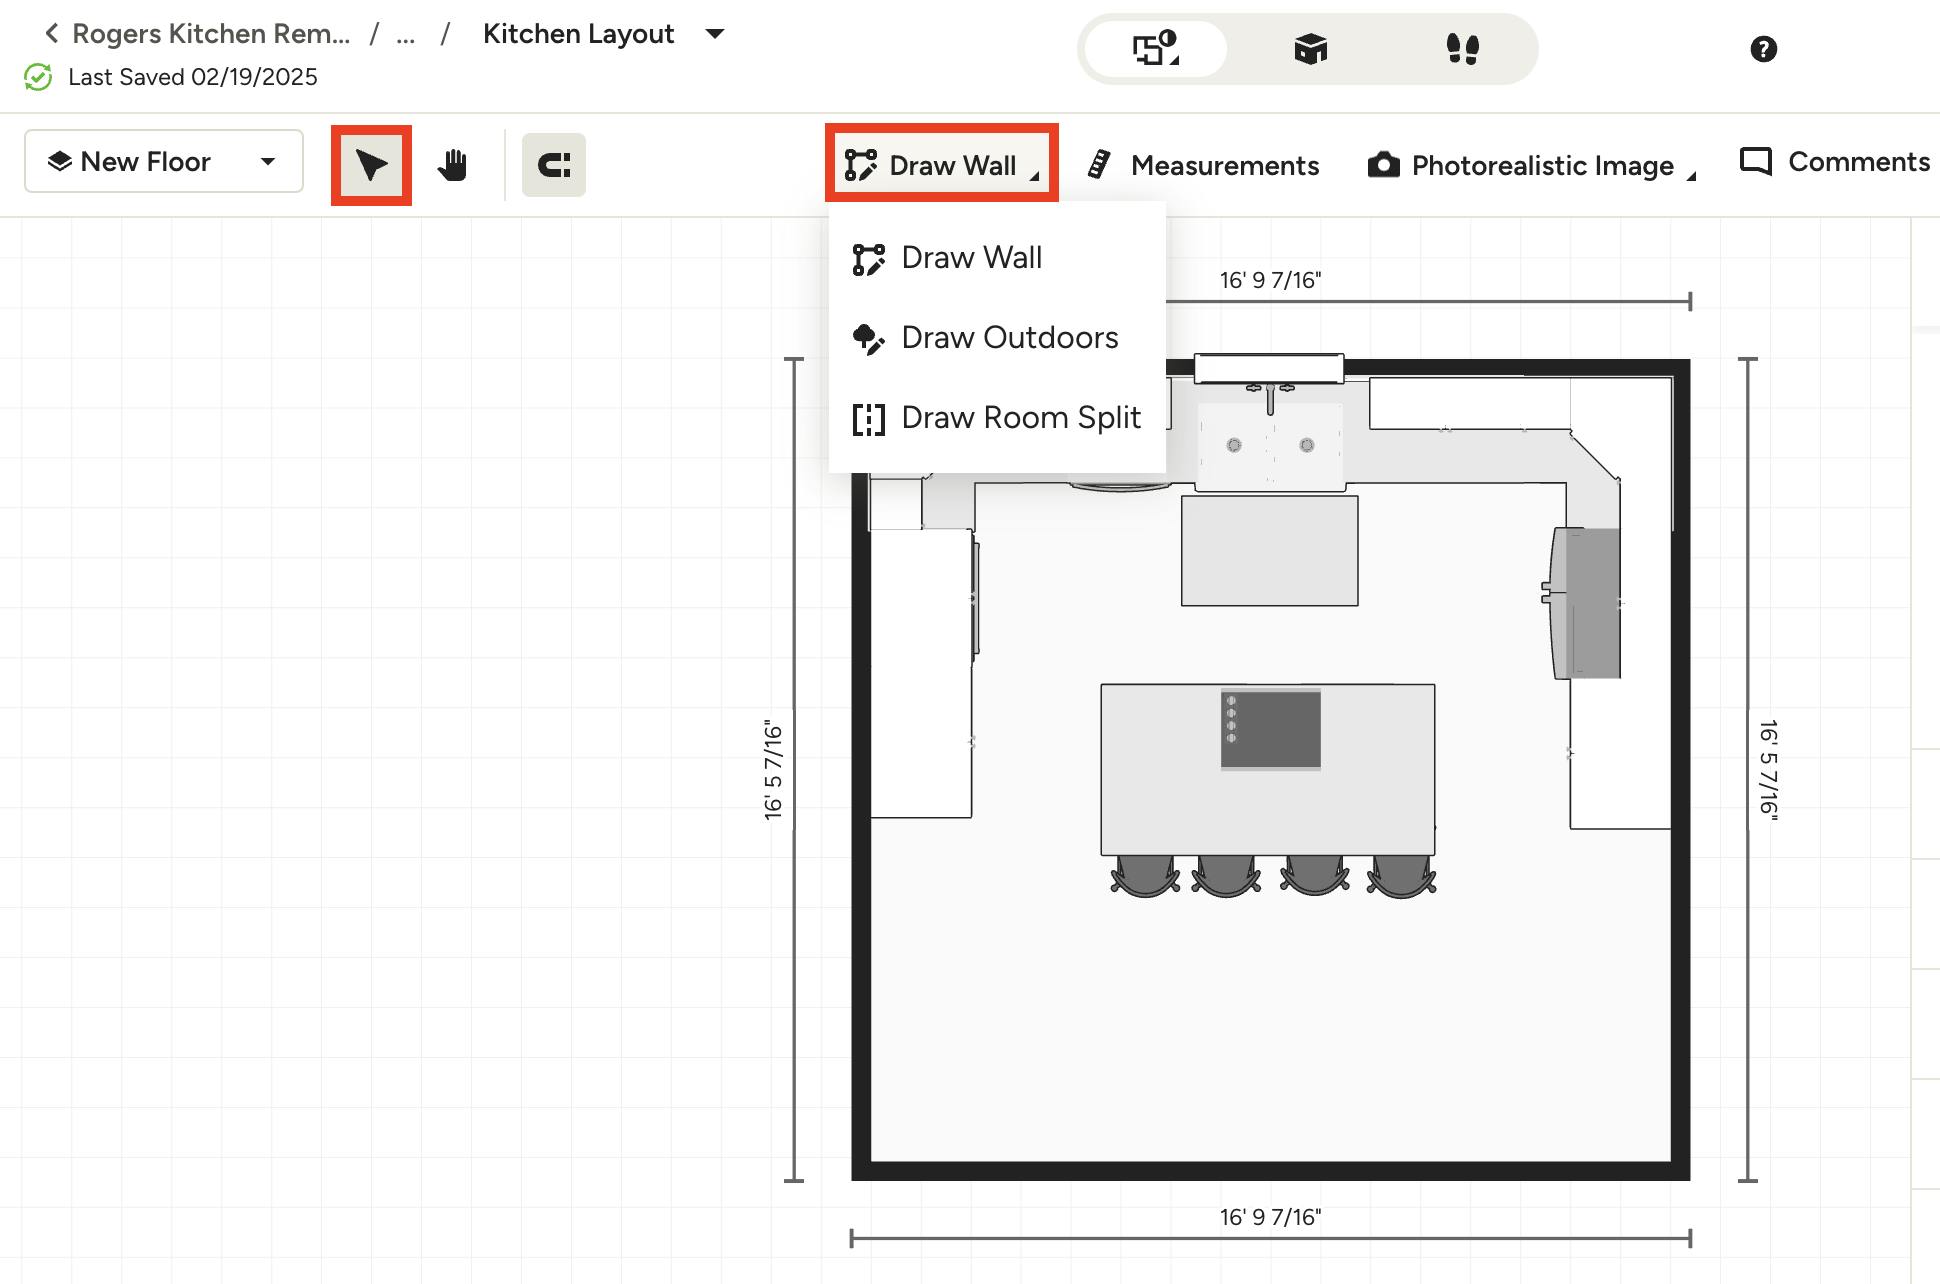
To start, you will need to create your walls. Select the Draw Wall button in the top toolbar of your 3D floor plan. Click your grid to start drawing the wall, then click again to end the wall.
To stop drawing walls and continue with other actions on your 3D floor plan, click the Pointer button in the top toolbar. You can also select the ESC button on your computer keyboard.
Label Walls
To ensure the accuracy of your 3D floor plan and any estimates or proposals you create, you can label your walls — New or Existing, as well as Interior or Exterior. These visual distinctions improve plan readability and make it easy to communicate the project scope for planning and permitting purposes.
New or Existing Wall
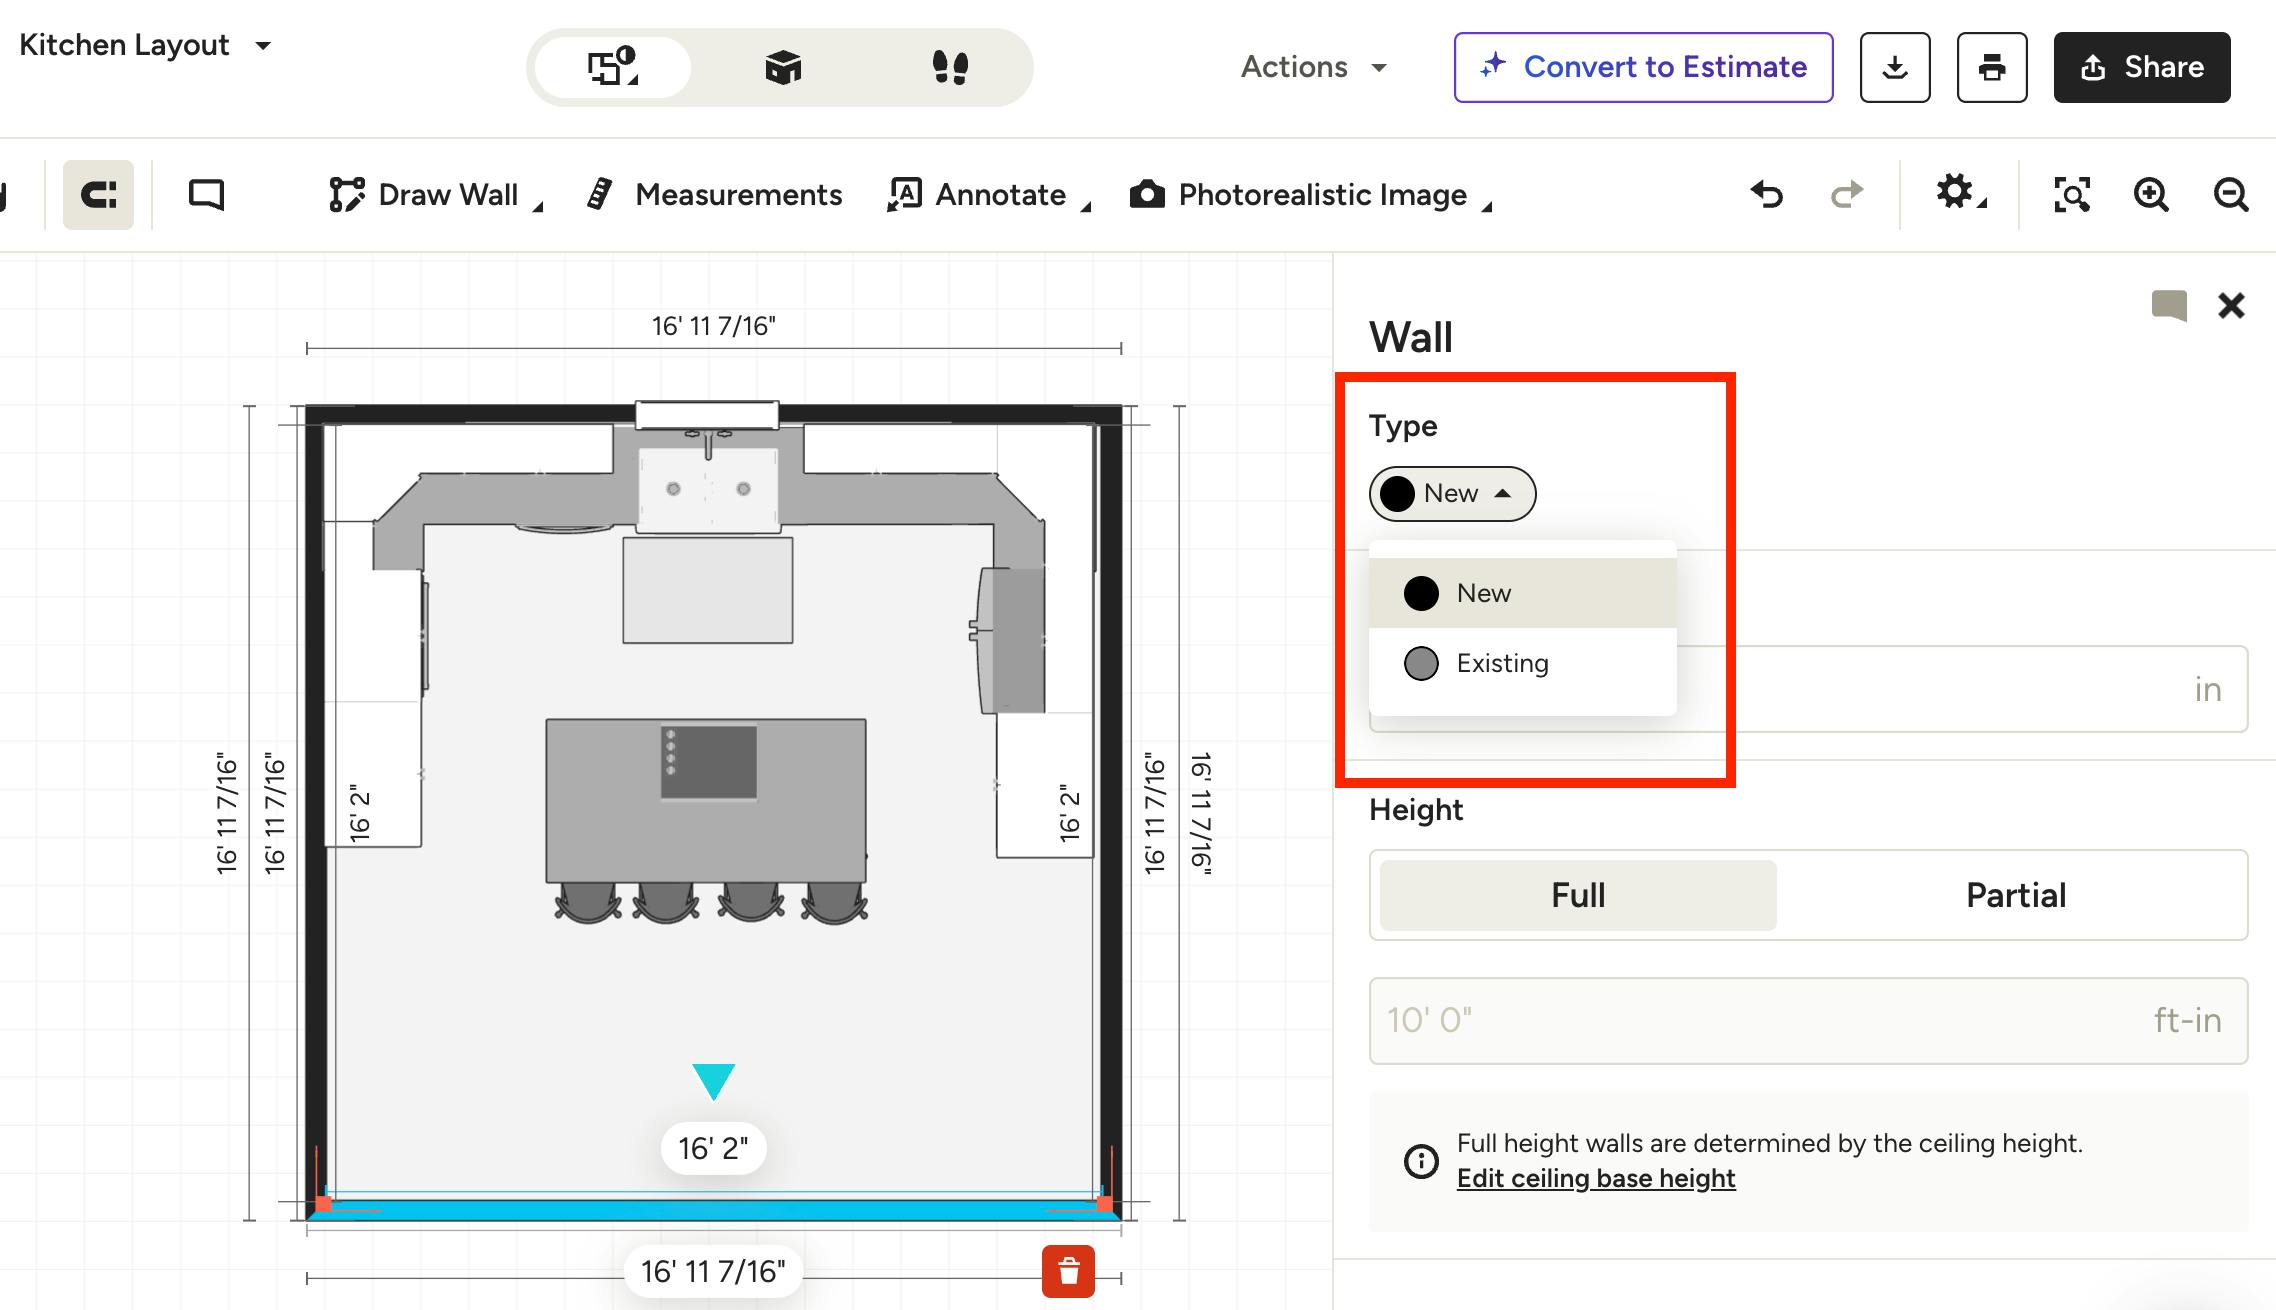
As you build out your walls, you can label a wall as either New or Existing. New walls display as solid black, while Existing walls display as gray with a black outline.
By default, walls drawn from scratch will be labeled as New. Walls imported from a room scan or 2D import default to Existing.
To change a wall's label, select the wall and choose New or Existing from the dropdown in the right panel. You can also adjust this before you start drawing the wall.
New and Existing wall labels can be toggled on or off in your 3D Settings. Read How to Adjust 3D Floor Plan Settings to learn more.
When you convert a 3D floor plan to an estimate, walls will be categorized as either New Walls or Existing Walls. This makes it easy to generate accurate, scope-specific estimates without manual sorting.
Interior or Exterior Wall
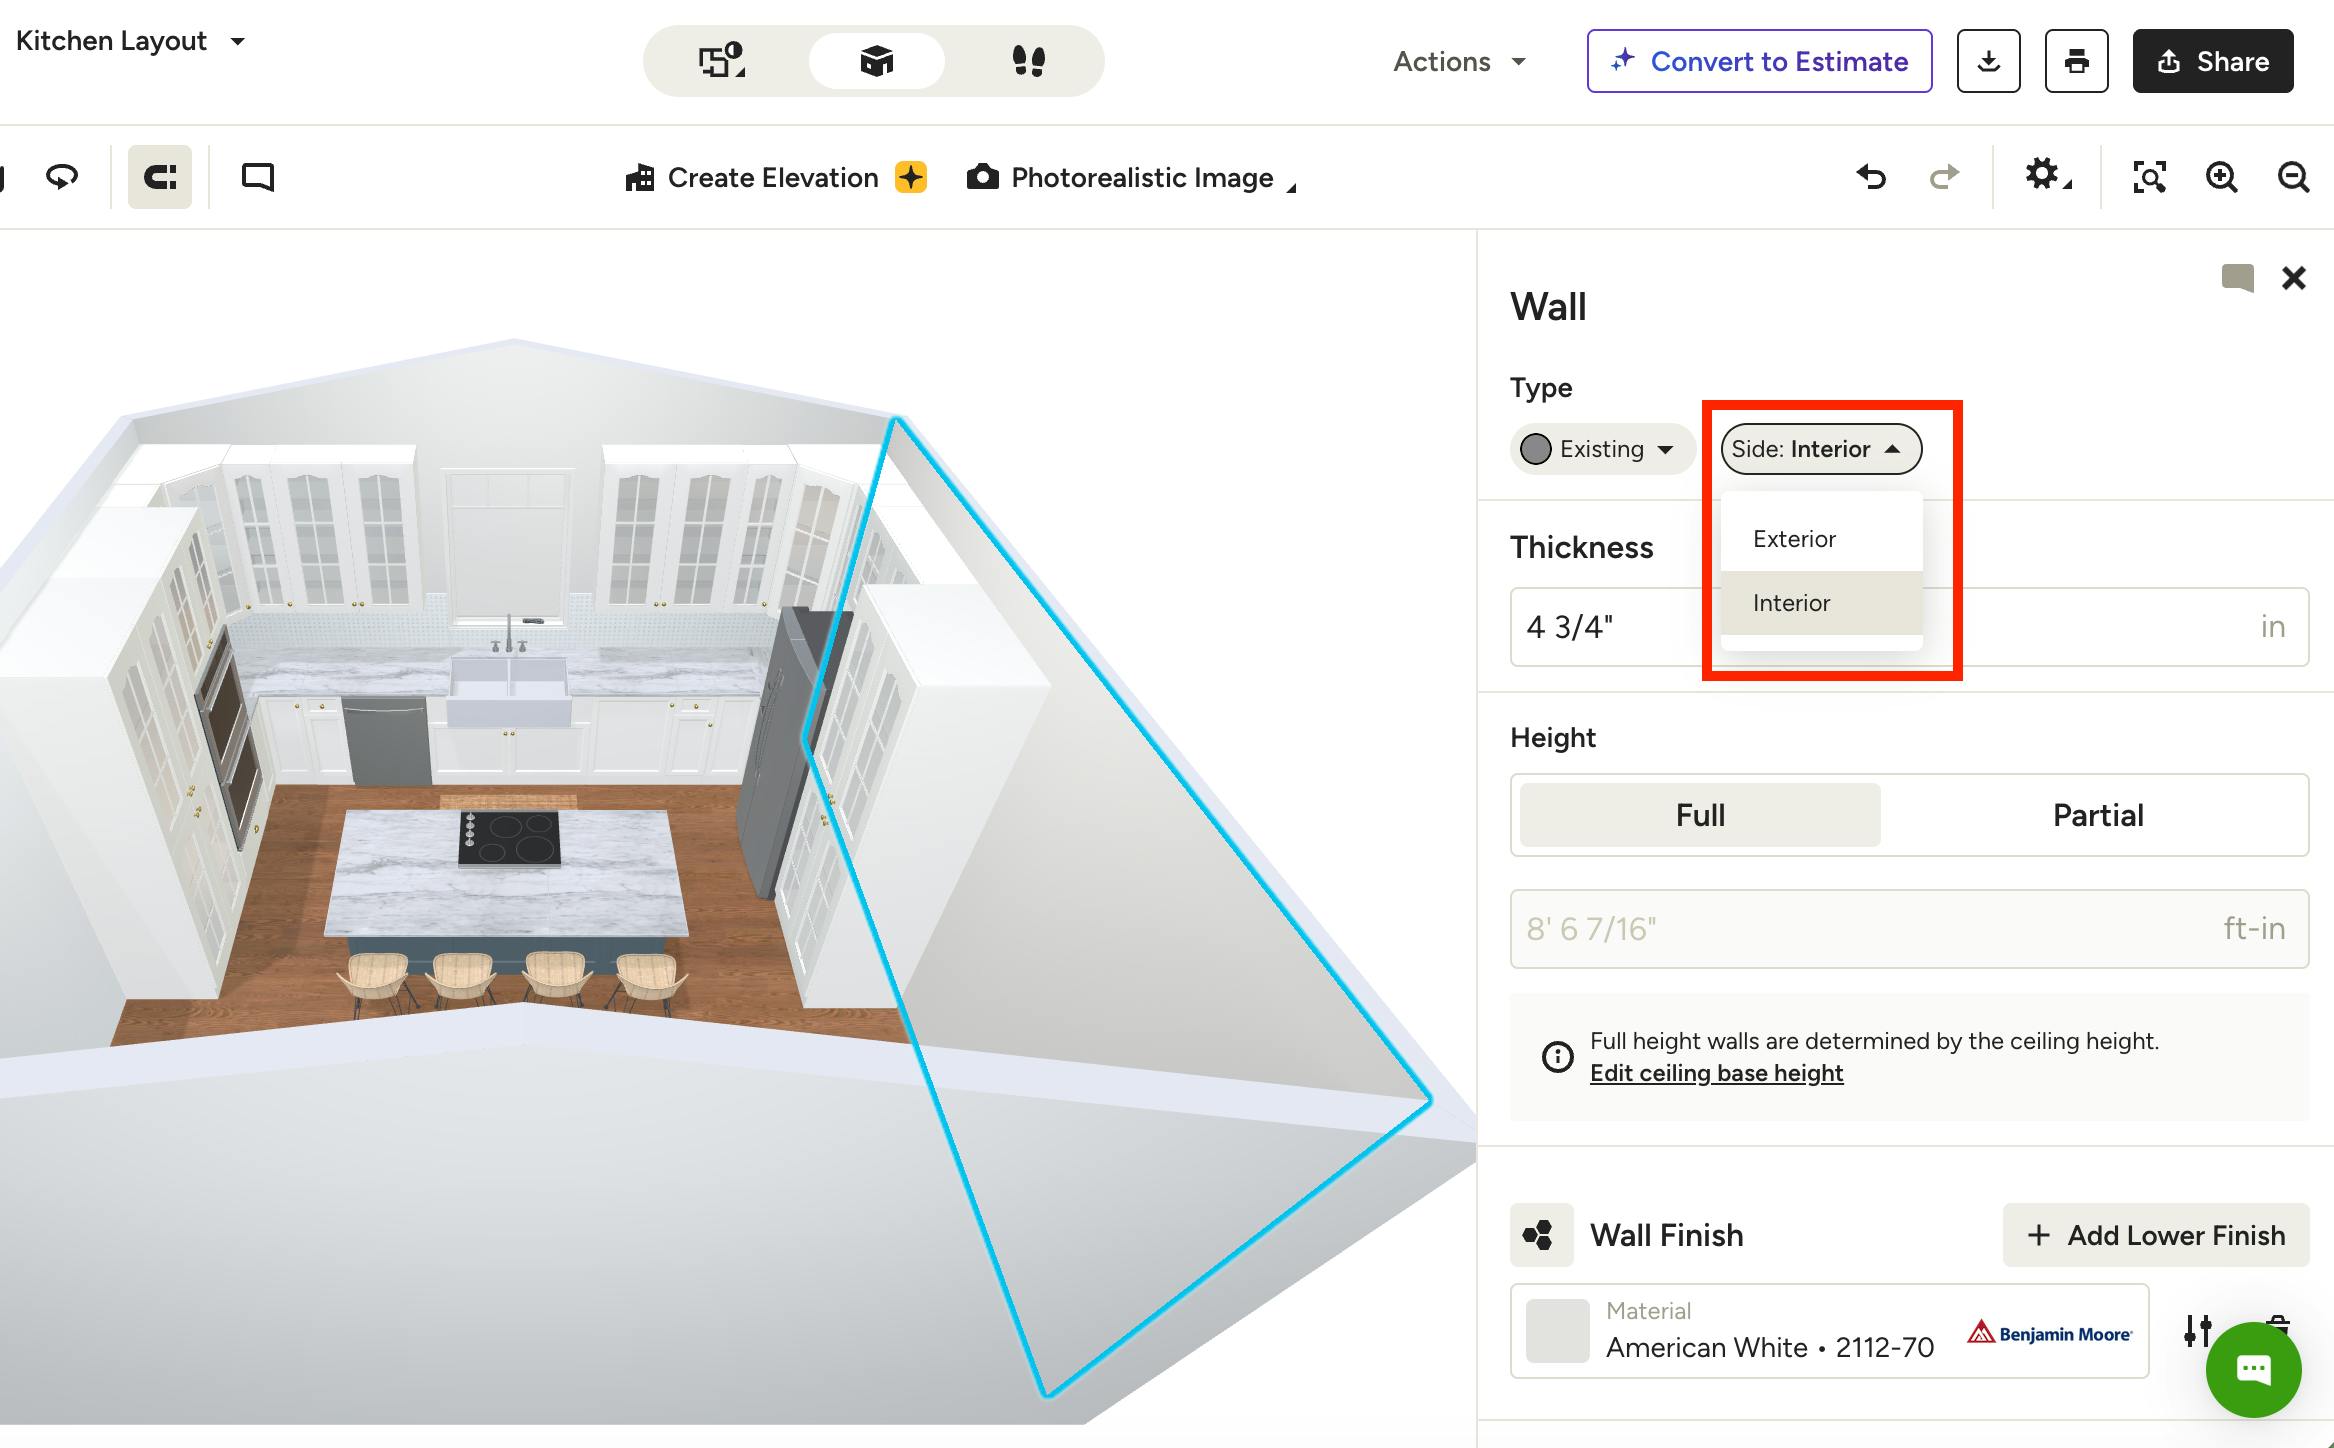
Wall sides are categorized as Interior or Exterior based on their position in your floor plan. This happens automatically as you build your plan, so there's no extra labeling step required.
To change a wall side's classification, select the wall in Dollhouse view only and update it from the Side dropdown in the right panel (as shown below).
When you convert a 3D floor plan to an estimate, walls will be categorized as either Interior or Exterior walls. This makes it easy to generate accurate, scope-specific estimates without manual sorting.
Input Precise Wall Measurements
When you add a new wall or click on an existing wall, you can input the precise wall measurements in a few ways.
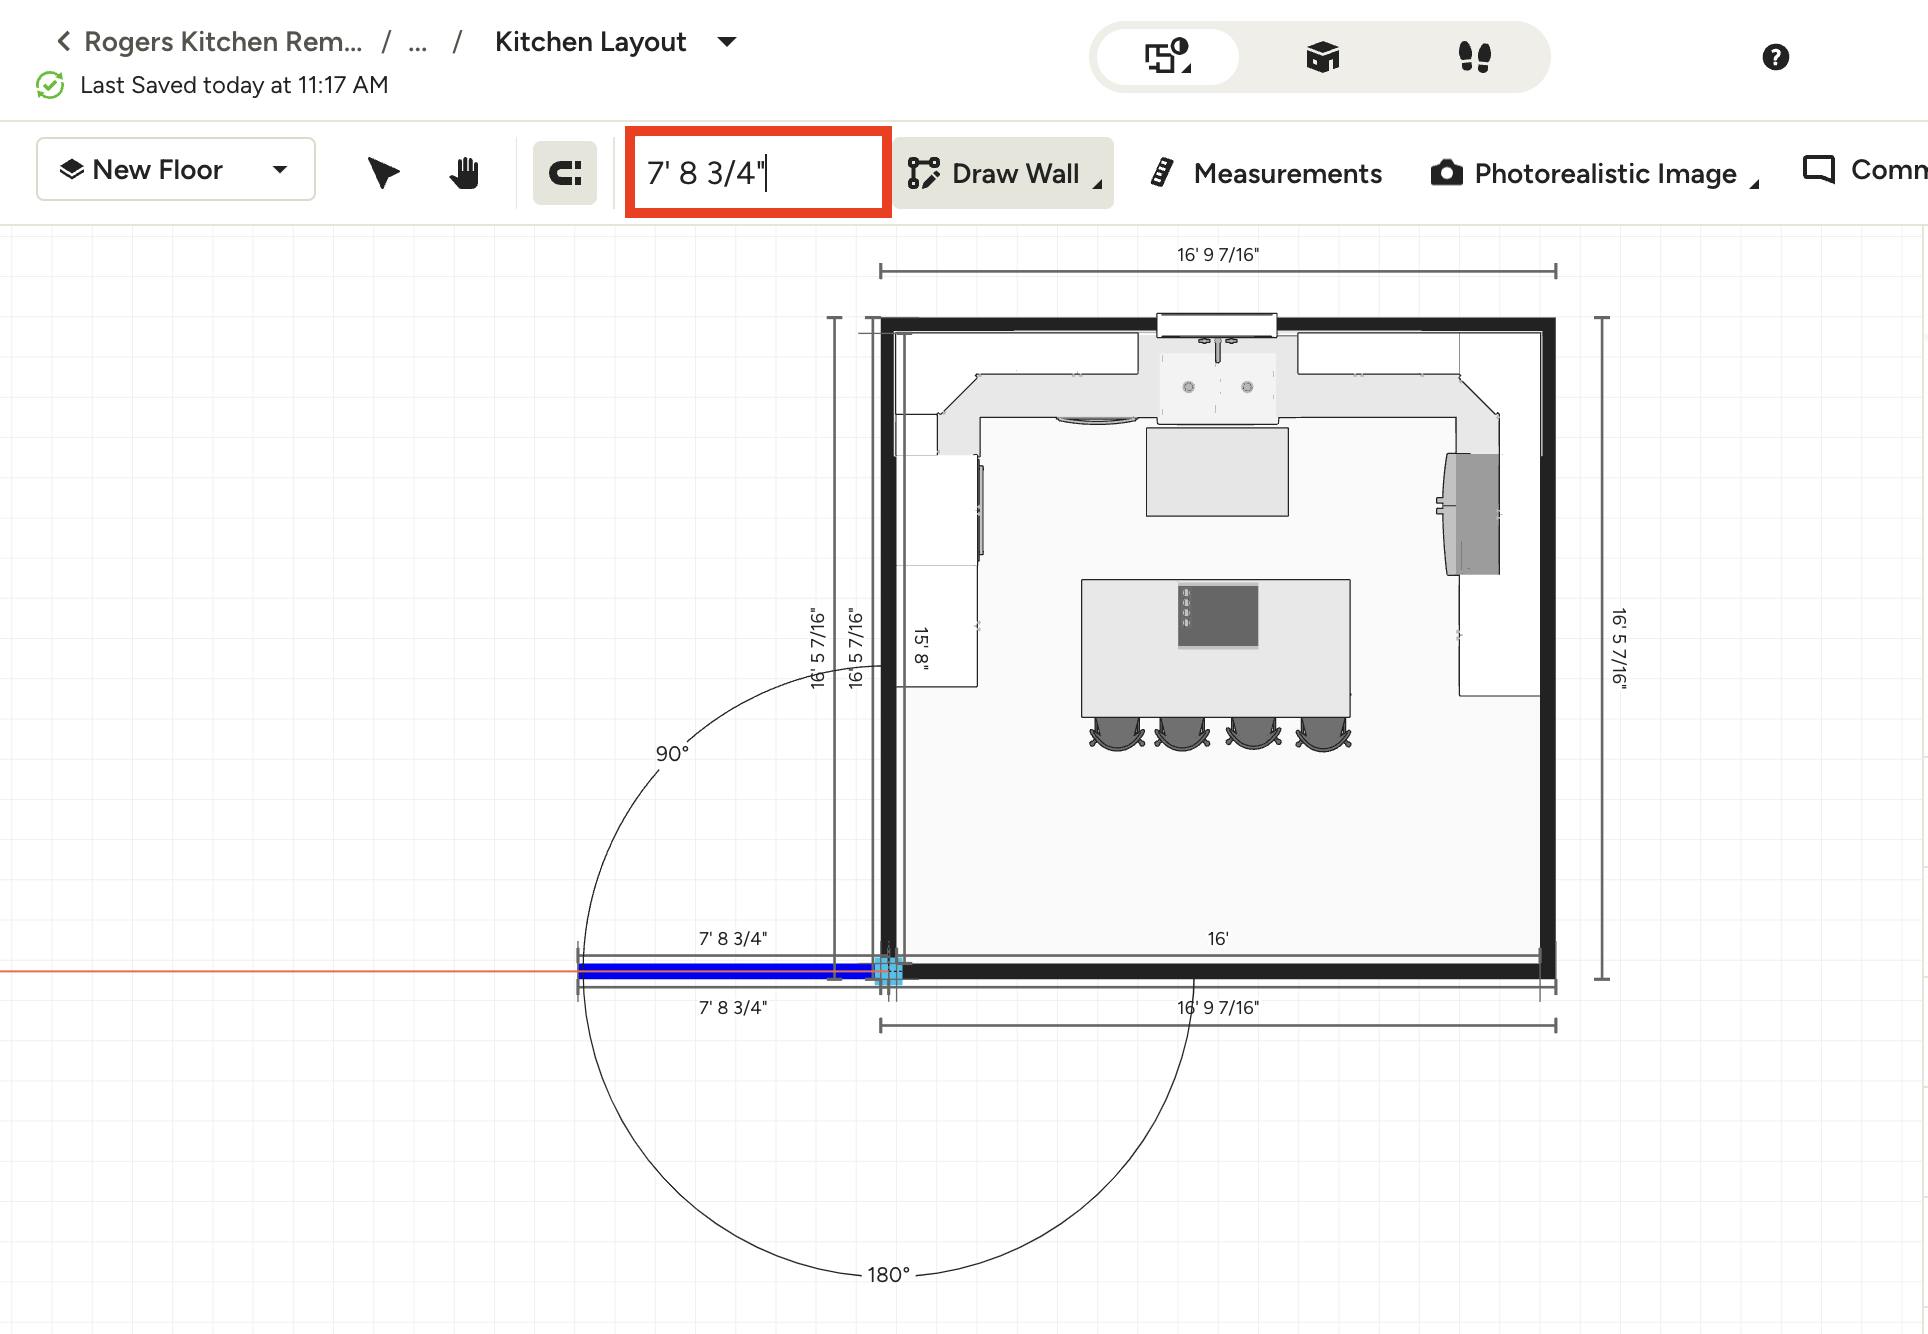
First, as you are drawing the line, you can type in the wall length with your keyboard. The wall will update to that exact length.
Note that the wall length input here is for the wall length center line, since the lengths of the outer and inner sides of the wall will be slightly different due to the wall thickness and number of corners.
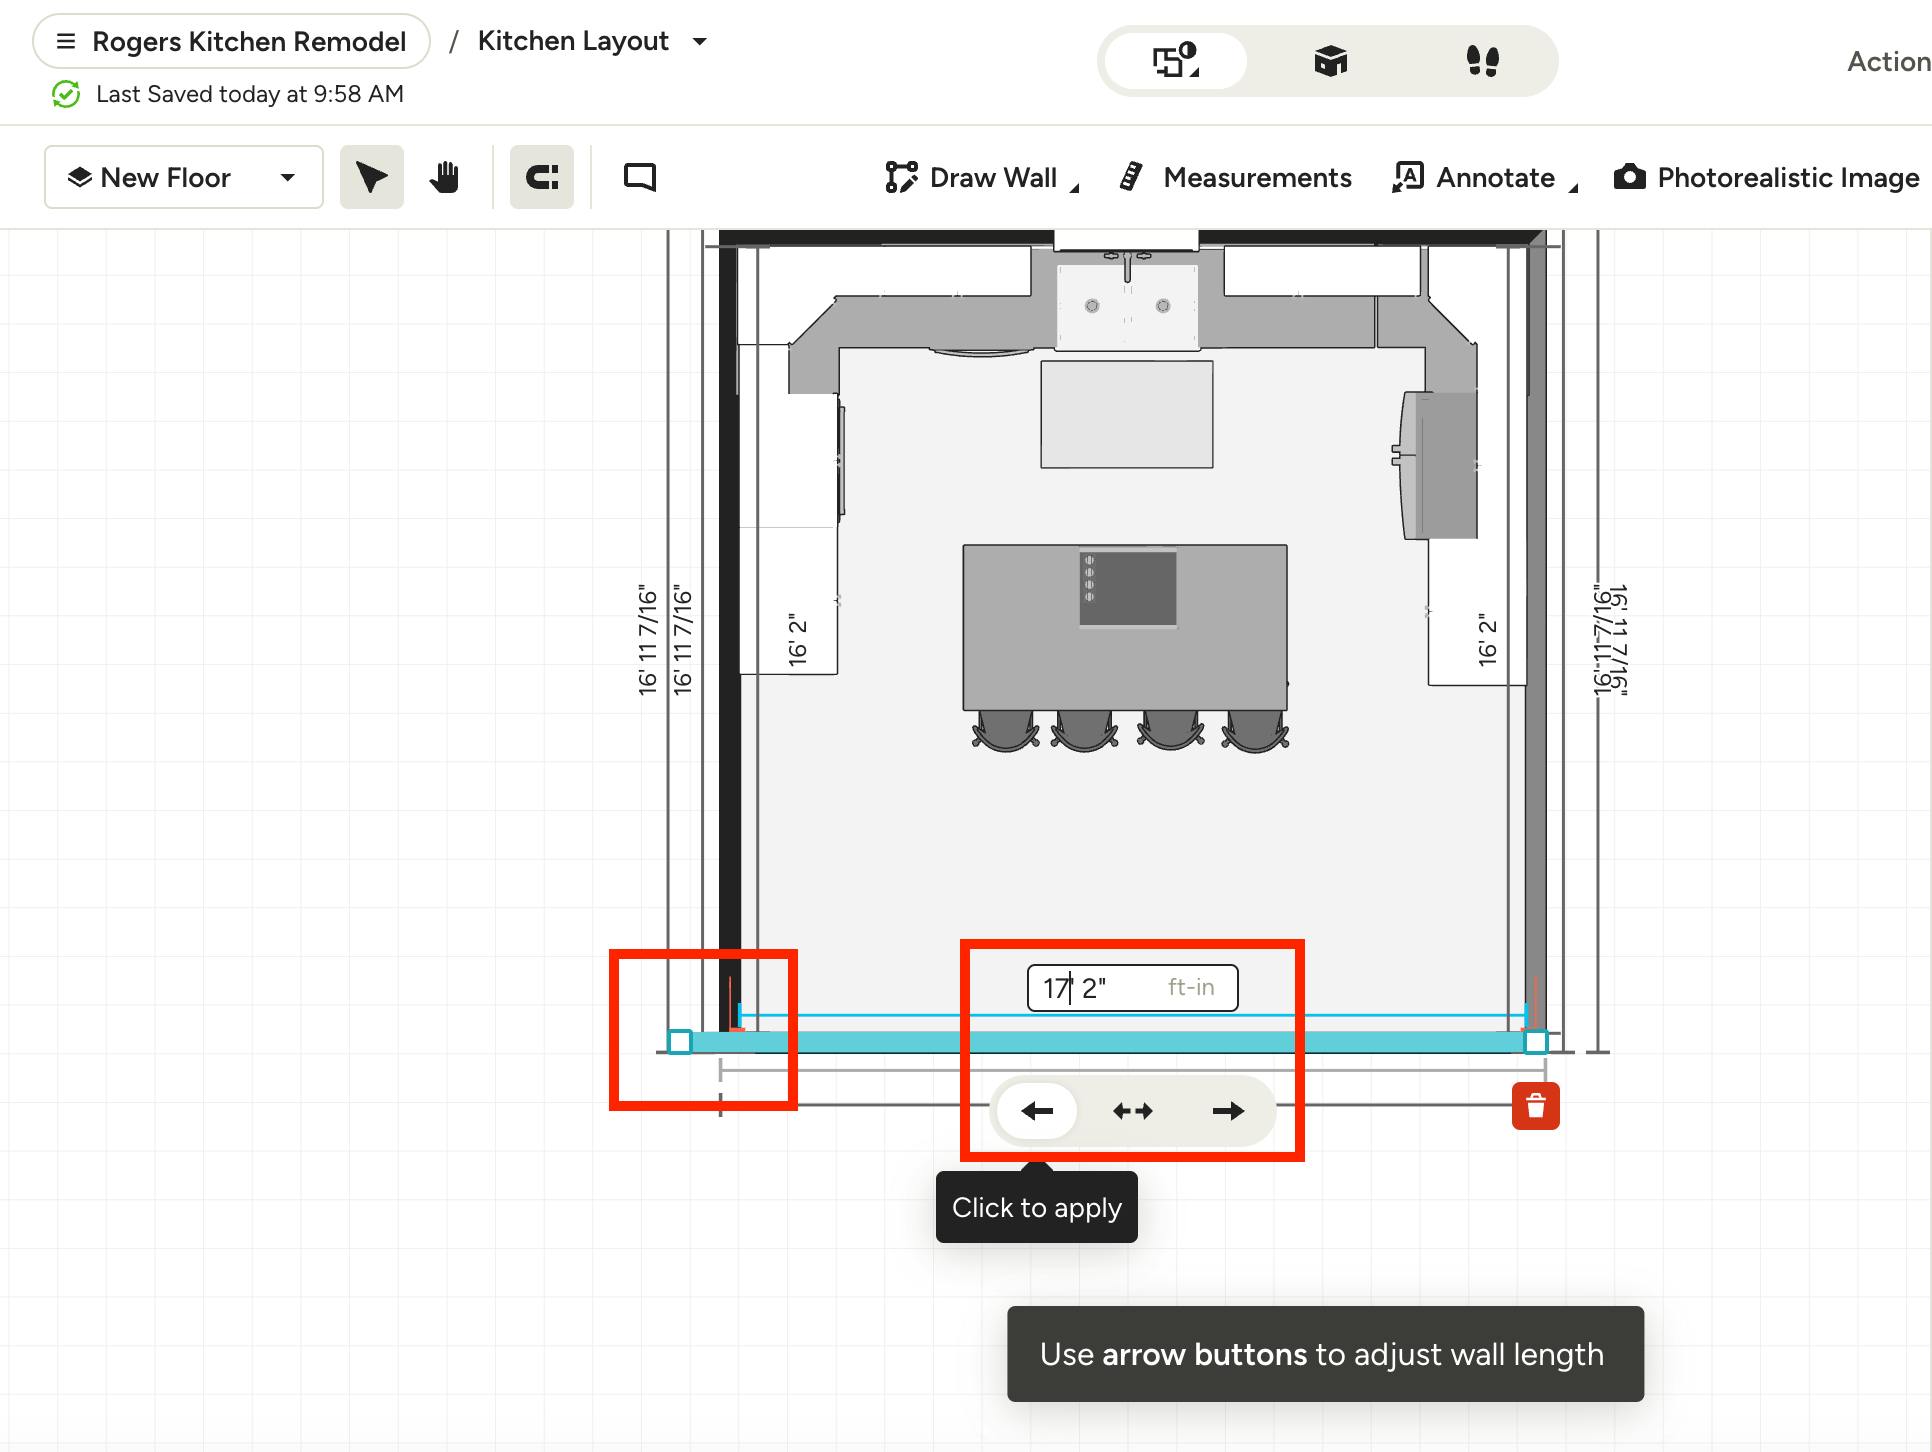
You can also adjust the wall length on the grid itself. After drawing the line, click the measurement for your wall and type the exact length in the text box.
The arrows control which end of the wall moves:
- Double arrow (←→): Moves both ends equally to center the change
- Left arrow (←): Moves the left end of a horizontal wall only (as shown below)
- Right arrow (→): Moves the right end of a horizontal wall only
- Top arrow (↑): Moves the top end of a vertical wall only
- Bottom arrow (↓): Moves the bottom end of a vertical wall only
You can hover over an arrow to preview the change — the wall will show which direction its length is changing in. If the preview looks good, click the arrow to apply.
In the example below, I'm lengthening the horizontal wall to make the kitchen larger. To extend only the left side, I enter the new length and select the left arrow.
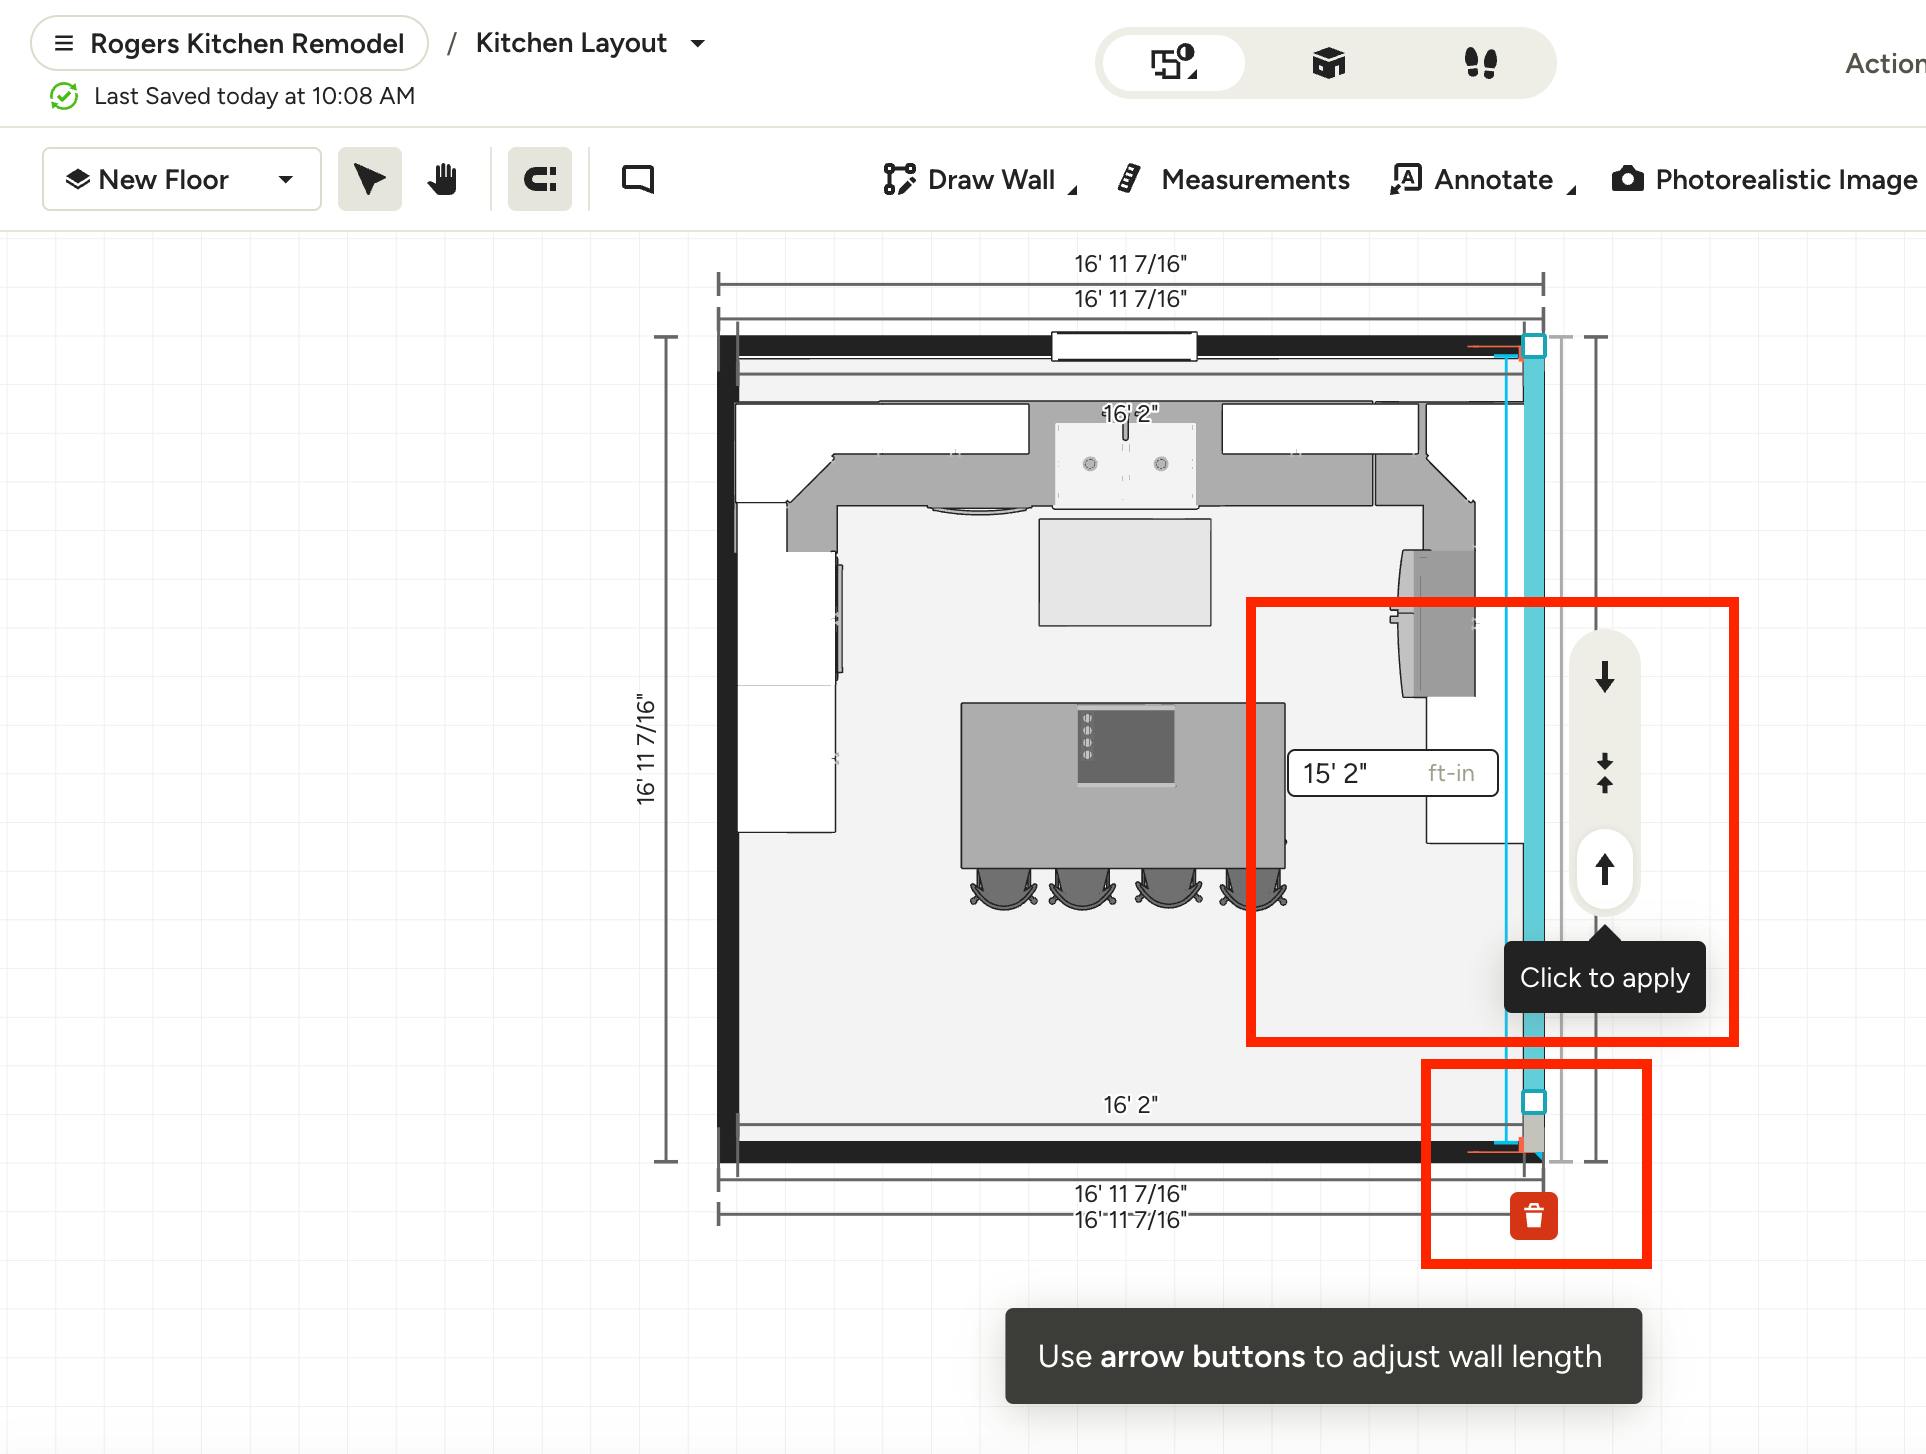
The same applies for reducing a wall's length. When the new length is shorter, the single arrows flip to point inward, showing the wall is getting smaller.
You can hover over an arrow to preview the change — the wall will show which direction its length is changing in. If the preview looks good, click the arrow to apply.
In the example below, I'm shortening a vertical wall for a smaller kitchen. To remove length from the bottom only, I enter the new length and select the bottom arrow, which now points up.
Please Note: If you have a fully enclosed room, any length adjustments you make to one wall will also impact the other connected walls.
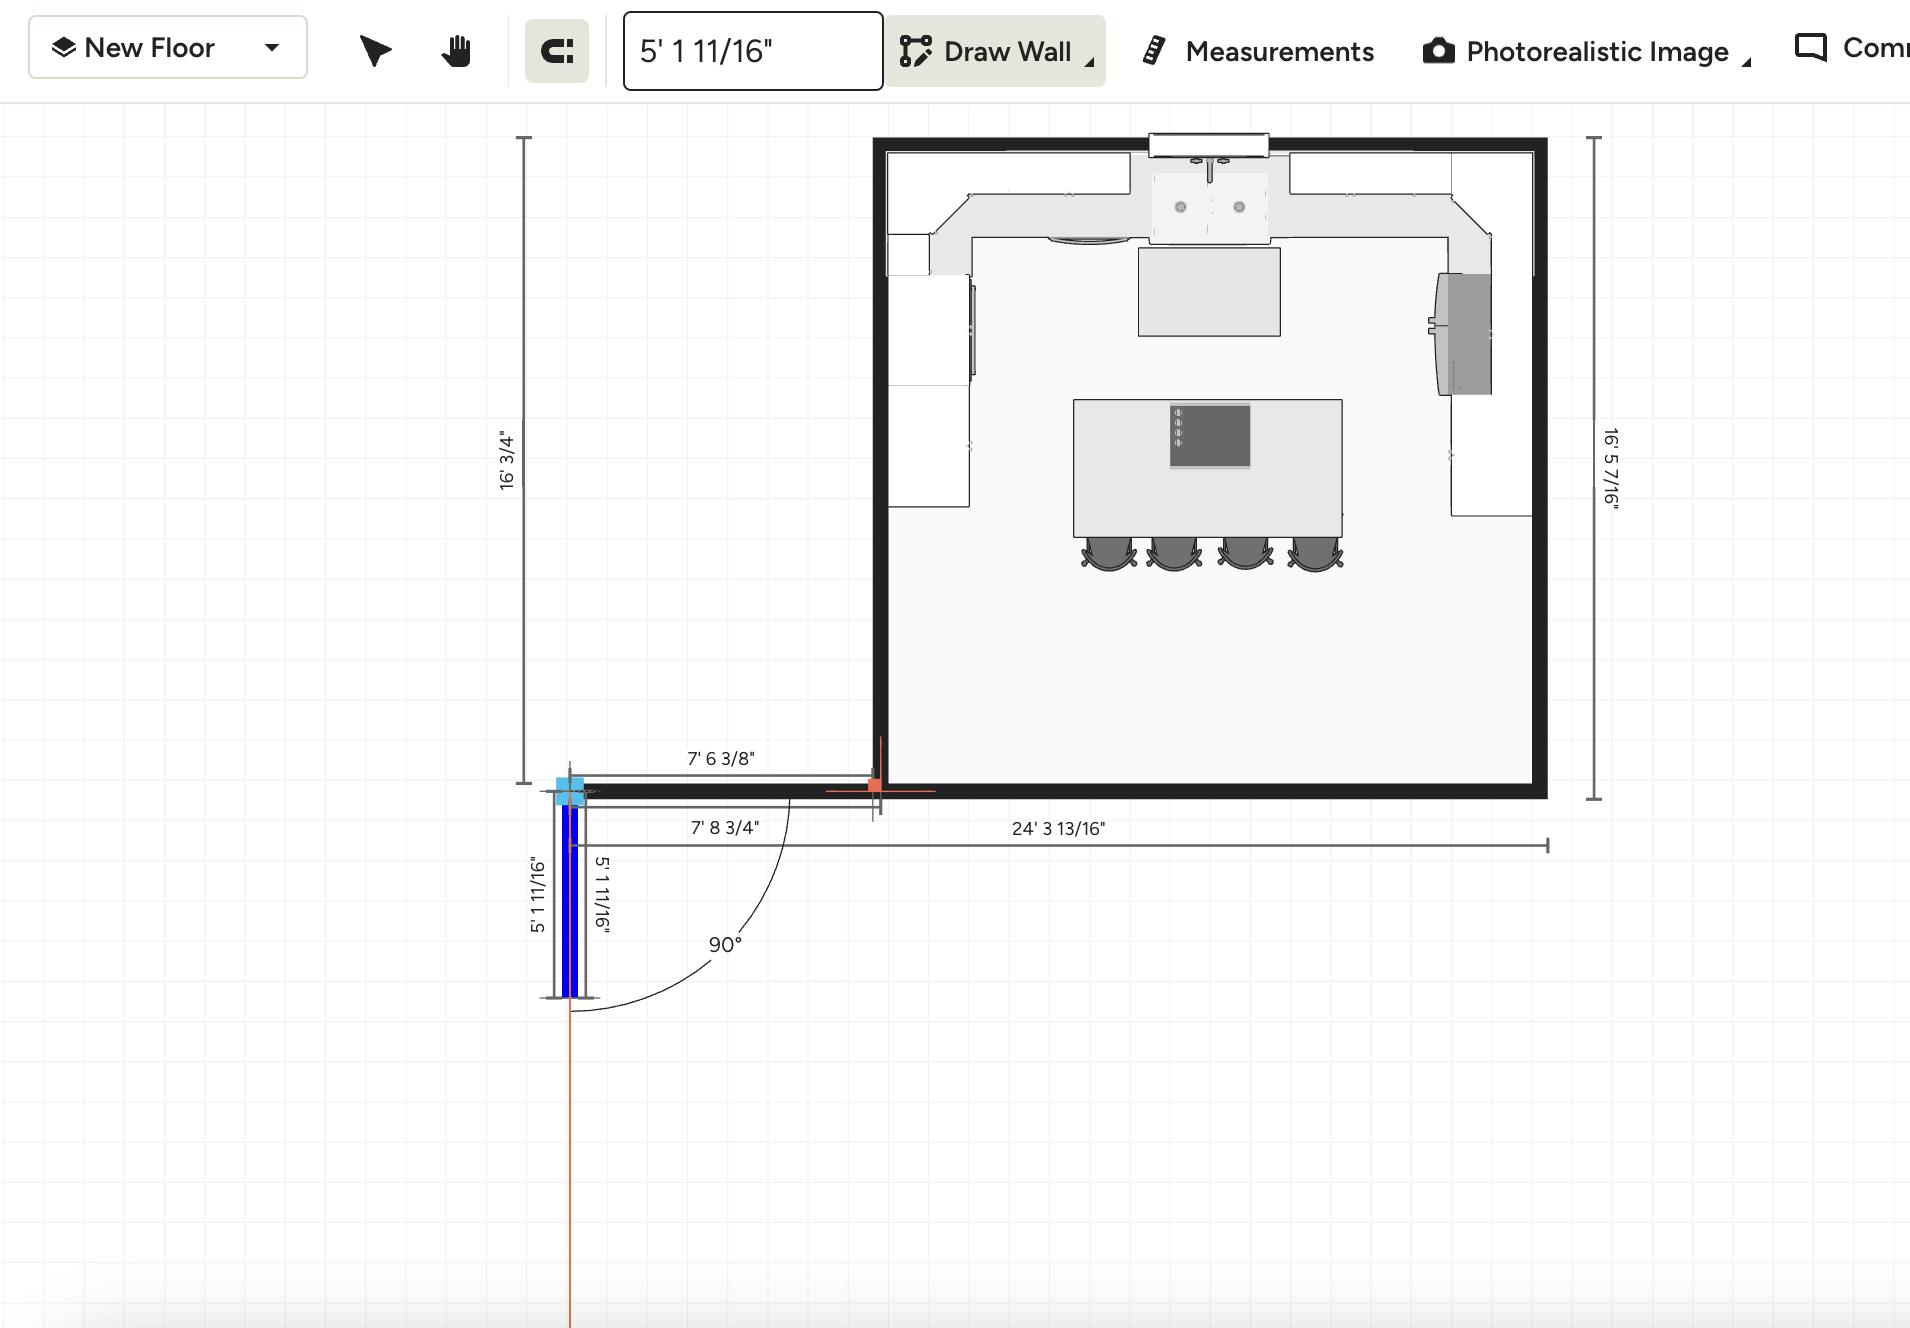
Draw Walls in Straight Lines
Use the red tracking lines to guide you to draw your walls in straight lines. The red tracking lines will appear on the grid in parallel and perpendicular positions to your other walls. Wall angles will also appear on the grid.
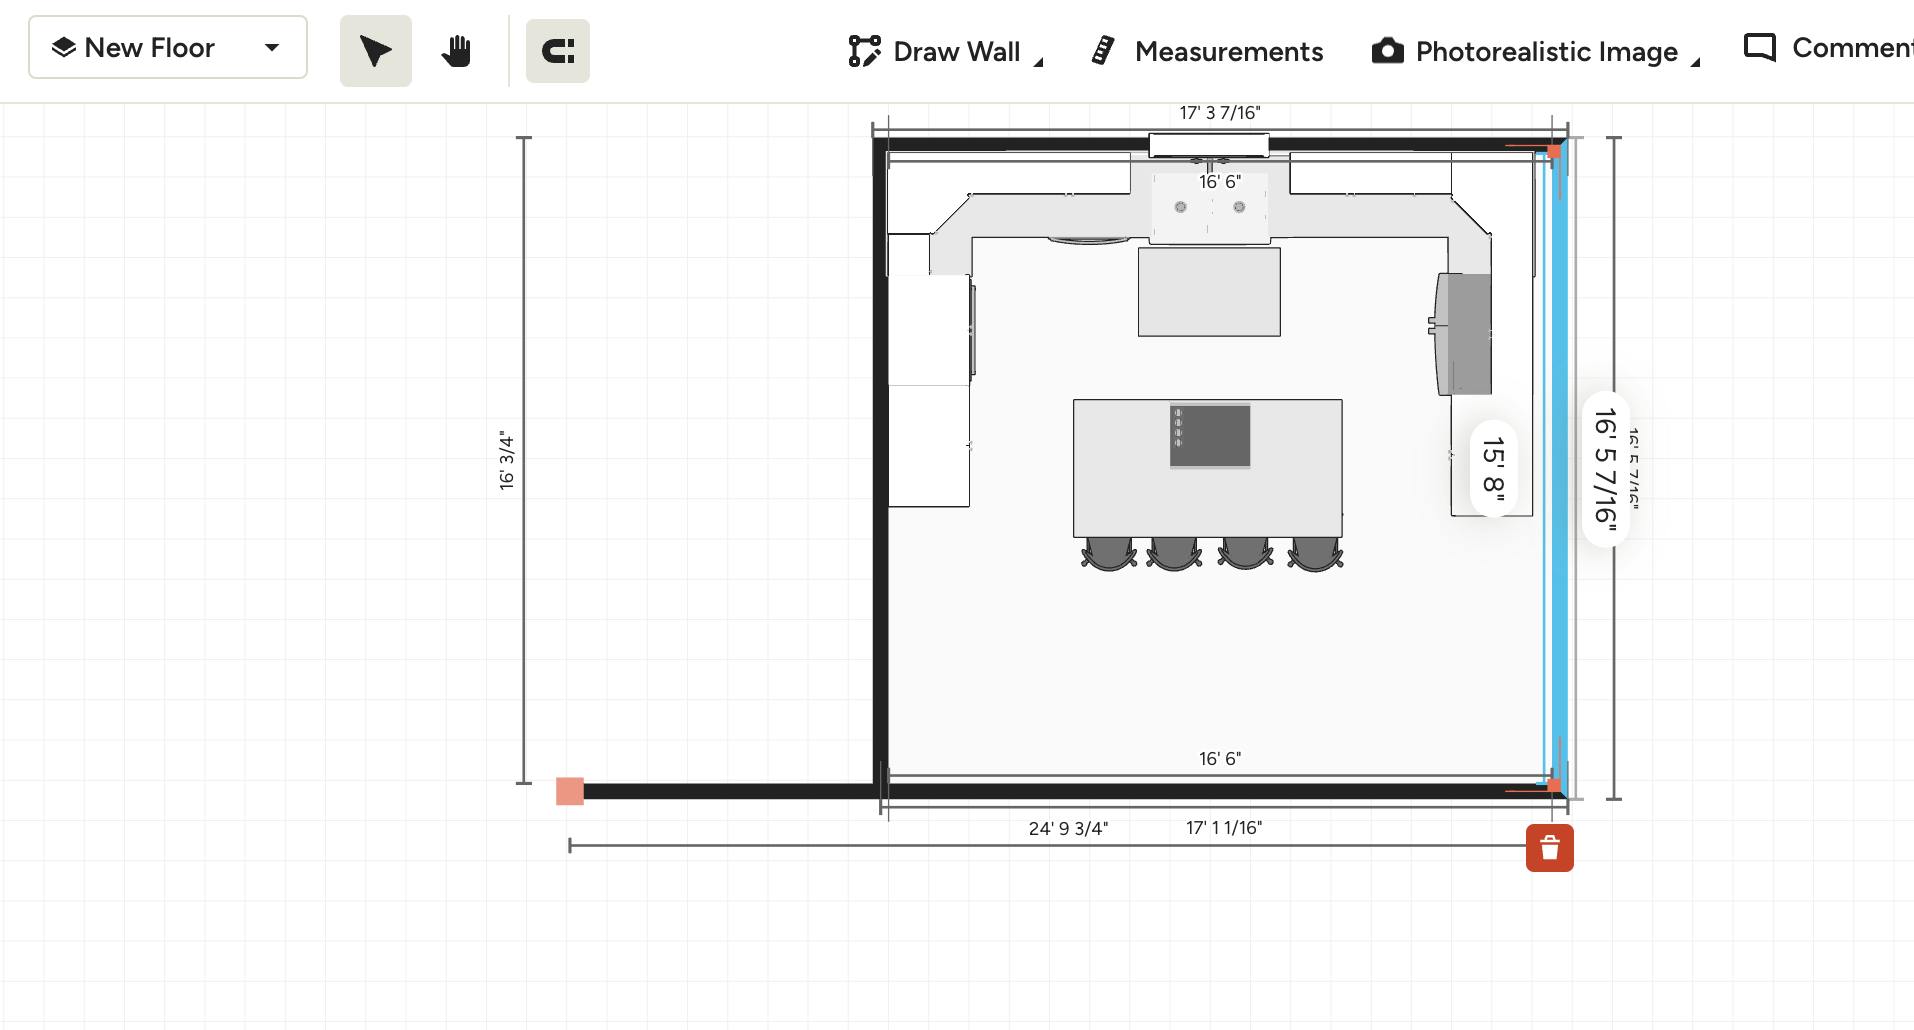
Drag and Adjust Connected Walls
To move one wall but keep it attached to its adjacent walls, click on the wall you want to change and just drag it where you want to move it. It will remain connected to the other walls and at the same angle.
Change the Wall Angles
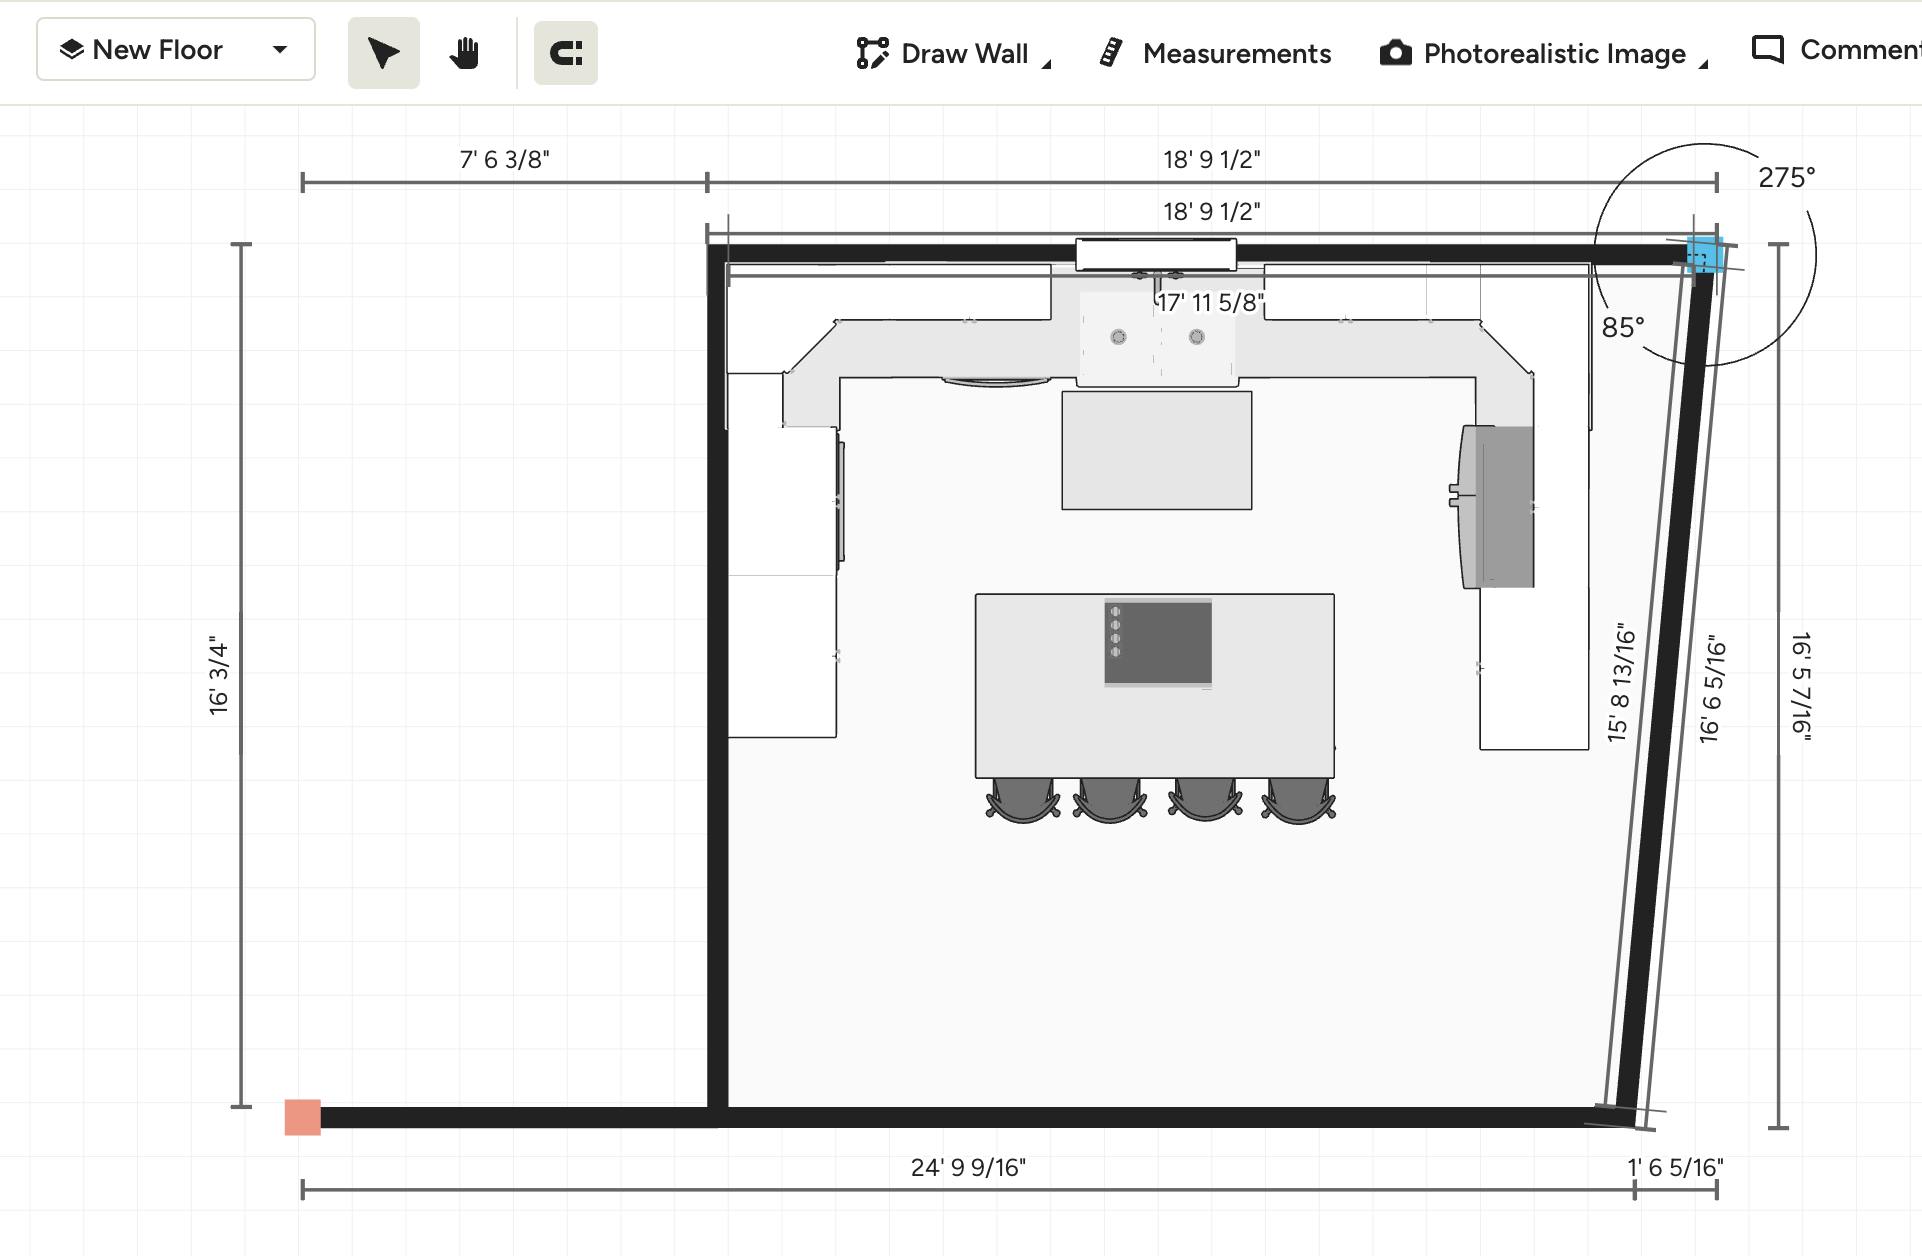
You can also change a wall's angle and still keep it attached to adjacent walls. Just click on a corner of the wall and drag it where you want to move it.
Adjust the Measurement Unit
If you would like to change your preferred unit of measurement, you can do this at any time within your 3D floor plan settings.
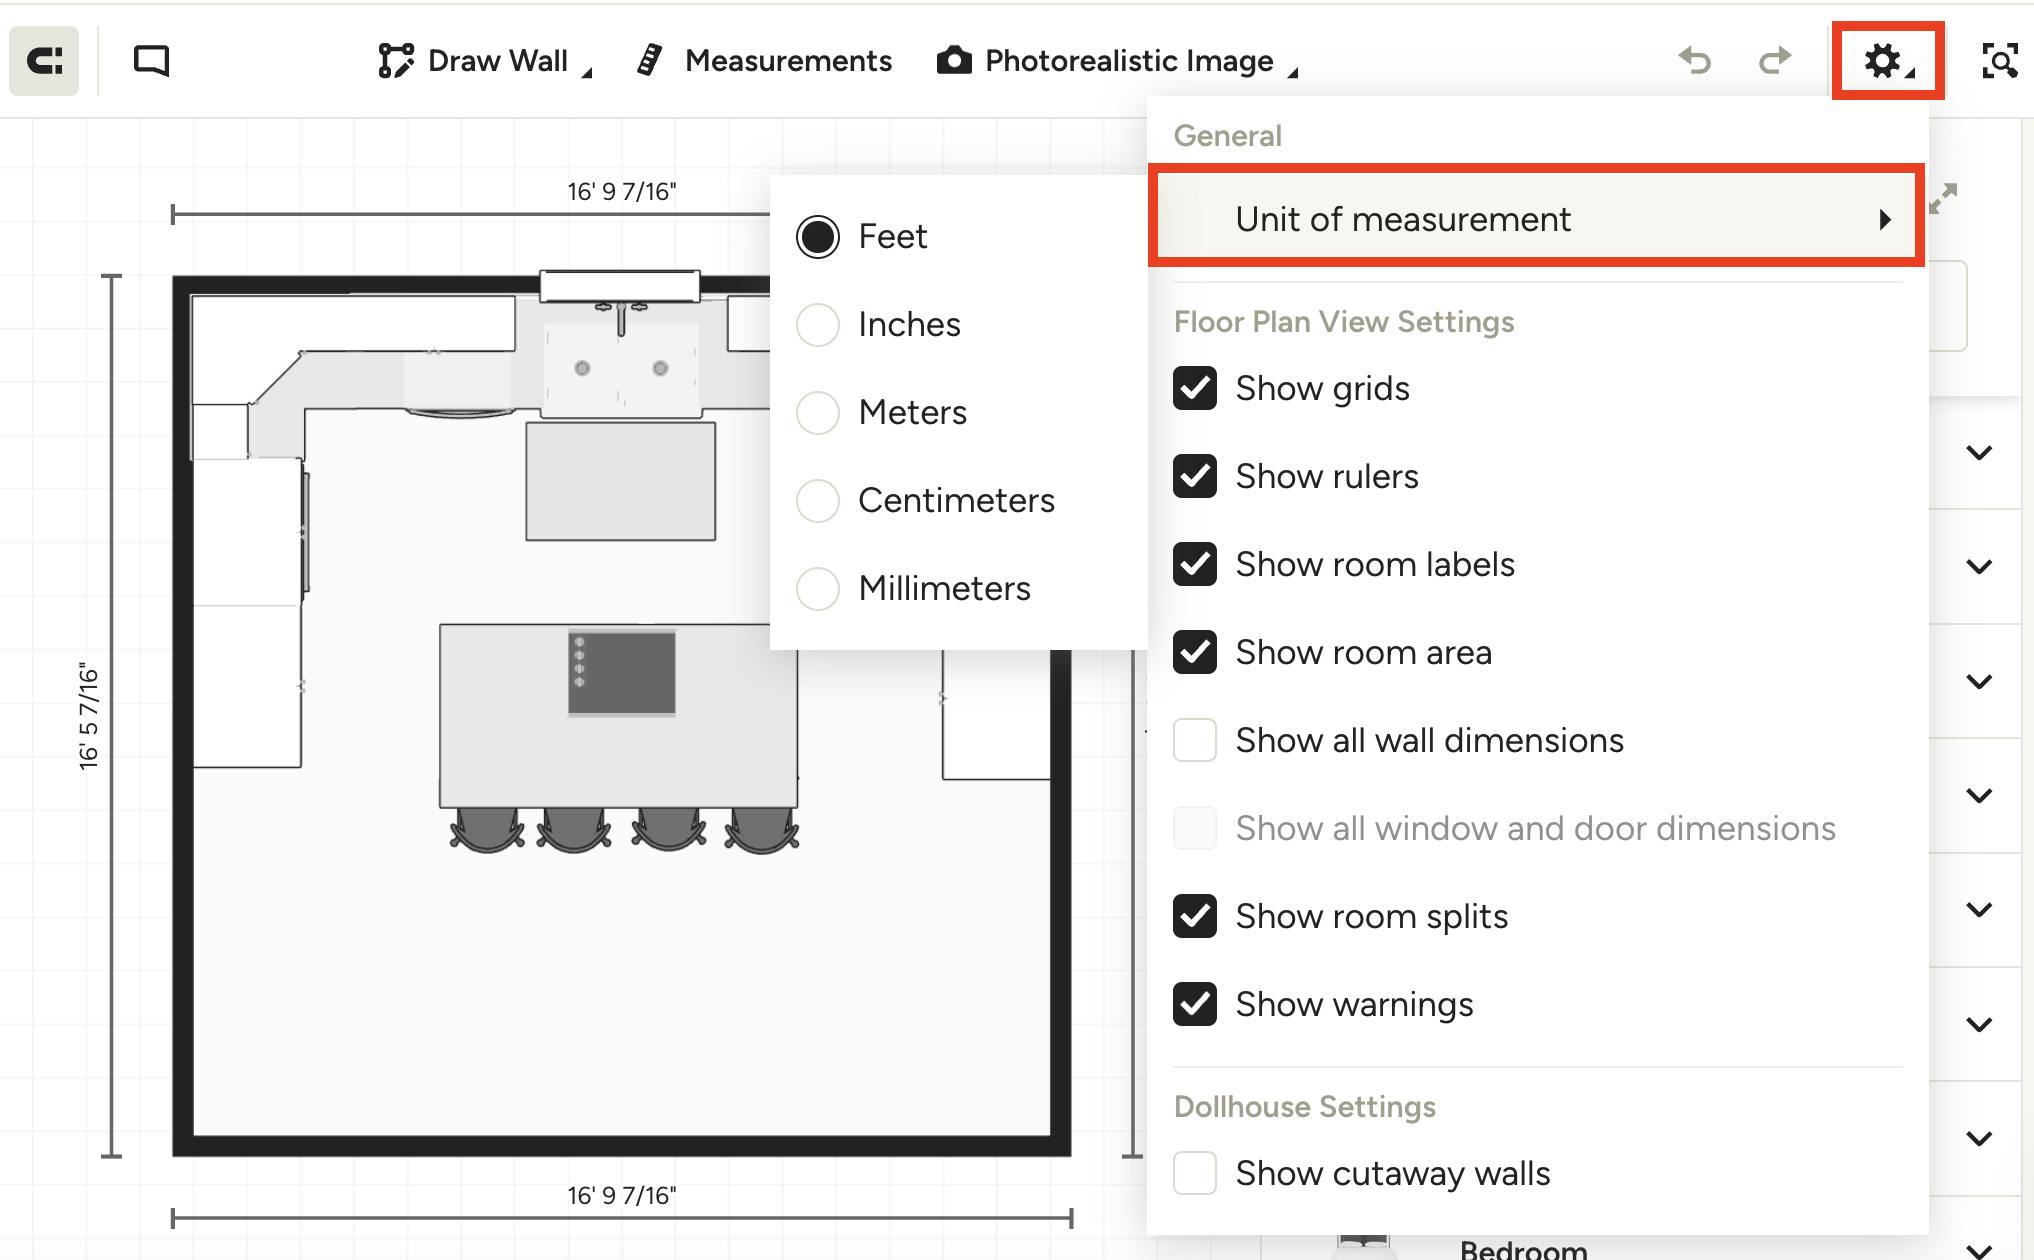
Click the Gear icon in your toolbar, then select Unit of Measurement at the top of the dropdown. Options will include Feet, Inches, Meters, Centimeters and Millimeters.
Select the circle next to the preferred unit. Your 3D floor plan measurements will automatically update to show that preferred unit. You can easily go back into the menu to adjust again if needed.