How to Move 3D Floor Plan Items
Adding furniture, cabinets, appliances, accessories and more to your 3D Floor Plan is a great way to help your client fully envision their new space. Houzz Pro 3D Floor Planner makes it easy to move things left and right, up and down, rotate items, duplicate them, and replace them. You can even place any item an exact distance from a wall or another item, so your plans are accurate down to the inch.
You can move and manage items in both floor plan mode and dollhouse mode.
Floor Plan Mode
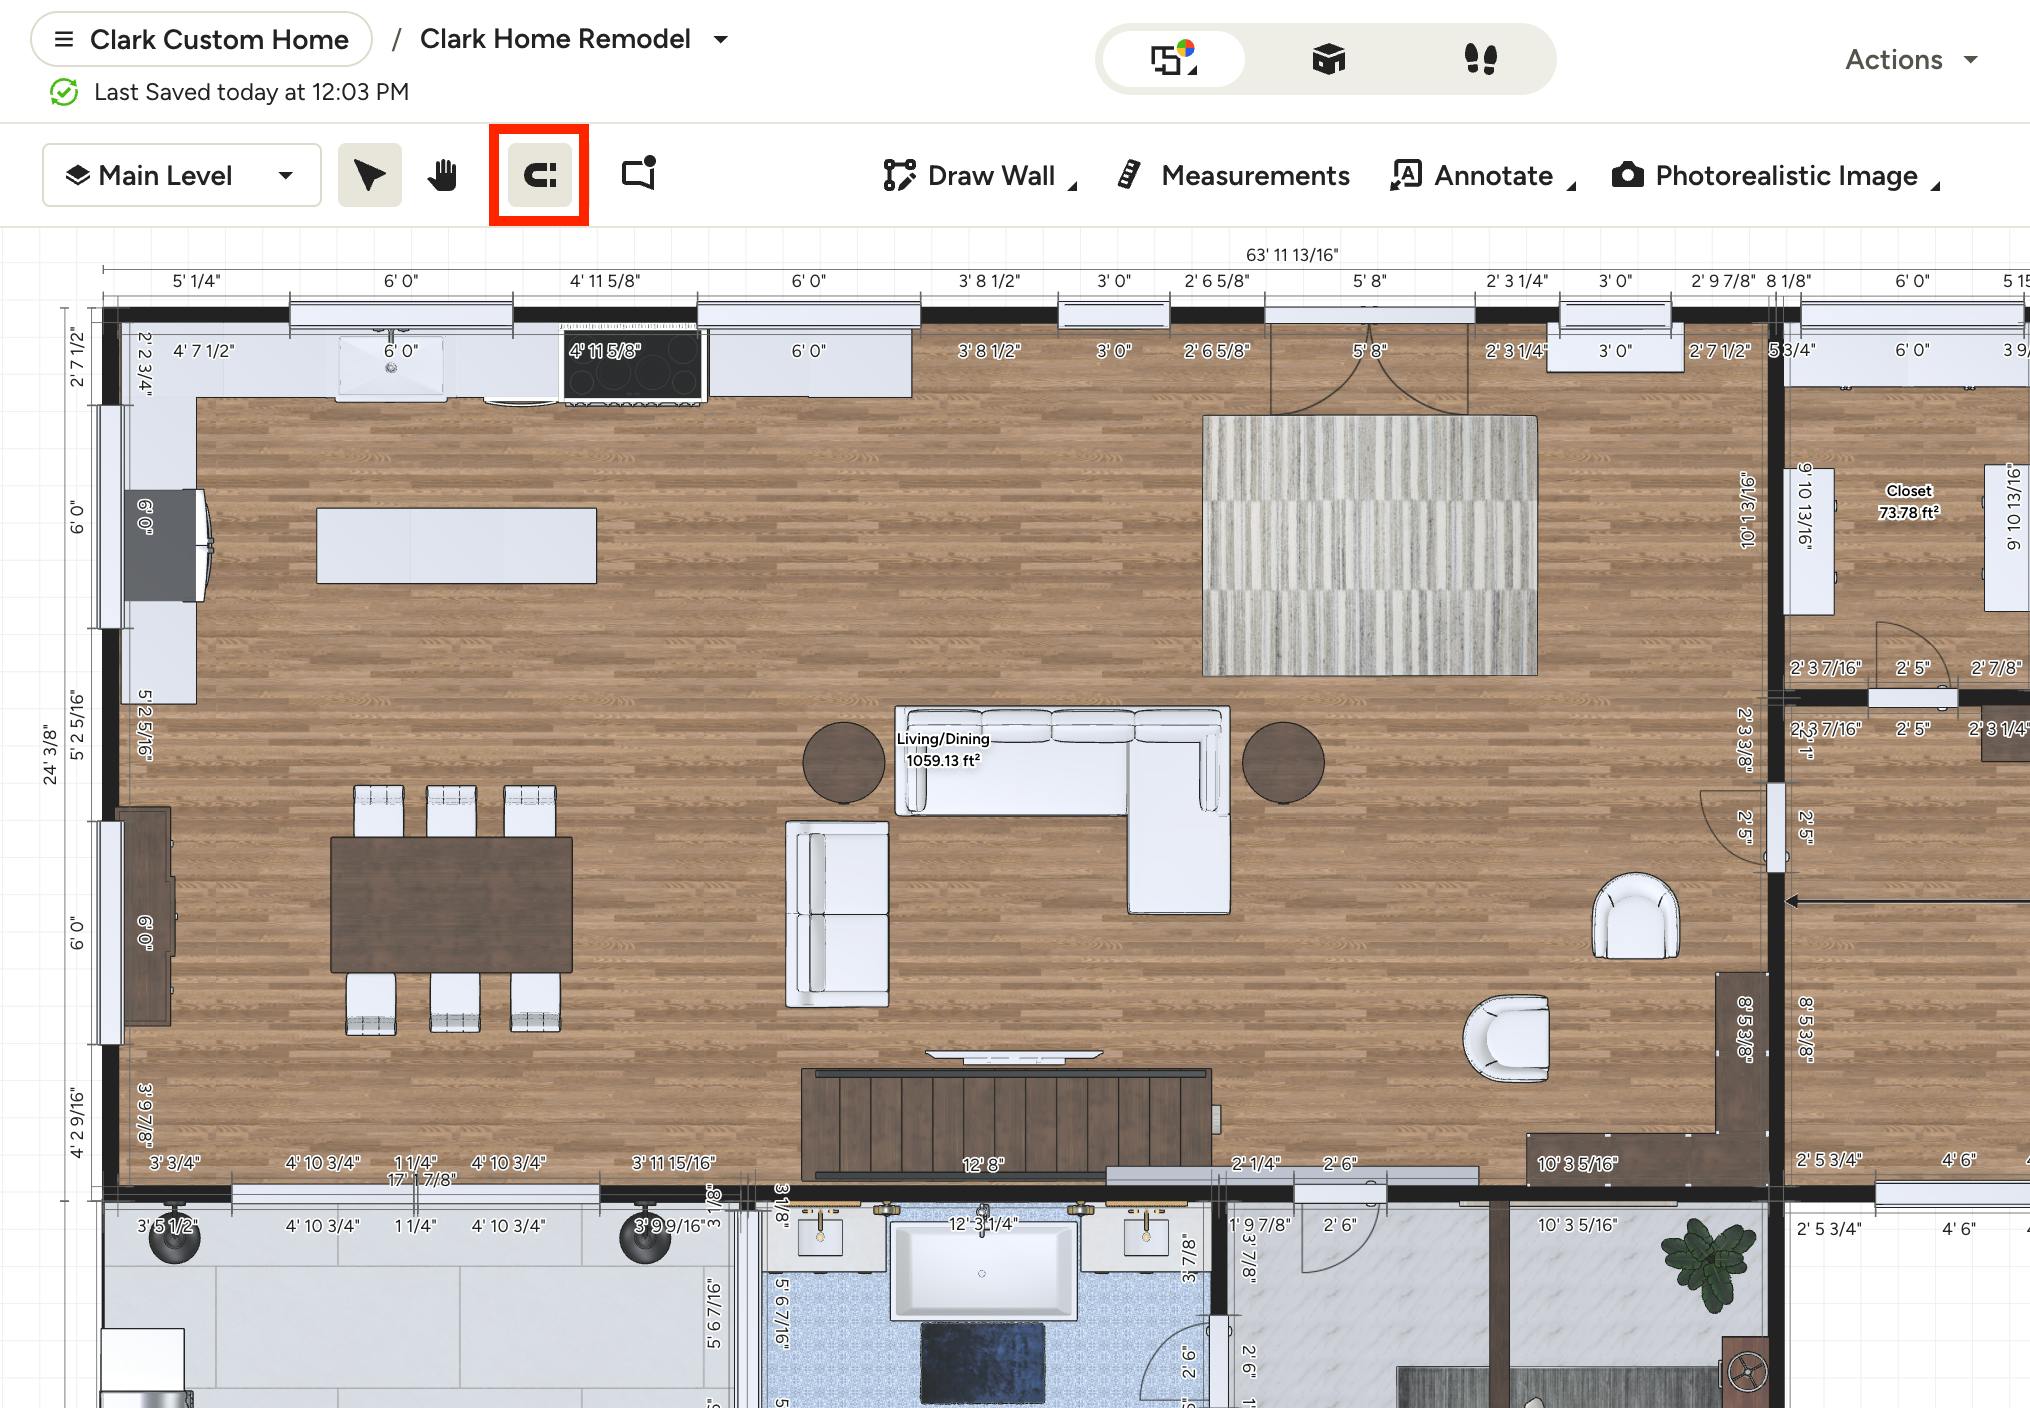
Snap Items into Place
When adding floor plan items, you want to make sure everything is properly aligned with other items or with the wall. To do this, you can easily "snap" items into place and accurately line them up.
To snap your items into place, select the Snapping icon in your top toolbar.
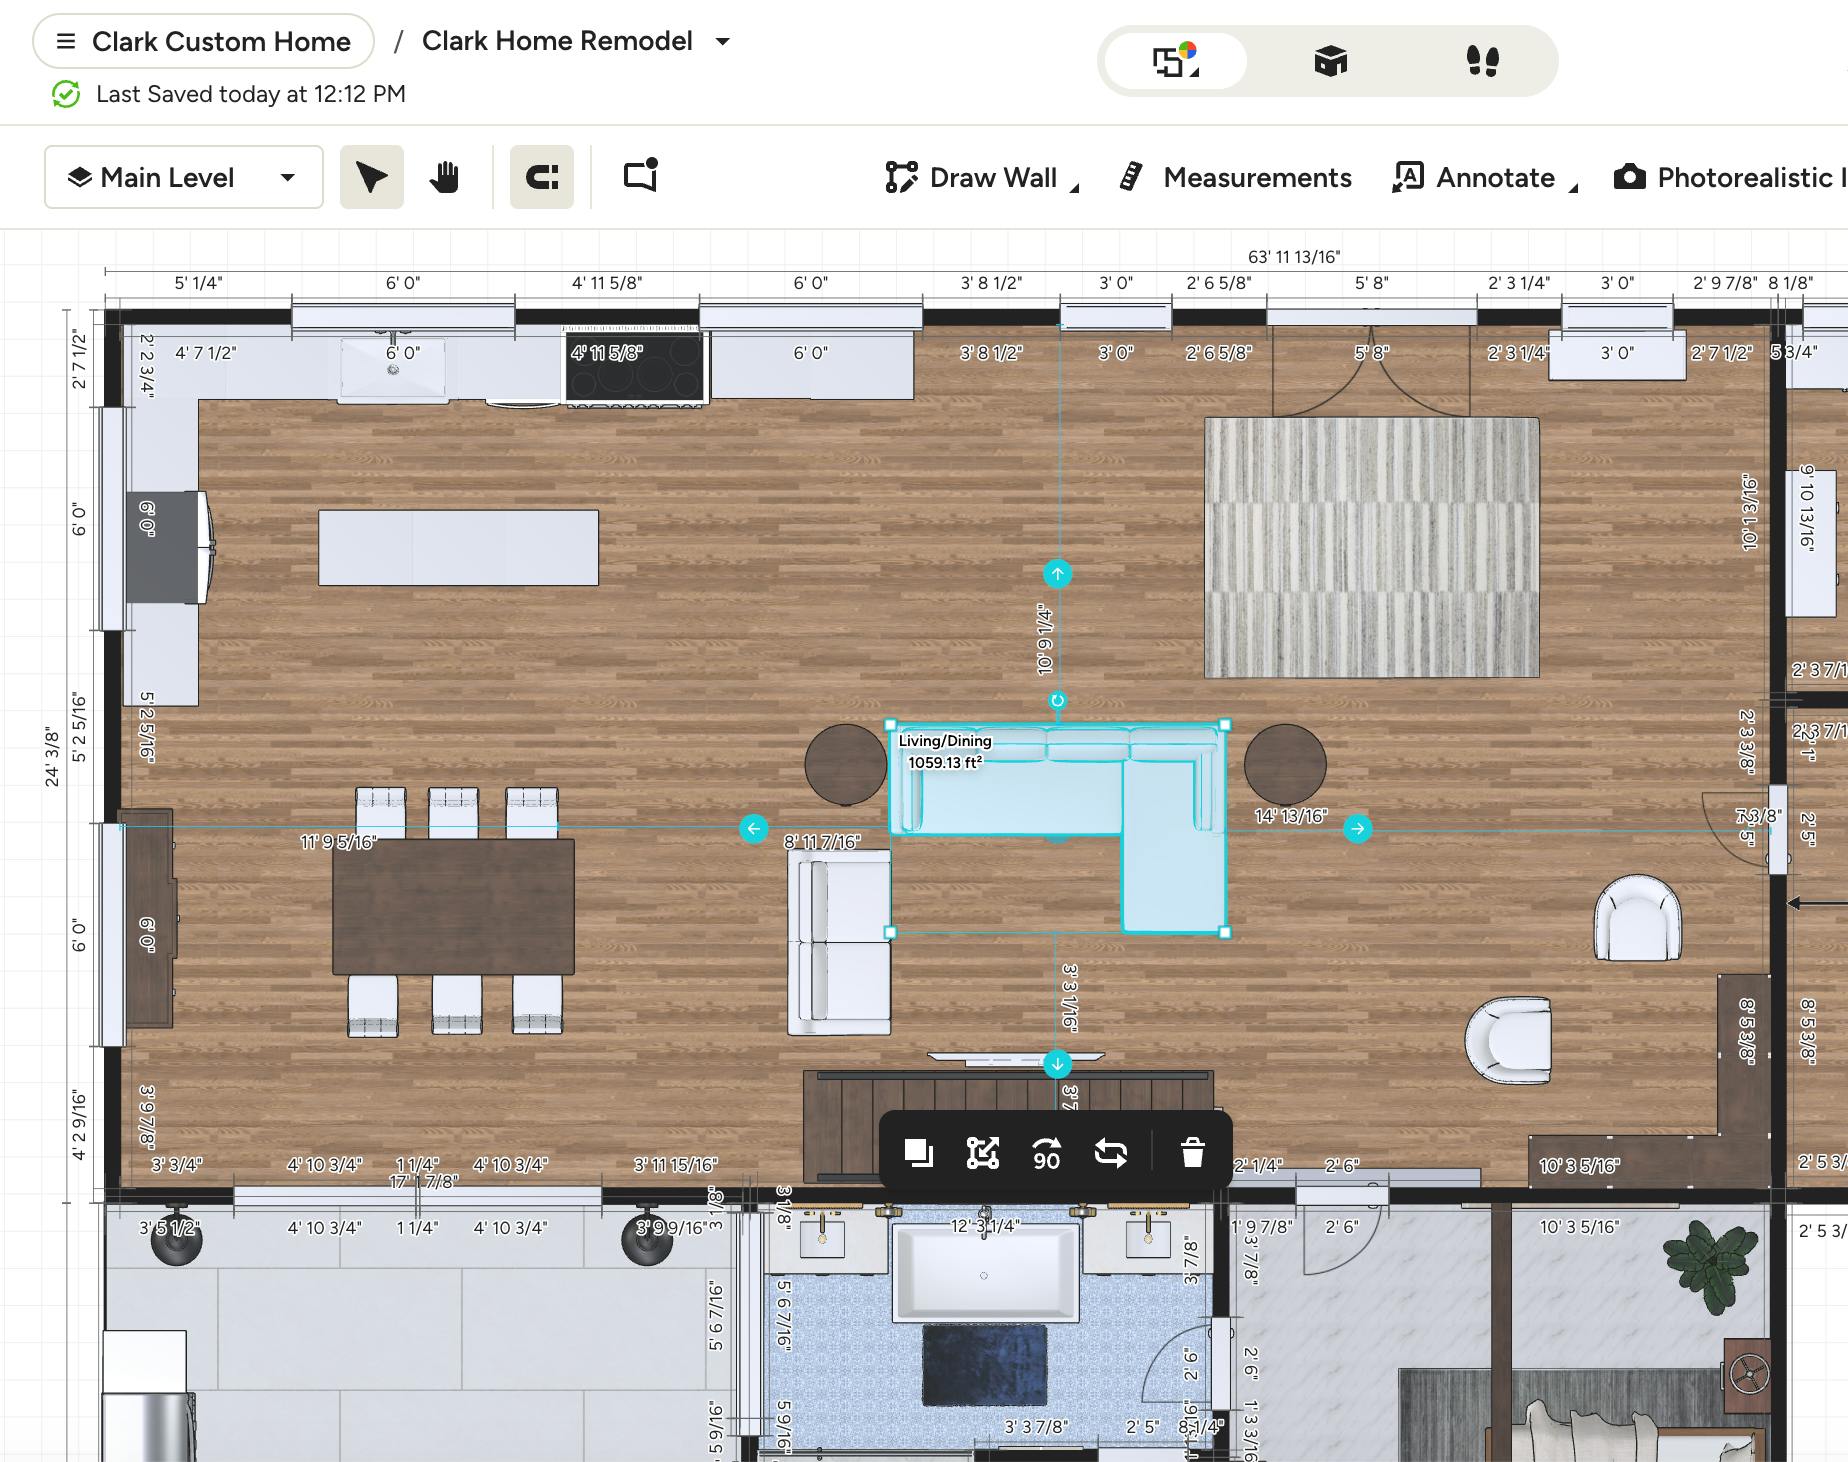
Drag an item close to the item you want to align it with, such as a piece of furniture or a wall, and they will automatically line up right next to each other. Items placed against a wall will also automatically snap to the wall.
If you don’t want an item to snap to another item, but still want it positioned close by, disable the Snapping icon in your top toolbar. Then, zoom in and place the item exactly where you want it. Zooming in enables you to position items very close together without snapping them to each other.
Move Items Up and Down
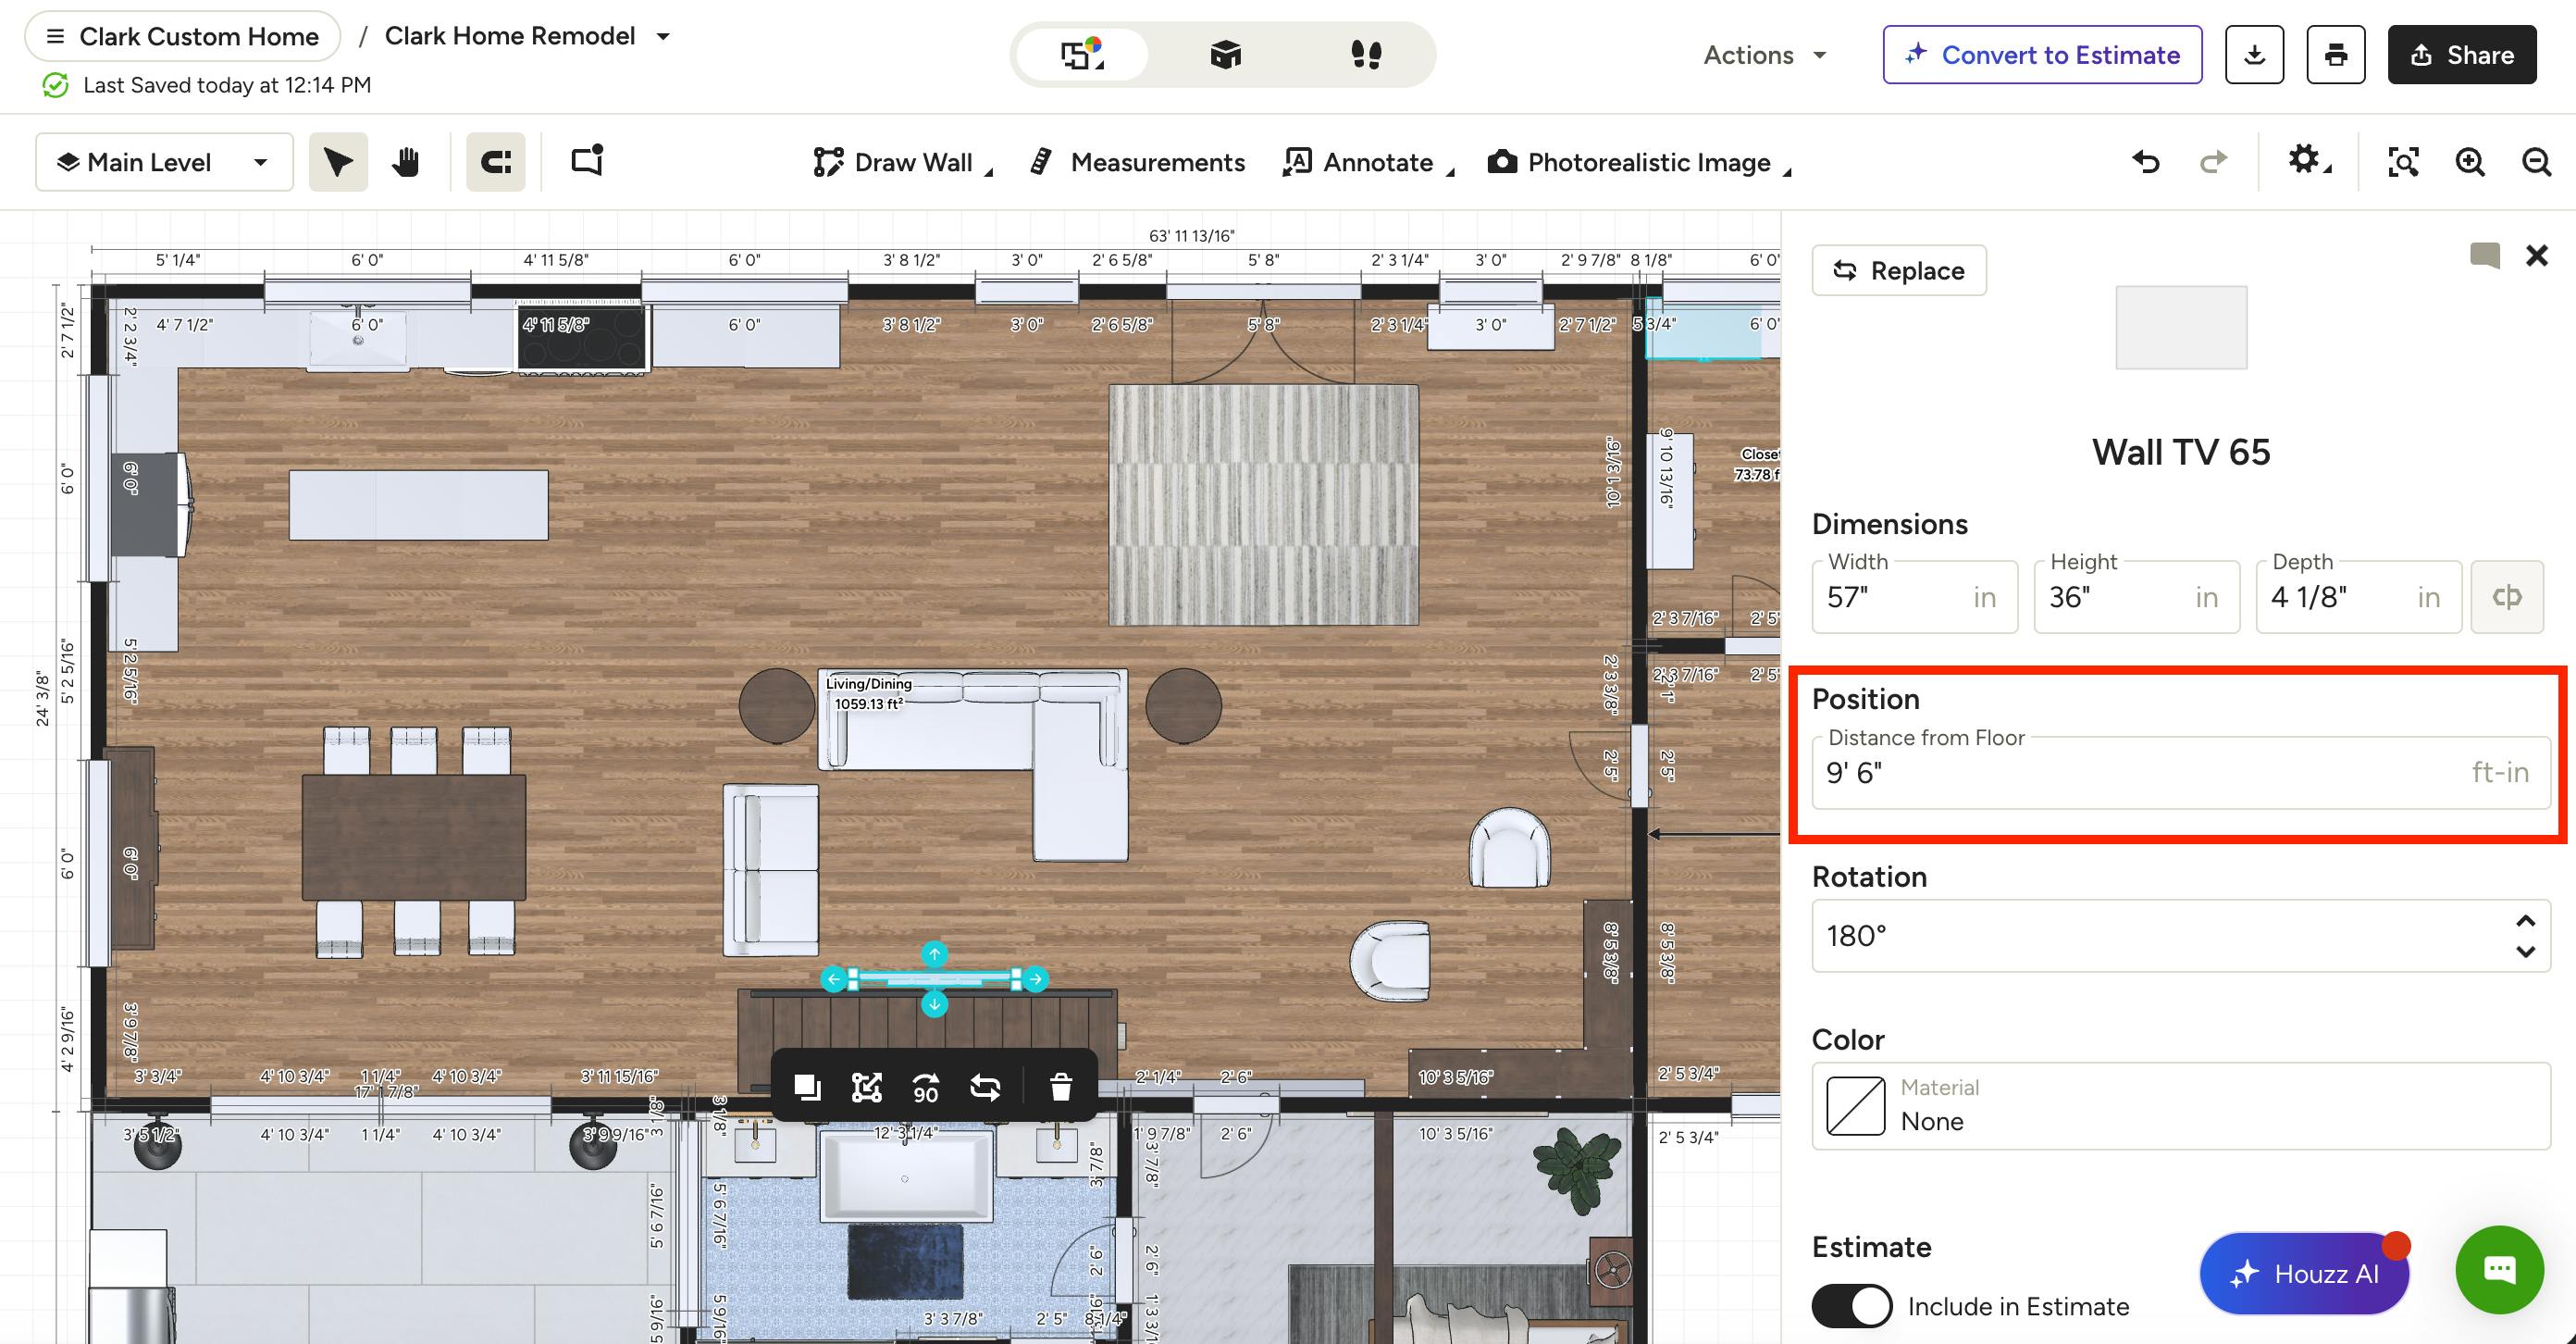
To move items up and down — for example, artwork placed on a wall — select the item and adjust the Distance from Floor measurement in the right menu. Click Return on your keyboard to make the visual adjustment in floor plan mode.
Resize Items
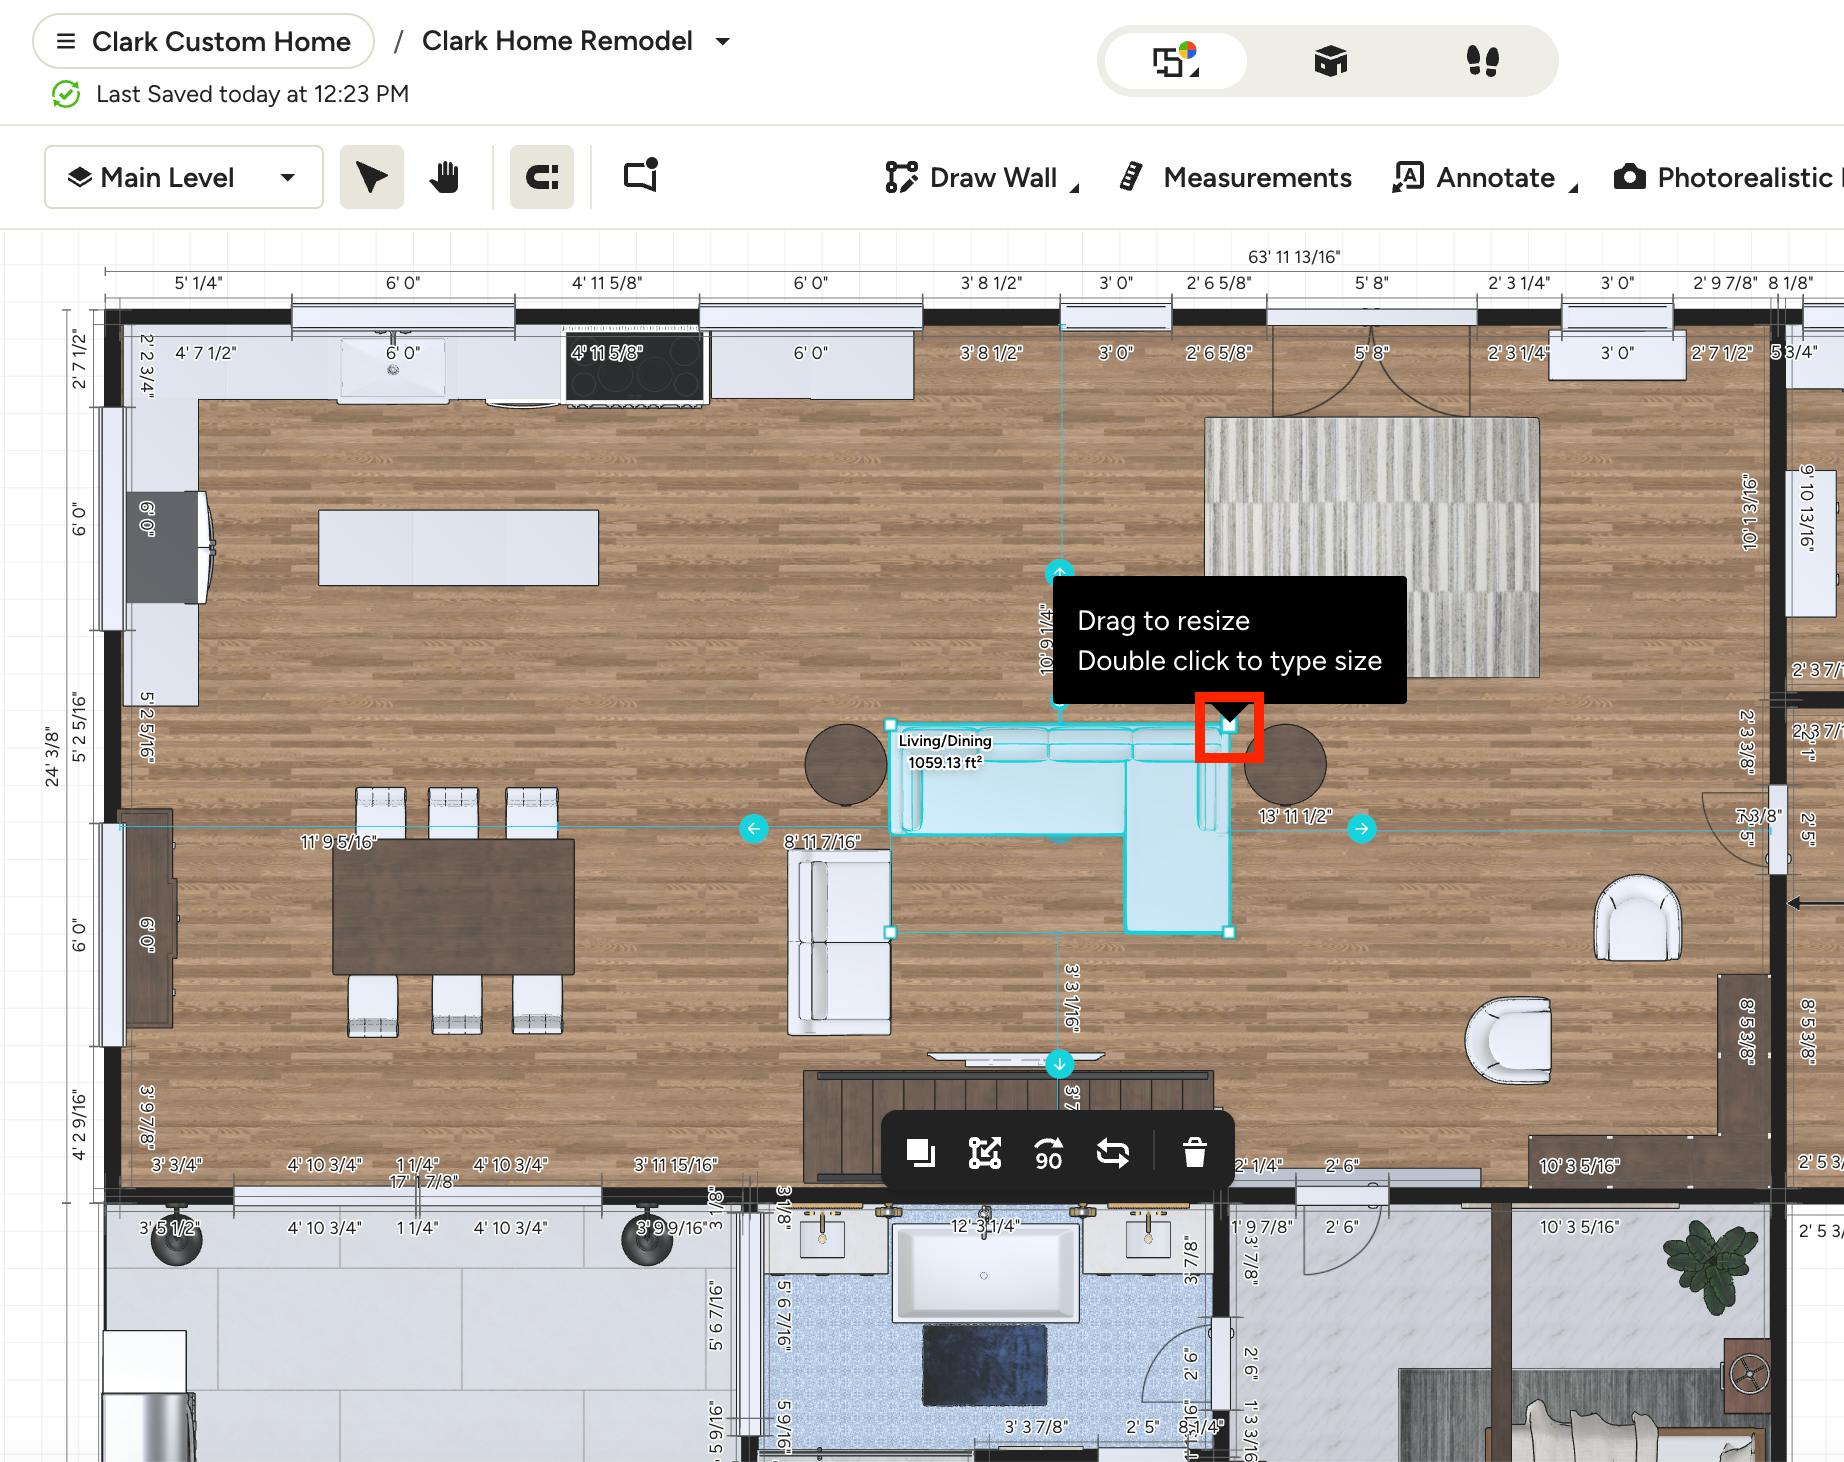
Resize any item directly on the canvas by dragging it to fit or by typing an exact size.
Drag to Resize: Click an item on the canvas to select it. Drag an edge or corner of the item to resize in any one direction. This is useful for stretching a sofa or vanity to fit a wall.
Hold Shift while dragging a corner to resize proportionally and keep the item's original shape.
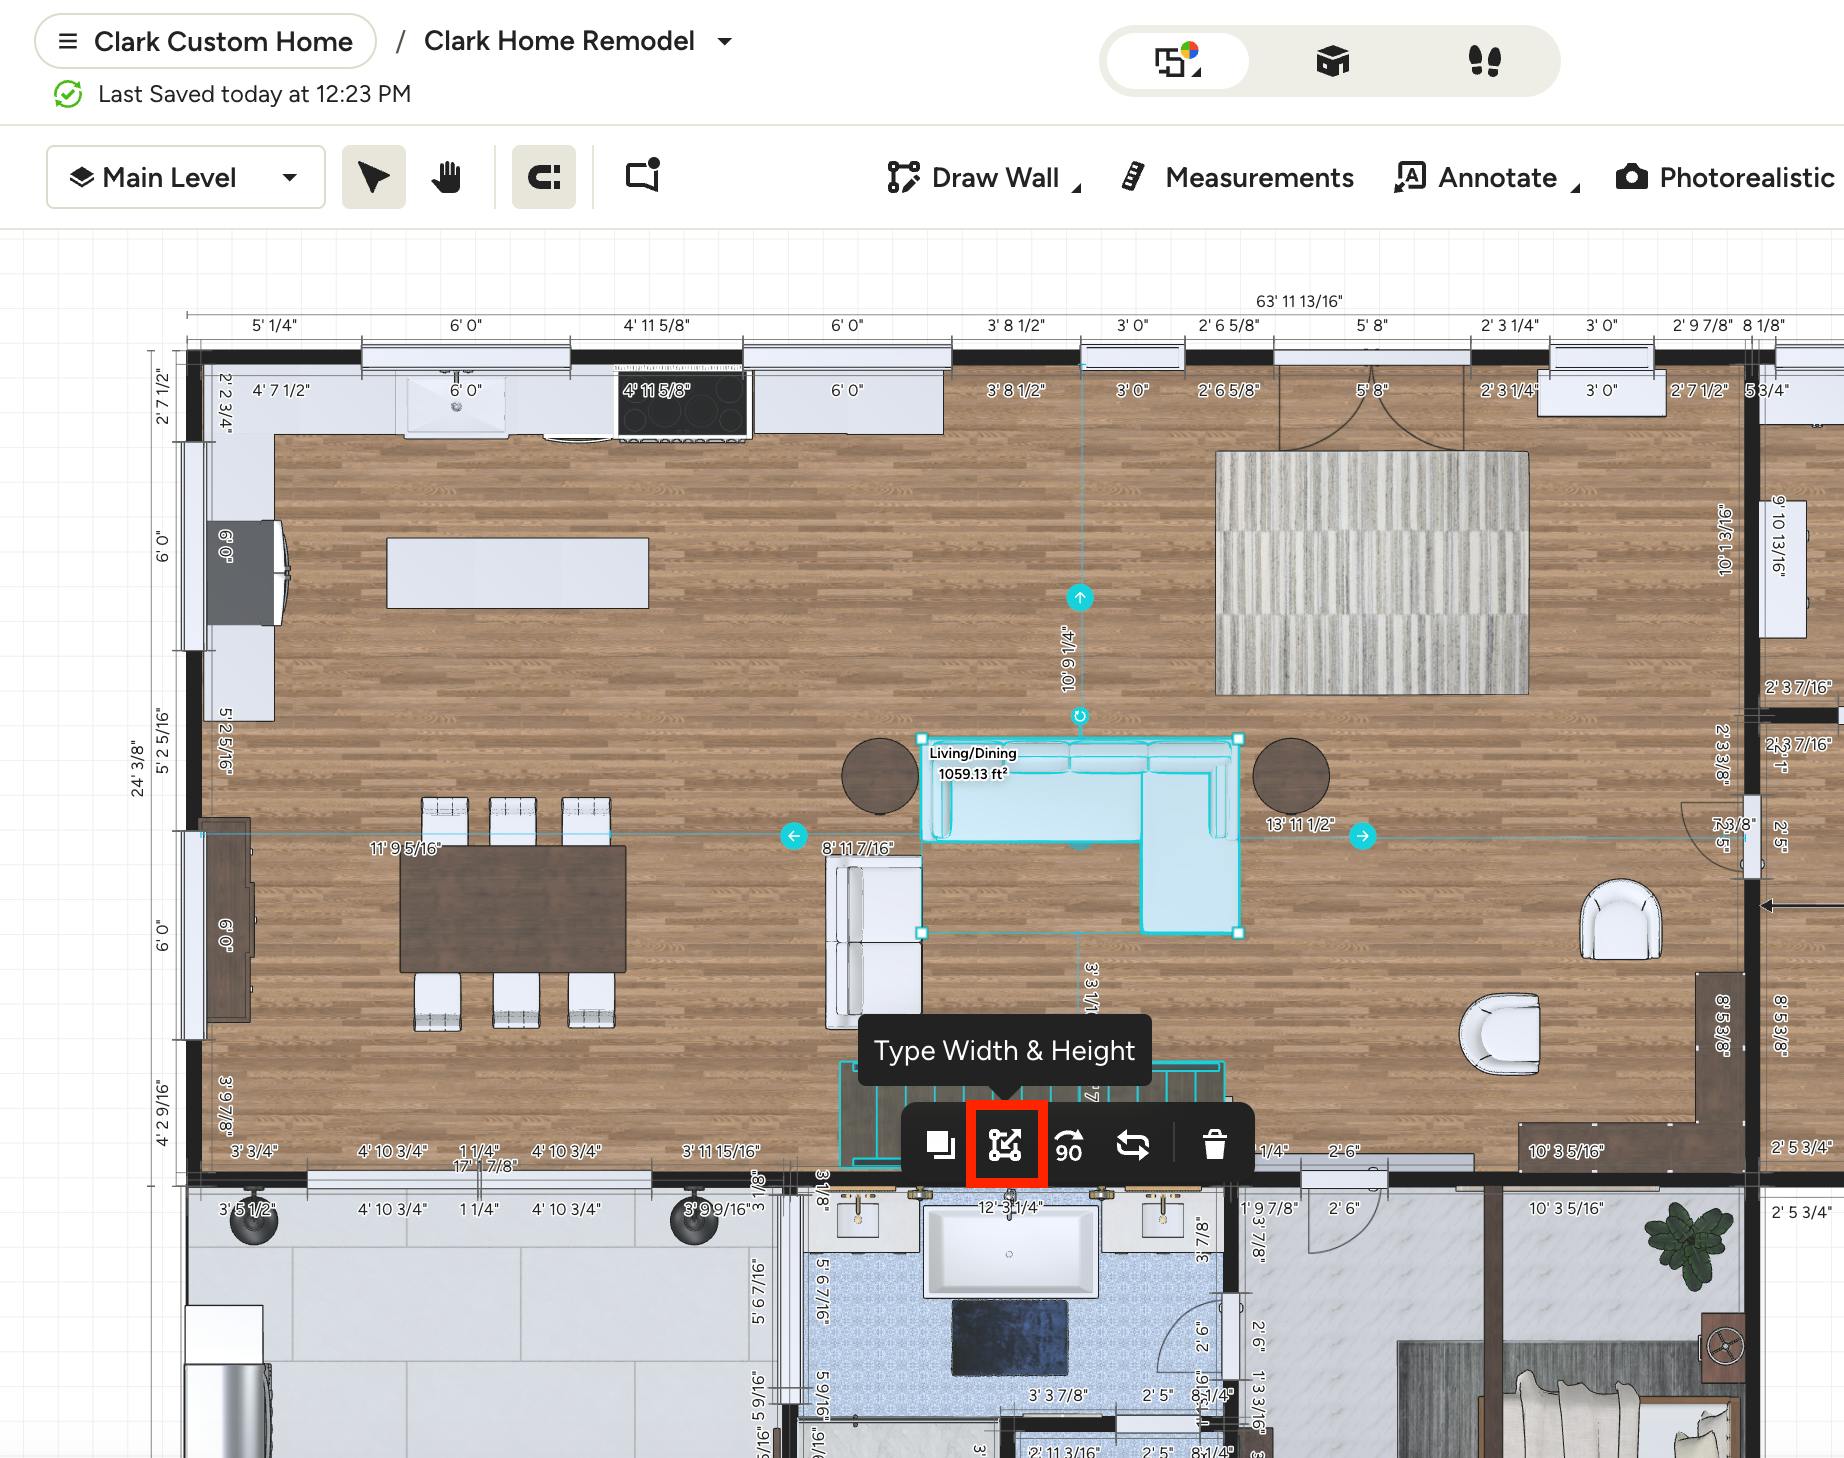
Enter Exact Size: Click an item on the canvas to select it. To adjust the item measurements, you can either double-click on a corner of the item, or you can select the Type Width & Height button in the toolbar underneath the item.
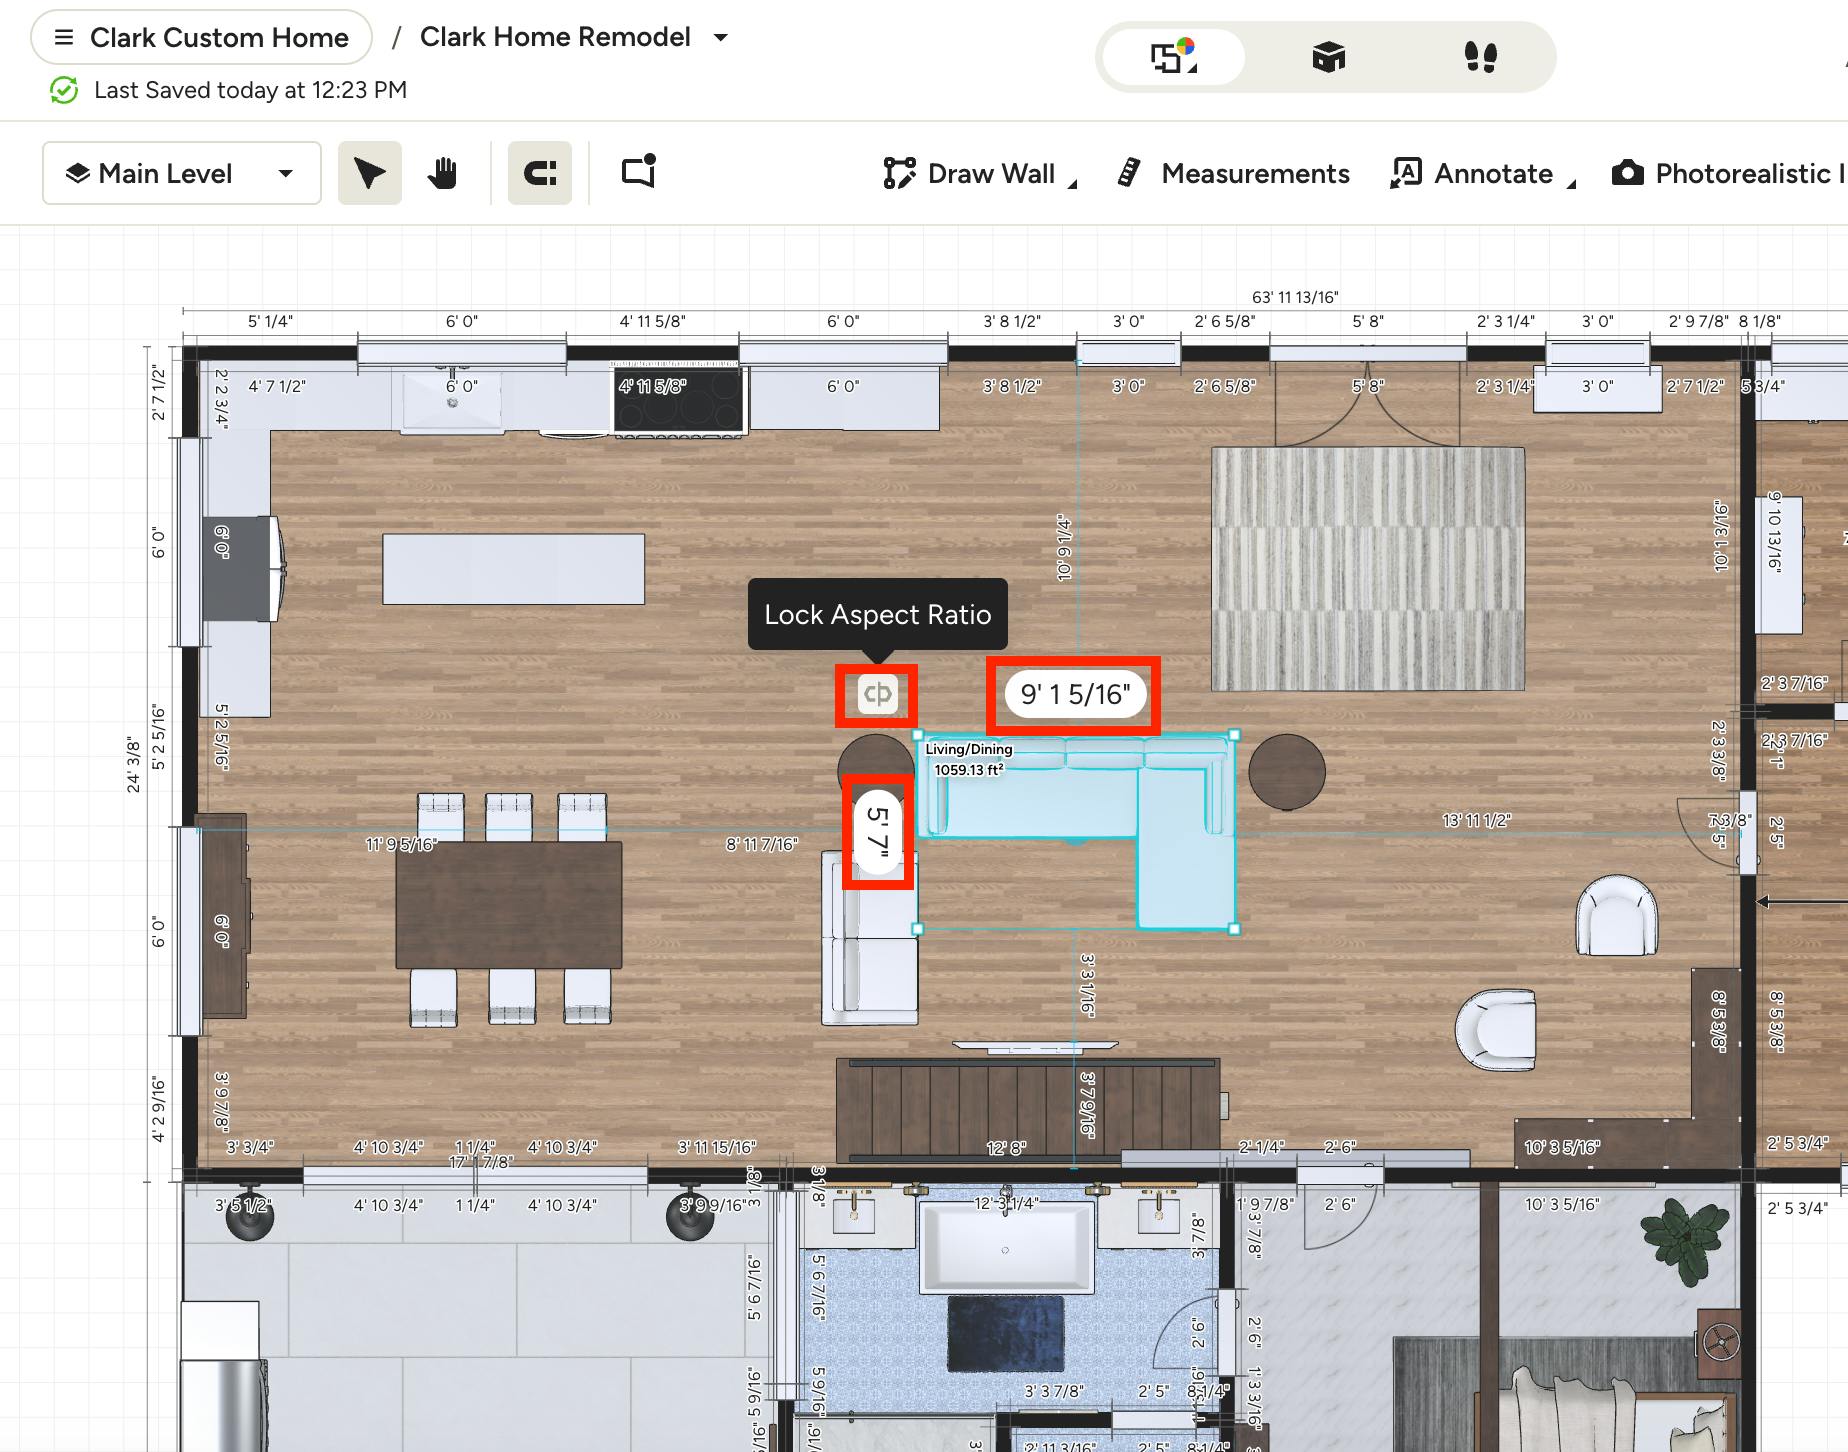
Once the measurements appear, type the exact dimensions you want, then press Enter/Return to apply.
To keep the item's proportions while you type, click the Lock icon. When you change one dimension, the others adjust automatically.
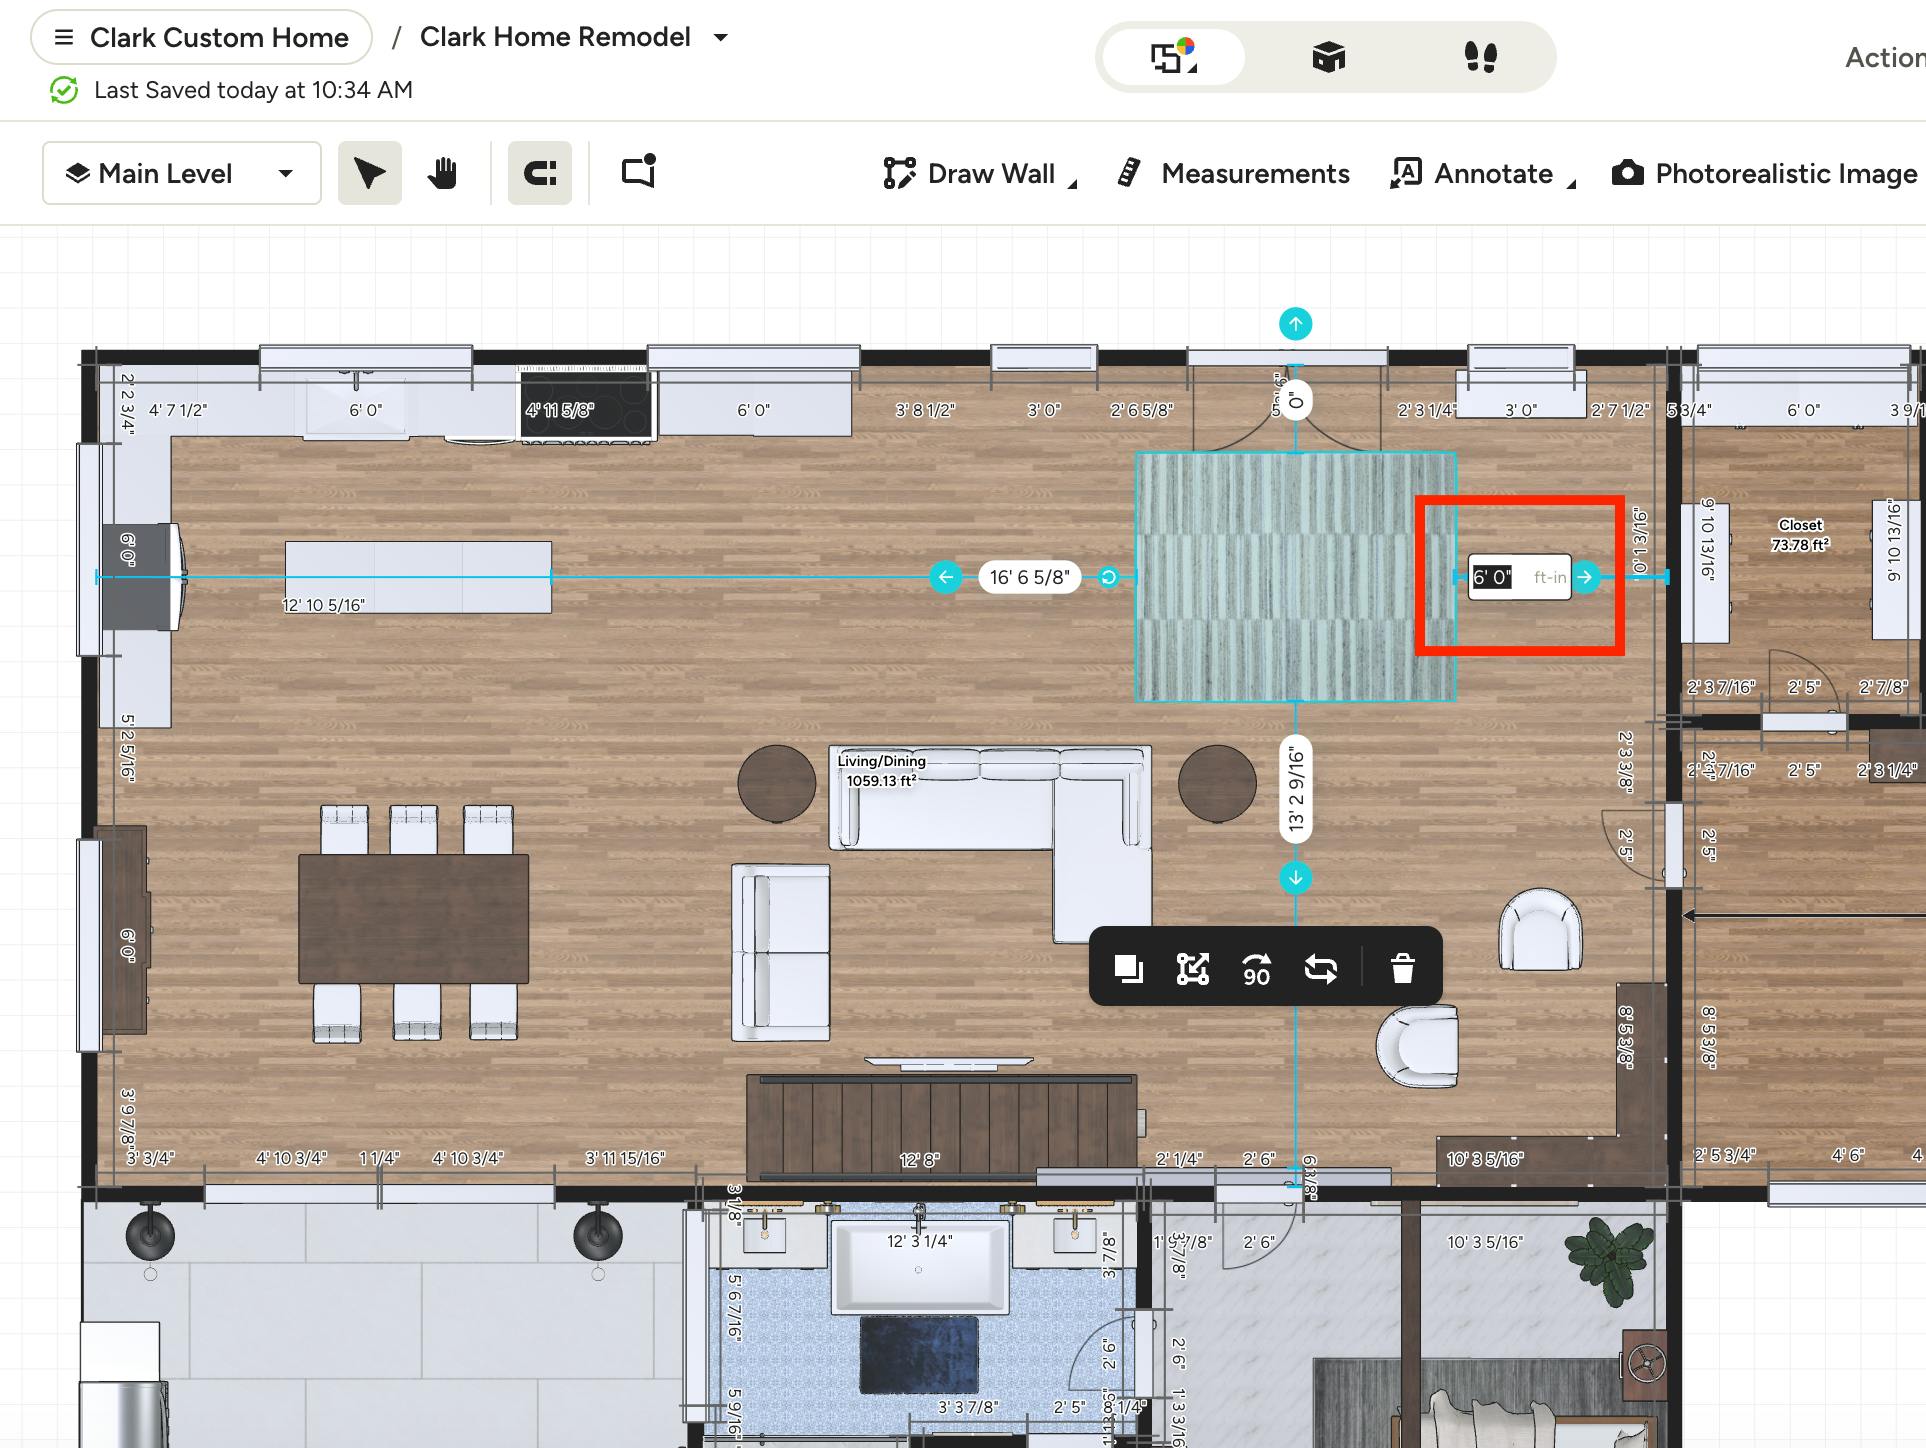
Set an Exact Distance from a Wall or Item
Need a vanity exactly 18" from the corner or a sofa 36" from the coffee table? You can type in the precise distance for any item on your floor plan.
Click the item you want to move. Measurements appear showing the distance between the item and the nearest walls or items.
Click the measurement you want to change. Type the exact distance you want, then press Enter/Return to apply. The item will move into position automatically, with no fine-tuning by hand needed.
Please Note: Resize your item before setting its distance. Changing the size afterward moves the item’s edges and changes the distance.
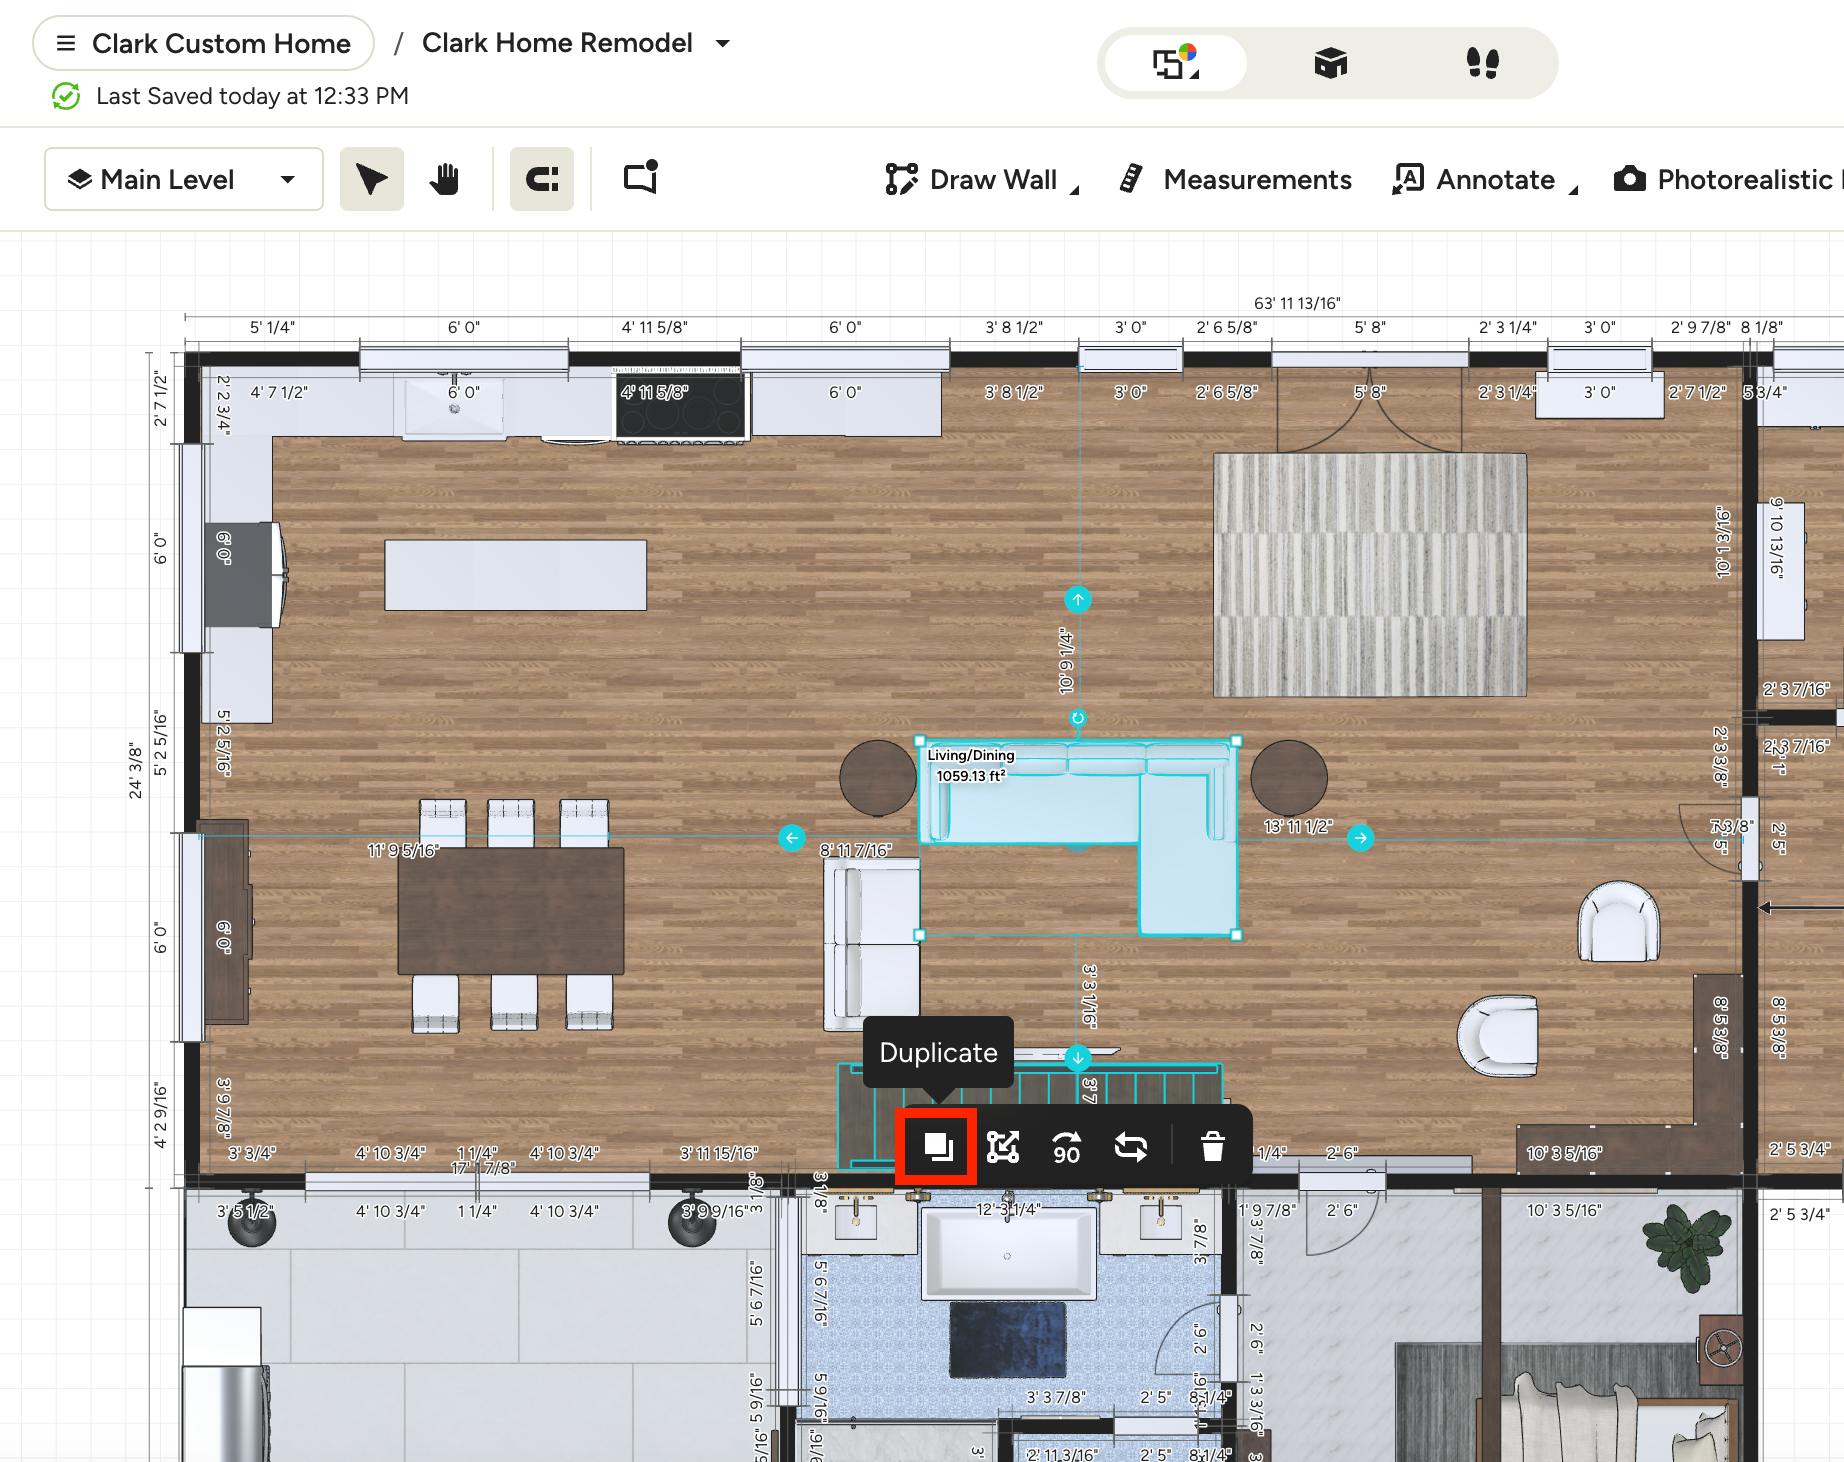
Duplicate Items
Create a copy of a selected item by clicking the Duplicate button in the toolbar underneath the item. This will create an exact match, which is helpful for multiples like chairs, cabinets, windows, doors and more.
Rotate Items
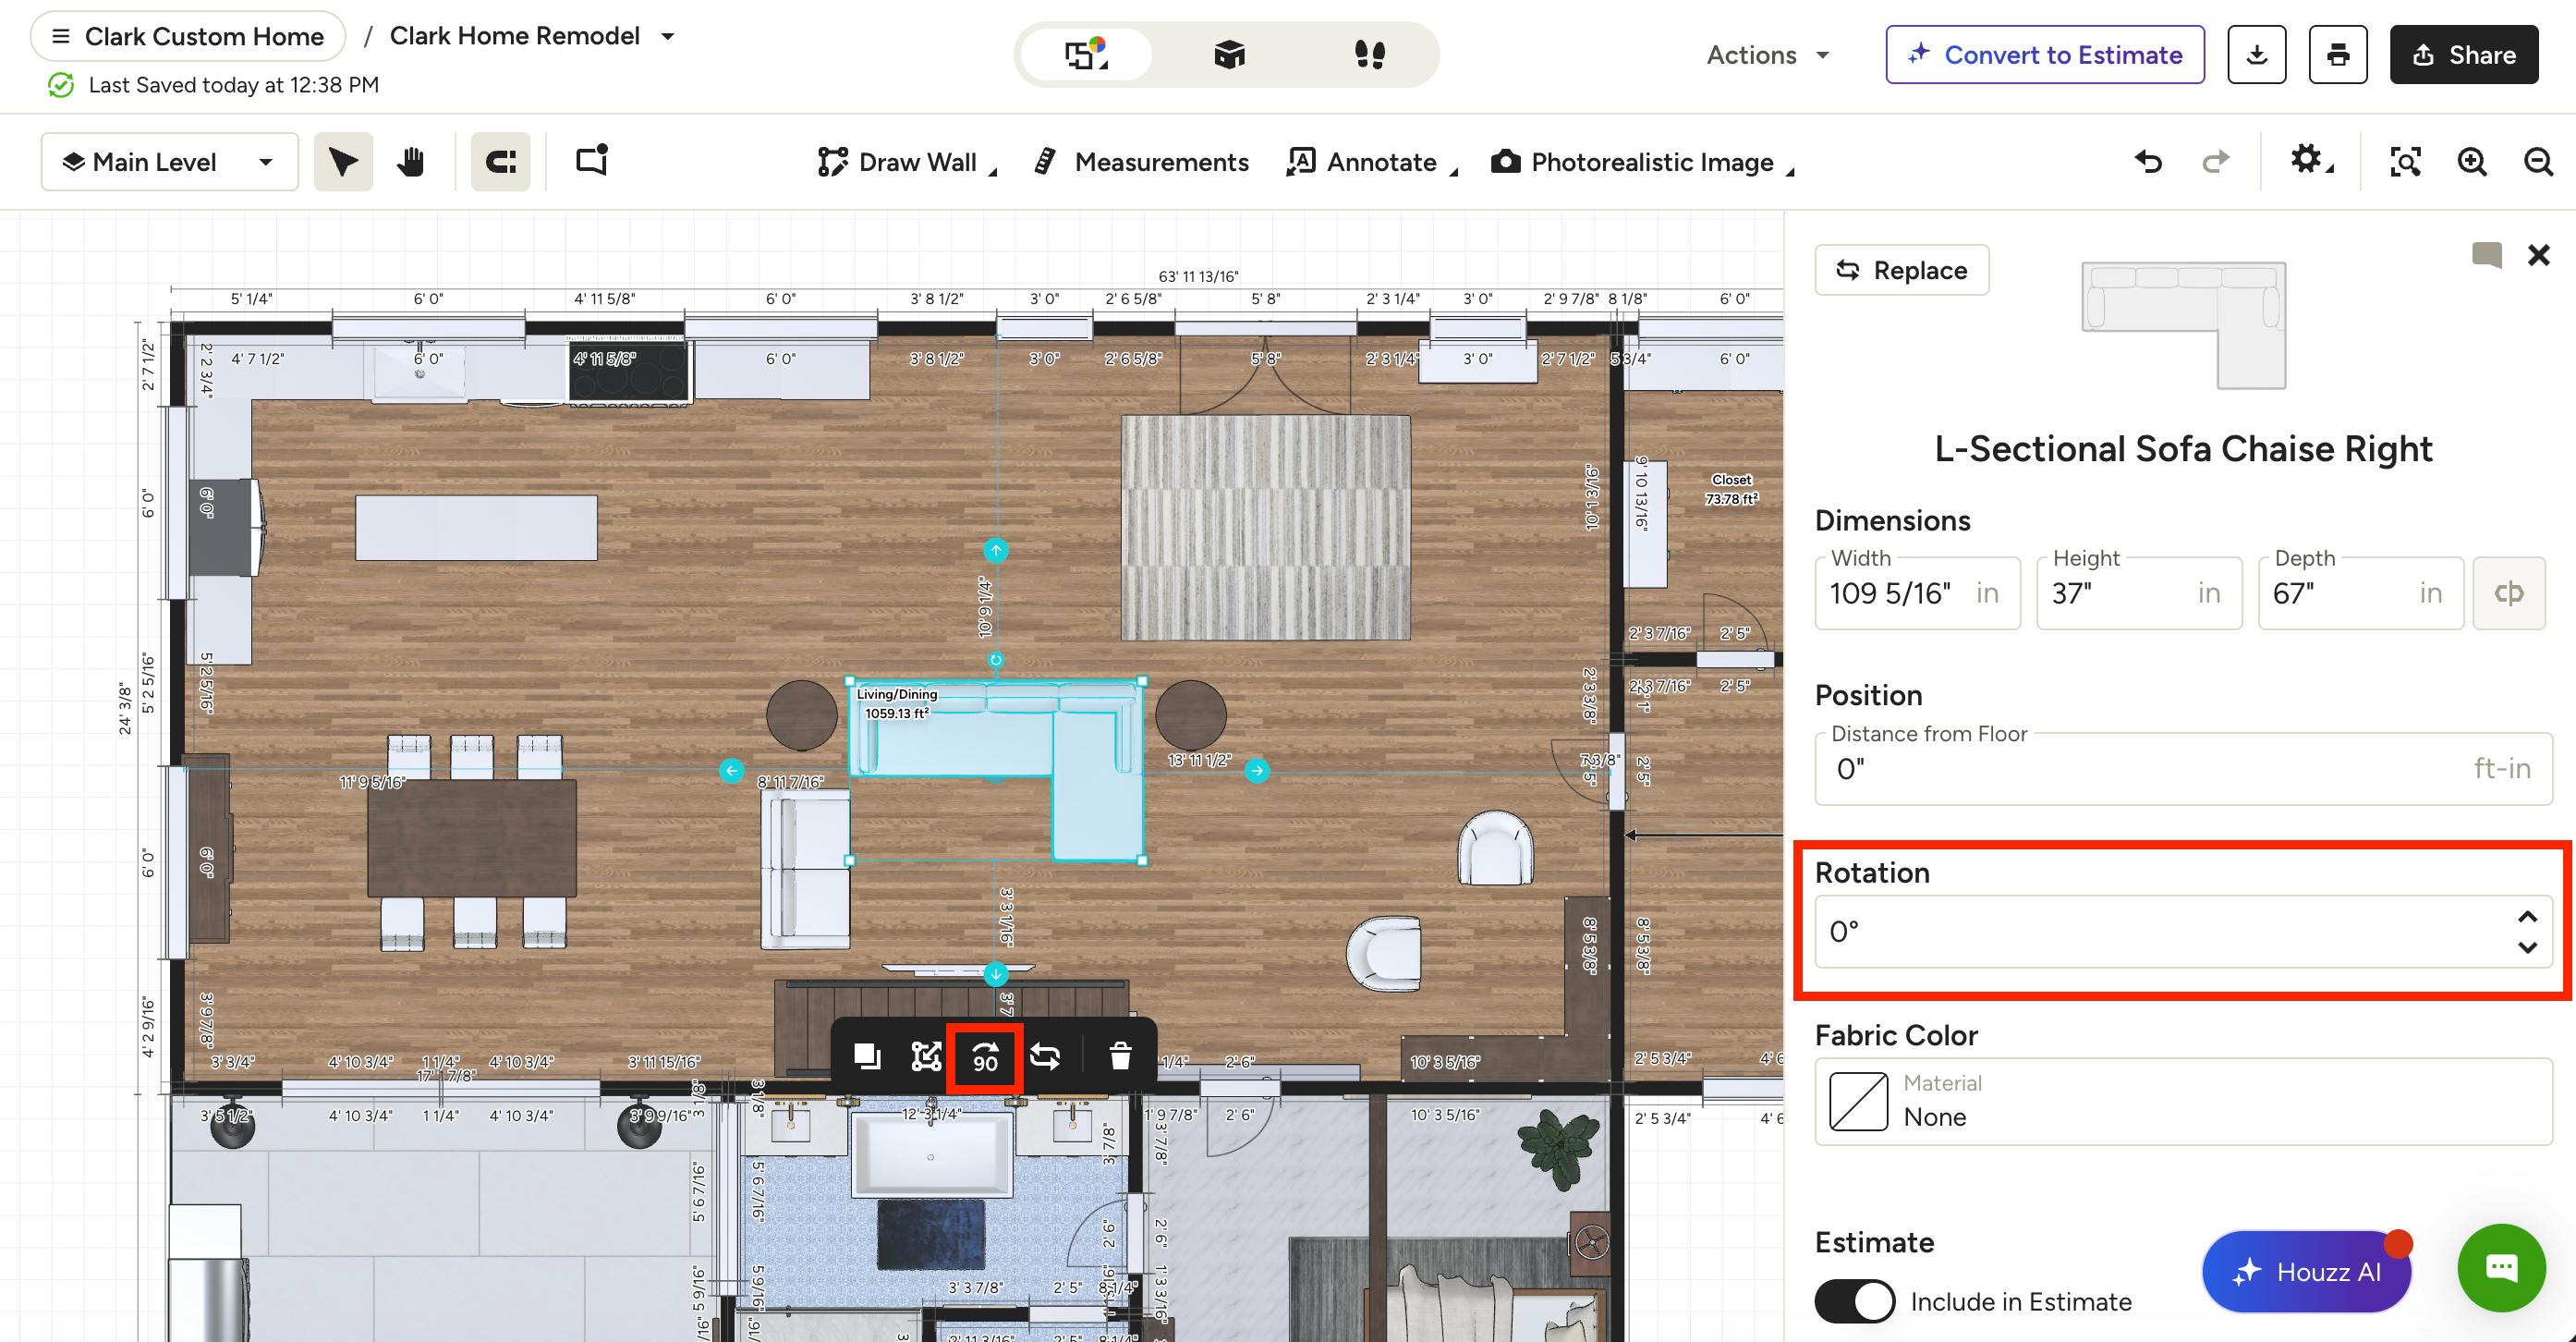
Rotates the item 90 degrees by clicking the Rotate button in the toolbar underneath the item. You can also create a custom rotation by inputting the rotation degree in the right menu.
Replace Items
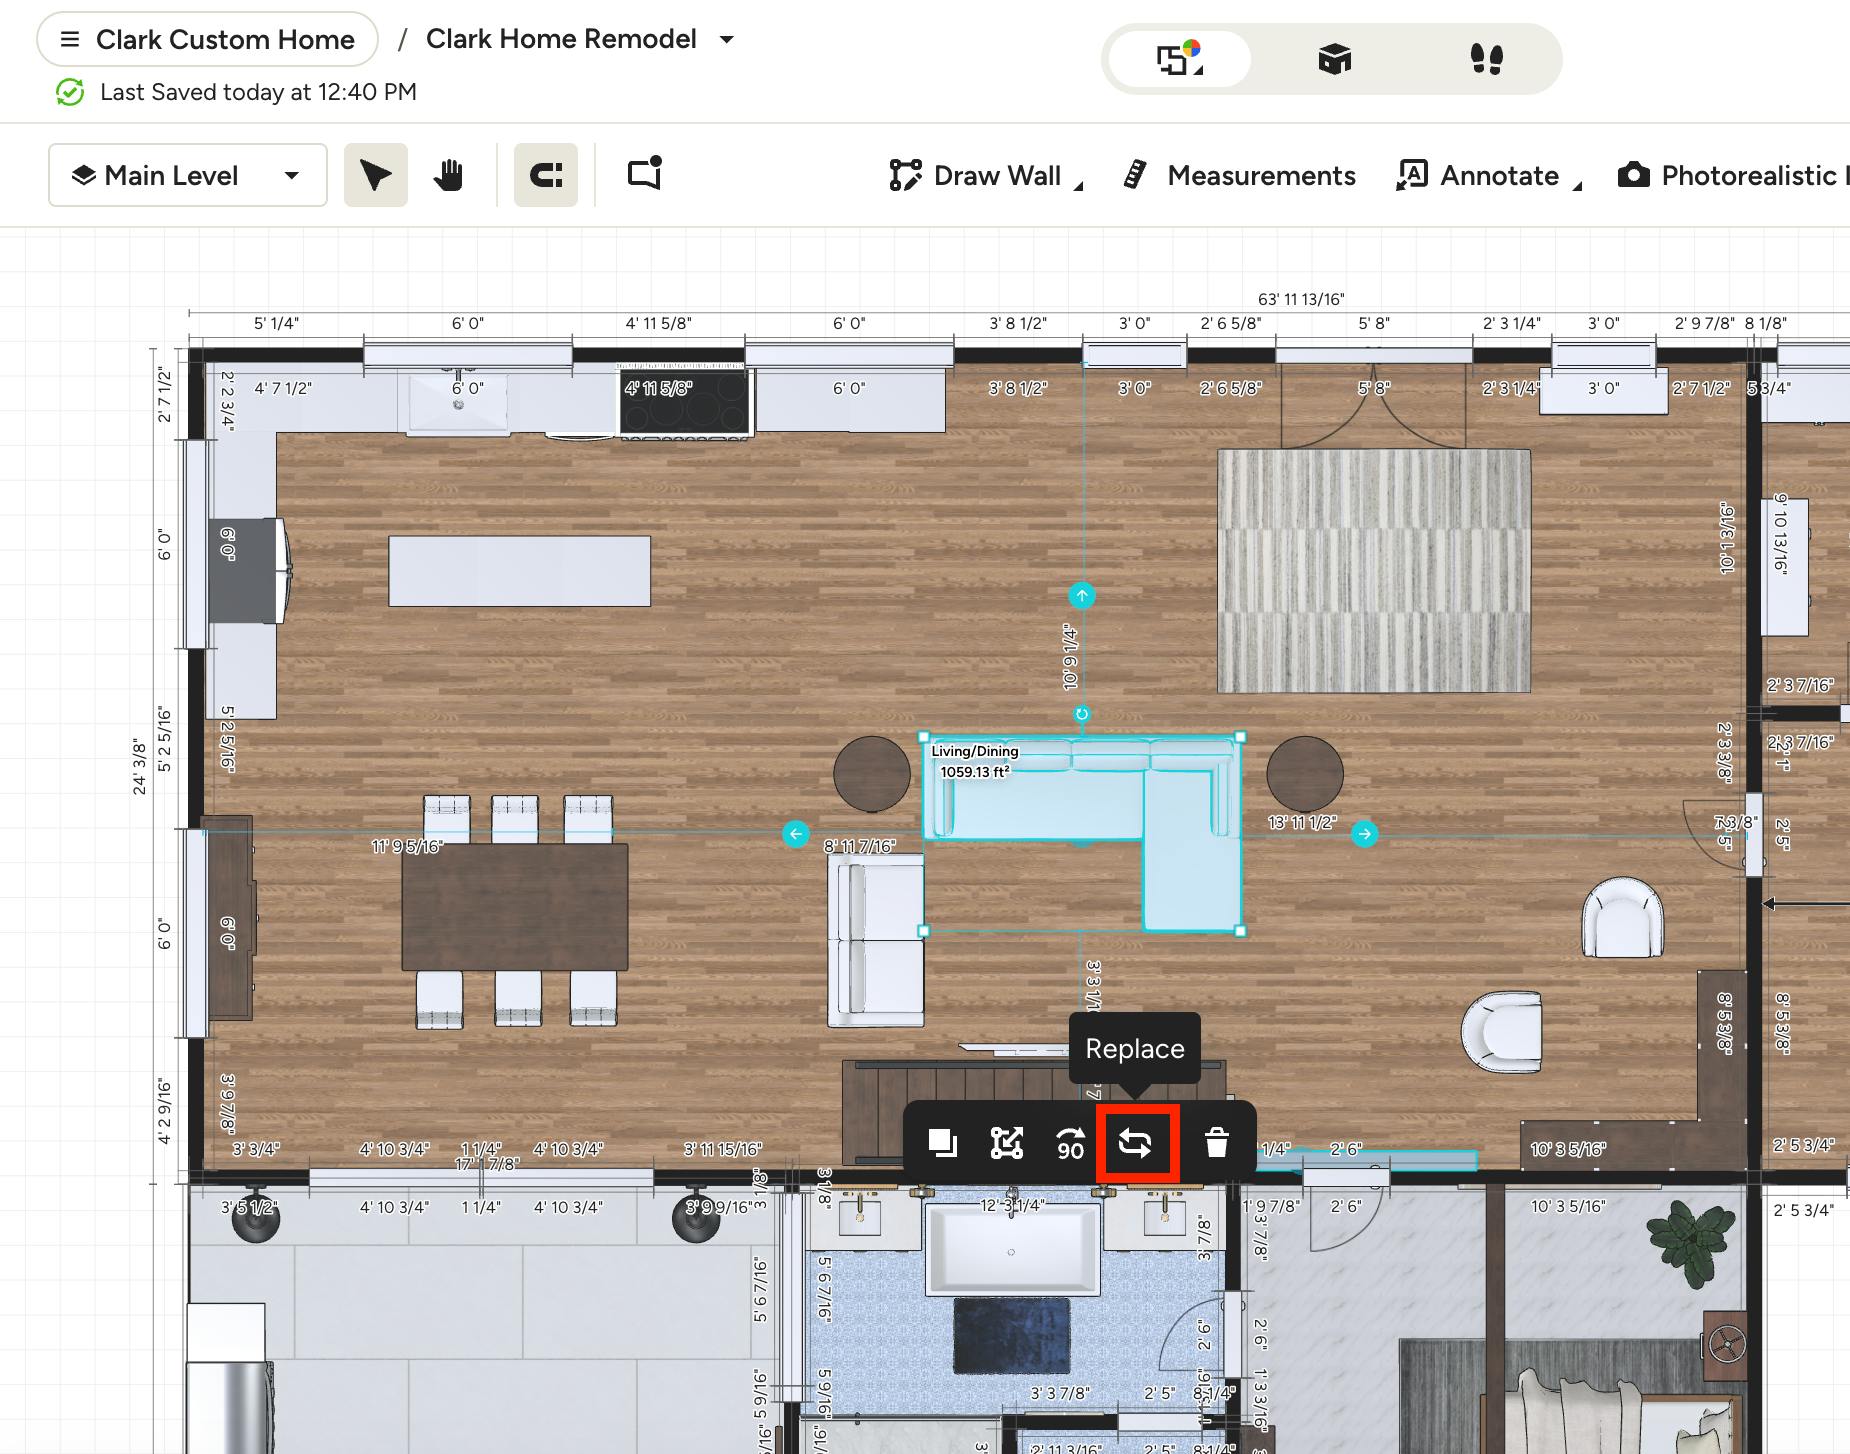
Select the Replace button in the toolbar to swap out the selected item with a different one.
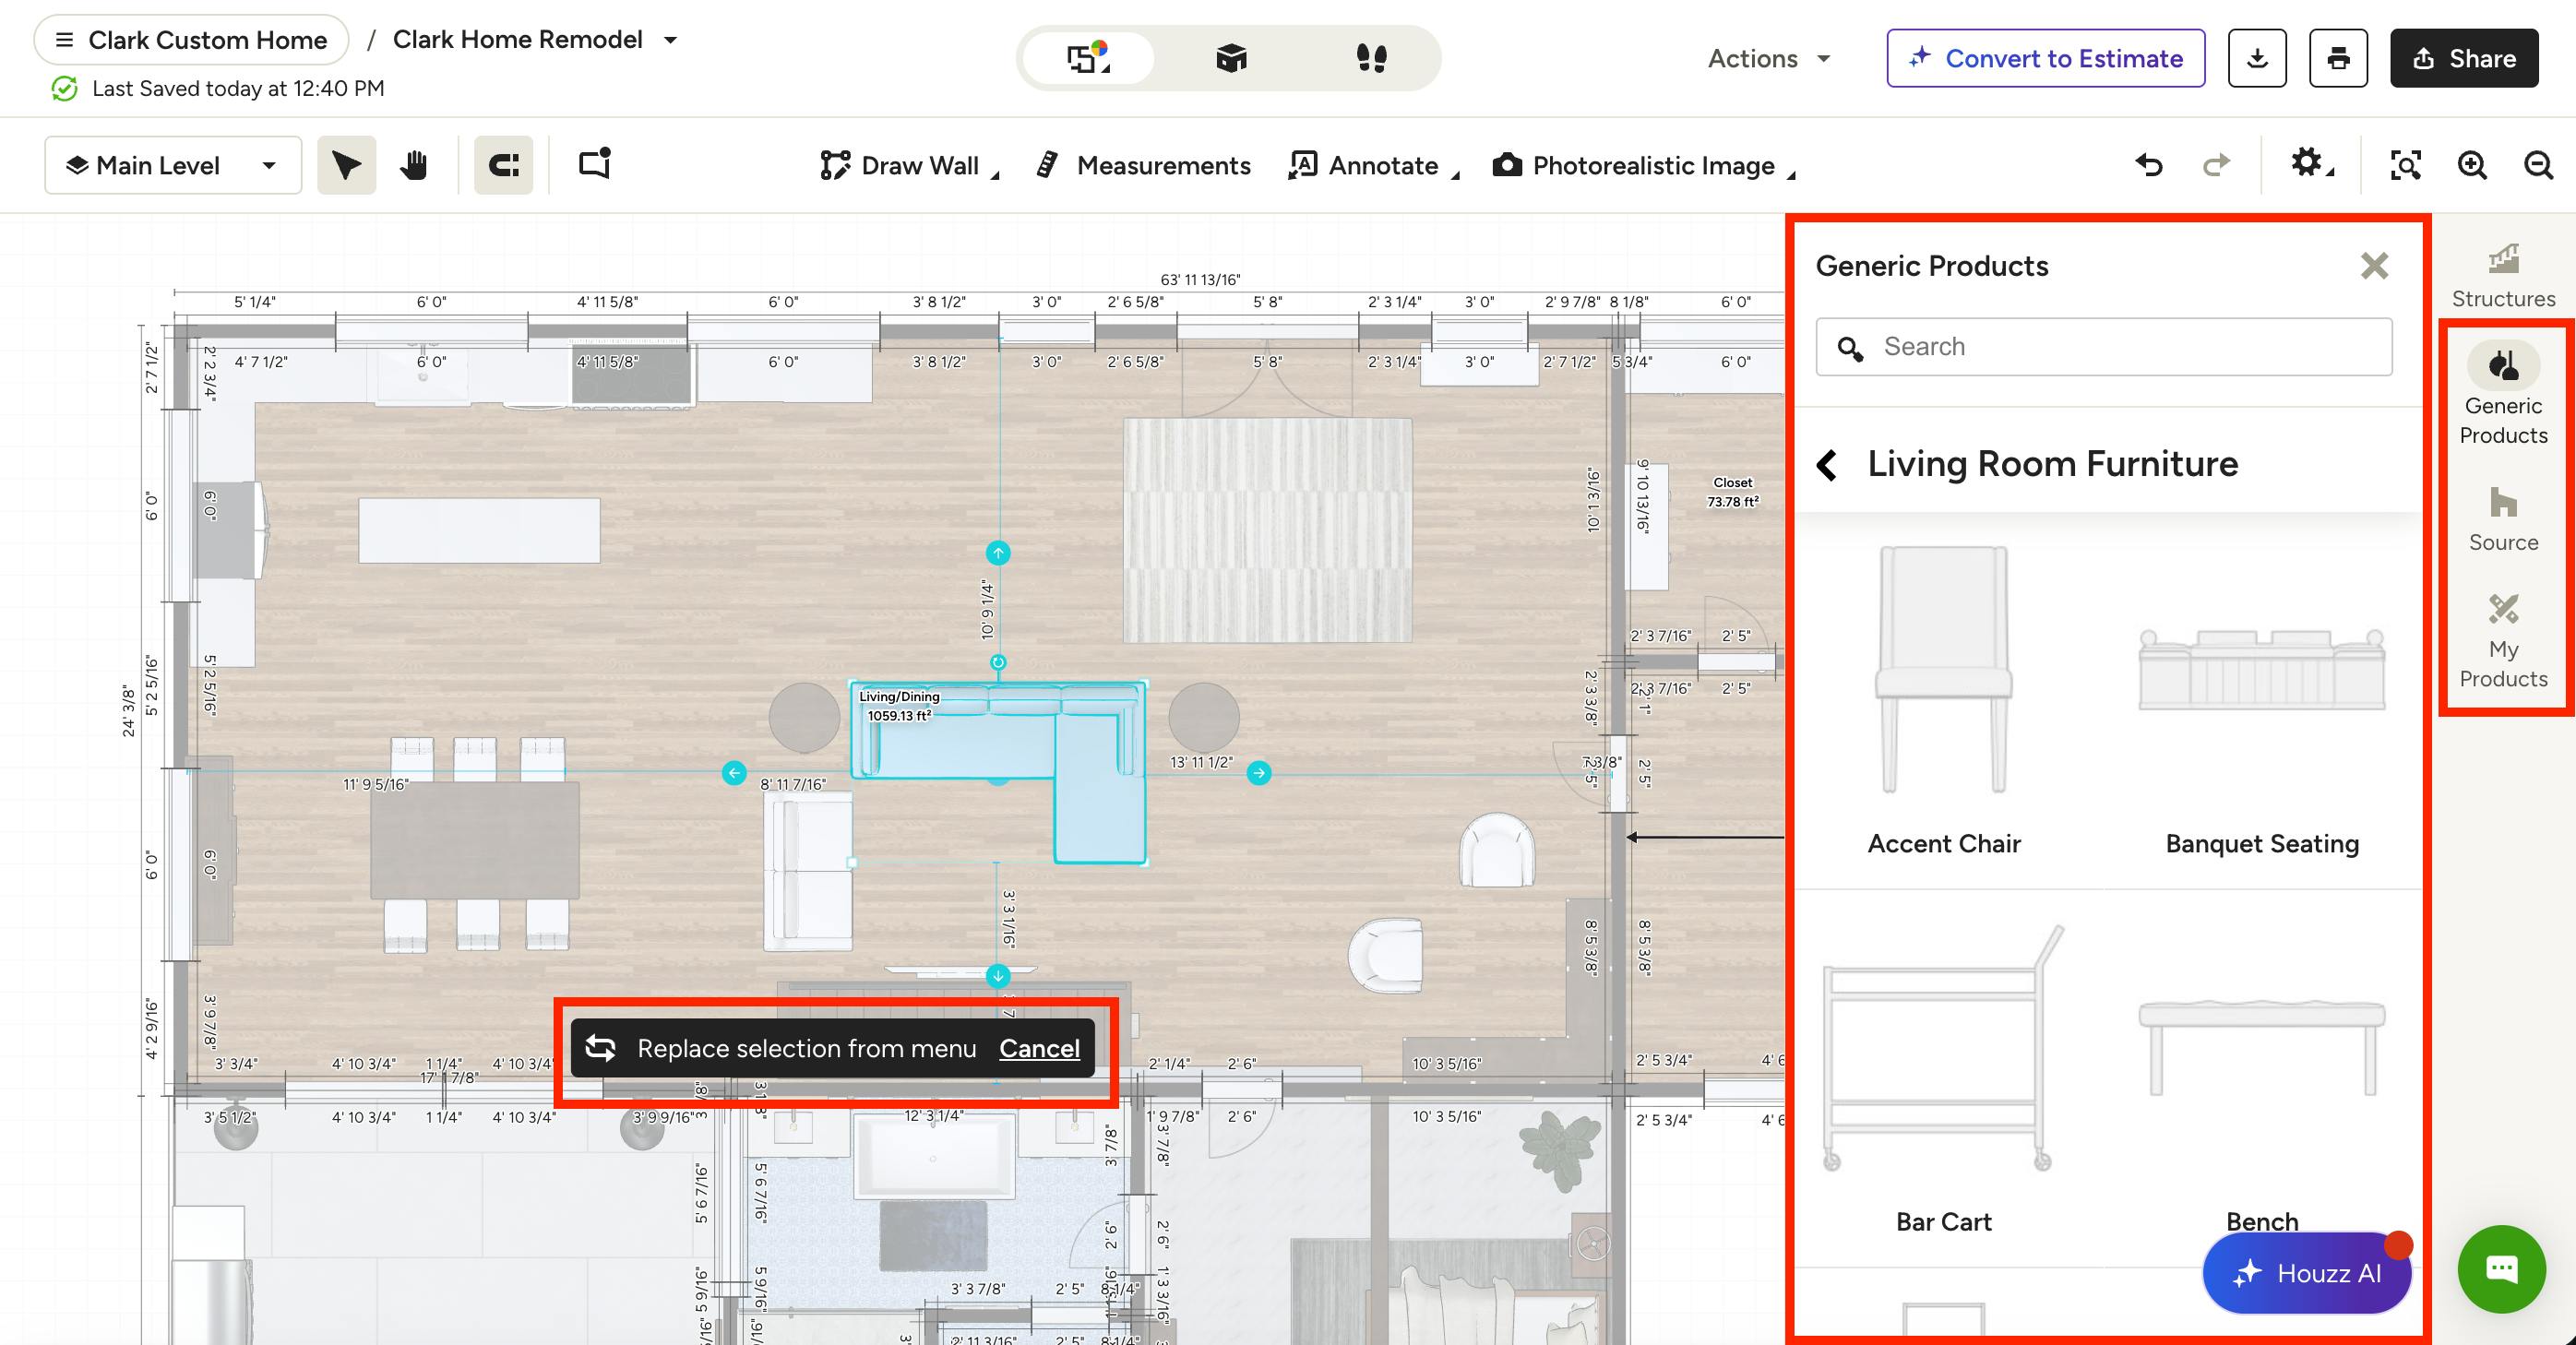
Once selected, the right menu will appear. You can then choose a replacement item from Generic Products, Source, or My Products. The item will appear on your canvas without having to manually reposition it again.
Click Cancel on your canvas to stop the replacement process.
Delete Item
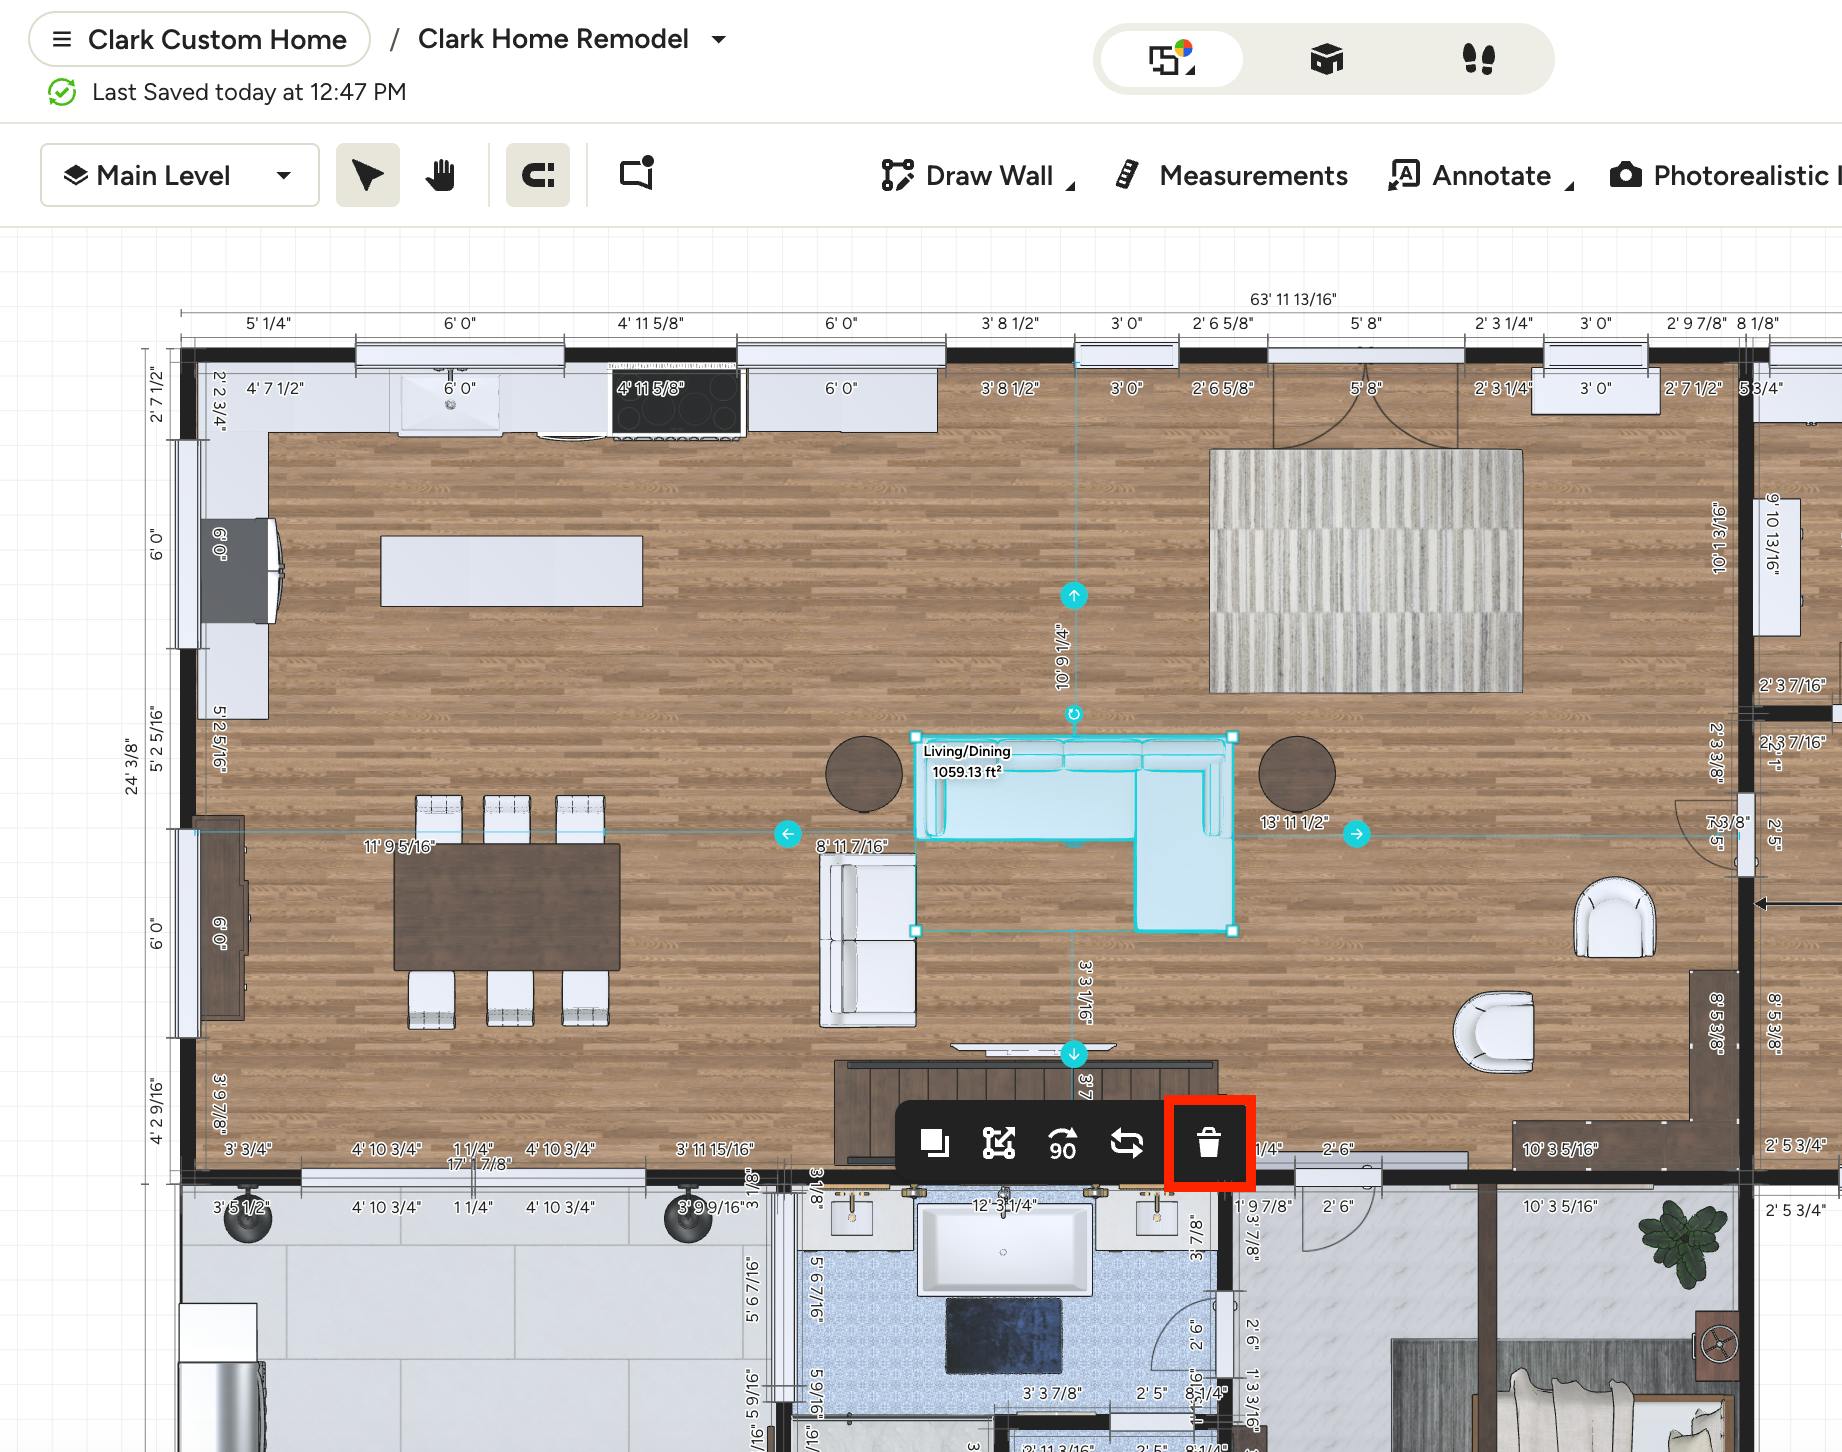
Select the Delete button in the toolbar to remove the selected item from your canvas.
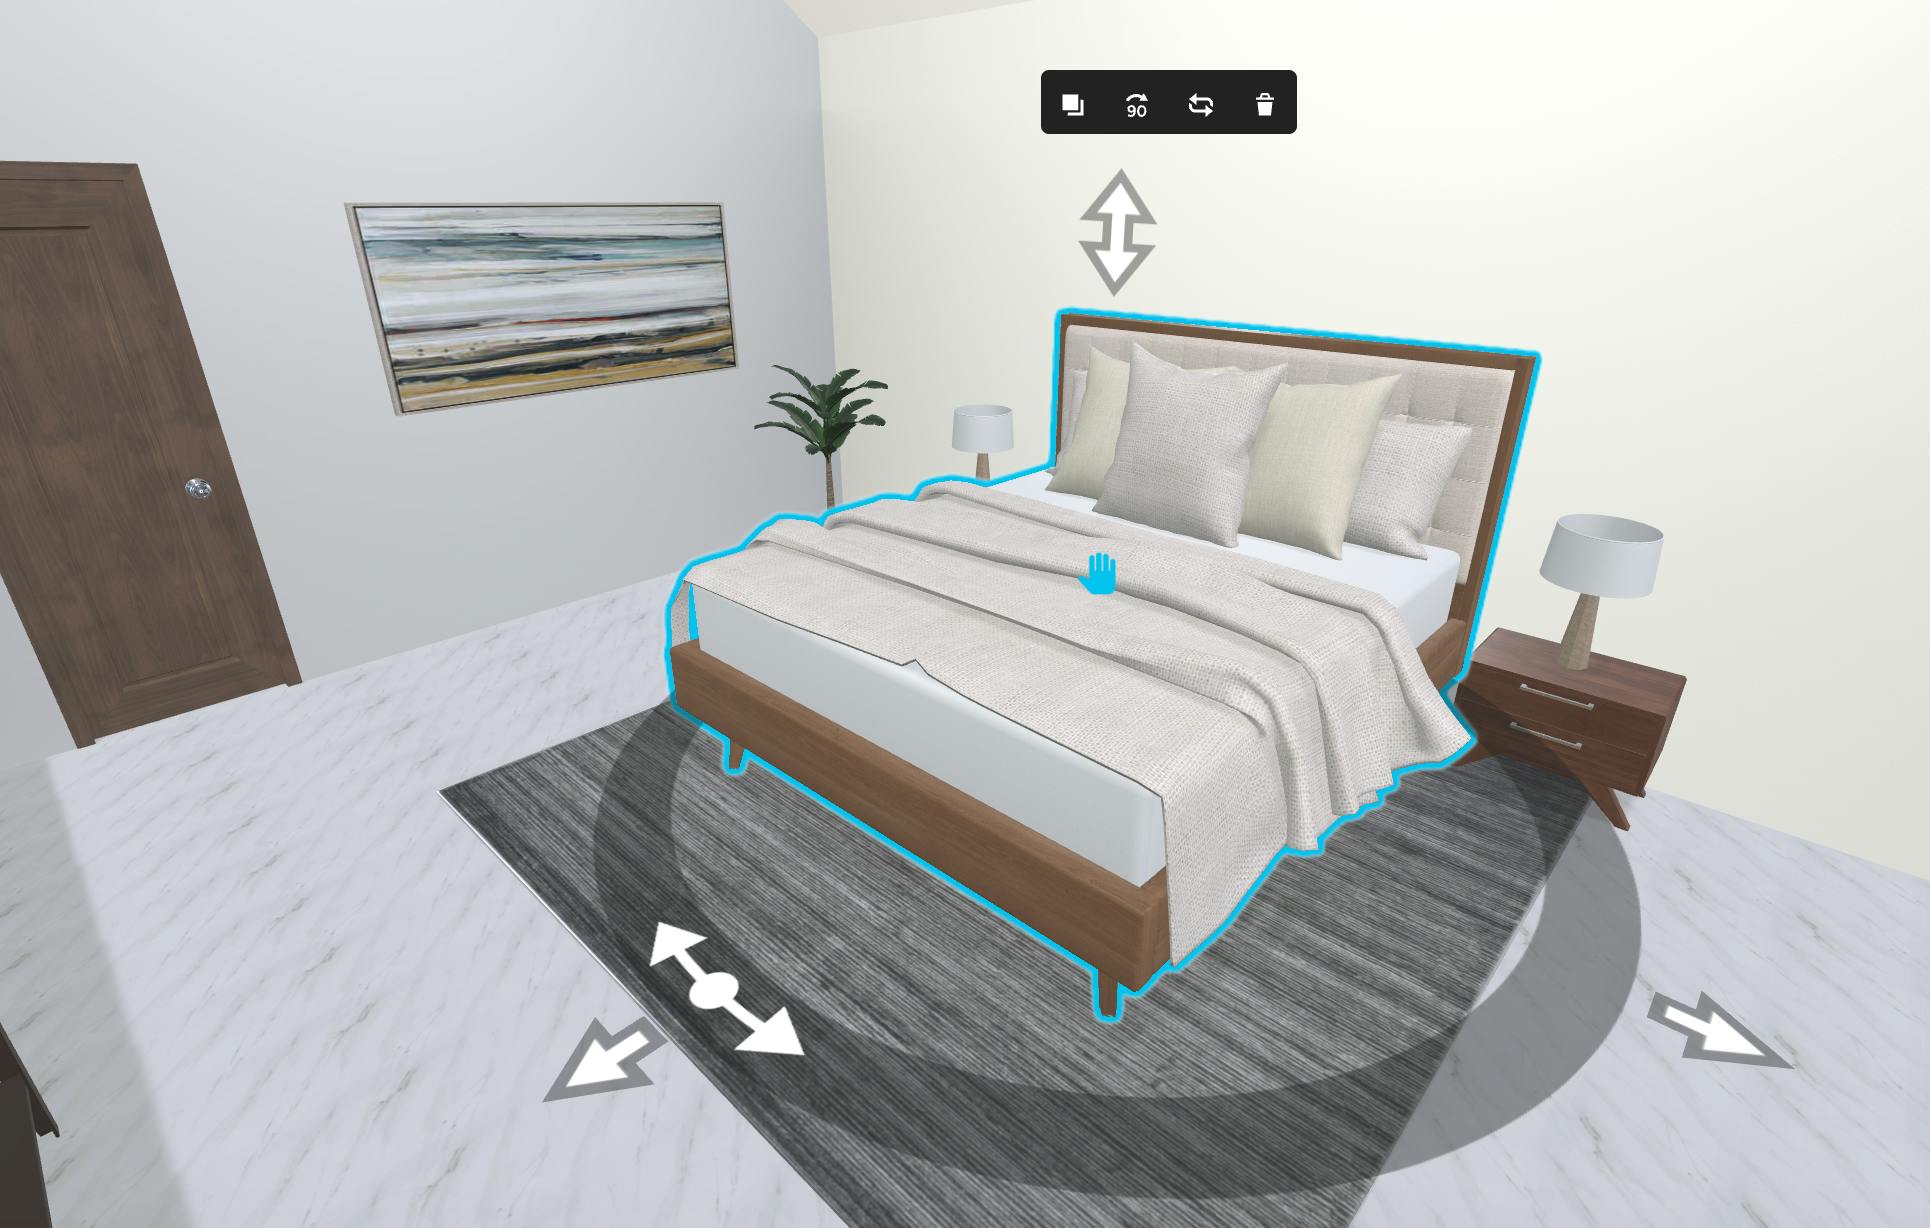
Dollhouse Mode
To move items in dollhouse mode, select the item until the hand icon appears over the item. To move an item left or right, click and drag the item and move it in the desired direction. This works for windows and doors as well.
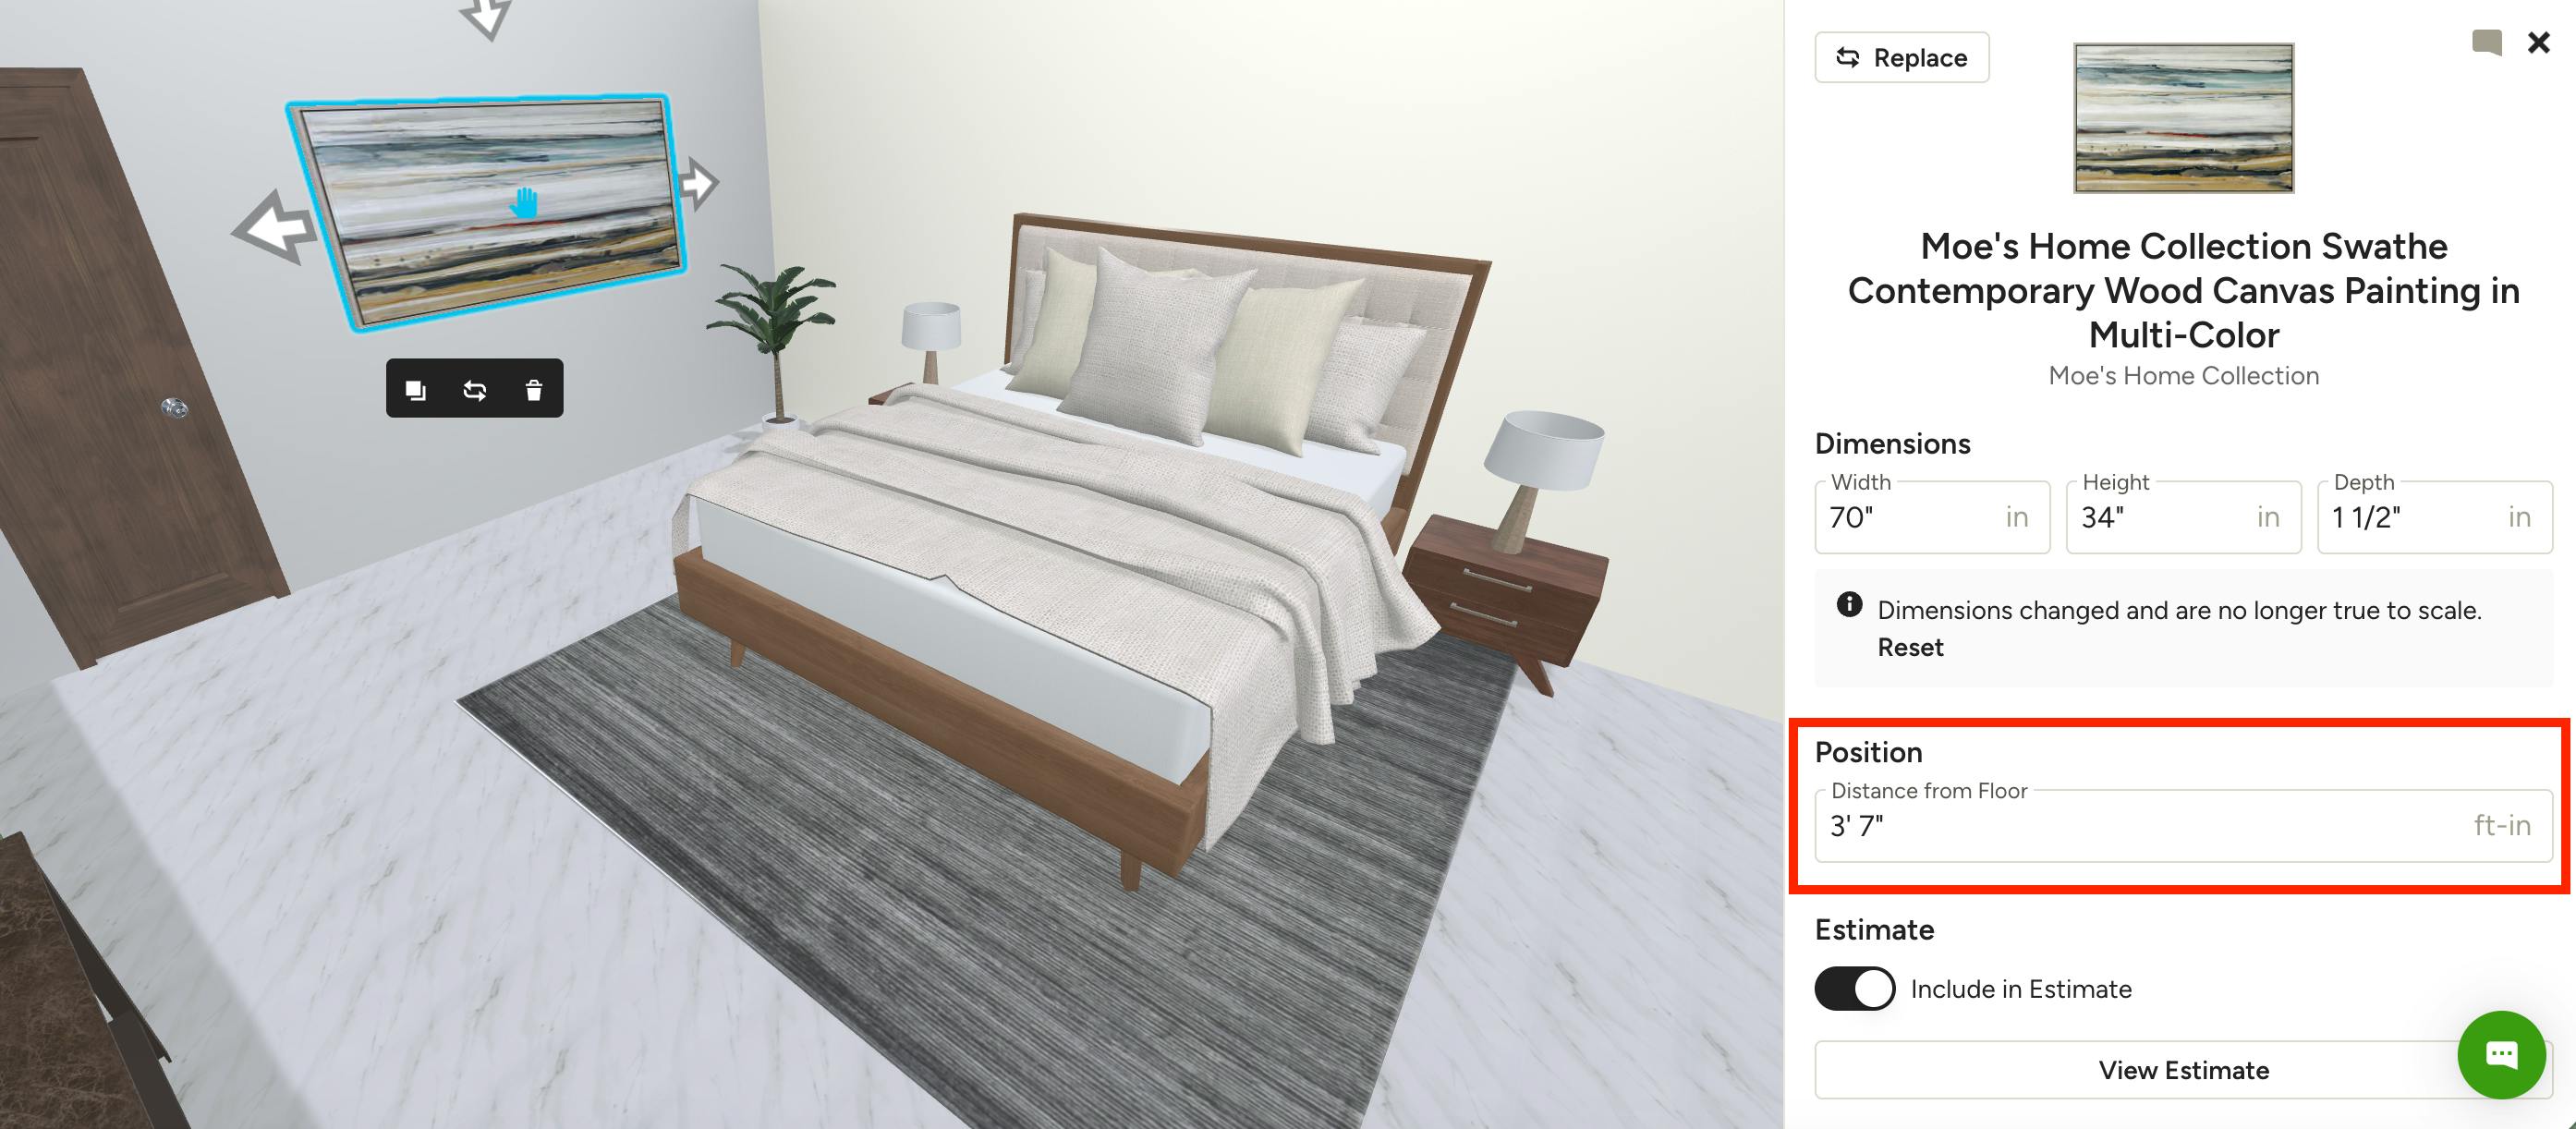
To move items up and down — for example, artwork placed on a wall — select the item and adjust the Distance from Floor measurement in the right menu. Click Return on your keyboard to make the visual adjustment in dollhouse mode.
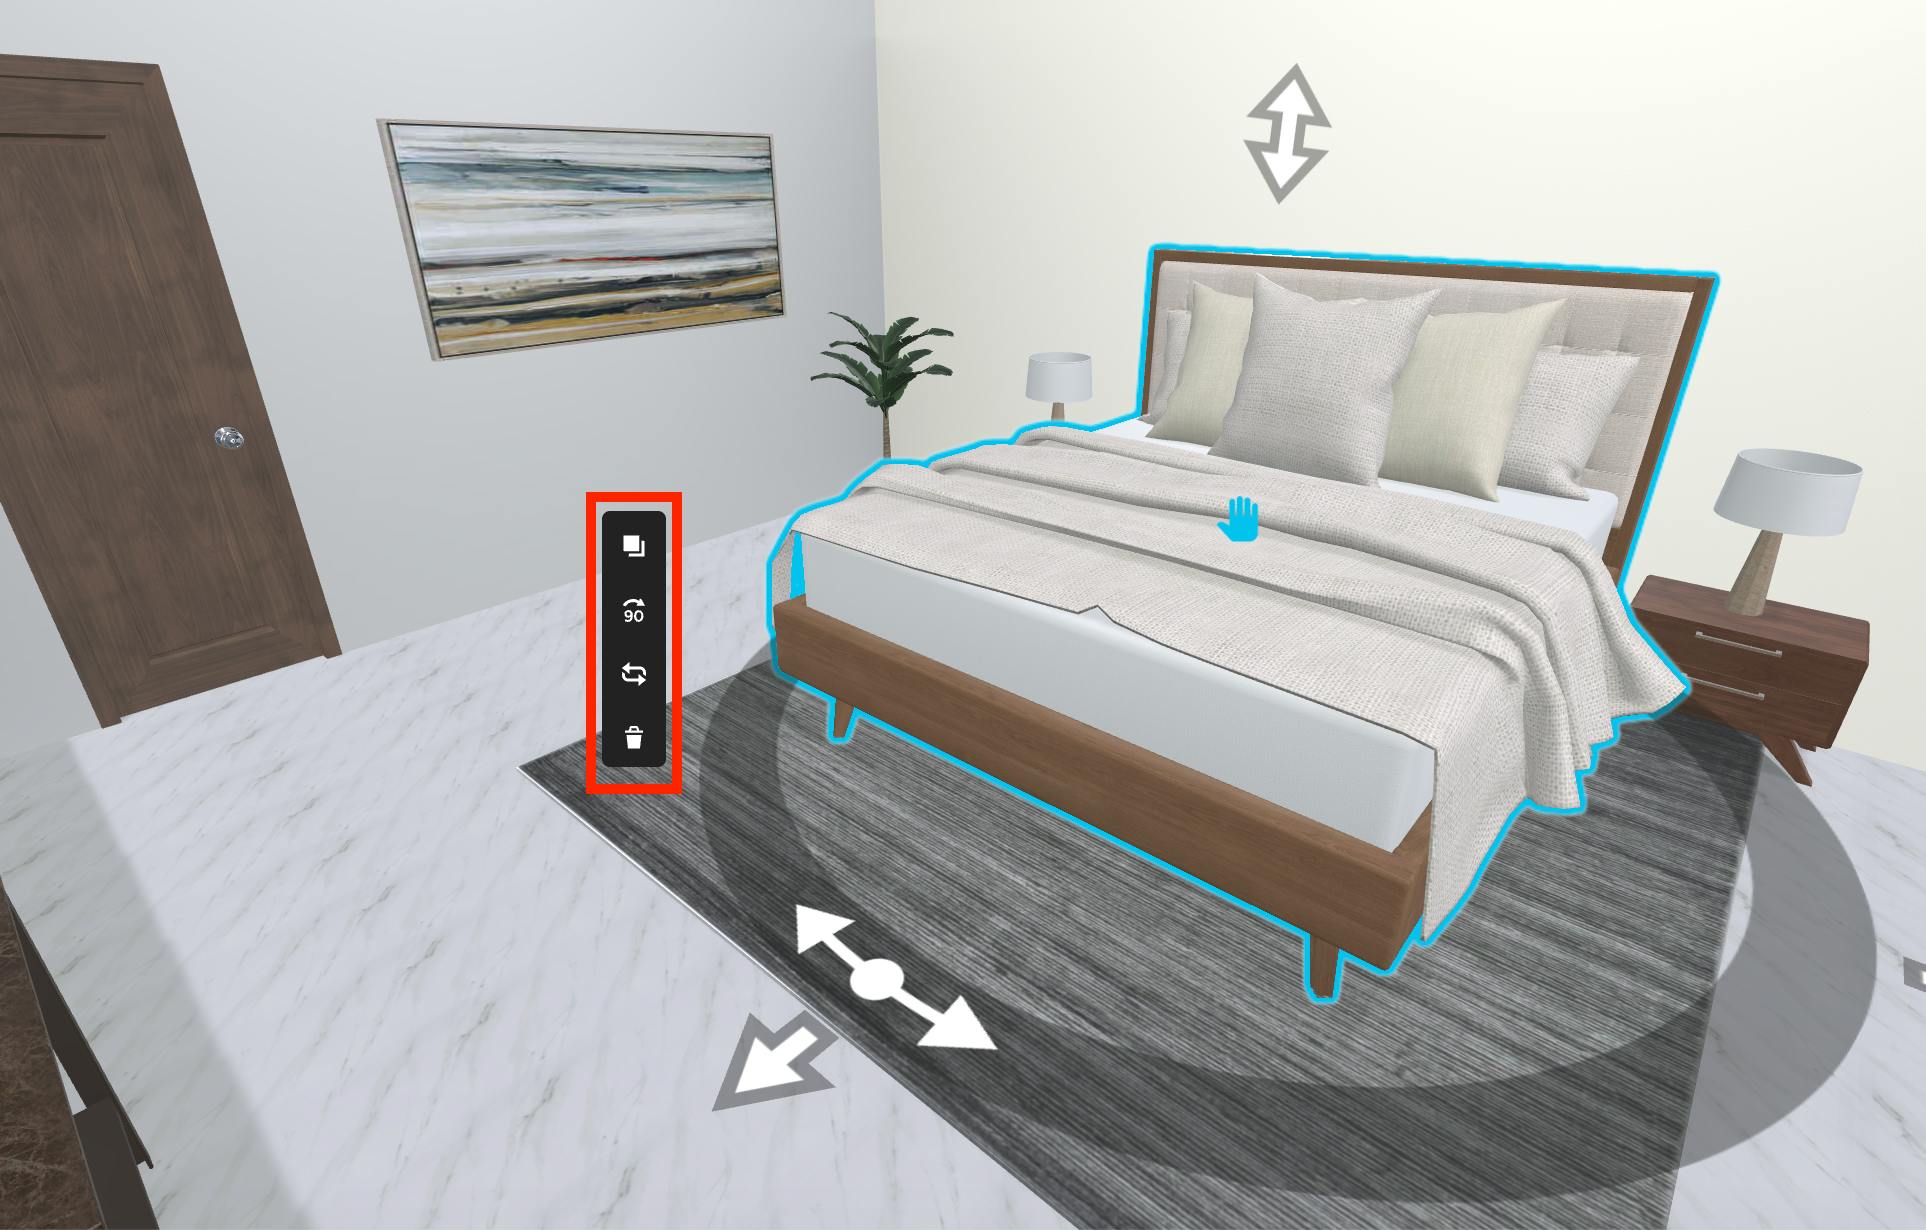
Adjust Items
Similar to floor plan mode, you can easily make changes in dollhouse mode using the buttons on the canvas. These include:
- Duplicate: Creates a copy of the selected item.
- Rotate: Rotates the item 90 degrees with a single click. You can also create a custom rotation (more details below).
- Replace: Replaces the selected item with a different one. This allows you to swap out any object without having to manually reposition it again.
- Delete: Removes the selected item.
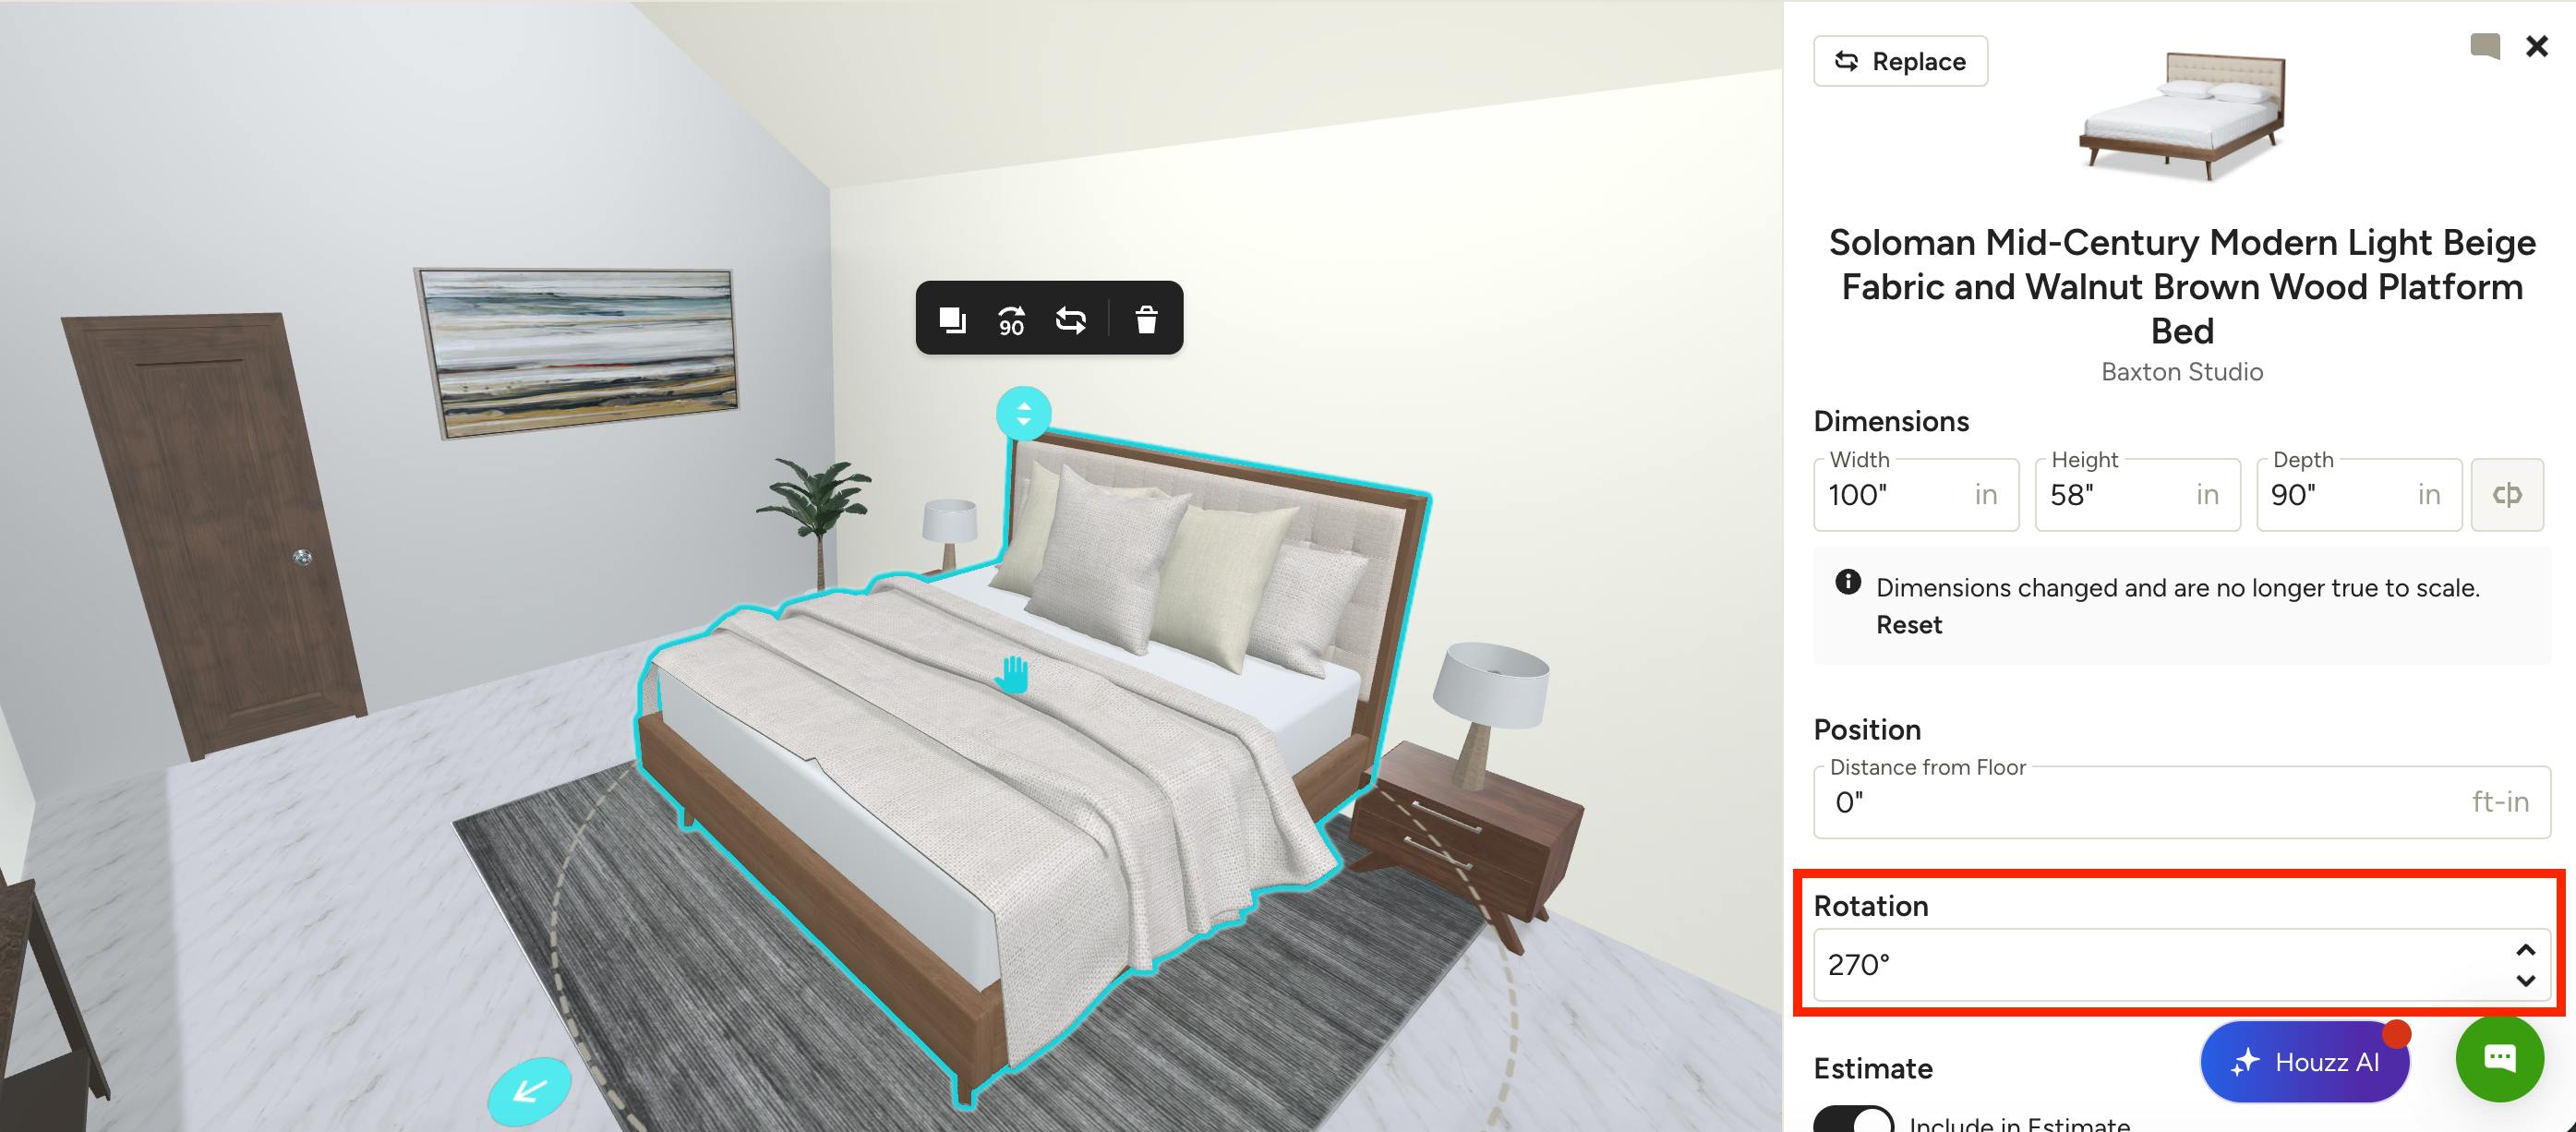
To create a custom rotation of an item in dollhouse mode, select the item until the hand icon appears over the item. Use the rotate ring to click and drag to adjust the item freely or snap in 45-degree increments.