How to Add Ceilings to Your 3D Floor Plan
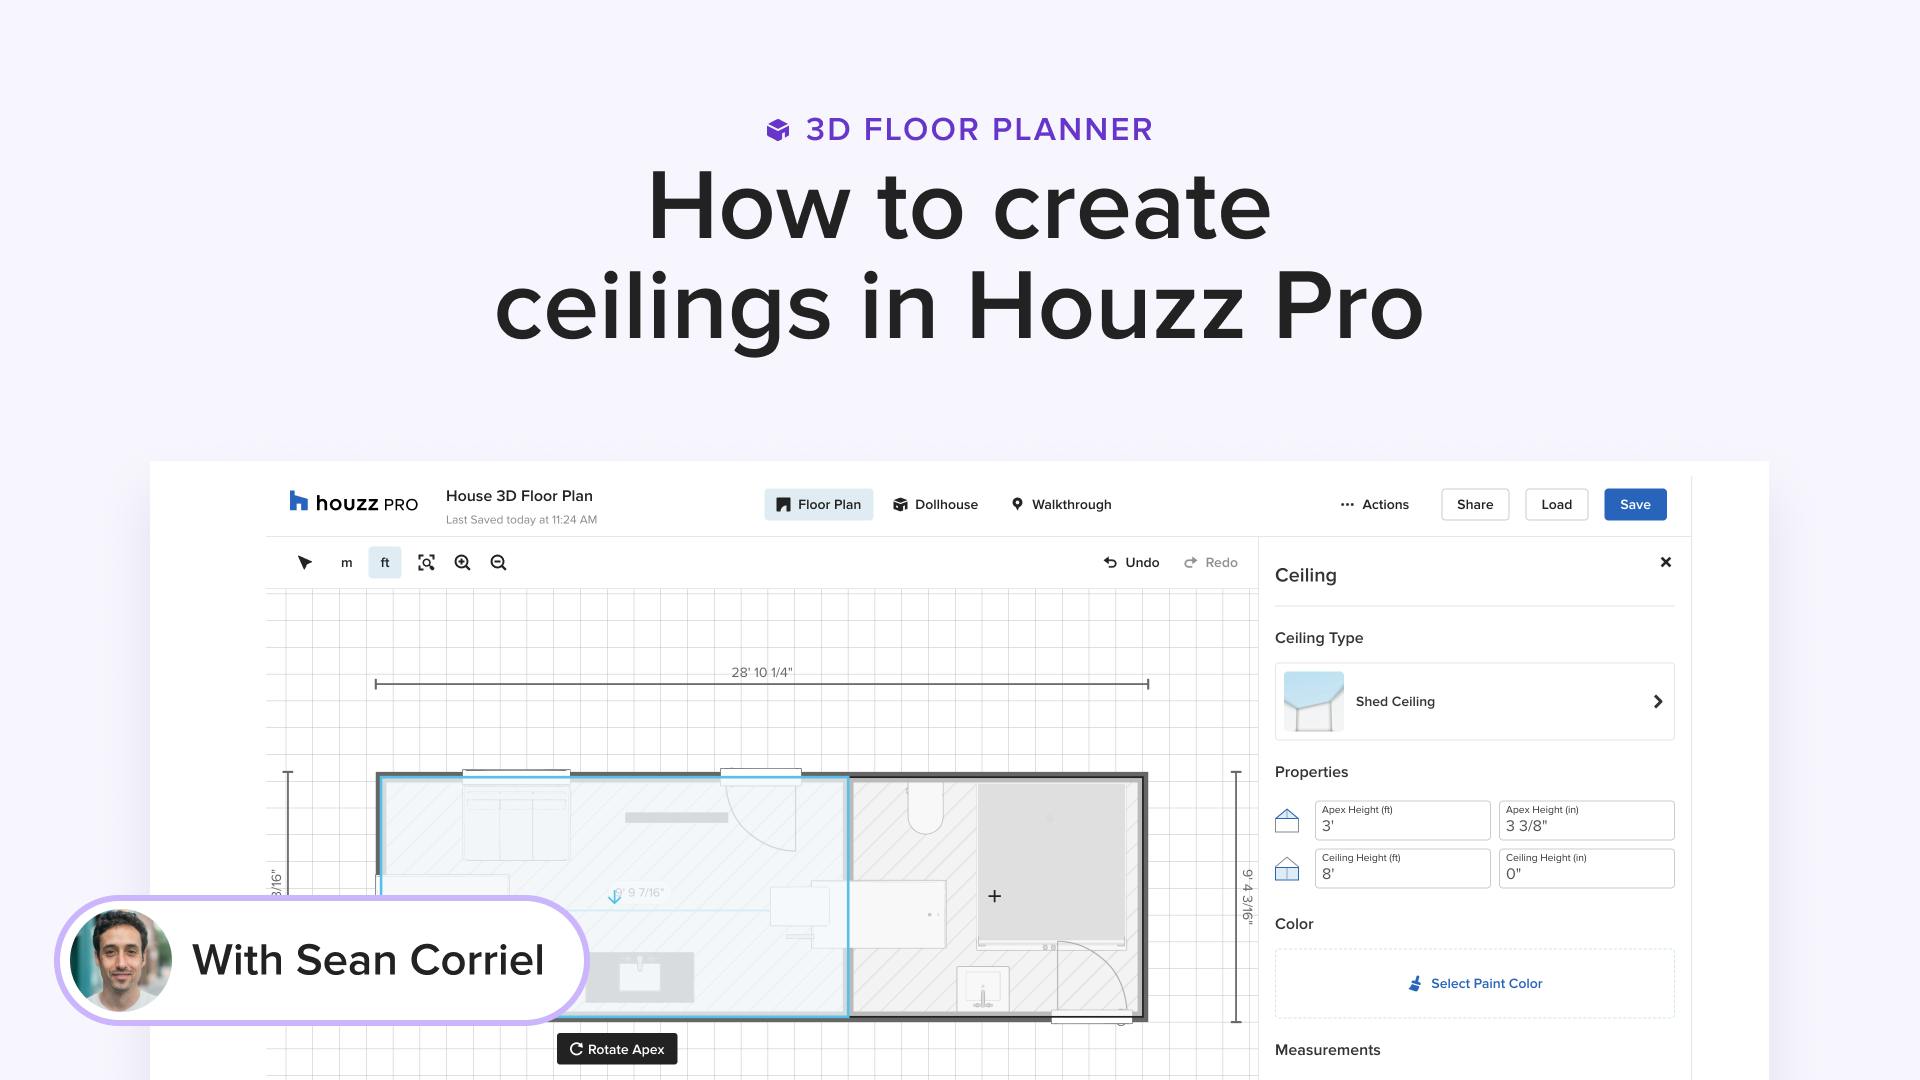
With the Houzz Pro 3D Floor Planner, you can design ceilings that match your project's real architecture. Choose from flat, shed, and cathedral styles, fine-tune the exact height and peak placement, apply custom finishes and materials, and add ceiling beams for extra detail. It's an easy way to give clients a more accurate, complete picture of the finished space.
Let's go over each option.
Create Ceilings
To add a ceiling to your design, open up your relevant 3D floor plan. Before you begin, make sure the walls are fully connected — red squares indicate unconnected wall endpoints. If walls are not fully connected, the space will not be recognized as a room, and you will not be able to add a ceiling.
There are two ways to access your ceiling options.
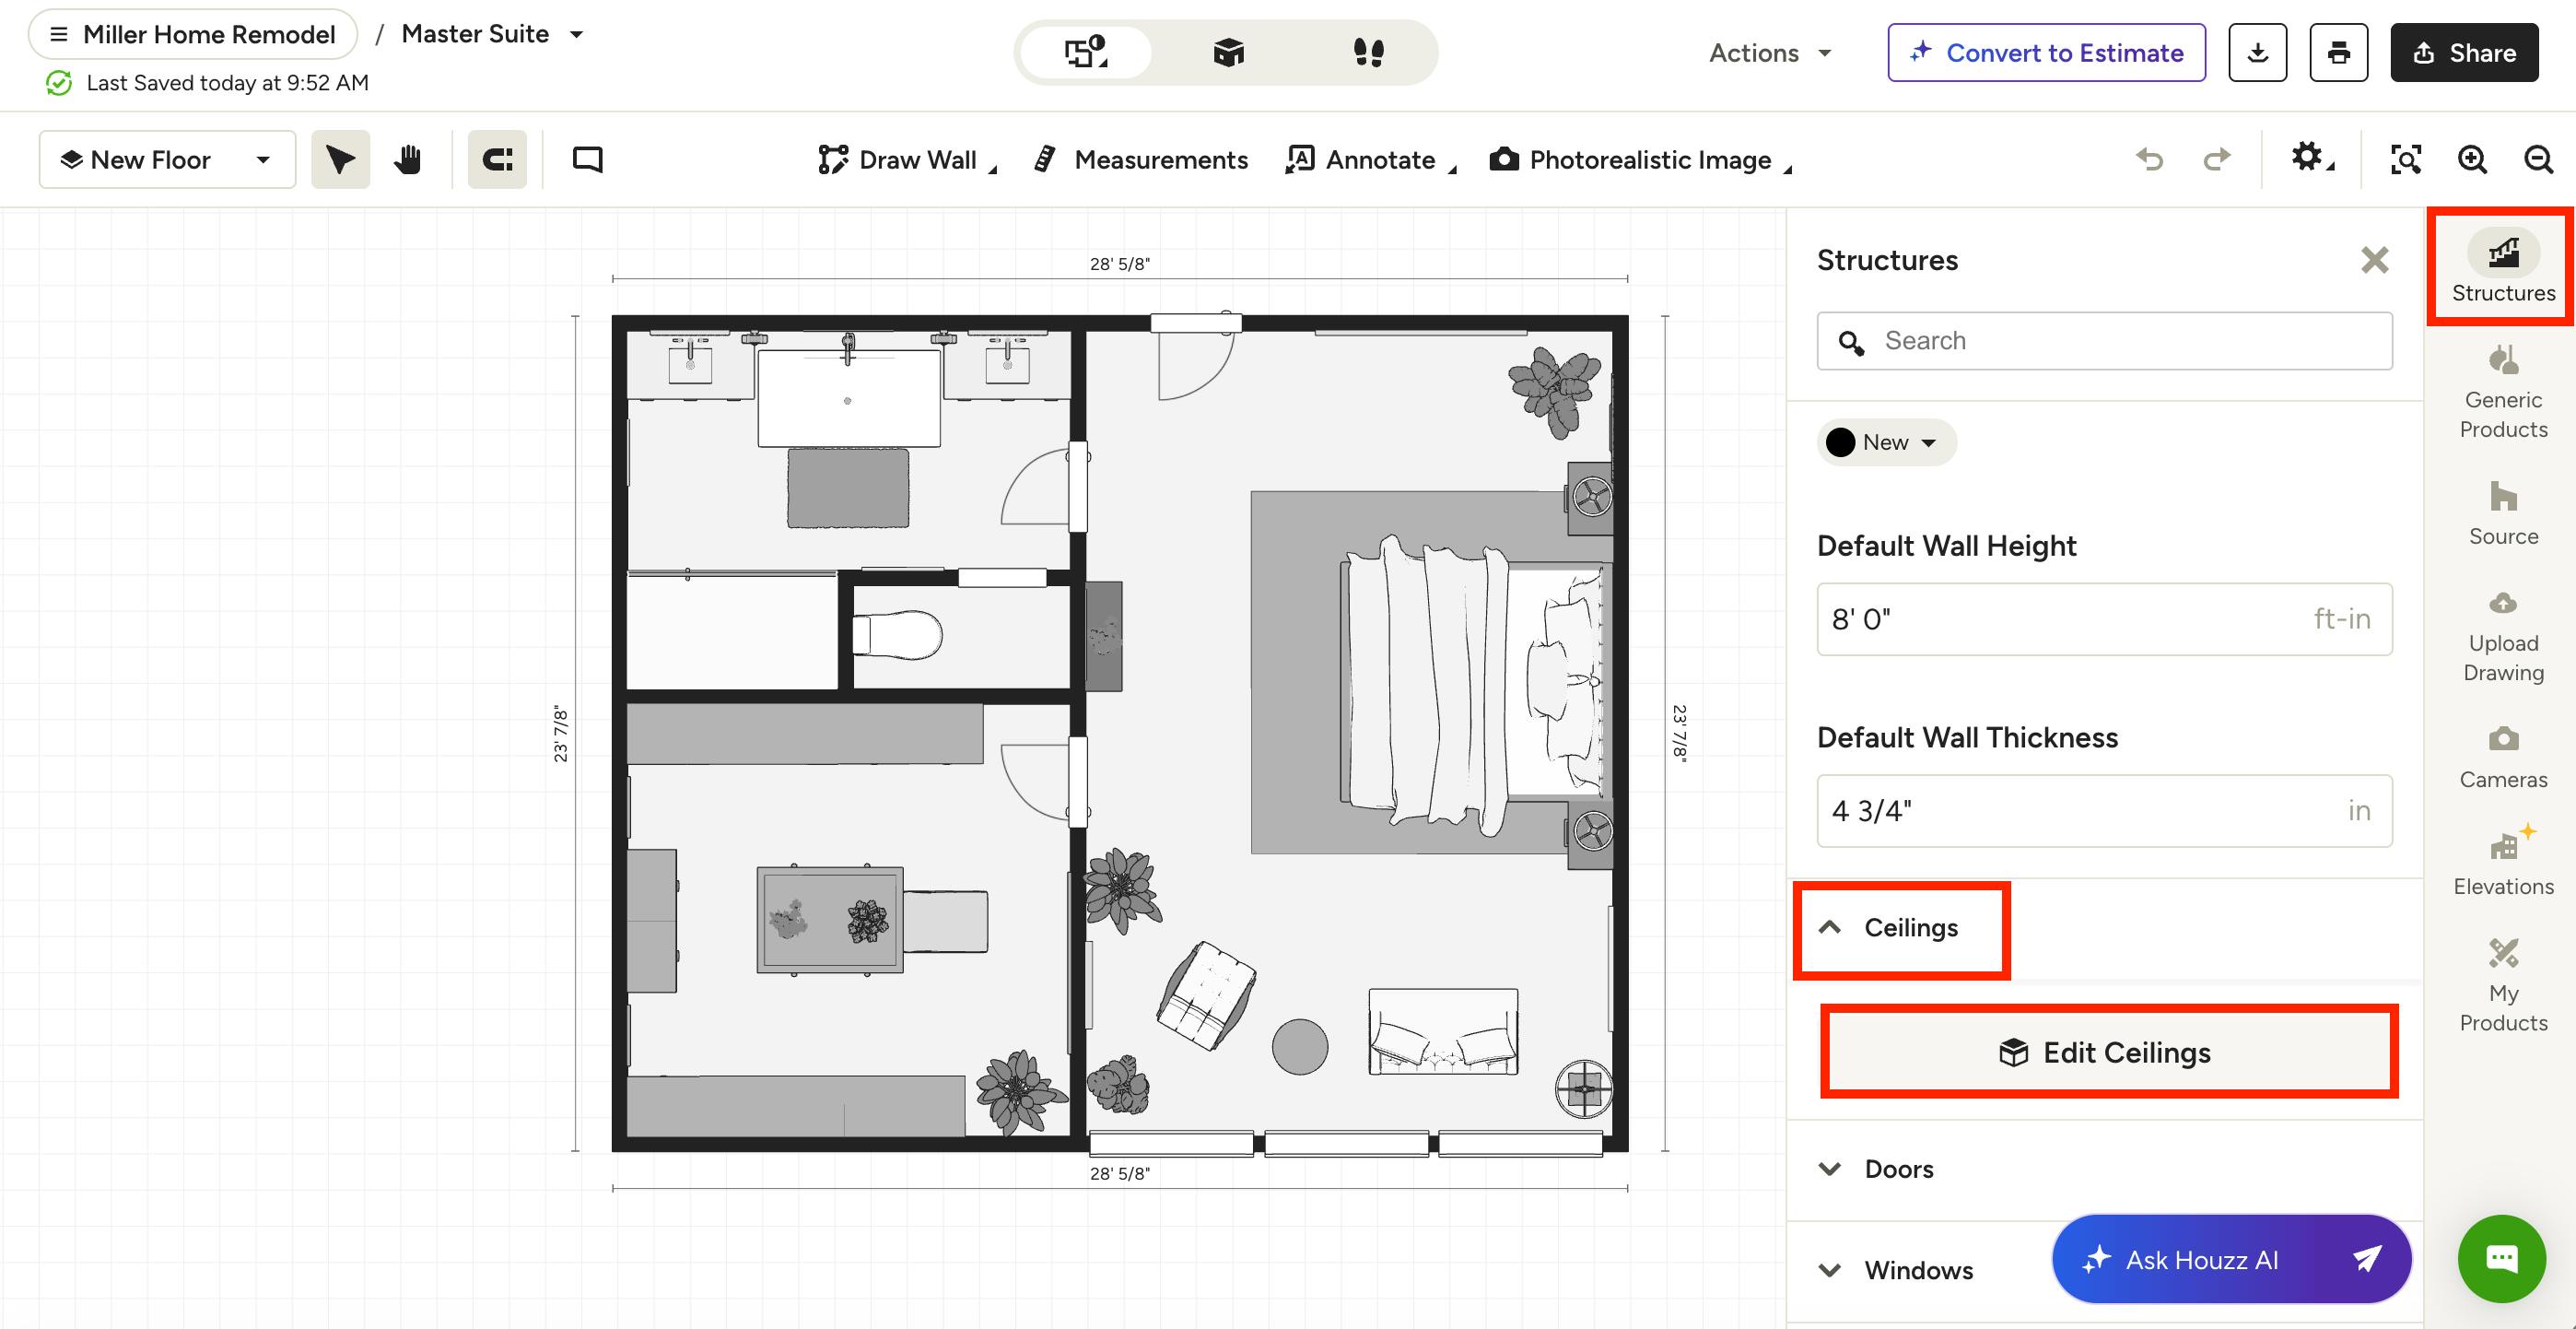
Click Structures in the right panel, select the Ceilings category, then click Edit Ceilings (as shown below). You will then need to select the room to edit.
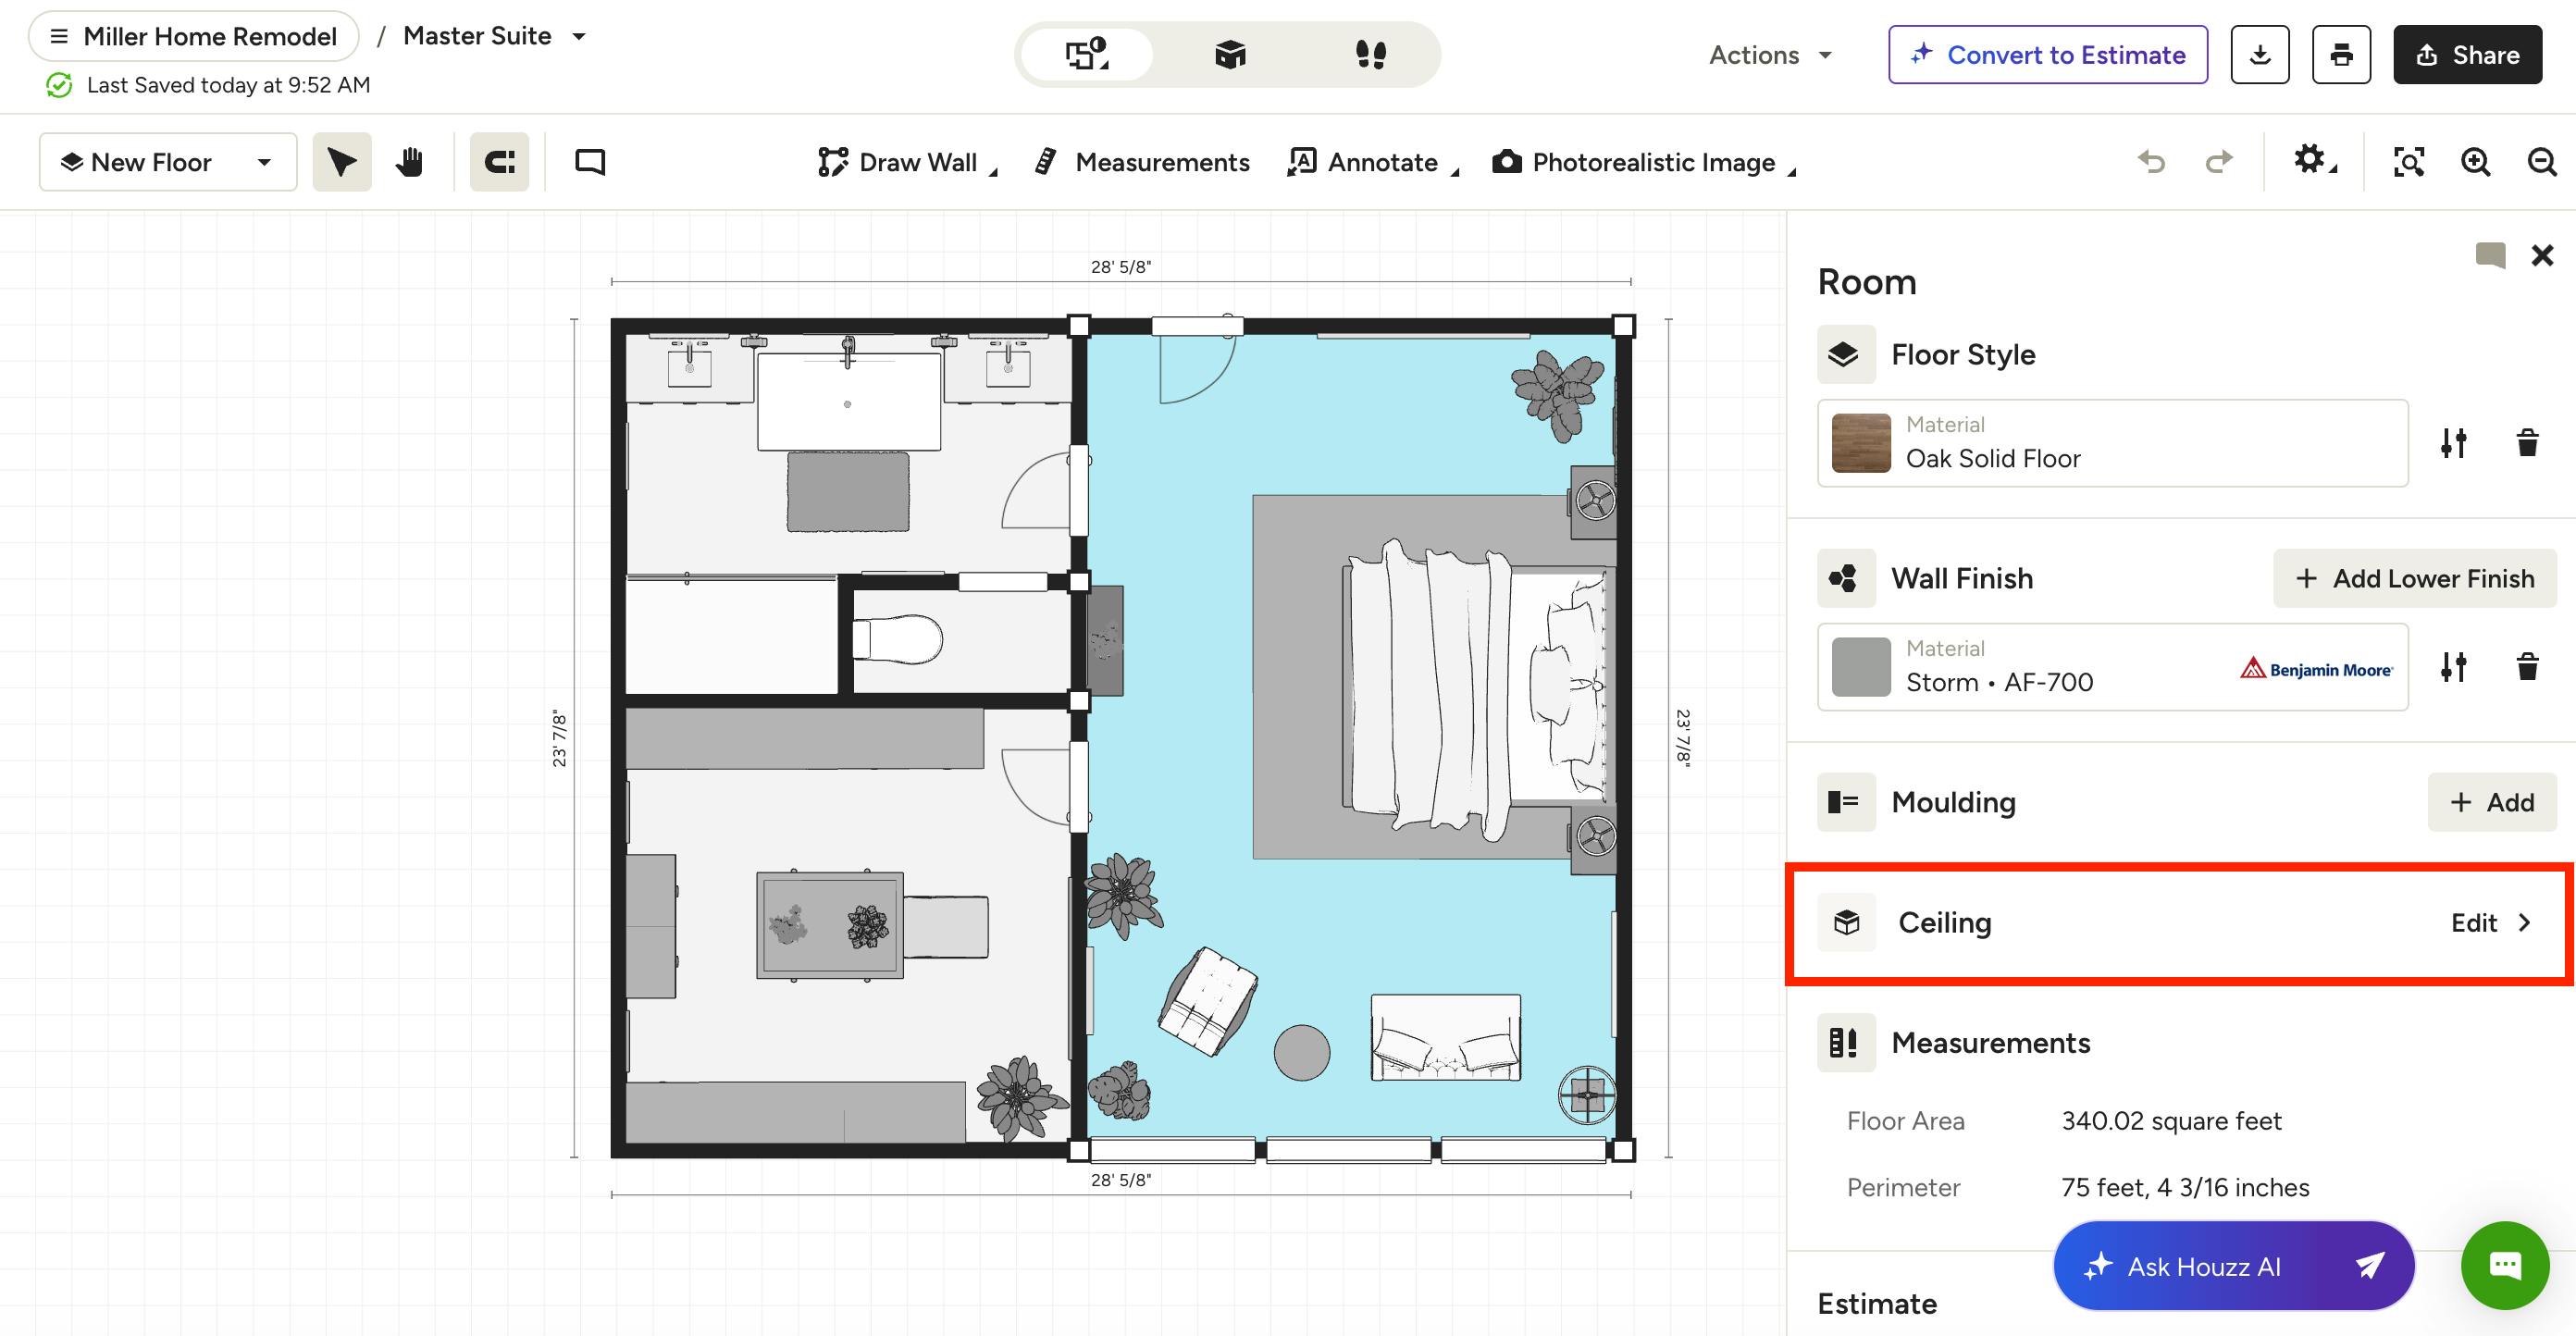
Another option is to click anywhere on a room's floor in your 3D floor plan, then select Edit in the Ceilings section of the right panel (as shown below).
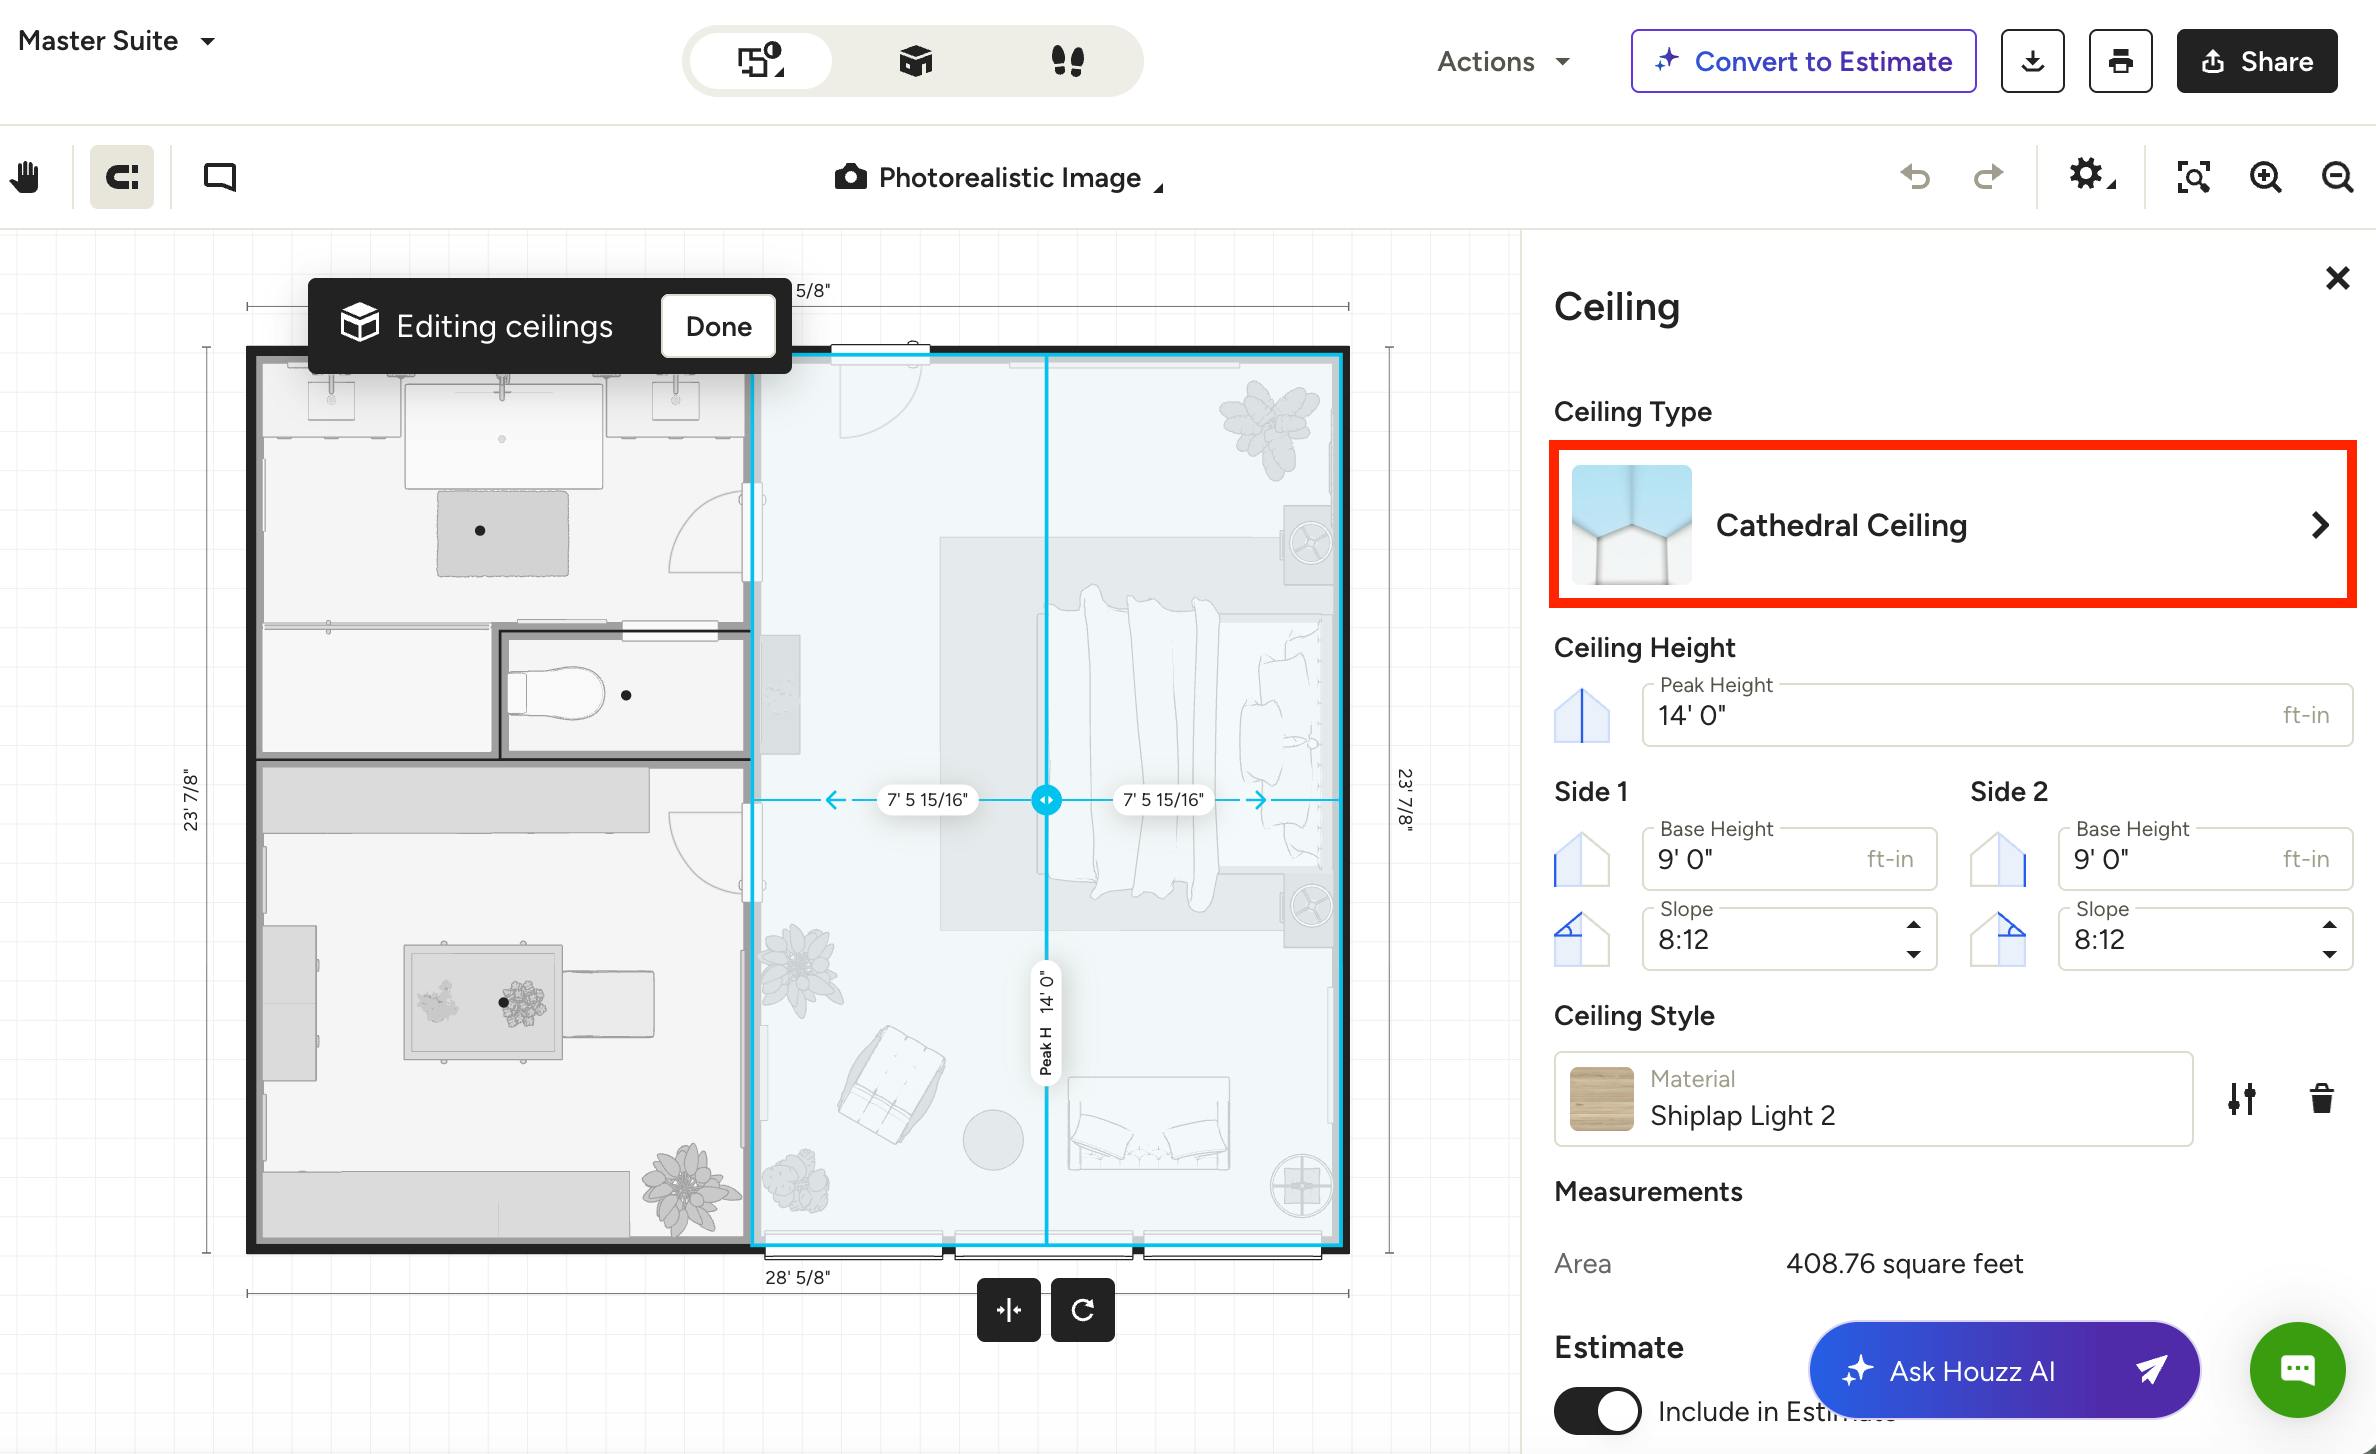
In both instances, your ceiling details will appear in the right panel. Here, you can start by selecting the ceiling type. Options include:
- Flat
- Shed
- Cathedral
- None
Once you select the relevant ceiling type, you can then edit the rest of the ceiling details.
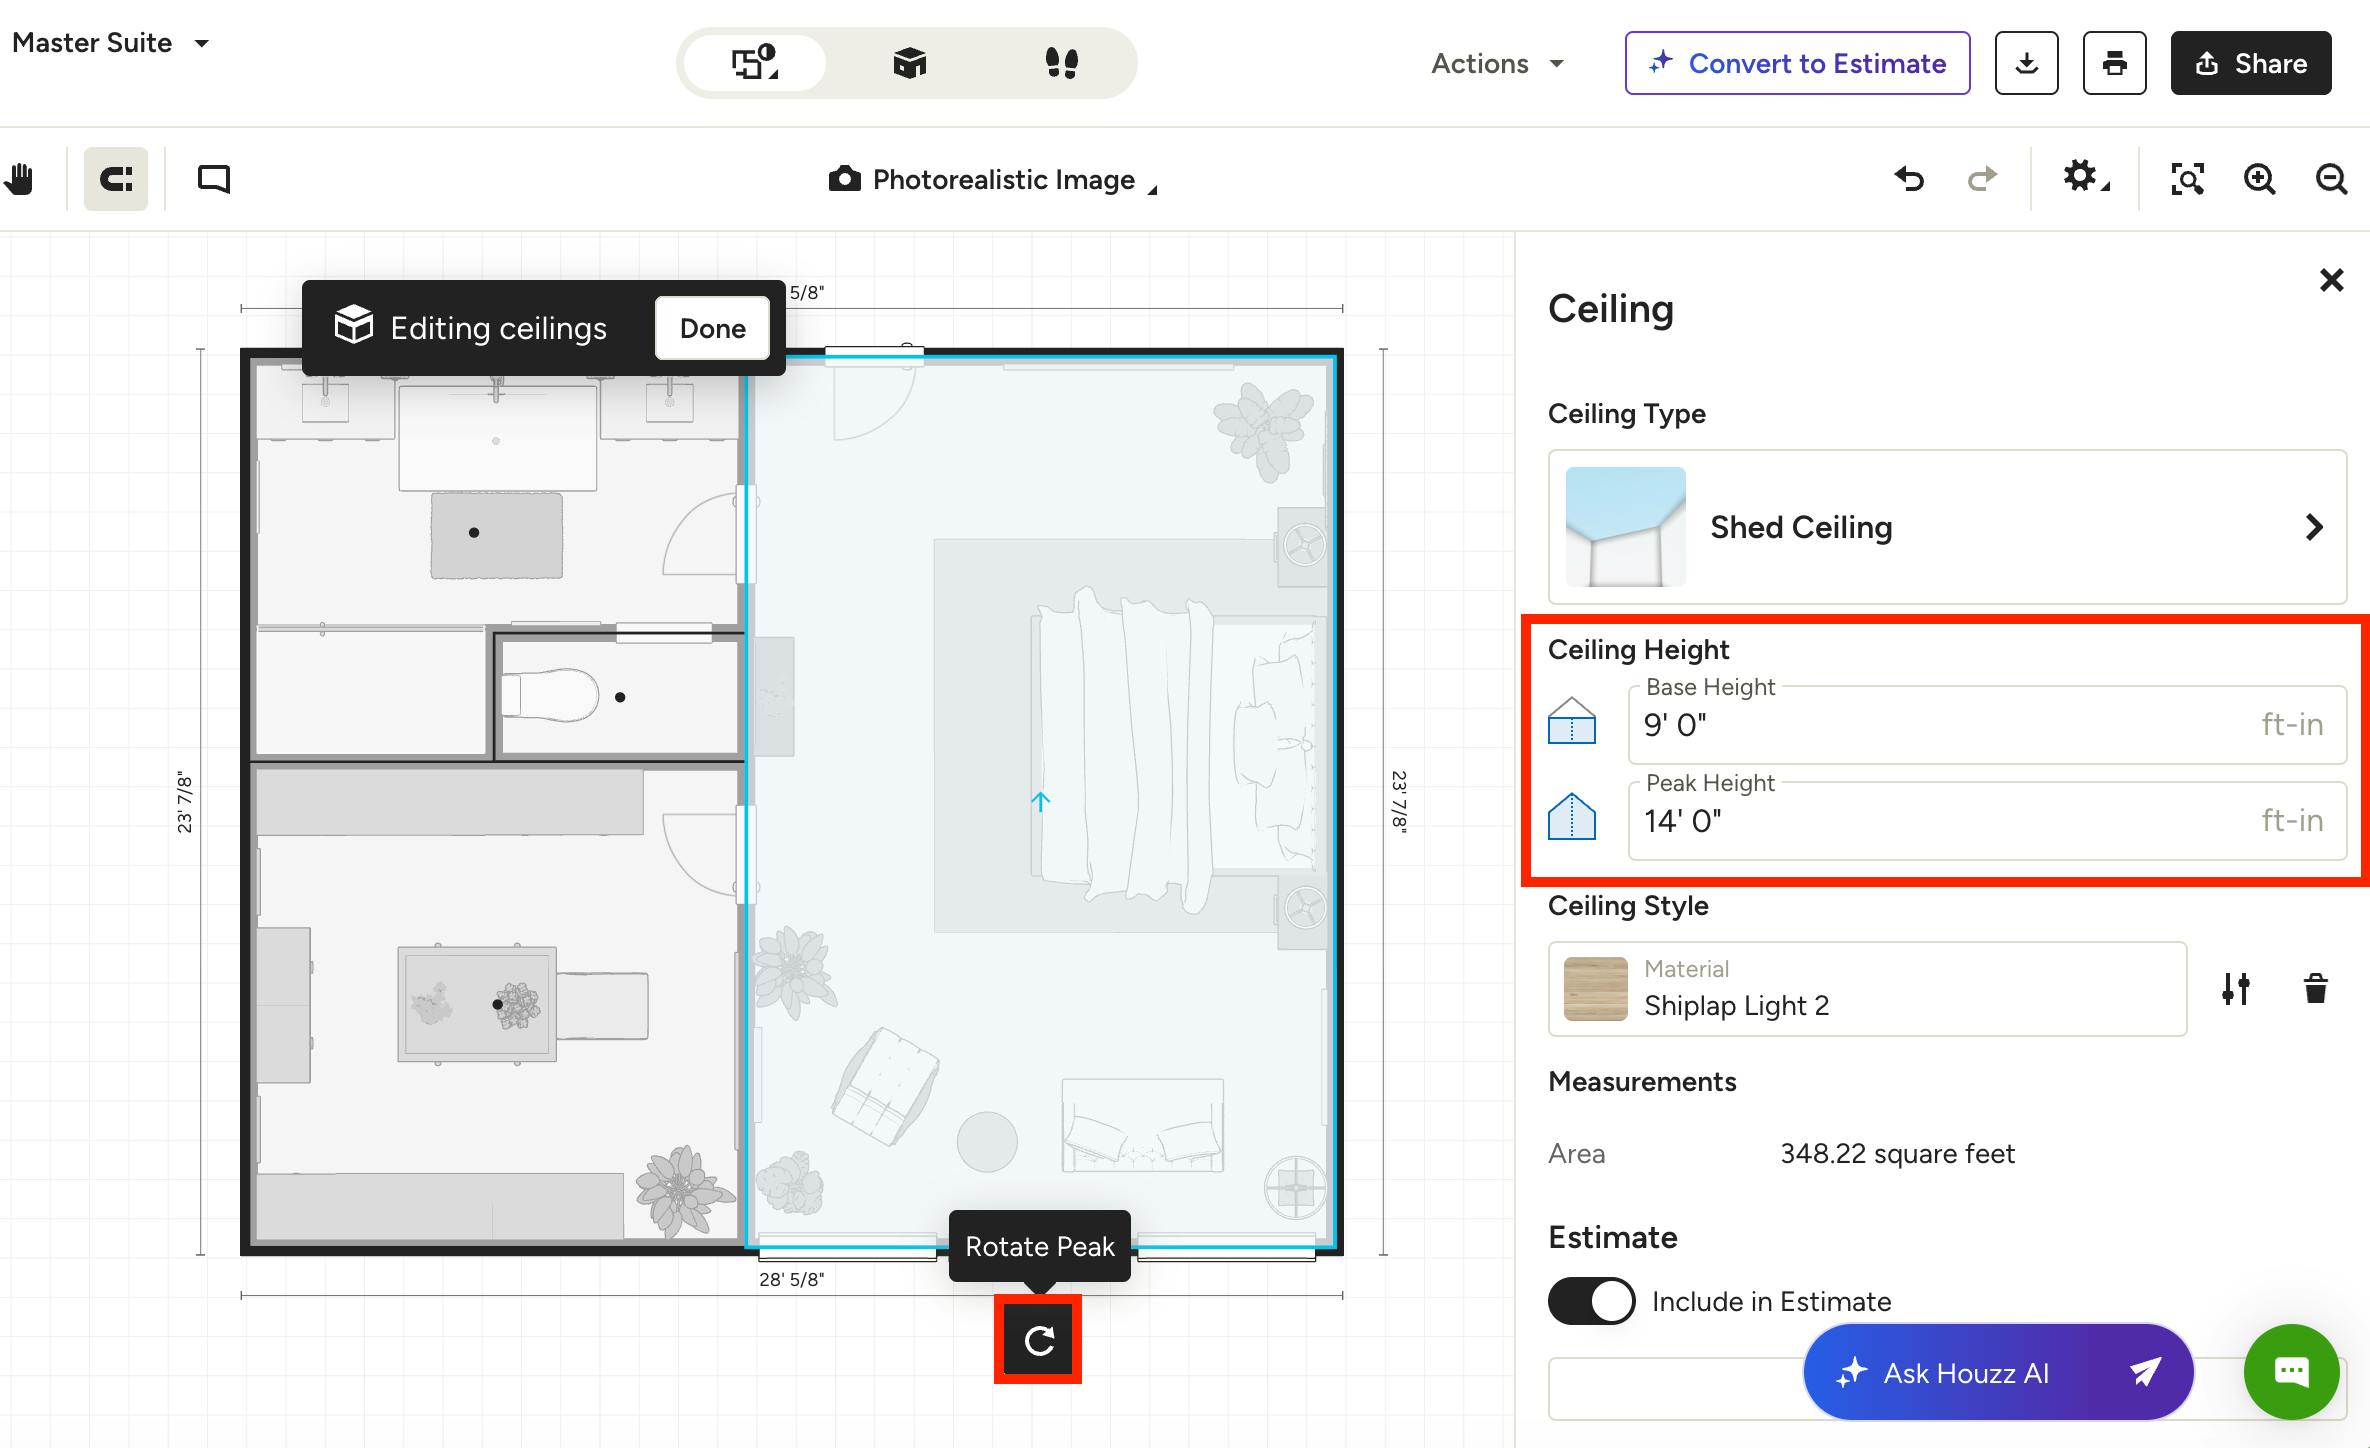
Ceiling Height
You can easily adjust the height of the ceiling, depending on the ceiling type.
- Flat ceilings have only a base height.
- Shed and Cathedral ceilings have both a base height and a peak height. The base height is the lowest point of the ceiling, while the peak height is the highest point. You can select Rotate Peak on the floor plan to adjust the peak design based on what's needed for the structure of the room (as shown below).
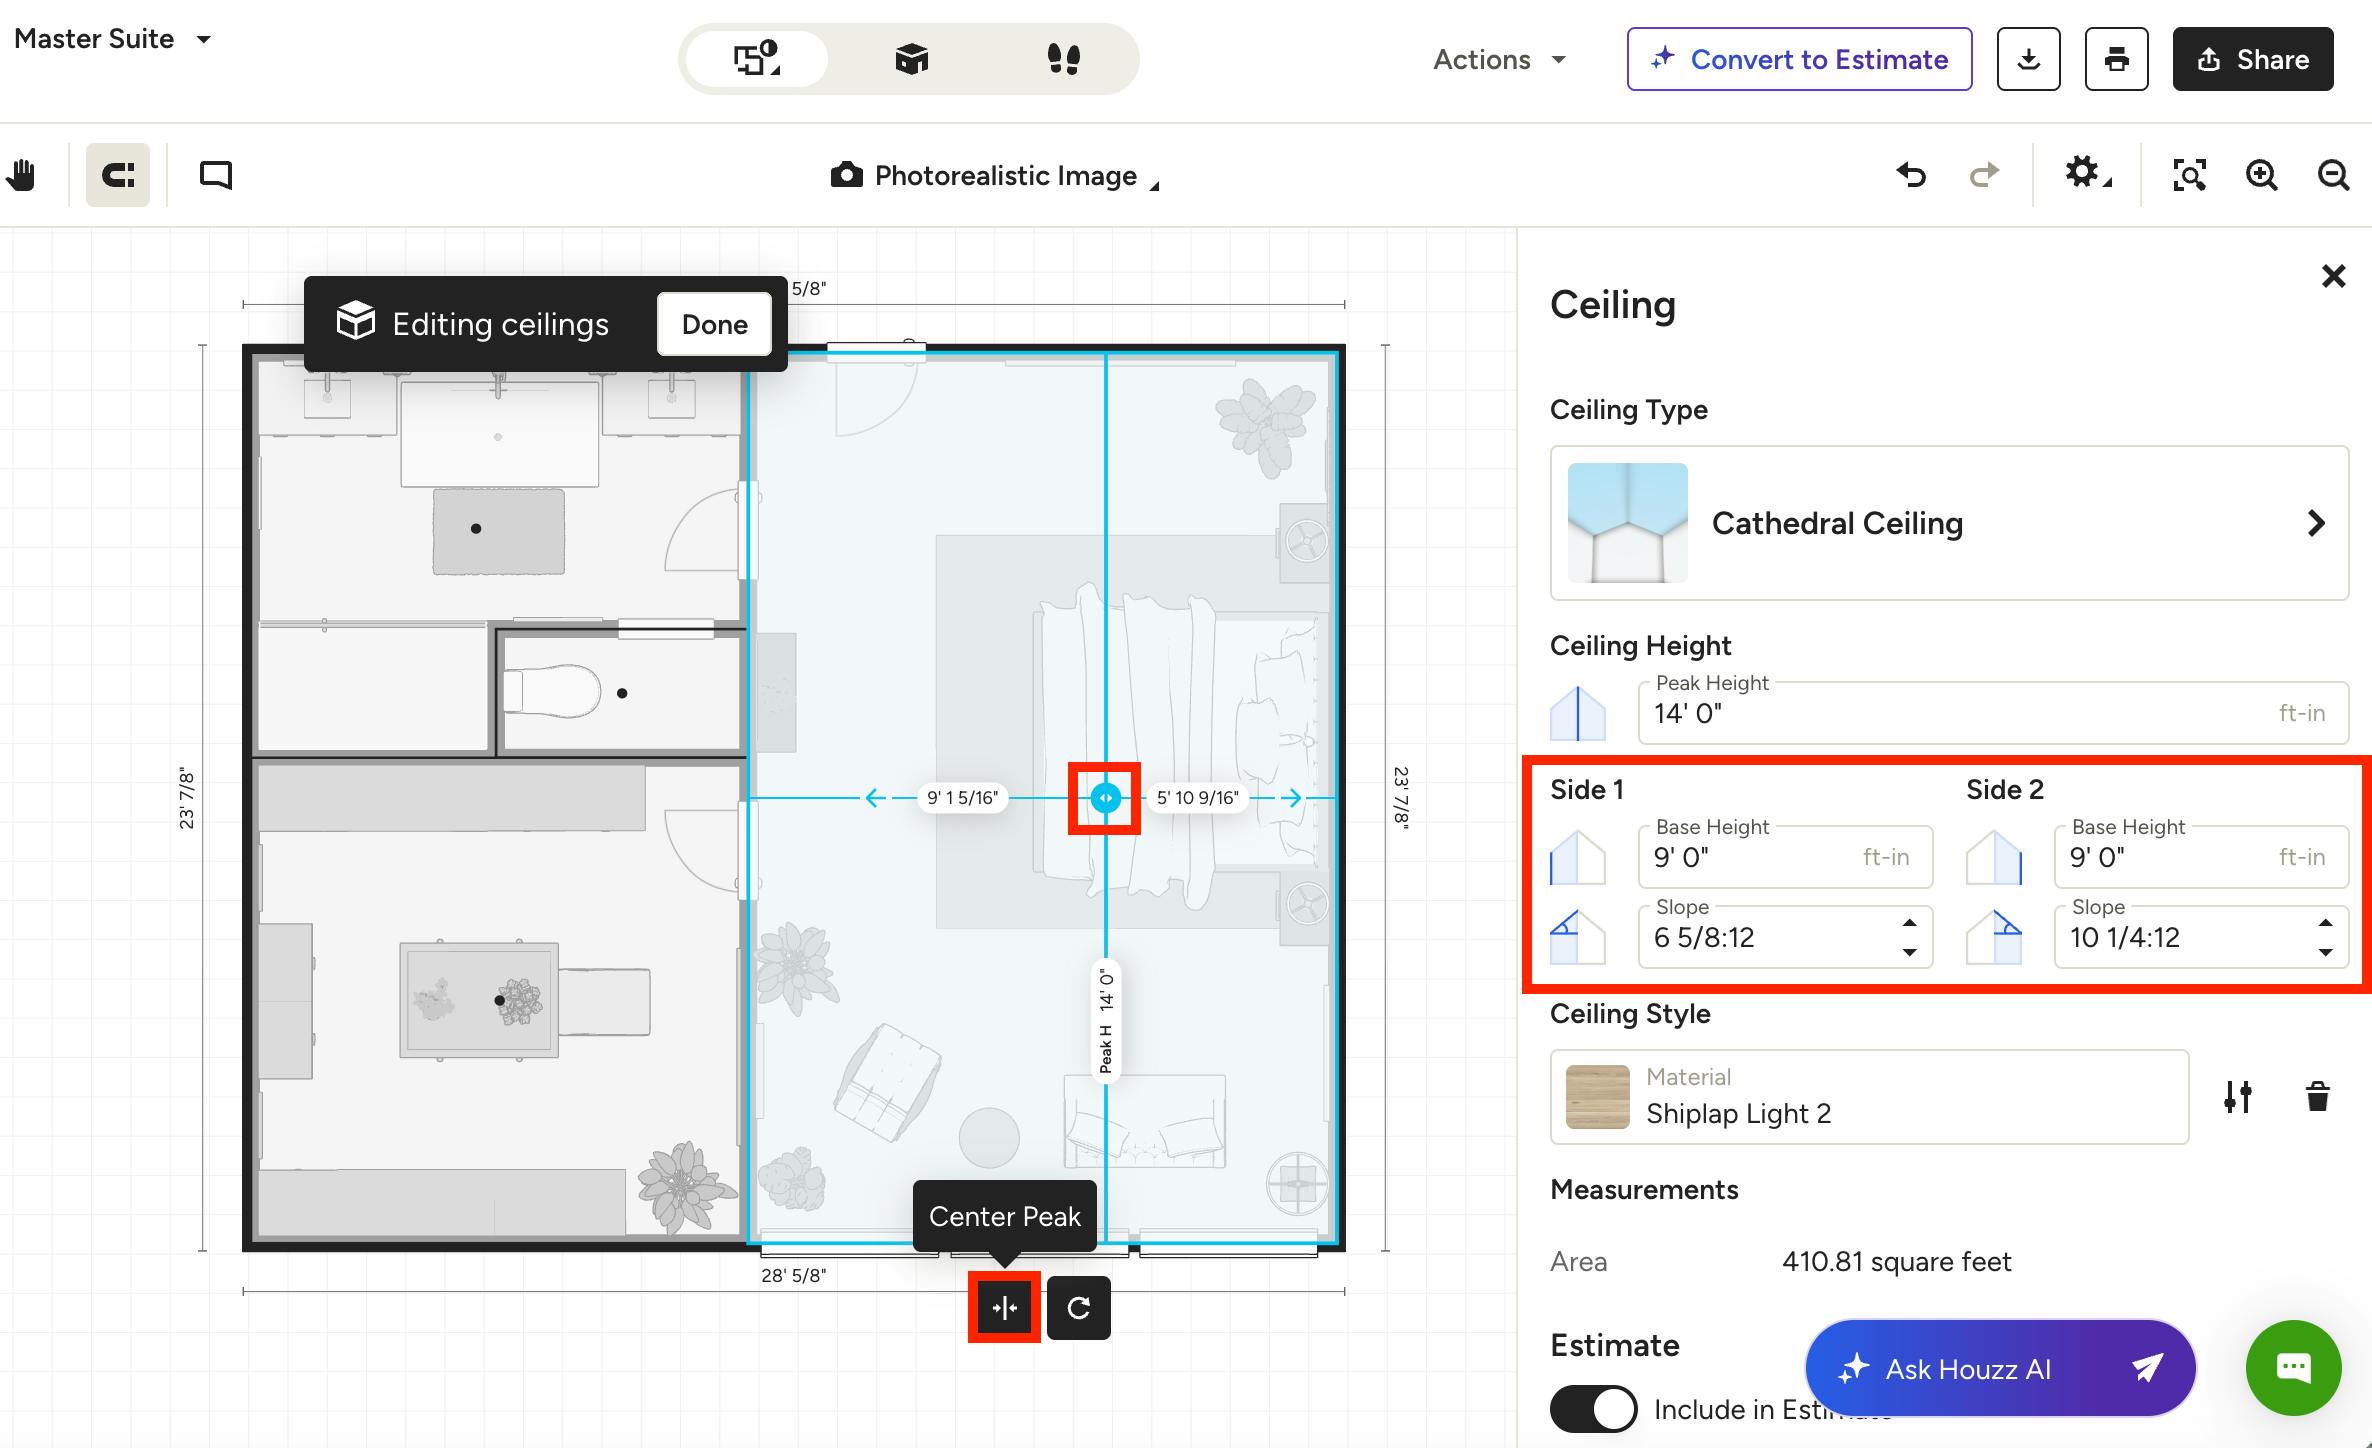
For Cathedral ceilings, you can fully customize the exact peak placement you need.
To do this, click and drag the arrow directly on the canvas to move the peak placement lines. The side measurements for your ceiling (base height and slope) will automatically adjust in the right panel.
To input precise measurements, you can also edit the side measurements directly in the right panel. The peak placement lines will automatically update on the canvas.
To reset to center, click the Center Peak button at the bottom on your canvas.
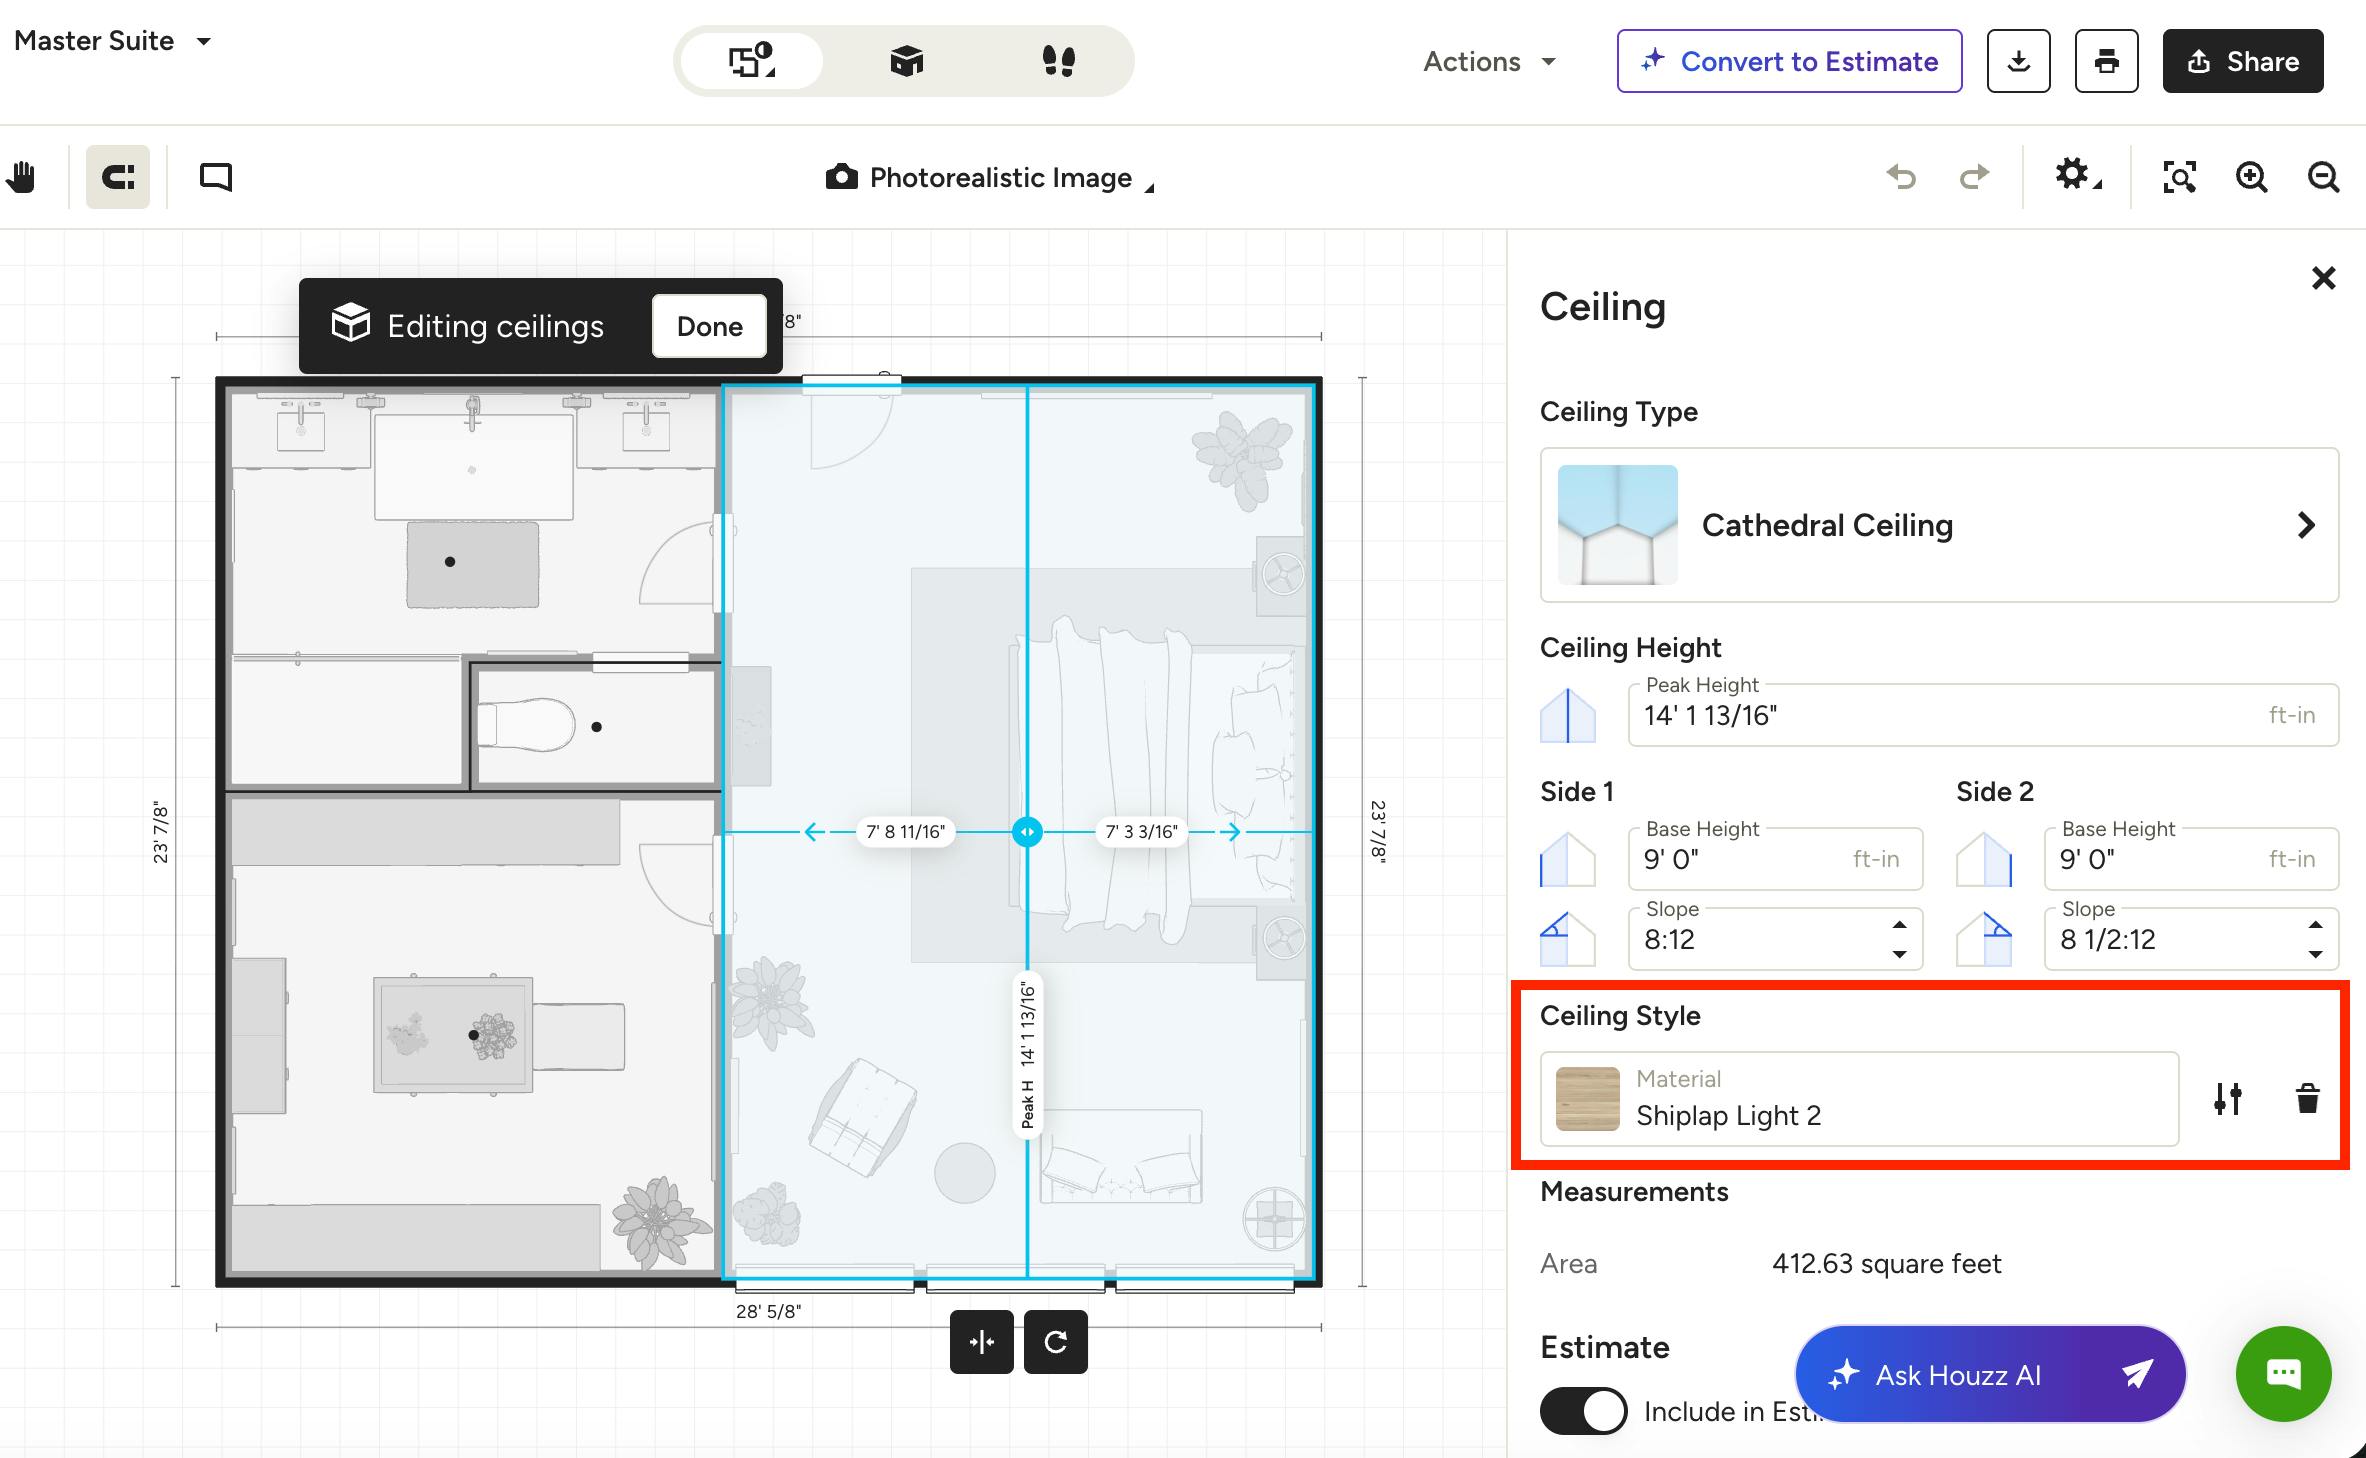
Ceiling Finish
You can adjust the material, color or finish of the ceiling from an extensive list of choices. To do so, click the material selector under Ceiling Style to pull up your options.
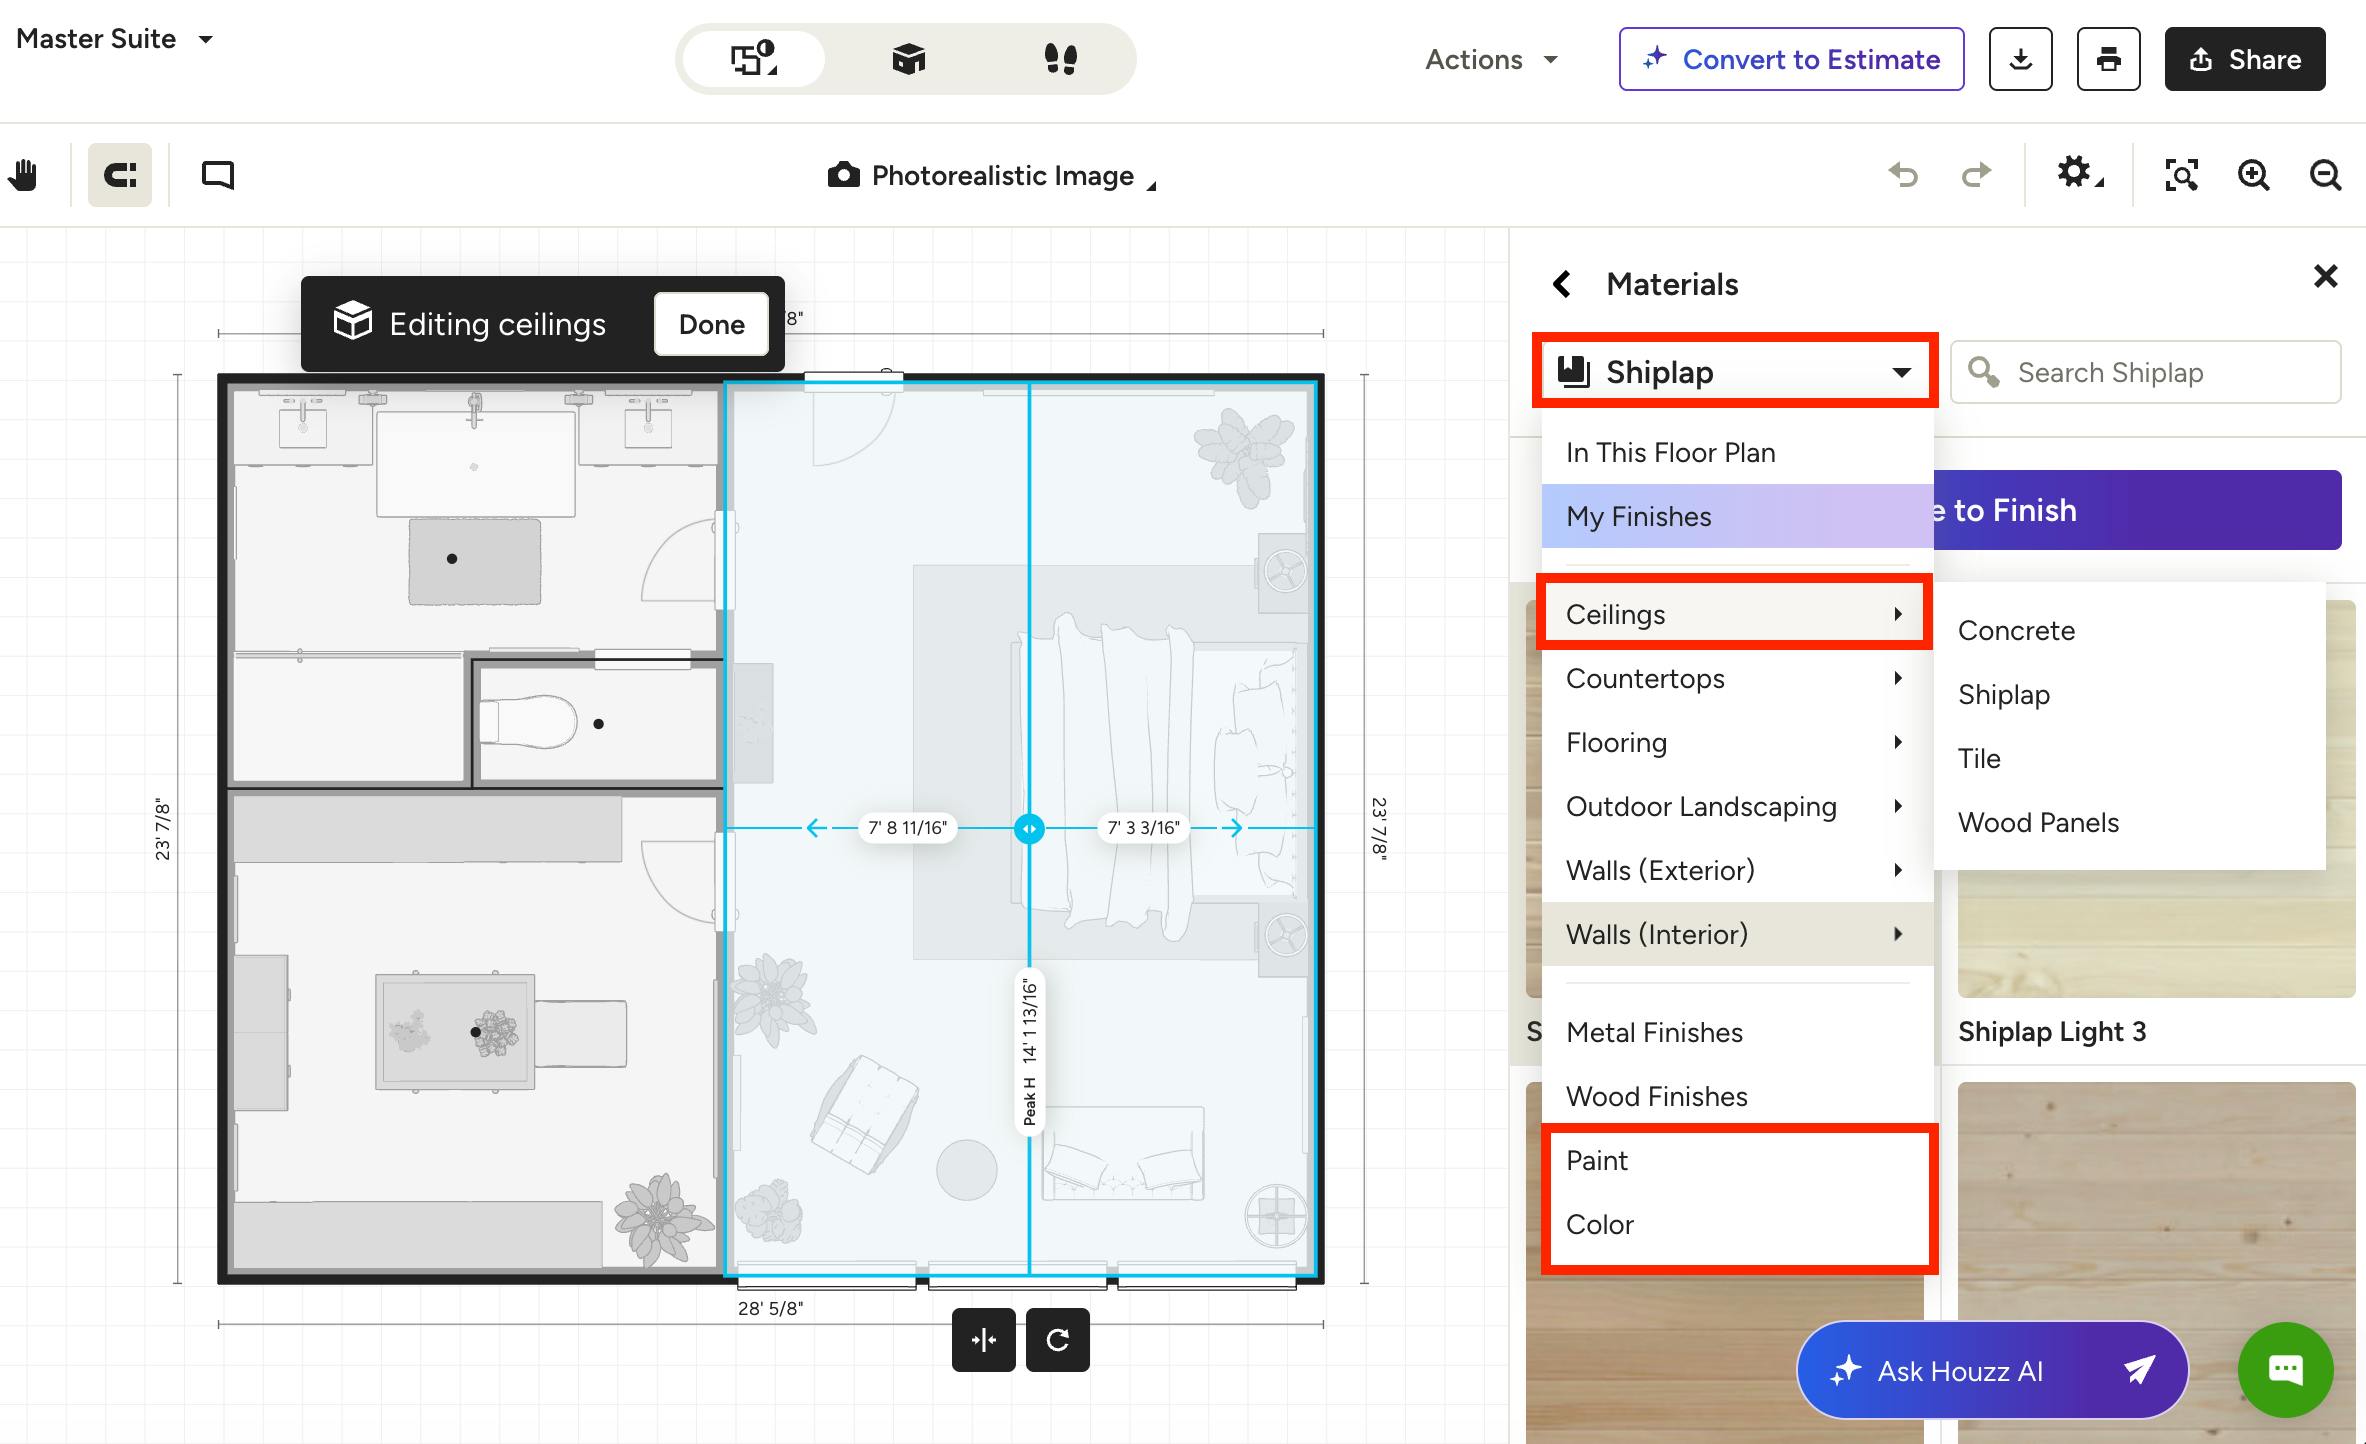
You will then be able to browse our Materials Library in the right menu. Use the dropdown at the top to narrow down your options, starting with the Ceilings section. You'll find popular paint colors by Sherwin-Williams and Benjamin Moore, as well as the ability to select your own color. You can also use the search bar to search by keyword.
Rotate Materials
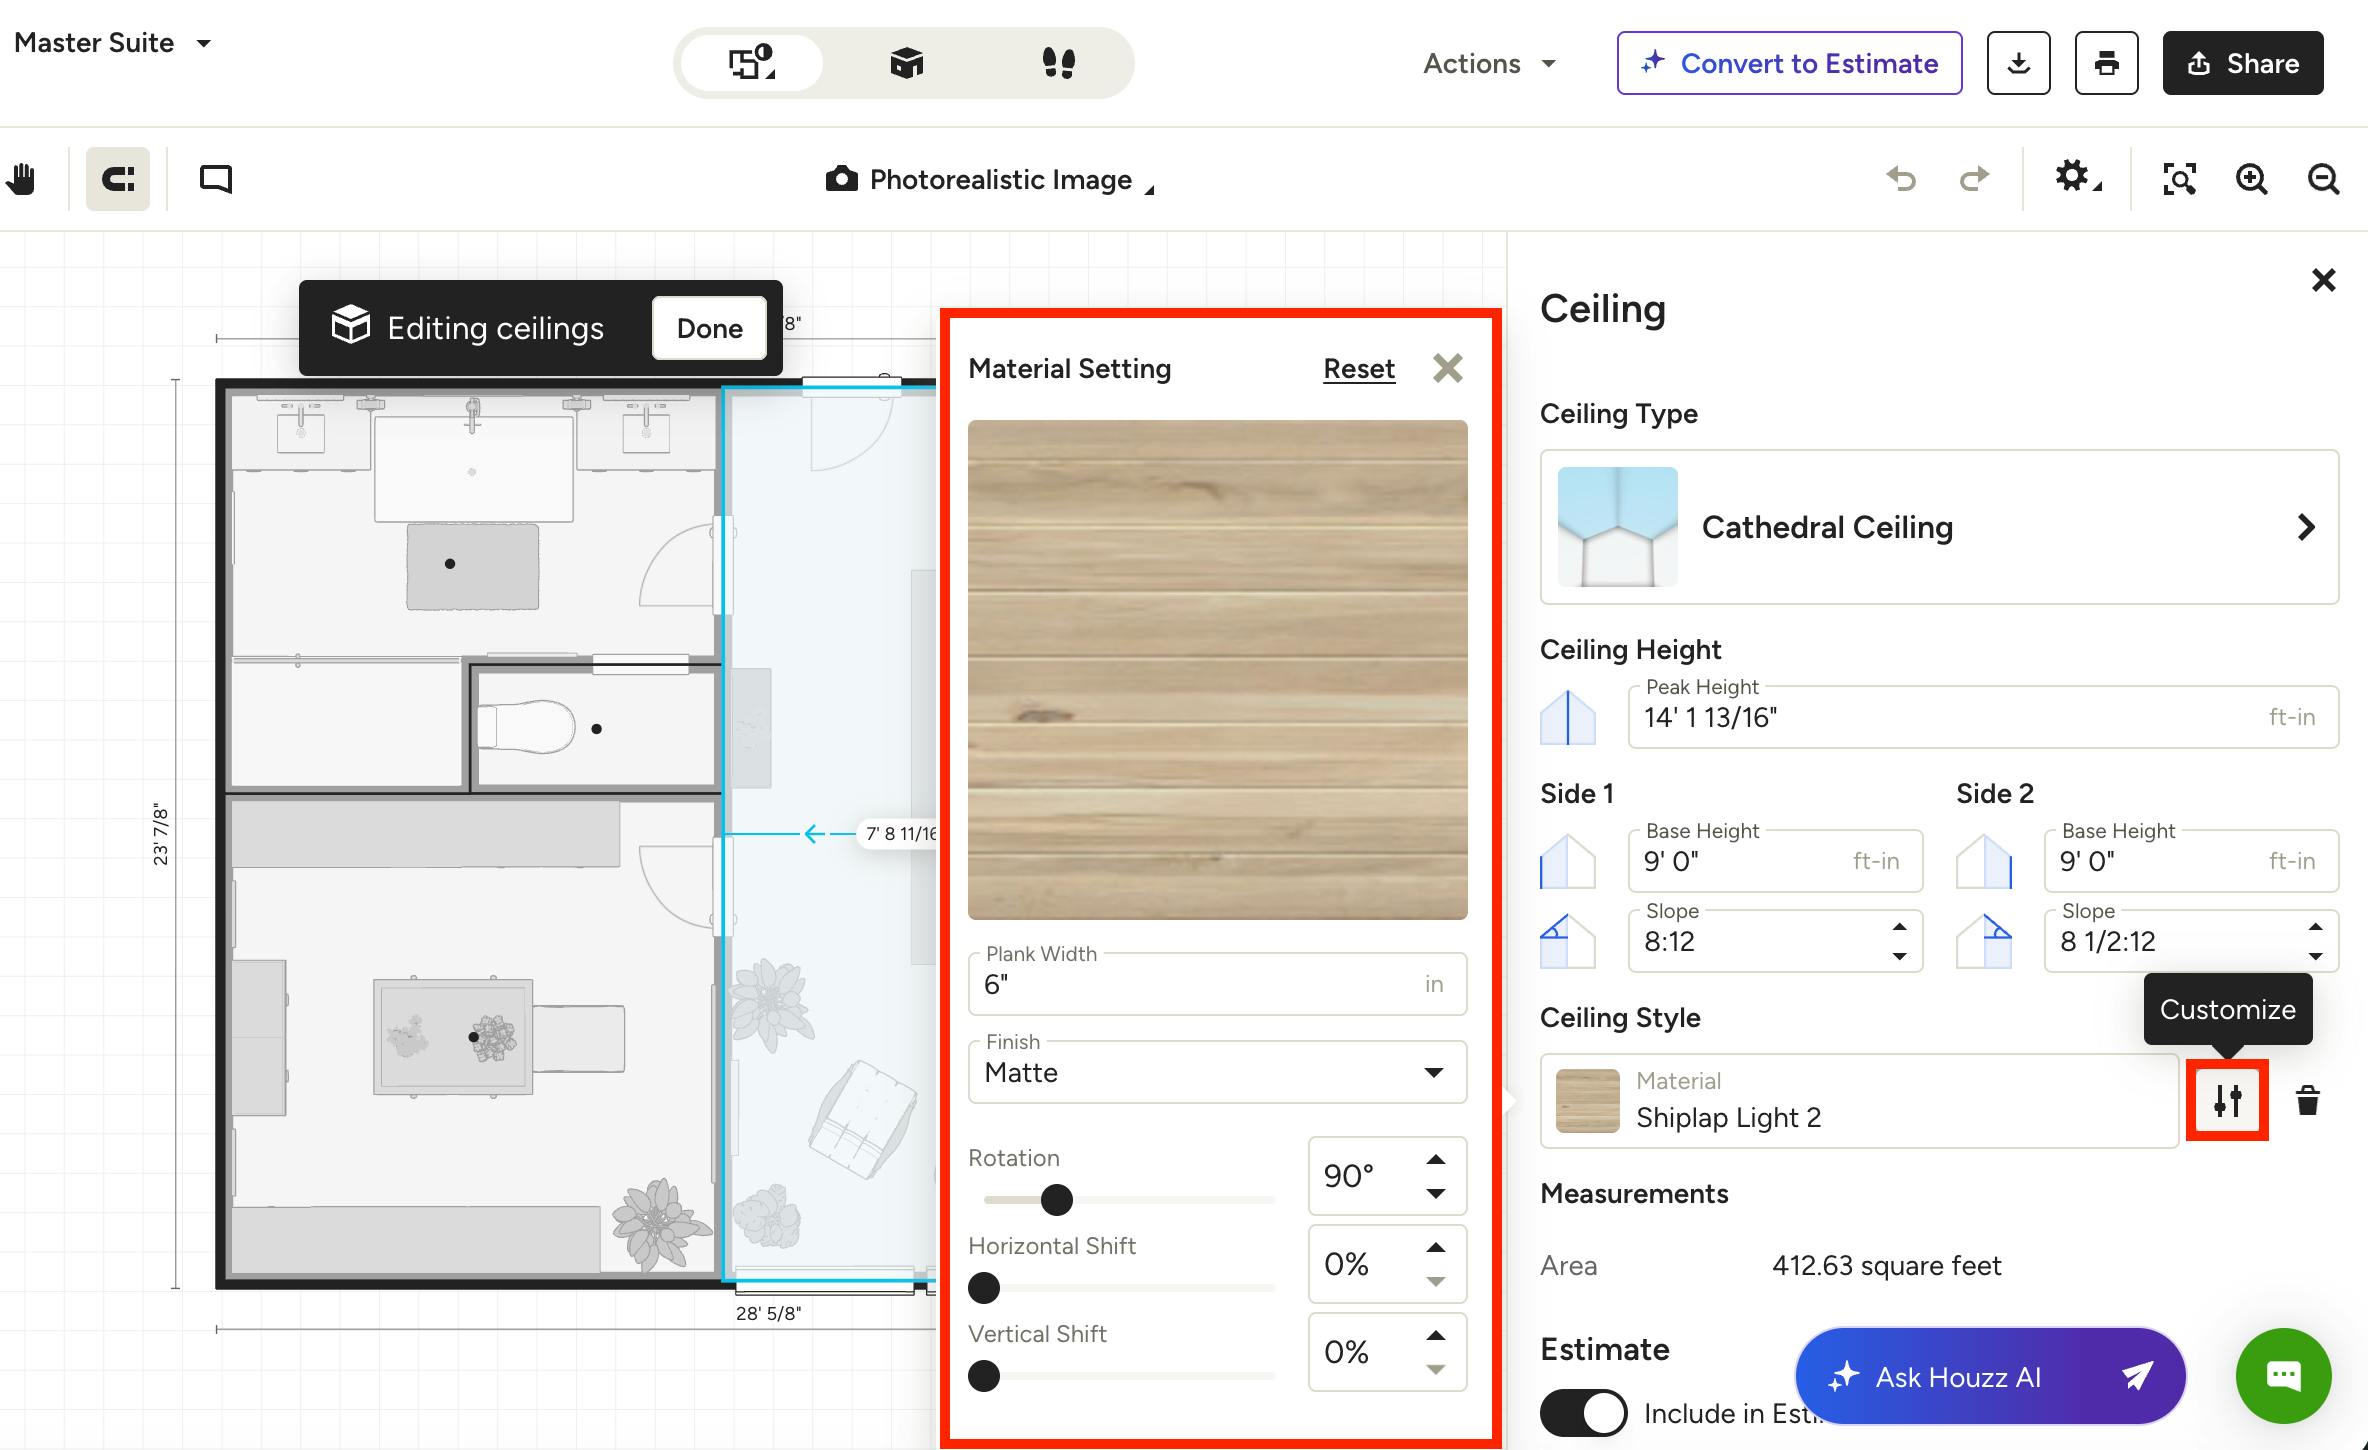
If you have applied a material finish to your ceiling, like shiplap or wood slats, you can adjust the rotation. To do so, click the Customize icon next to the material in the Ceiling Style section of the right panel. If you're still in the Materials Library, exit out using the X in the top right. Once your Material Settings are open, you can change the rotation using the slider or by typing in the degree.
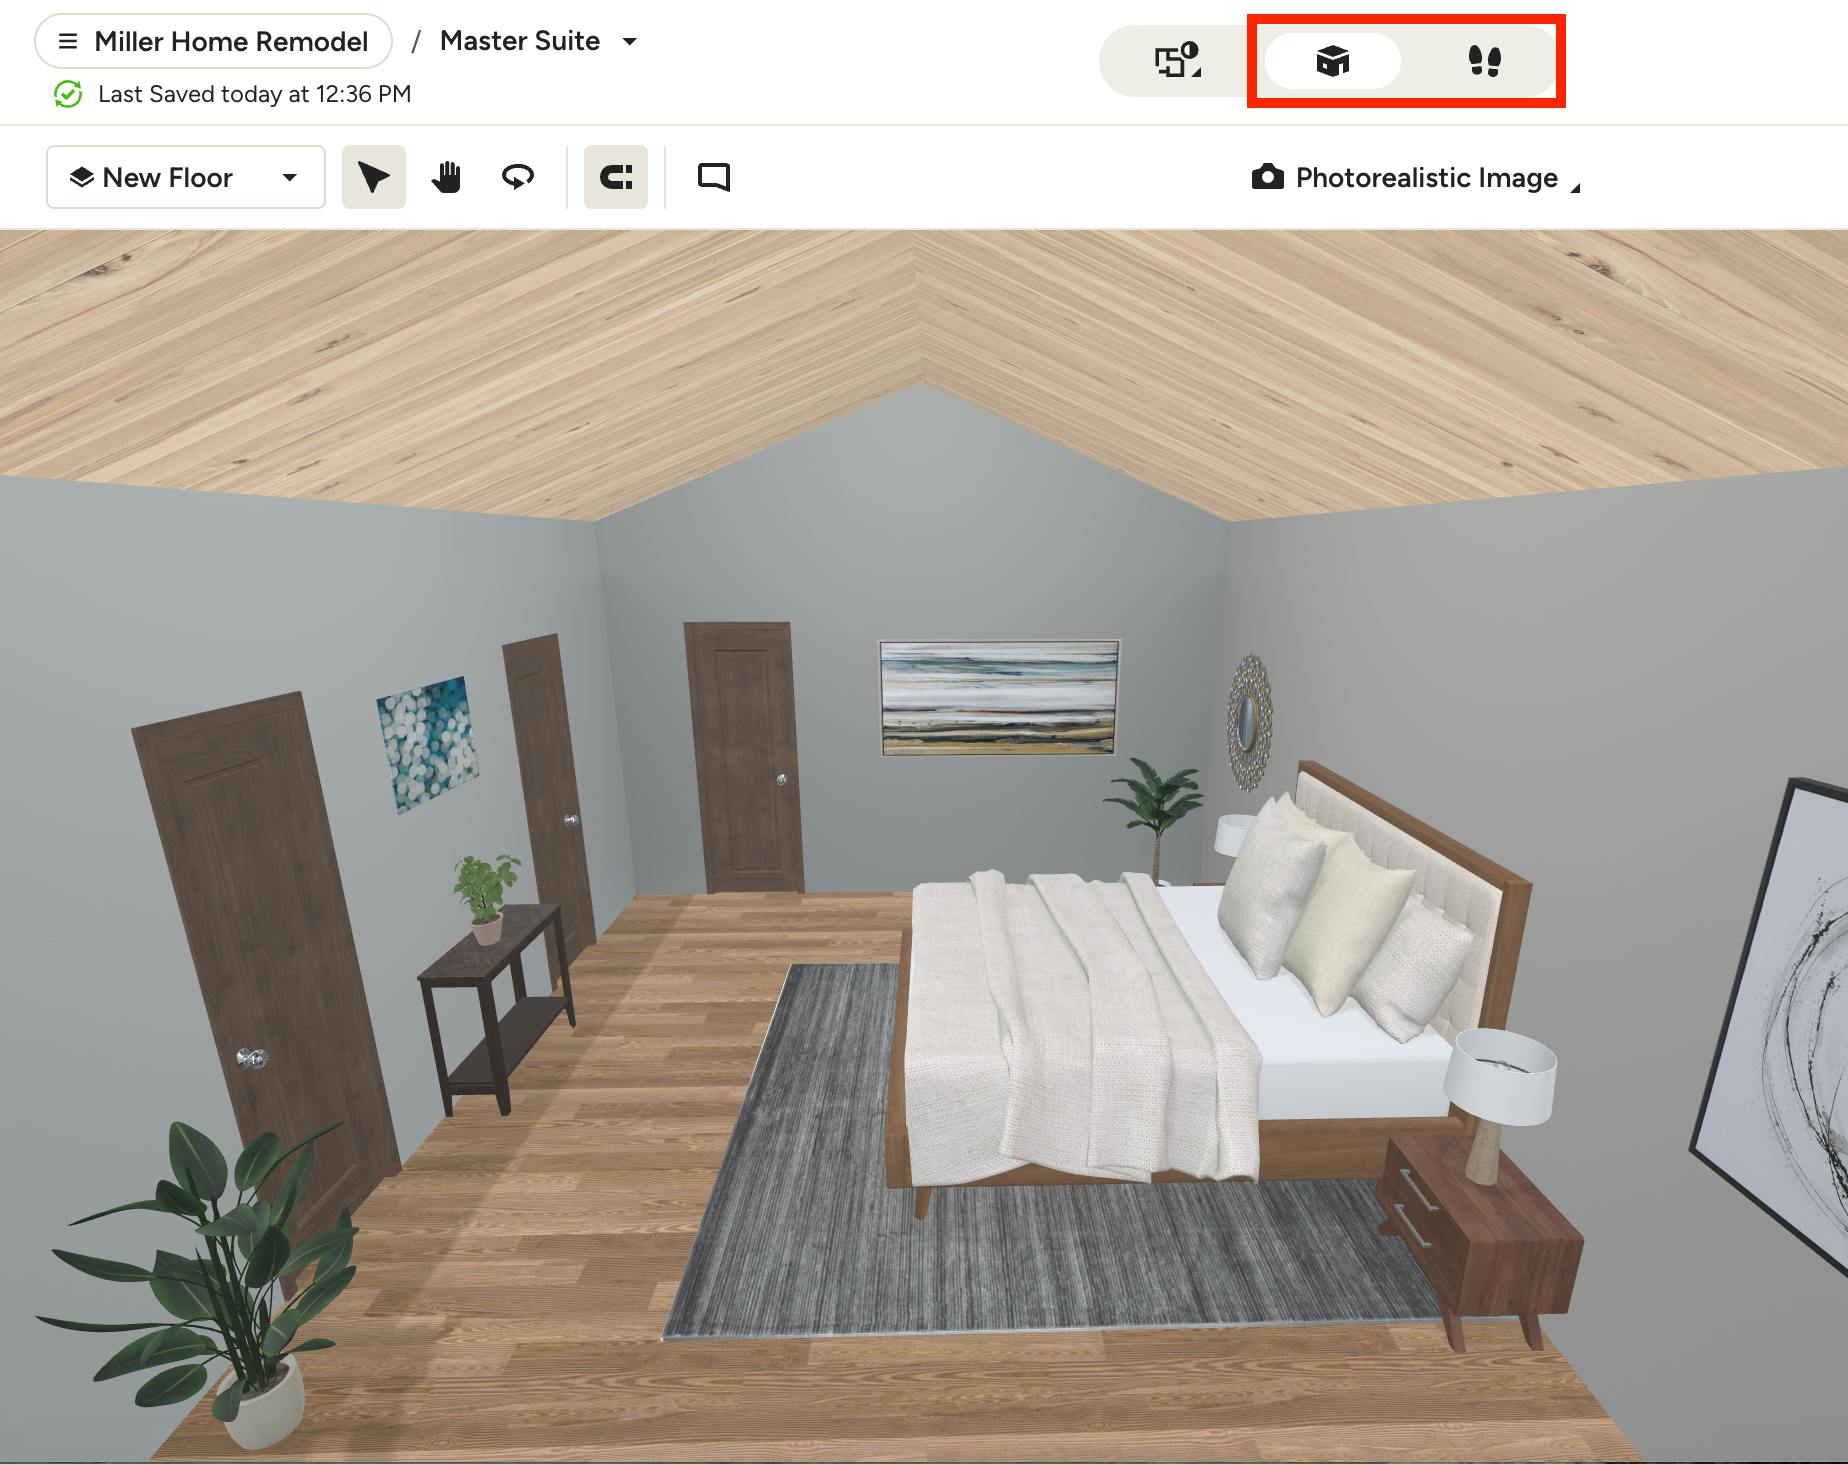
Once you're done customizing the ceiling properties, click Done directly on the floor plan. Then, go into Dollhouse or Walkthrough mode to preview your ceiling details.
Add Ceiling Beams
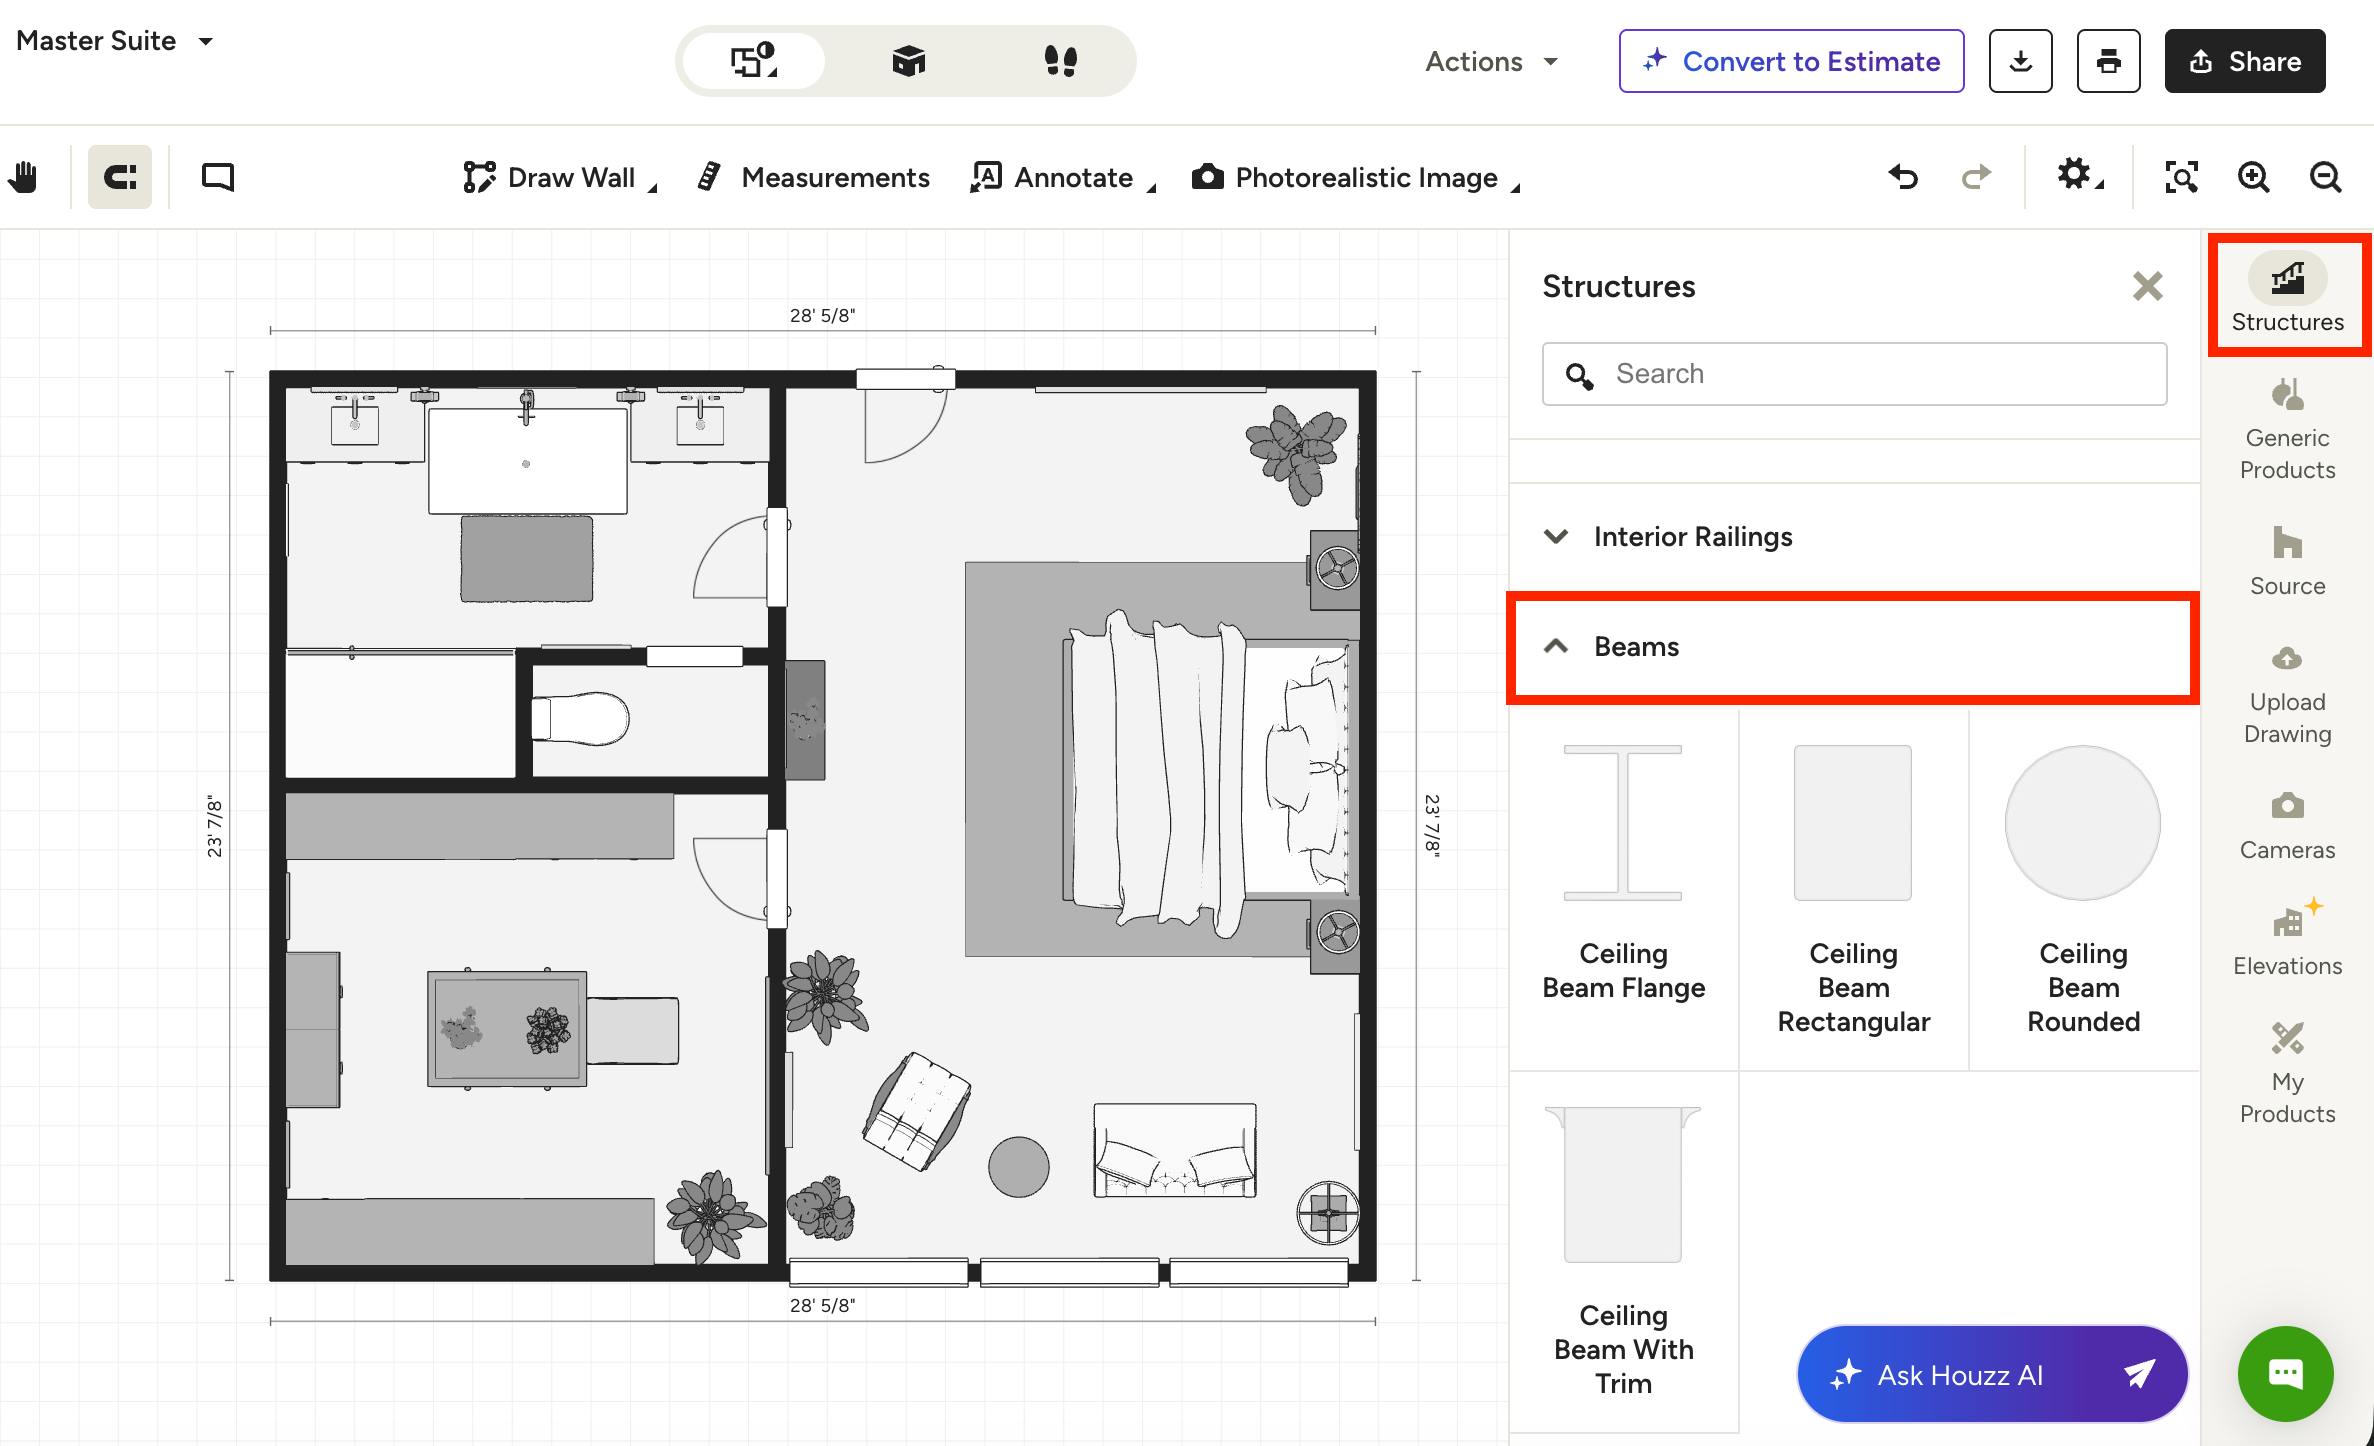
To add ceiling beams to your design, click the Structures section in the right panel, then scroll down the list and click on Beams.
Click on the relevant beam style — you can choose from Flange, Rectangular, Rounded or With Trim.
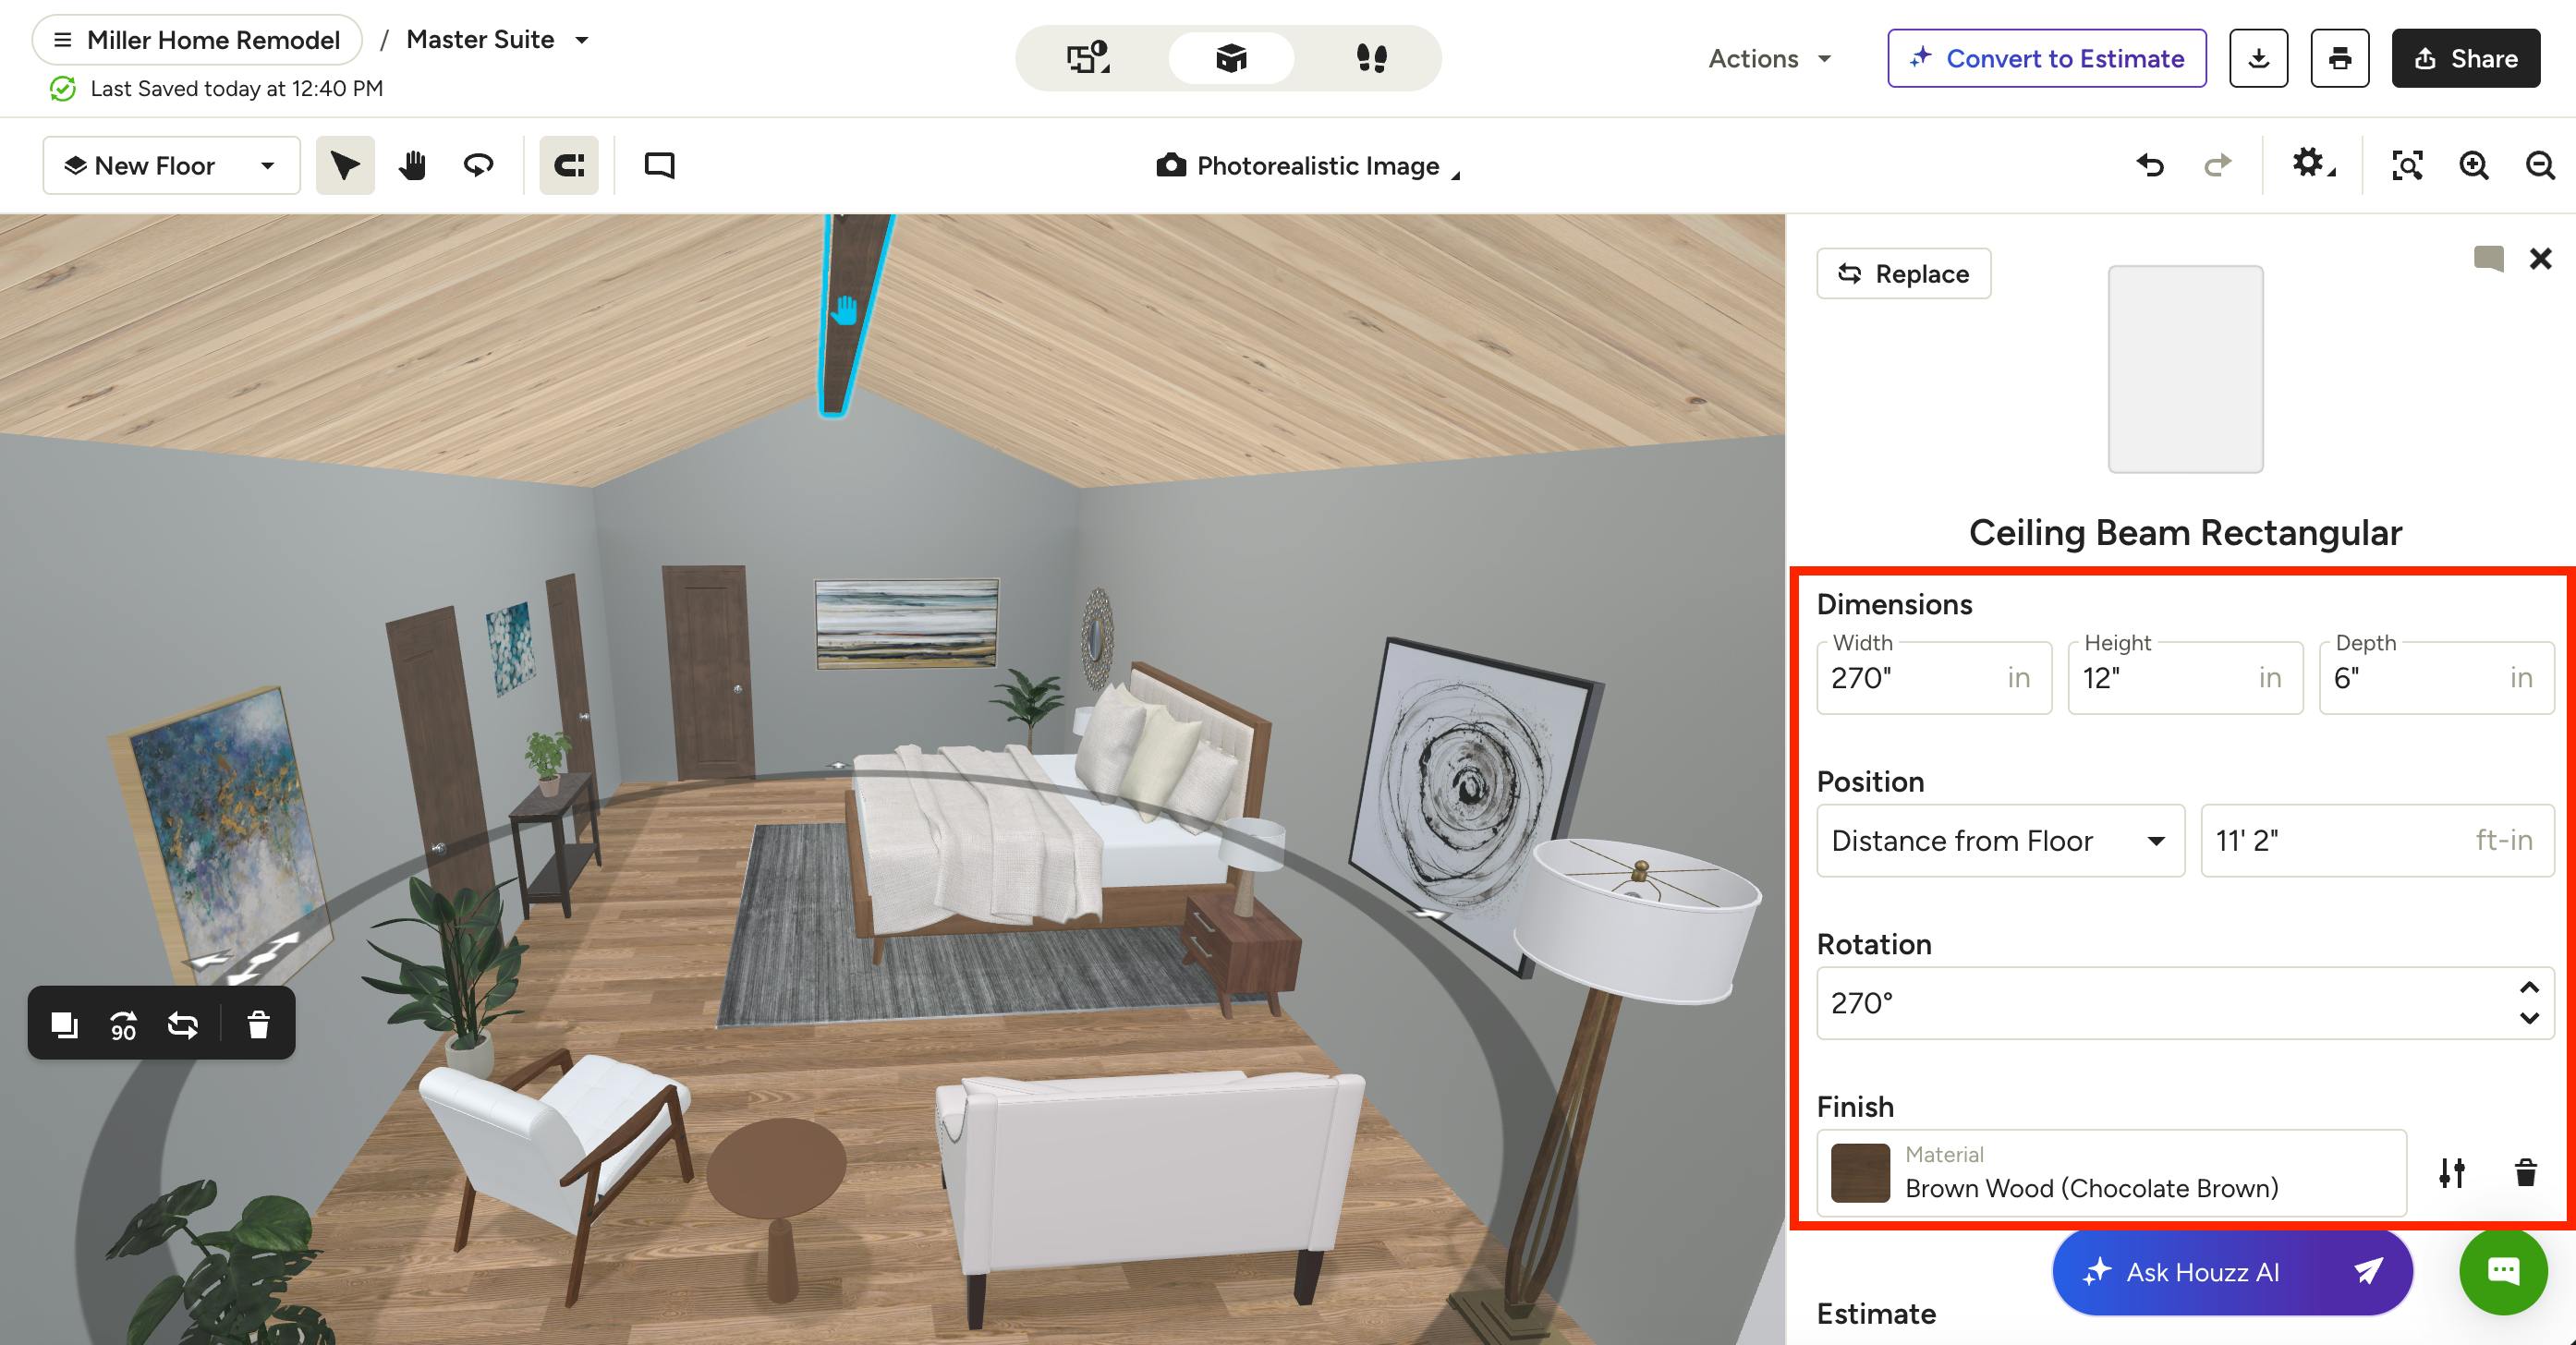
Once the style is selected, the beam will appear on your 3D floor plan. Beams do not automatically snap into place. To position a beam, you will need to manually drag the beam to the desired location (this is best done in Floor Plan mode). In the right menu, you can make adjustments to the beam width, height, depth, distance from floor, rotation and finish.
Pro Tip: If you're not able to see the beam in Dollhouse or Walkthrough mode, check the beam's Distance from Floor measurement. If it's higher than your ceiling height, it will not be visible.
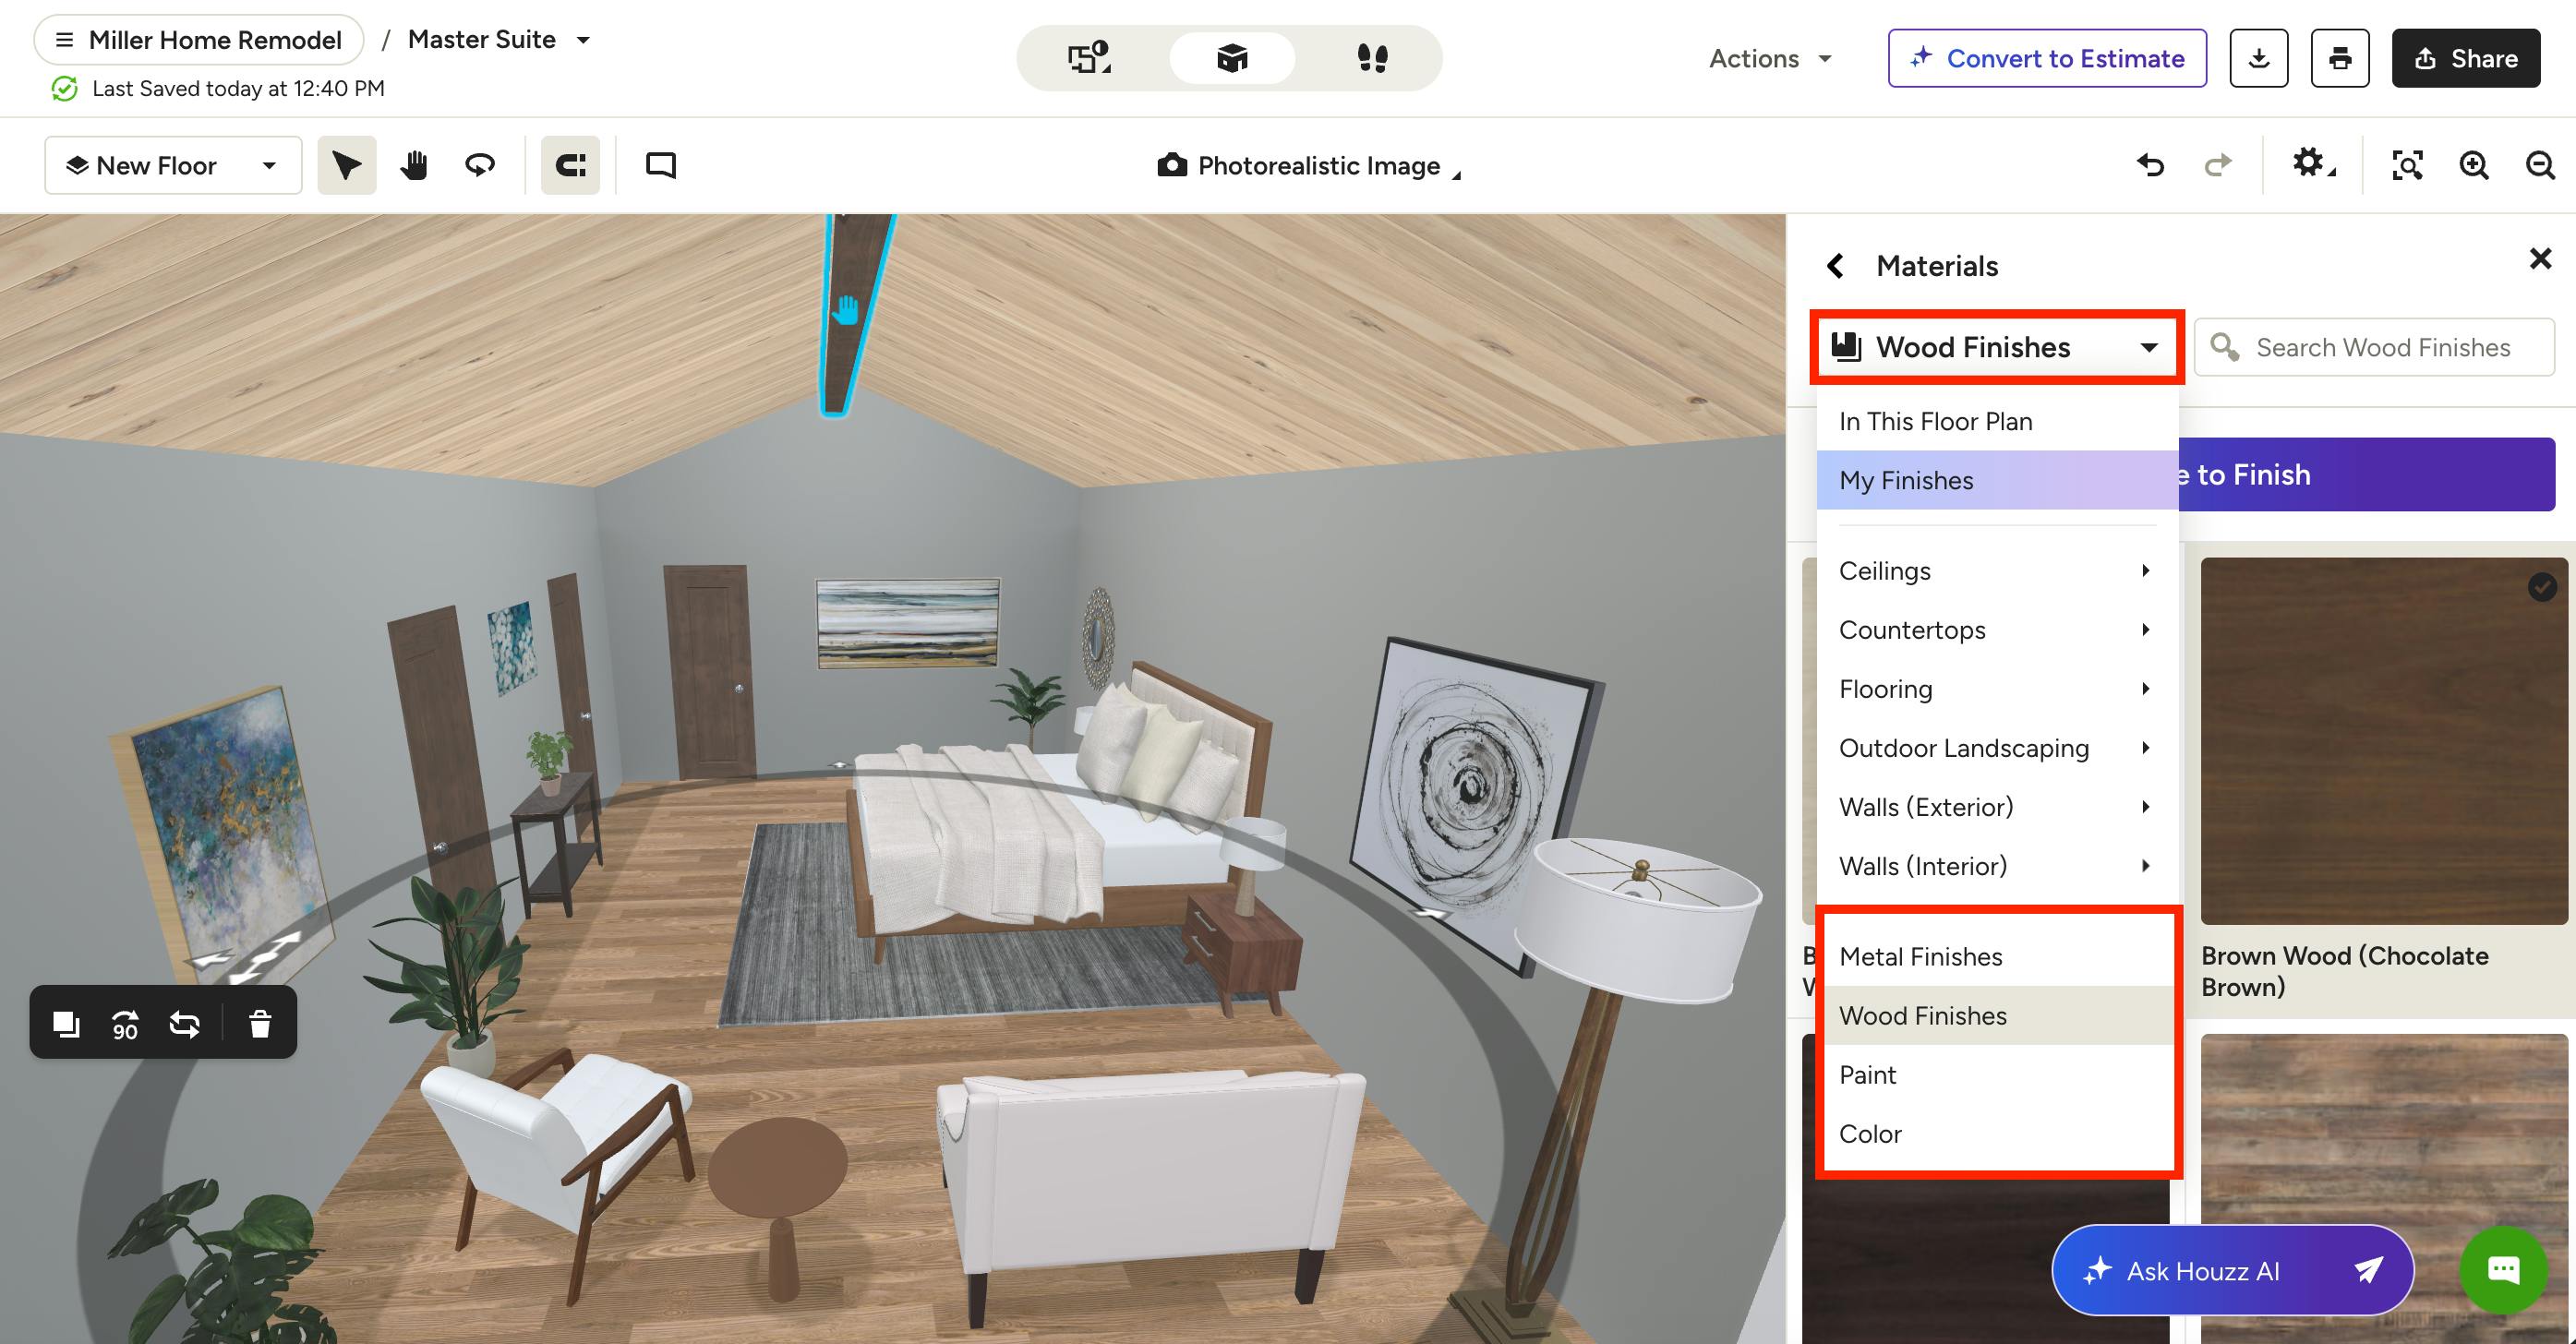
When you select finish, you will be able to browse our Materials Library in the right menu. Use the dropdown at the top to narrow down your material selections — options for beams are at the bottom and include Metal, Wood, Paint and Color finishes. You will find popular paint colors by Sherwin-Williams and Benjamin Moore, as well as the ability to select your own color. You can also use the search bar to search by keyword.