How to Convert a 3D Floor Plan to Takeoffs
Once you create your 3D floor plan, you can turn your vision into a reality by uploading your design into the Takeoffs section of your project. When you convert your 3D floor plan to a takeoff, you can start creating measurements to order flooring, drywall, windows, doors and more.
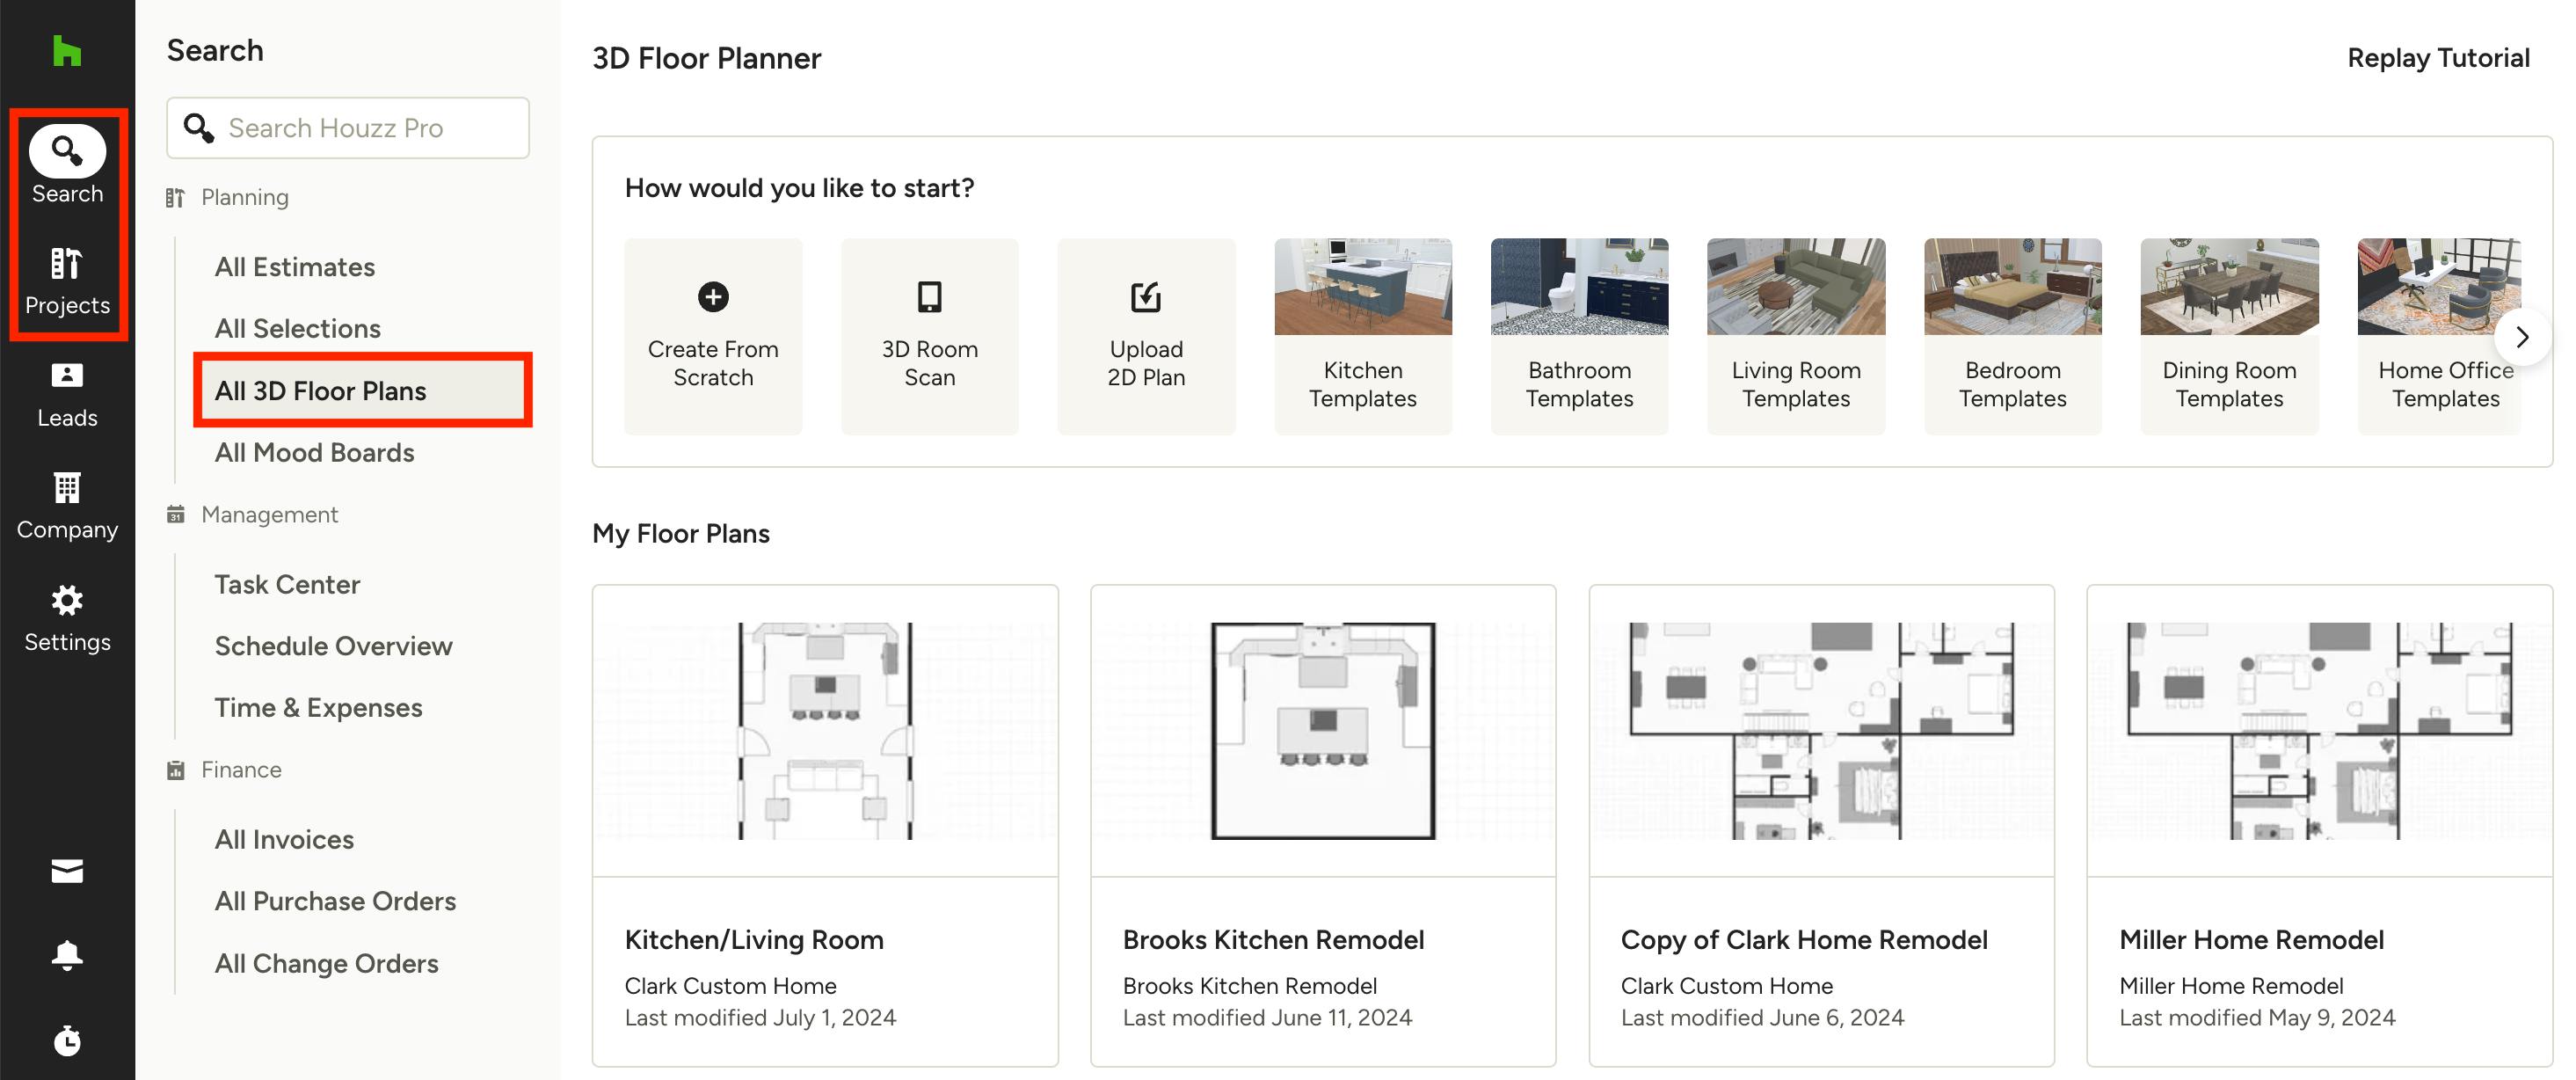
To start: Open up the relevant floor plan. You can view all floor plans by clicking the Search icon in your left navigation, then selecting from the list. You can also click the Projects icon, select the relevant project, then click 3D Floor Plans from the left menu.
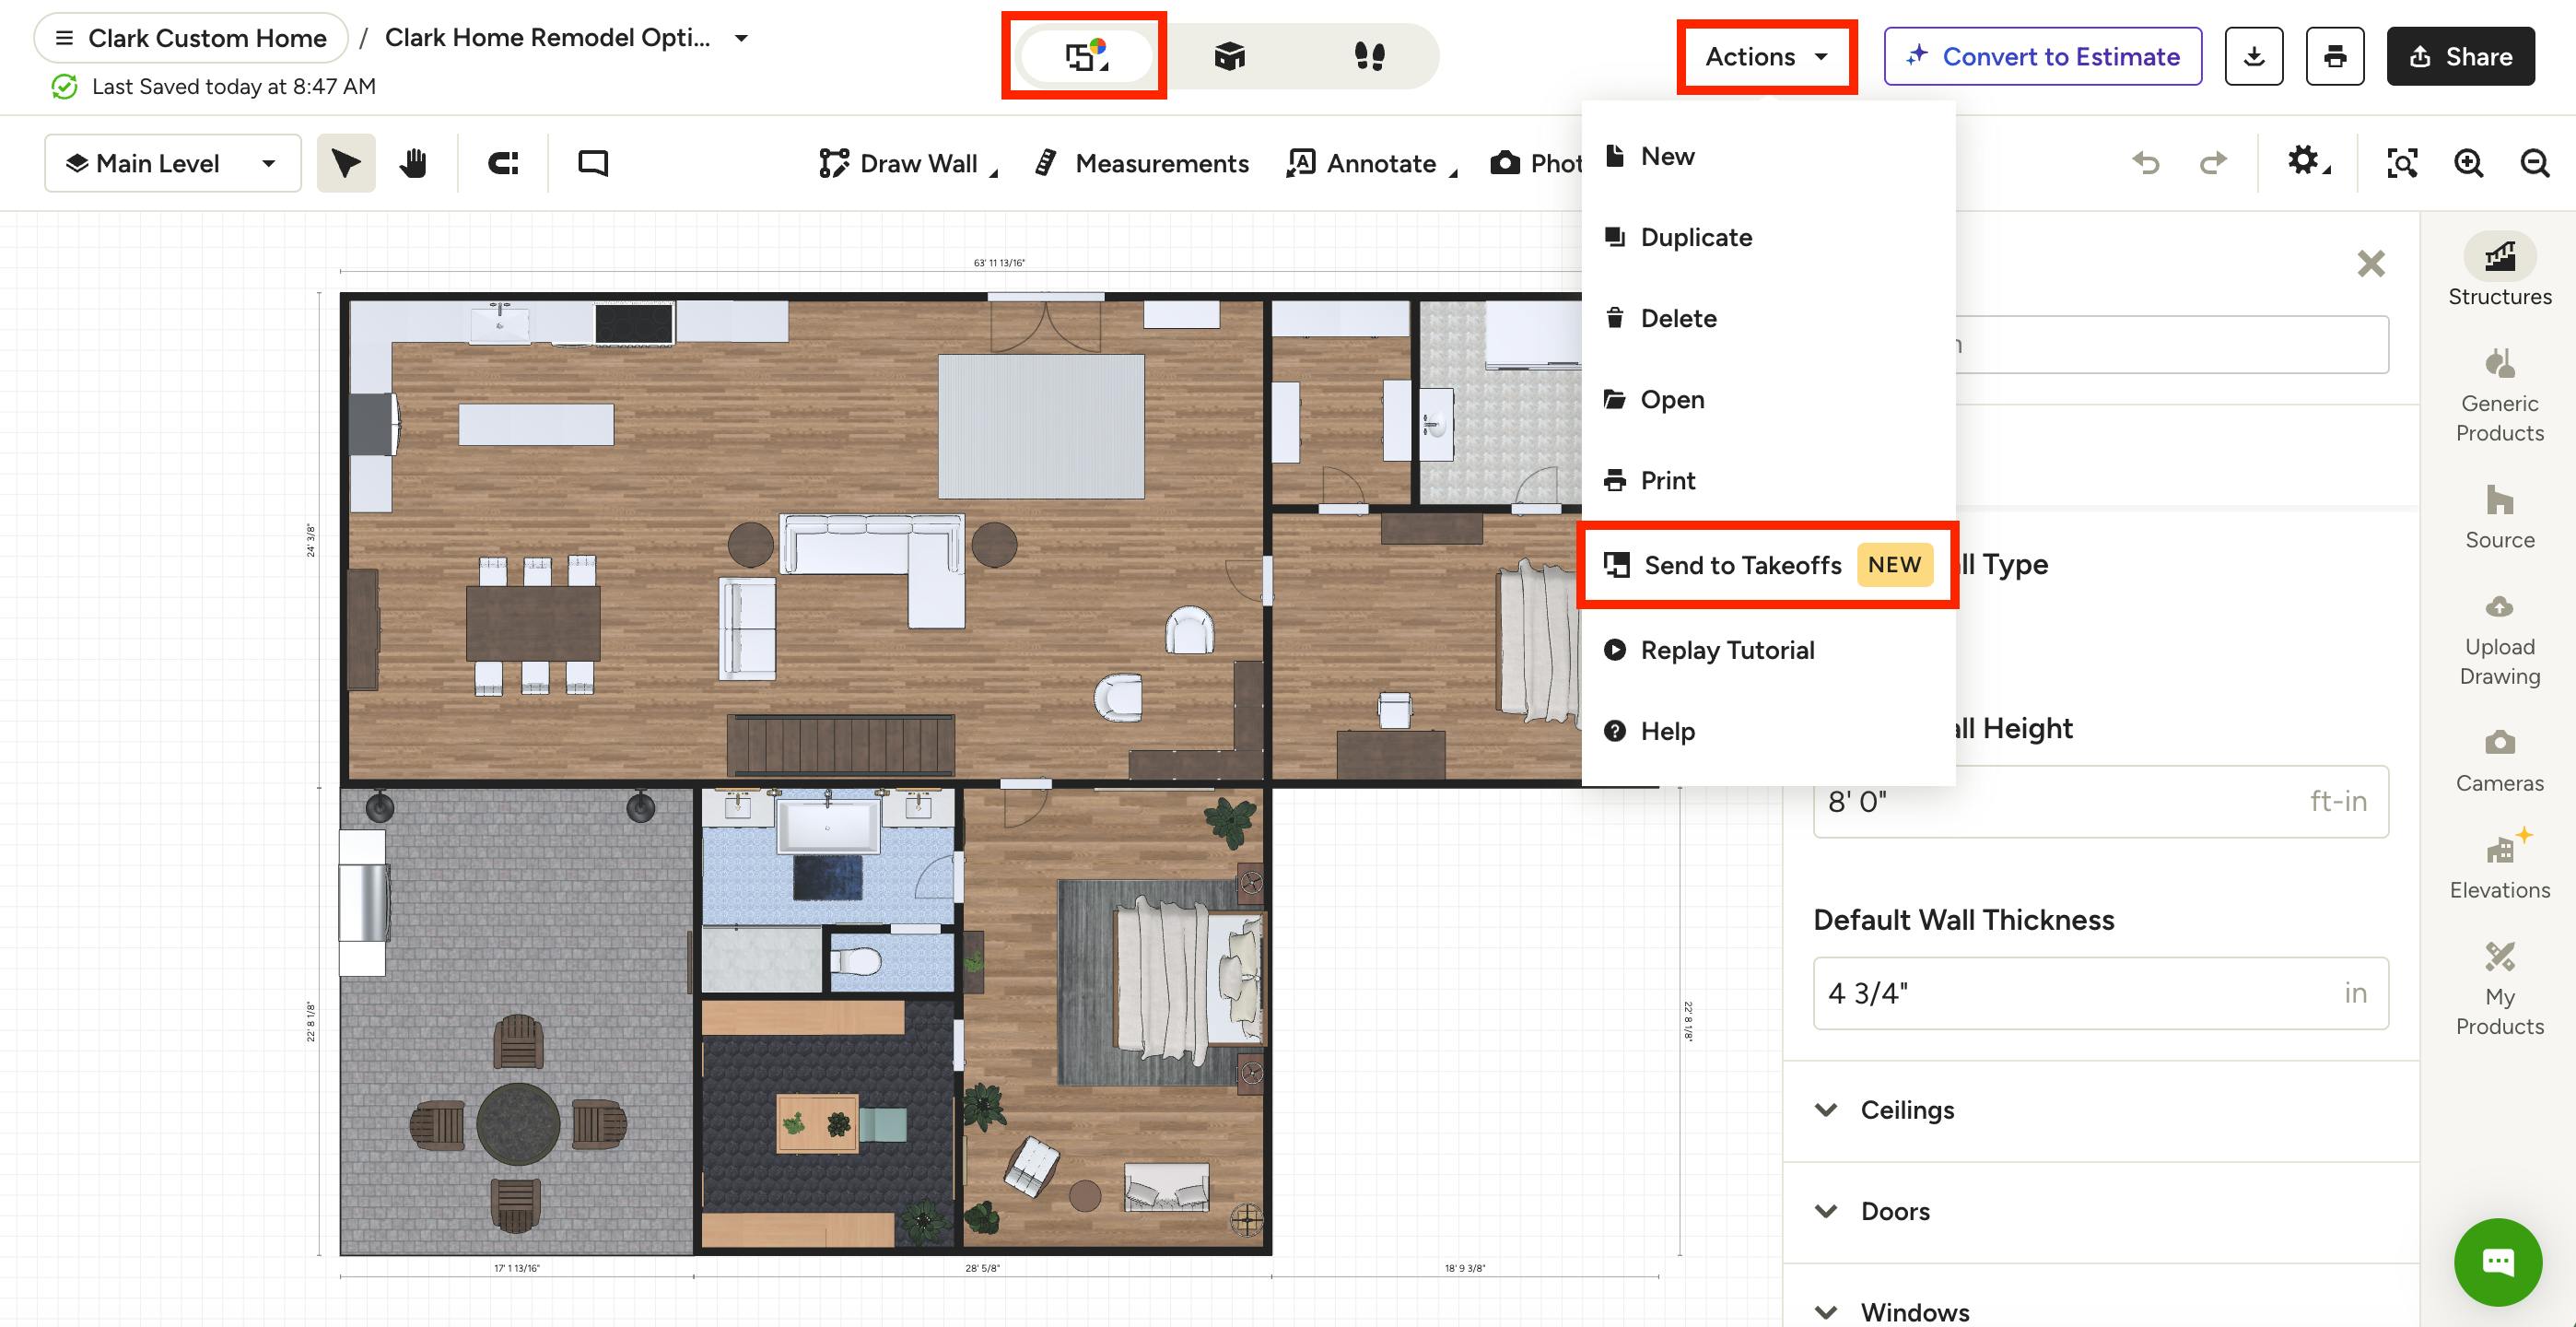
Be sure to select Floor Plan (2D) mode at the top of your plan for accurate takeoff measurements — you can select Black and White or Color based on your preference.
At the top of your floor plan, select Actions, then click Send to Takeoffs in the dropdown menu.
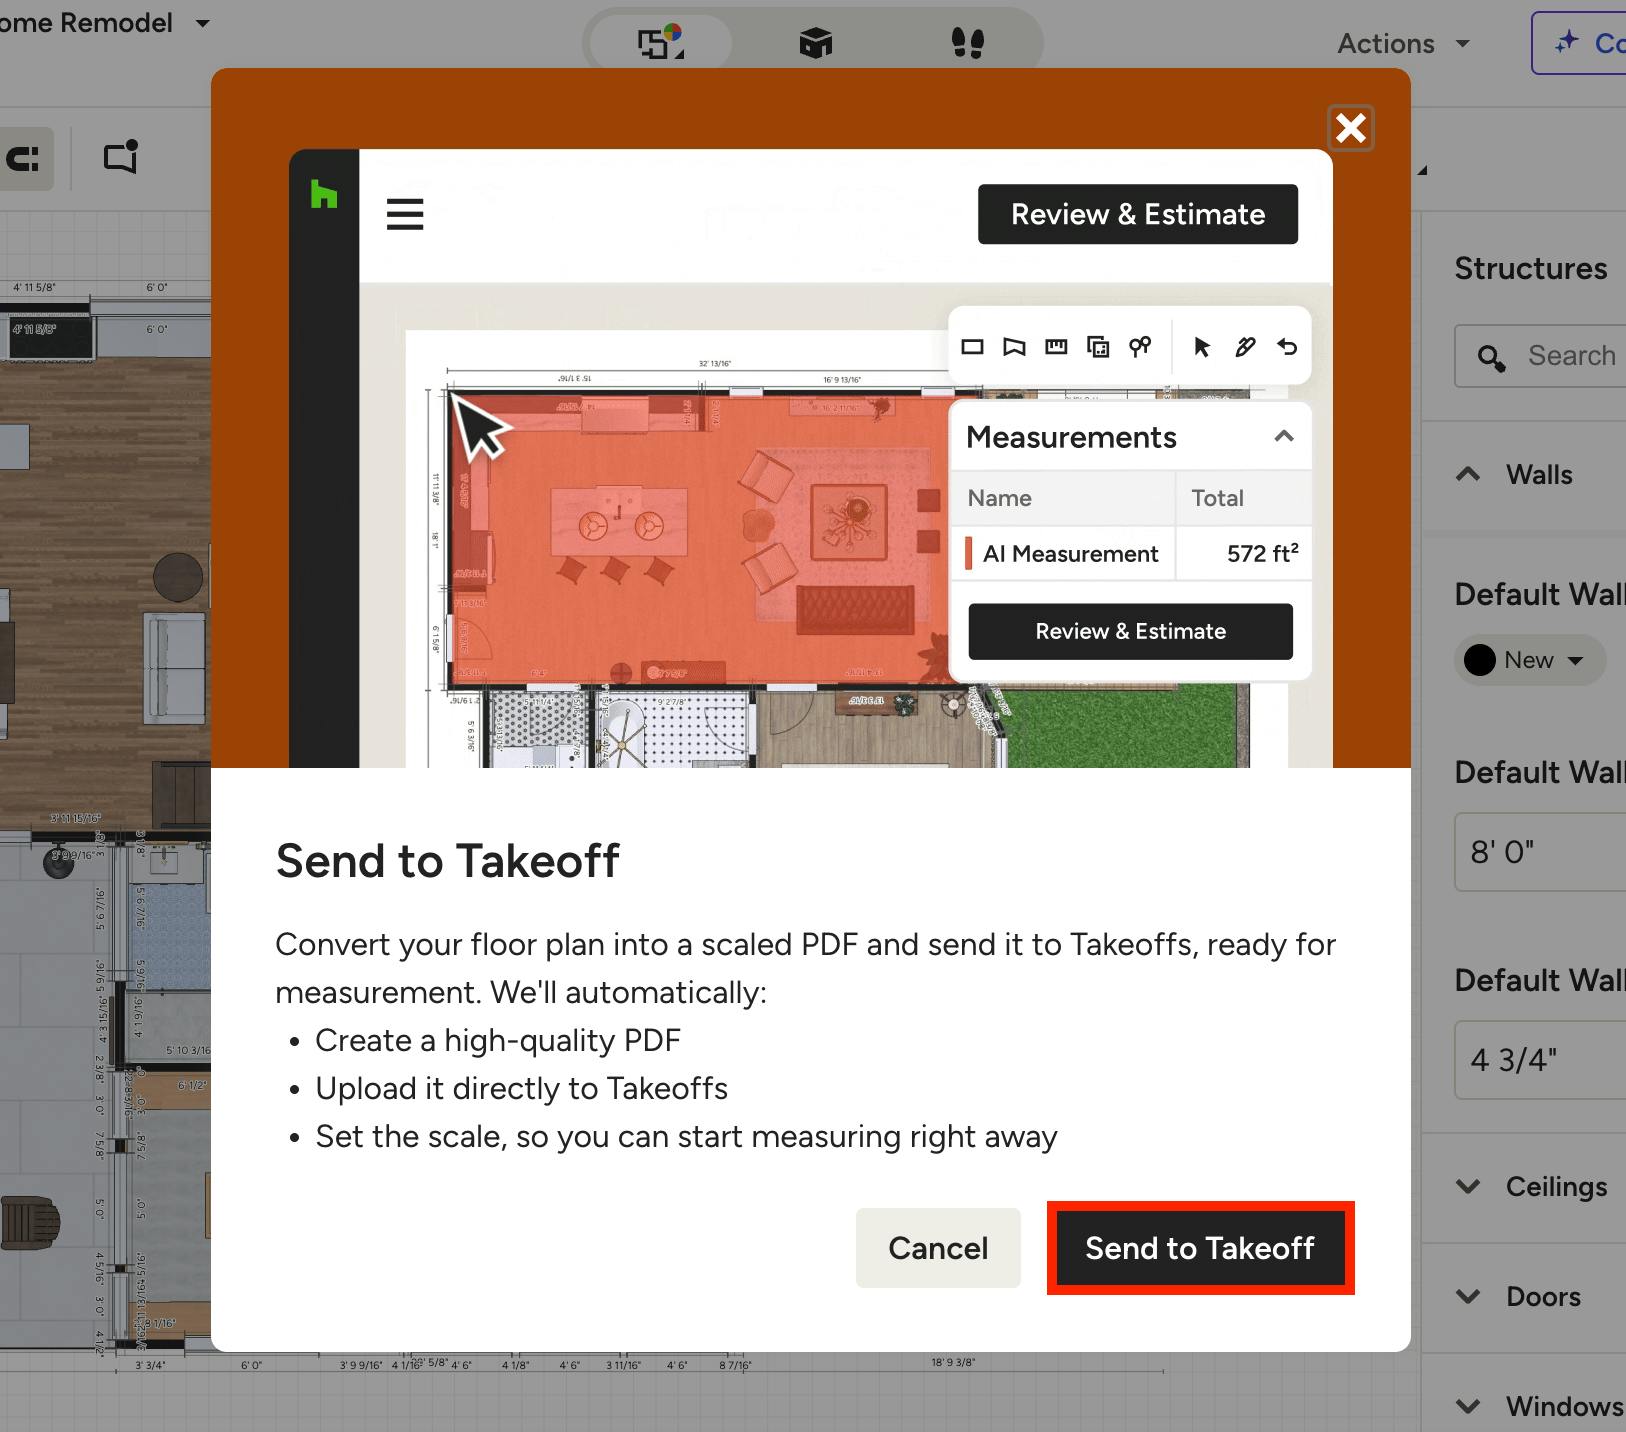
A new screen will appear with details on the process — select Send to Takeoff to continue.
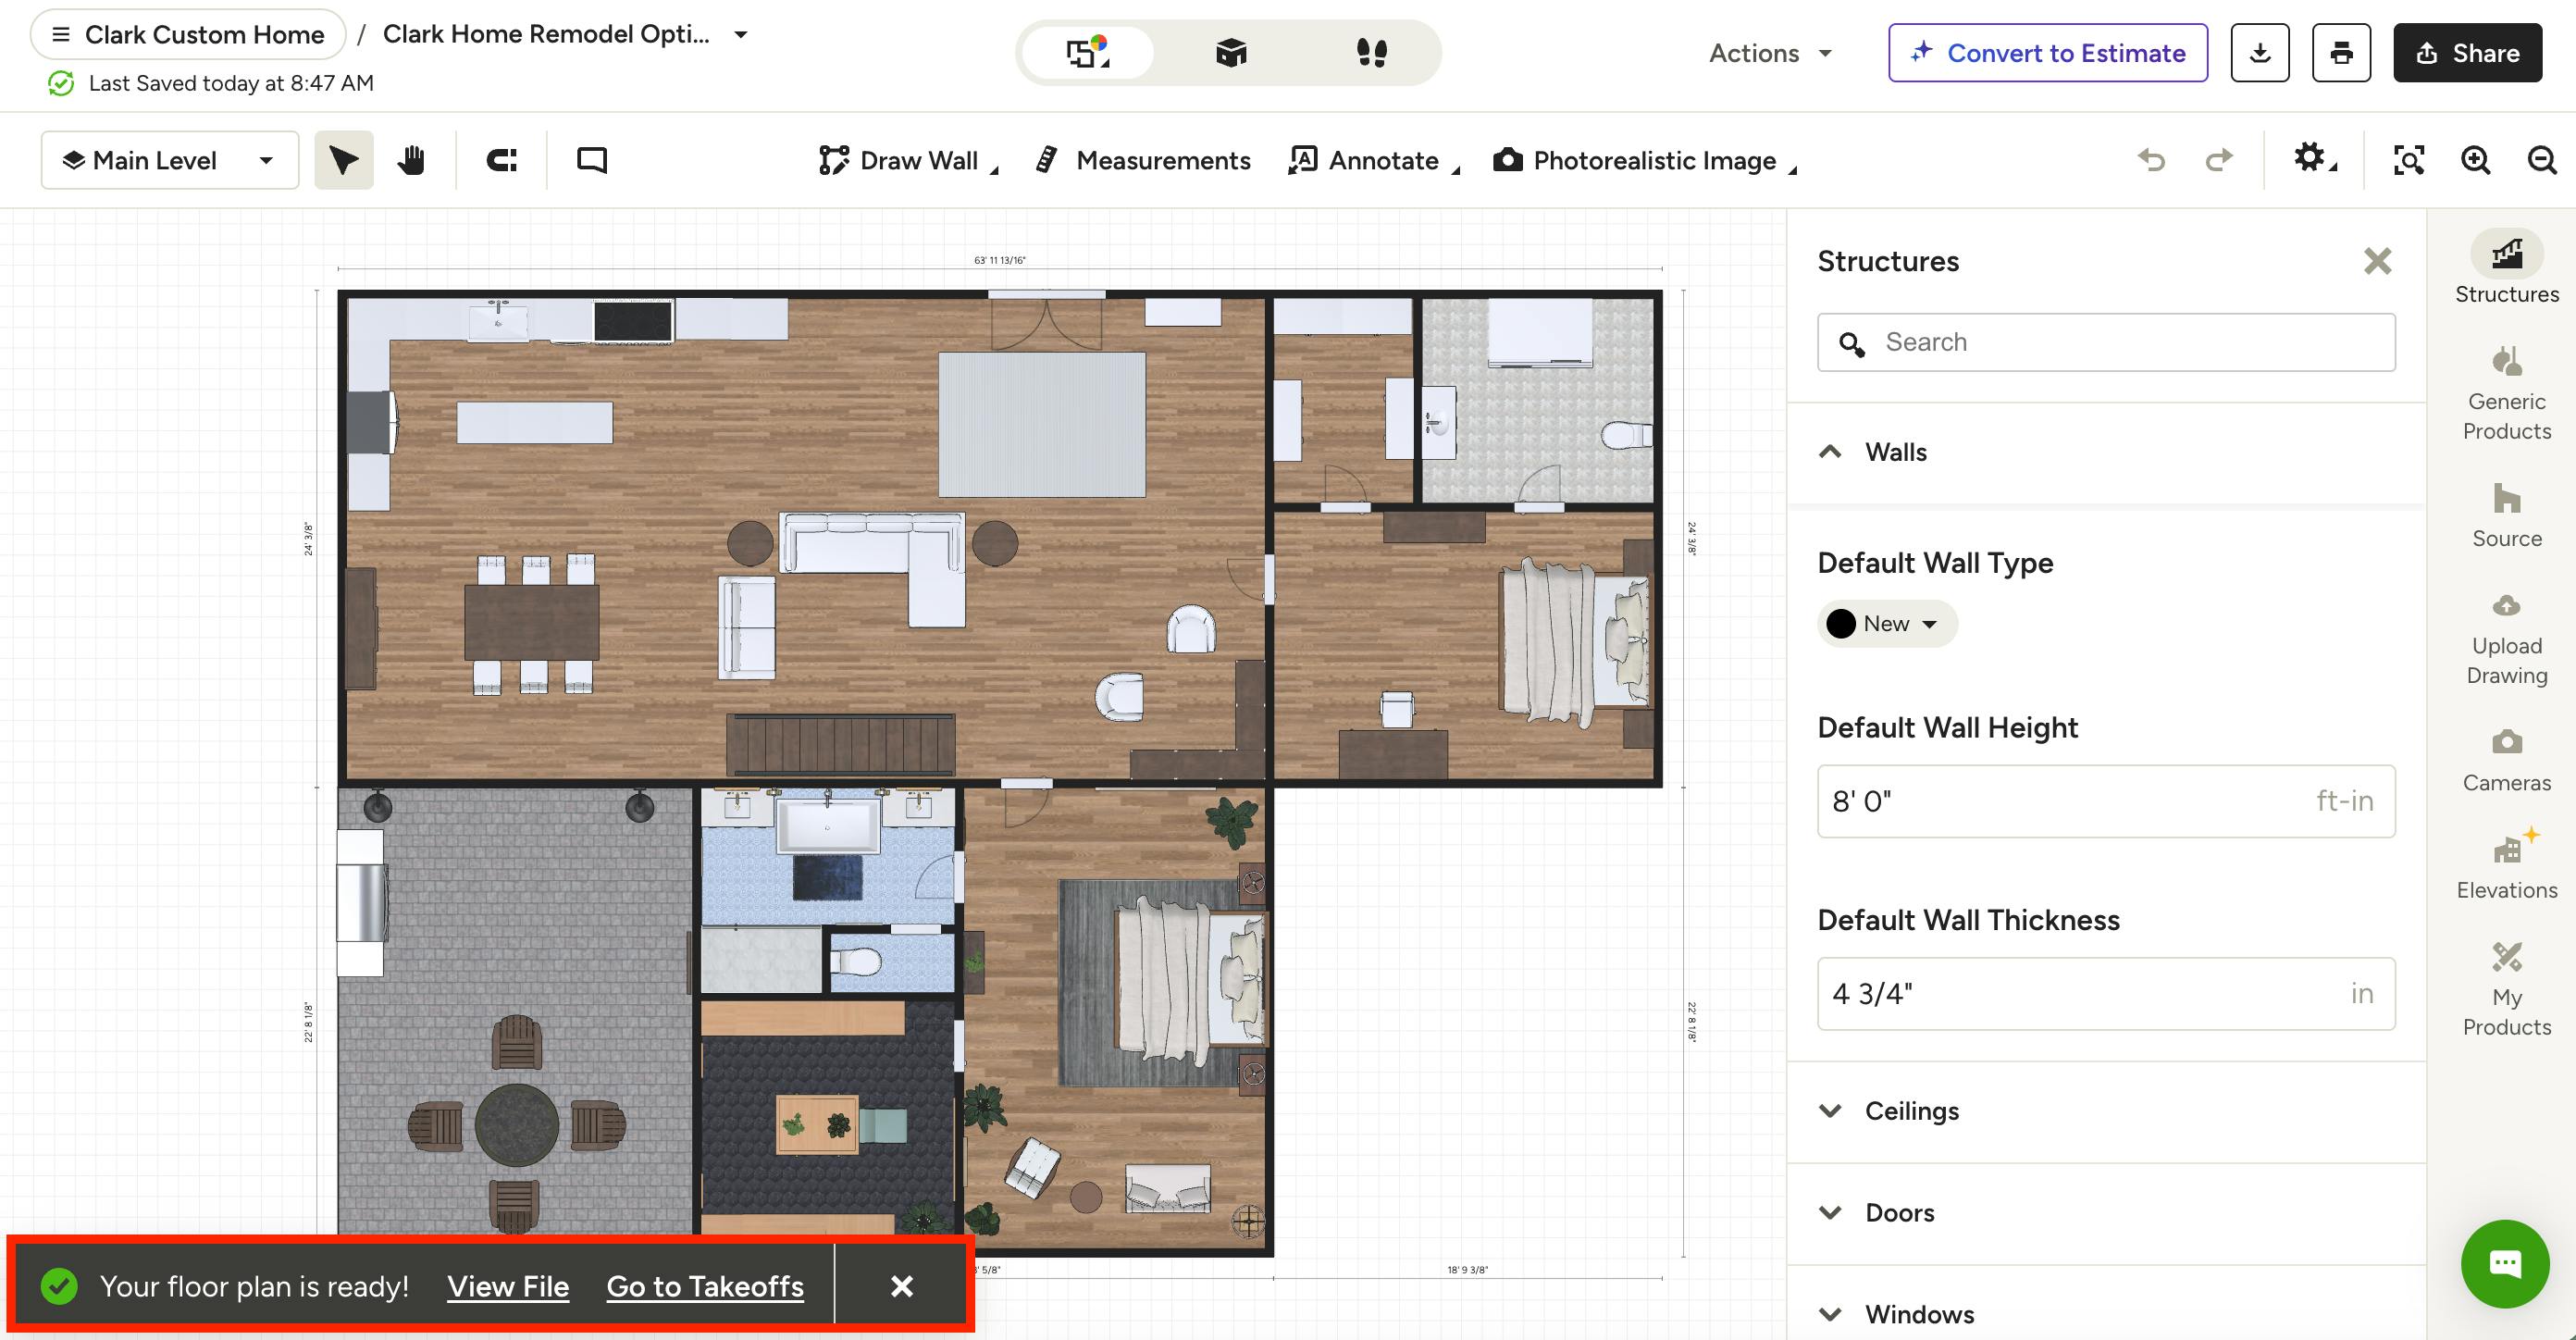
Your takeoff will now take a few moments to generate. Once complete, you will receive a notification at the bottom of your screen to inform you it's ready for review (as shown below).
Click View File to view the PDF file within Files & Photos in your project. Click Go to Takeoffs to open up the editable file directly in Takeoffs.
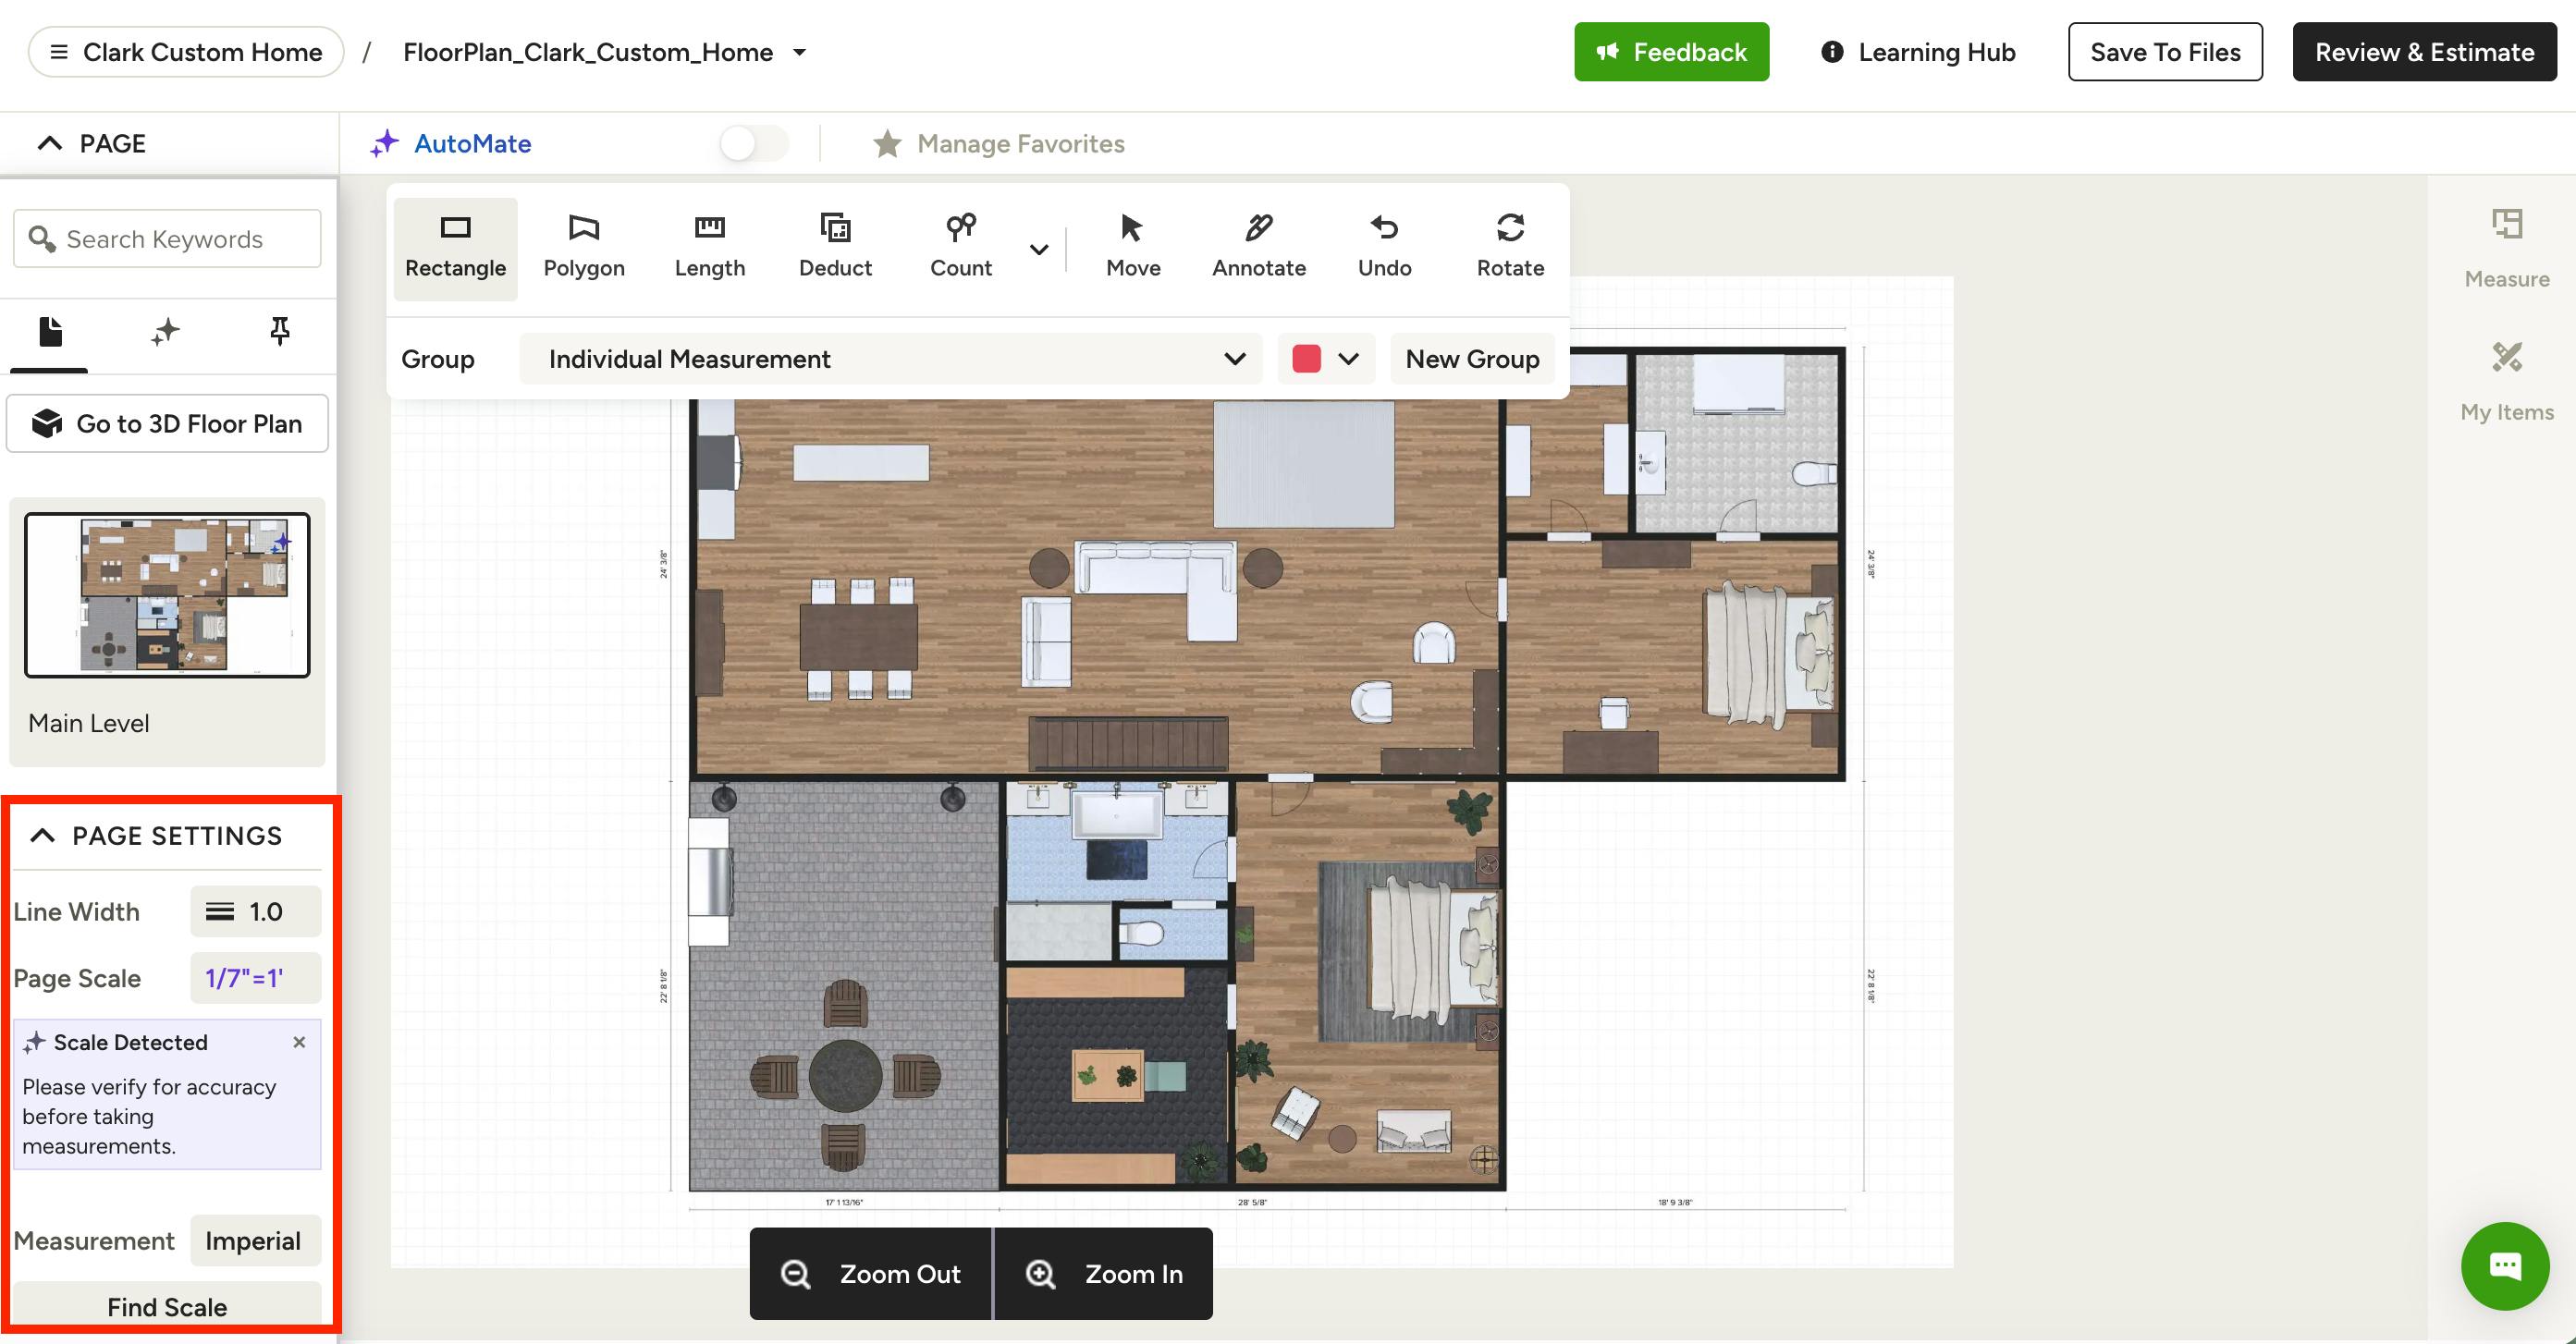
Please Note: While the scale will be set automatically during conversion, it is important to review the page scale under Page Settings — this ensures that your measurements are accurate and your takeoff is successful.
Read How to Set the Correct Scale on Takeoffs to learn more.
Once your page scale is set, you can start creating measurements, counting items, adding annotations and more. To learn more about everything you can accomplish in takeoffs, read How to Use Takeoffs on Houzz Pro.