How to Adjust QuickBooks Online Settings
Please note that Houzz is not an accounting professional. If you want to change the accounting software’s default settings or have any accounting-related questions, please consult with your advisor.
After you sync with QuickBooks Online, you can easily make adjustments to your QuickBooks Online Settings when needed. Within the Settings section, you can adjust:
- The start date for your document sync
- Payment settings
- Document sync exceptions
- Expense sync settings
- Cost & markup settings
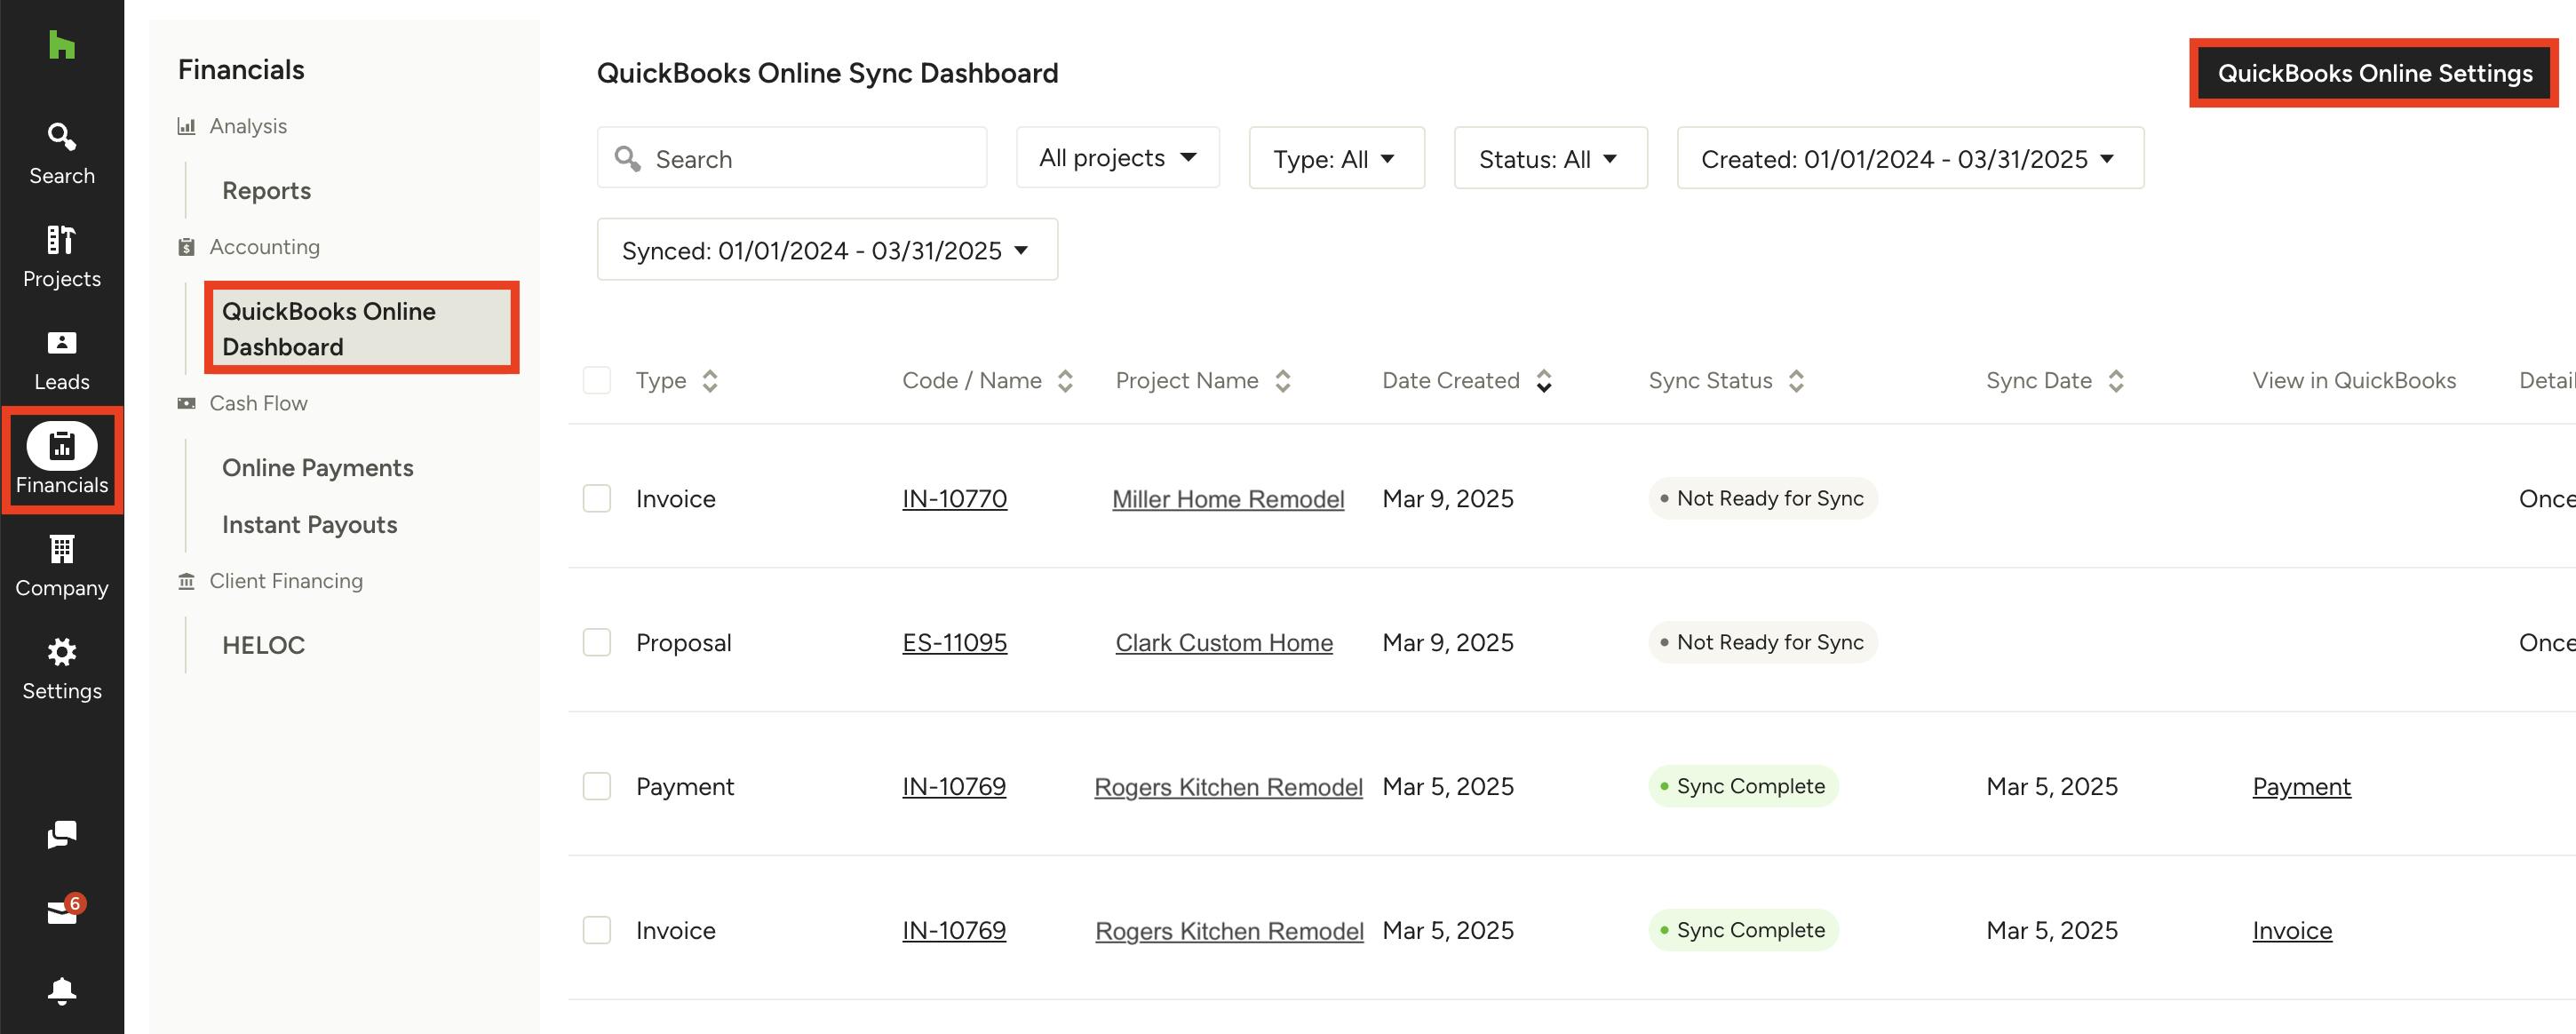
To access your QuickBooks Online Settings page, click the Financials icon in the left navigation, then QuickBooks Online Dashboard from the menu. Select the QuickBooks Online Settings button at the top of the dashboard.
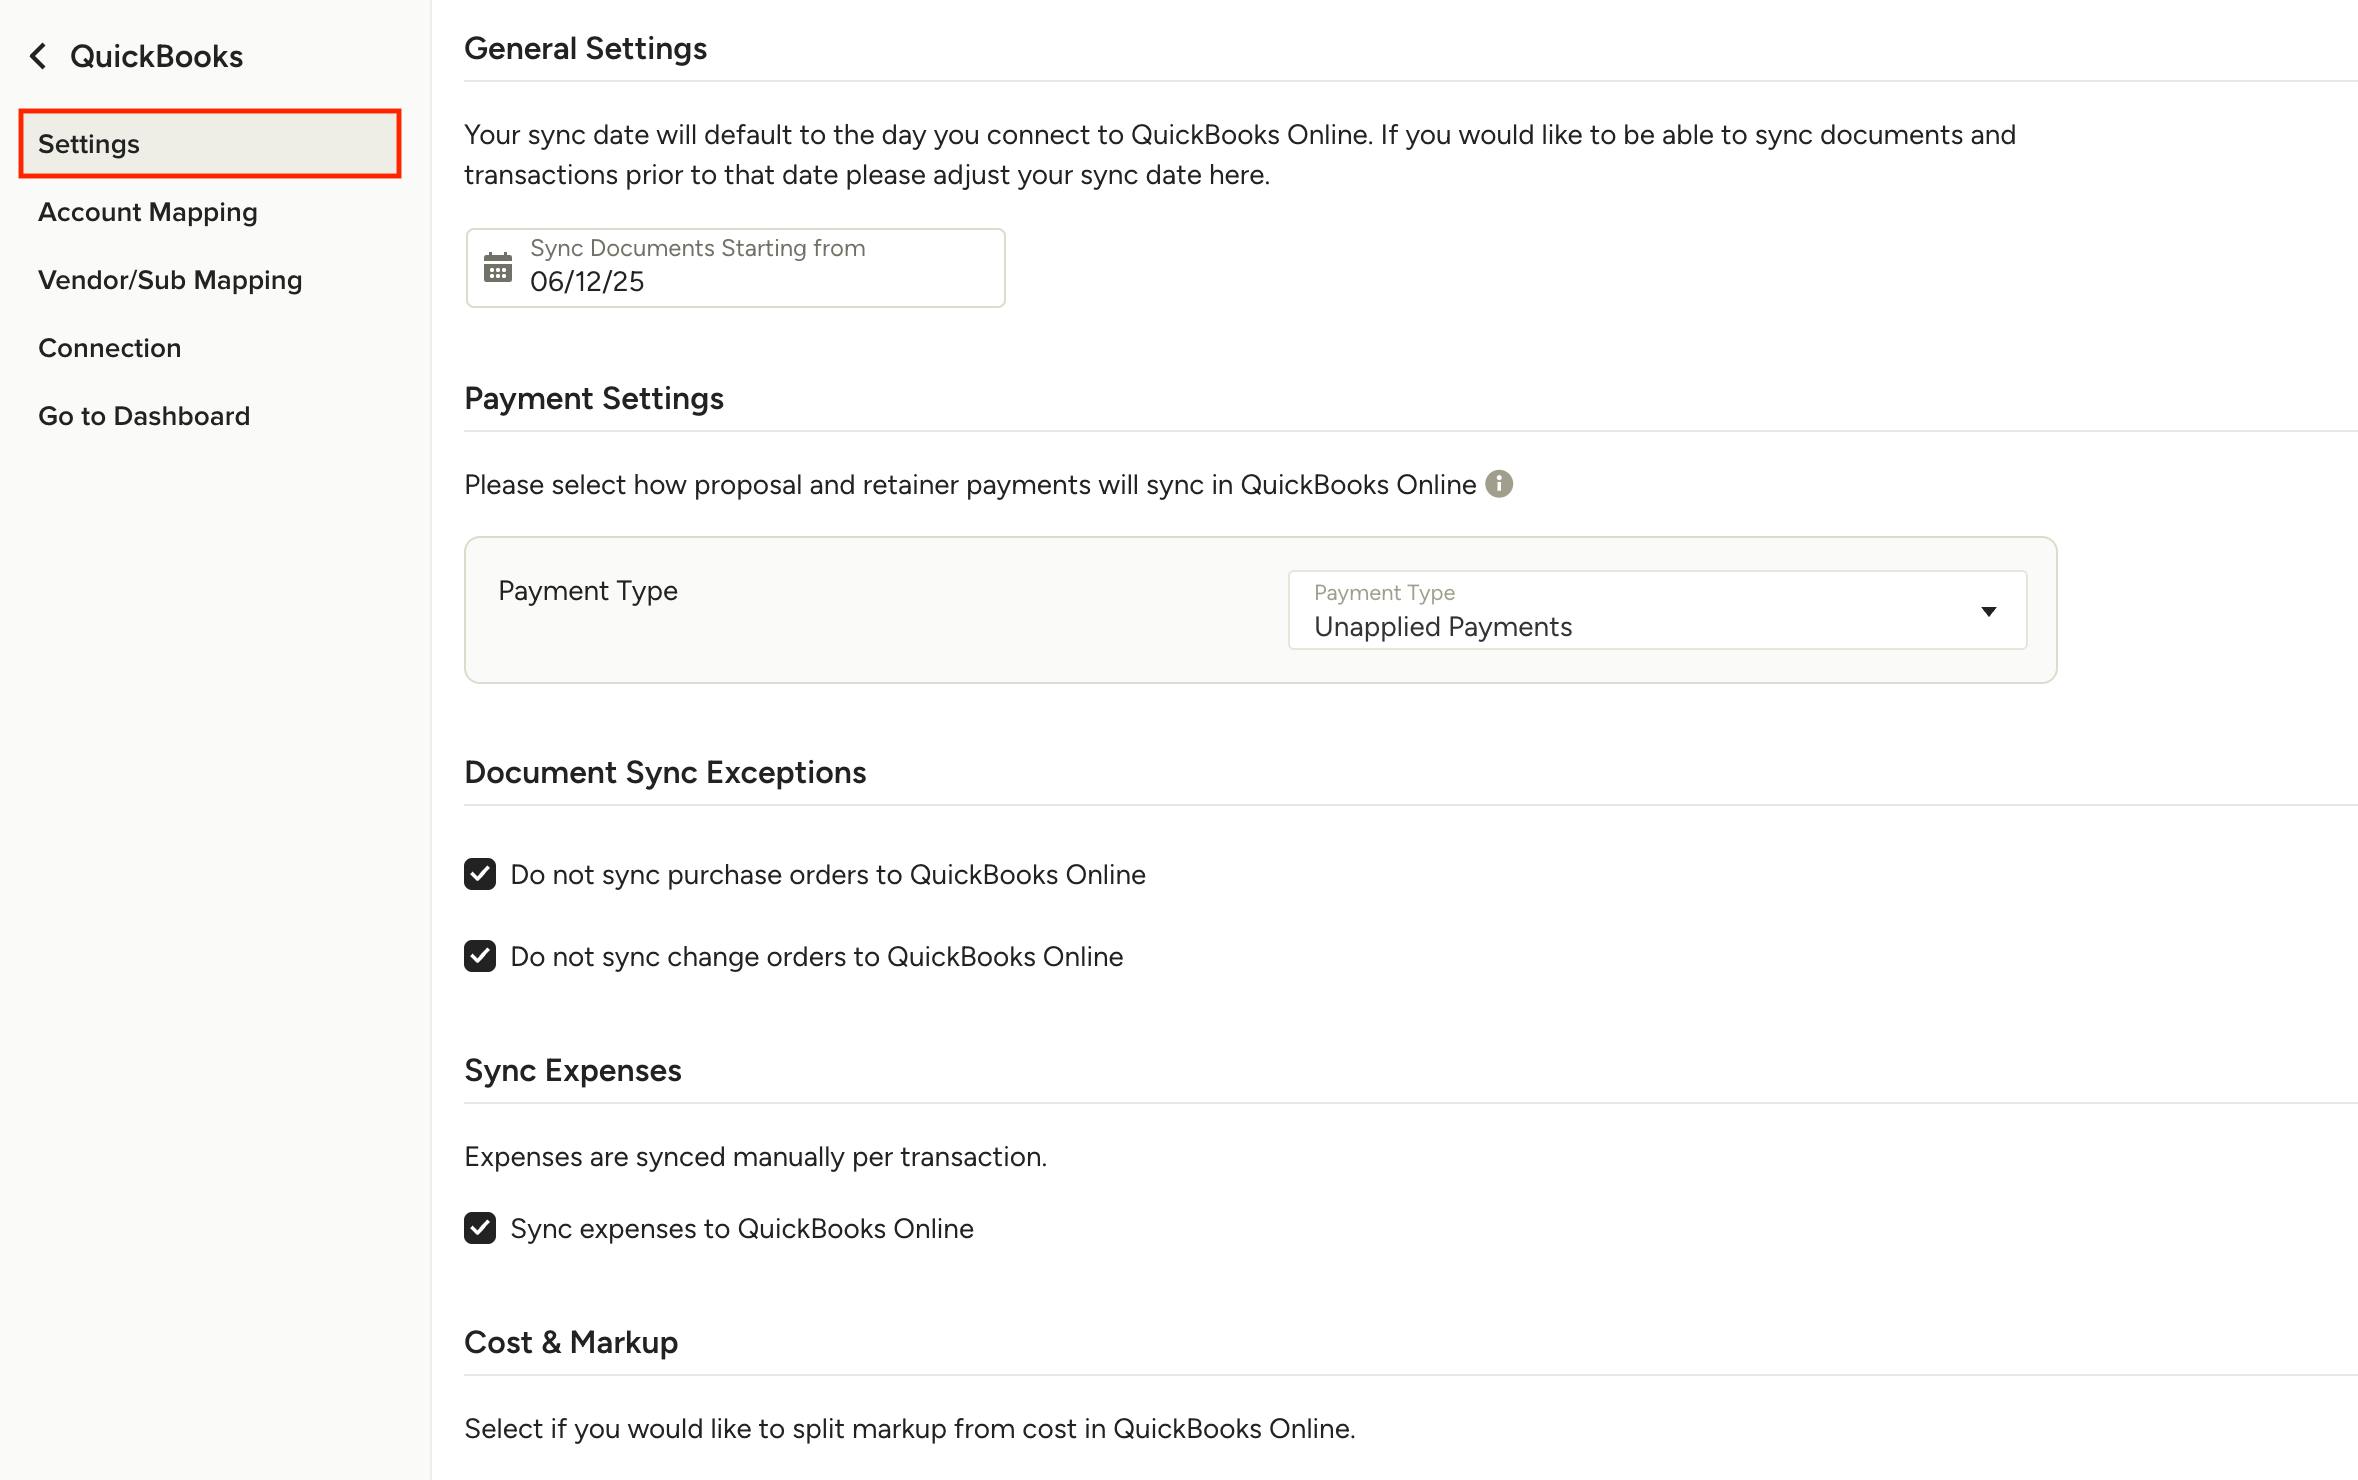
You will land on the Settings page by default (as shown below). Let's go over all that you can adjust on this page.
Document Sync Date
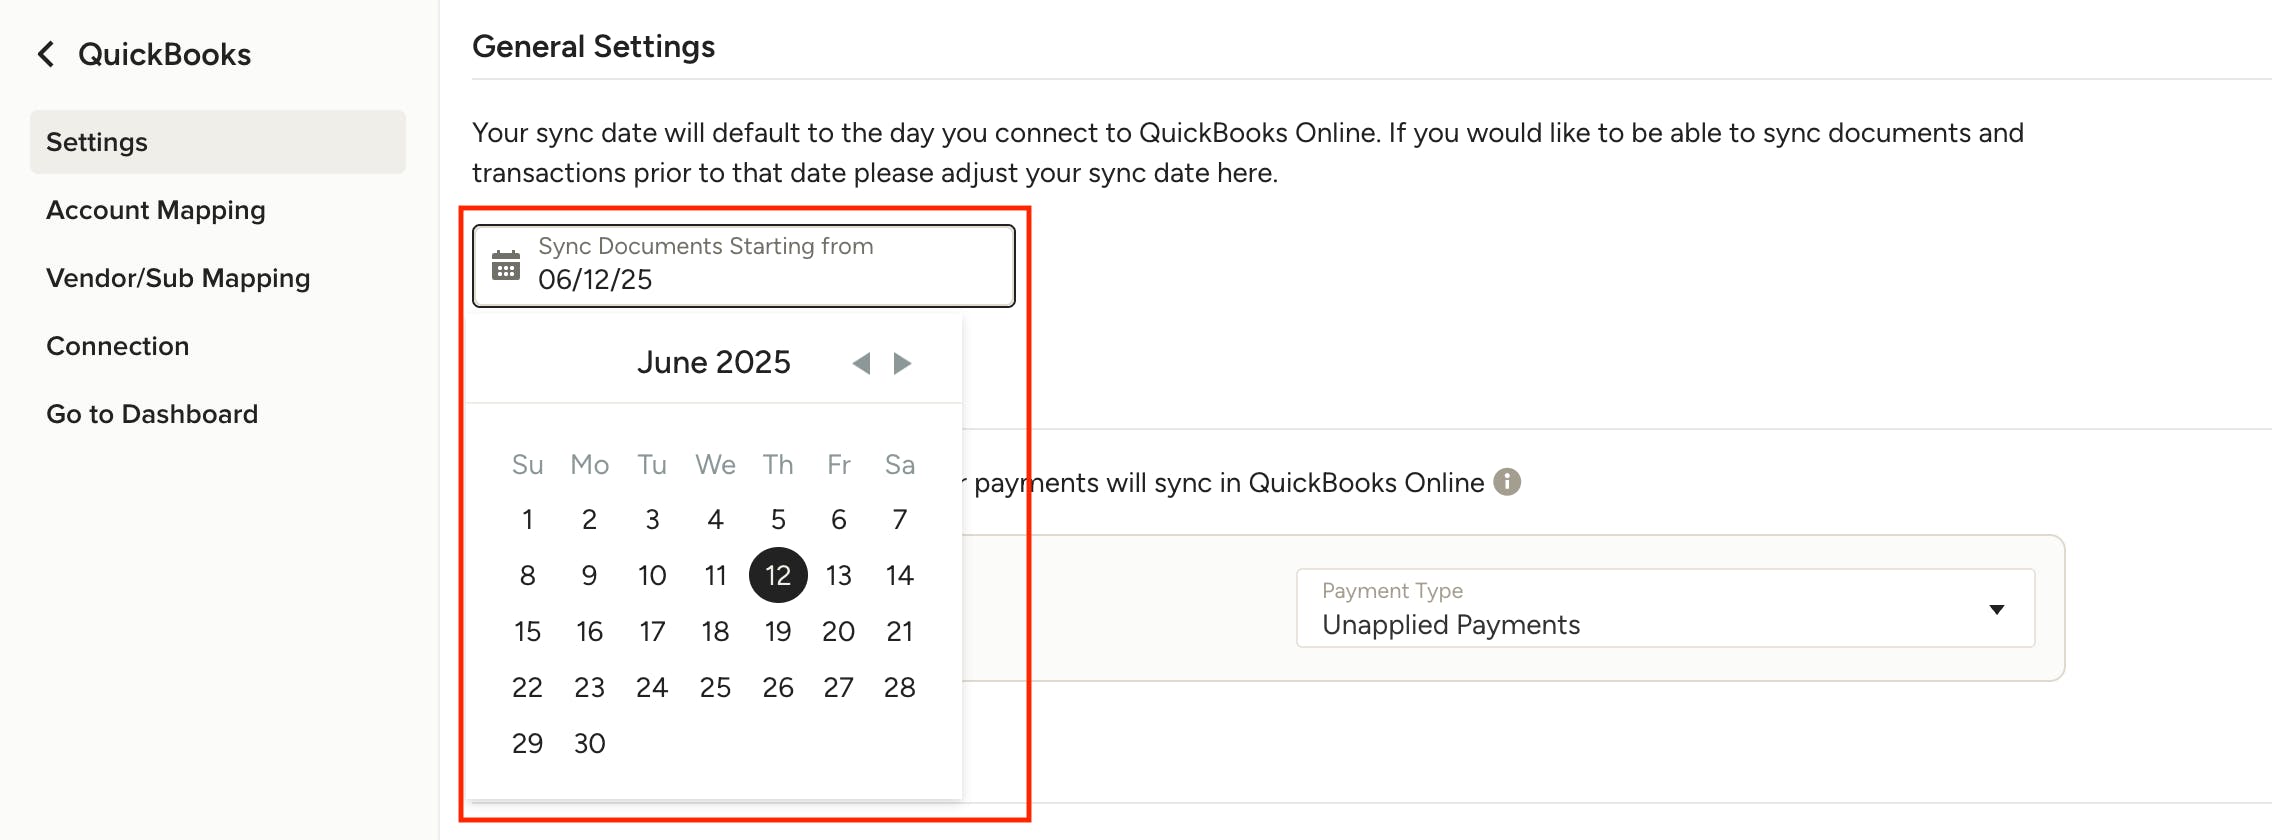
In the first section of the Settings page, you will be able to adjust the sync start date — documents after this date will be synced to QuickBooks Online. By default, the sync start date is based on when you established the connection between QuickBooks Online and Houzz Pro.
To adjust, click on the current sync date, and select a new date in the calendar that appears. Be sure to select the checkbox at the bottom of the settings page, then click Save, to complete the change.
Please Note: Documents created before October 7, 2020 will not sync to QuickBooks Online. Also, payments that are received on invoices or change orders that were created prior to October 7, 2020 will not sync over, since their host document cannot sync over.
Payment Settings
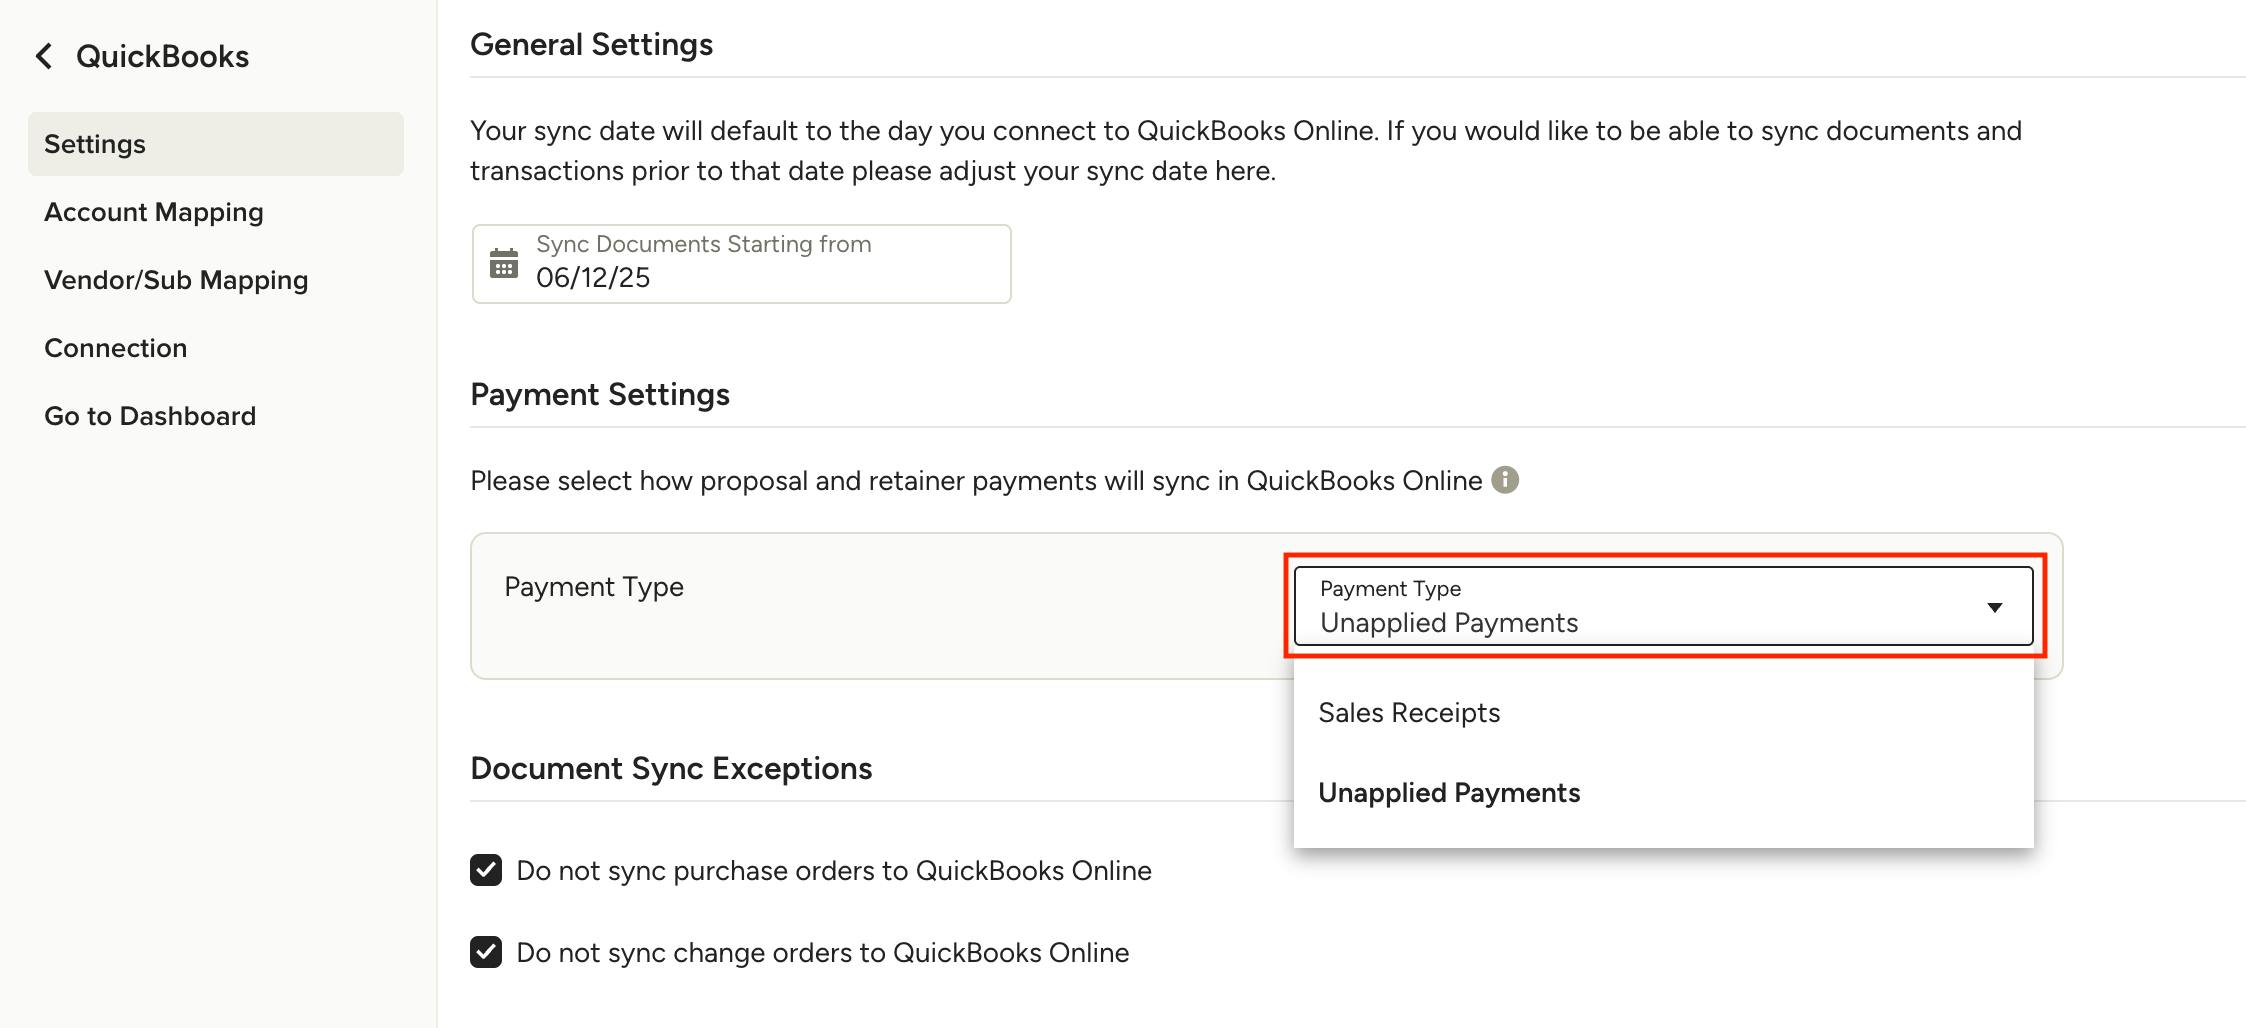
In the Payment Settings section, you can map your retainer payments or payments received against an estimate or proposal. Here, the default is Unapplied Payments, but you can also select Sales Receipts in the dropdown menu.
If you make a change, be sure to select the checkbox at the bottom of the settings page, then click Save to complete the change.
Unapplied Payments
If you select this method, which is the default, the retainer payment or the payment against an estimate/proposal will sync under the customer profile as an unapplied payment.
Once the payment is applied to an invoice and that syncs to QuickBooks Online, the unapplied payment is applied against the invoice as a payment.
Sales Receipt
If you select this method, a sales receipt will sync to QuickBooks Online when you record a retainer payment or a payment against an estimate/proposal.
The payment will hit your deposit account, and the sales receipt will offset and increase the liability account. The default liability account is Houzz Pro Retainer Deposit — you have the option to change it to any other customer liability account if needed.
Once the retainer payment is applied against an invoice, or if a paid estimate/proposal is converted to an invoice, the sales receipt will be recorded against the invoice as a negative line item on the invoice. This will reduce or zero out the invoice.
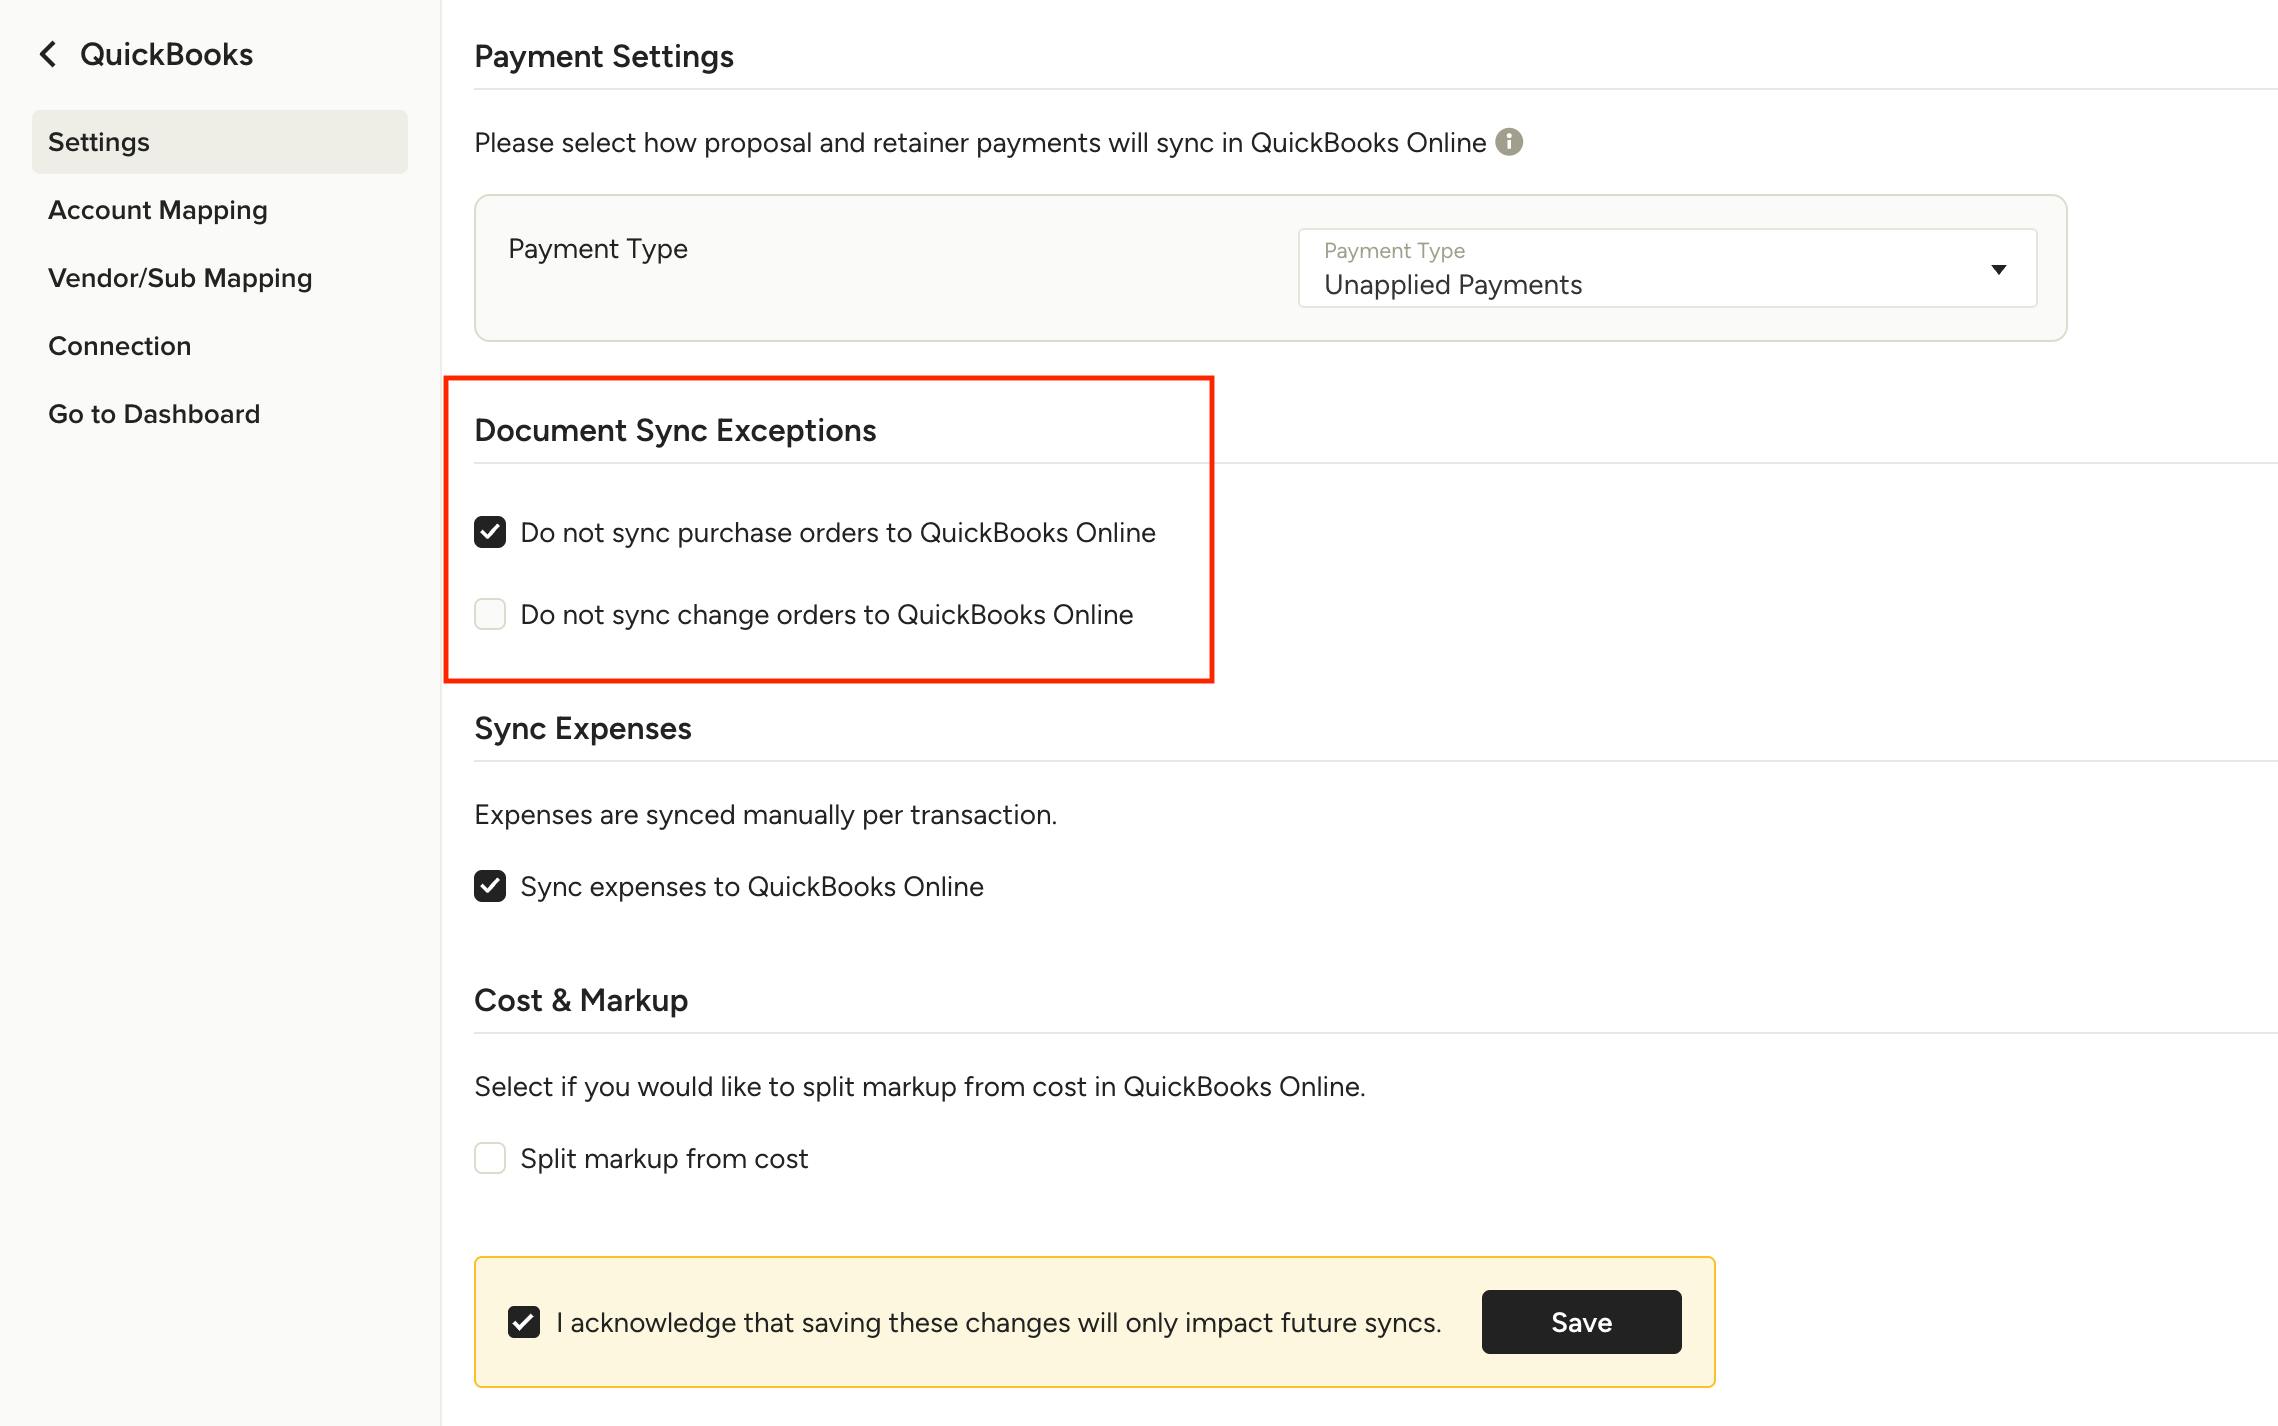
Document Sync Exceptions
In the Document Sync Exceptions section, you can decide whether or not you would like to sync Purchase Orders and/or Change Orders over to QuickBooks Online.
Turn on the toggle next to the relevant document type if you do not want to sync that document type.
Turn off the toggle next to the relevant document type if you want to sync that document type.
To complete the change, select the checkbox at the bottom of the settings page, then click Save.
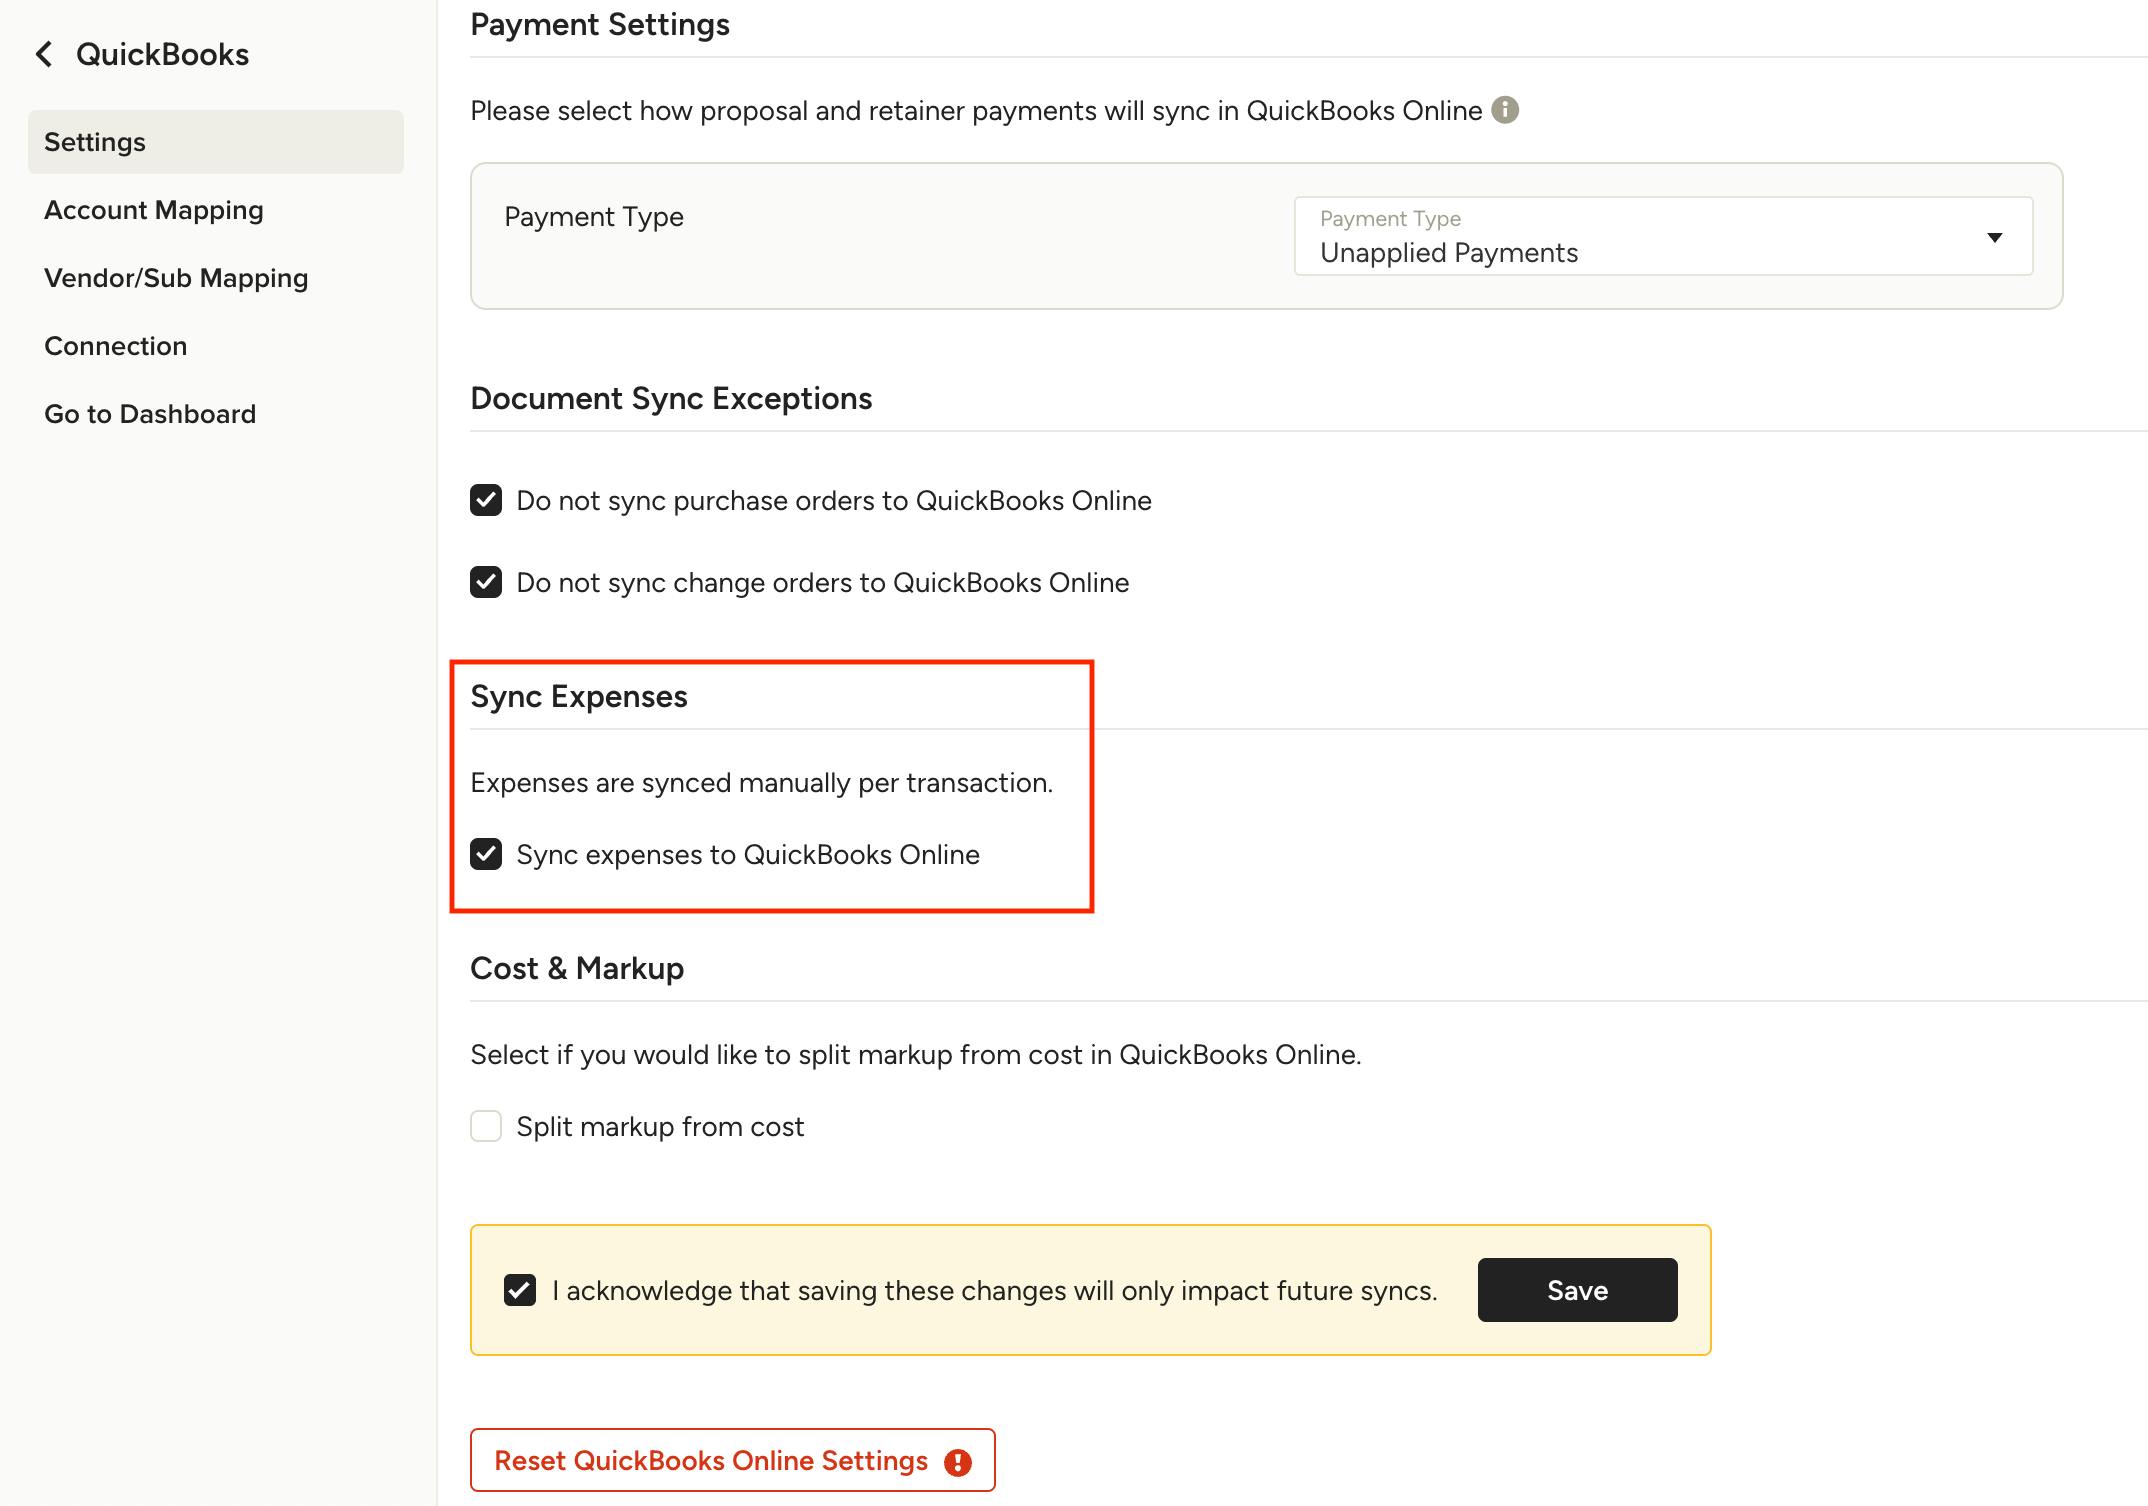
Sync Expenses
In the Sync Expenses section, you can decide whether or not you would like to sync expenses over to QuickBooks Online.
Select the checkbox if you would like your expenses to sync.
Note: Expenses are synced manually per transaction. More on this below.
If you make a change, be sure to select the checkbox at the bottom of the settings page, then click Save to complete the change.
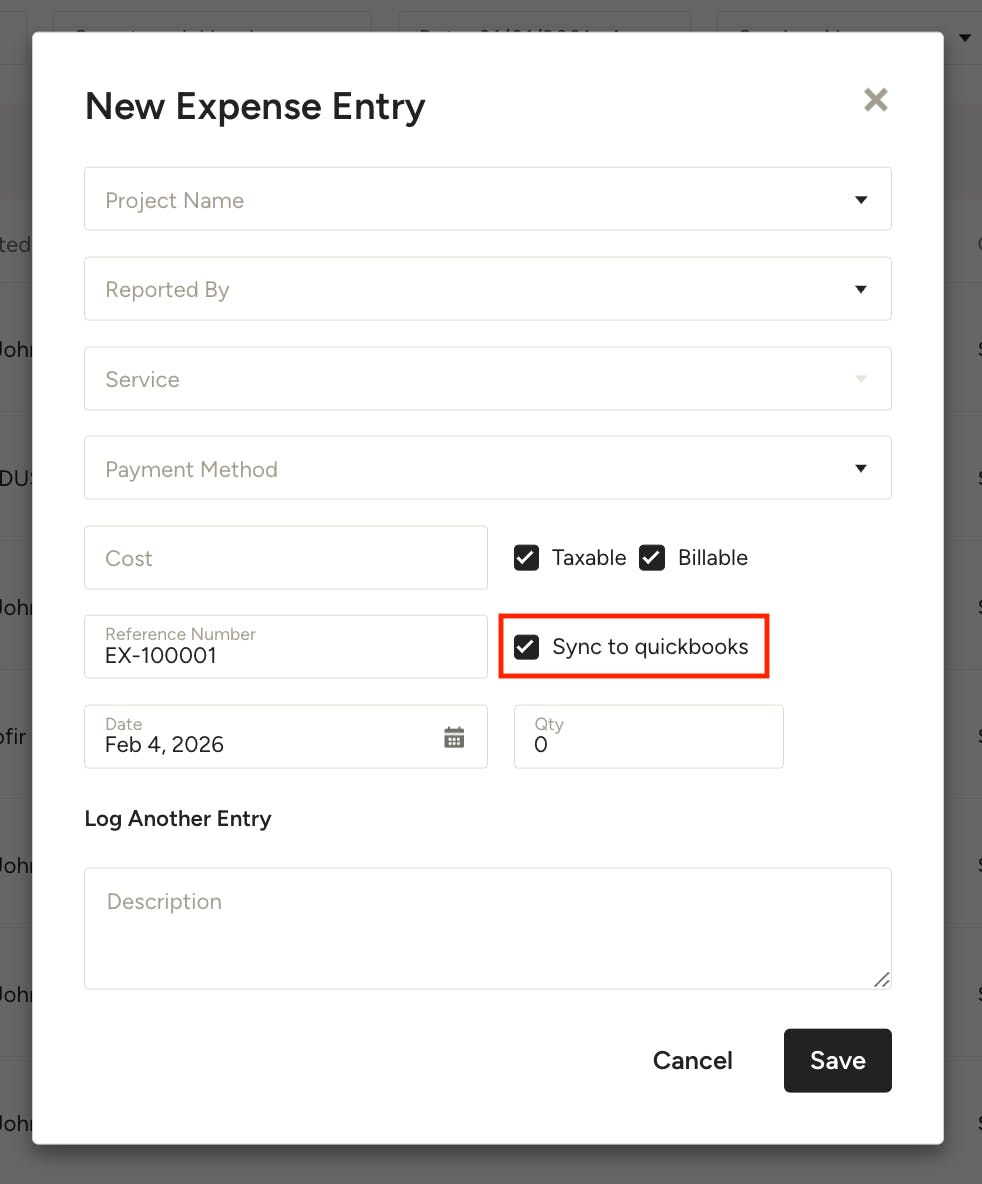
If you enable expense syncing, you will see a checkbox when creating expense entries to Save to QuickBooks. Check this box to sync the expense entry when saved.
Note: If the vendor field is filled in on a synced expense, this will sync over as the Payee. Learn how to map vendors from Houzz Pro to QuickBooks here.
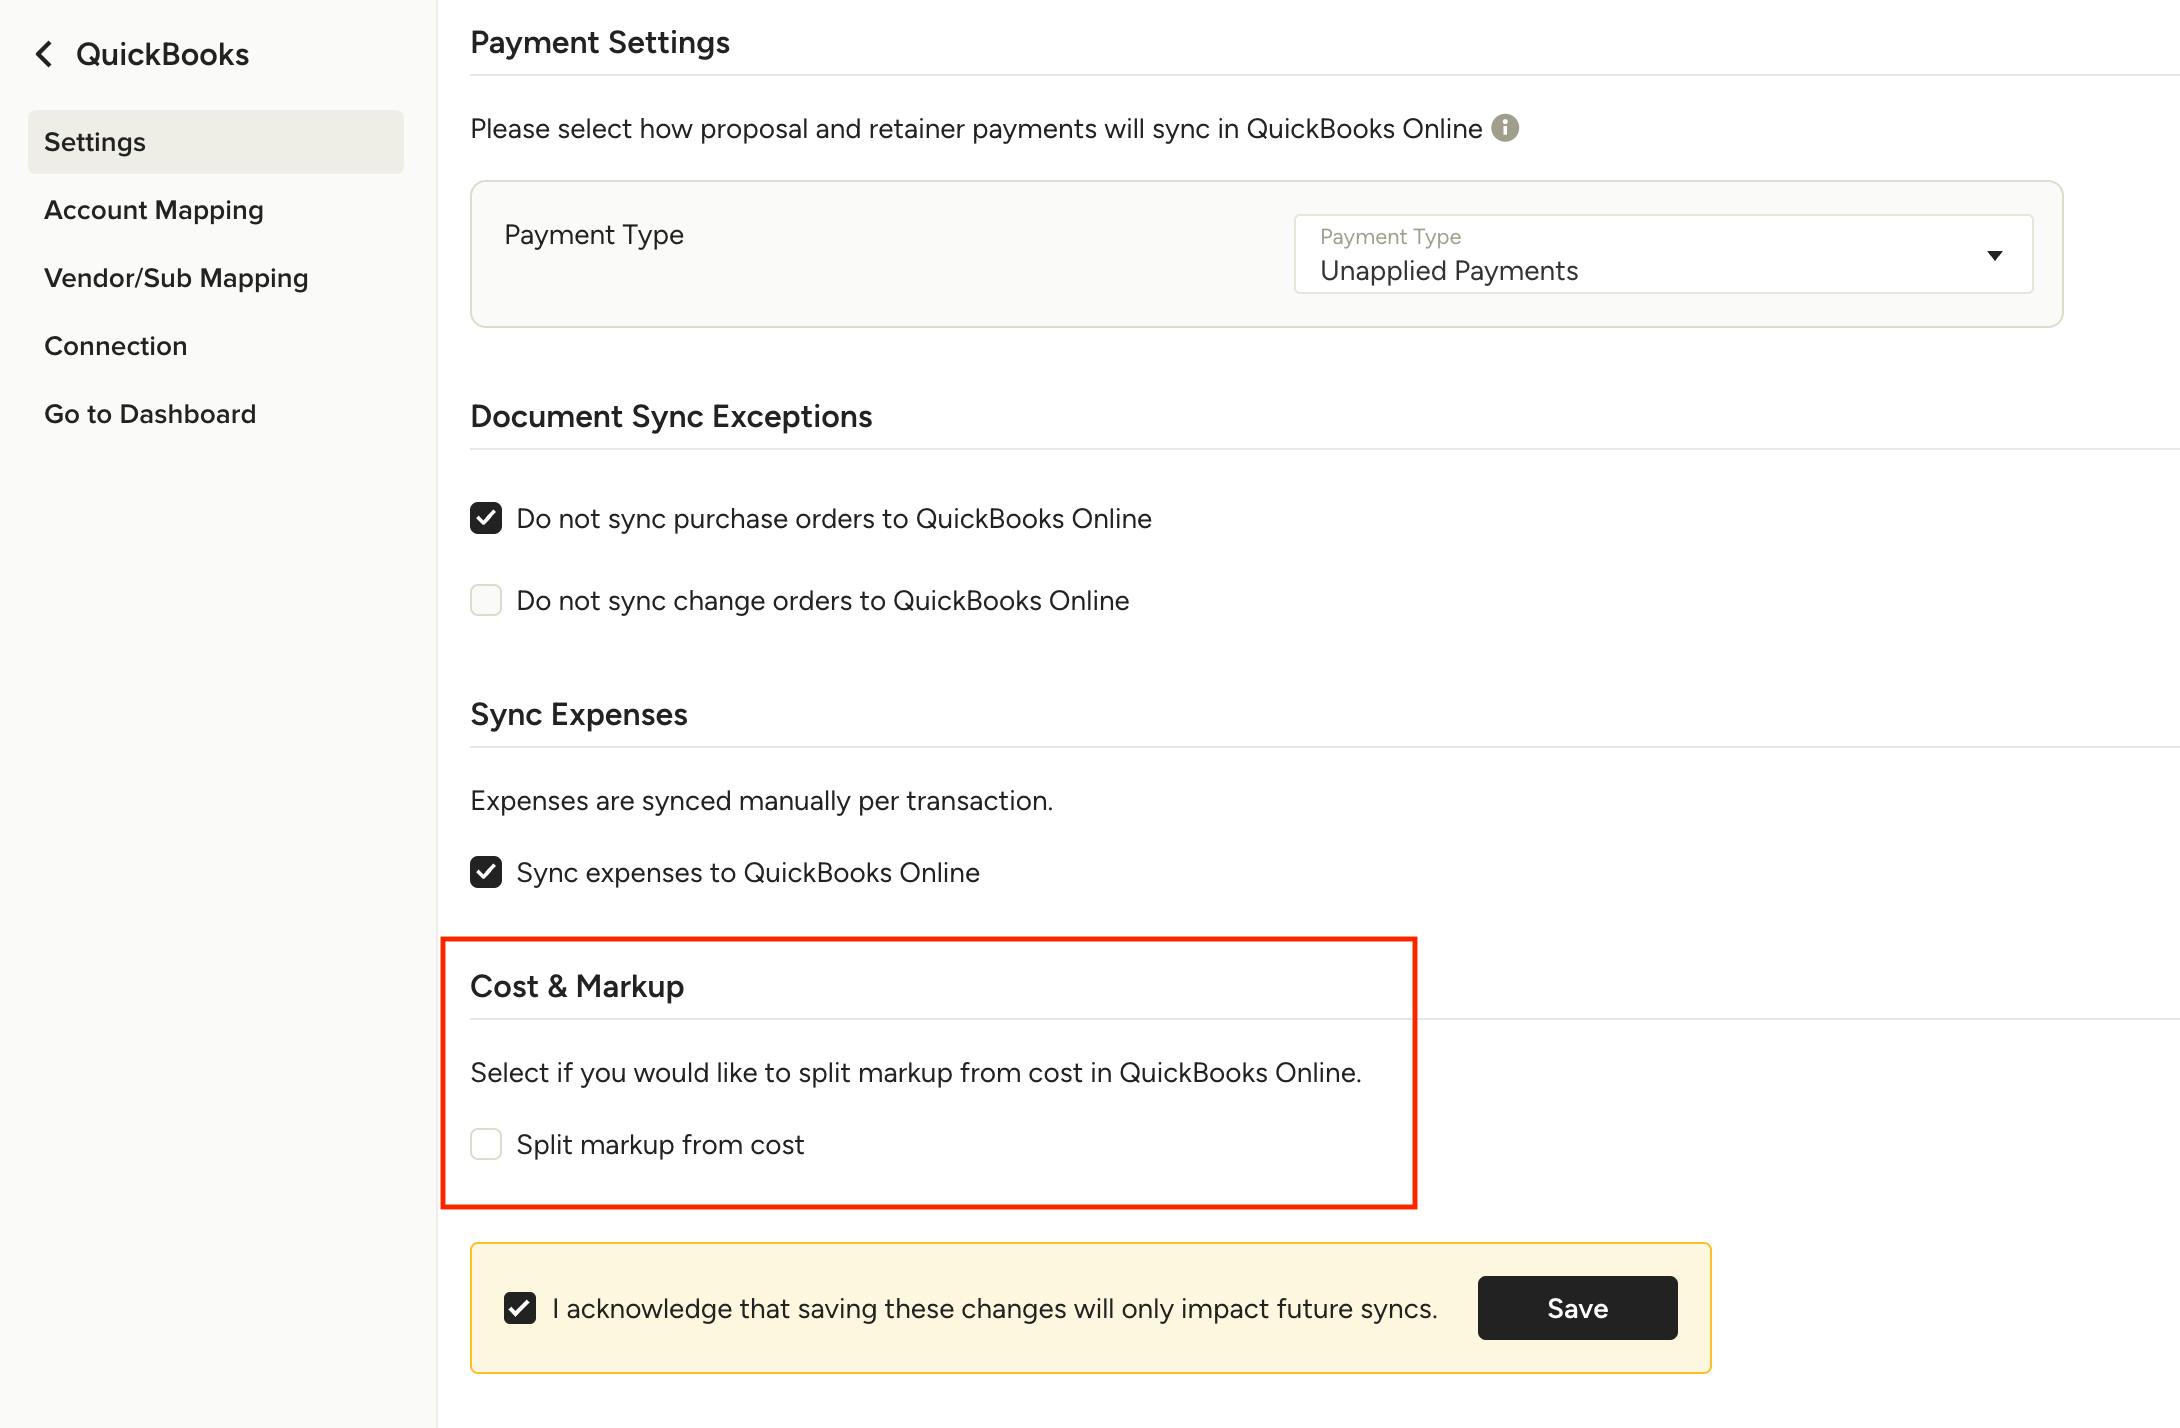
Cost & Markups
In the Cost and Markups section, you can decide whether you would like to split markups from costs in QuickBooks Online. This settings gives you more flexibility — it allows you to sync your financial data the way you want with fewer manual adjustments.
Select the checkbox if you would like to split cost and markup into separate lines.
De-select the checkbox if you would like cost and markup to enter as a total amount.
By default, the Design package will sync the total amount. The Build package will split cost and markup into separate lines.
To complete the change, select the checkbox at the bottom of the settings page, then click Save.
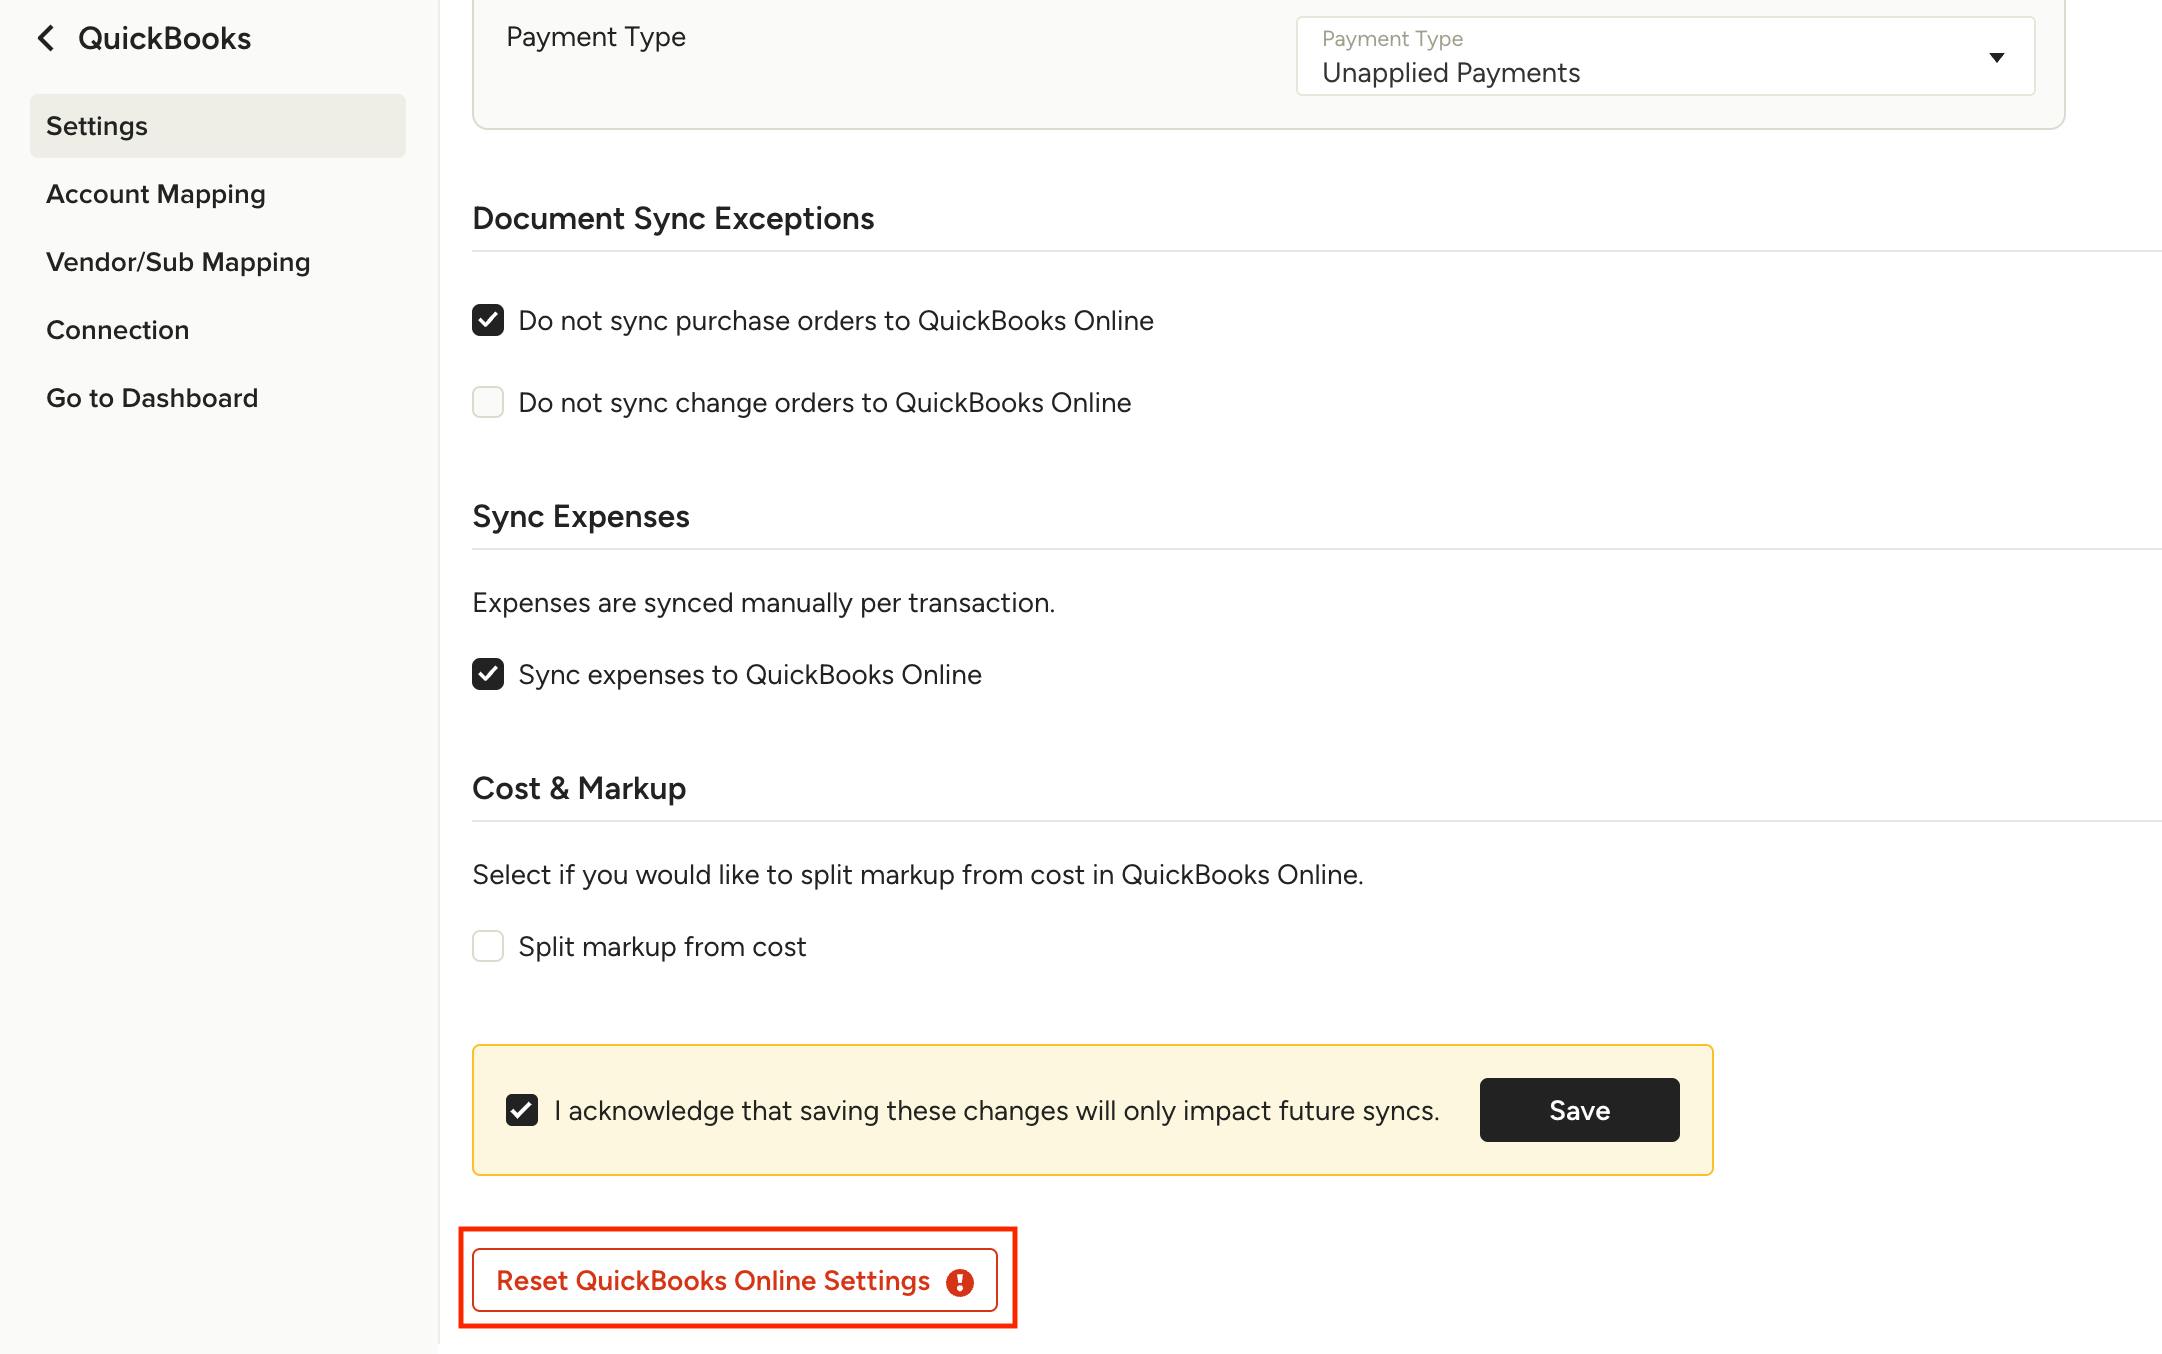
Reset QuickBooks Settings
At the bottom of the QuickBooks Online Settings page, you will see a Reset QuickBooks Settings button. Click this button to delete all custom mappings and reset to the default settings.
Please Note: This action cannot be undone — you will need to readjust all your settings.
Other QuickBooks Online Resources
How to Map Houzz Pro to QuickBooks Online Chart of Accounts
How to Map Vendors in Houzz Pro to QuickBooks Online
How to Check QuickBooks Online Sync Status on Documents
How to Sync Houzz Pro With QuickBooks Online
How to Turn on Purchase Orders in Your QuickBooks Online Settings