How to Add Annotations to Your 3D Floor Plan
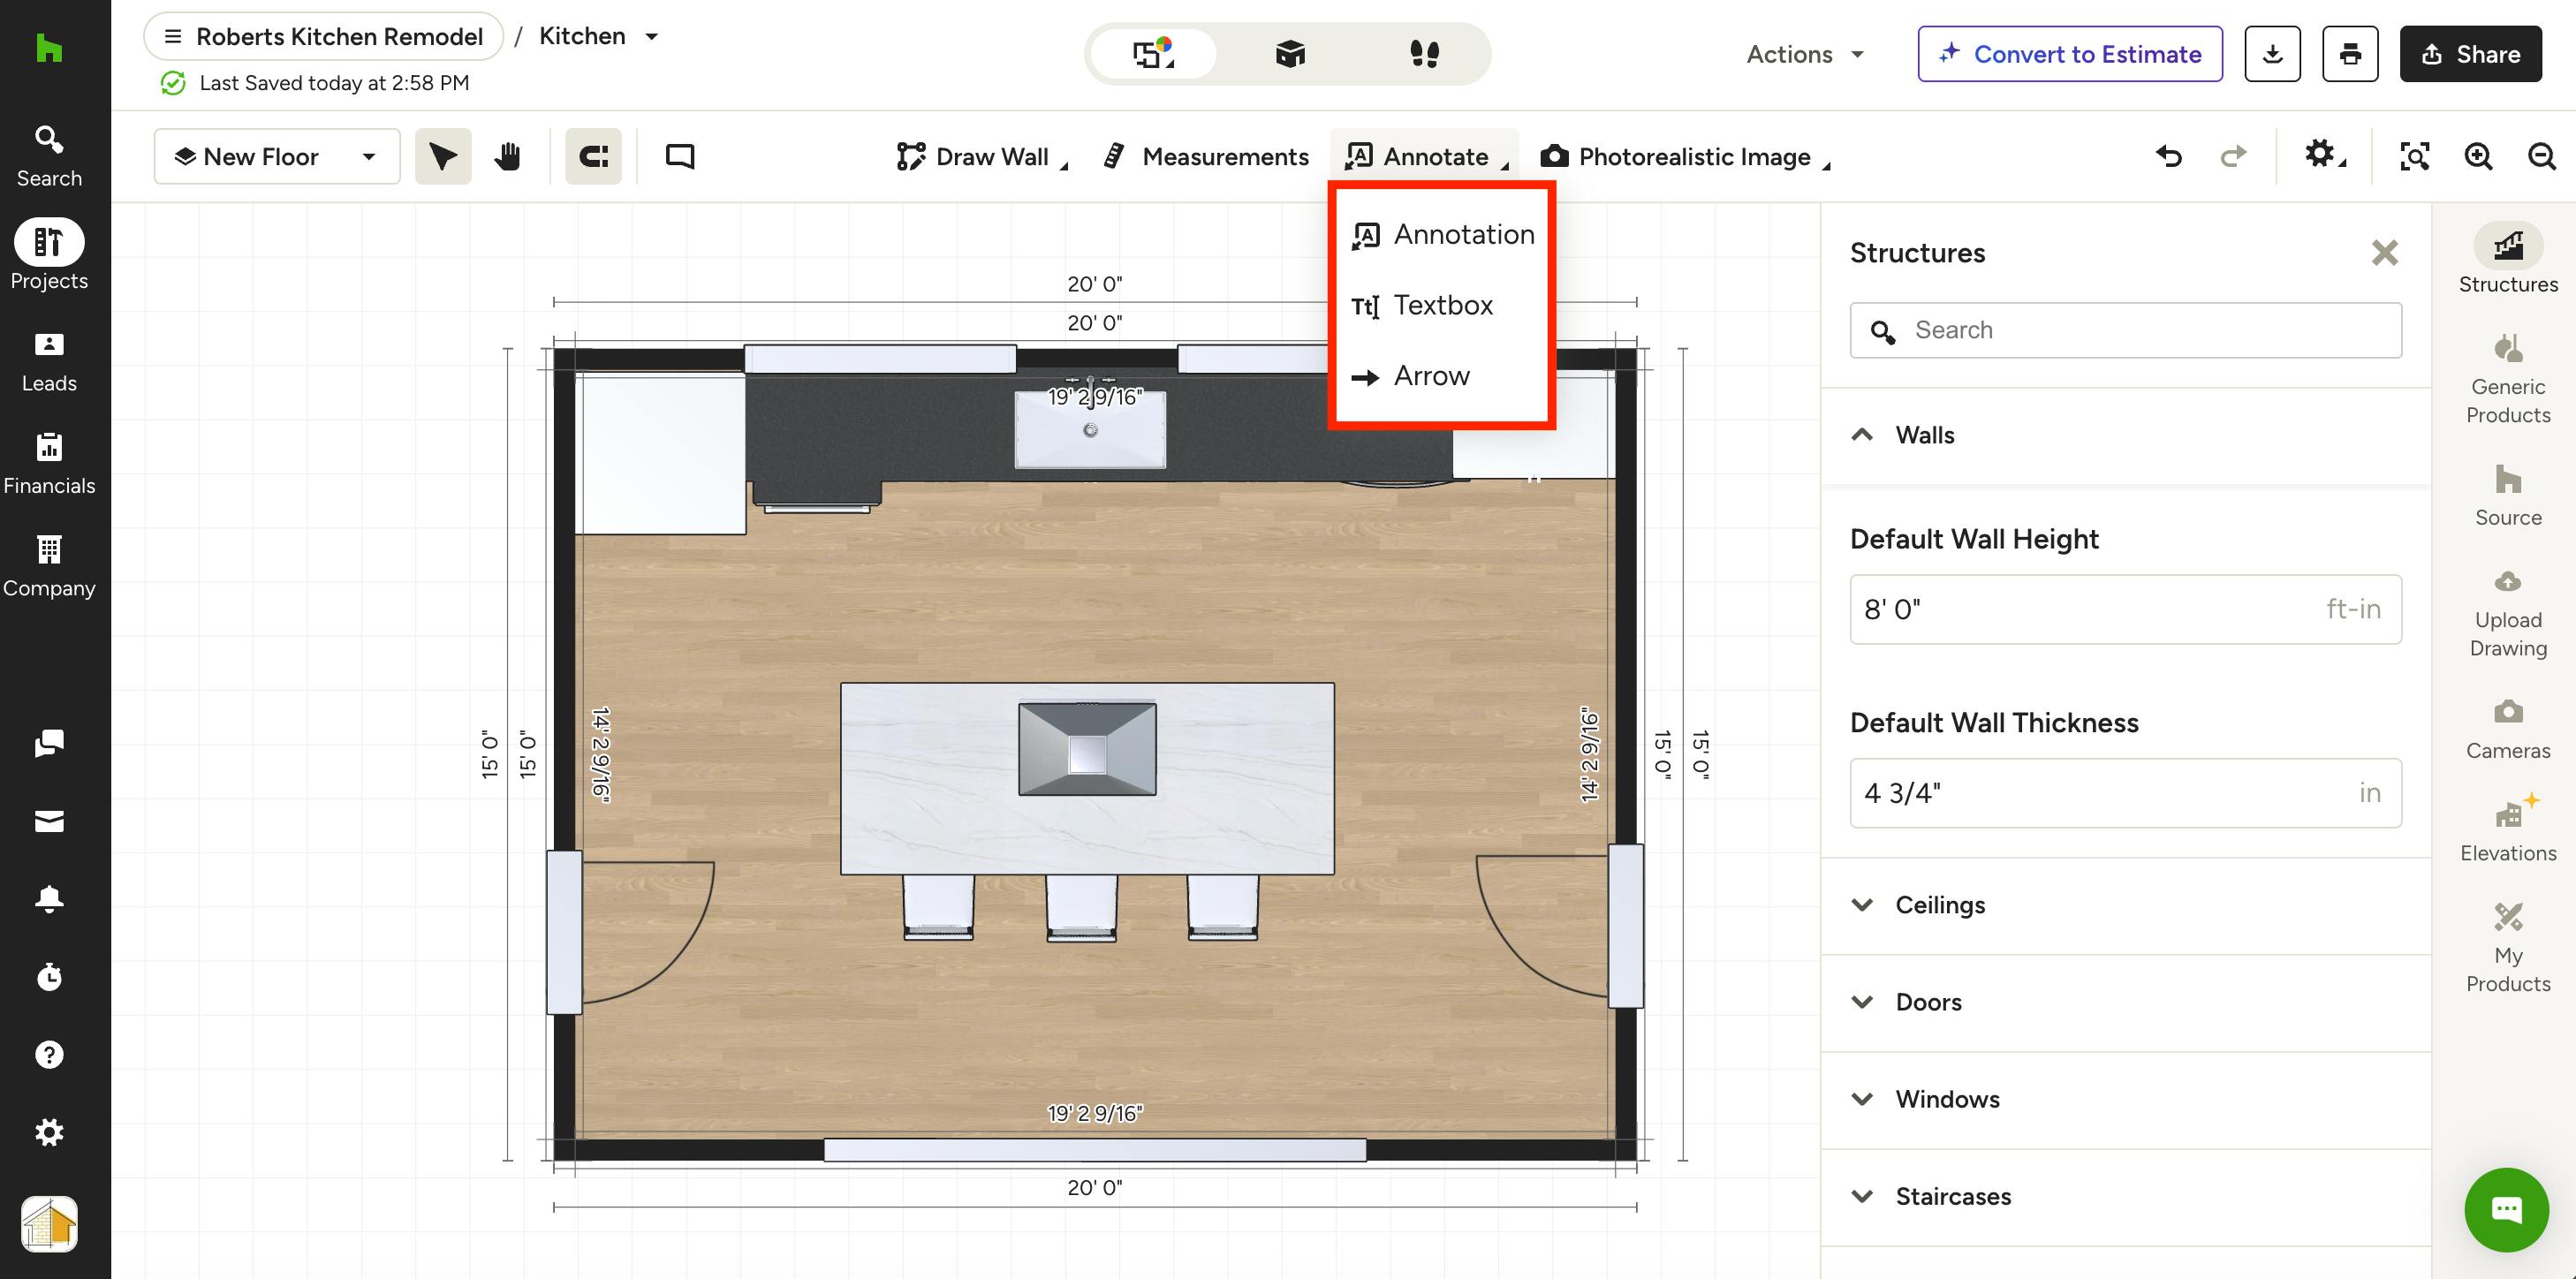
Annotations let you add detailed callouts, notes, and directional arrows directly onto your 3D floor plans. They ensure that every spec, material detail, and install instruction lives exactly where it's needed. Whether you're documenting demolition areas, flagging finish selections, or adding general job notes for your team or client, annotations keep your floor plans clear and communication-ready.
Annotations Overview
Annotations are available in Floor Plan view and Elevations view only. They are not yet supported in Dollhouse view. Annotations will be visible by default, but you can turn them off in your floor plan settings (more details below).
There are three different annotation tools you can use in your 3D floor plan, depending on your purpose:
- Annotation — A combined arrow + text callout. Use this to point to a specific element in your floor plan and label it with specs, materials, or instructions.
- Textbox — Text only, no arrow. Ideal for creating legends, general notes, or job specs in the margins of your floor plan.
- Arrow — A standalone directional arrow. Use this to draw attention to multiple items or indicate a direction without additional text.
Please Note: For room names, always use the Room Label tool — it keeps your estimates and reports accurate. Annotations are for specs and callouts.
Let's go over each option.
Add Annotation
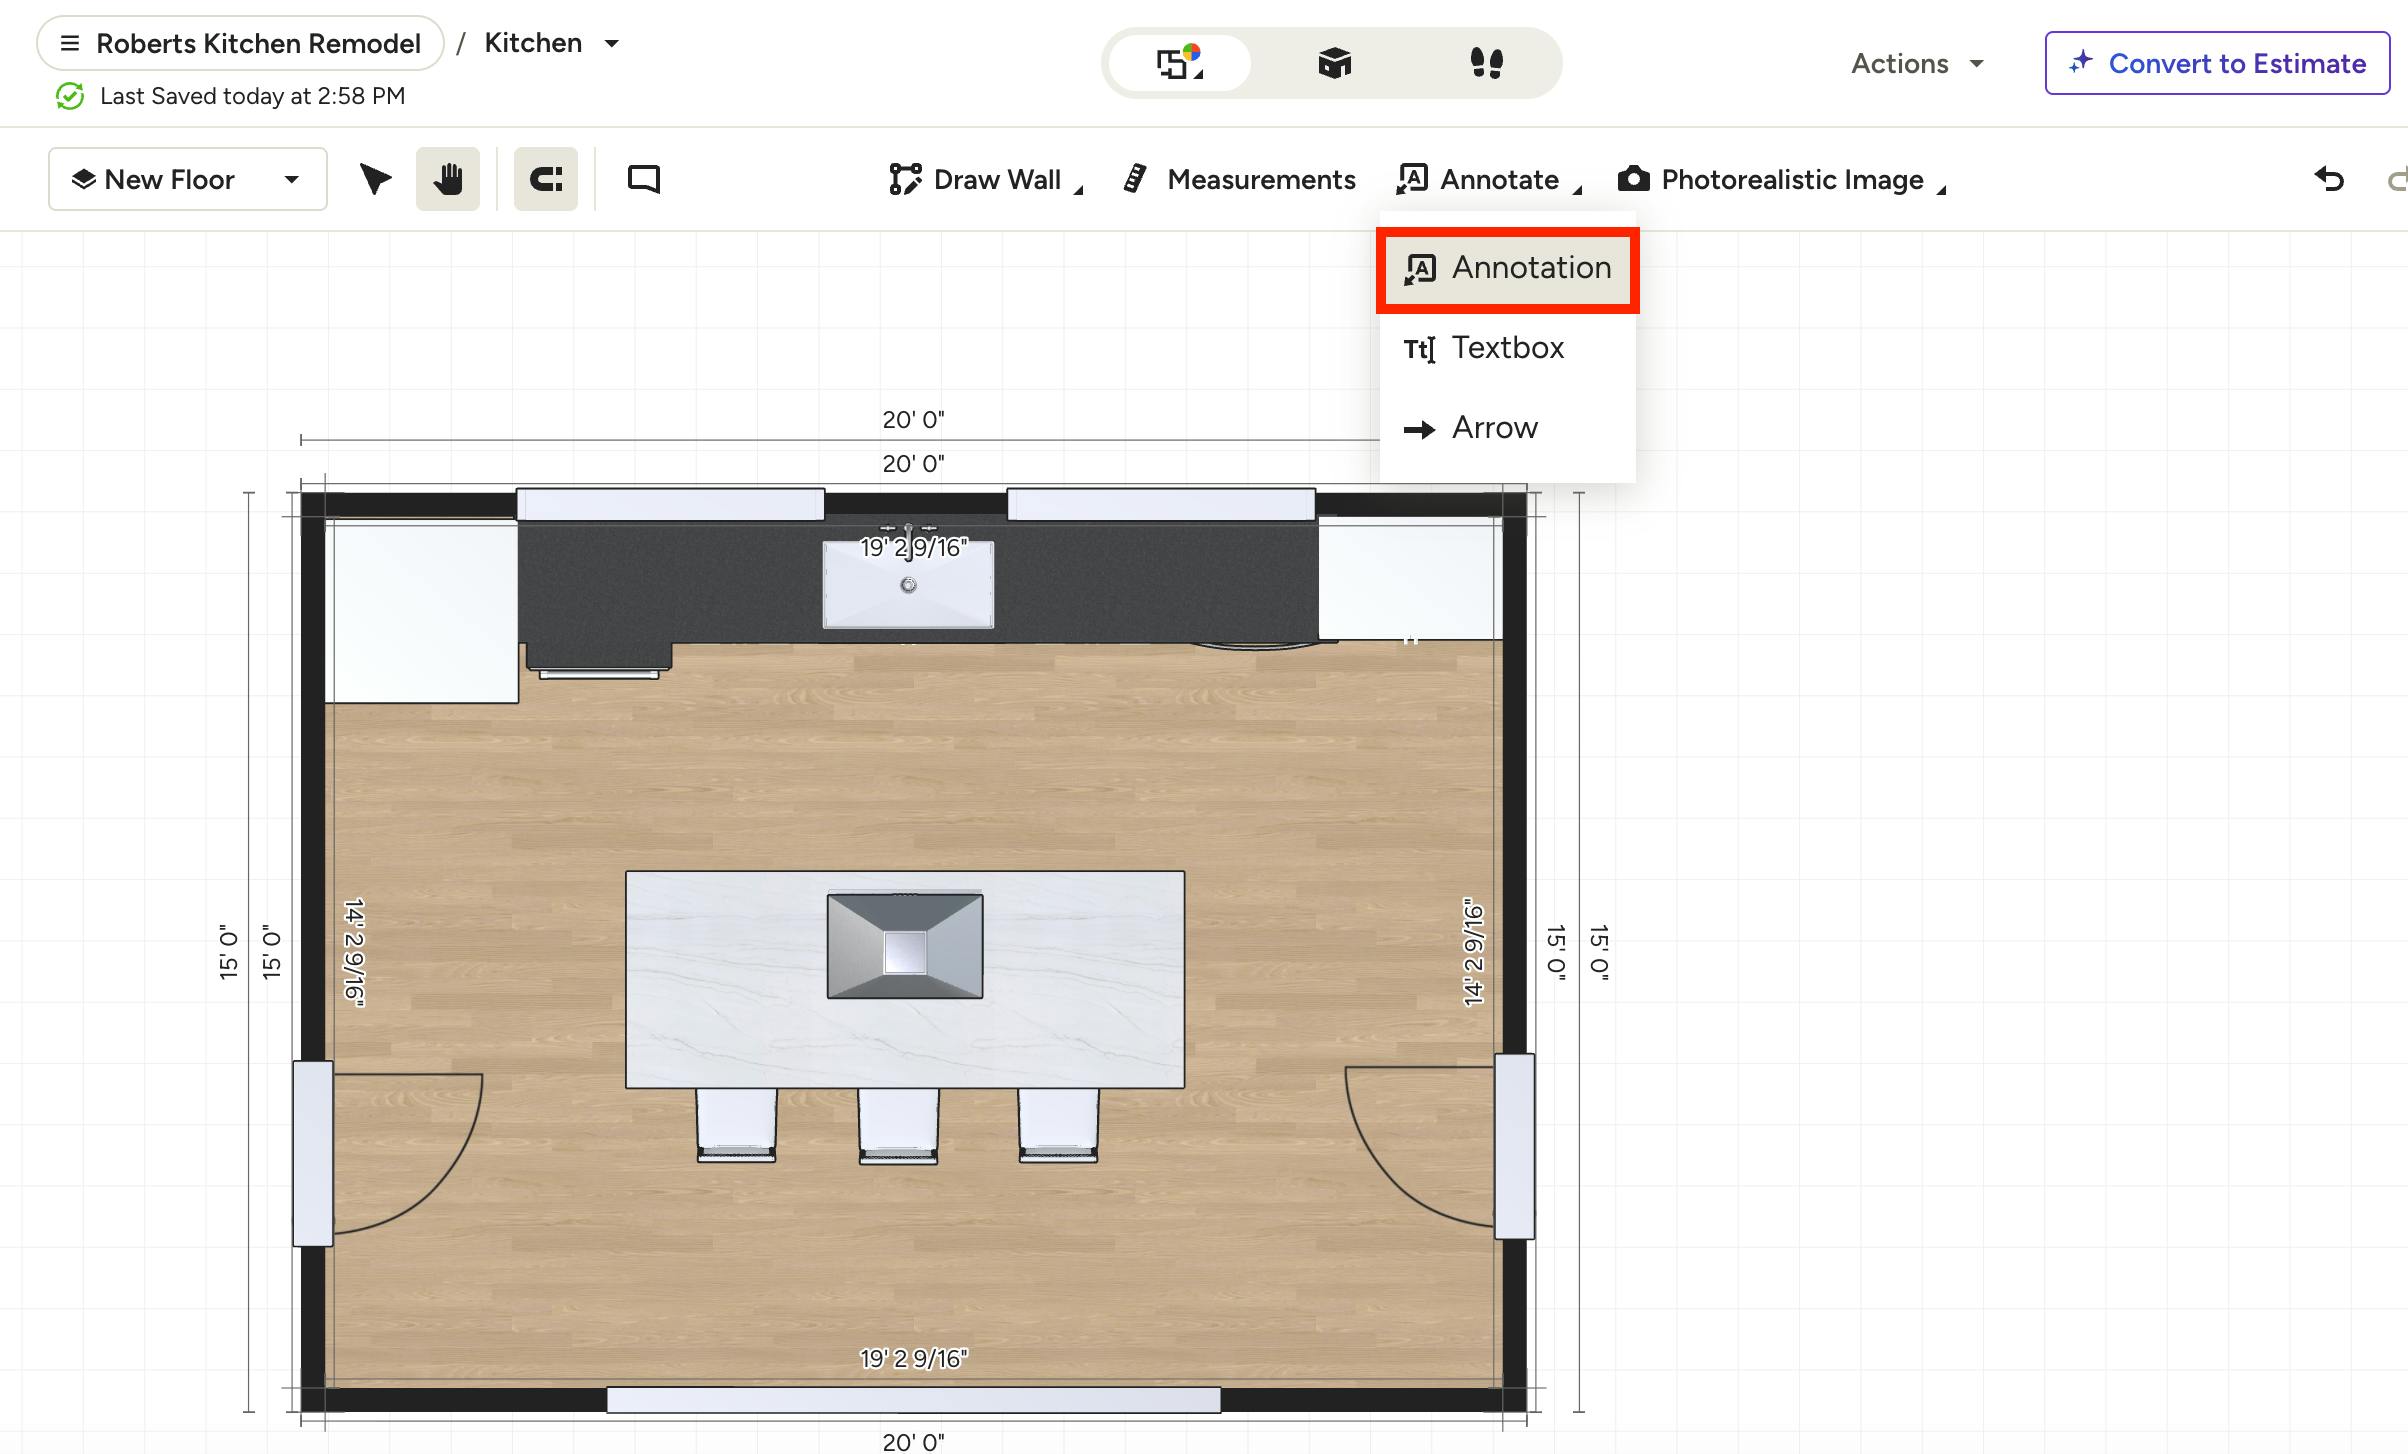
To add a new annotation that includes both a textbox and arrow, open up the relevant 3D floor plan. Select Annotate in the top toolbar, then select Annotation from the dropdown menu.
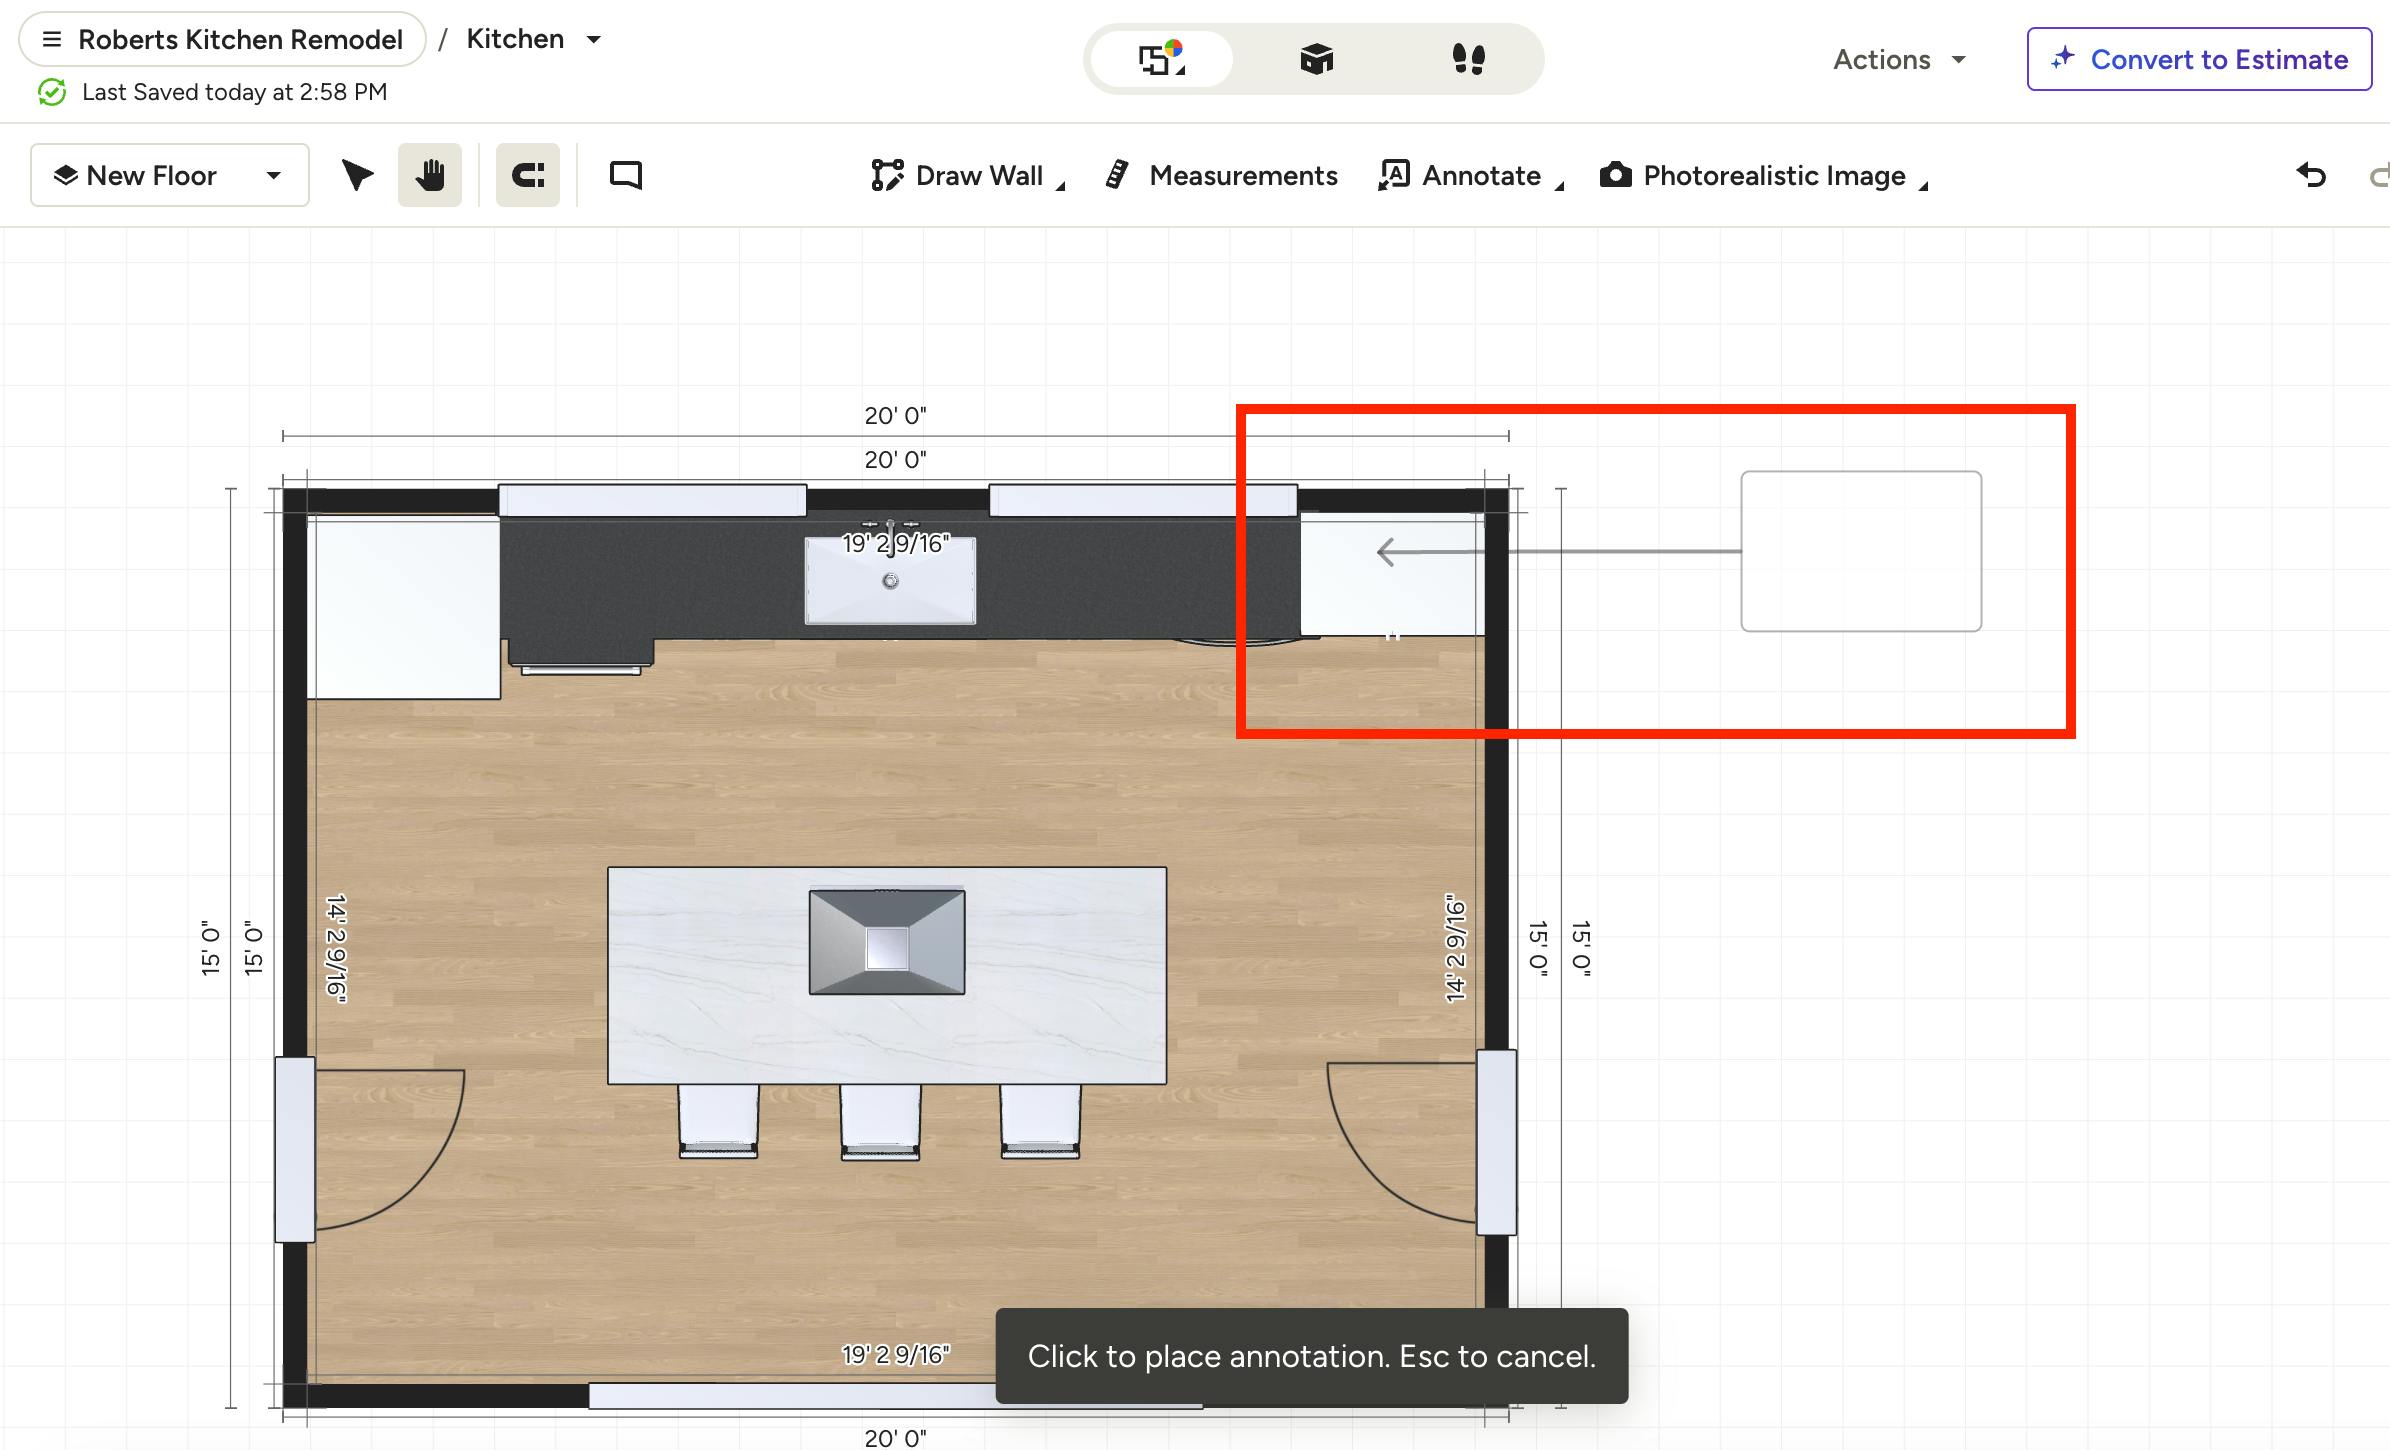
Click once on the floor plan where you want the arrow point to land — this is the element you're calling out (e.g., a wall, fixture, cabinet or material area).
Move your mouse to the area you want the textbox to appear. Click a second time to place the textbox — it will now appear connected to the arrow, as shown below.
Pro Tip: You can always adjust the arrow or the textbox after your initial placement. To do this, click and drag the textbox or the arrowhead and re-place it in a different area.
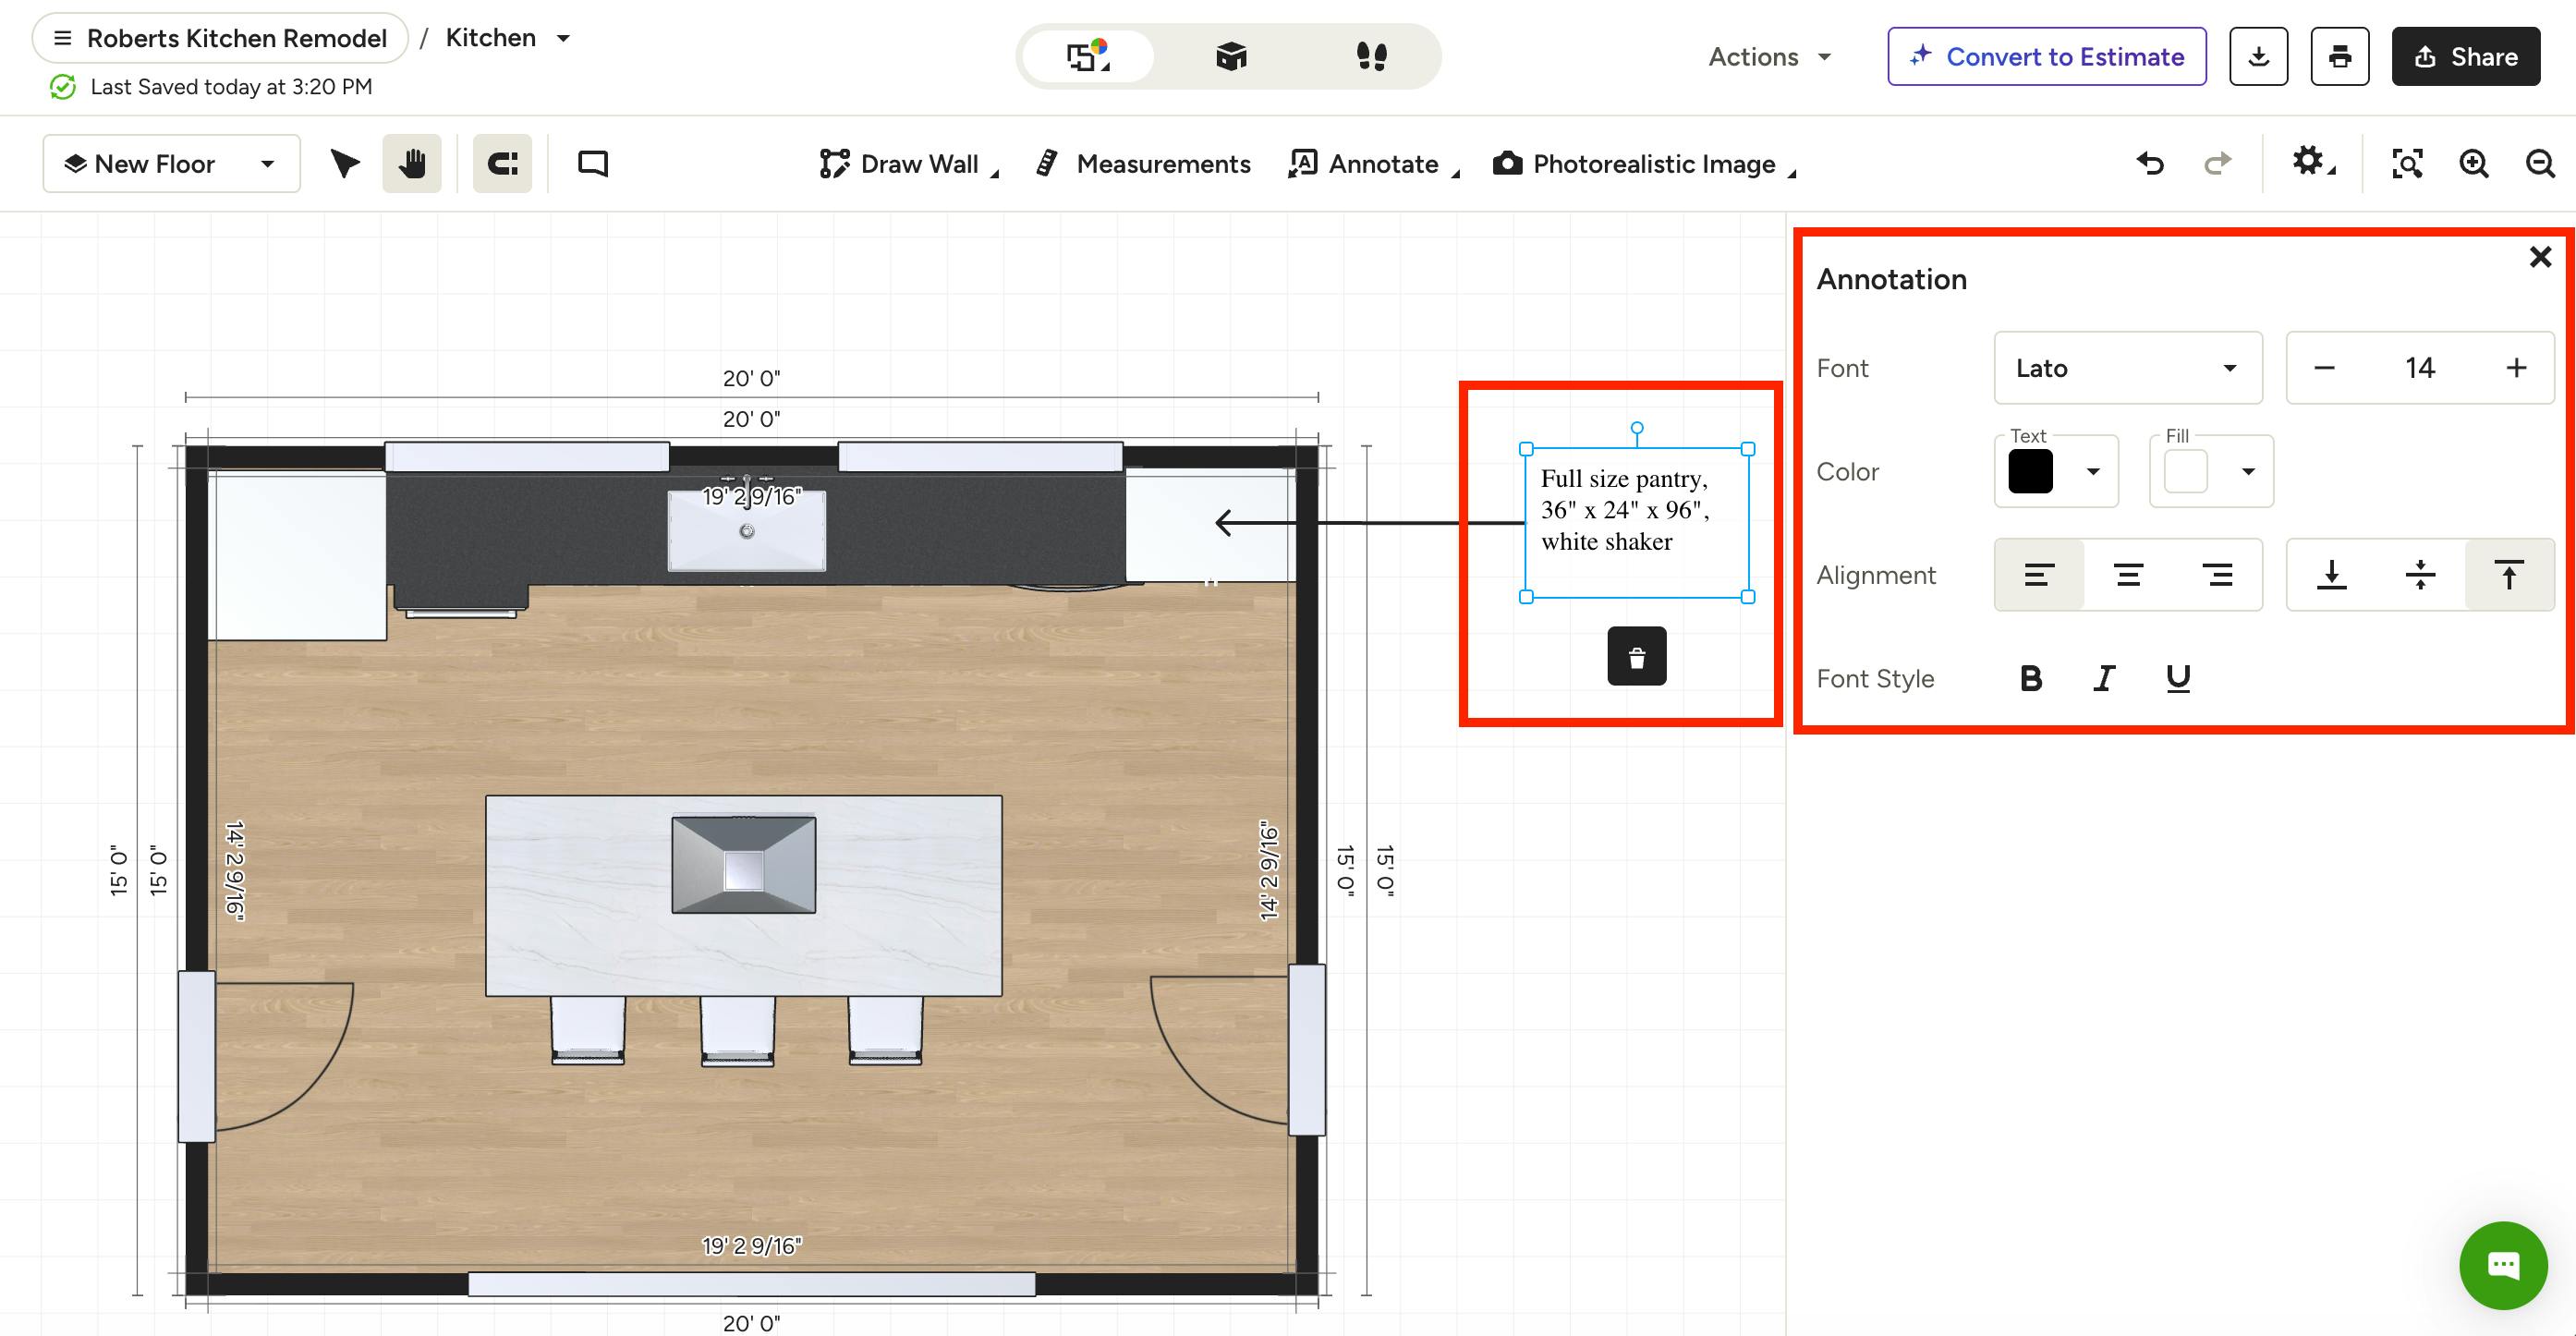
Type your annotation text directly in the textbox. In the right menu, you can make adjustments to the formatting — font type and size, font color and textbox color, alignment, and font style.
Once complete, click outside the textbox. If you would like to delete the textbox, click the trash can icon.
Add Textbox
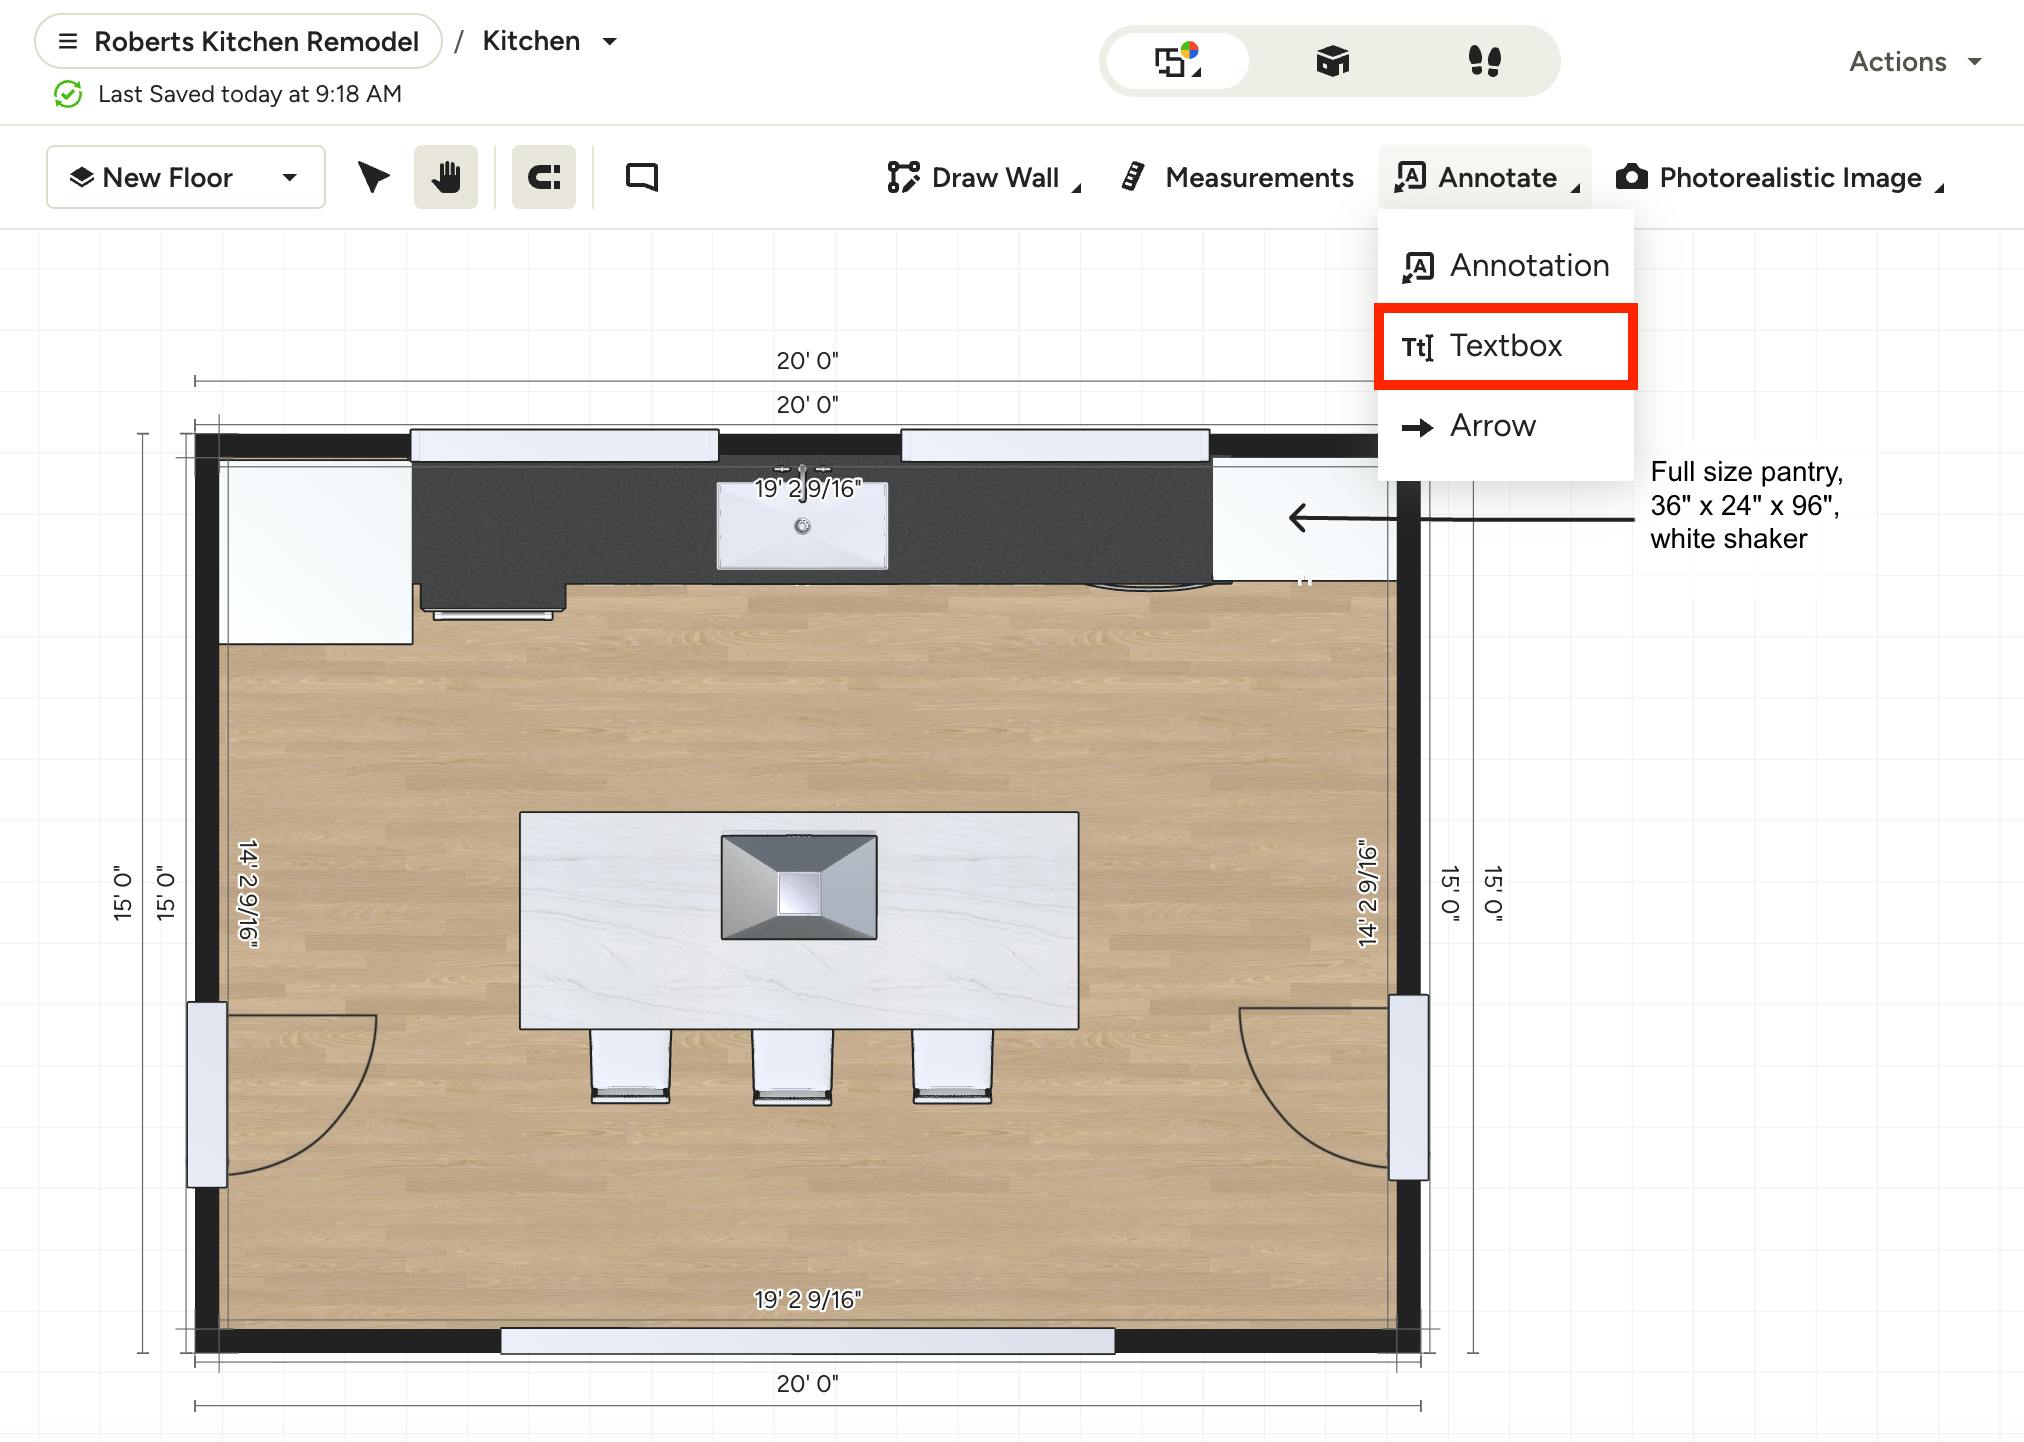
To add a new textbox that includes text only but no arrow, open up the relevant 3D floor plan. Select Annotate in the top toolbar, then select Textbox from the dropdown menu.
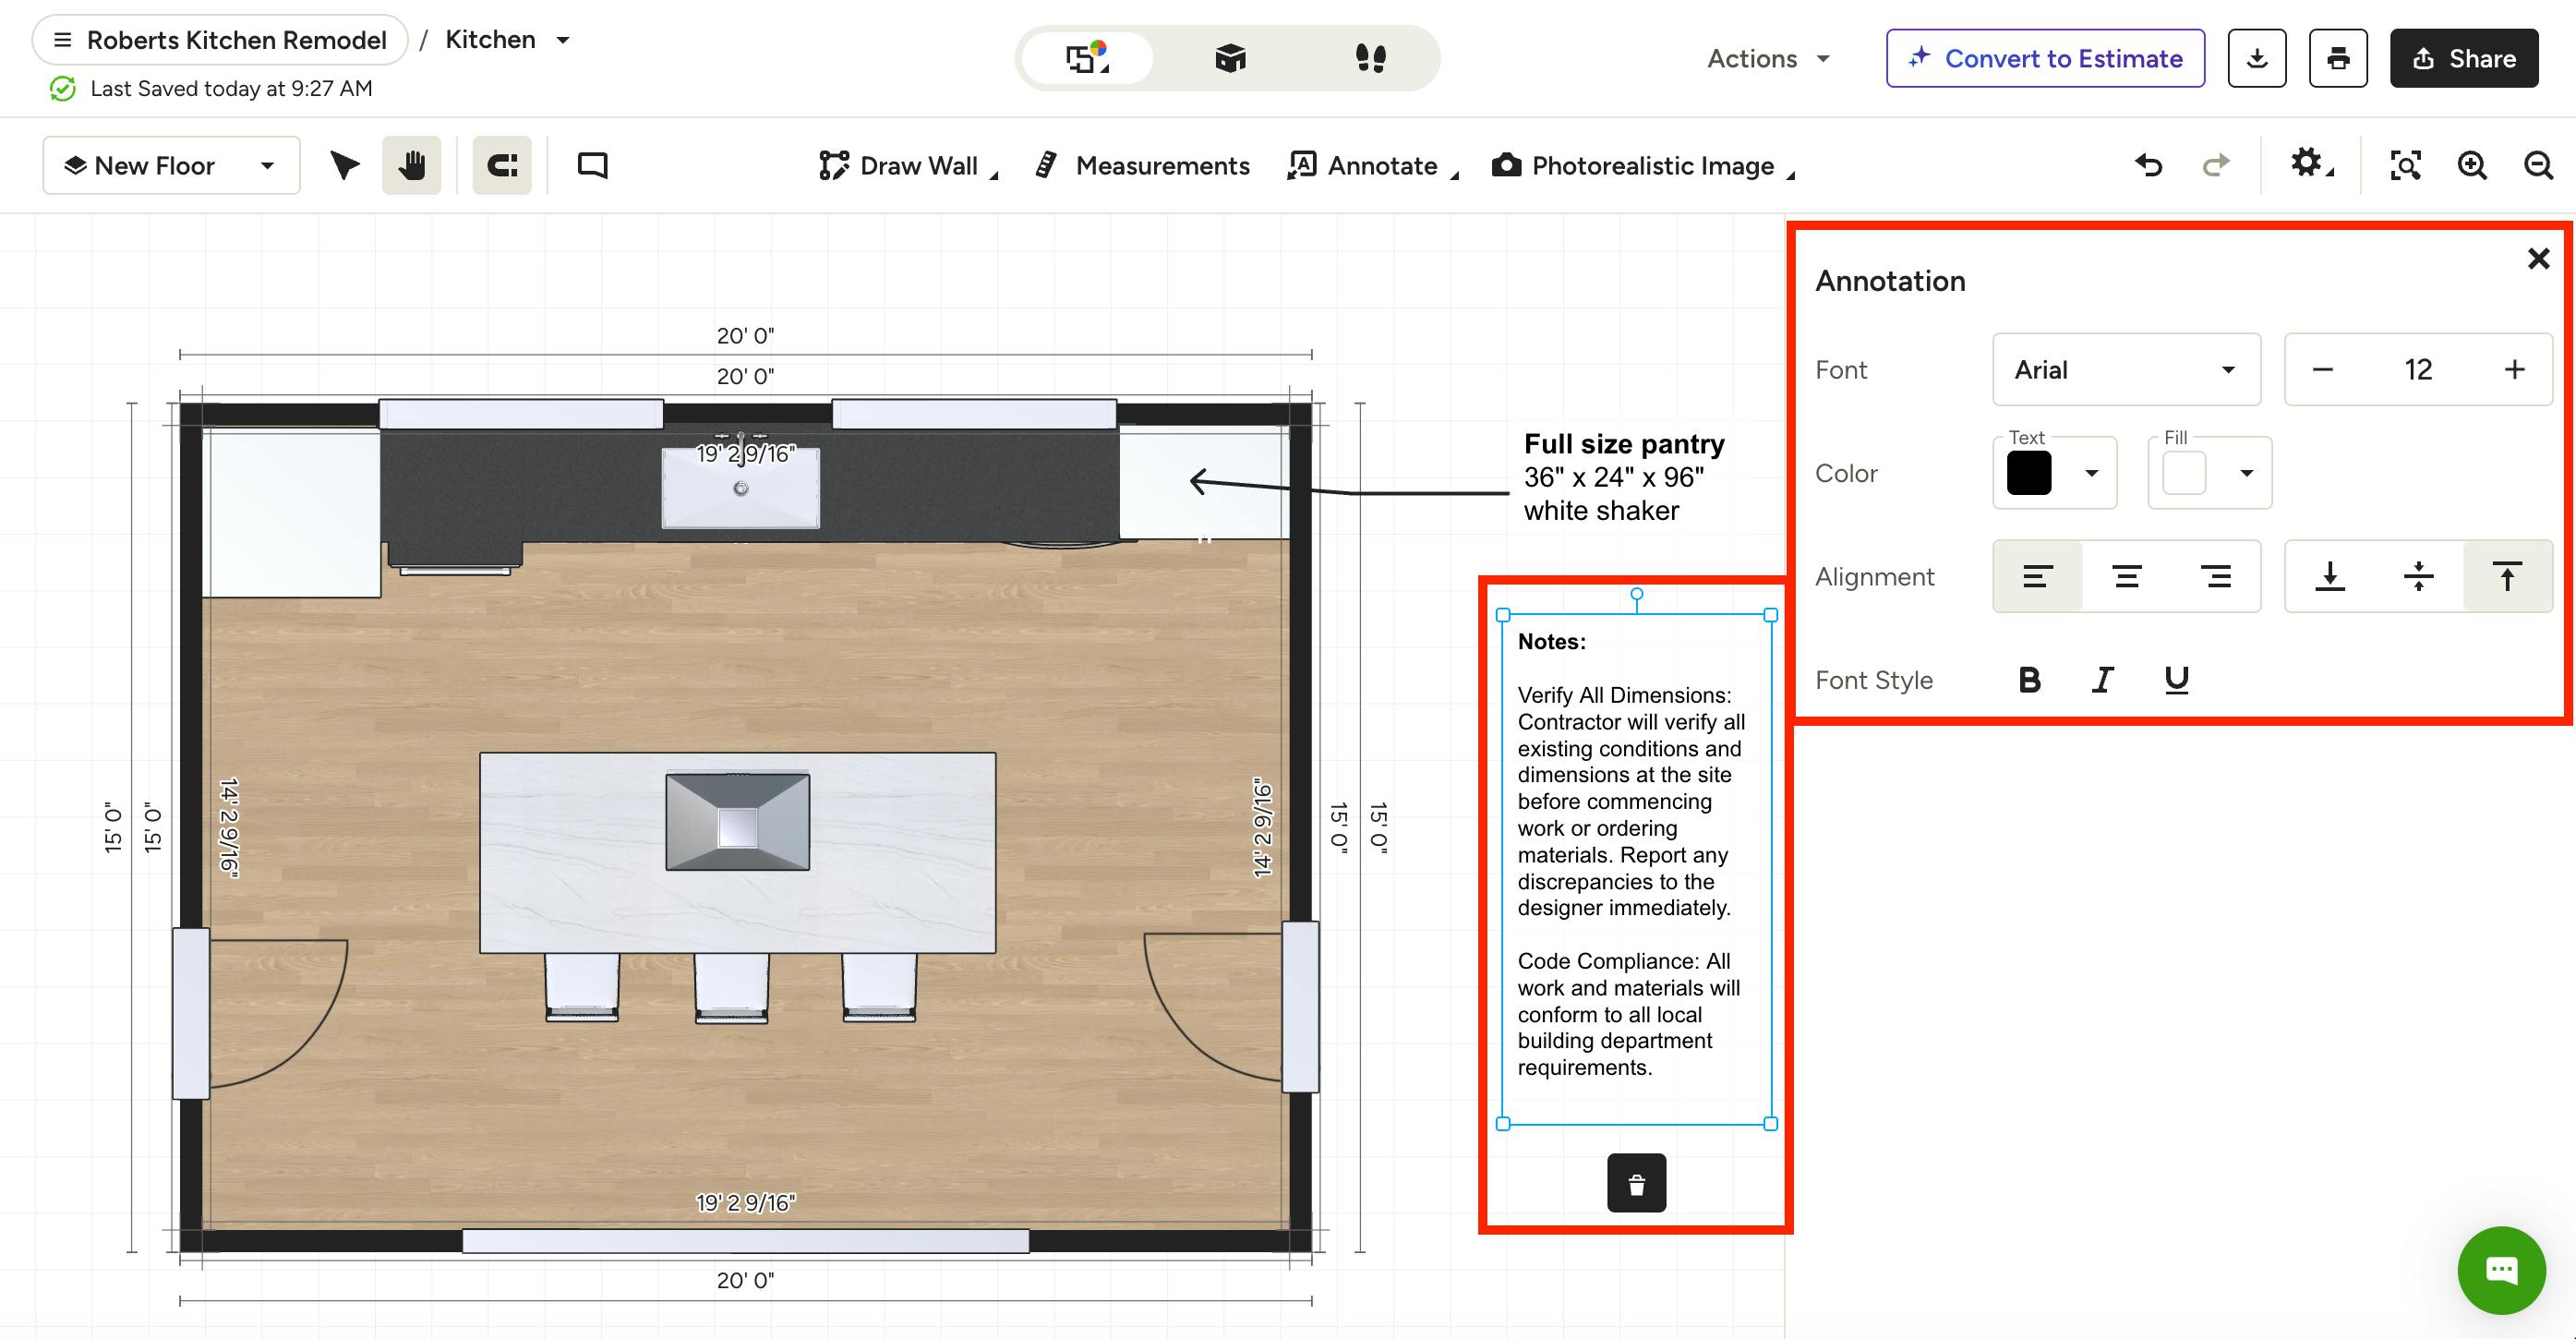
Move your mouse to the area you want the textbox to appear, then click once to place it. The textbox will now appear on your floor plan — you can click to move placement if needed.
Type your text directly in the textbox. In the right menu, you can make adjustments to the formatting — font type and size, font color and textbox color, alignment, and font style.
Once complete, click outside the textbox. If you would like to delete the textbox, click the trash can icon.
Add Arrow
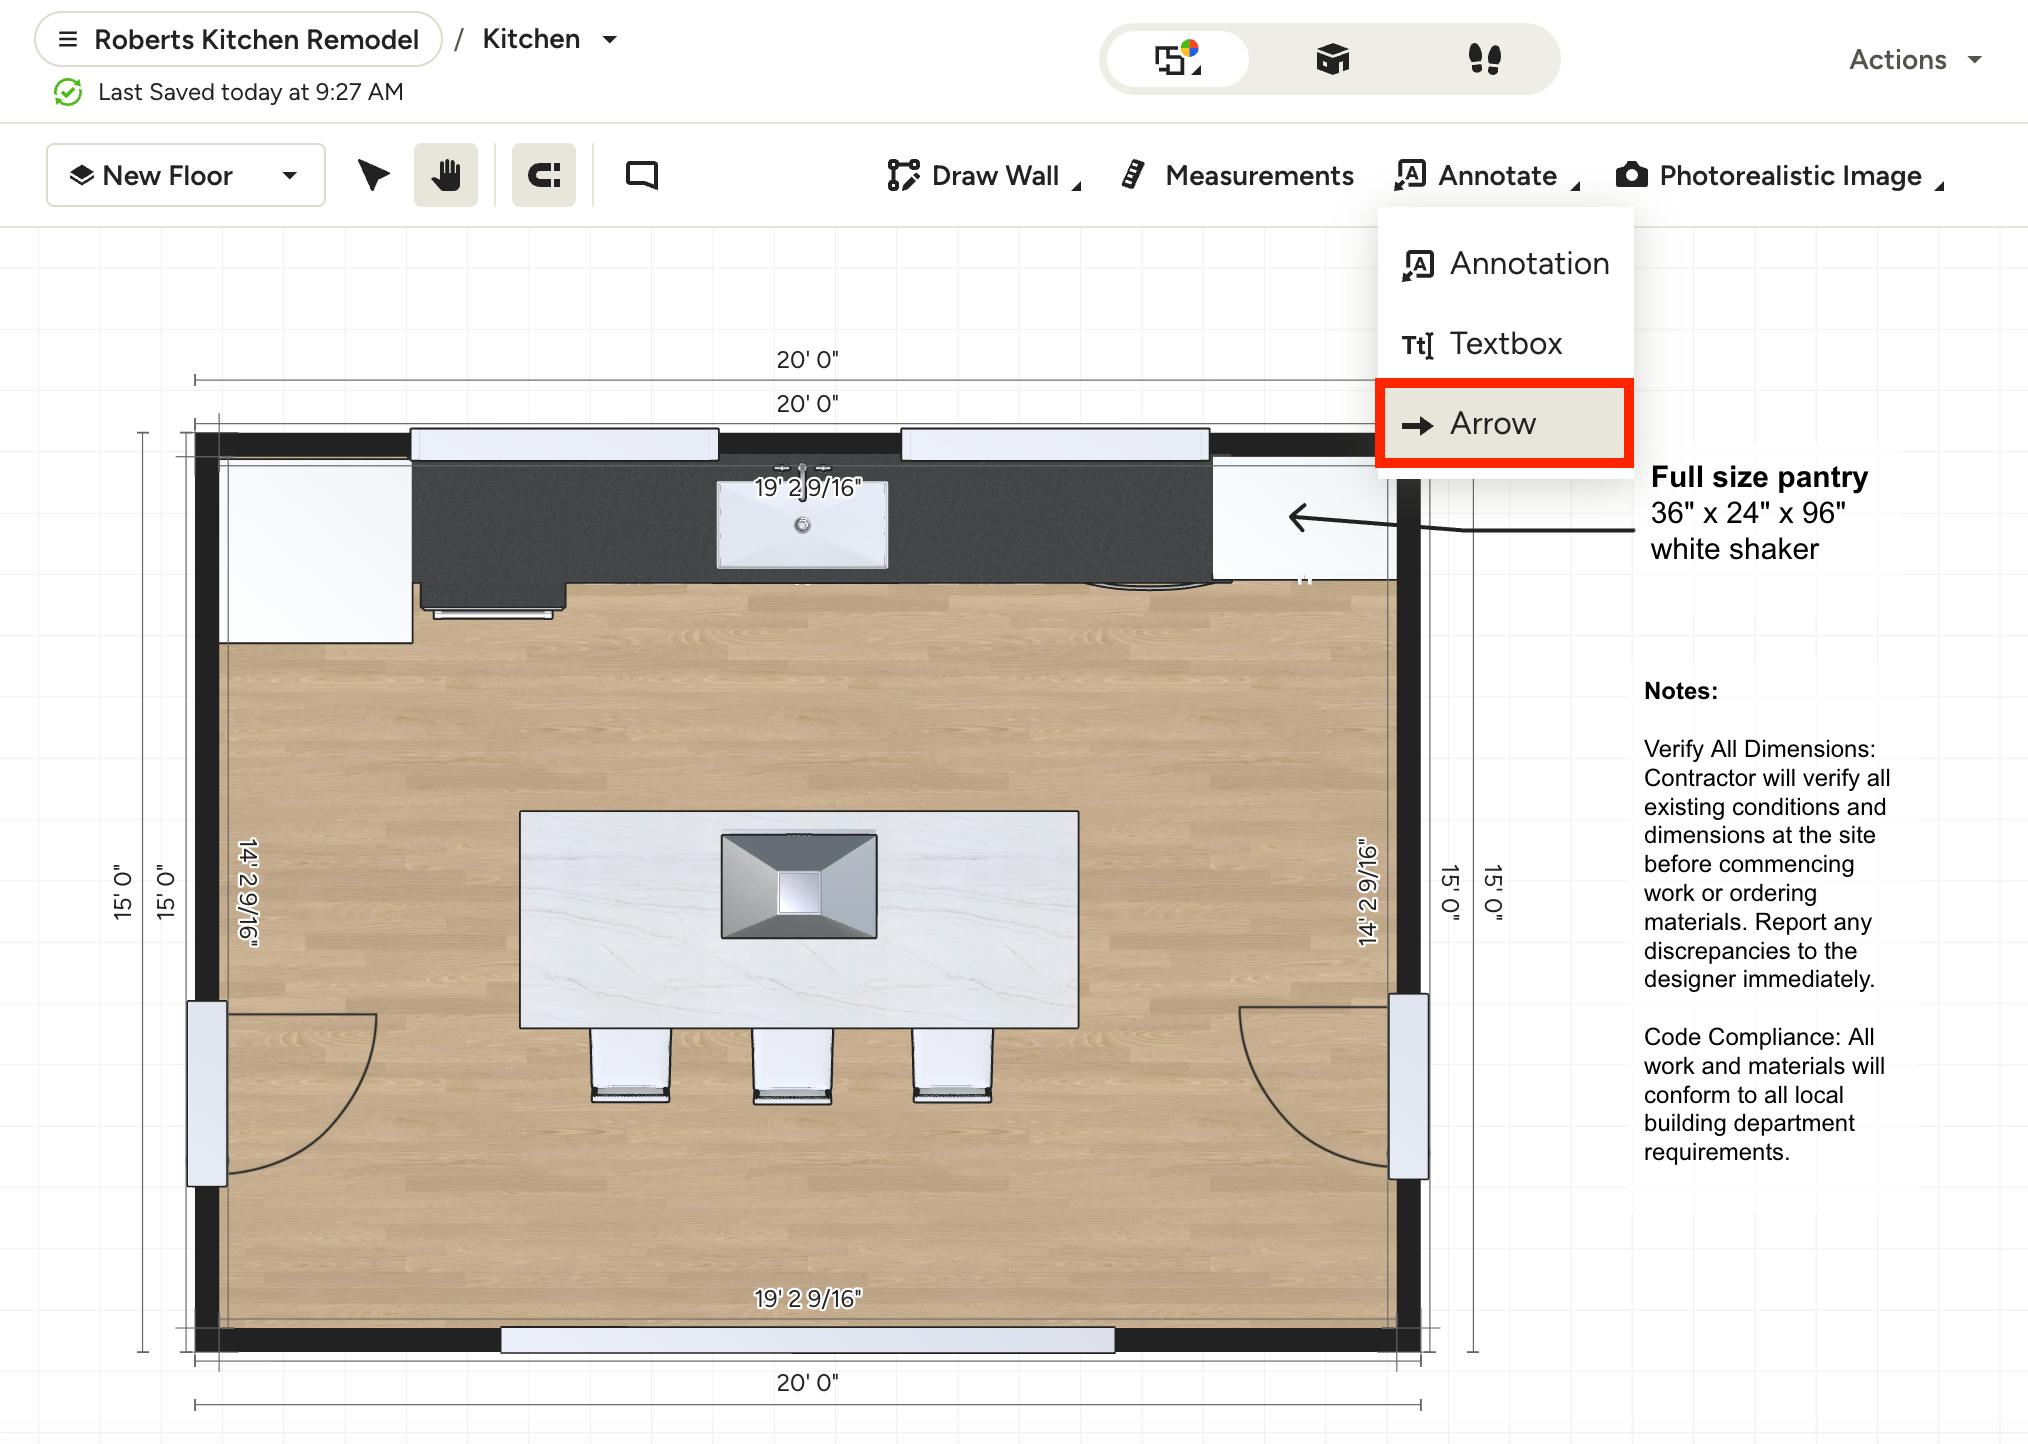
To add a new arrow that includes an arrow but no text, open up the relevant 3D floor plan. Select Annotate in the top toolbar, then select Arrow from the dropdown menu.
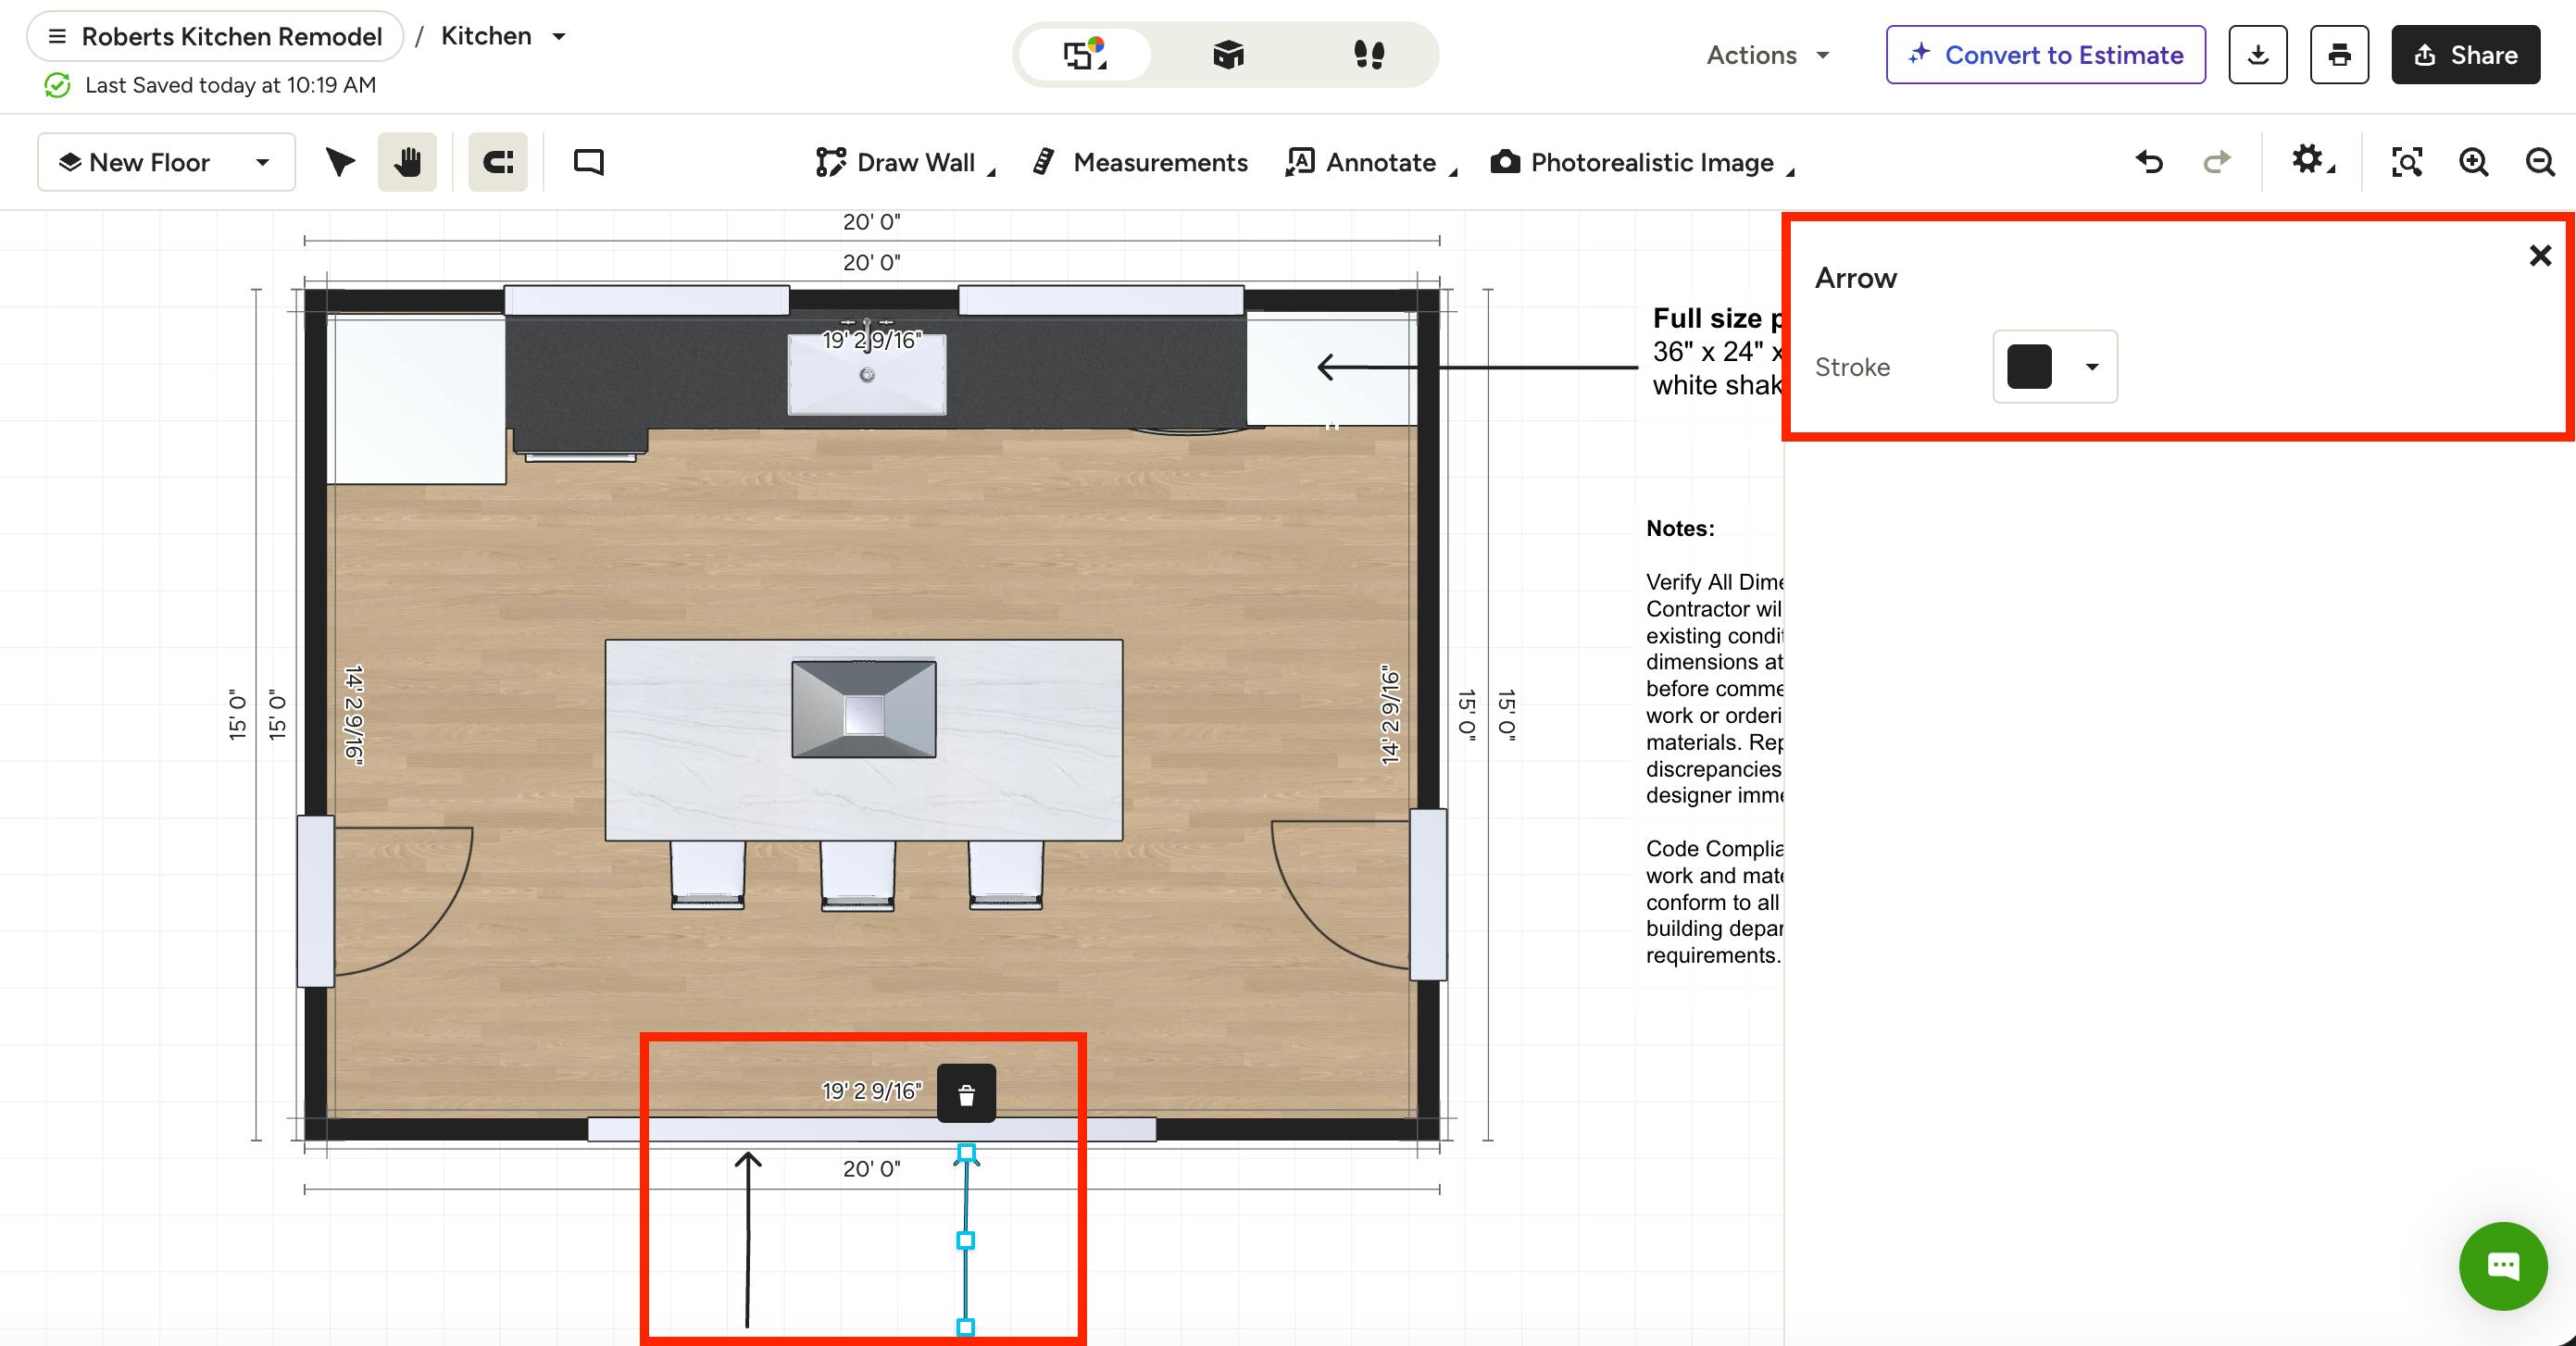
Click once on the floor plan where you want the arrow point to land — this is the element or direction you're calling out (e.g., a wall, fixture, cabinet or material area).
Move your mouse to the area you want the arrow to end, then click a second time. In the right menu, you can make adjustments to the arrow color.
Once complete, click outside the arrow. If you would like to delete the arrow, click the trash can icon.
Adjust Annotations in Settings
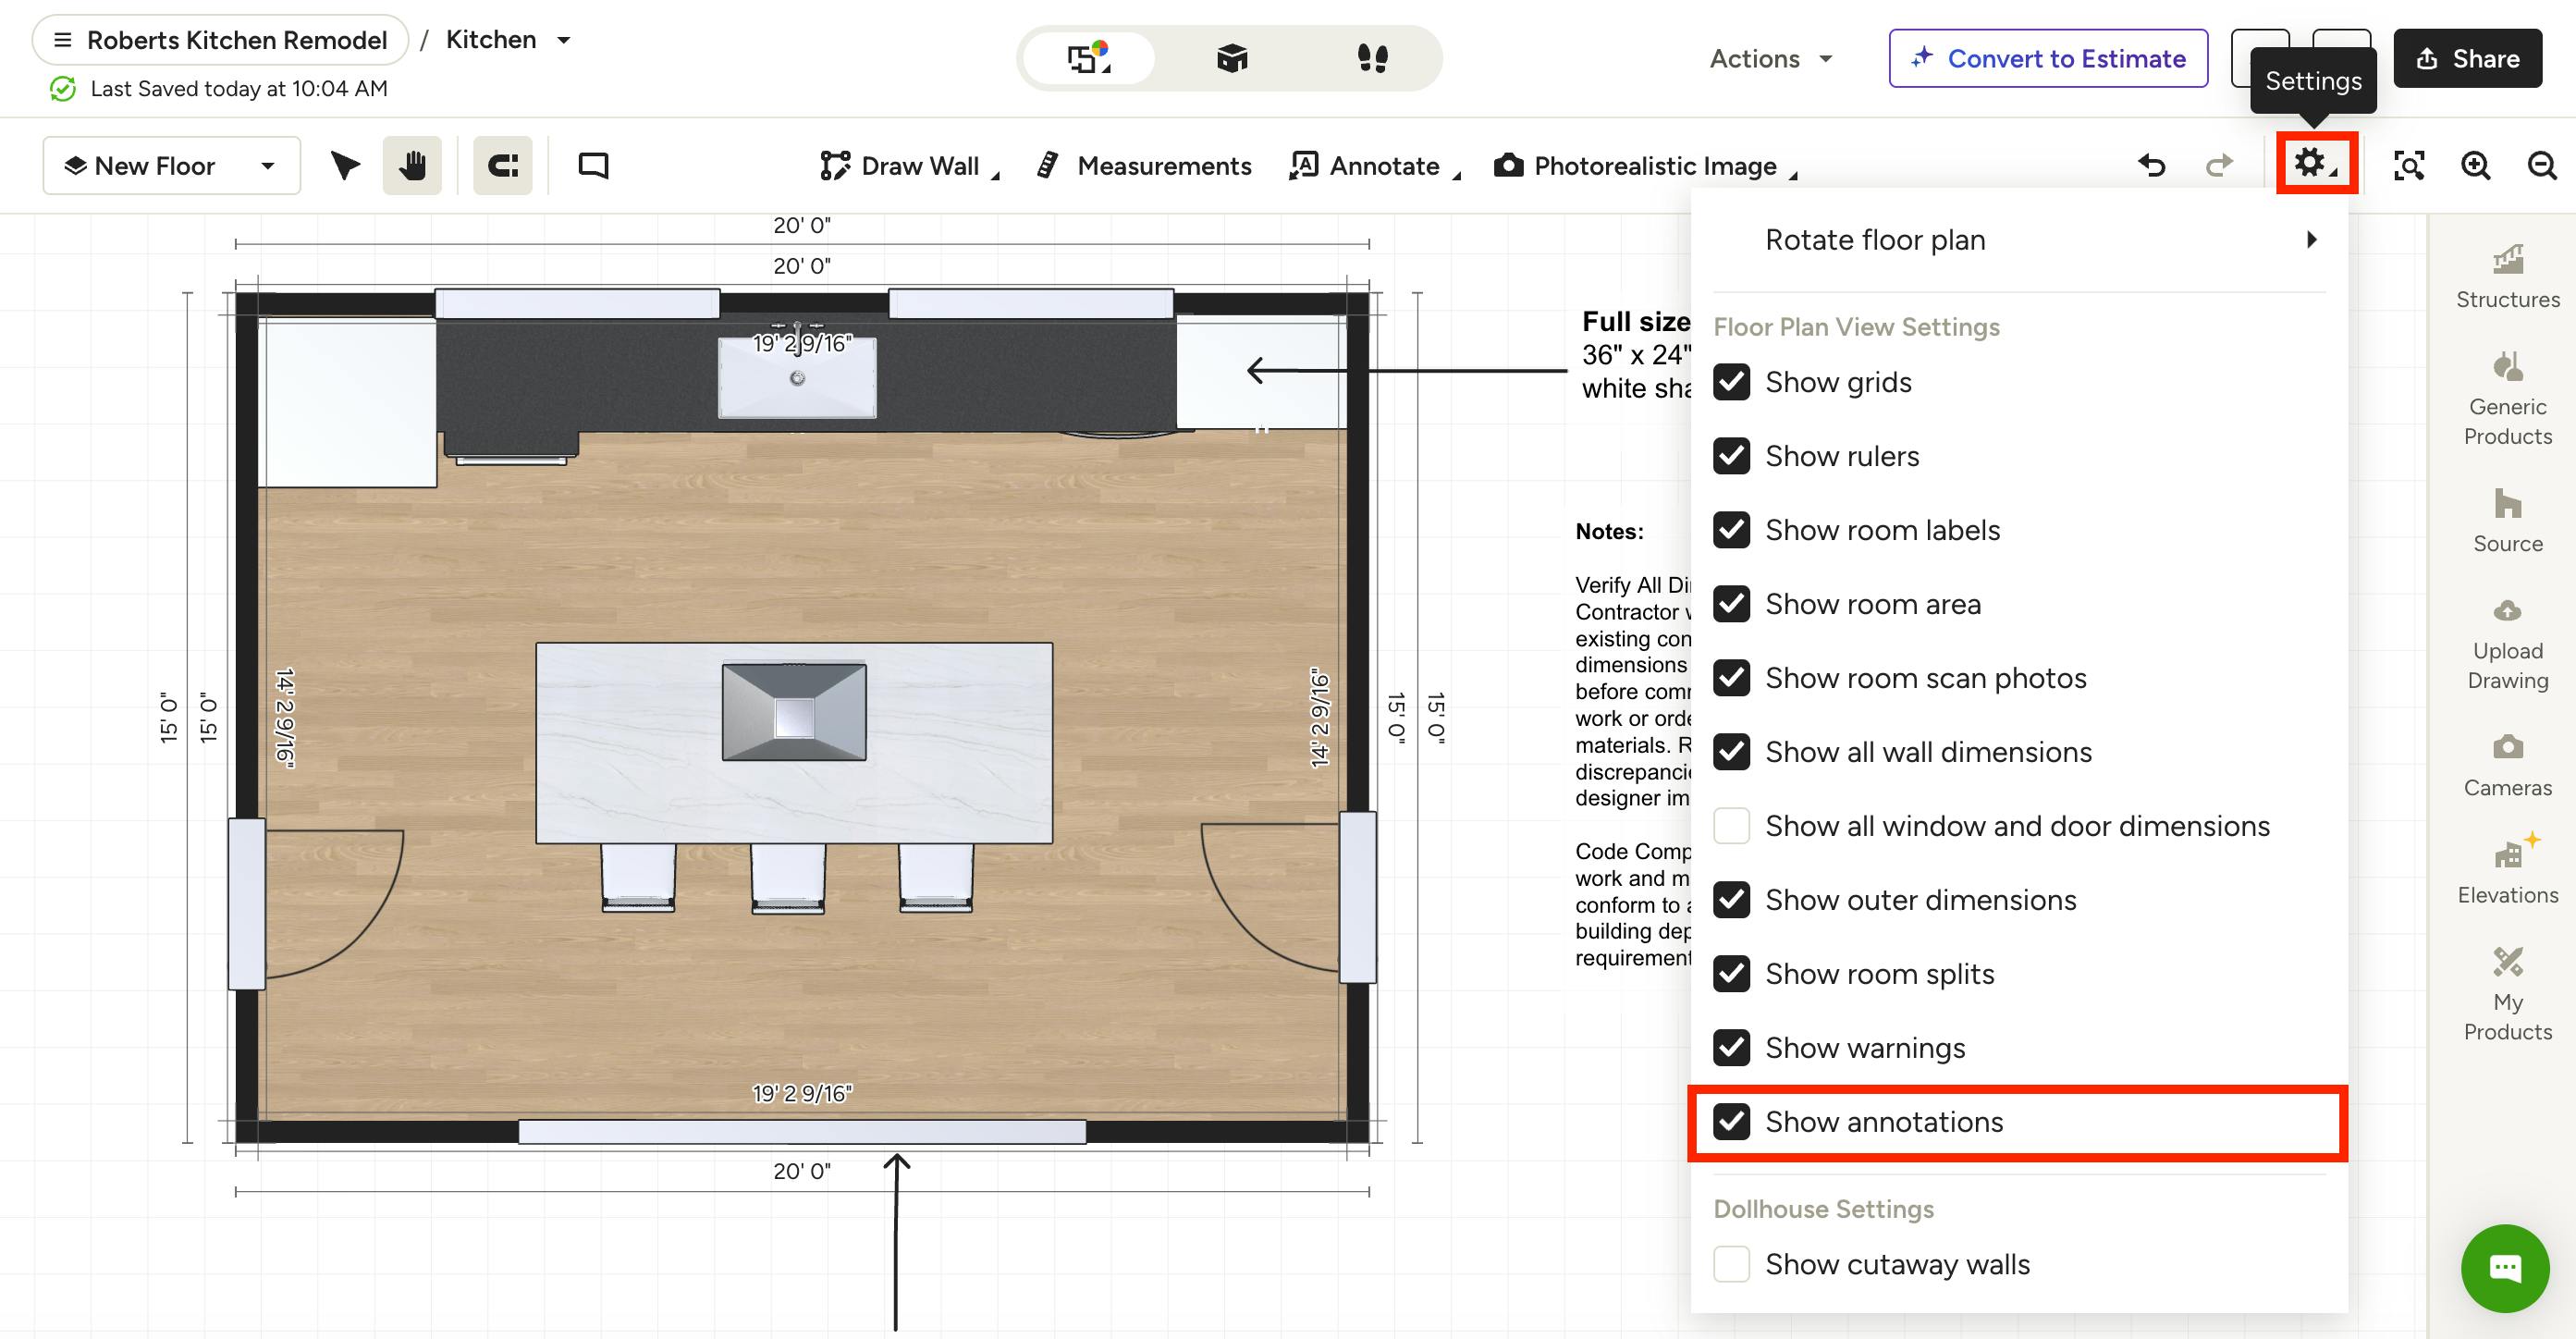
While annotations are on by default, you do have the option to turn them off so you can share a clean version of your floor plan without callout clutter. This will hide any existing annotations from view, but it will not delete them.
To do this, click the Settings gear icon at the top of your floor plan. In the dropdown menu, uncheck the checkbox next to Show Annotations.
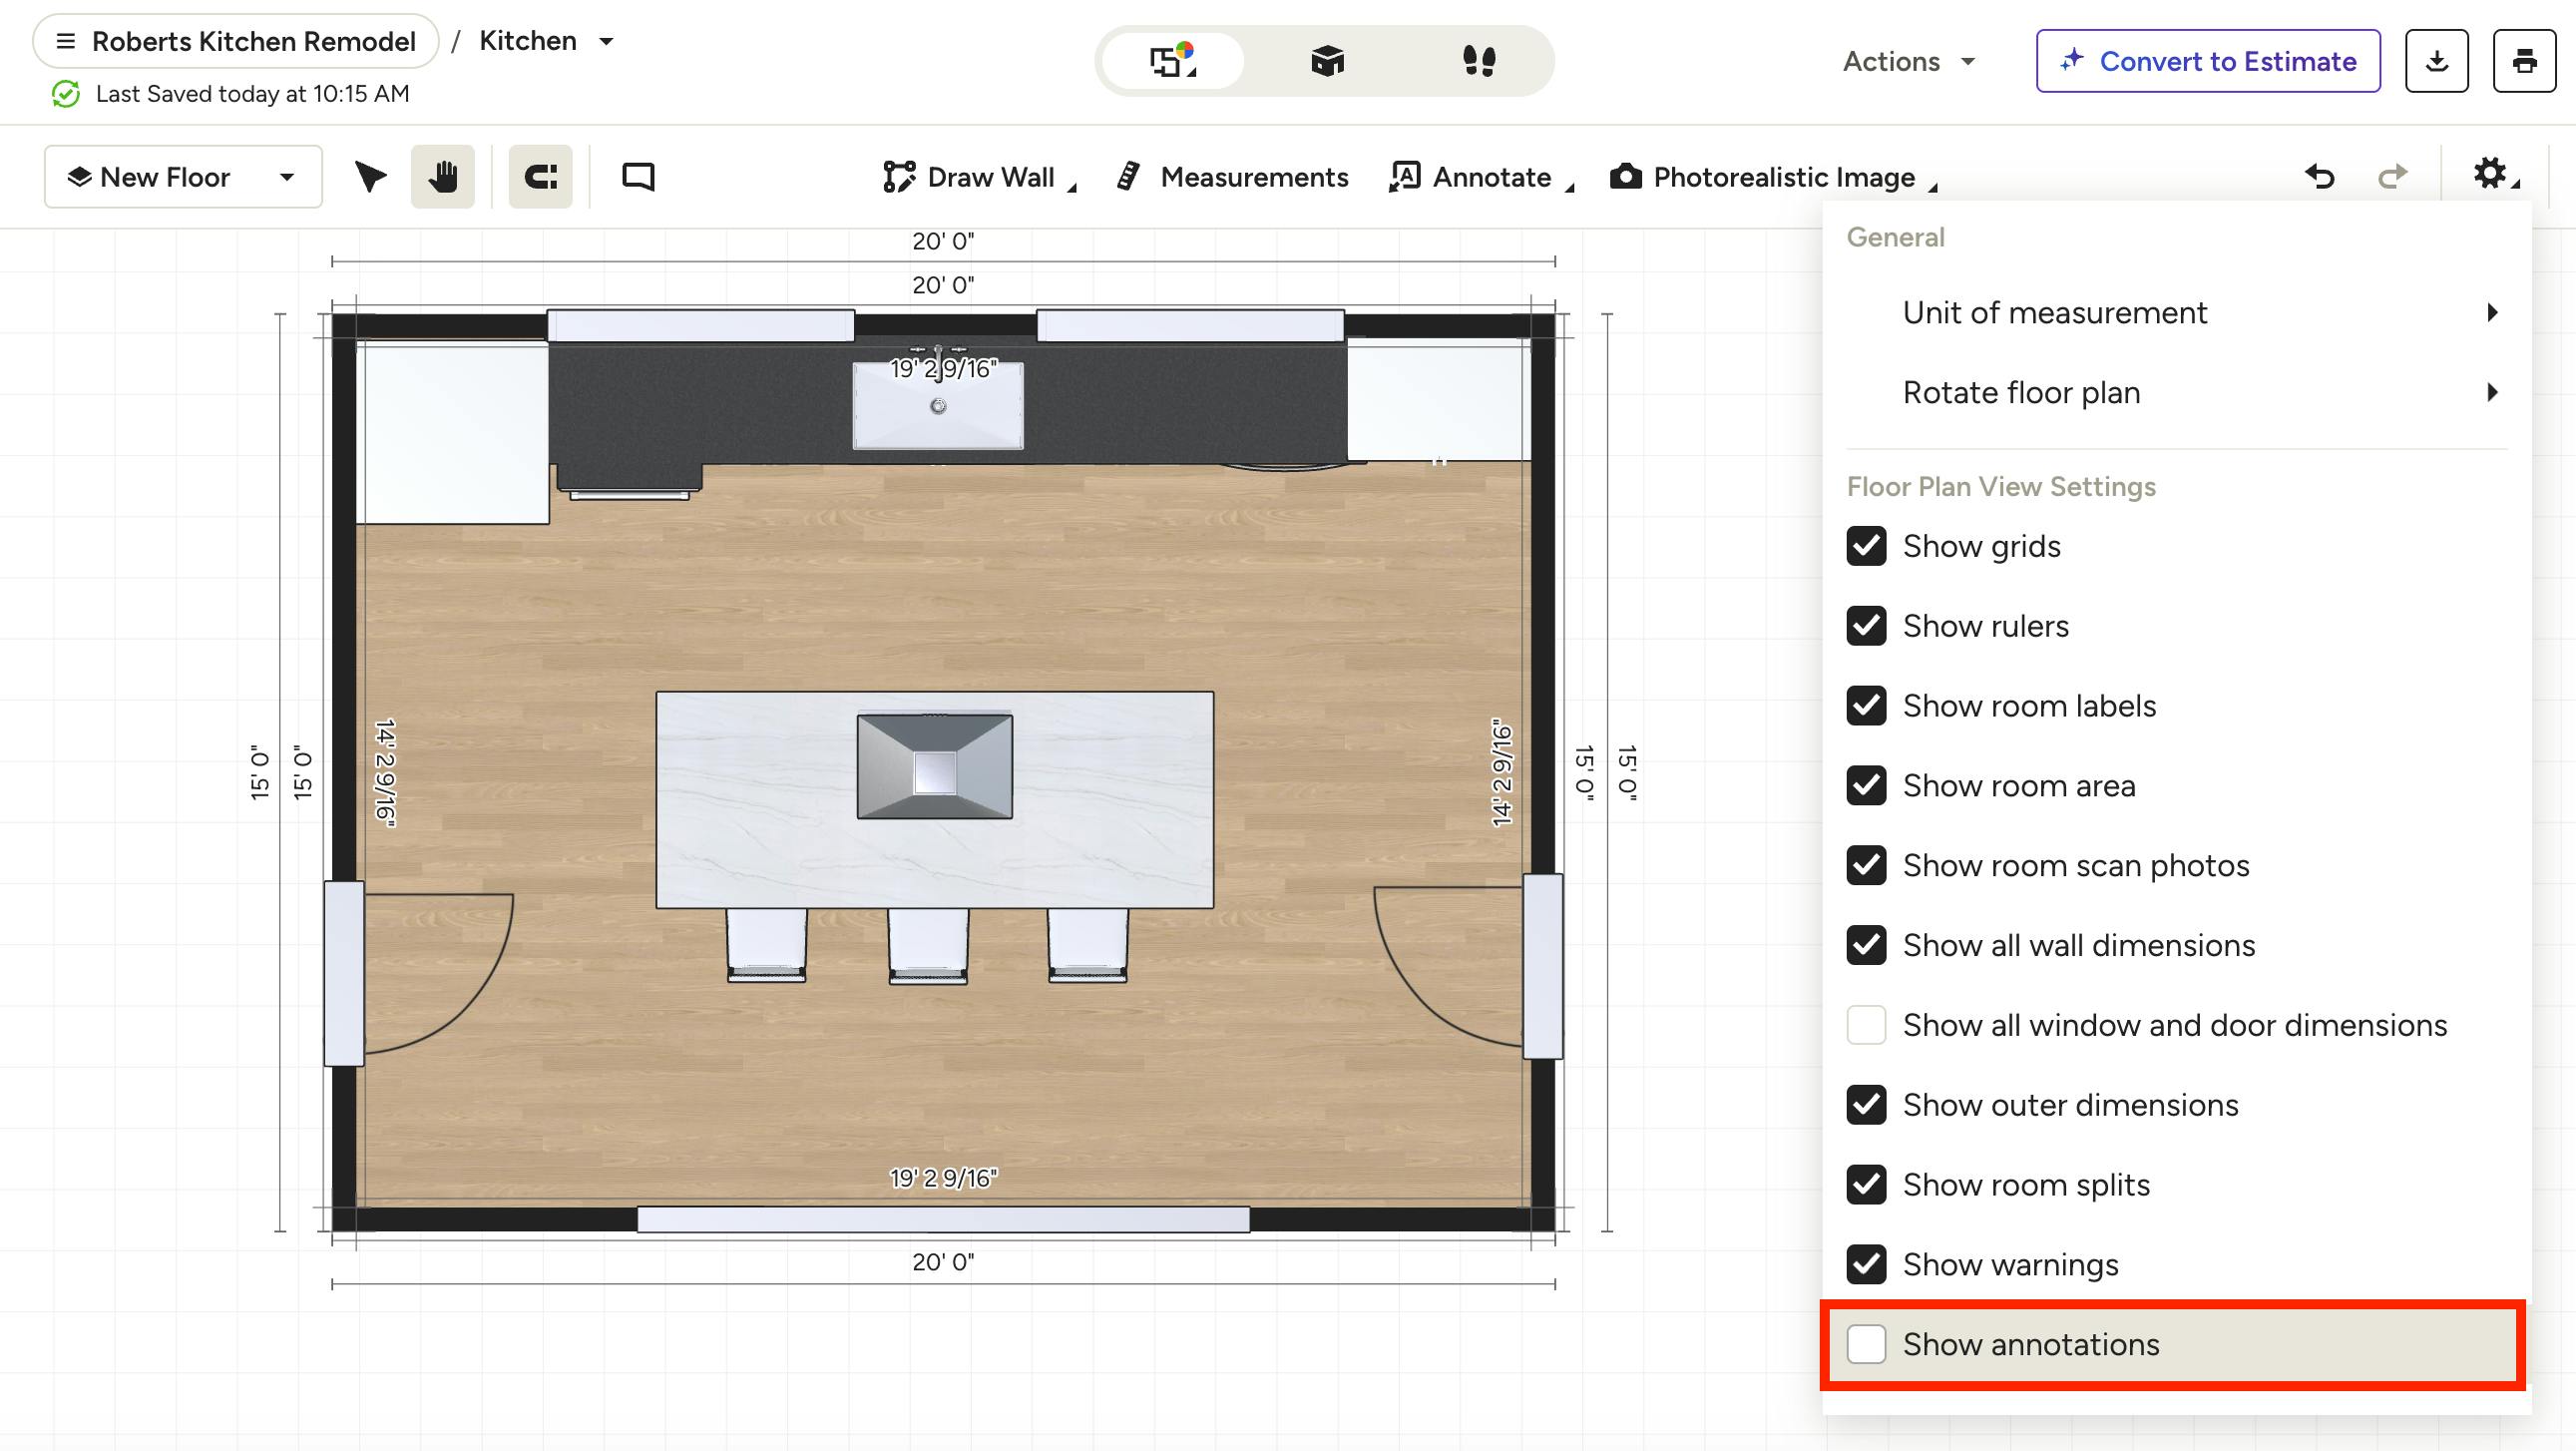
All existing annotations will disappear from view (as shown below). You can easily turn them on again by checking the Show Annotations box again.
Please Note: If you add a new annotation while annotations are turned off, all your annotations will automatically appear again so you can best determine placement.
Share Annotations
If annotations are turned on, they are visible to anyone you share your floor plan with, including clients and team members. They are also visible when you print your 3D floor plan.
If you don't want to include annotations when you share or print, you can uncheck the Show Annotations checkbox within your 3D floor plan settings (as mentioned above).
Read How to Share and Collaborate on a 3D Floor Plan or How to Print a 3D Floor Plan to learn more.