How to Create an Estimate or Proposal Using Your 3D Floor Plan
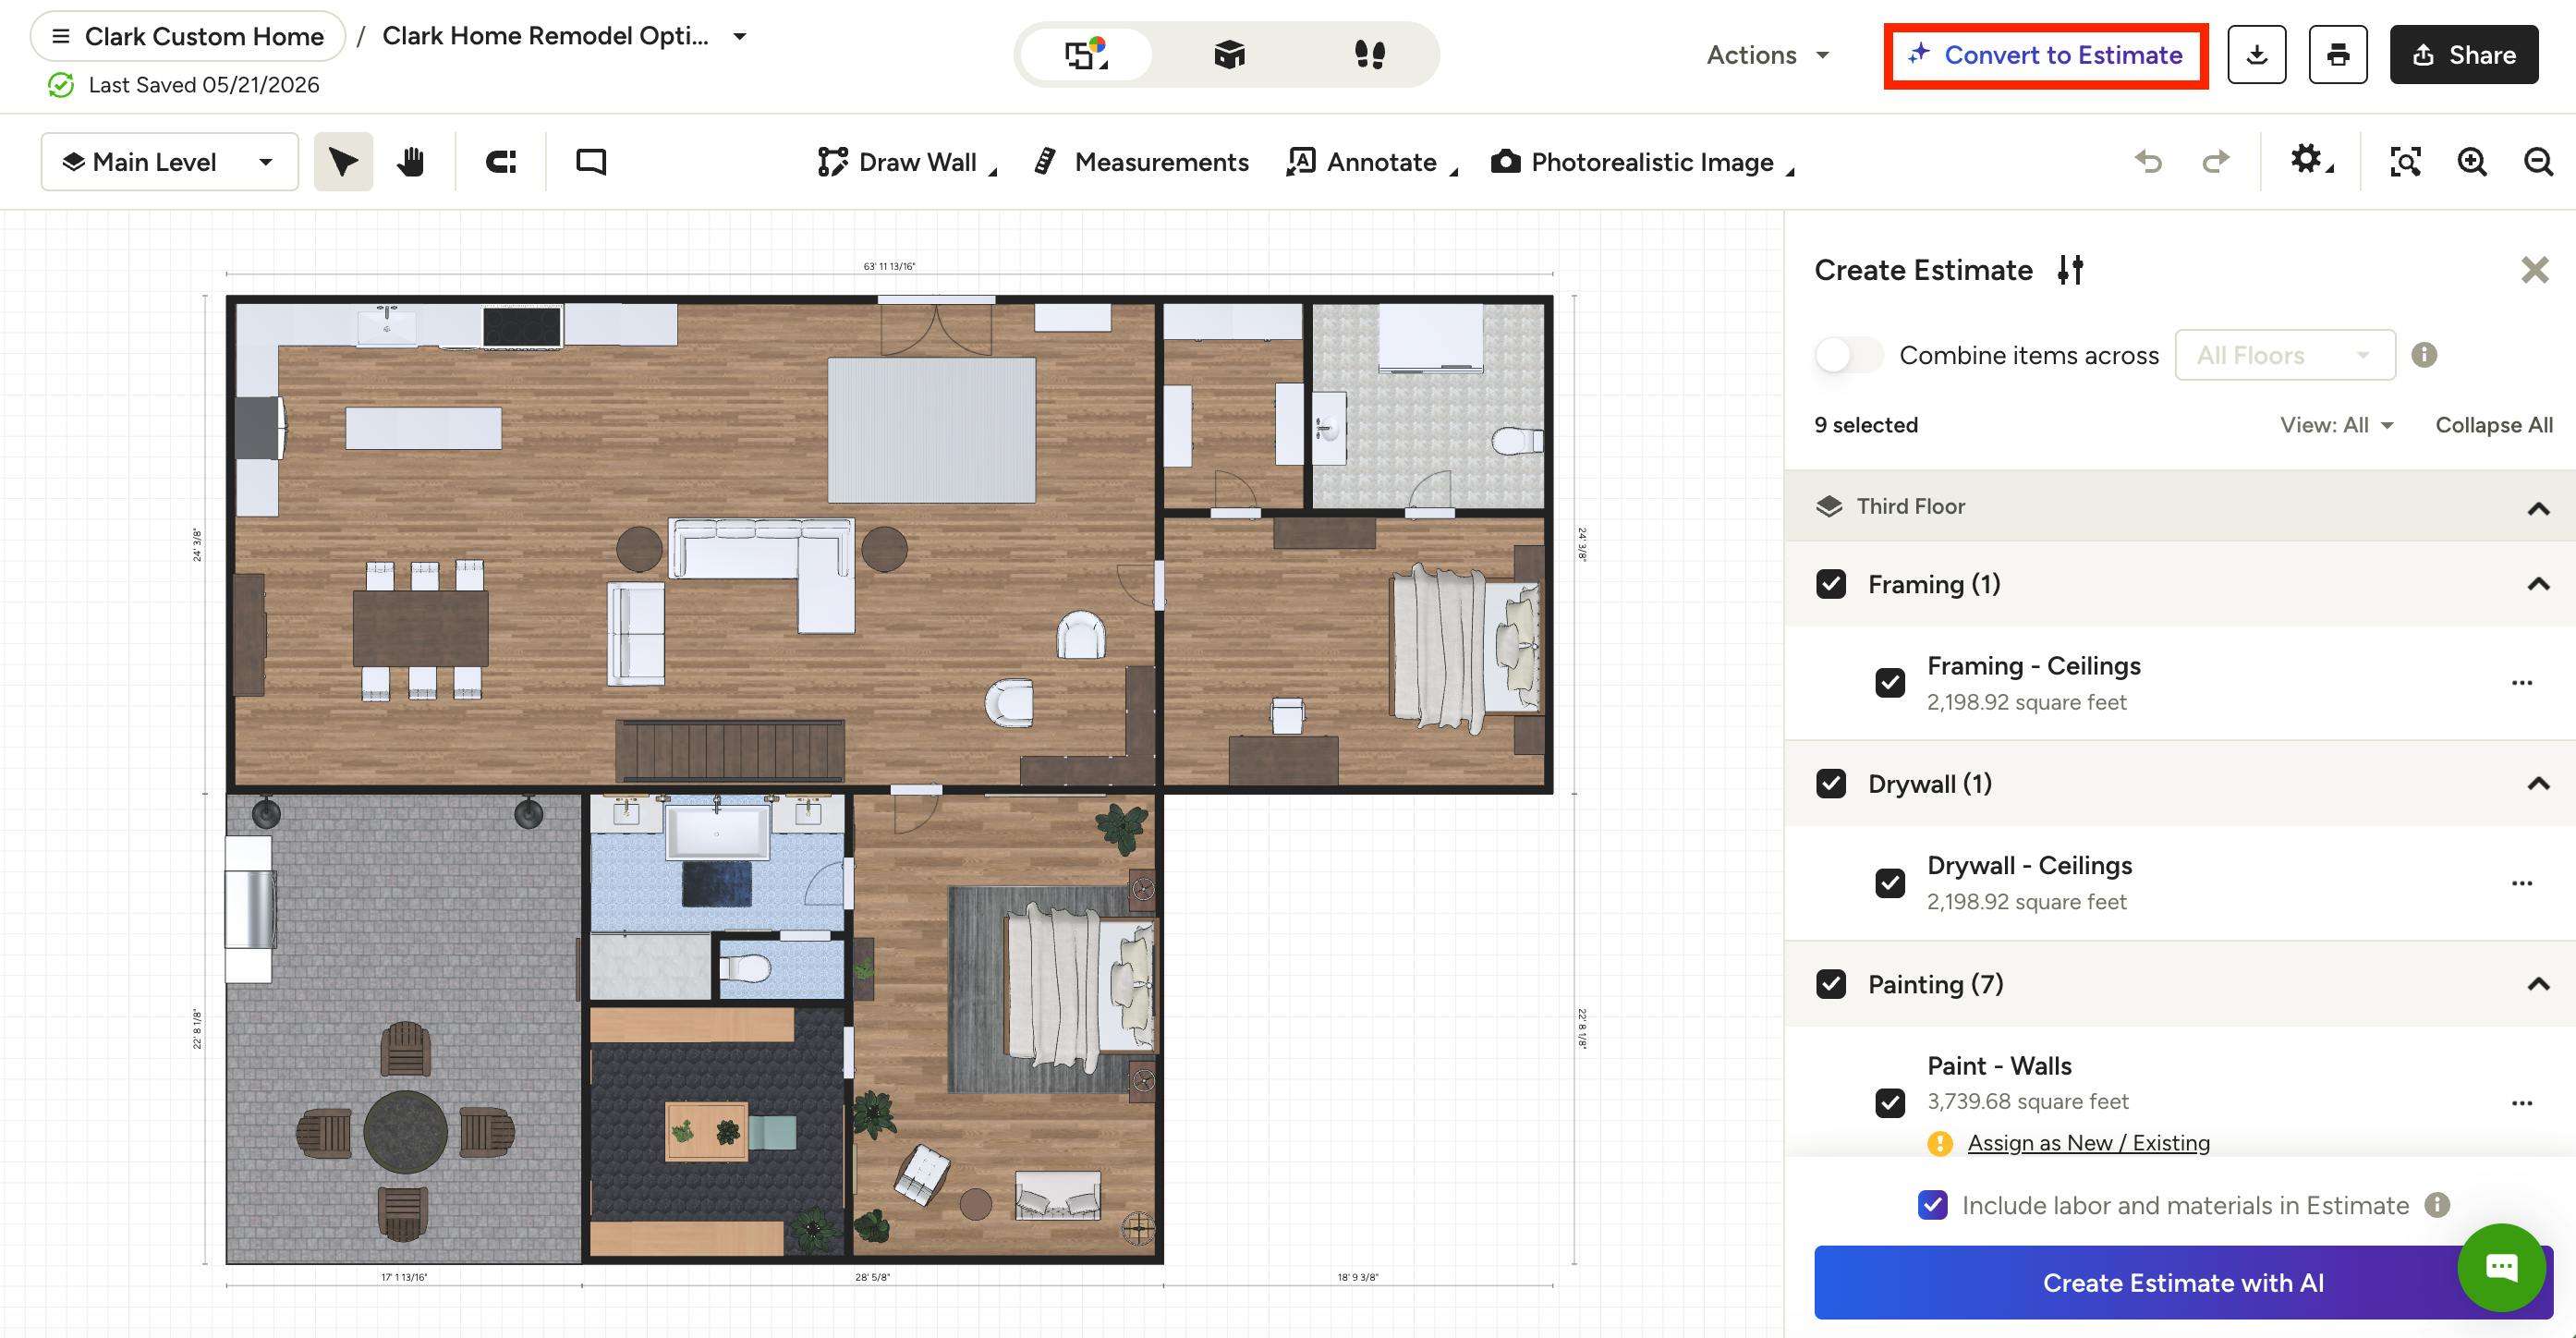
With Houzz Pro, you can quickly turn your detailed 3D floor plan into an estimate or proposal to share with clients. Converting your floor plan to a document saves you time and increases efficiency — it avoids double entry on work you've already completed.
To start creating your estimate (for builders) or proposal (for designers), open up the relevant 3D floor plan, or create a new floor plan from scratch or from a template. Click the Convert to Estimate or Proposal button at the top of your floor plan.
By default, Houzz Pro will use AI to generate a list in the right panel of all the items used in your 3D floor plan.
From here, you can select a preset option to auto-select categories and items based on your project type (more details below). Or, if you want a more customized estimate/proposal, you can manually select the relevant categories and items to include. You can also decide to add AI labor and material costs, or just enter costs manually later on.
Let's go over the details.
Select a Project Type Preset
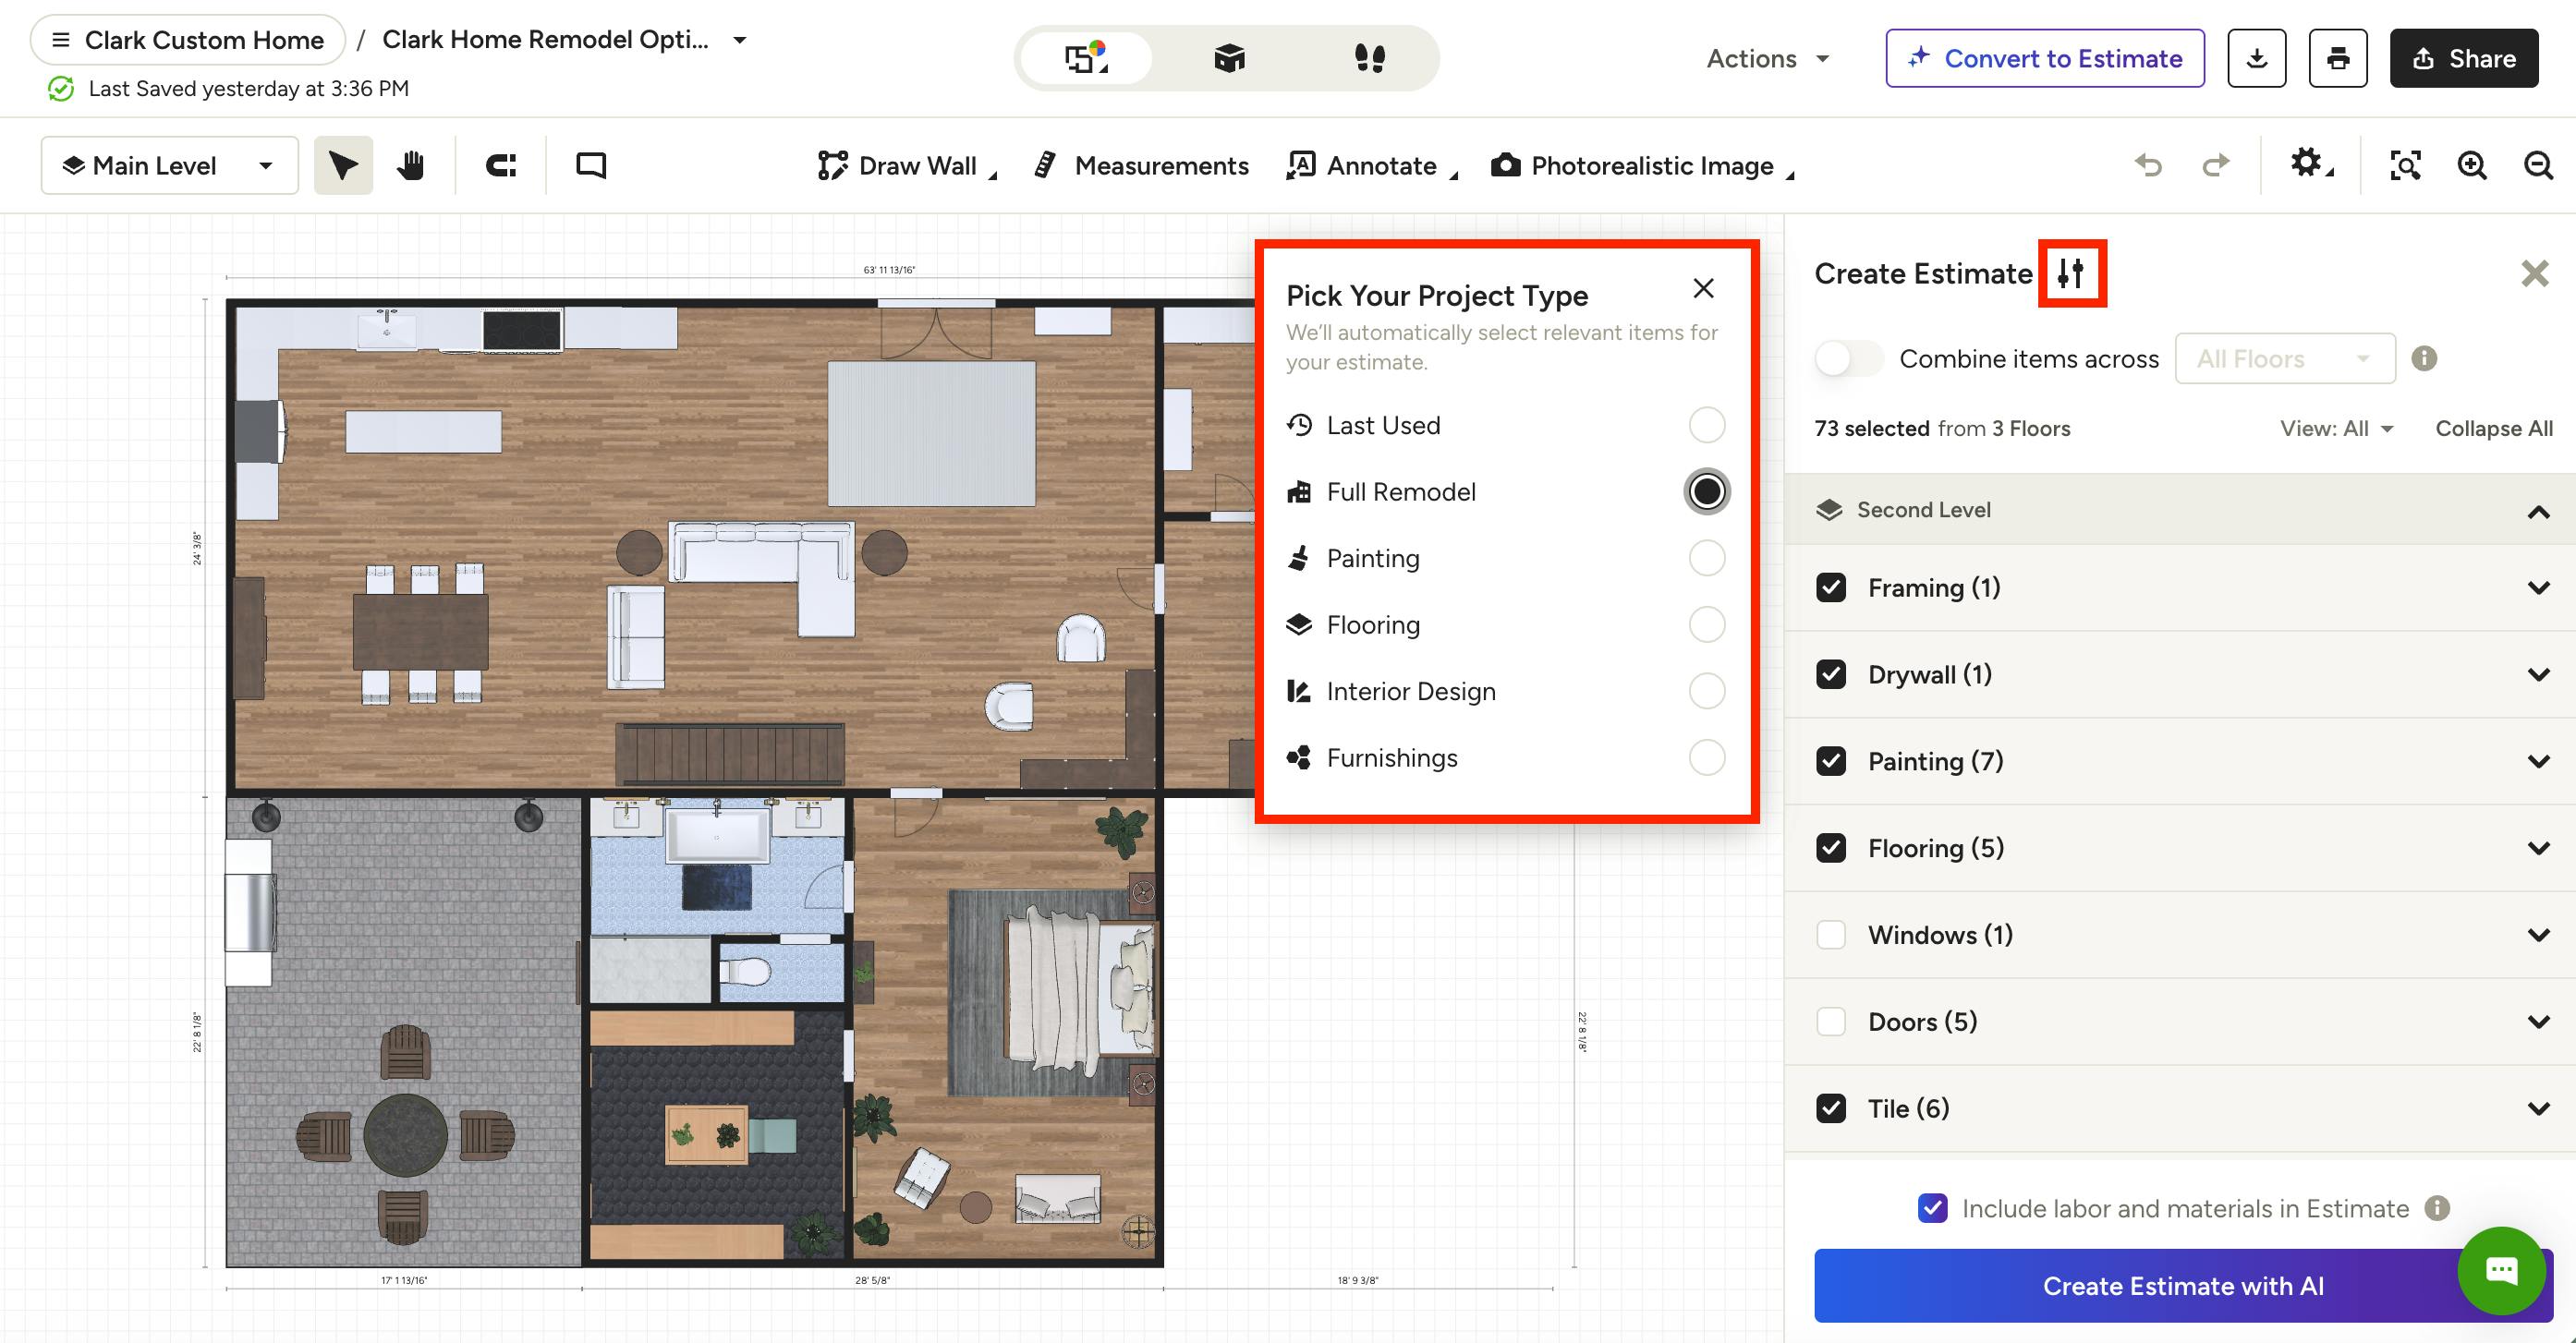
When you click Convert to Estimate/Proposal, a Presets popup will appear that asks you to pick your project type. You can also access this from the Customize button at the top of the estimate/proposal.
Presets are pre-configured item selections based on common job types. They are optional to use, but they make it faster to select the right items for your estimate/proposal without starting from zero.
Options include: Last Used, Full Remodel, Painting, Flooring, Interior Design, and Furnishings. Click the option to apply it.
Once applied, it will auto-select the relevant categories and items. You can still modify individual line items by selecting or de-selecting the relevant checkbox (more details below).
Please Note: If you've already generated an estimate from this floor plan, the preset will automatically default to Last Used, reflecting your previous selections.
Edit Document Details
If you don't apply a preset, all items will be unchecked by default, giving you full control over what goes into your estimate or proposal.
Select Your Categories and Items
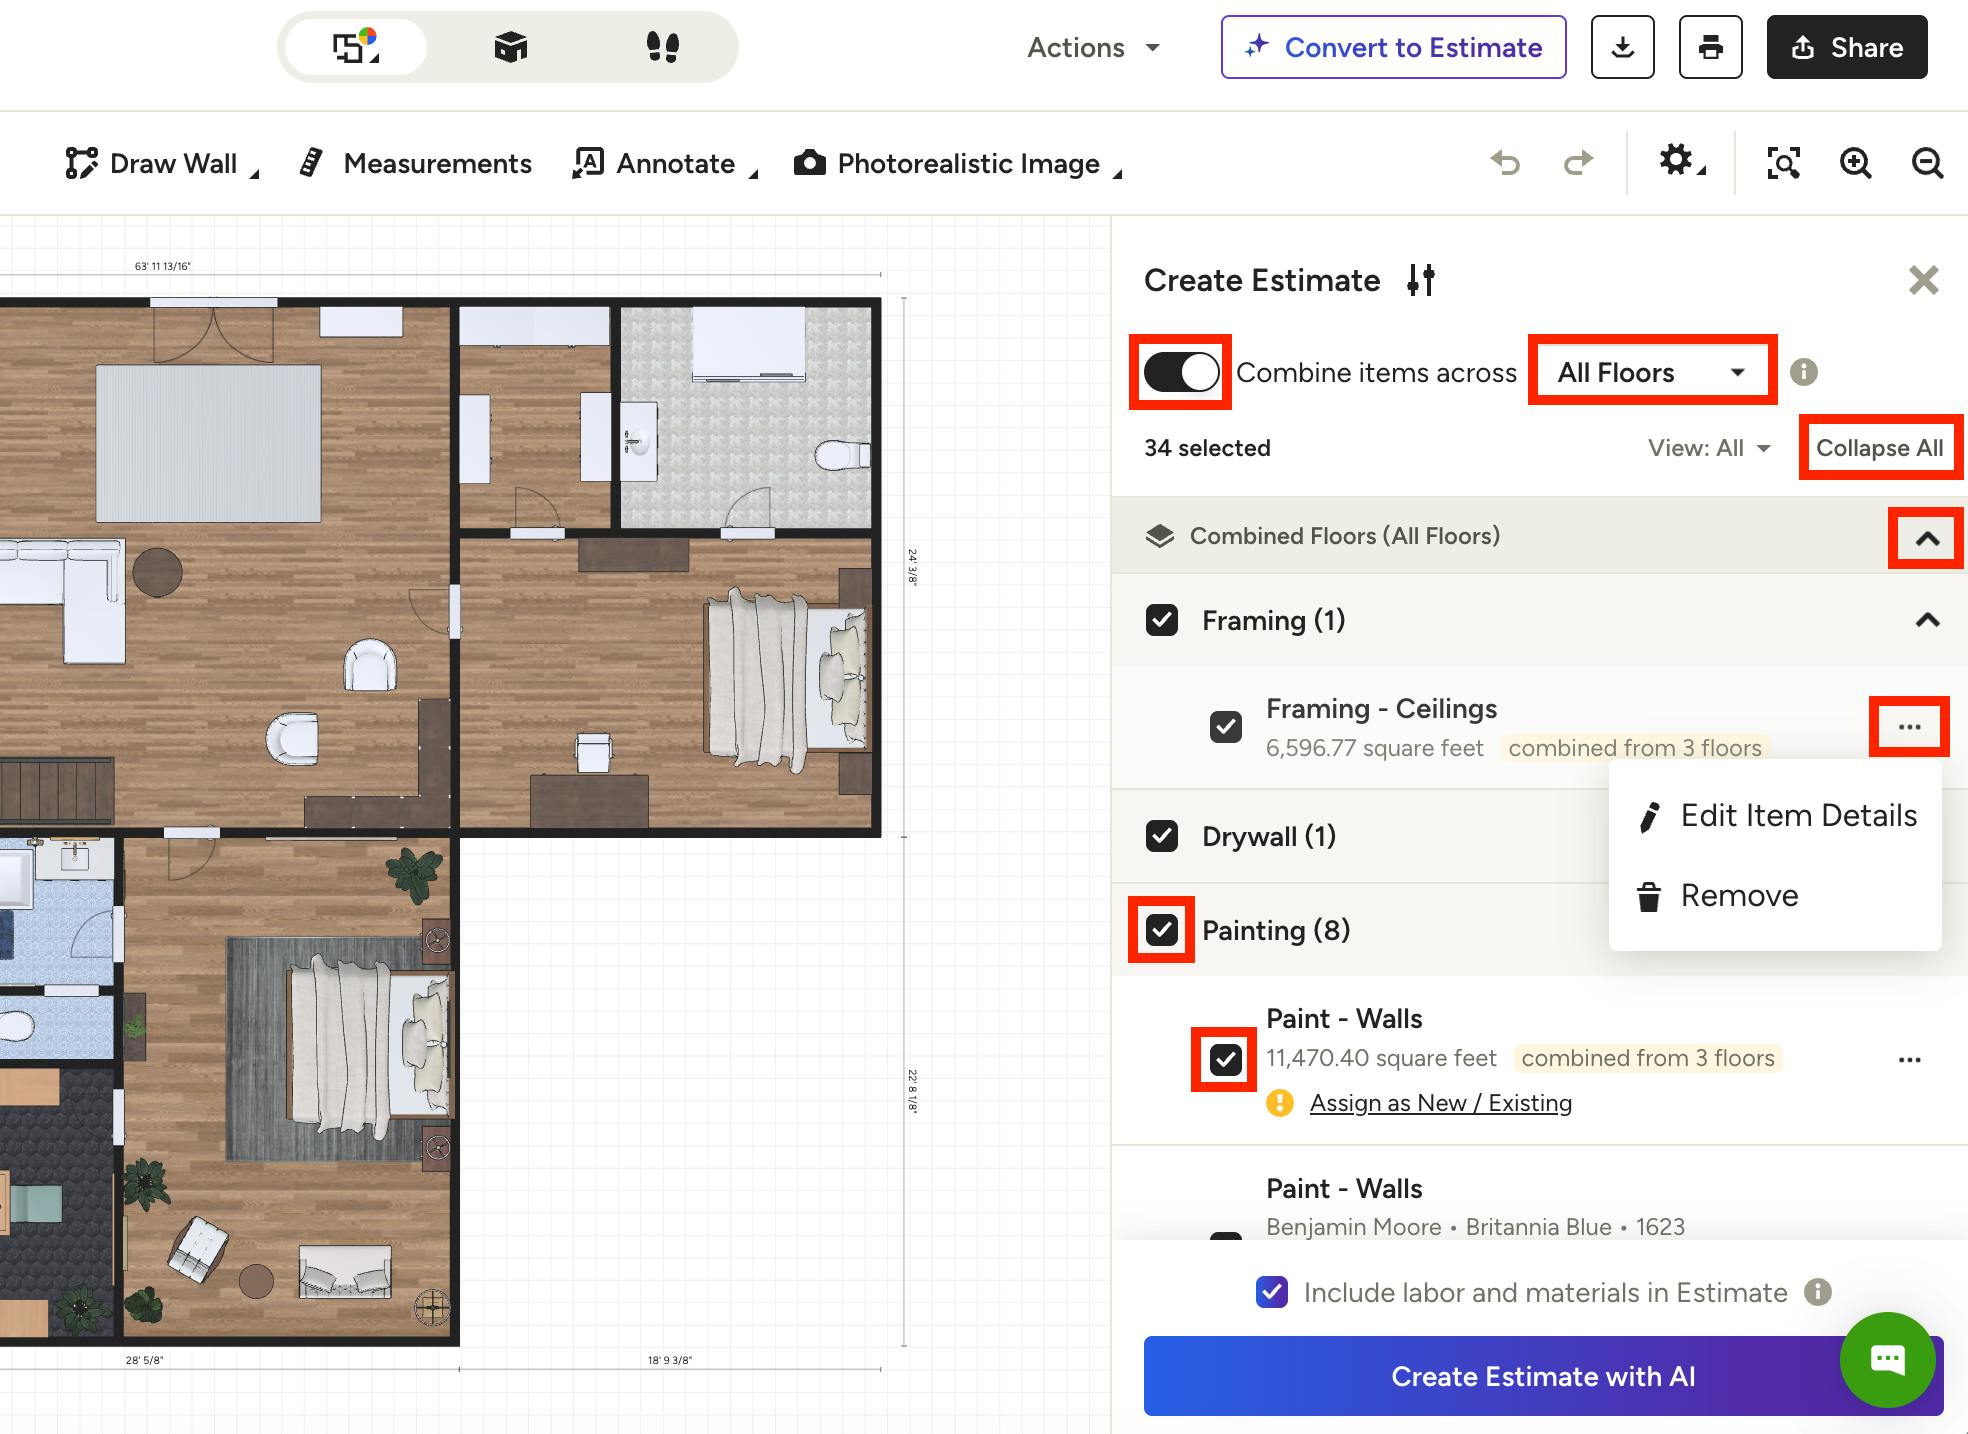
Select the checkbox next to each category or item you want to include in your estimate or proposal. De-select the checkbox next to any category or item you want to exclude.
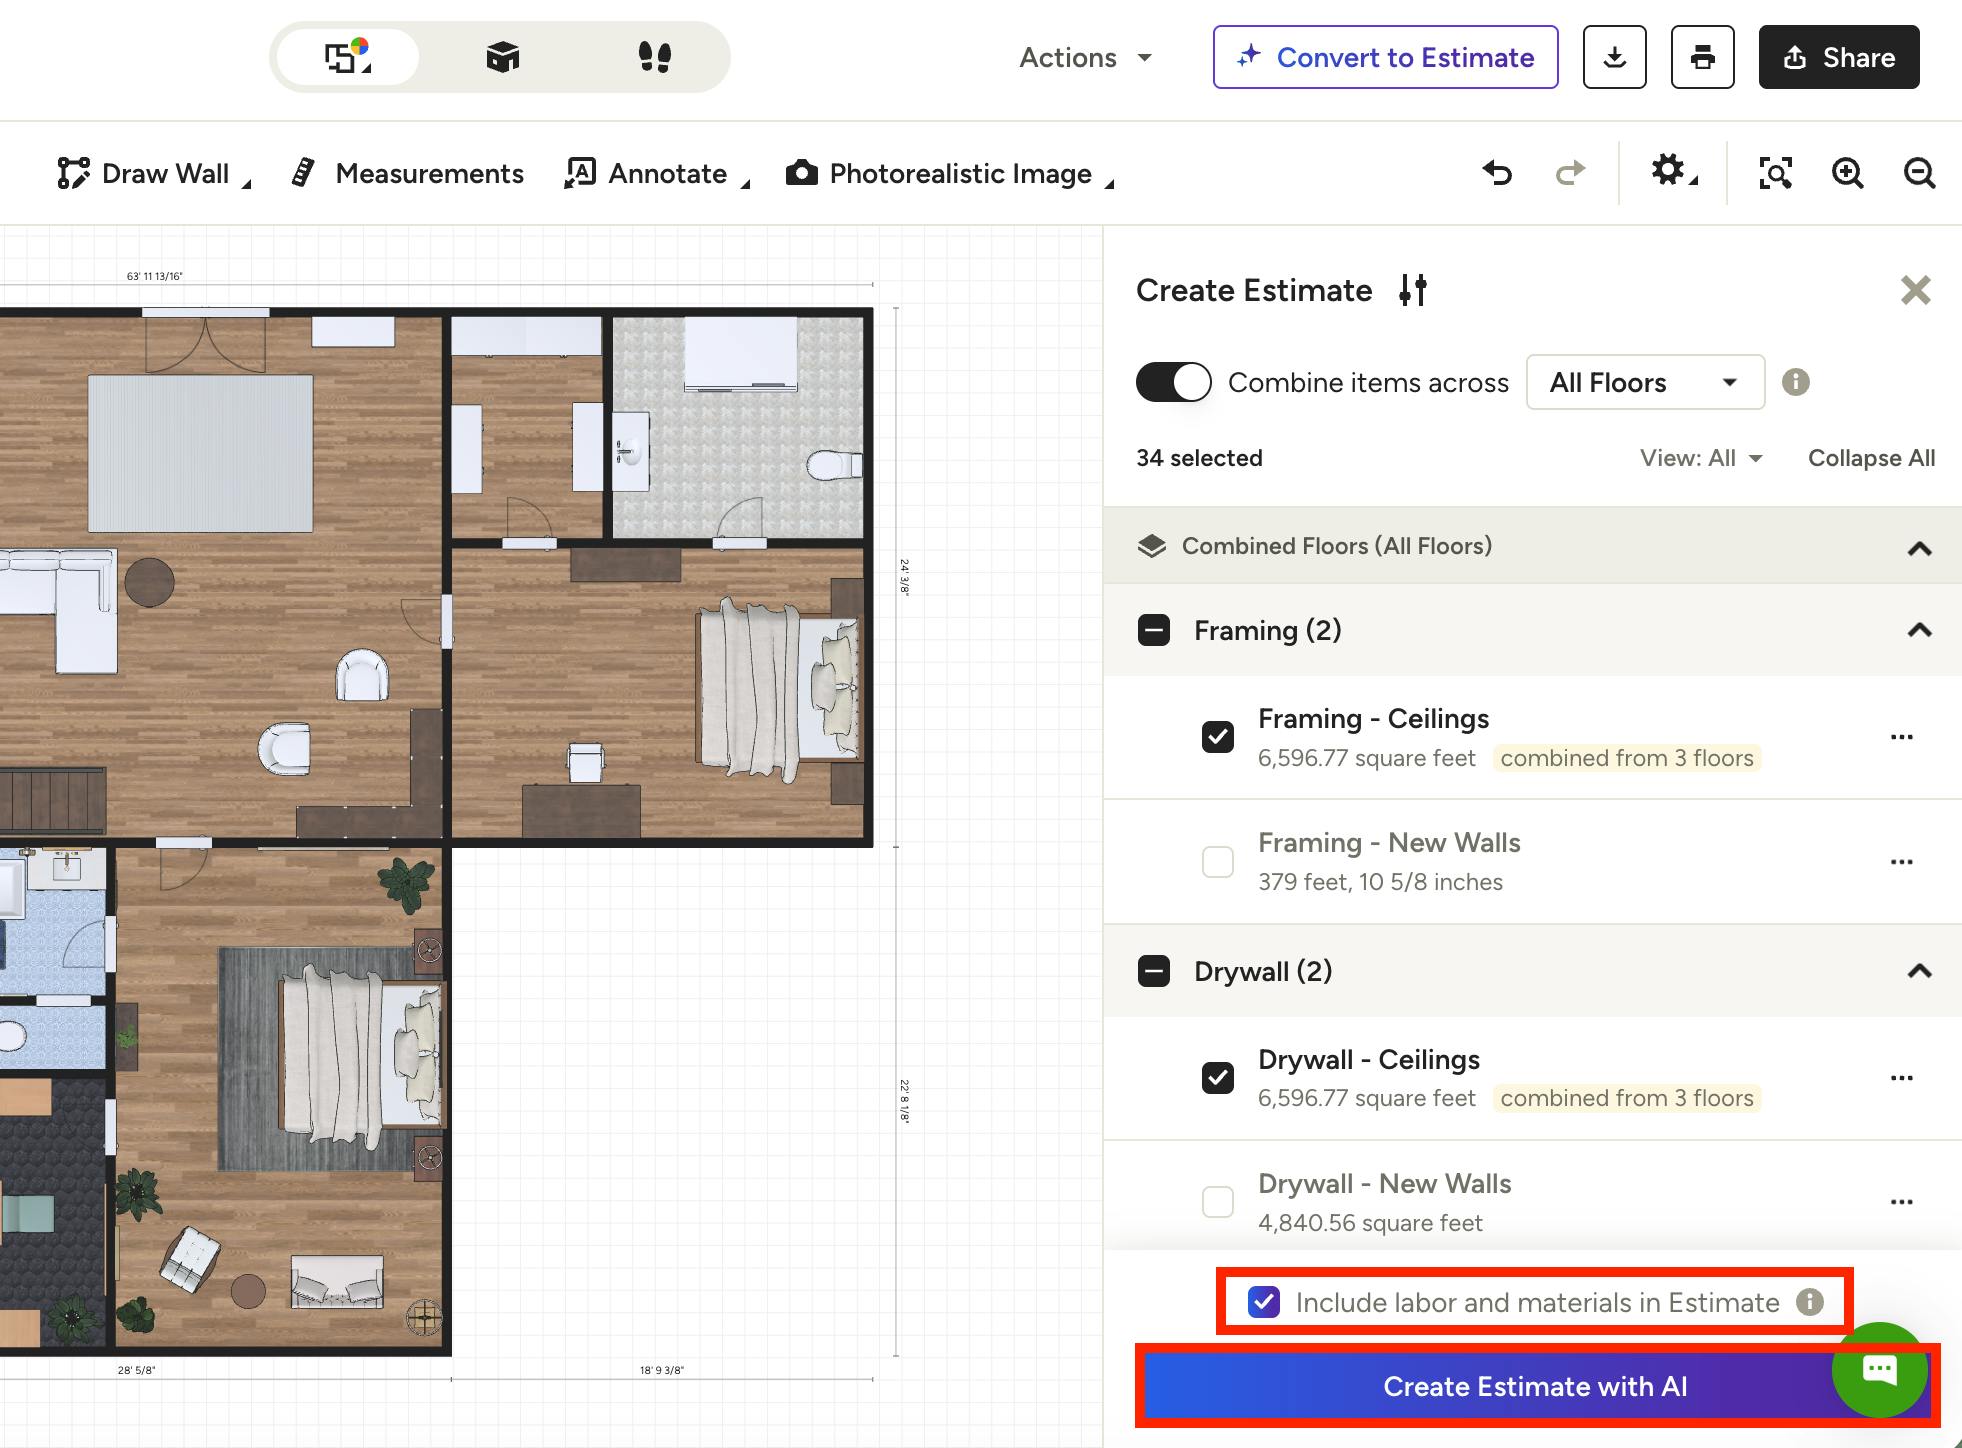
Toggle on Combine Items Across Floors to add up items across multiple floor plan levels. You can select All Floors in the dropdown menu, or select specific floors to include.
Select Collapse All or Expand All to condense or expand your view of the estimate or proposal list. You can also collapse a specific category by clicking the ^ icon next to it.
Edit Item Details
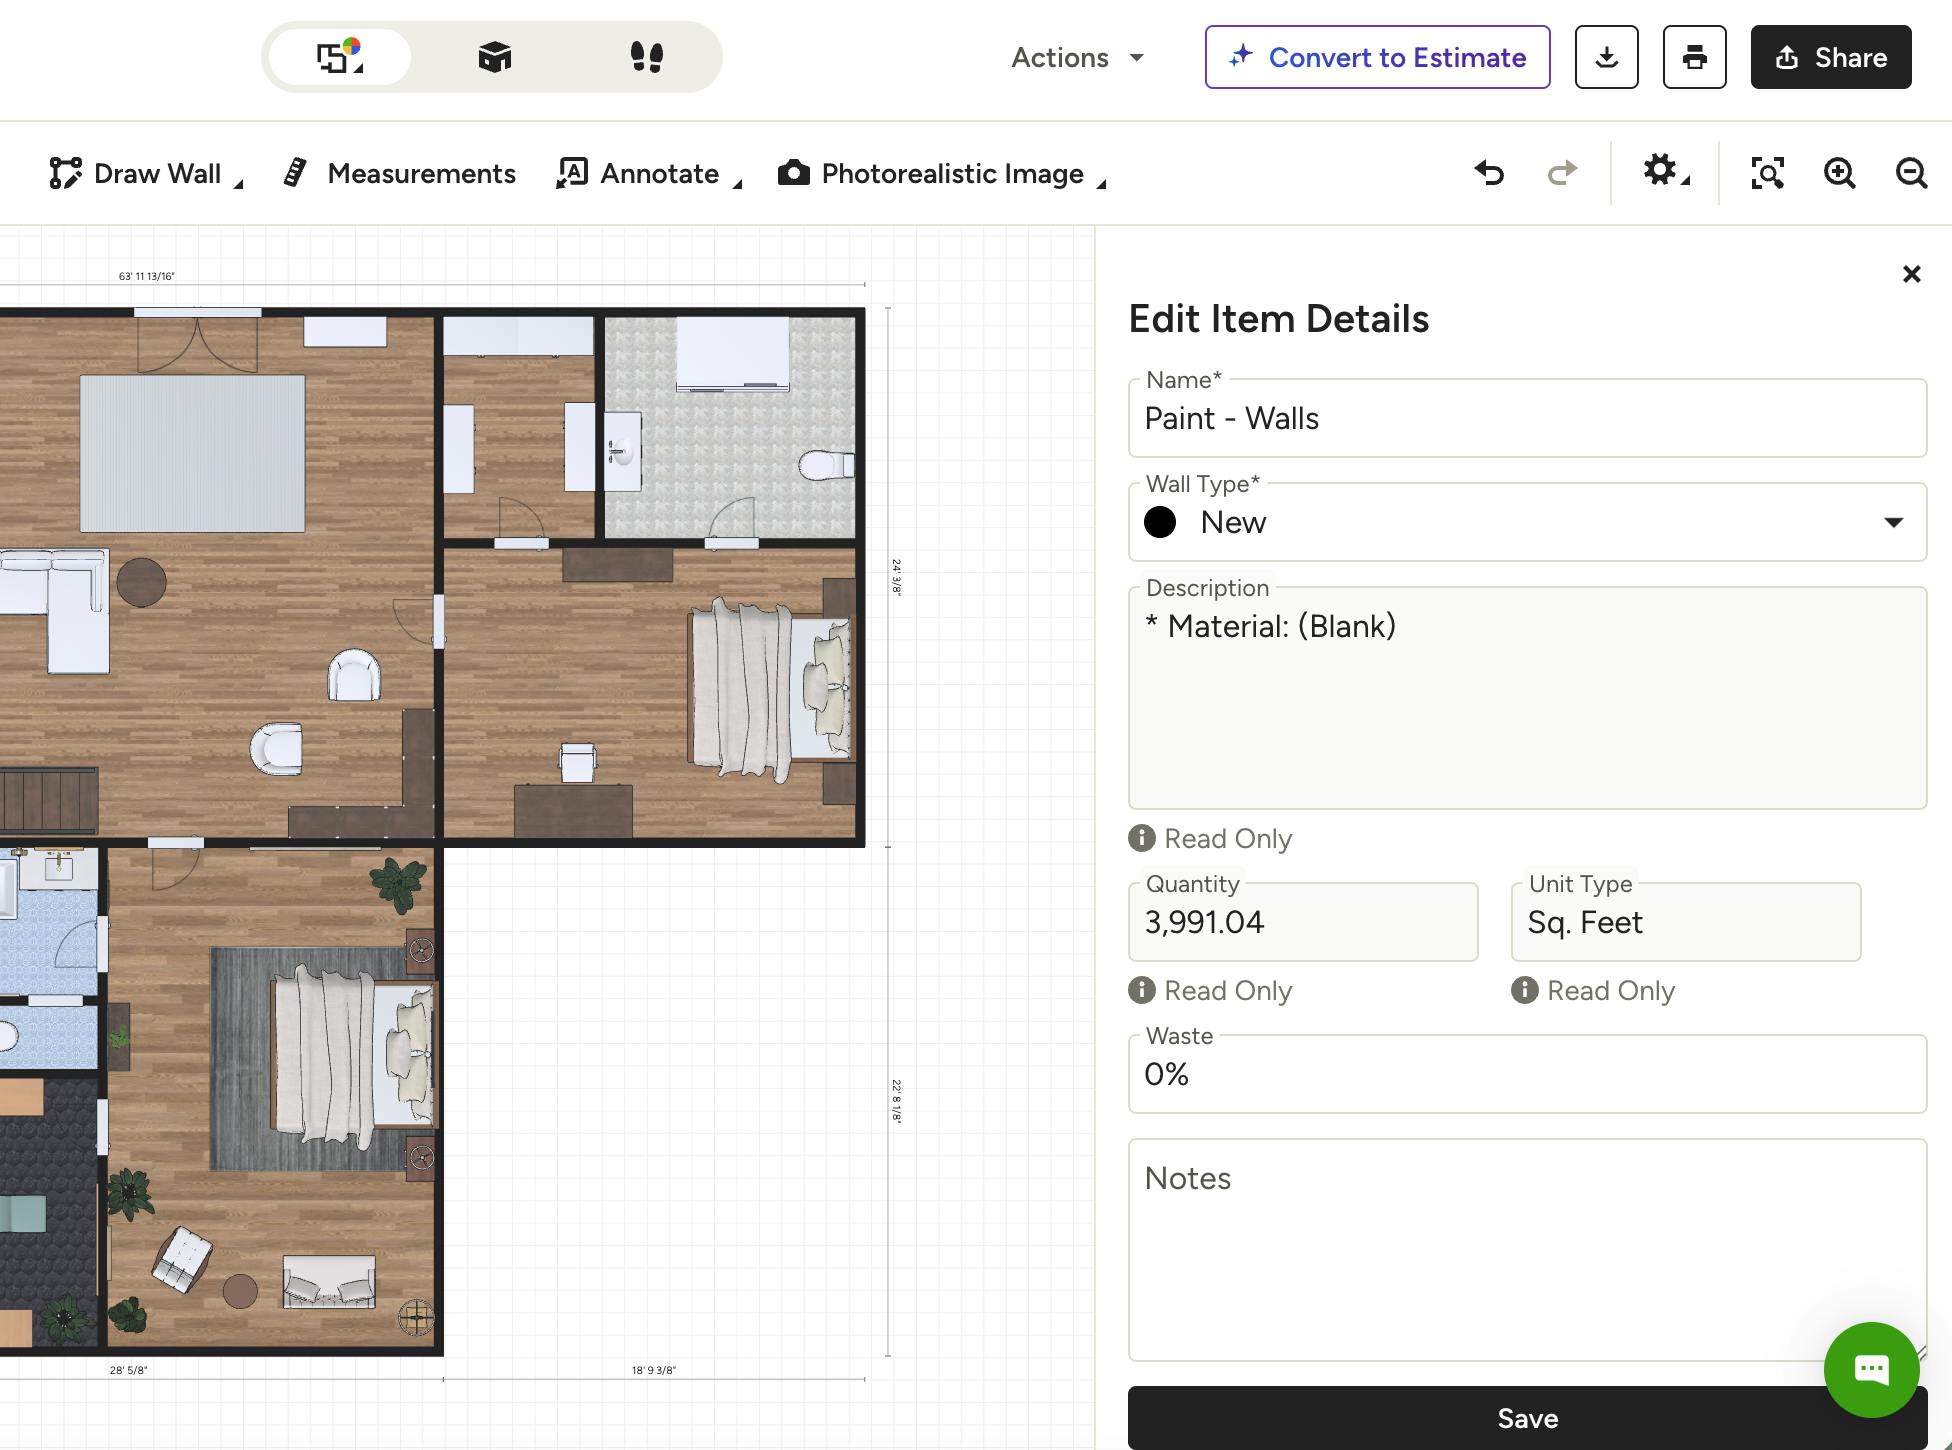
You can Remove or Edit Item Details by clicking the three dots icon next to any item.
If you select Edit Item Details, you can adjust the item name, add notes, or include a waste percentage to account for extra materials (this adds to the total quantity in your estimate).
For items associated with walls, you can select whether the wall is new or existing. This is important to input for your estimate/proposal, since new walls will automatically get framing and drywall.
Click Save once you've made your changes.
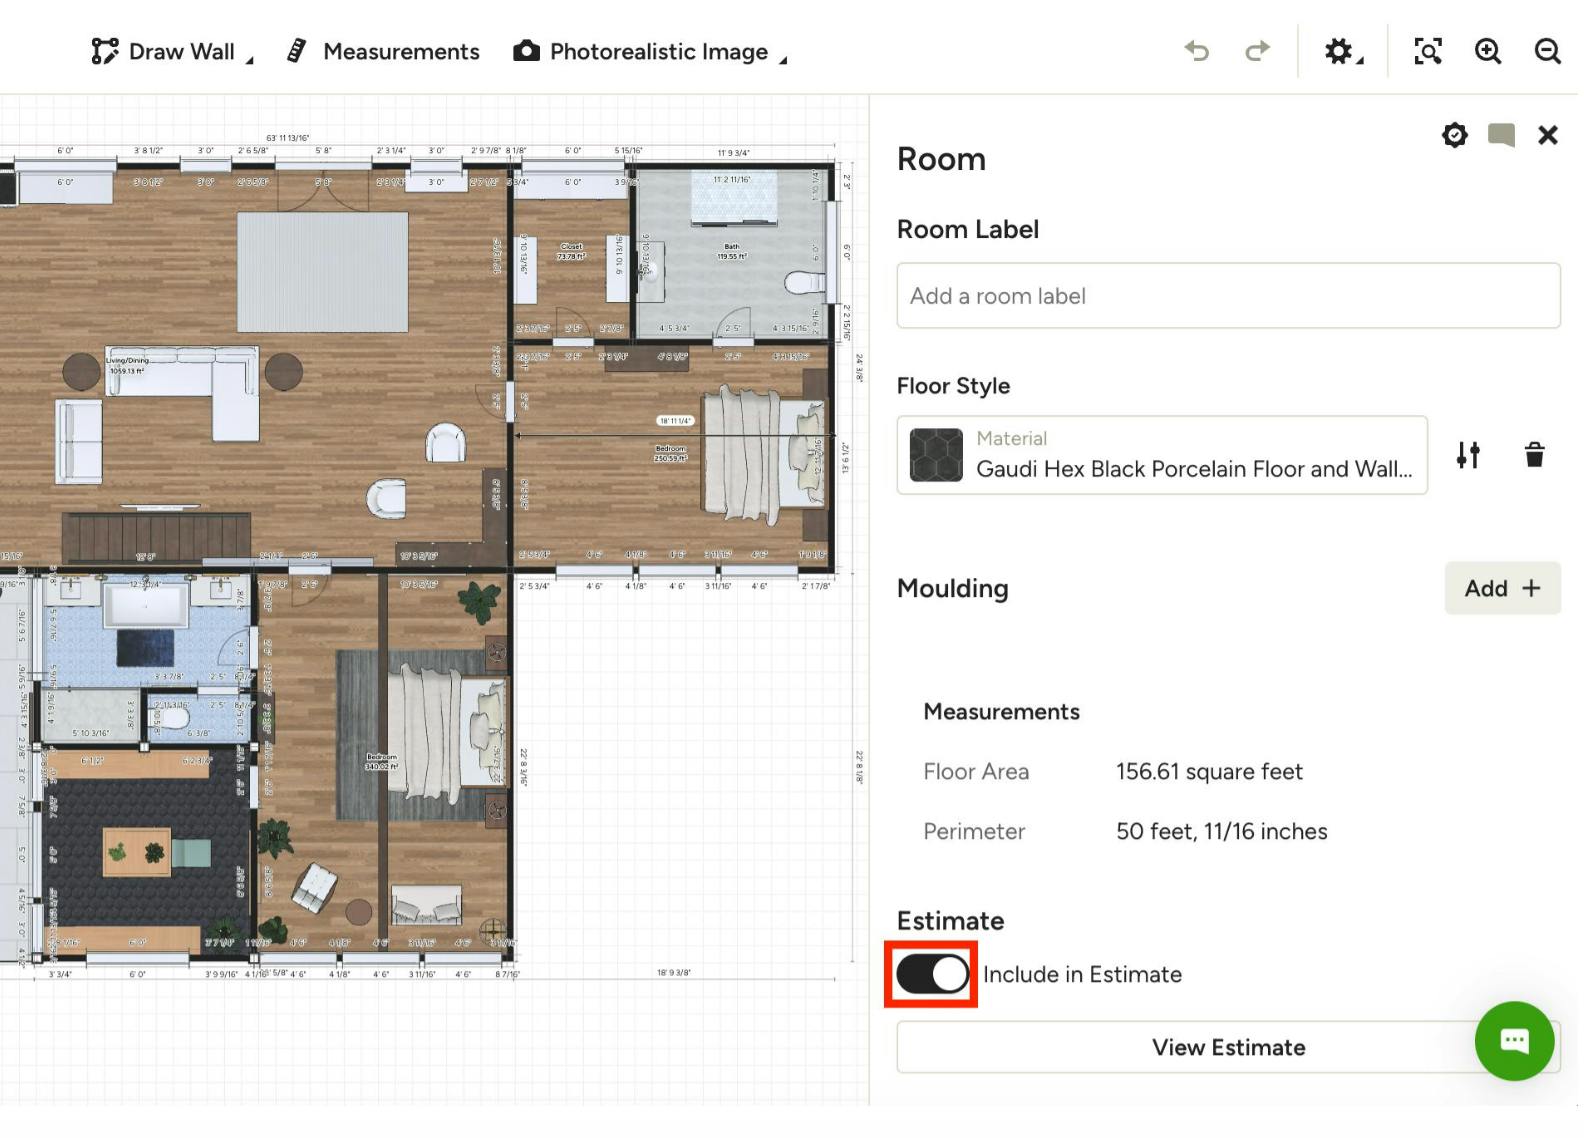
Please Note: Some item fields are read-only in the estimate/proposal panel. To edit description, quantity, or unit type, make those changes directly in the 3D floor plan. You can also do this in the estimates/proposal page once the document is created.
To do this on your floor plan, click the floor plan item you would like to change, add or remove. In the right panel, make the necessary adjustments to materials, colors, dimensions or quantity.
At the bottom of the right panel, toggle off Include in Estimate/Proposal if you want to remove an item that's already added. If you would like to add a new item that's not already included, toggle on Include in Estimate/Proposal. Any changes you make here will automatically update your floor plan and your AI document details.
Set Cost Preferences
As part of the document creation process, you also have the option to use AI technology to automatically add labor and material costs to your estimate or proposal. The included pricing is based on AI data from Gemini, and also considers the project zip code and location for improved accuracy.
By default, the checkbox next to Include Labor and Materials will be selected — this will include AI pricing. De-select the checkbox if you want to remove AI pricing and manually input cost information later on.
Be sure to select Create Estimate/Proposal to create your document.
Add AI Description
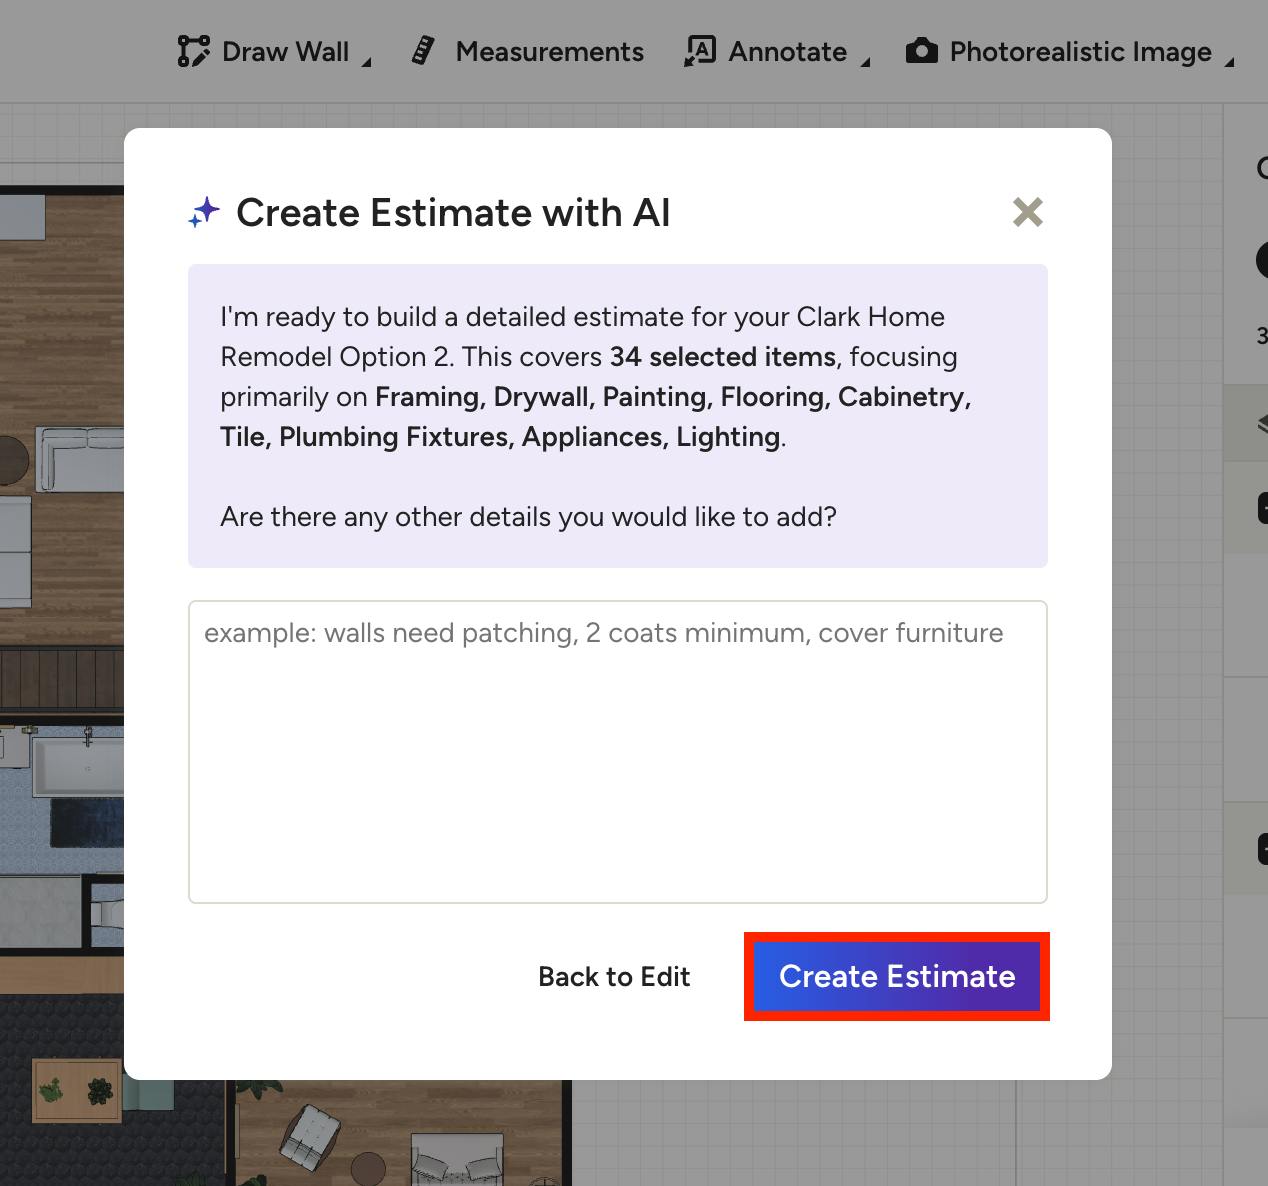
As the final step for document creation, you can input an AI description to provide more detail on the project. This is optional, but it gives AI additional context for a more accurate estimate or proposal.
For example, you can include details about higher quality materials and finishes, specific renovation/repair work needed, or instructions that increase or decrease materials used.
Select Create Estimate/Proposal once finished.
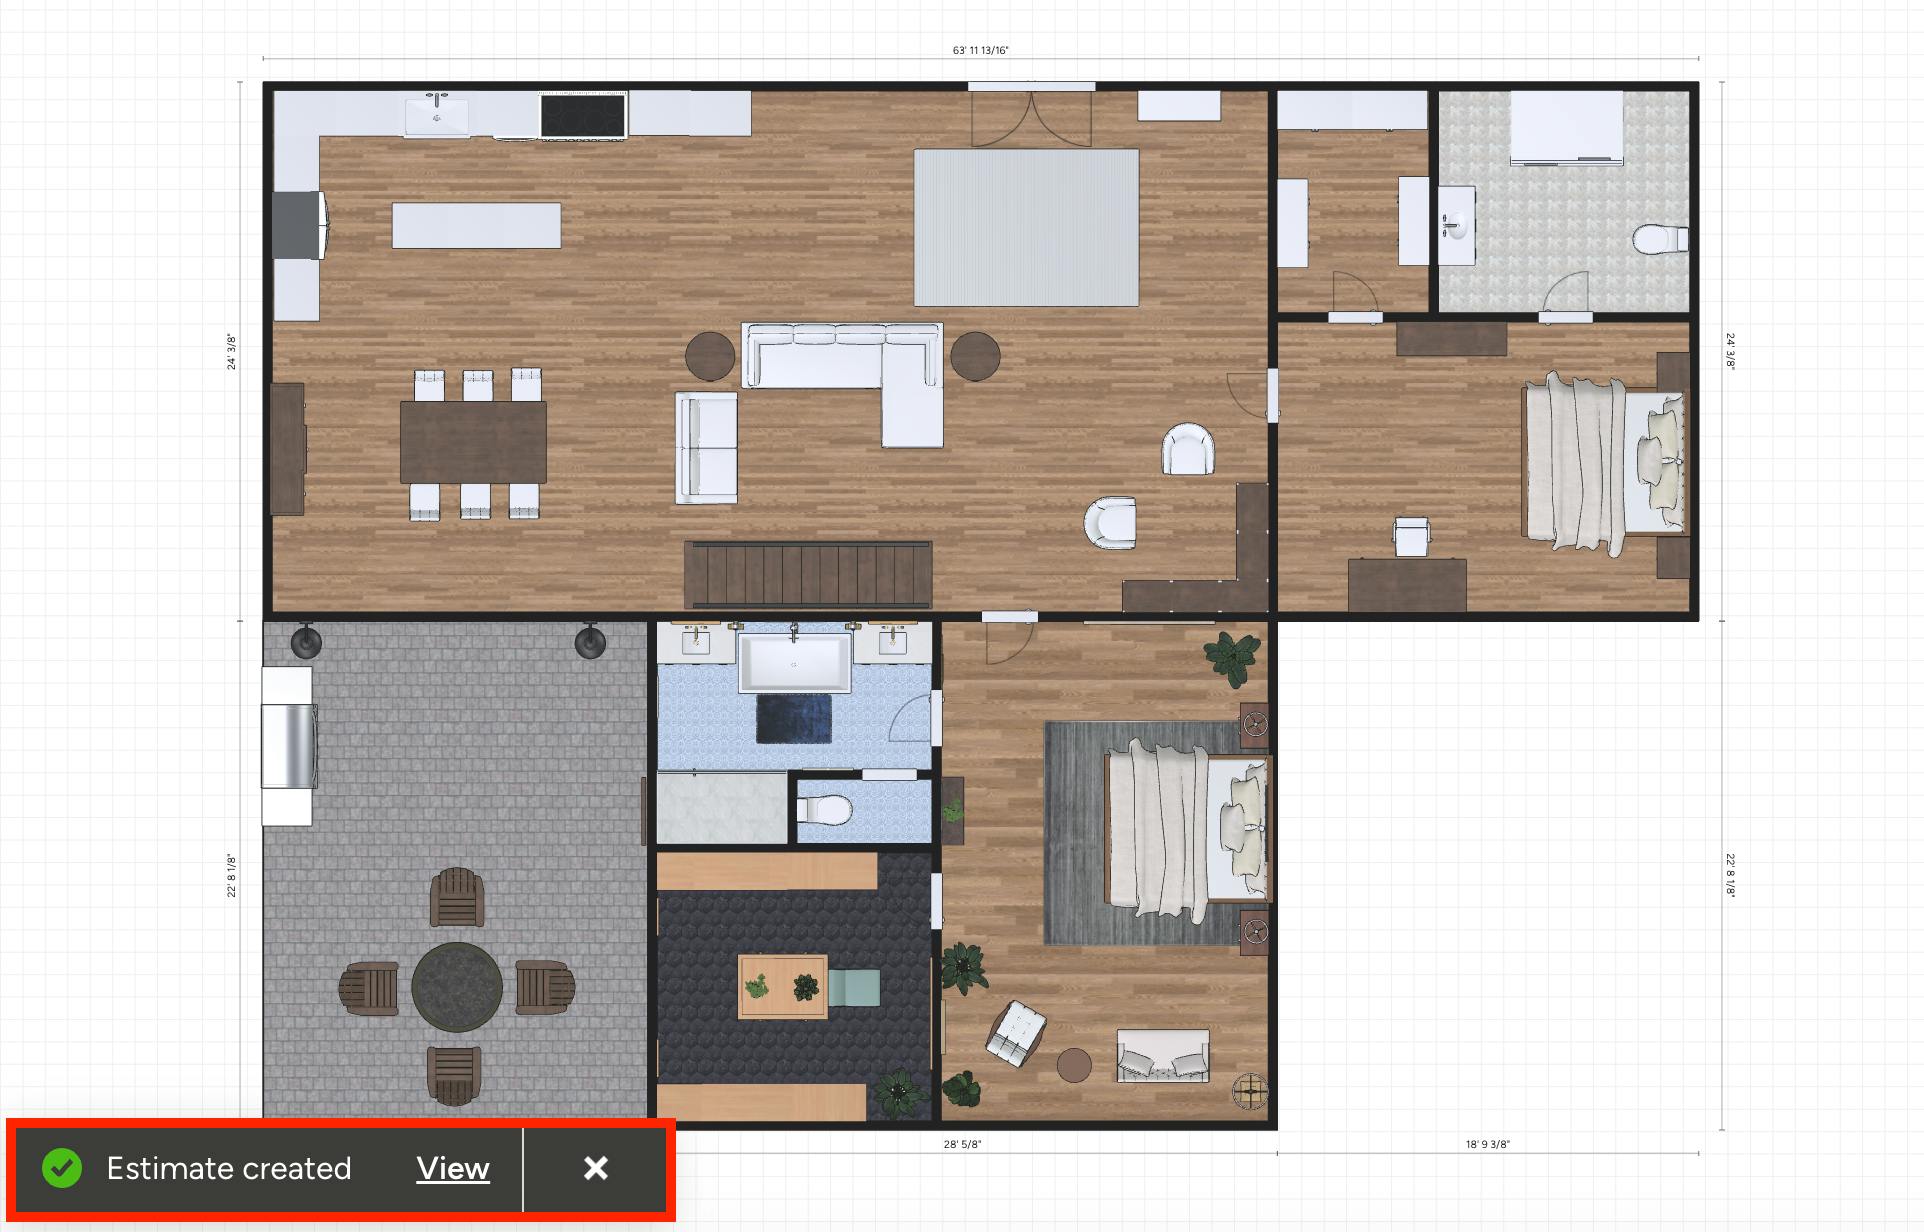
It may take a few minutes to generate your document. Once ready, you will see a notification at the bottom of your 3D floor plan. Click View to open up the estimate or proposal, which you can edit if needed and/or share with your client or team.