How to Use the Product Library in Takeoffs
Within Takeoffs, you can use the Product Library to pull products, materials, services and even cost codes (if relevant) directly into the takeoff canvas. Any items you add from your library will automatically carry over key details to estimate and exports, such as markup, unit cost, and wastage. This streamlines your transition from measuring to estimating and ensures data consistency across your entire project workflow.
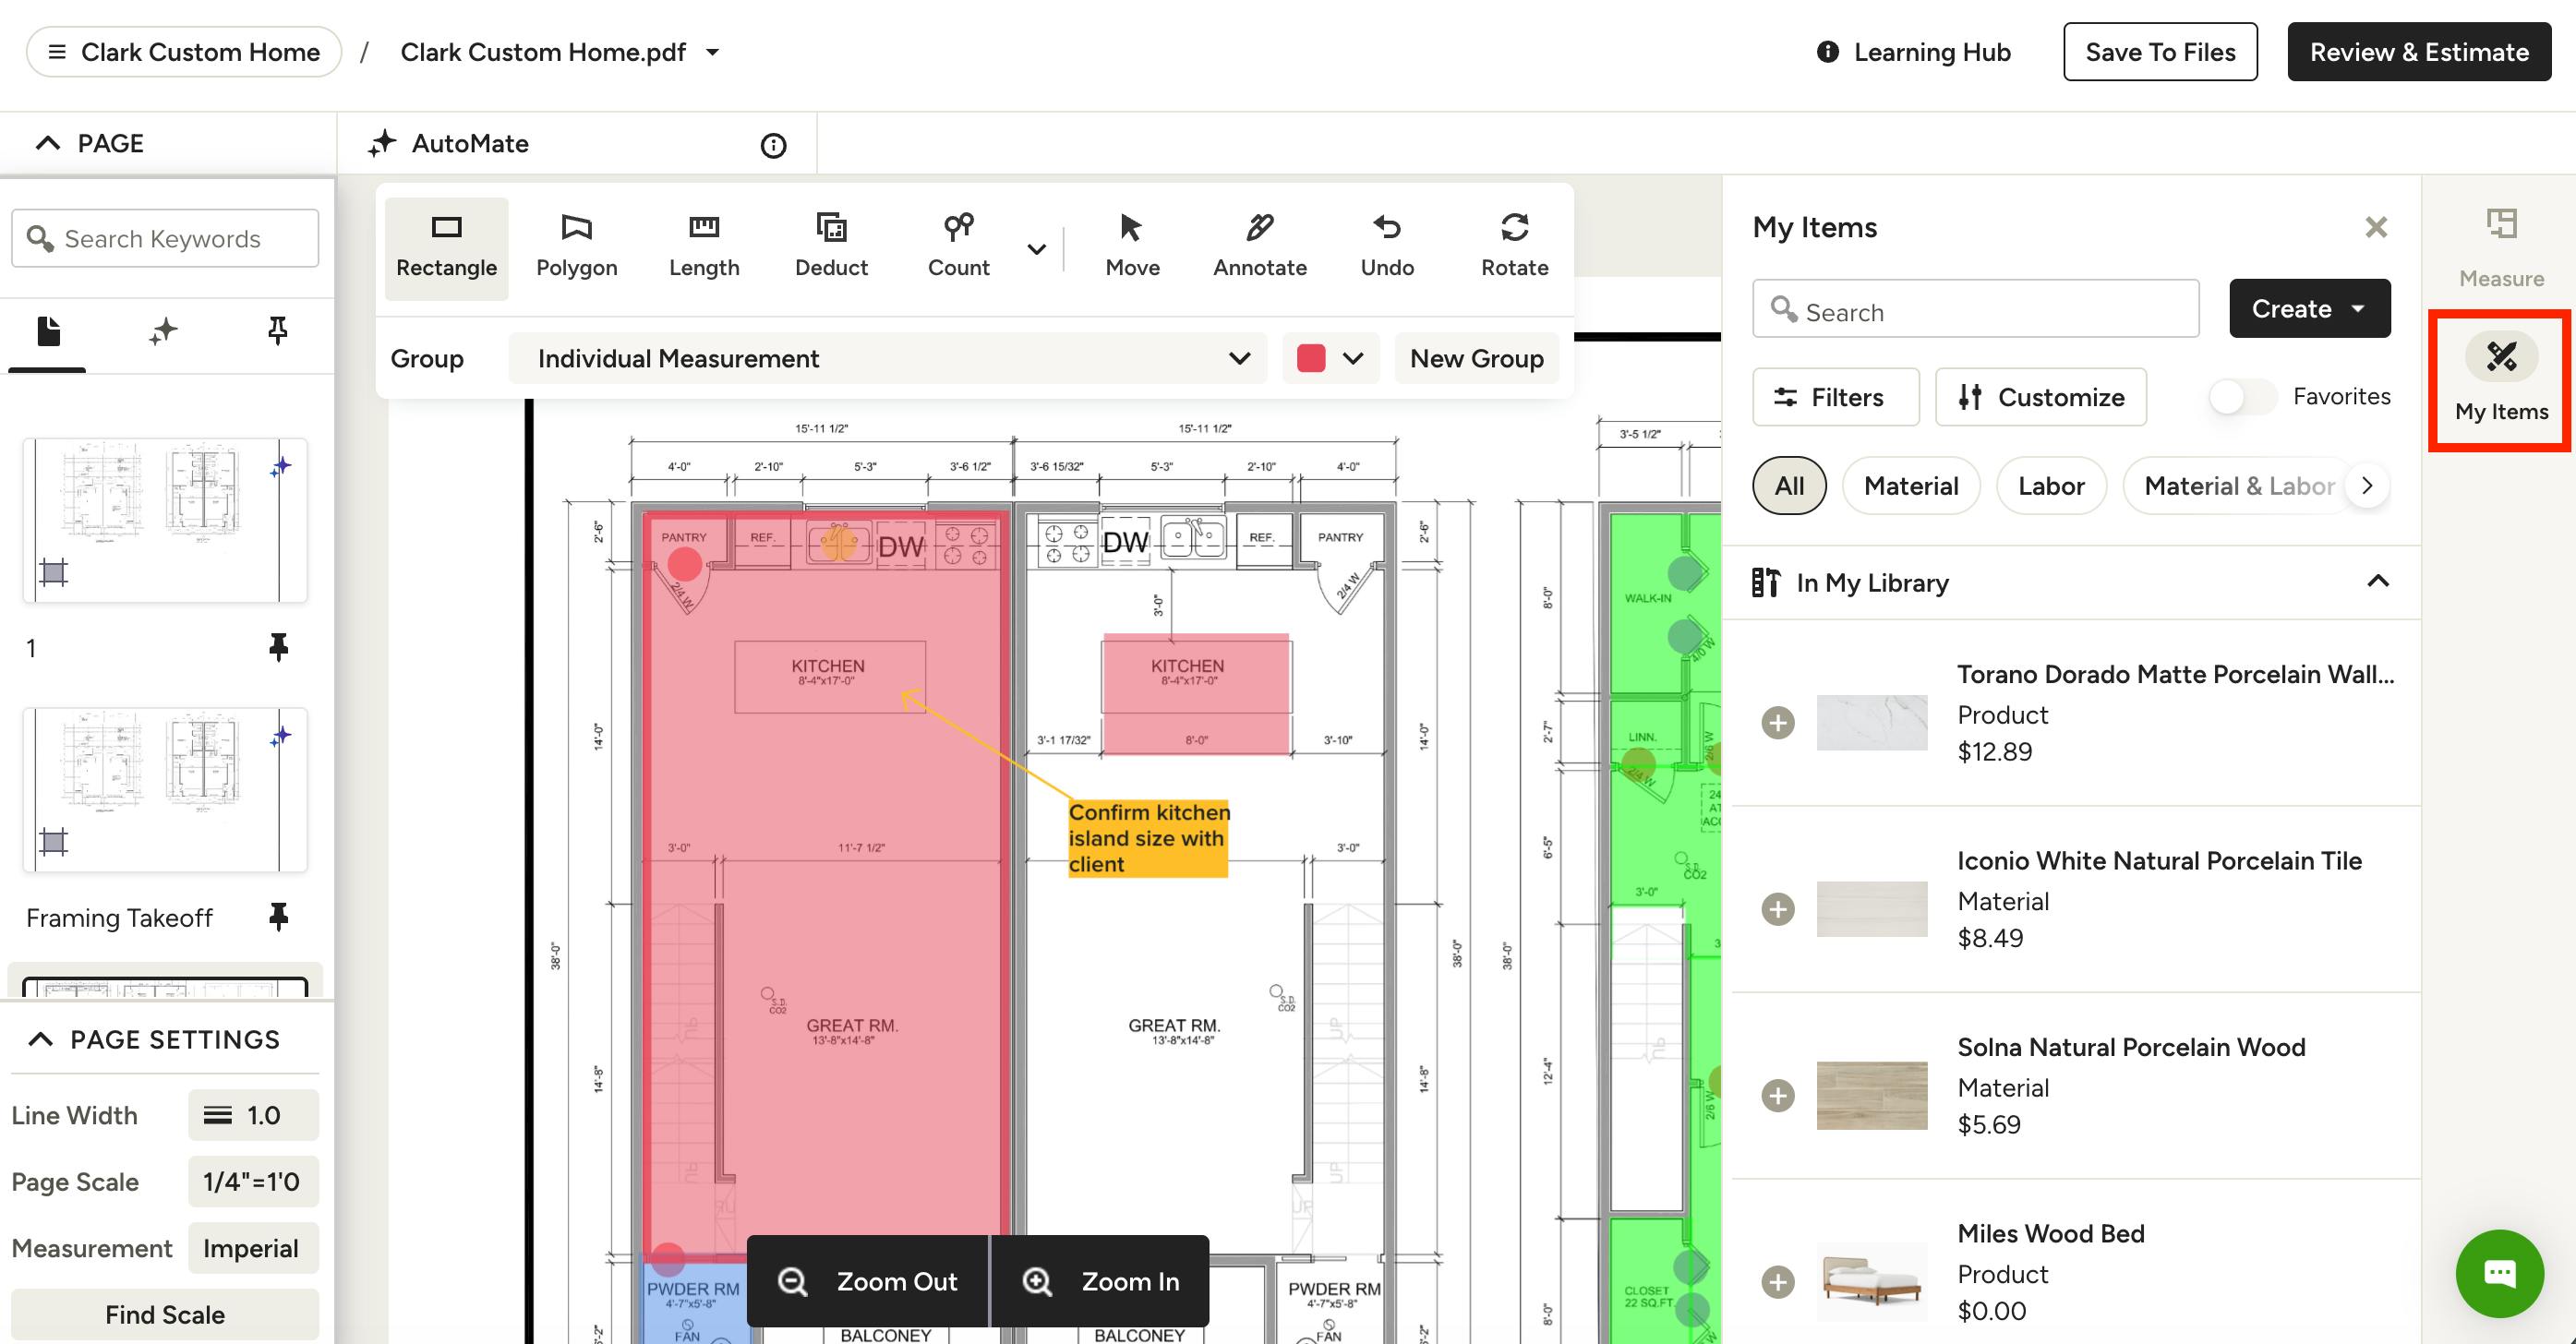
You can access your Product Library (or cost codes) directly from the takeoff canvas using the right menu. You will see three main tabs:
- Measure: Access your standard measurement tools and groups.
- My Items: Browse your full library of products, materials, and labor items.
- Cost Codes: If enabled, browse a list of all your cost codes.
If your project has cost codes enabled, the My Items list will automatically adapt to show your cost code structure and items instead of standard categories.
Add Existing Item to Takeoff
To select an existing item from the Product Library to use in your takeoff, select My Items from the right menu.
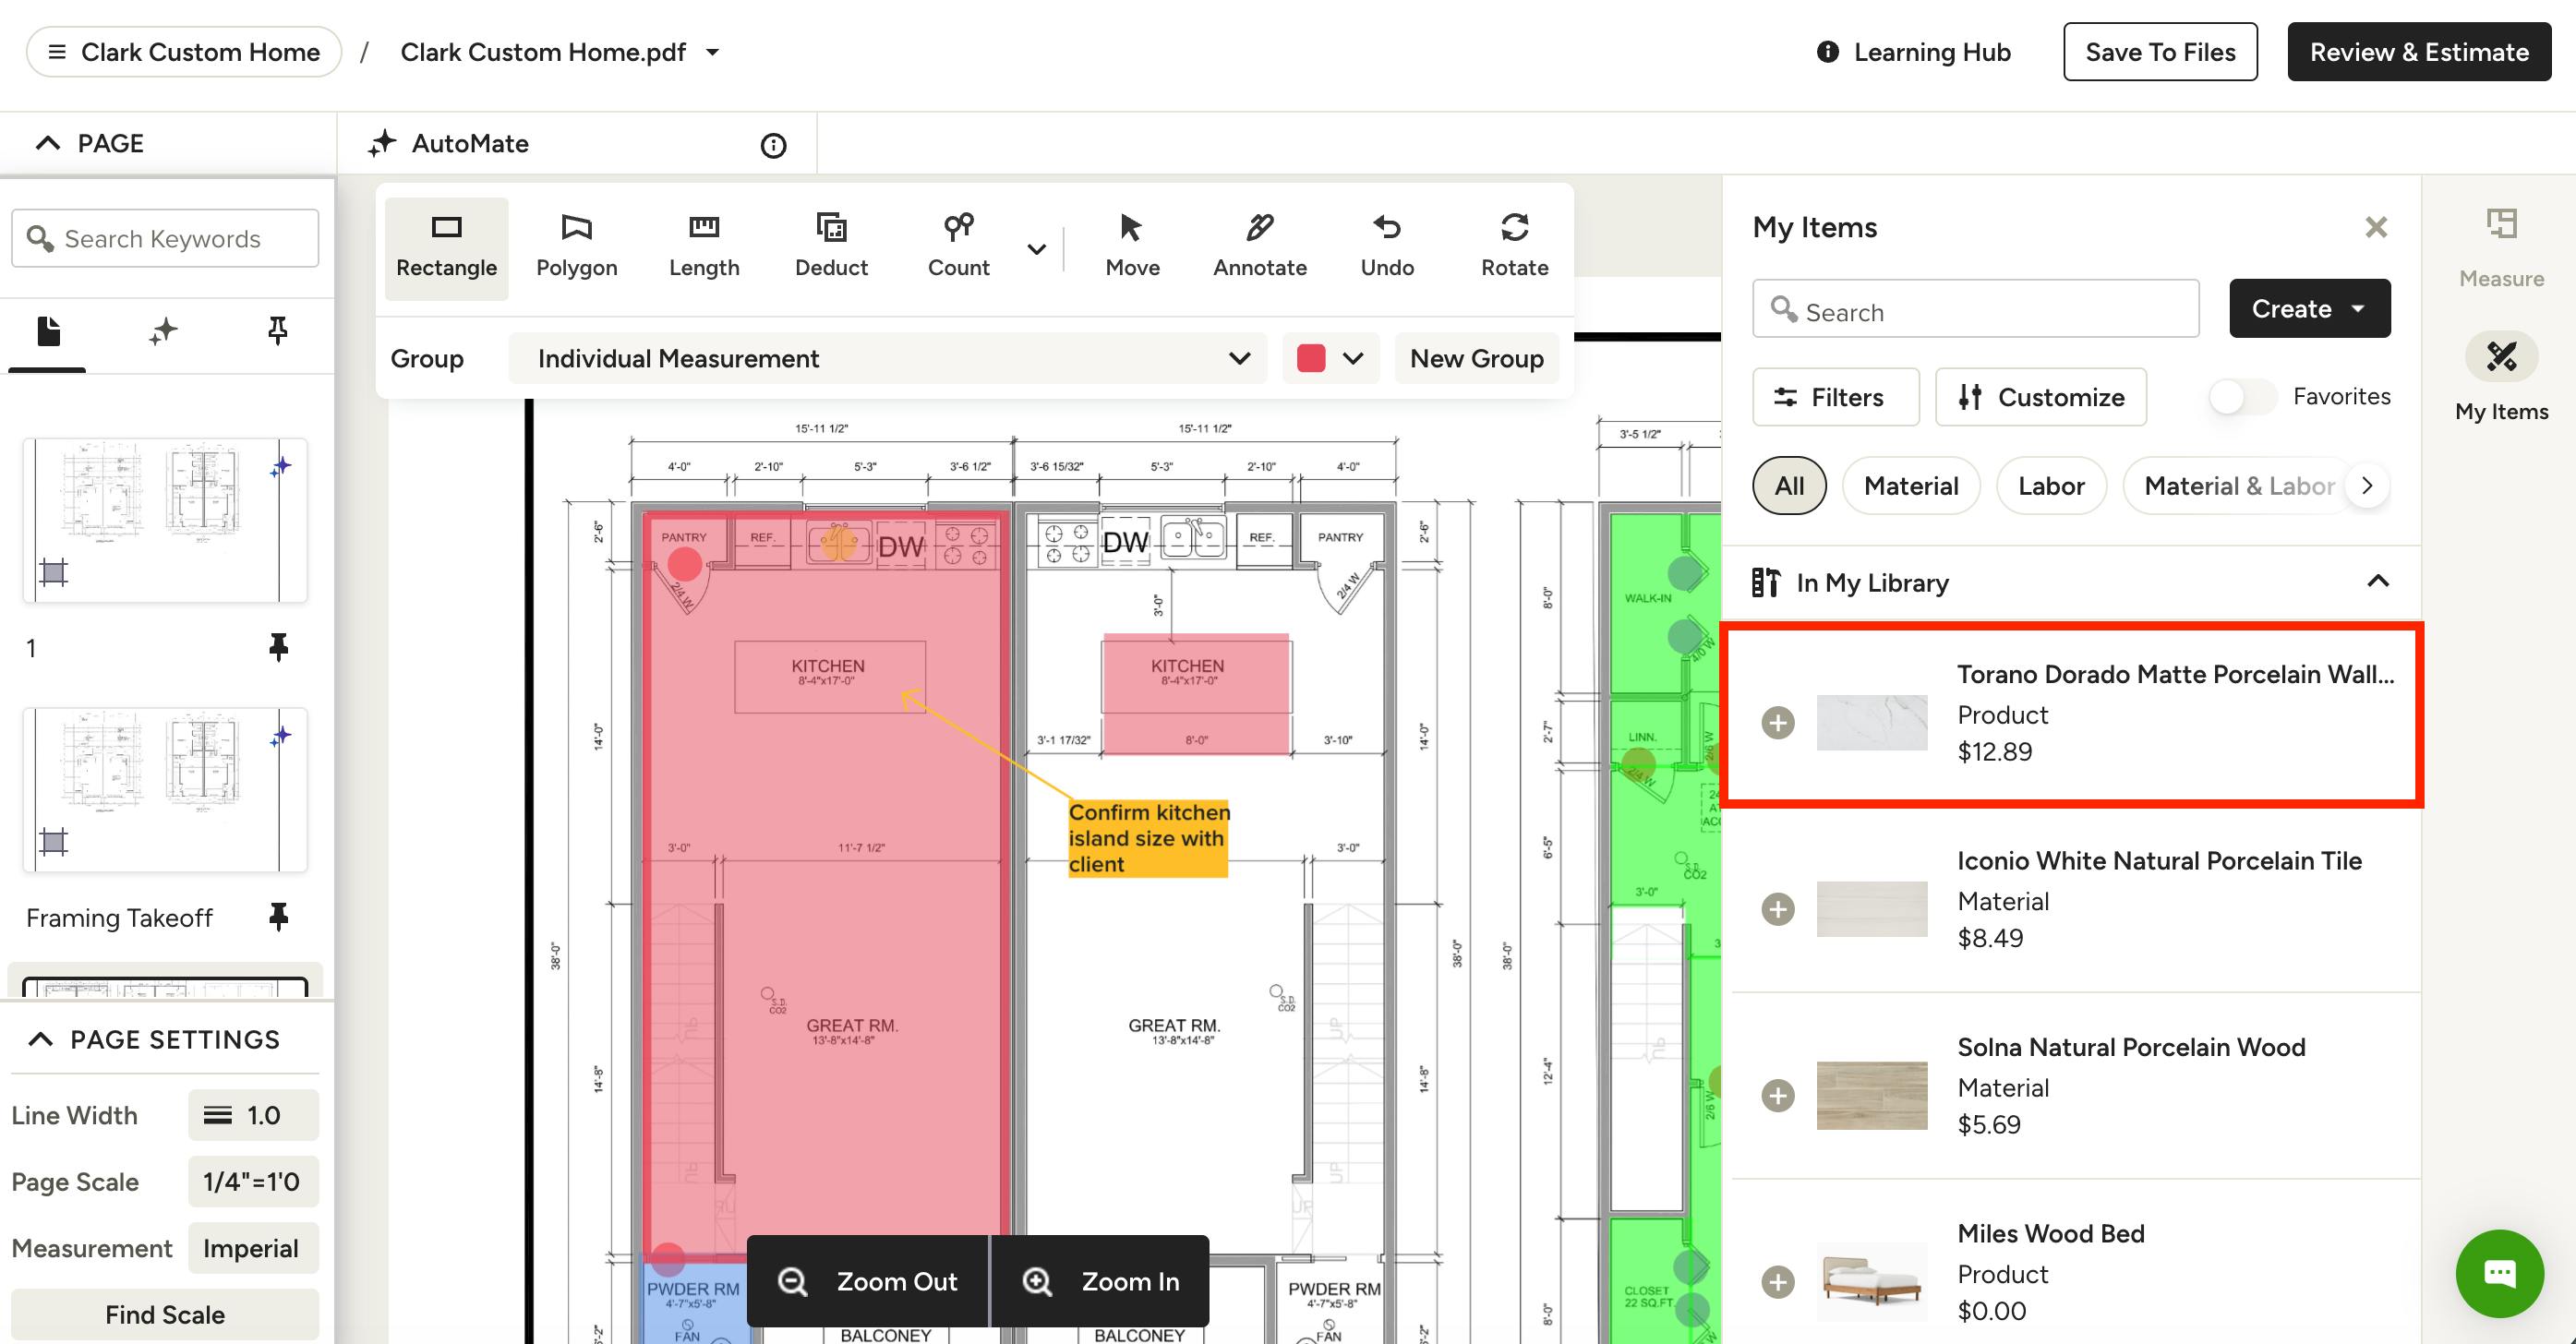
Once selected, your existing Product Library will appear. Click on the relevant item under In My Library. You can use the search bar or the filters at the top to find your exact item.
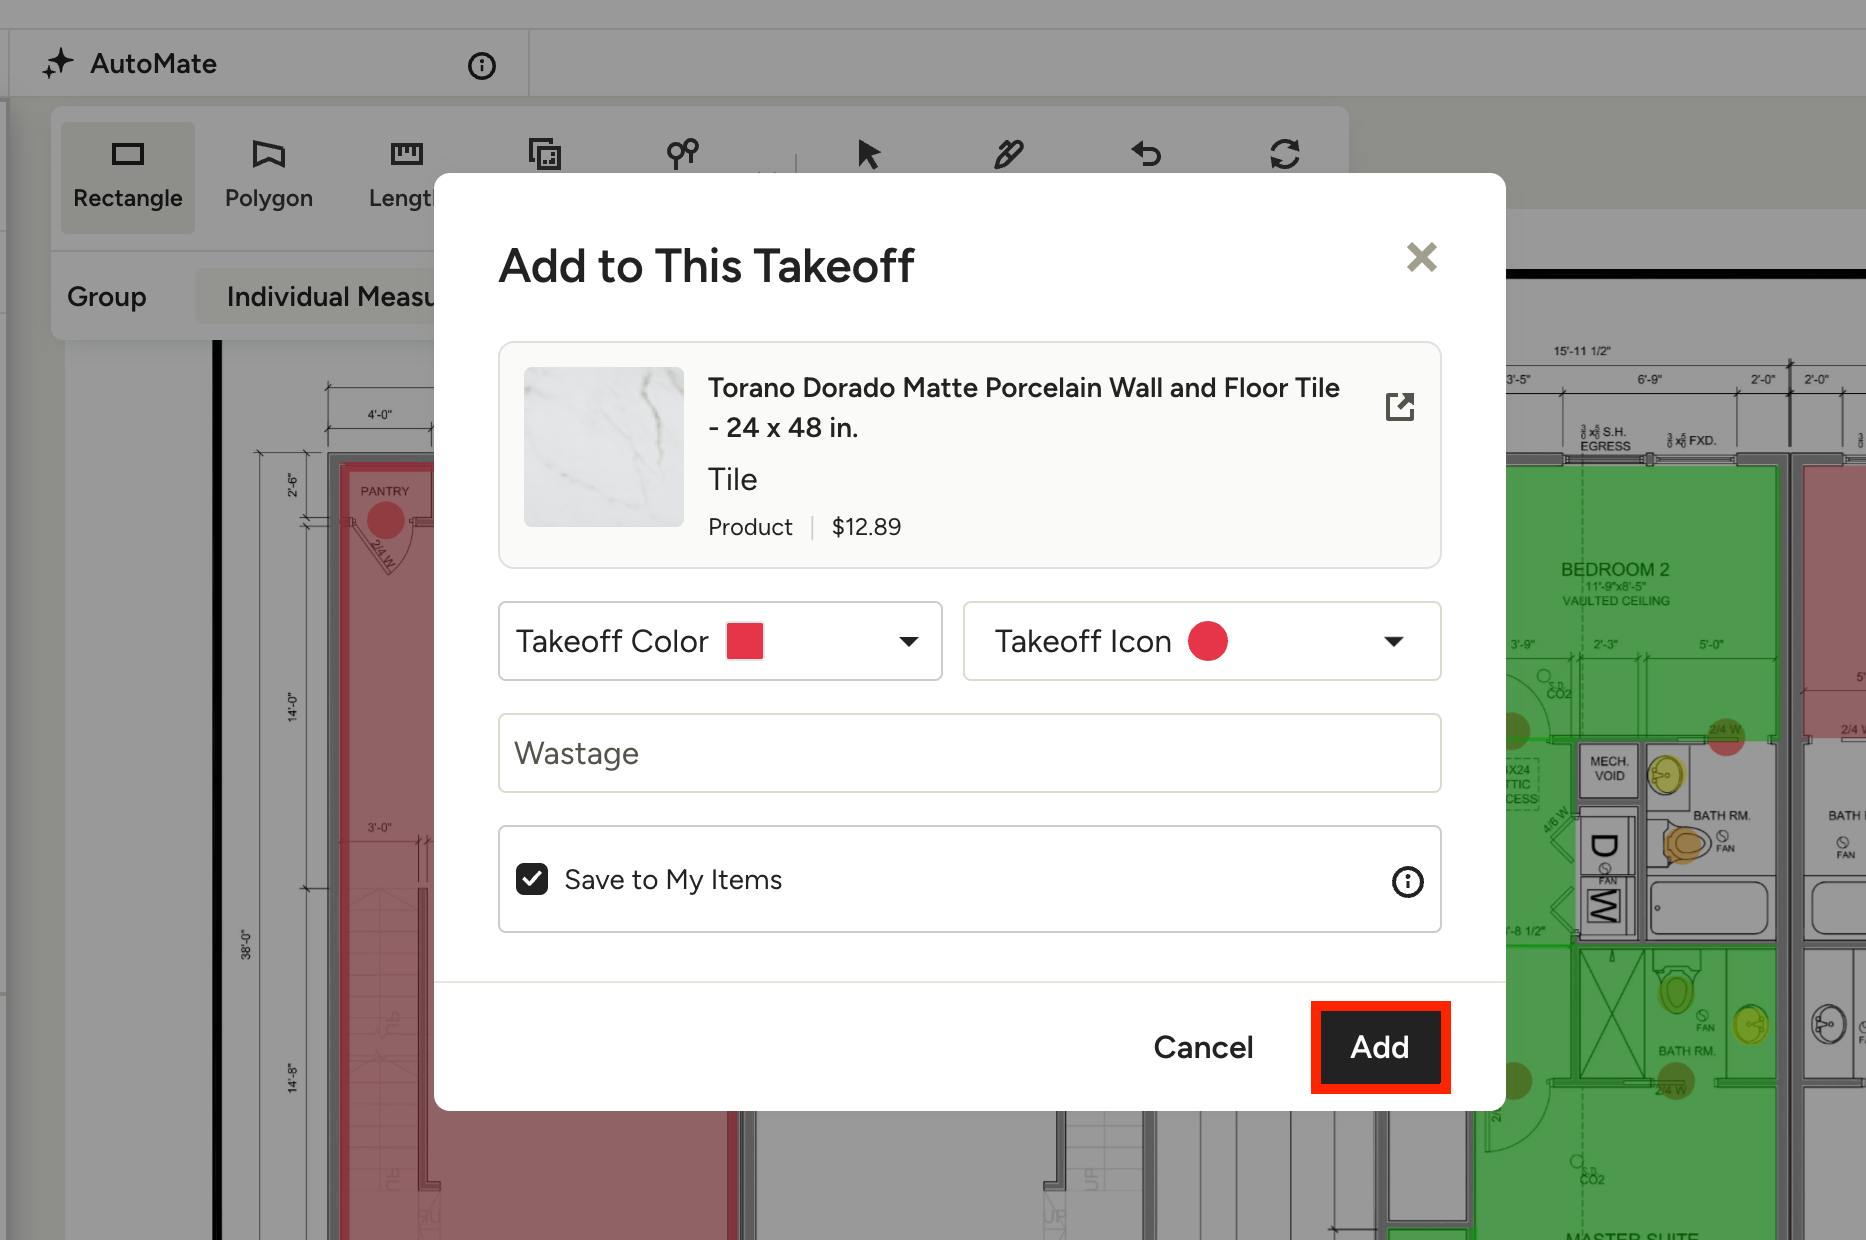
If this is the first time you are using this item within Takeoffs, you will need to adjust specific takeoff item details. You can set:
- Takeoff Color: Choose the color that will represent this item on your plan.
- Takeoff Icon: Select an icon (specifically for "Count" measurements).
- Wastage: Set a percentage to automatically account for material waste in your estimates.
By default, the Save to My Items checkbox is selected. This will save these takeoff details to your library so you can skip this setup for future projects.
Once complete, click Add.
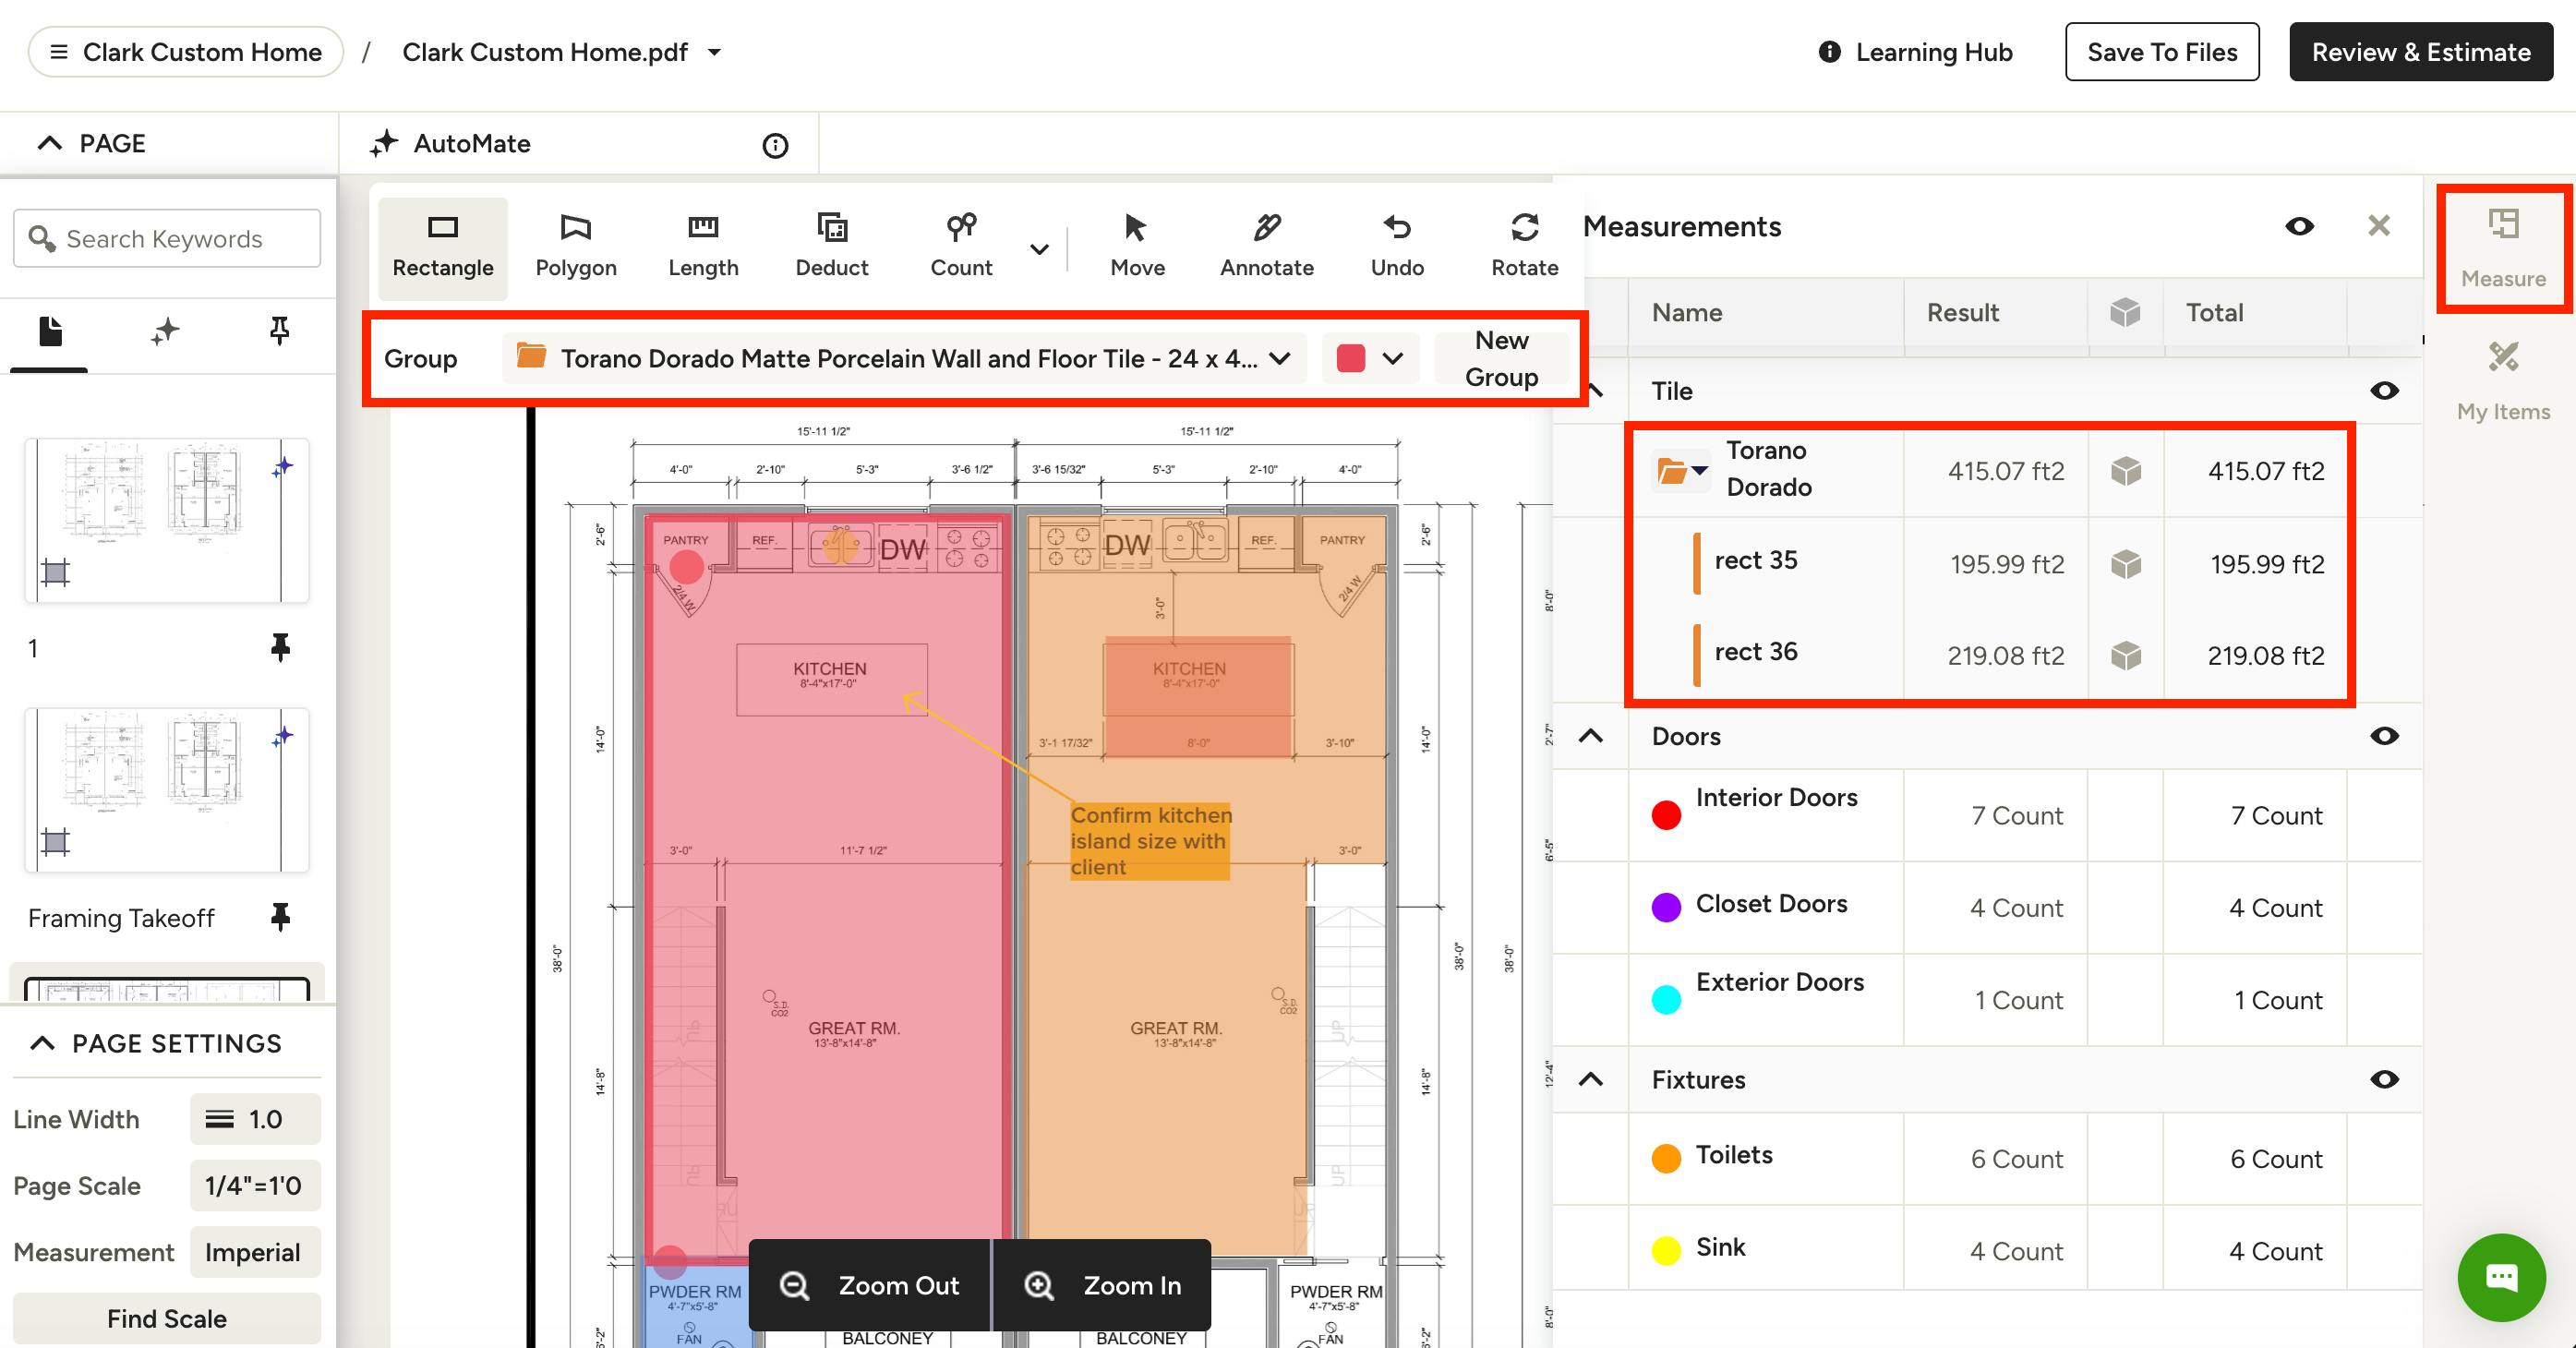
The item will now appear in your takeoff as a new group. The system will automatically switch your active tool to Measure and auto-select your newly added group so you can start measuring immediately using all the takeoff tools (rectangle, polygon, length and count).
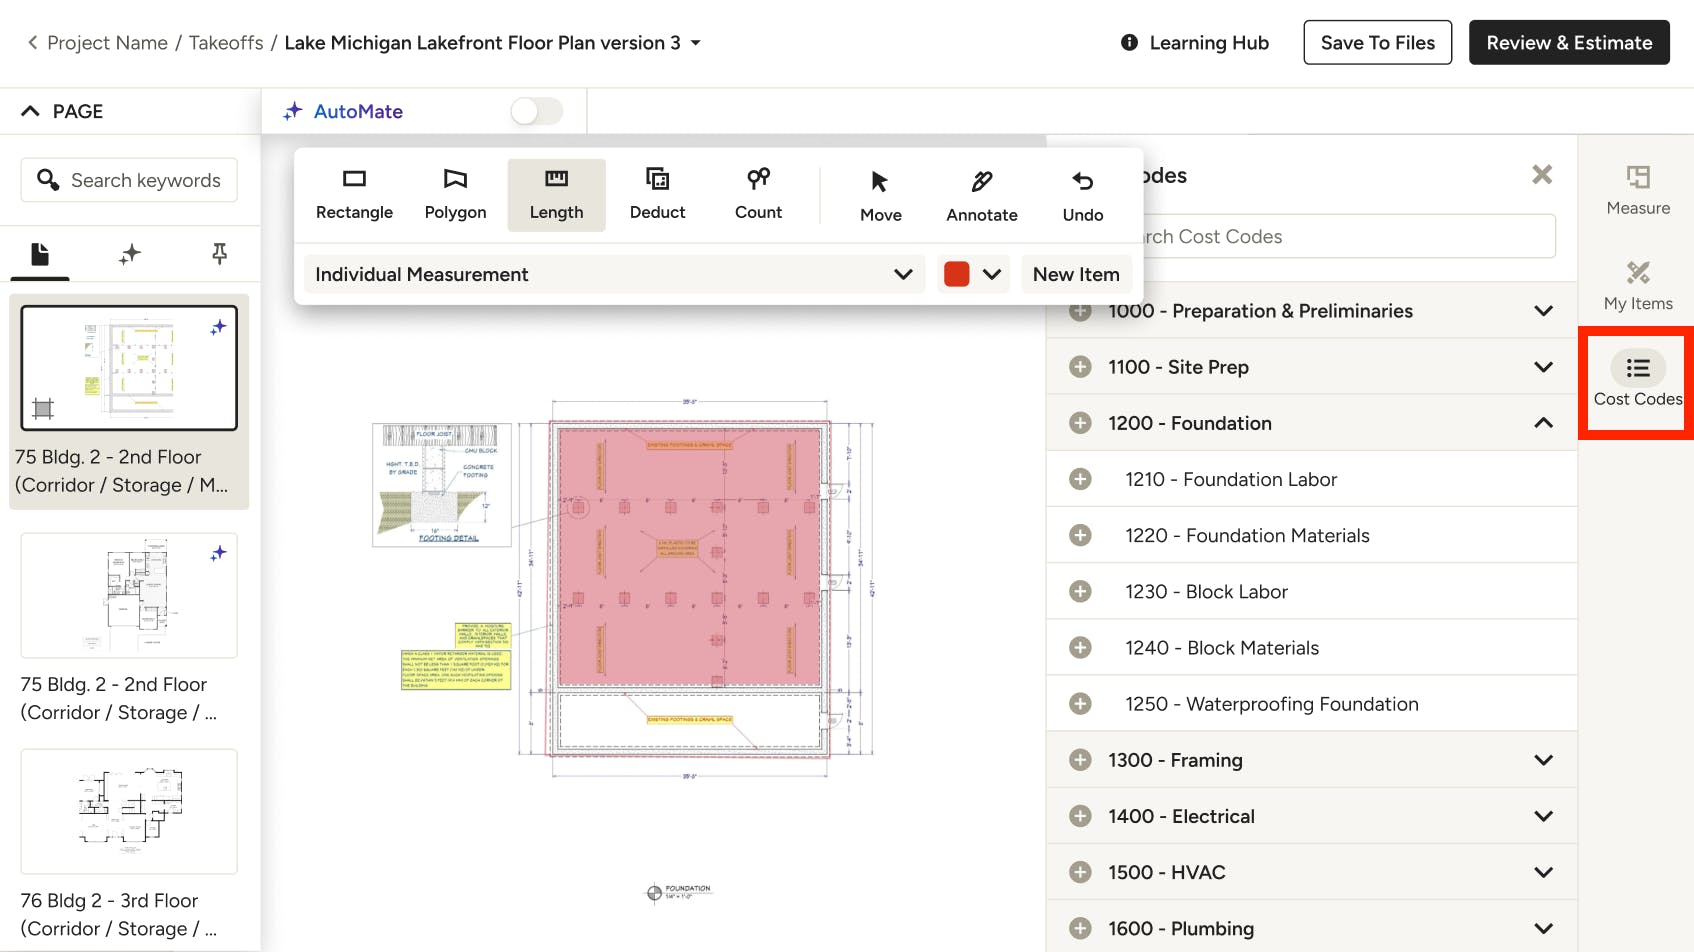
Cost Codes in Takeoff
If you have set up cost codes for your business, you can also integrate those into your takeoff.
To start, select Cost Codes from the right menu. A list of your existing cost codes will appear. Click on the relevant cost code, or use the search bar at the top to find an exact match.
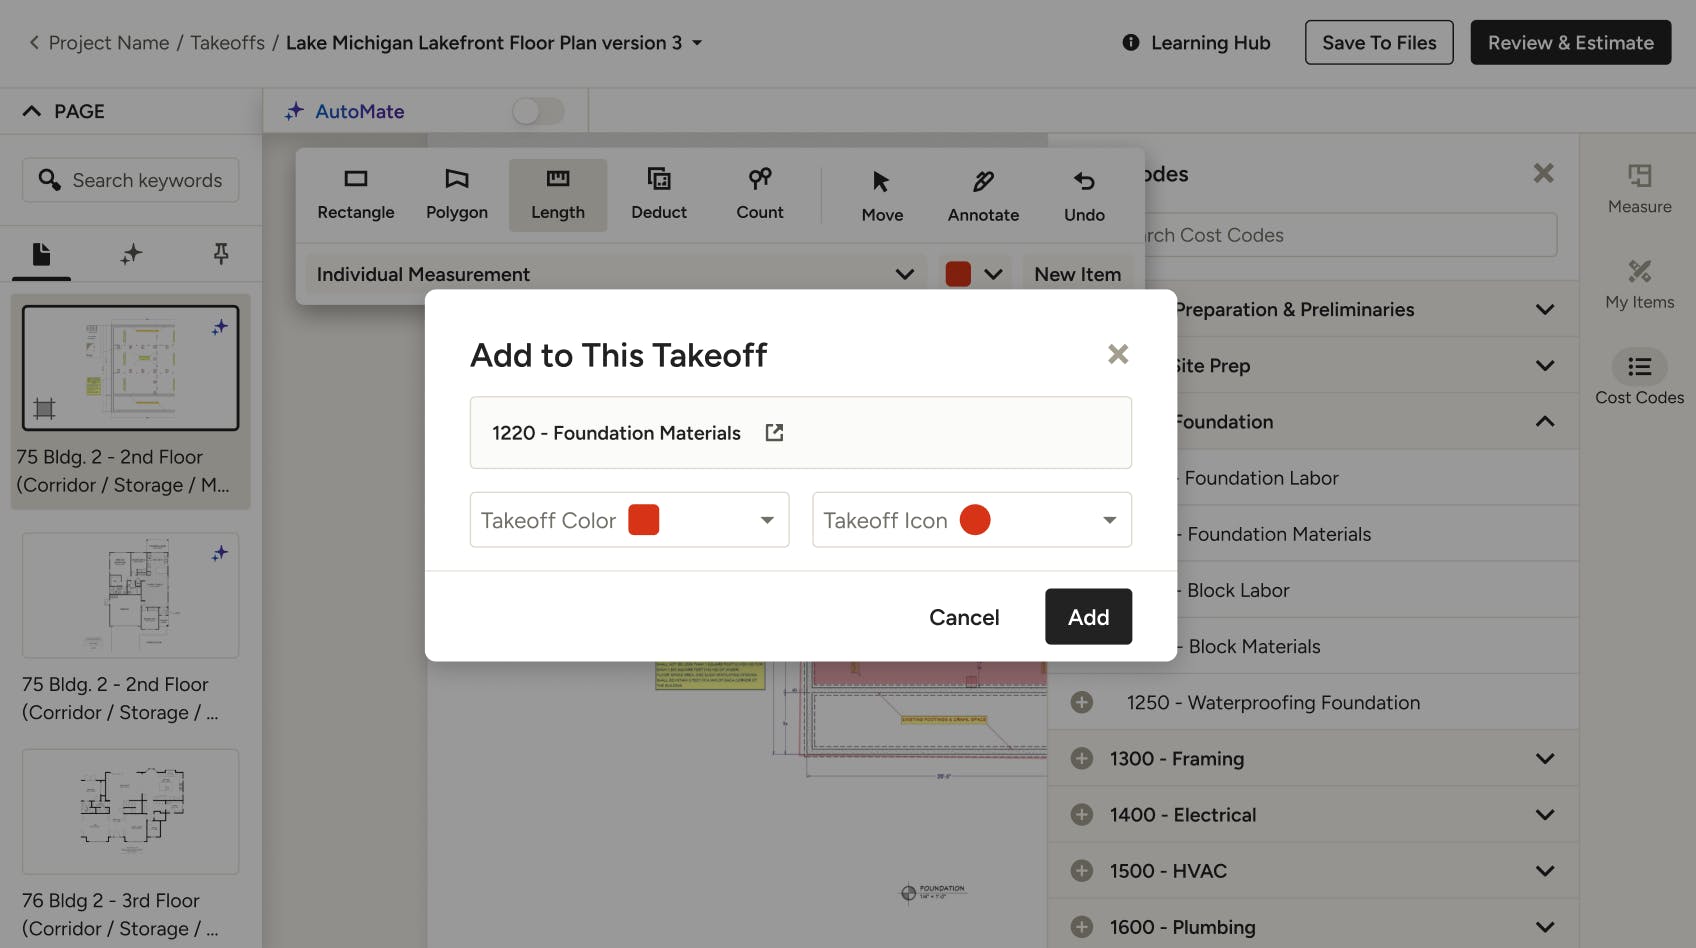
If this is the first time you are using this cost code within Takeoffs, you will need to adjust specific takeoff cost code details. You can set:
- Takeoff Color: Choose the color that will represent this item on your plan.
- Takeoff Icon: Select an icon (specifically for "Count" measurements).
Once complete, click Add.
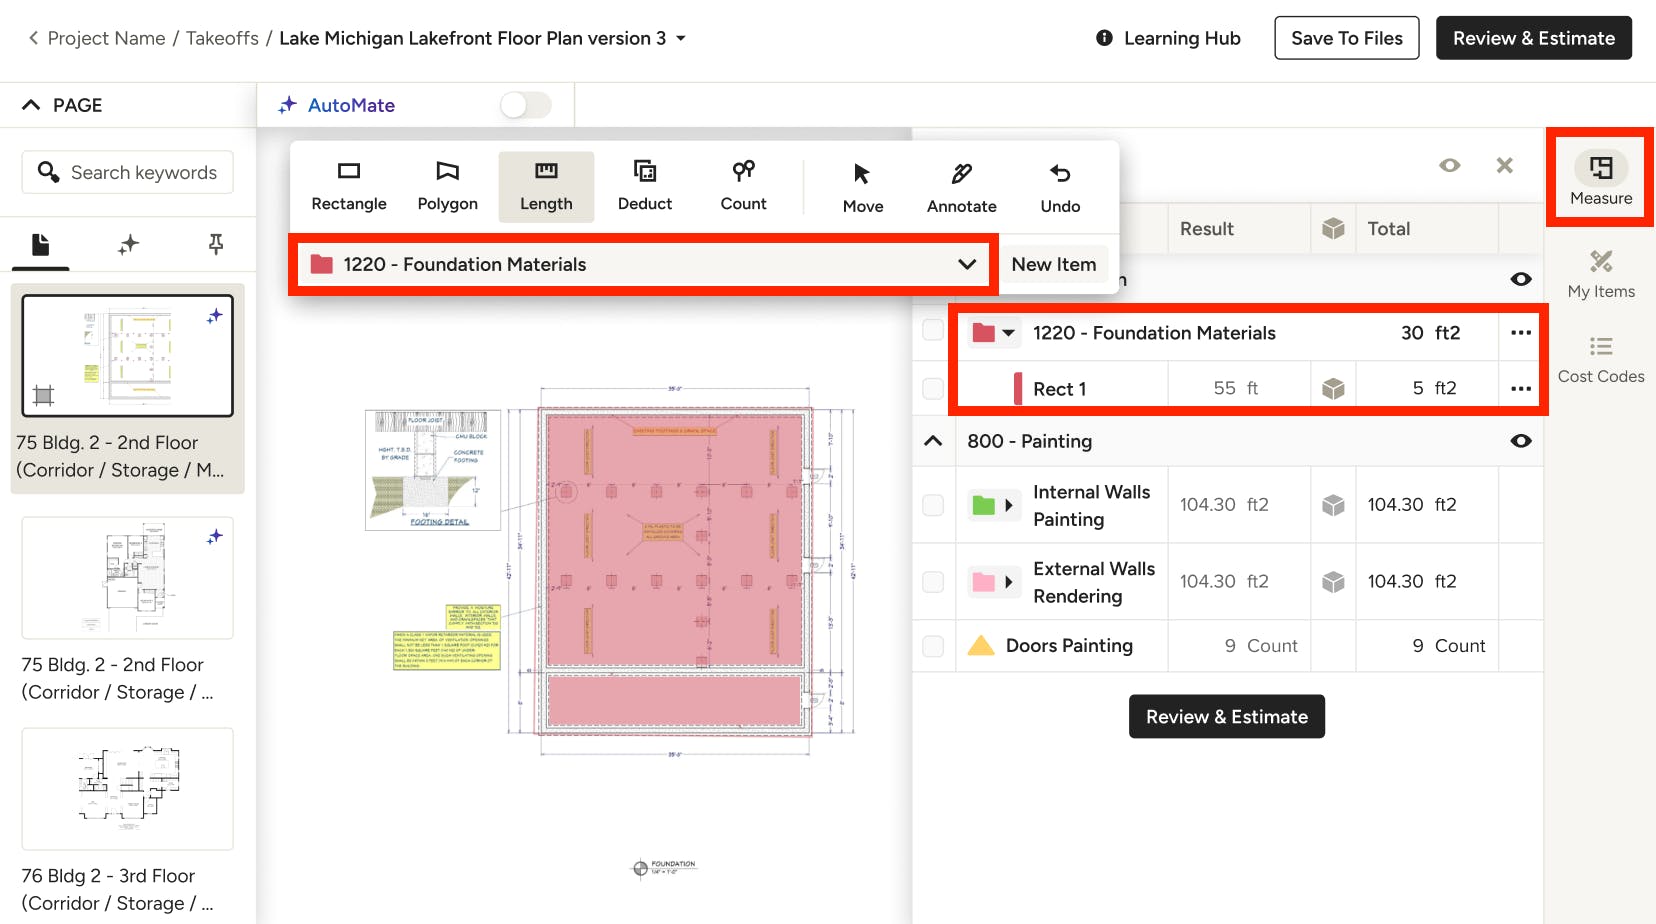
The cost code will now appear in your takeoff as a new group. The system will automatically switch your active tool to Measure and auto-select your newly added group so you can start measuring using all the takeoff tools (rectangle, polygon, length and count).
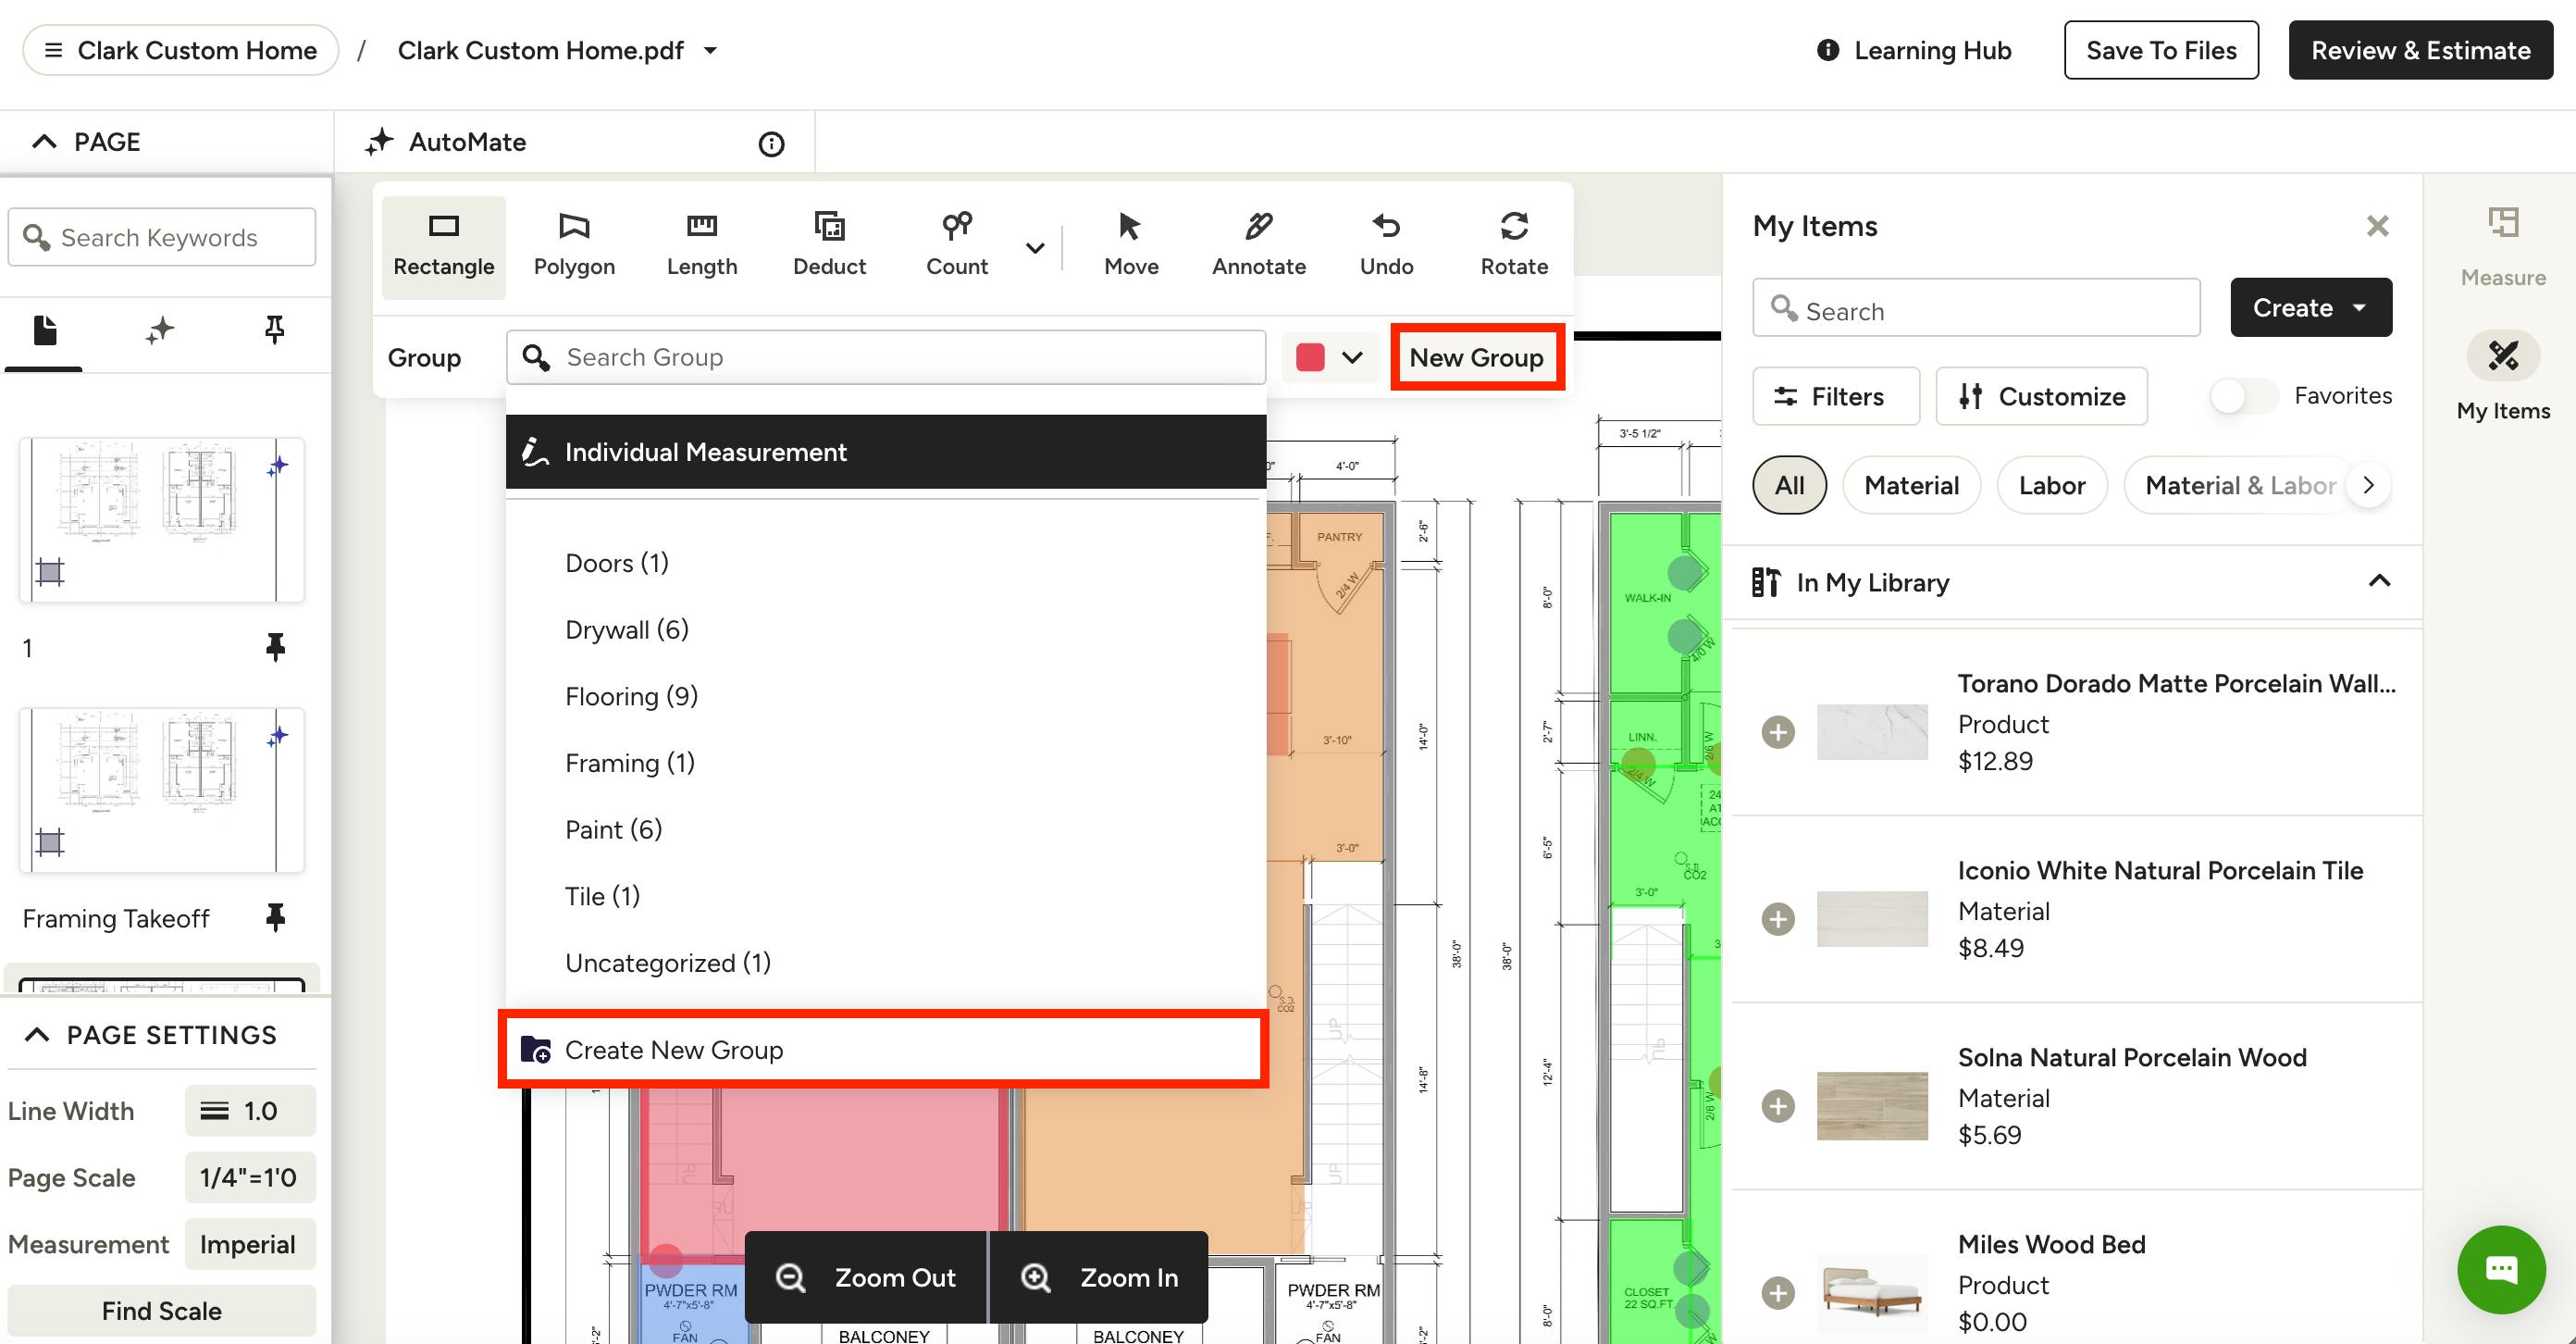
Add New Group to Takeoff
When you create a new item and/or group in Takeoffs, you will use Product Library categories or cost codes (if relevant) to organize them for consistency across Houzz Pro.
To add a completely new group in your takeoff, select the New Group button, or select Create New Group in the Group dropdown menu.
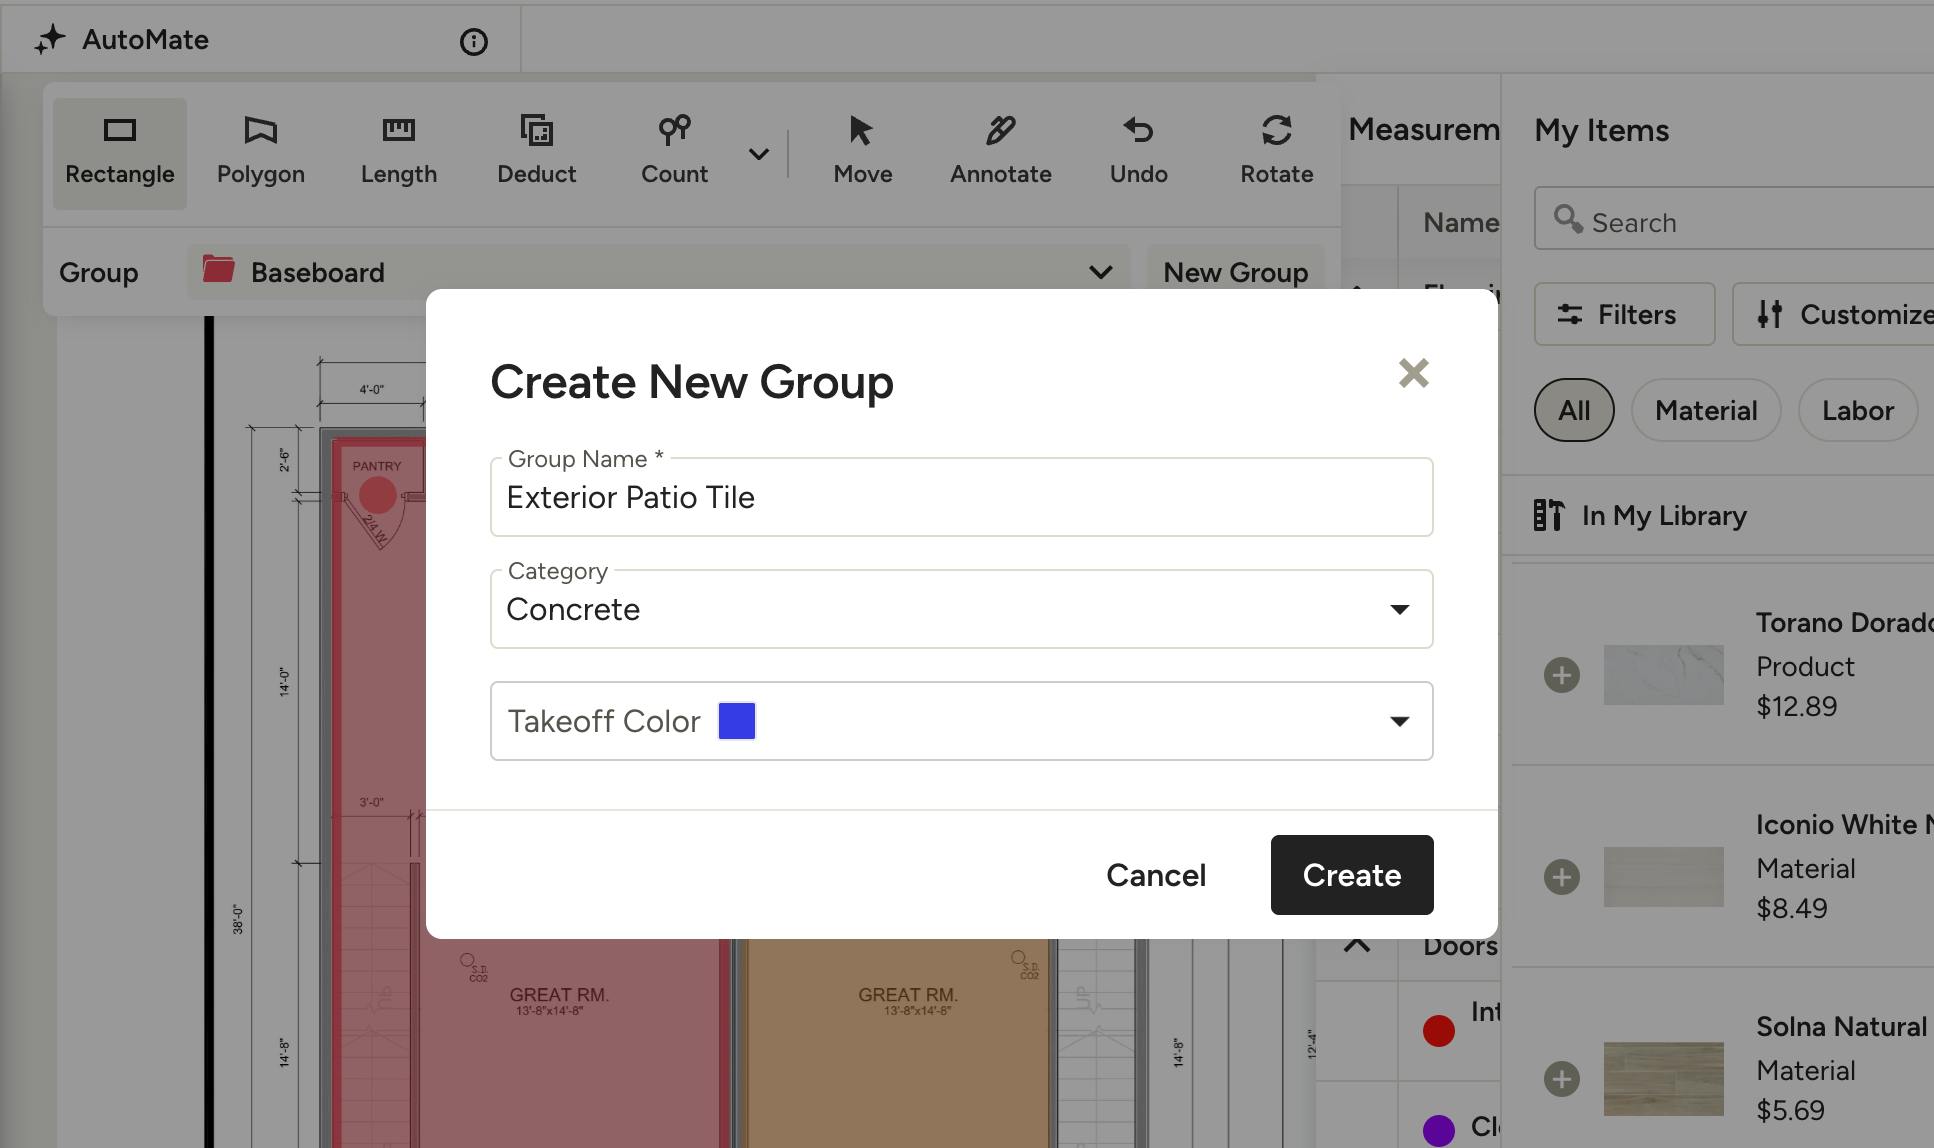
A screen will appear. Add the Group Name, Category and Takeoff Color.
The Category dropdown menu will include all the categories listed in your Product Library. If you have cost codes enabled, your cost codes will be listed here instead.
While you can select from existing categories, you can also create a new category here. To do this, type the specific category name into the Category text box, then select Create New Category. This new category will be added to your takeoff and to your Product Library for future use as well.
Click Create once complete.
The new group will now appear in your takeoff.
Edit Group in Takeoff
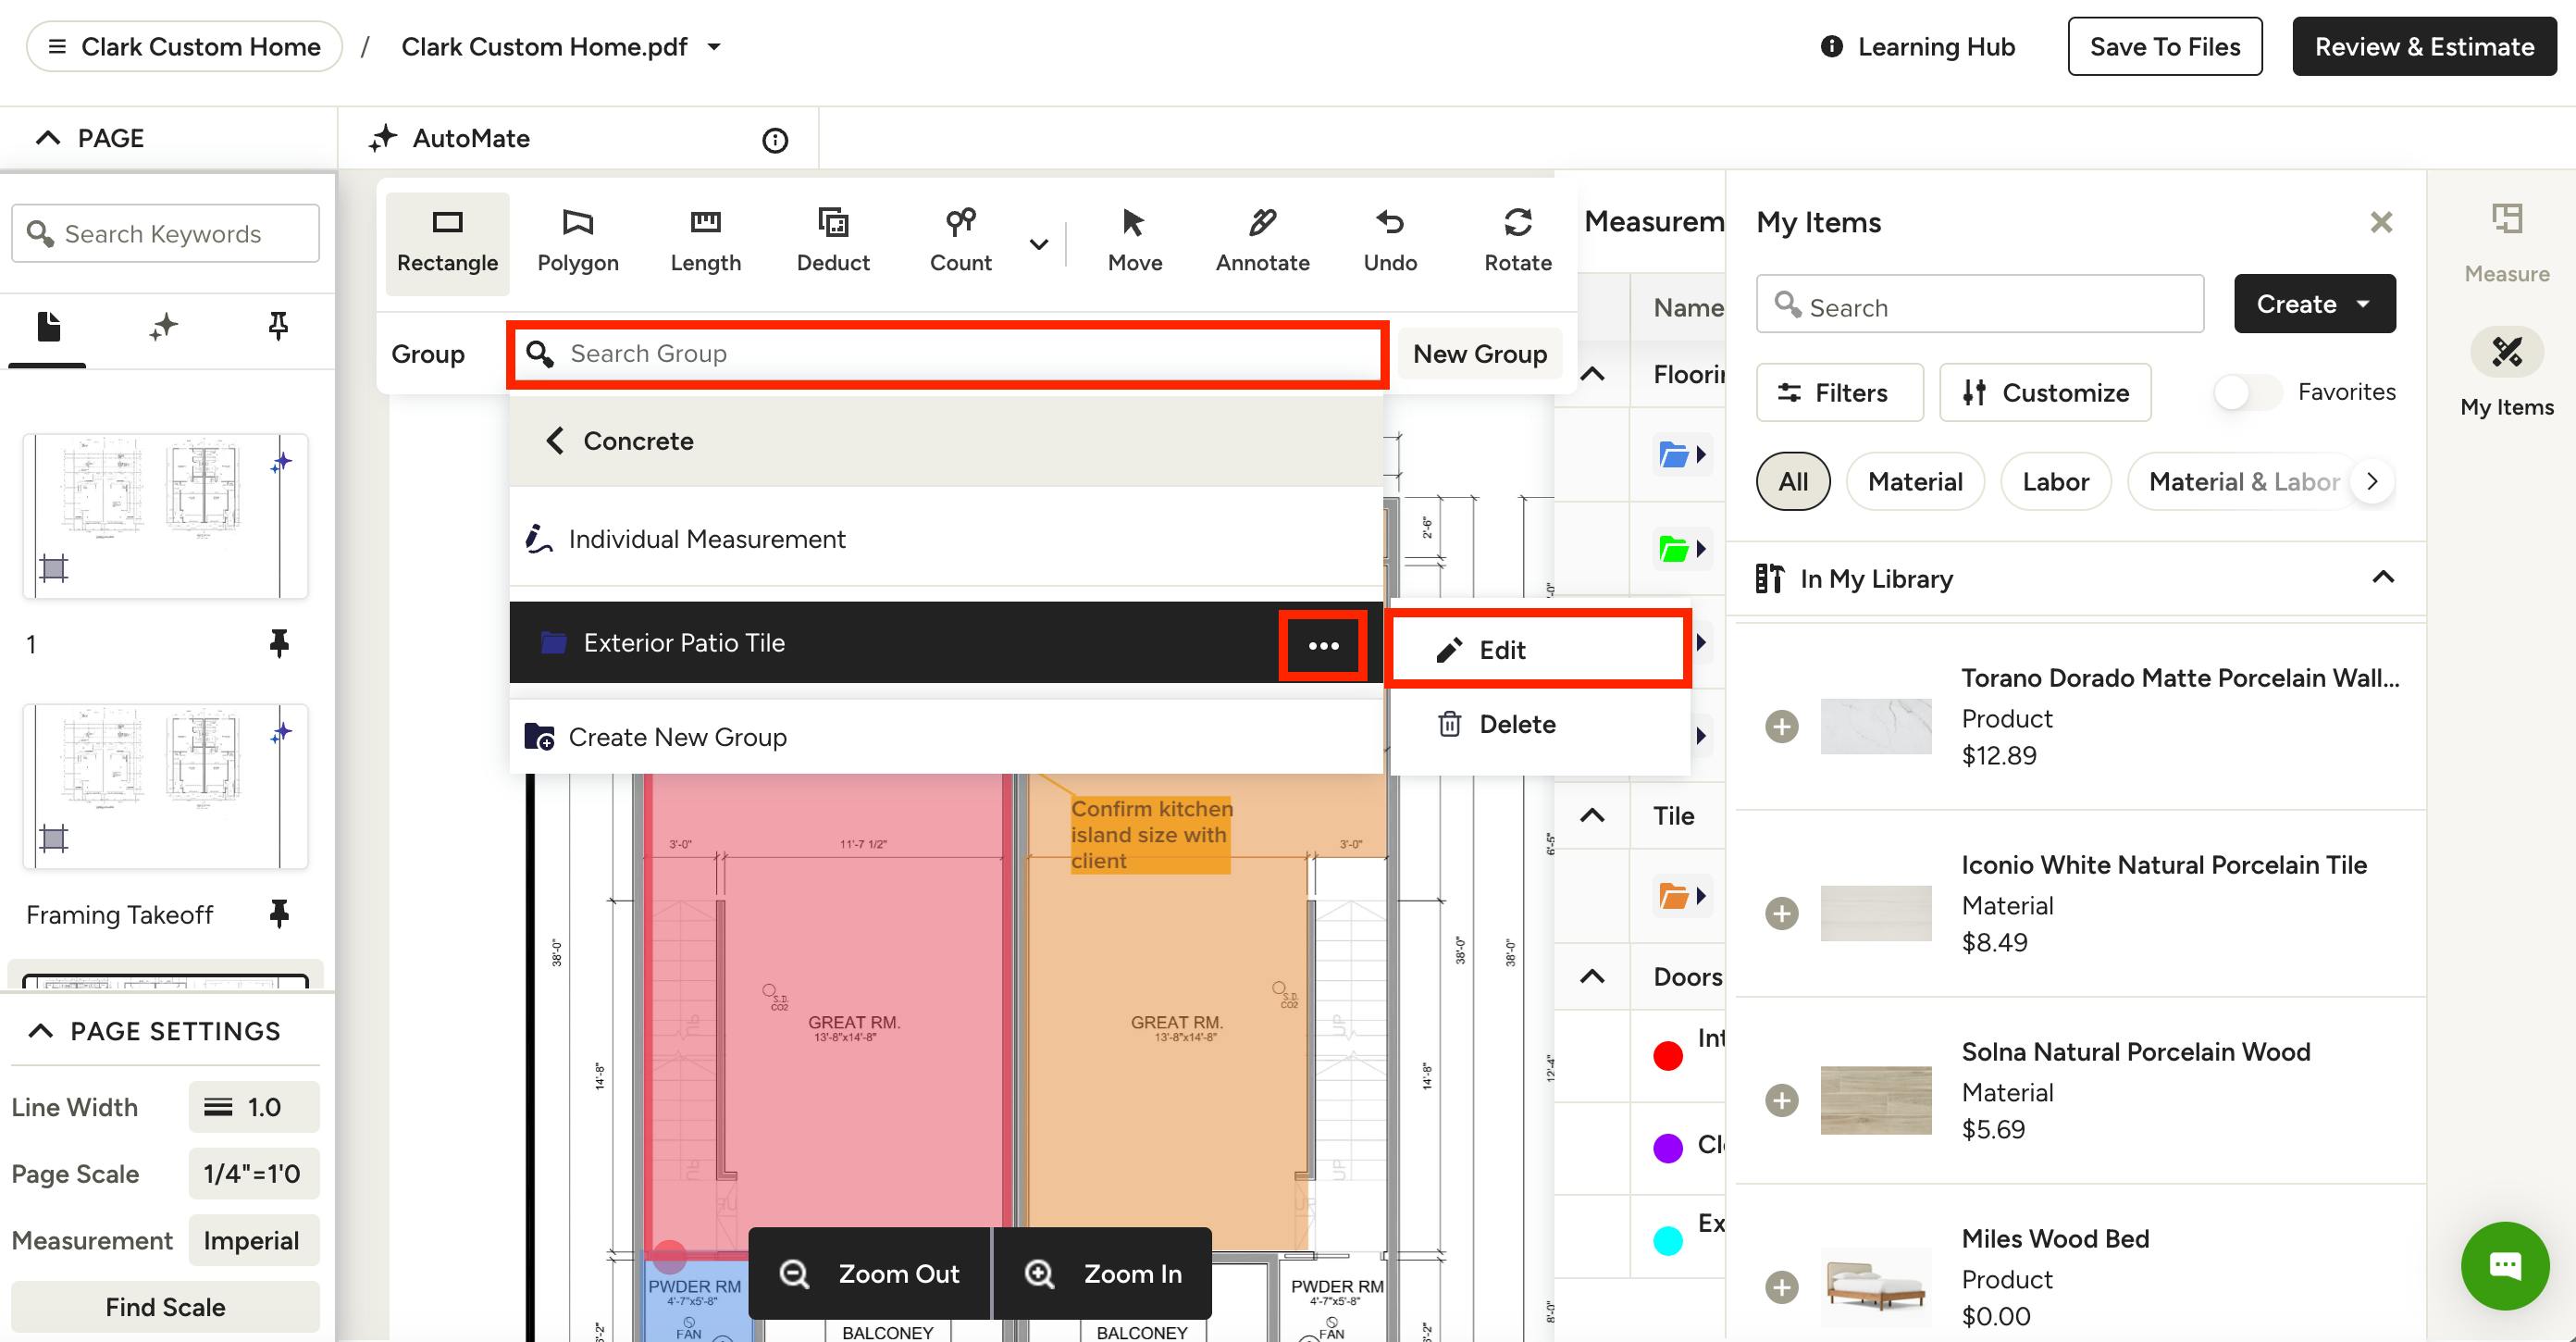
To edit an existing group in your takeoff, open the Group dropdown menu, then select the three dots icon to the right of the group you want to edit.
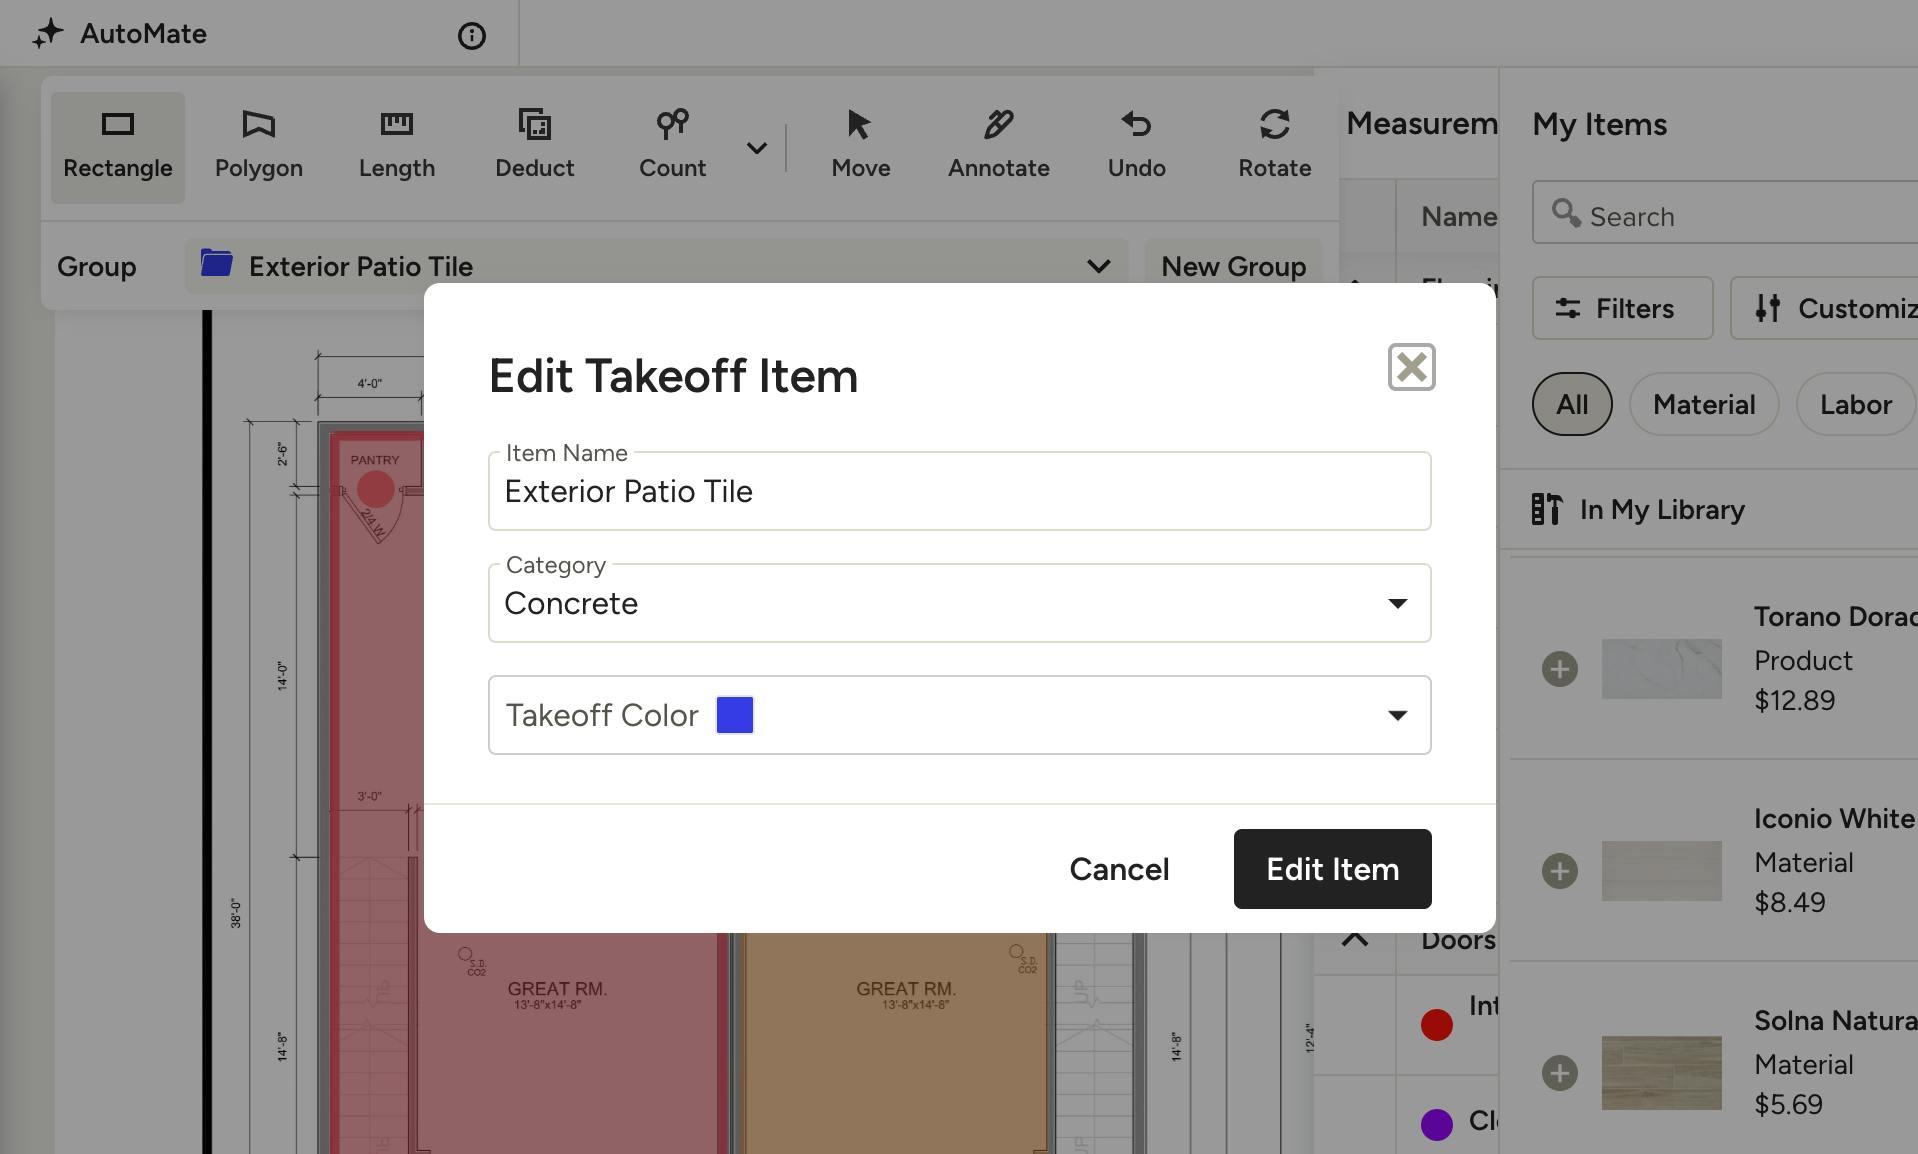
Make the changes, then select Edit Item to save.