How to Set Up QuickBooks Online for Canada
QuickBooks Online integration is now live for Canadian professionals! You now have access to connect your Houzz Pro account to your QuickBooks Online account. Here's how to get started.
Connect QuickBooks Online Account
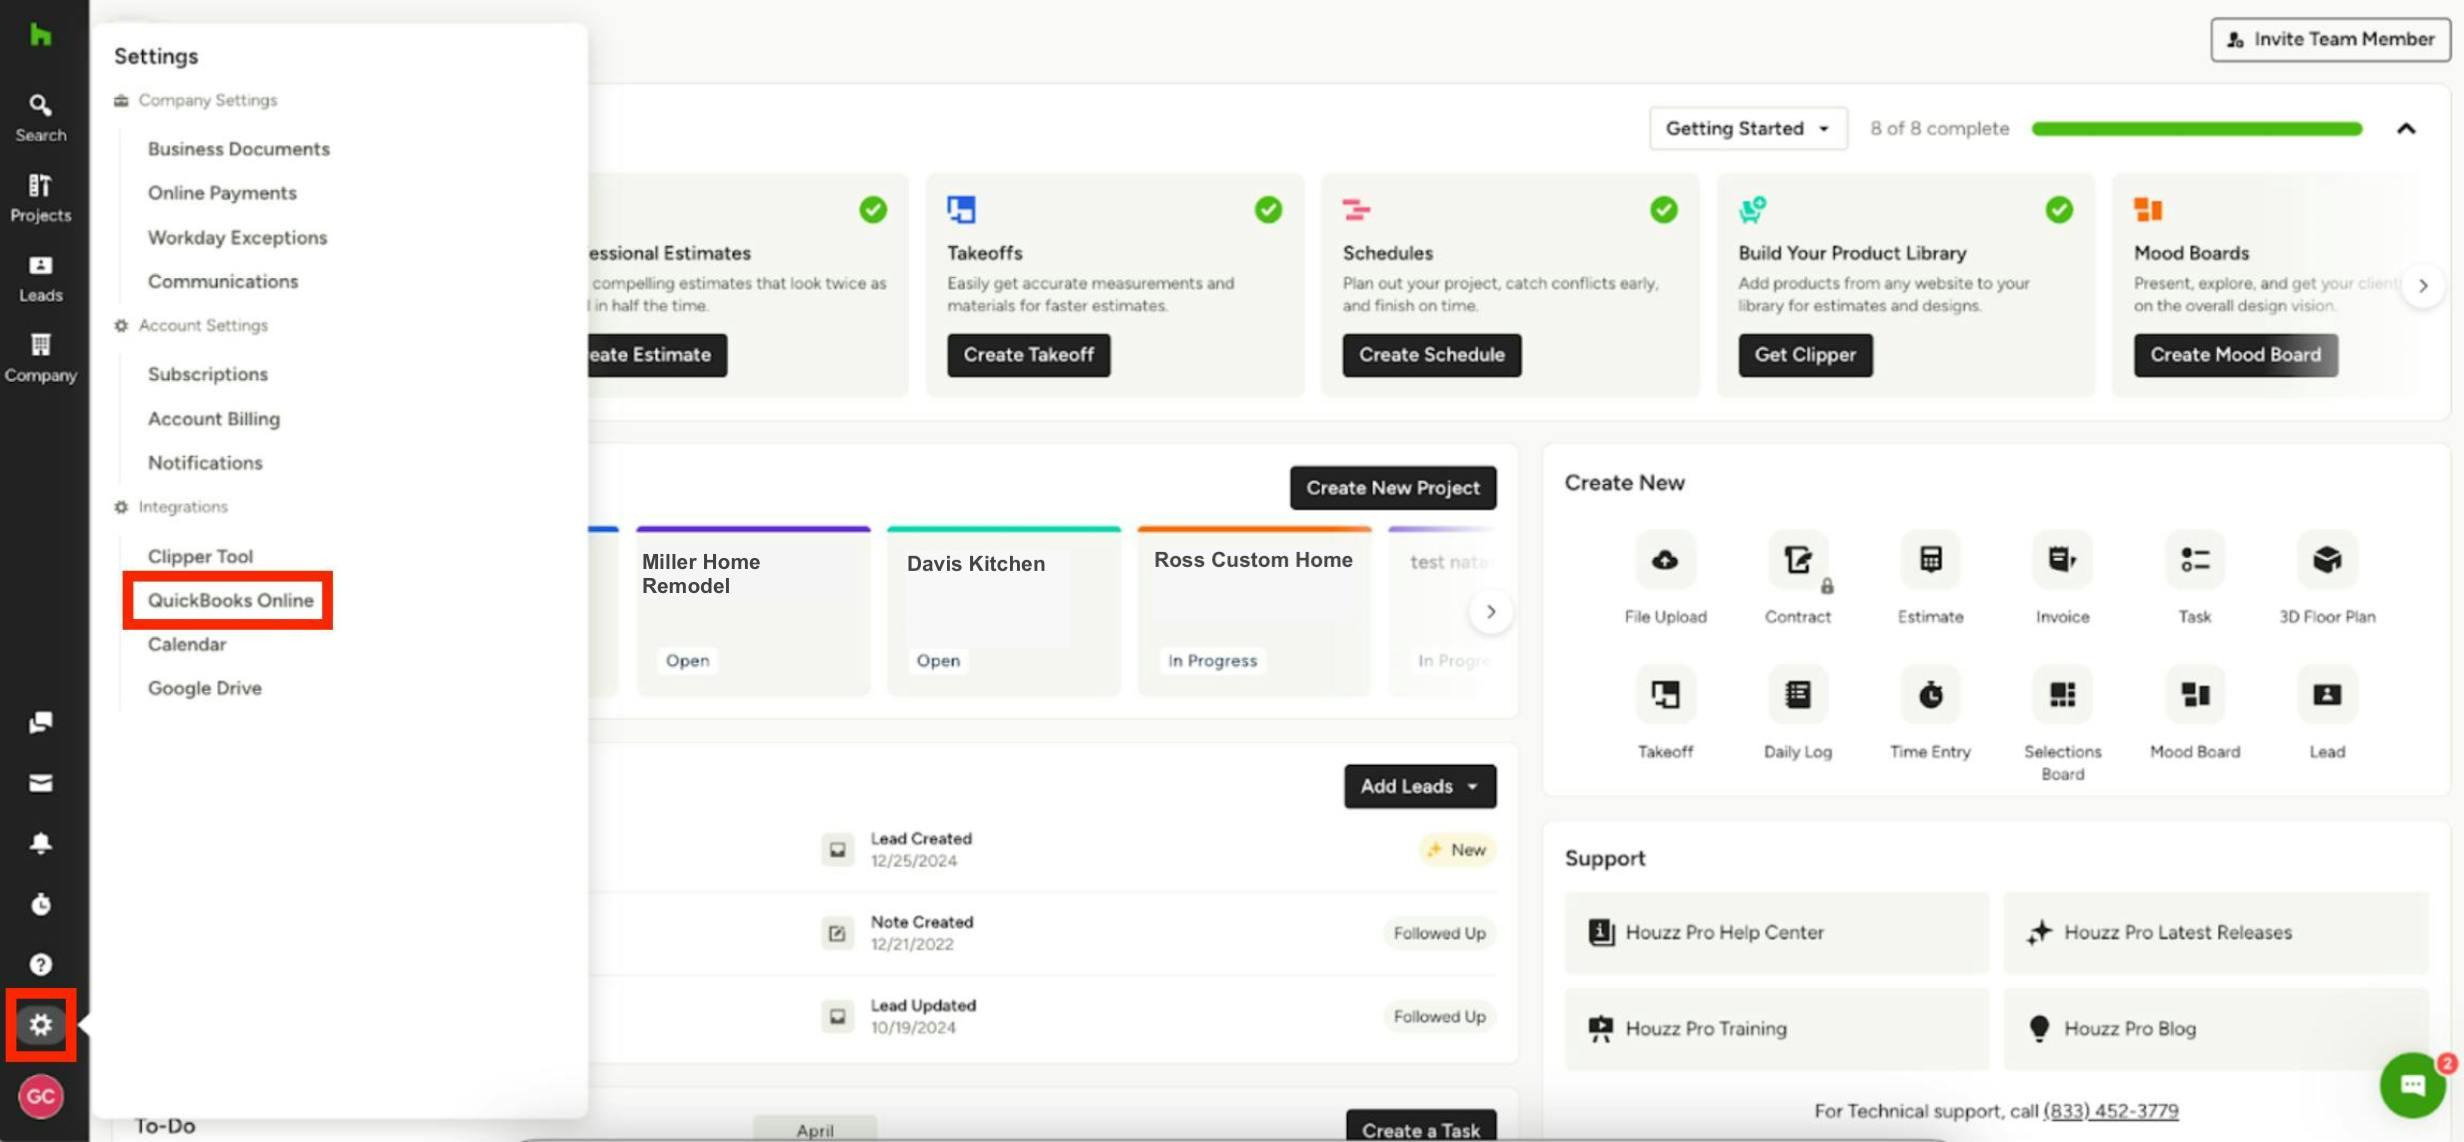
To set up your QuickBooks Online account, please navigate to the Settings icon at the bottom of the left navigation bar, then click QuickBooks Online under Integrations.
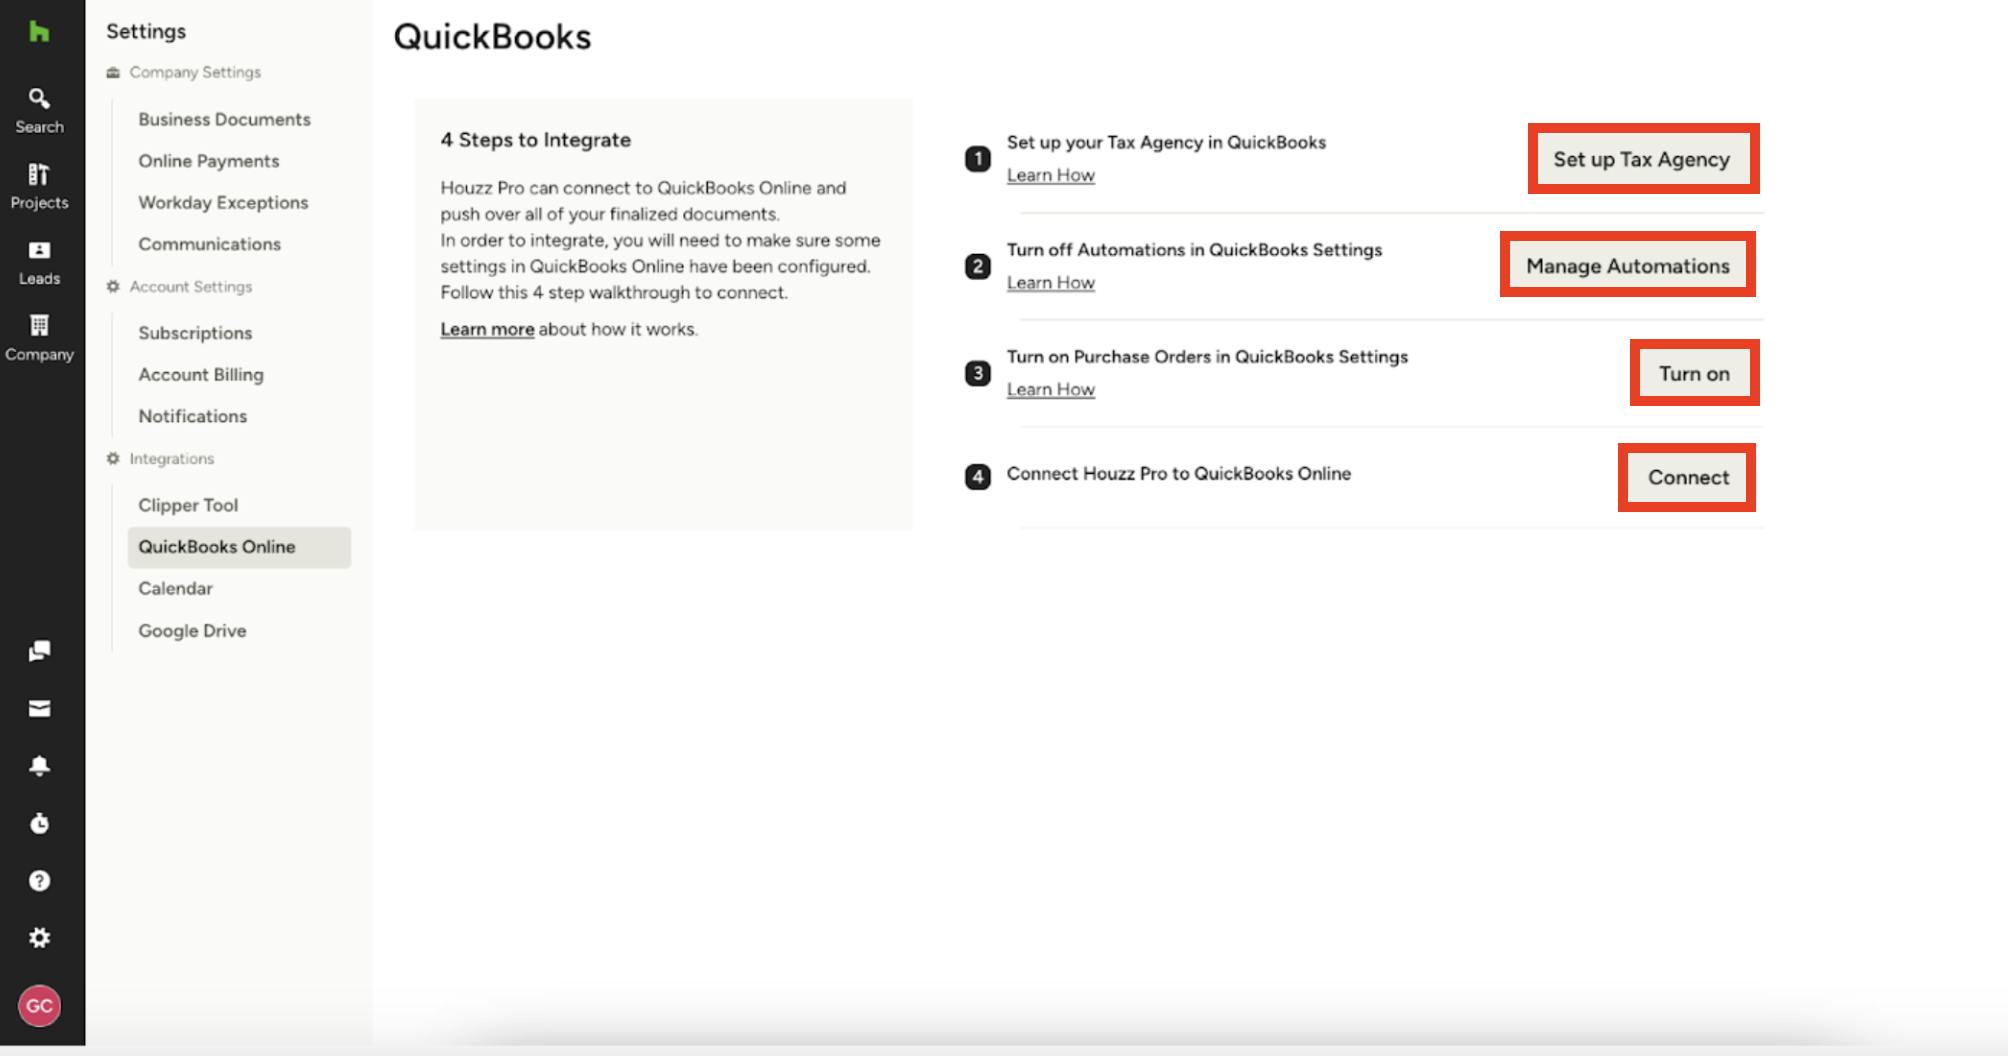
Prior to connecting, please ensure the following has been done in your QuickBooks Online account:
- Automated sales tax is set up
- Automation settings are turned off
- POs (if applicable) are enabled
Once complete, click Connect.
Update Account Mapping
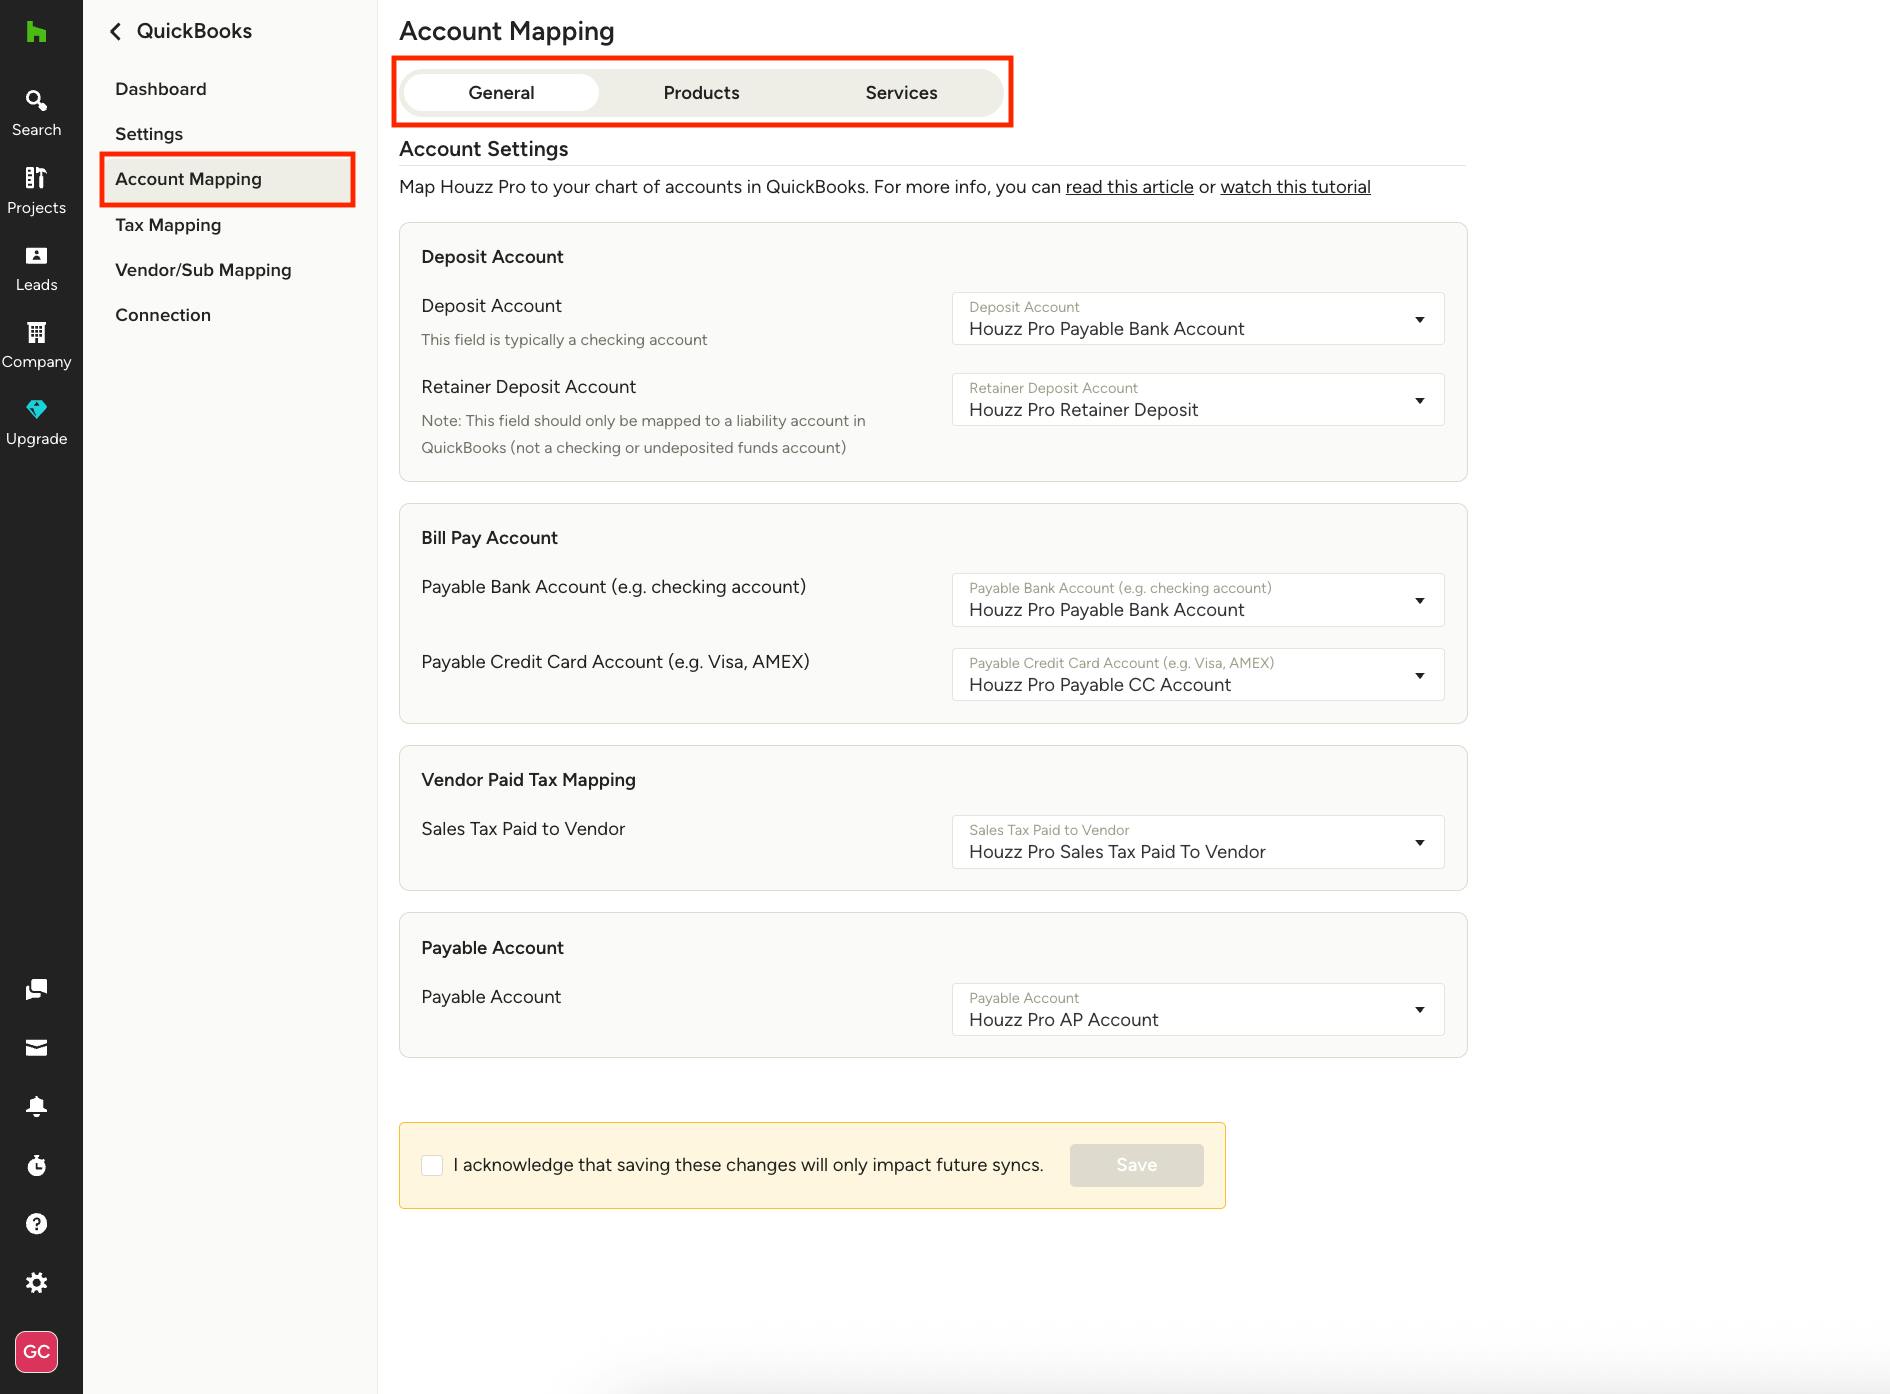
Once connected, please update your mapping. To do this, select Account Mapping from the left menu. Here under the General tab, you can map Houzz Pro to your chart of accounts in QuickBooks Online. This includes your Deposit Account, Bill Pay Account, Vendor Paid Tax Mapping, and Payable Account.
To make adjustments, select the correct account from the dropdown menu. Be sure to select the checkbox at the bottom of the page, then click Save, to complete the change.
On this screen, you can also make adjustments to Products and Services mapping by selecting the tab at the top. To learn more about making adjustments here, read How to Map Houzz Pro to QuickBooks Online Chart of Accounts.
Update Tax Mapping
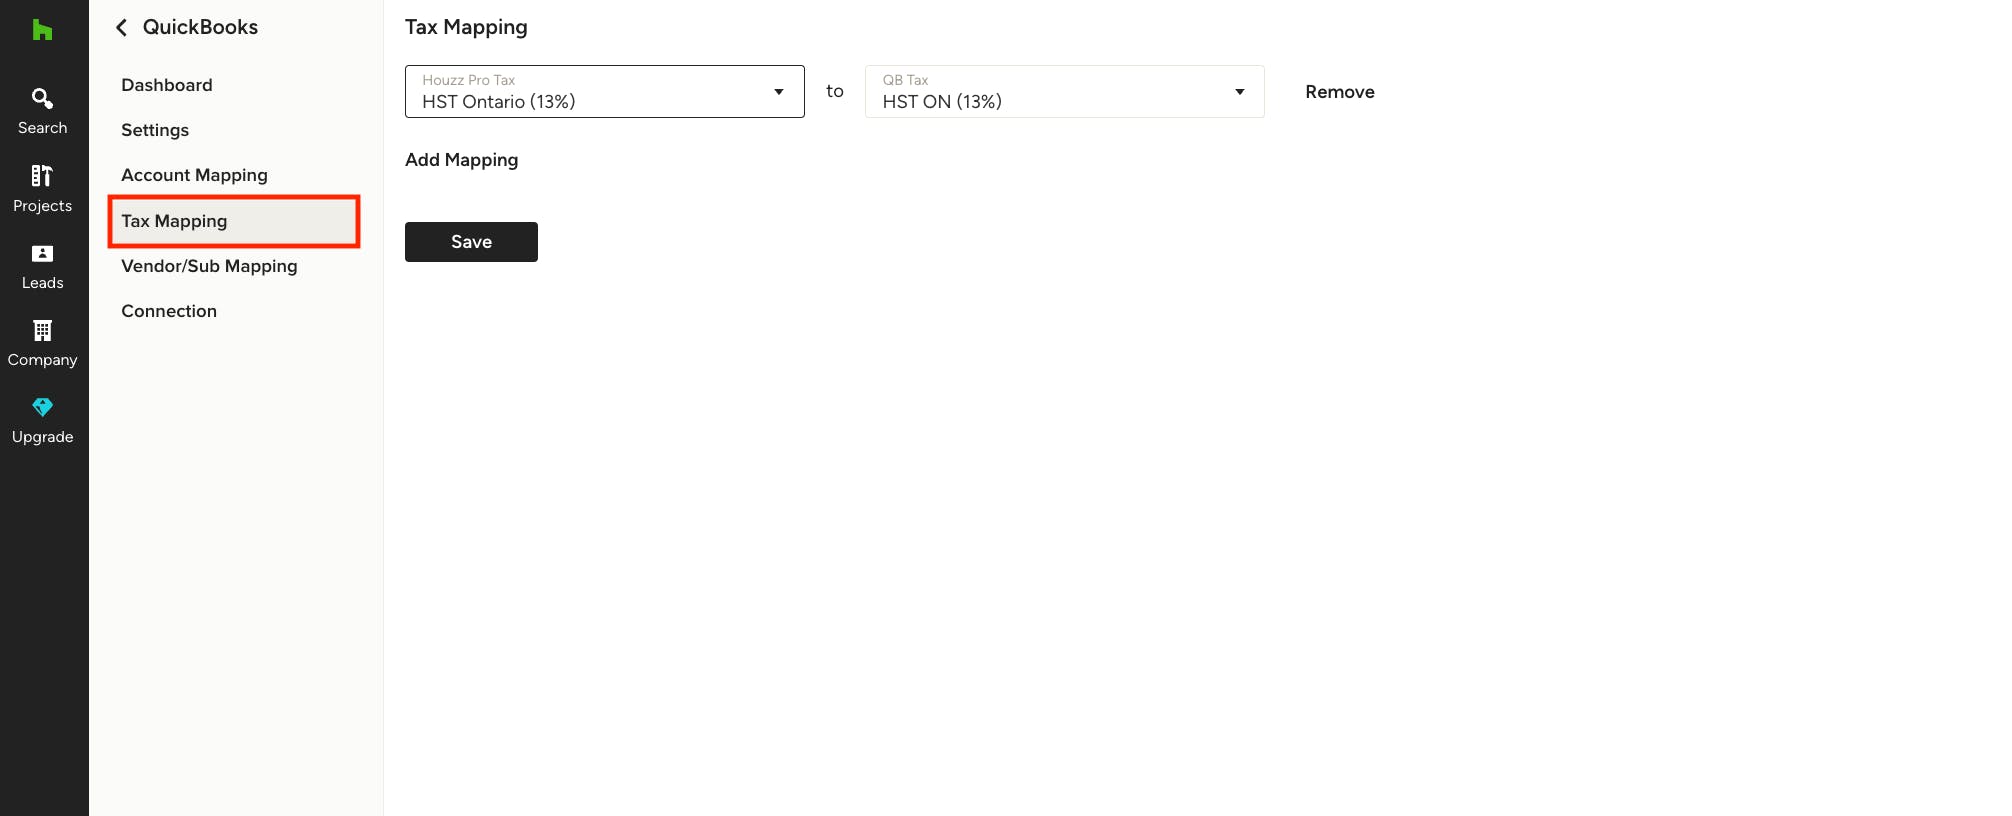
You will also need to update your tax mapping prior to syncing any documents. To do this, select Tax Mapping from the left menu.
To make adjustments, select the correct tax from the dropdown menu, or select Add Mapping to create a new tax mapping. Be sure to click Save to complete the change.
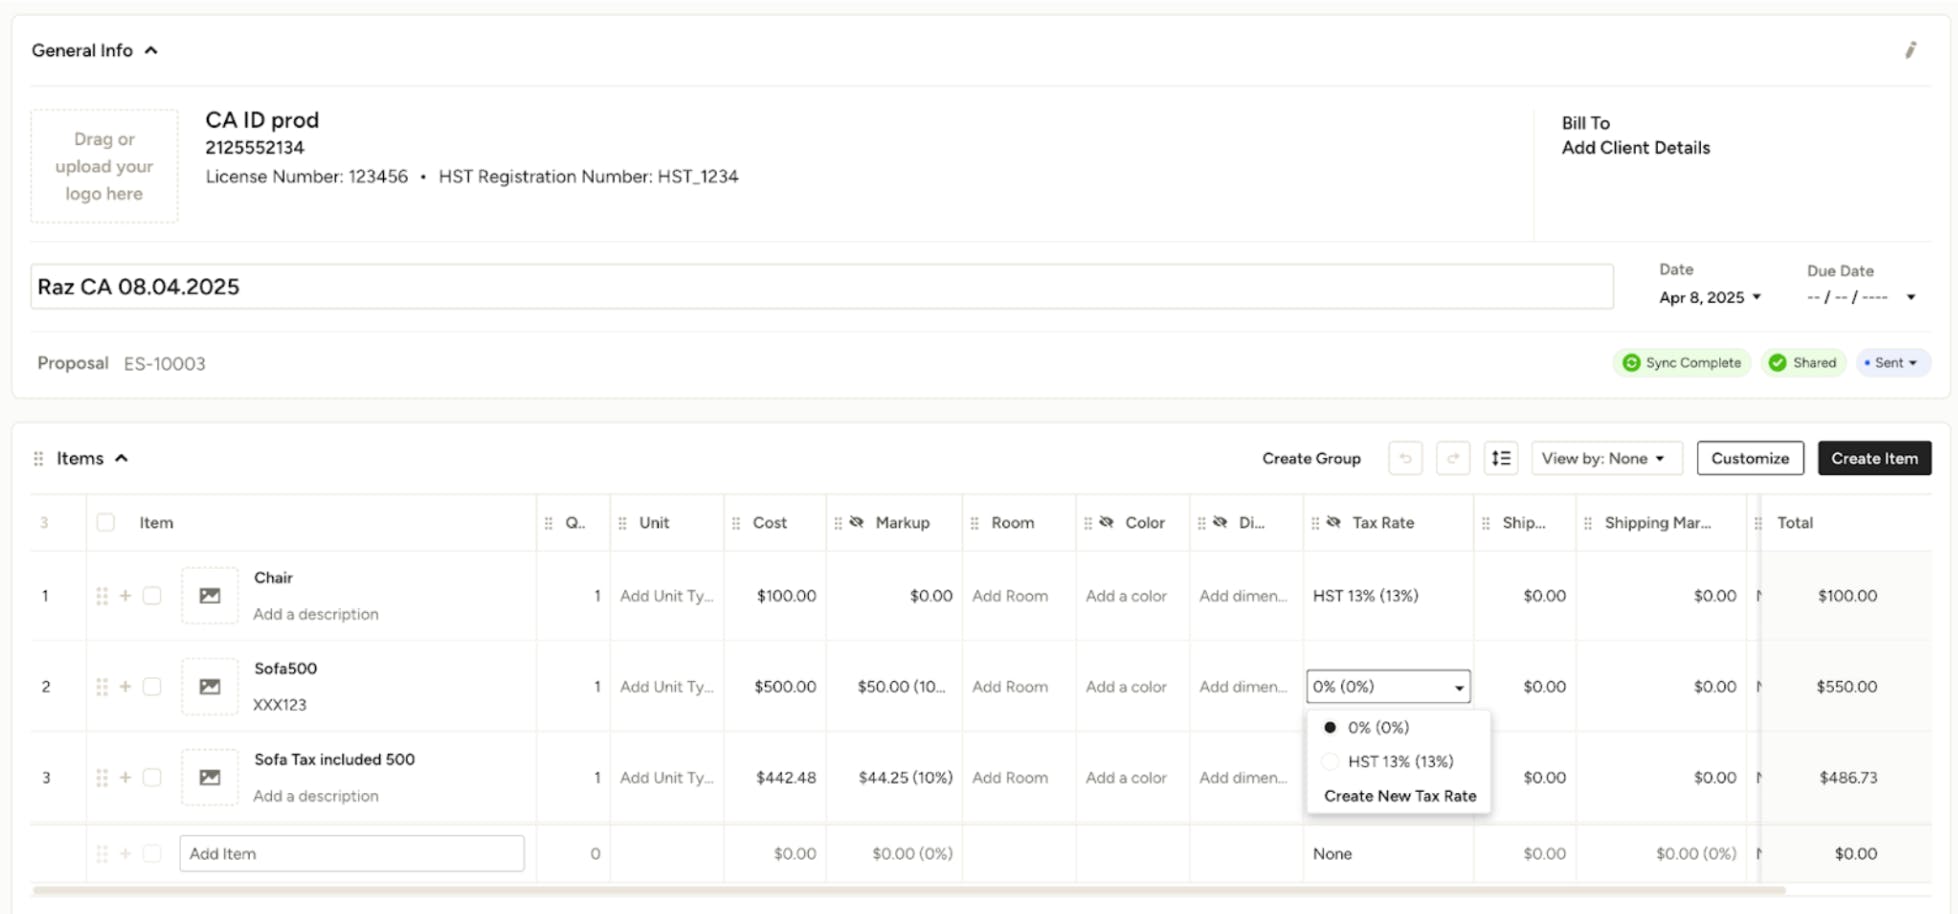
Please Note: With tax mapping on your documents, each line item must include a valid tax rate value that corresponds to your tax mapping (see tax mapping instructions above).
In cases where a line item is tax exempt, we recommend that you create a tax rate of 0% and map to the QuickBooks Online tax rate of 0% in your tax mapping. Then, you can utilize this rate on those particular line items. Please reach out to support should you have any additional questions on this.
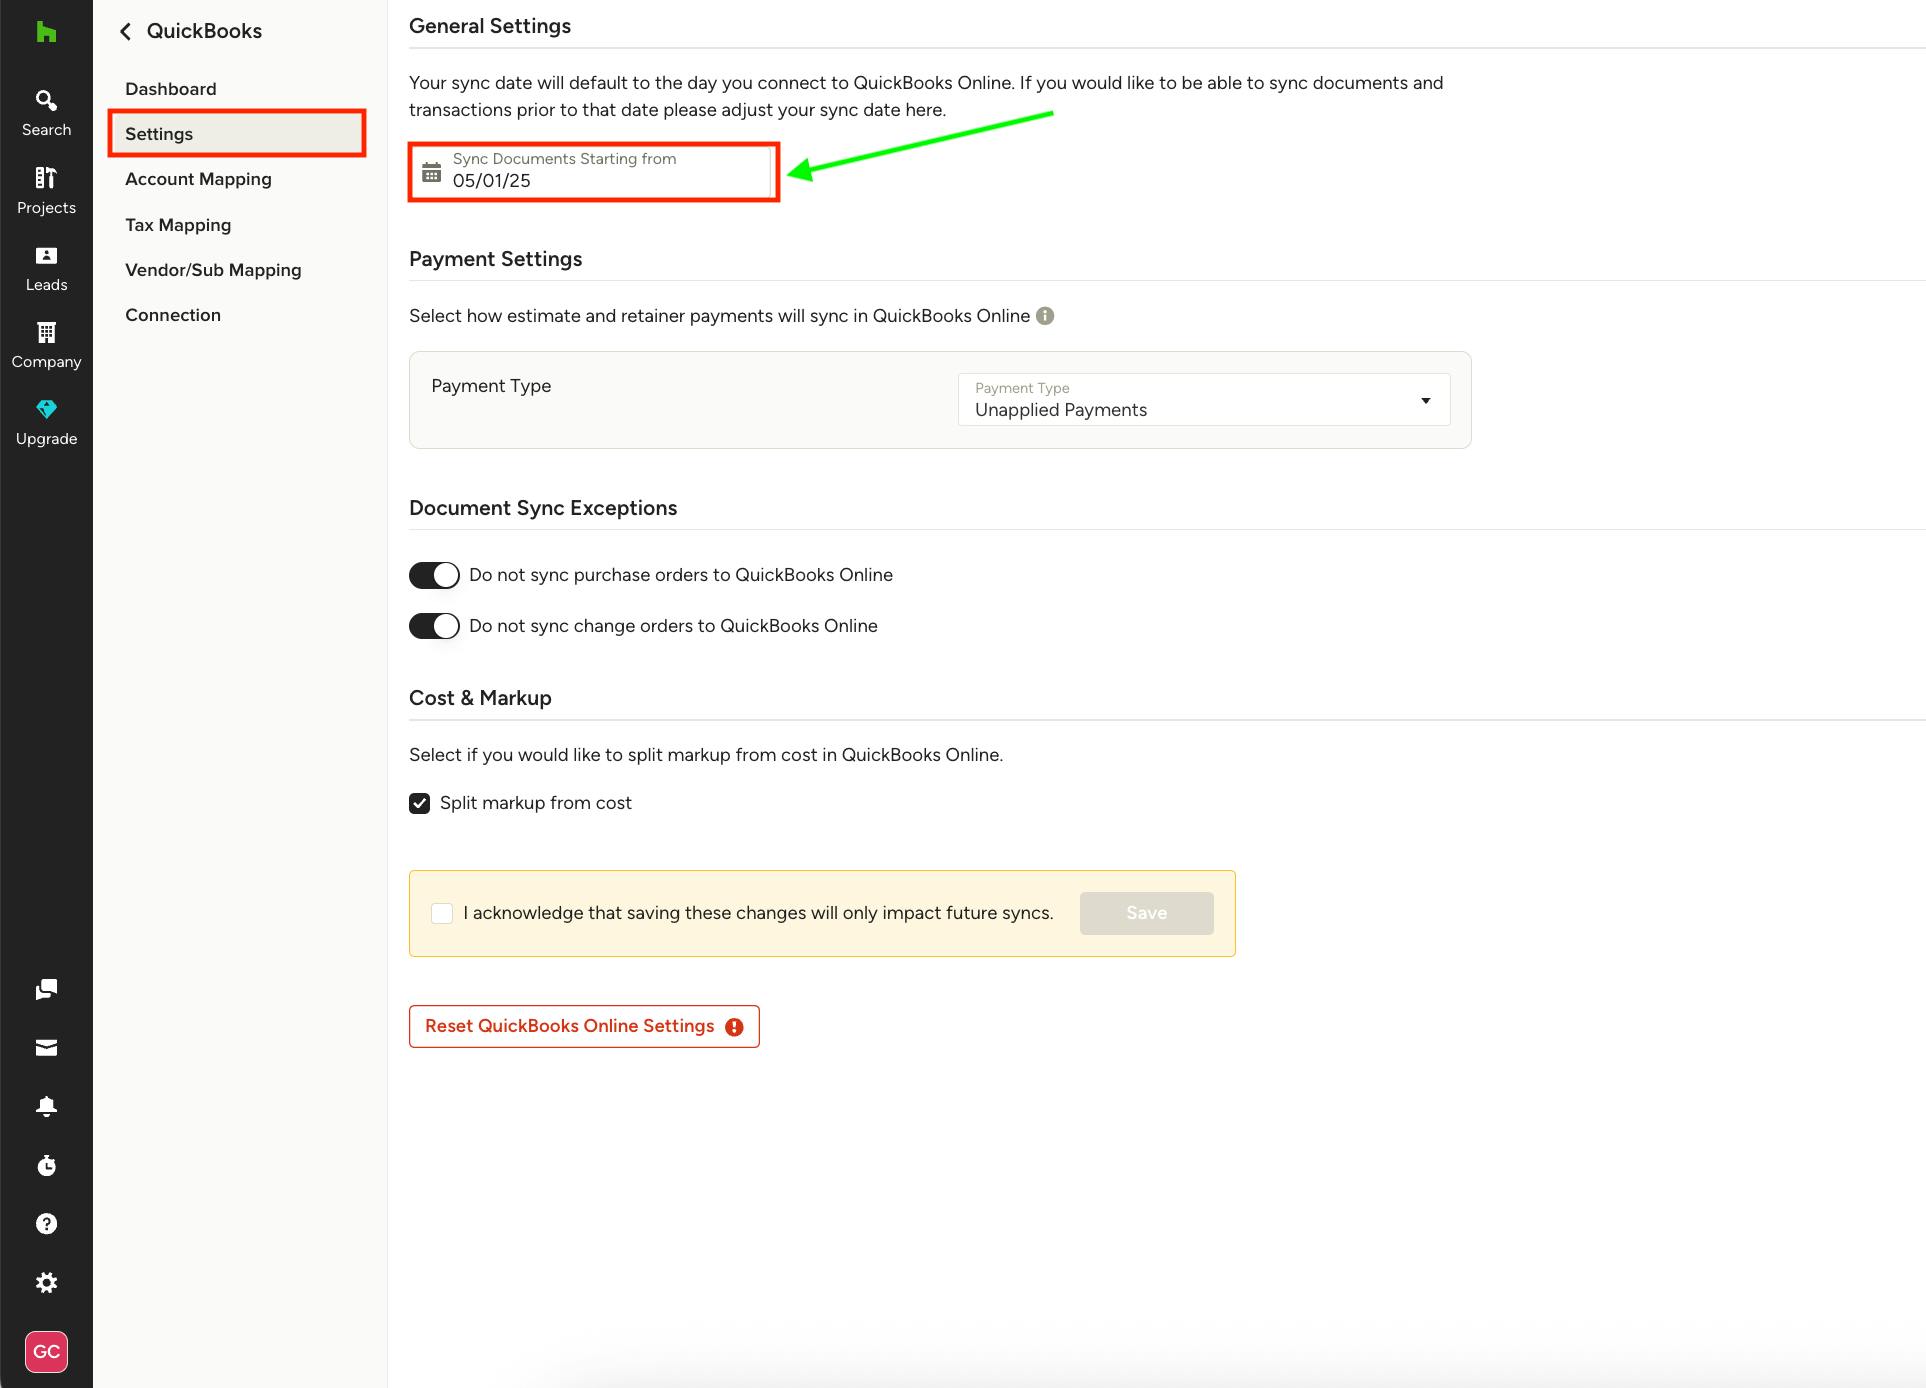
Update Settings
Once your mappings are complete, select Settings from the left menu to update your sync date to historically sync documents and transactions to QuickBooks Online. To learn more about making adjustments here, read How to Adjust QuickBooks Online Settings.