How to Move Processing Fees to Your Markup

Houzz Pro online payments gives you an easy, convenient and secure way to receive payment from your client. When your client pays online with either ACH/bank transfer or credit card, there is a processing fee associated with that payment.
To increase your client's adoption of online payments so you get paid faster, you can absorb the processing fees and discreetly pass the cost to clients. One way to do this is to build the fees into your company’s overhead and overall cost of doing business. Or, you can increase your markup to cover the fees (as discussed below). You also have the option to offset the processing fee to your client if you prefer.
How Does Moving Processing Fees to Markup Work?
If you decide to pay any processing fees and add them to your markup, we will automatically add a markup percentage that covers these ACH or credit card fees.
If you only accept ACH/bank transfer payments, we add 1.1% to cover all your fees, plus any required tax.
If you accept credit cards, we add a credit card processing fee to cover the fees, plus any required tax. This ensures you don't lose money if your client pays with a credit card, which has higher fees.
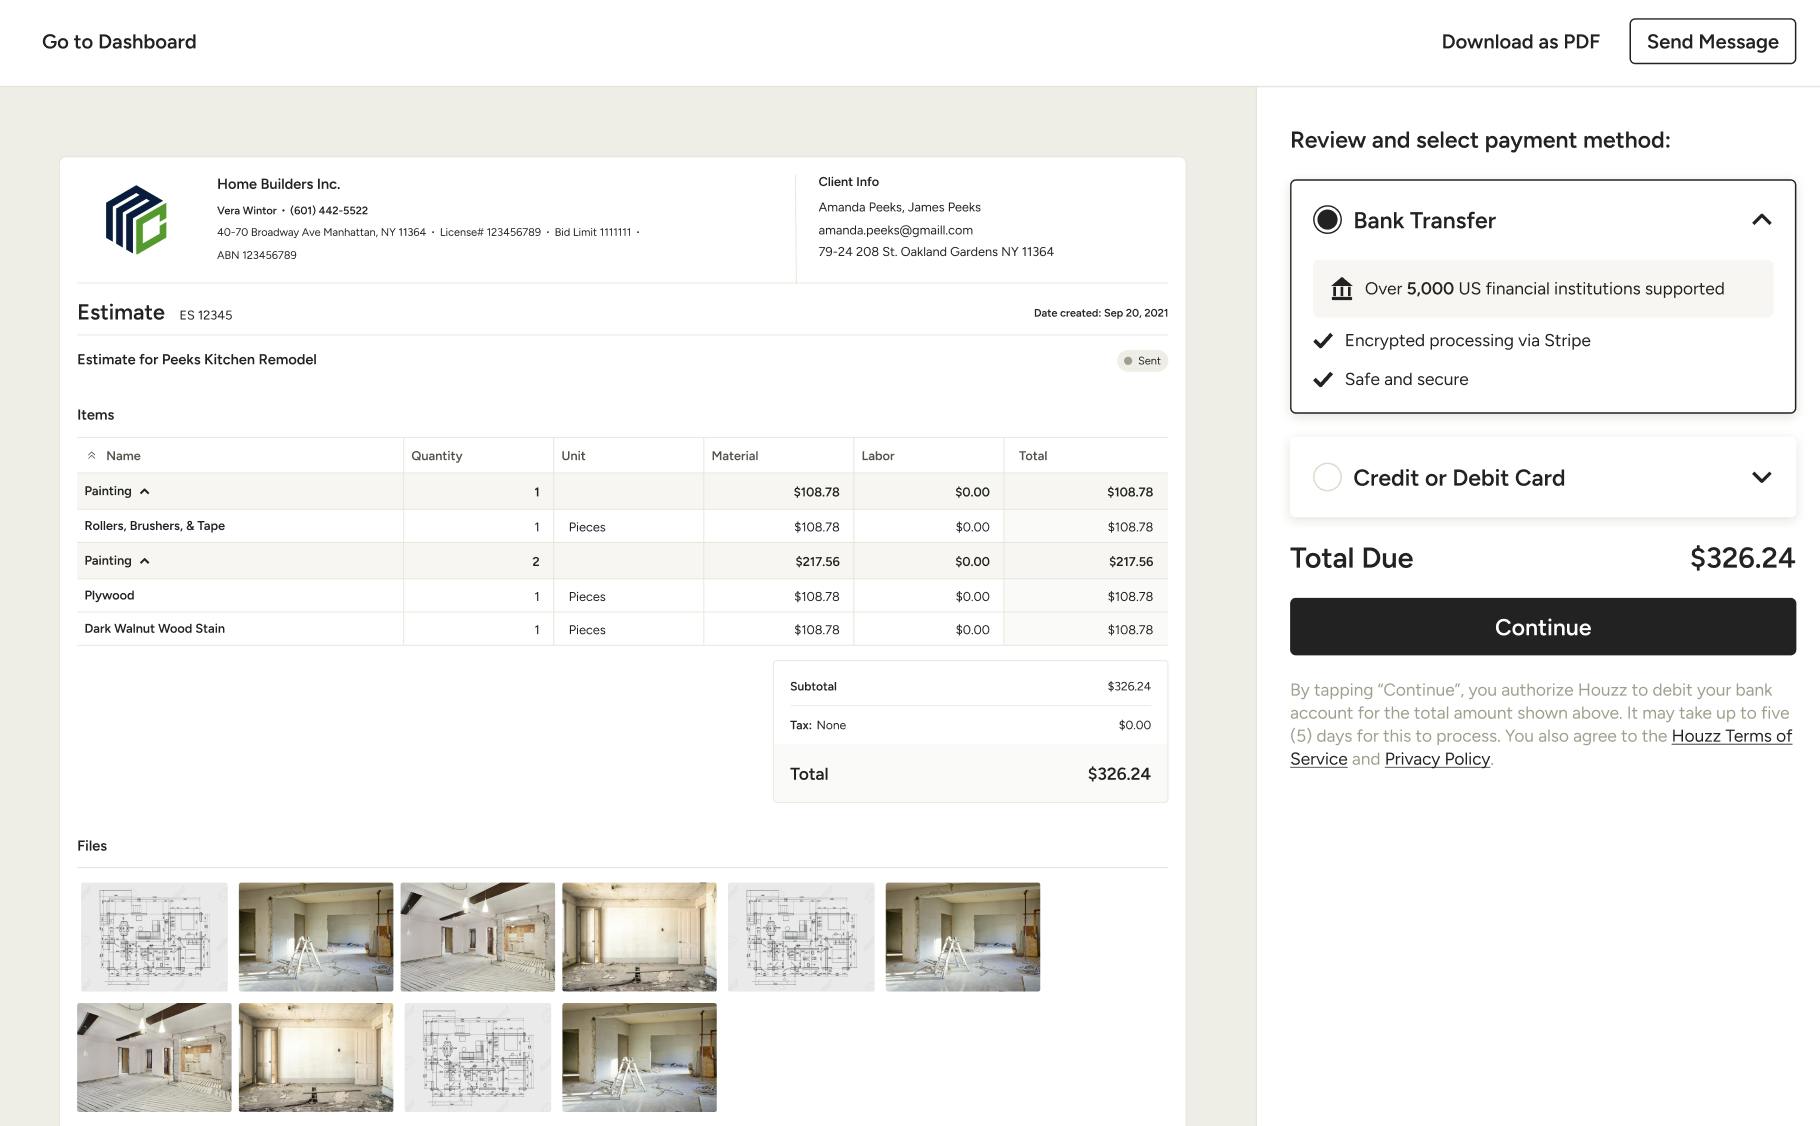
When you choose to pay these fees and recoup them through your markup, the fees will be included in the total cost of the job. As a result, your client will not see a separate Processing Fee line item on their final documents — as shown in the client document view below — and you’ll receive the total invoice amount minus the fees.
There are four ways to add fees to your markup:
- At the project level: A popup appears as you start to work on your project's document with prompts to help you add the fees.
- On a document: Use the markup column of your estimate or proposal.
- At the project level within Project Details.
- At the account level for all projects within Online Payment Settings.
Add Fees to Your Markup at the Beginning of Your Project
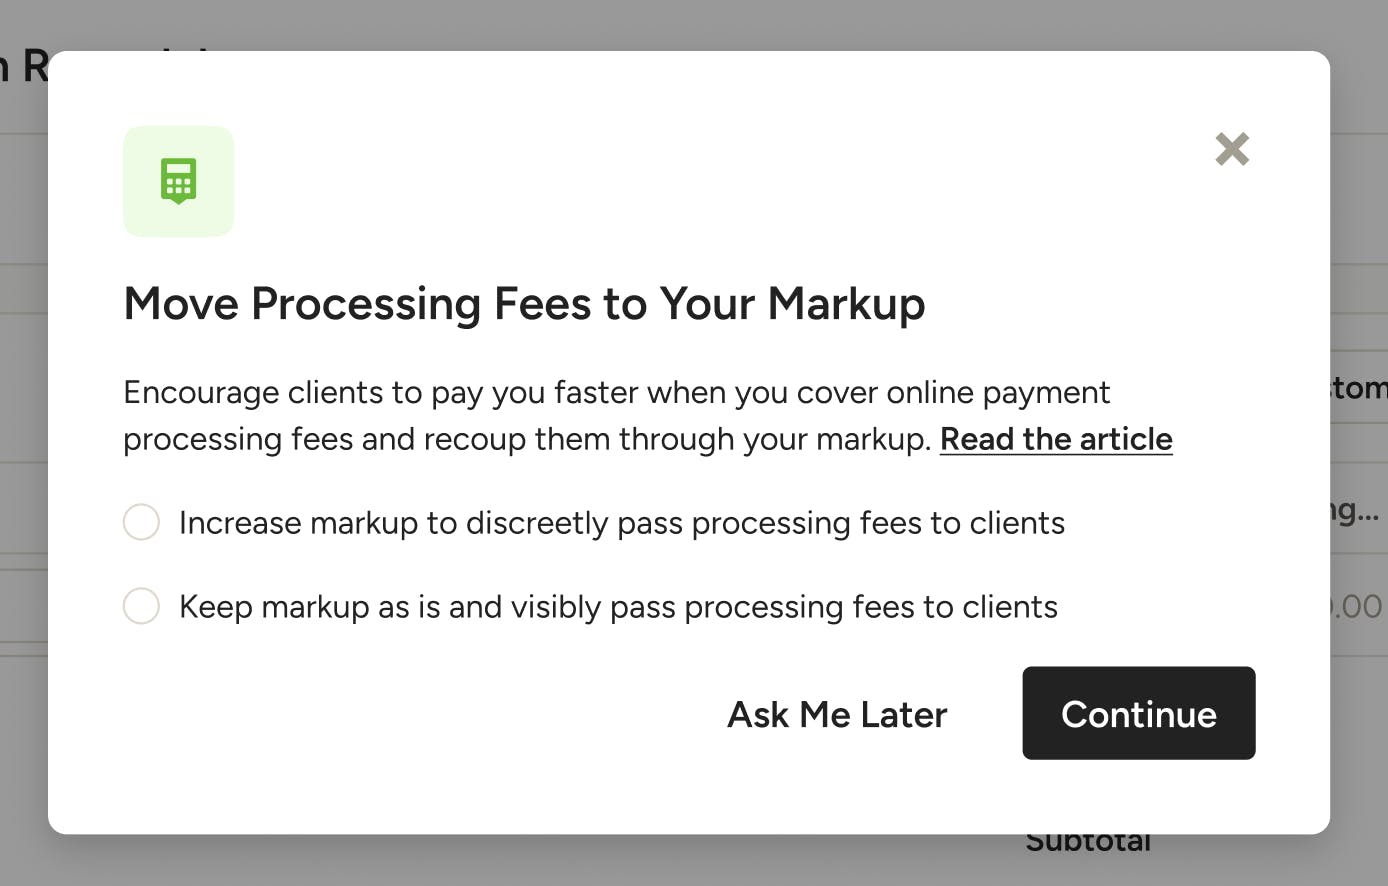
As you begin working on your estimate or proposal for your project, a popup screen will appear and ask how you would like to handle processing fees. You can:
- Increase markup to discreetly pass processing fees to clients
- Keep markup as-is and visibly pass processing fees to clients
Select the relevant option, then click Continue. If you would prefer to decide later on, select Ask Me Later.
Please Note: Using this option to add fees to your markup will impact all future documents for this project. Existing documents or documents in other projects will not be affected.
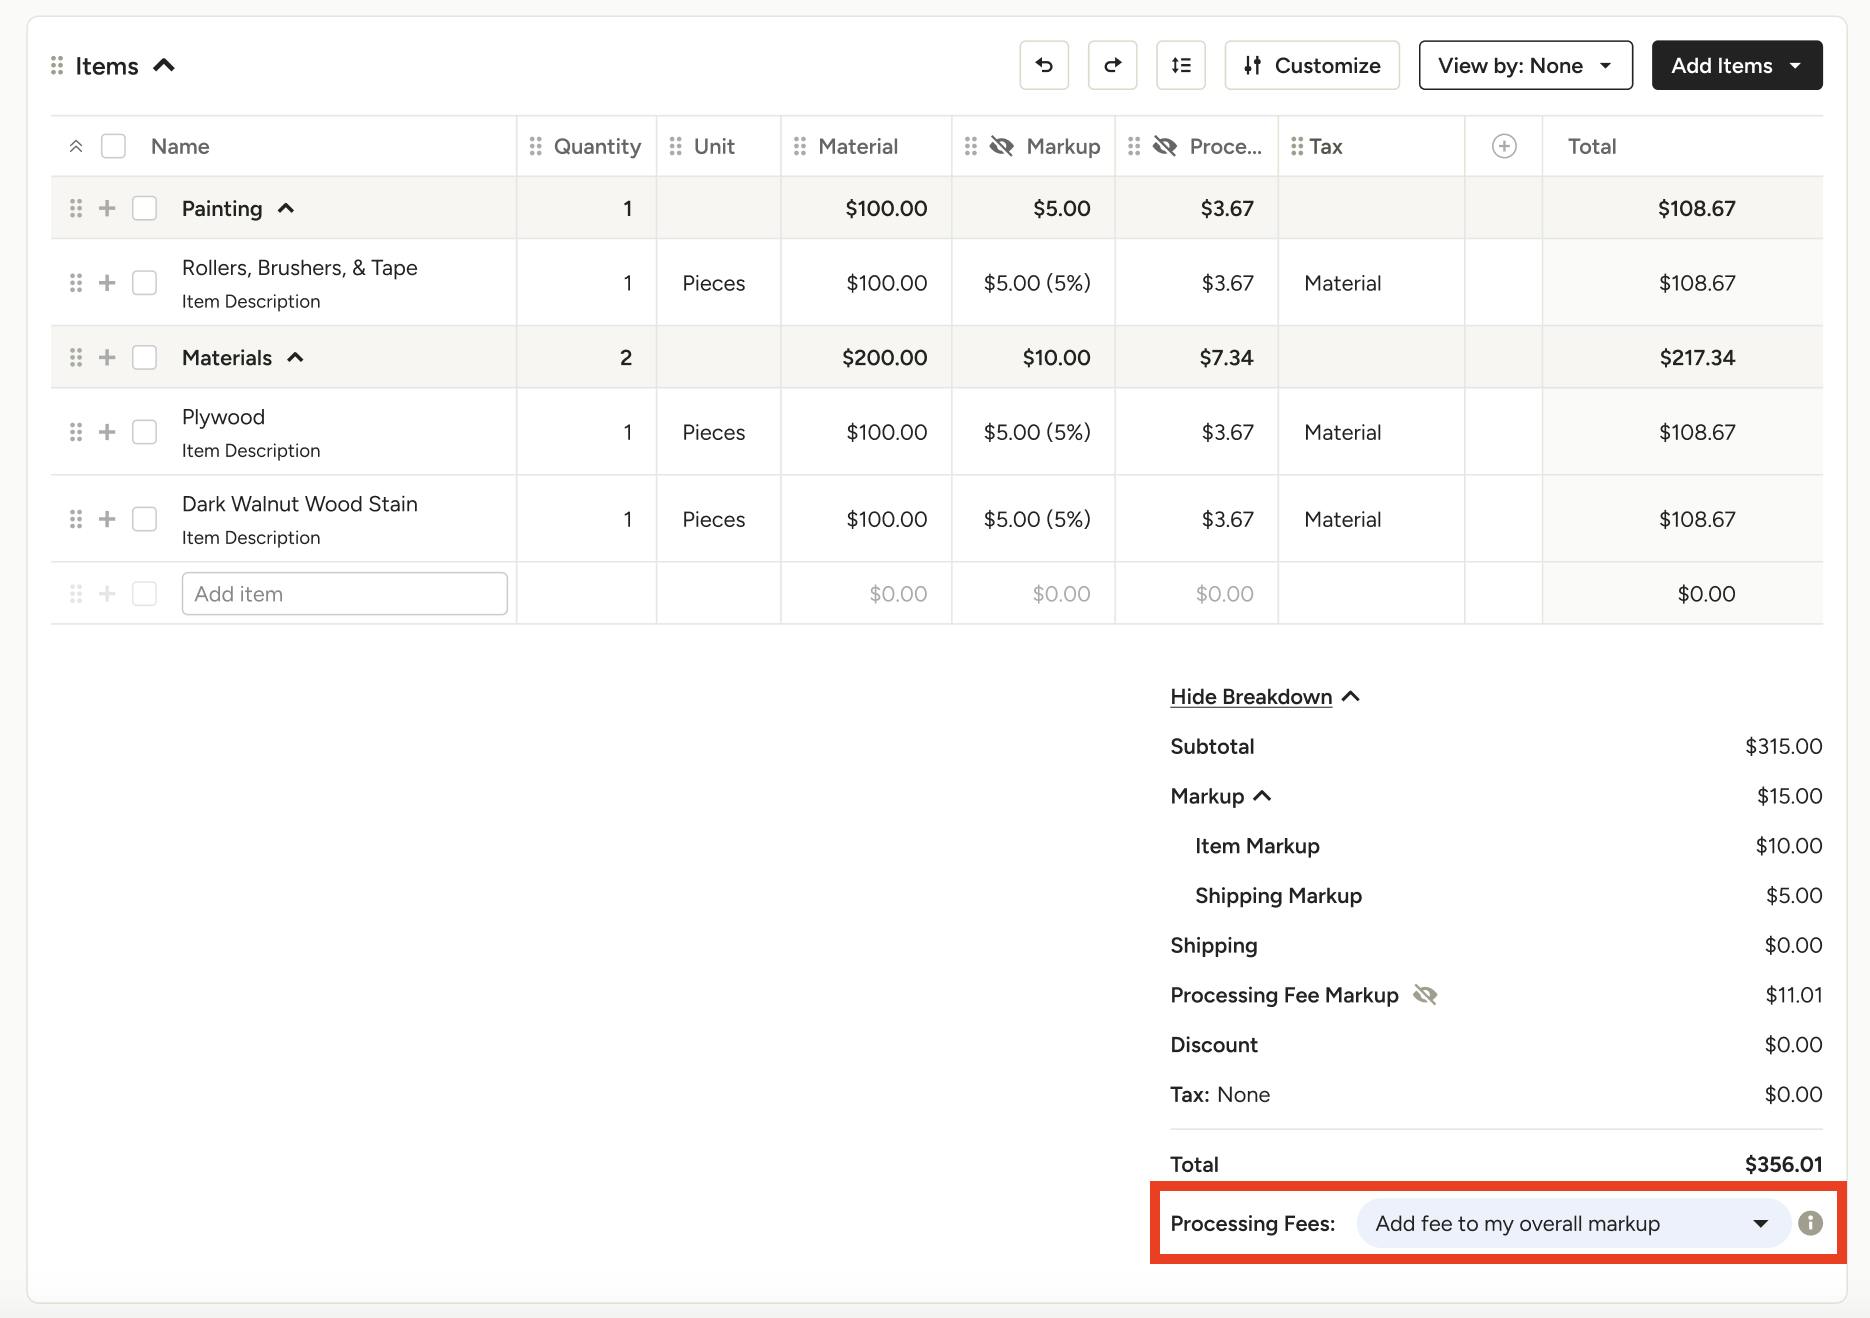
If you select to move fees to your markup, the dropdown underneath the document total will say, Add Fee to My Overall Markup (as shown below). If you select to skip additional markup, the dropdown will say, Client Pays Fee During Processing.
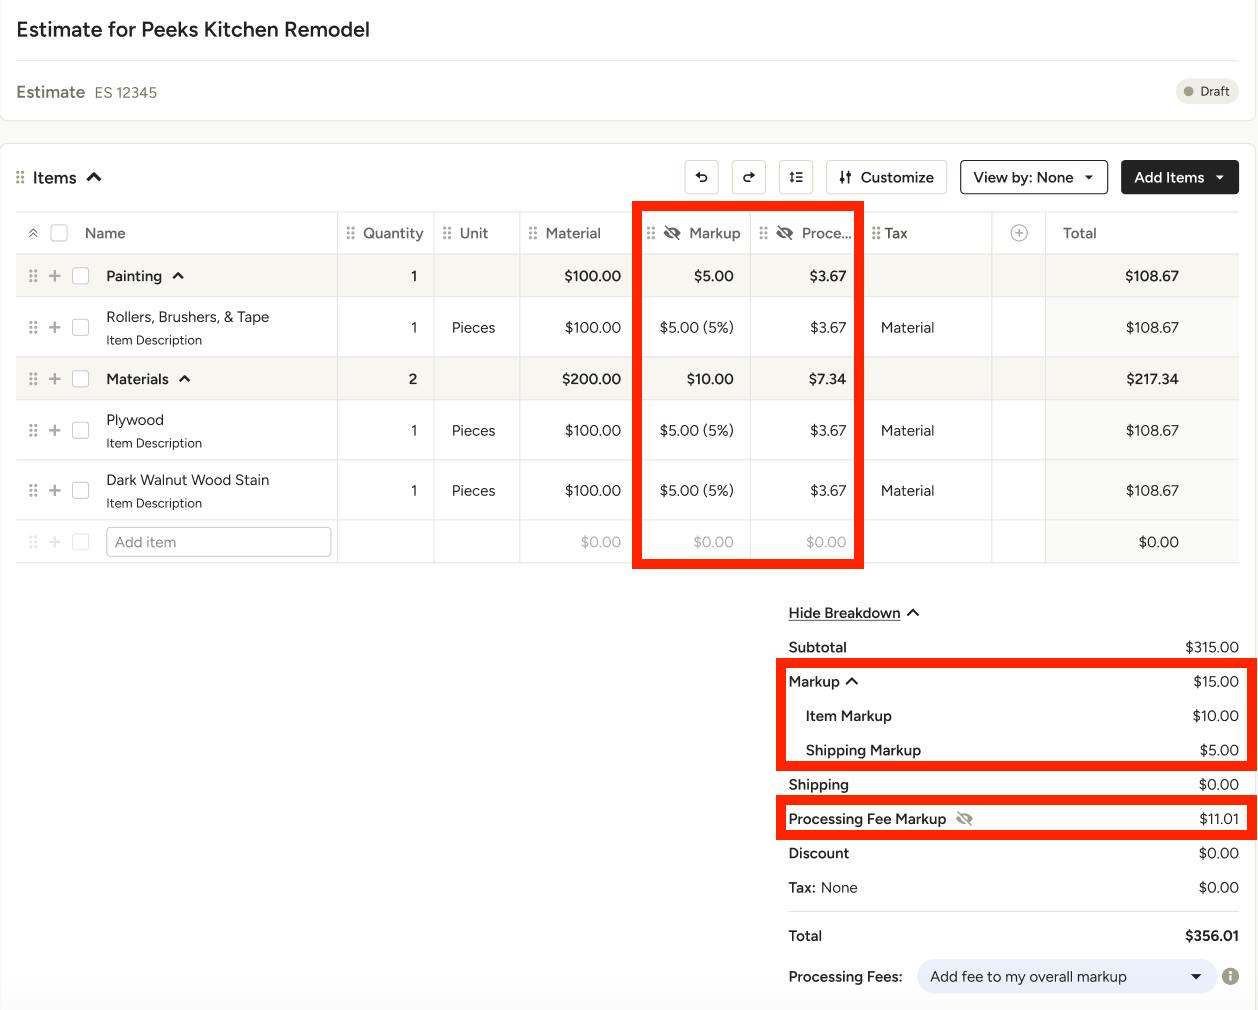
As you add items to your estimate or proposal, you will notice a Markup column and a Processing Fees column. Your typical markup costs will show in the Markup column. Your processing fees markup will show in your Processing Fees column.
In the Total section at the bottom of the document, your typical markup will appear under Subtotal.
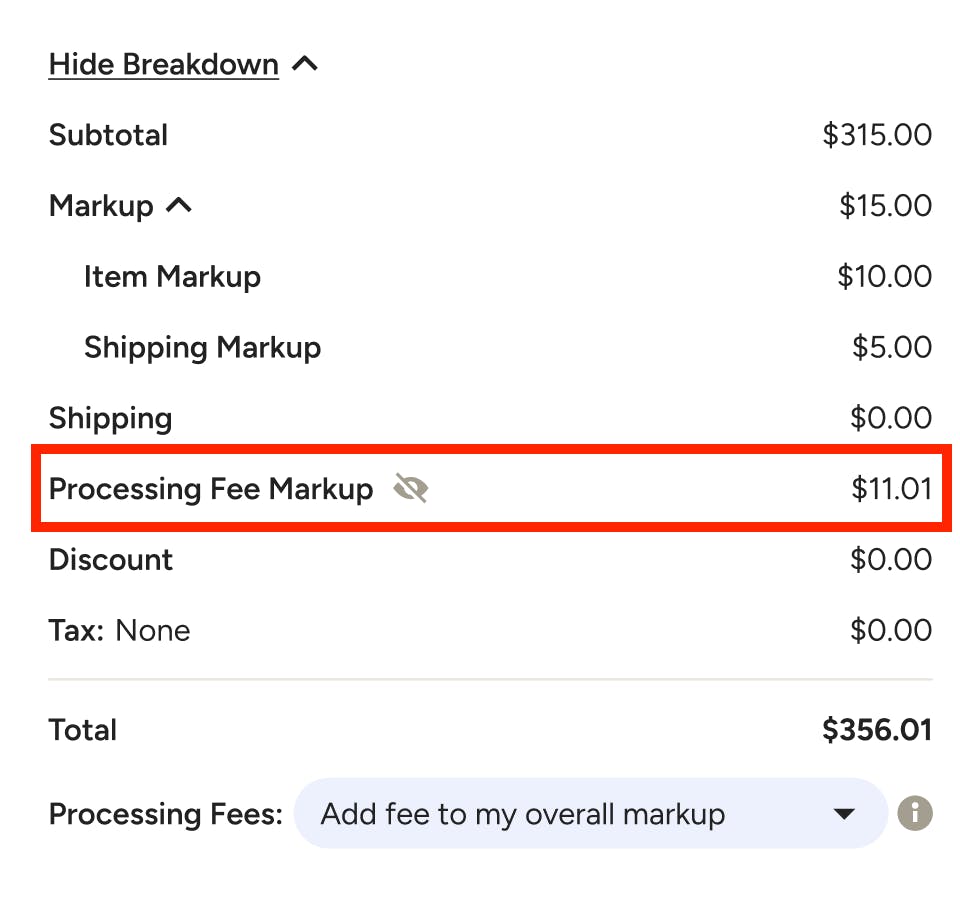
A specific line item — Processing Fee Markup — will show at the bottom of the Total section. This is the post-tax cost, which means it's the total processing fee cost after deducting discounts and adding taxes. It will only appear if you decide to cover fees. The crossed out eye icon indicates that these fields will not be visible to your clients.
Set Markup in Markup Column
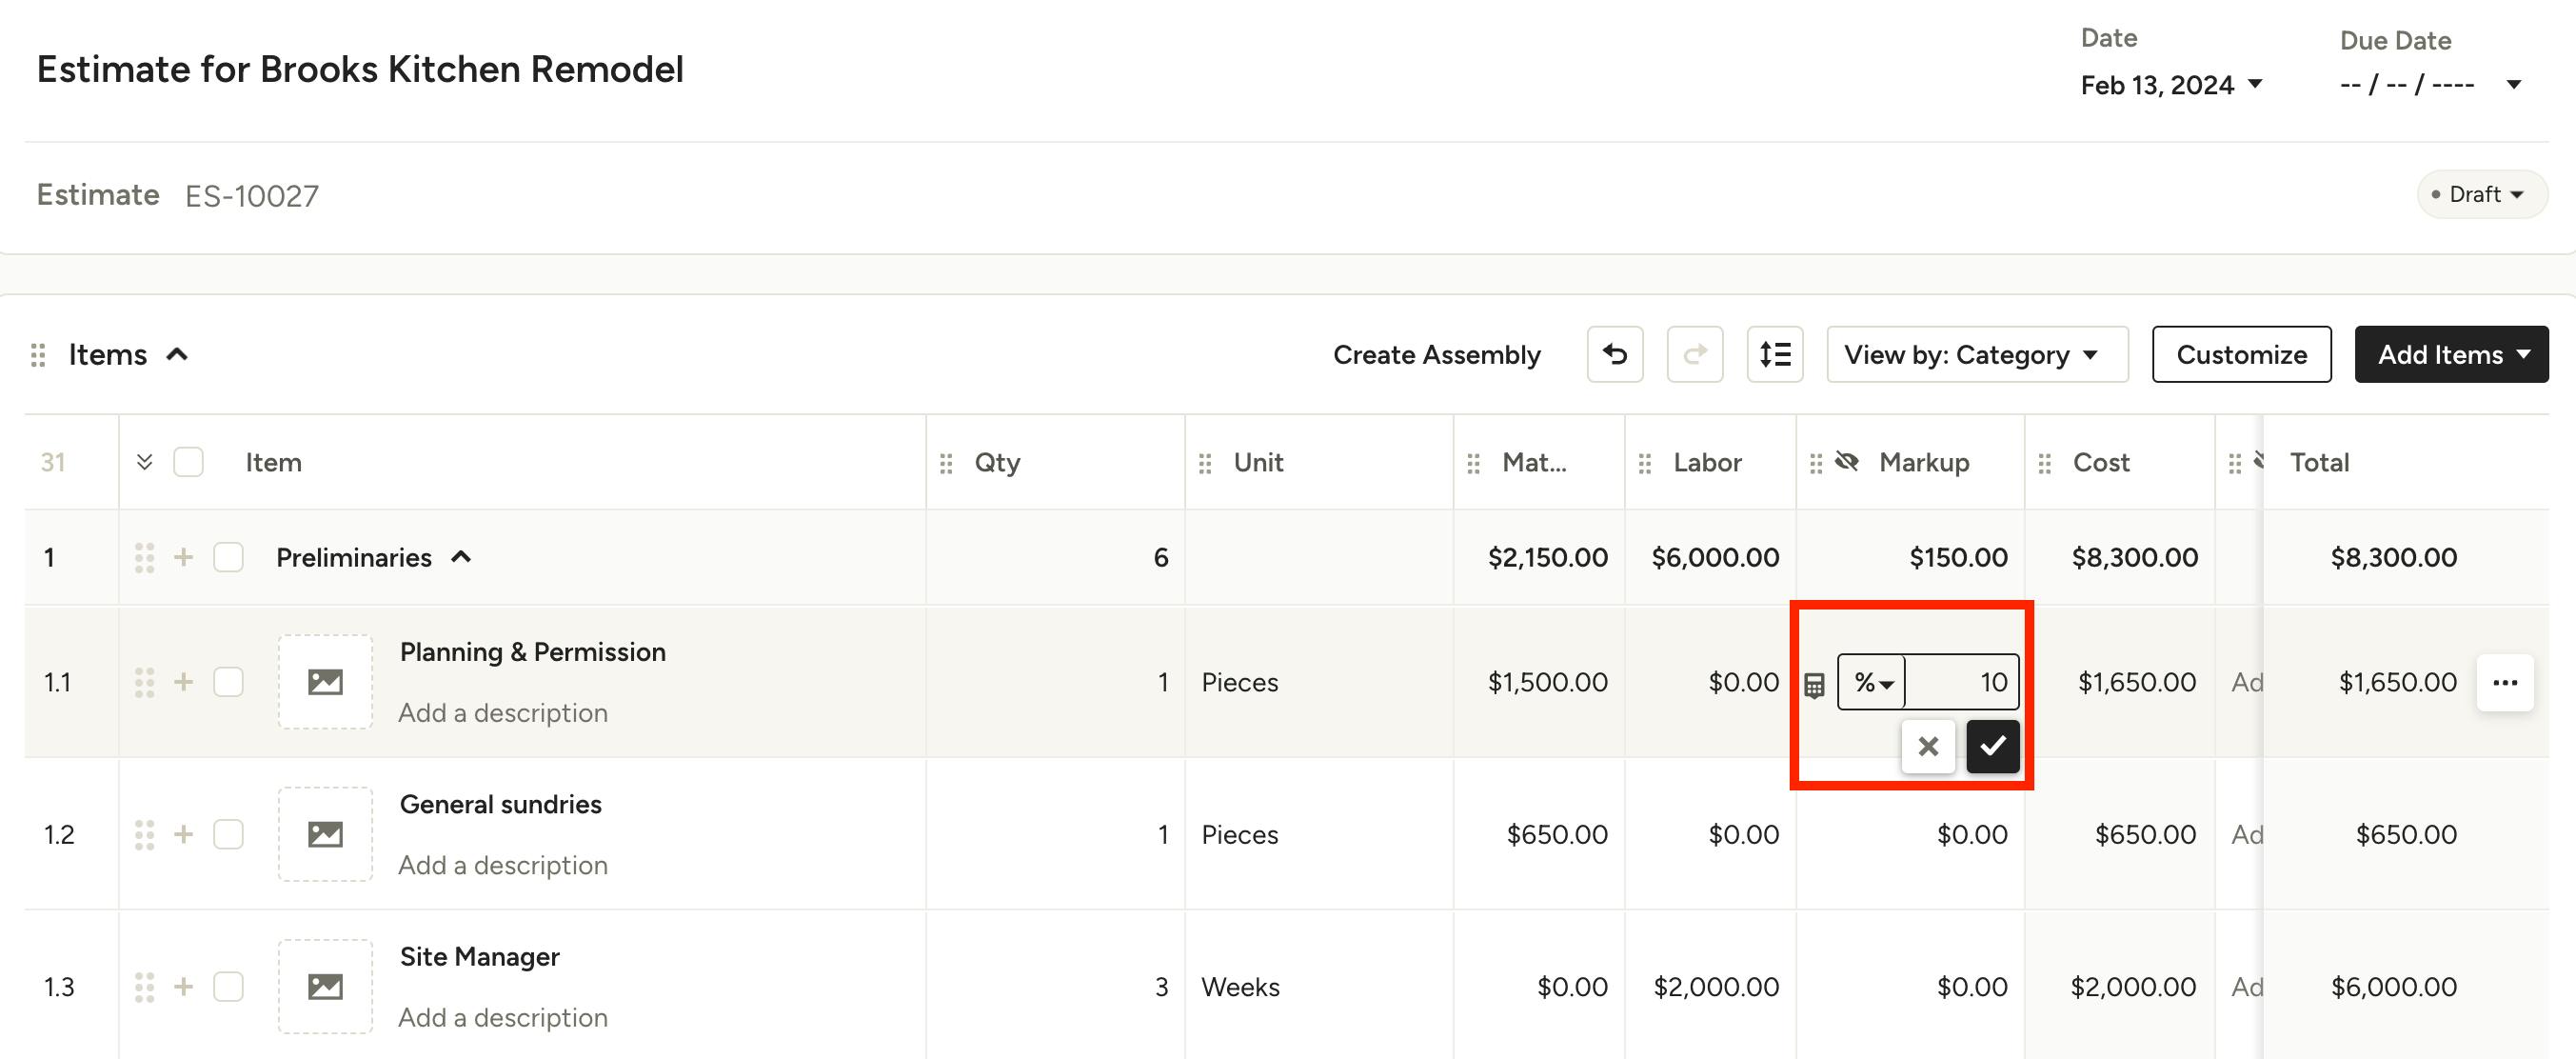
You can also make changes to your markup directly in your estimate or proposal. To do this, you can either:
- Edit the individual line item in the markup column
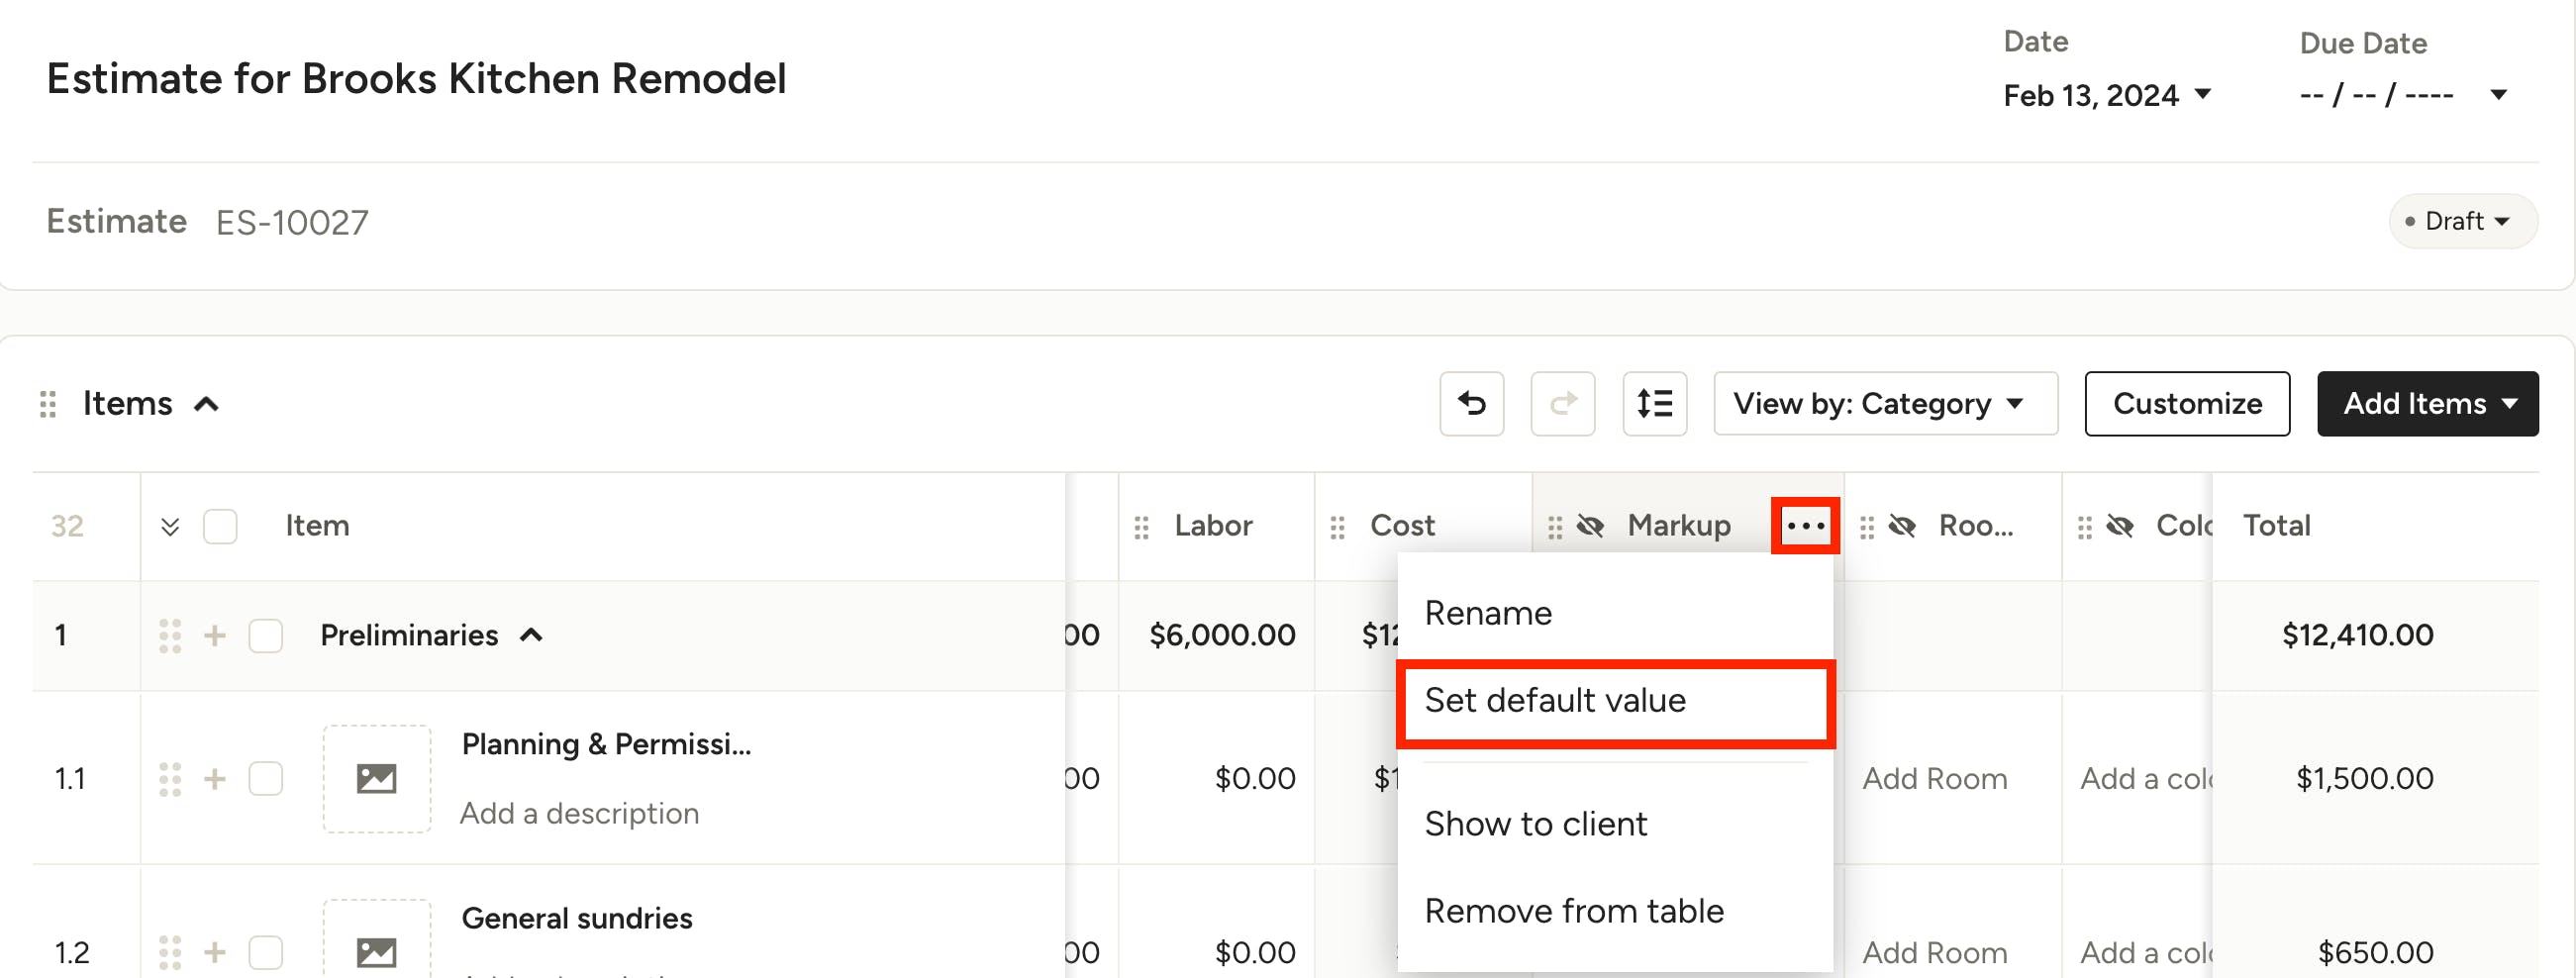
- Edit all line items at once by adjusting the Set Default Value in the markup column
Please Note: Editing the markup in an individual line item will only affect that line item — it will not impact other existing or future documents. Editing the Set Default Value in the markup column will impact this document, as well as future documents for this project.
Edit Markup for Individual Line Item
To edit the markup for a line item, open up the relevant document and find the individual line item. In the Markup column, click to edit. You can either set a percentage or a fixed amount — click the check mark once complete to save. This change will adjust the markup for that line item only.
Edit Markup for All Line Items
To edit the Set Default Value, open up the relevant document and find the Markup column. Click on the three dots icon, then select Set Default Value.
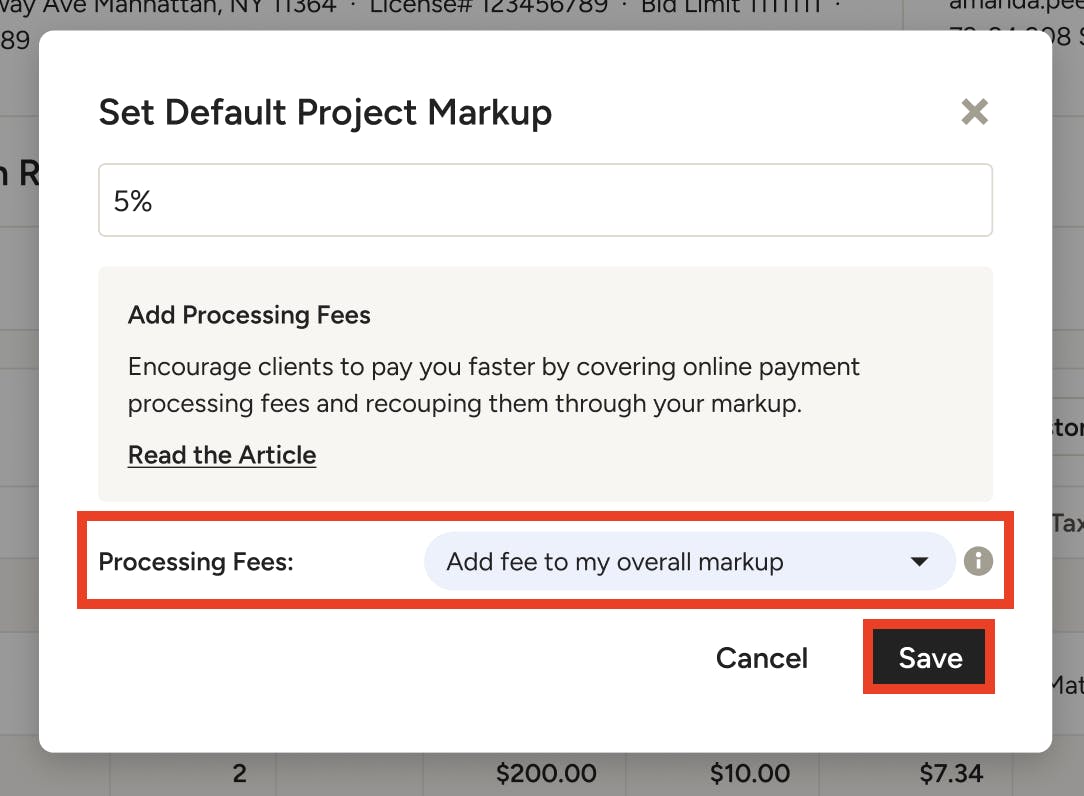
From here, you can set your typical markup percentage. If you want to pay the processing fee and add it to your markup so your clients won’t see the processing fees, select Add Fee to My Overall Markup in the processing fees dropdown. This will automatically add the necessary percentage to cover fees. Be sure to click Save.
All the line items in your estimate or proposal will now show your updated markup percentage — the Markup column will show your typical markup, while the Processing Fees column will show your fee markup. The Markup percentage shown in the screen above represents the typical markup and does not automatically account for the processing fee, which is calculated separately, displayed in a separate column.
The Processing Fee Markup will also appear in the total at the bottom of your document.
Set Markup in Project Settings
If you would like to make changes at the project level, you can do this in the Project Settings section.
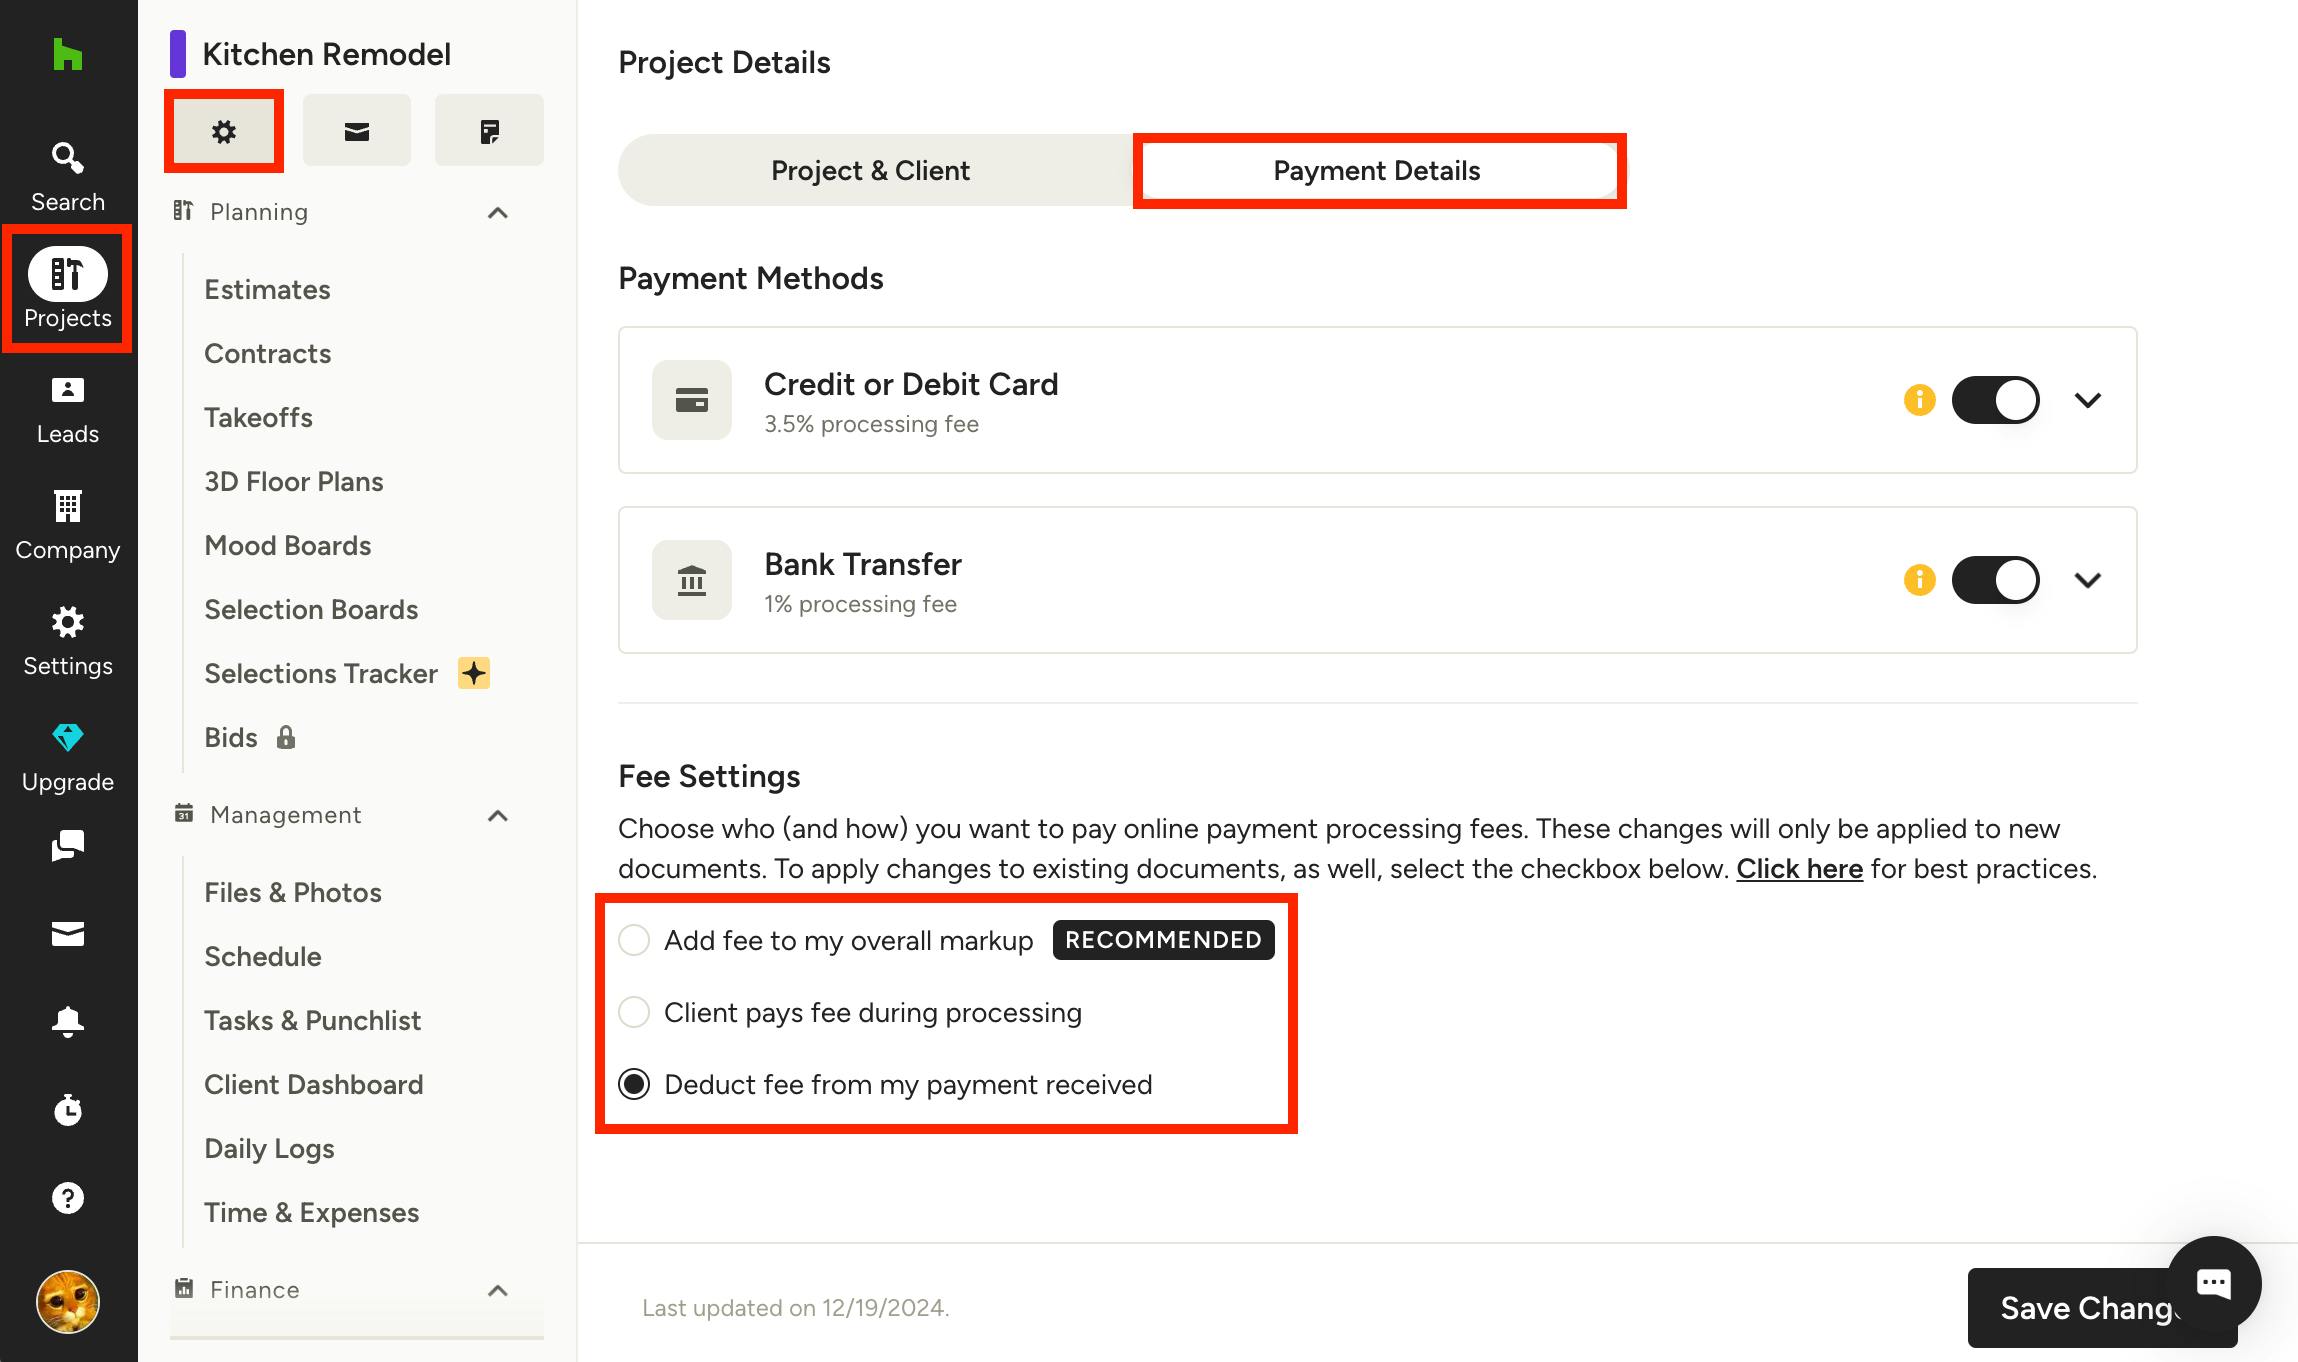
To start, click the Projects icon in the left menu, then select the relevant project from the list. Once on the project overview page, click the gear icon at the top left of the page to edit project details. At the top of page, select the Payment Details tab.
Underneath Payment Methods, there is a Fee Settings section with three options:
- Add fee to my overall markup (RECOMMENDED) — Automatically add a markup percentage that covers ACH or credit card fees. You will absorb the processing fees and discreetly pass the cost to clients.
- Client pays fee during processing — Pass the processing fees to clients; your client will be able to view the fee breakdown when making an online payment. Read How to Offset the Processing Fee to Your Client to learn more.
- Deduct fee from my payment received — Absorb the processing fees yourself without passing the cost to clients.
If you would like to move the processing fee to your markup, select the circle next to Add Fee to My Overall Markup.
Once complete, click Save Changes at the bottom.
Please Note: Using this method to move fees to your markup will only impact future documents for this specific project. Existing documents that have been shared with your client or documents in other projects will be unaffected.
Set Processing Fees in Account Settings
If you would like to make broader account-level changes to how processing fees are handled, you can do this in Online Payment Settings. This will create consistency across your business and ensure that processing fees are handled in the same way for each project. To learn more about how to update processing fees on an account level, read How to Edit Online Payment Settings.
Payment Setting Notifications
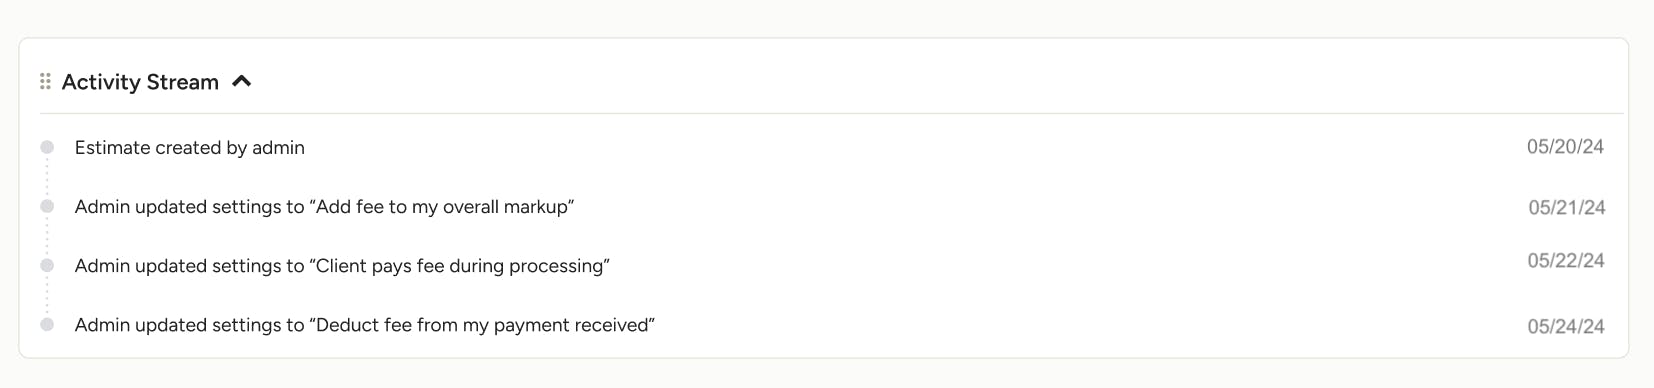
Only admins, finance roles and/or those with online payment permissions can make changes to your online payment settings. When changes are made, they will be documented in the activity stream at the bottom of your document.