How to Maximize the Selections Tracker as a GC
The Selections Tracker in Houzz Pro is more than just a place to store Selections decisions - it’s a central command center for managing every finish, fixture, and material across your projects. From pre-construction through installation, it keeps your team and your subs working from the same playbook.
With the right setup, you can use it to track approvals, organize by trade, streamline ordering, and share the right details with your team, whether internally or in the field. Below are some of the ways you can maximize the Selections Tracker to work smarter and keep every project moving.
Proper Setup
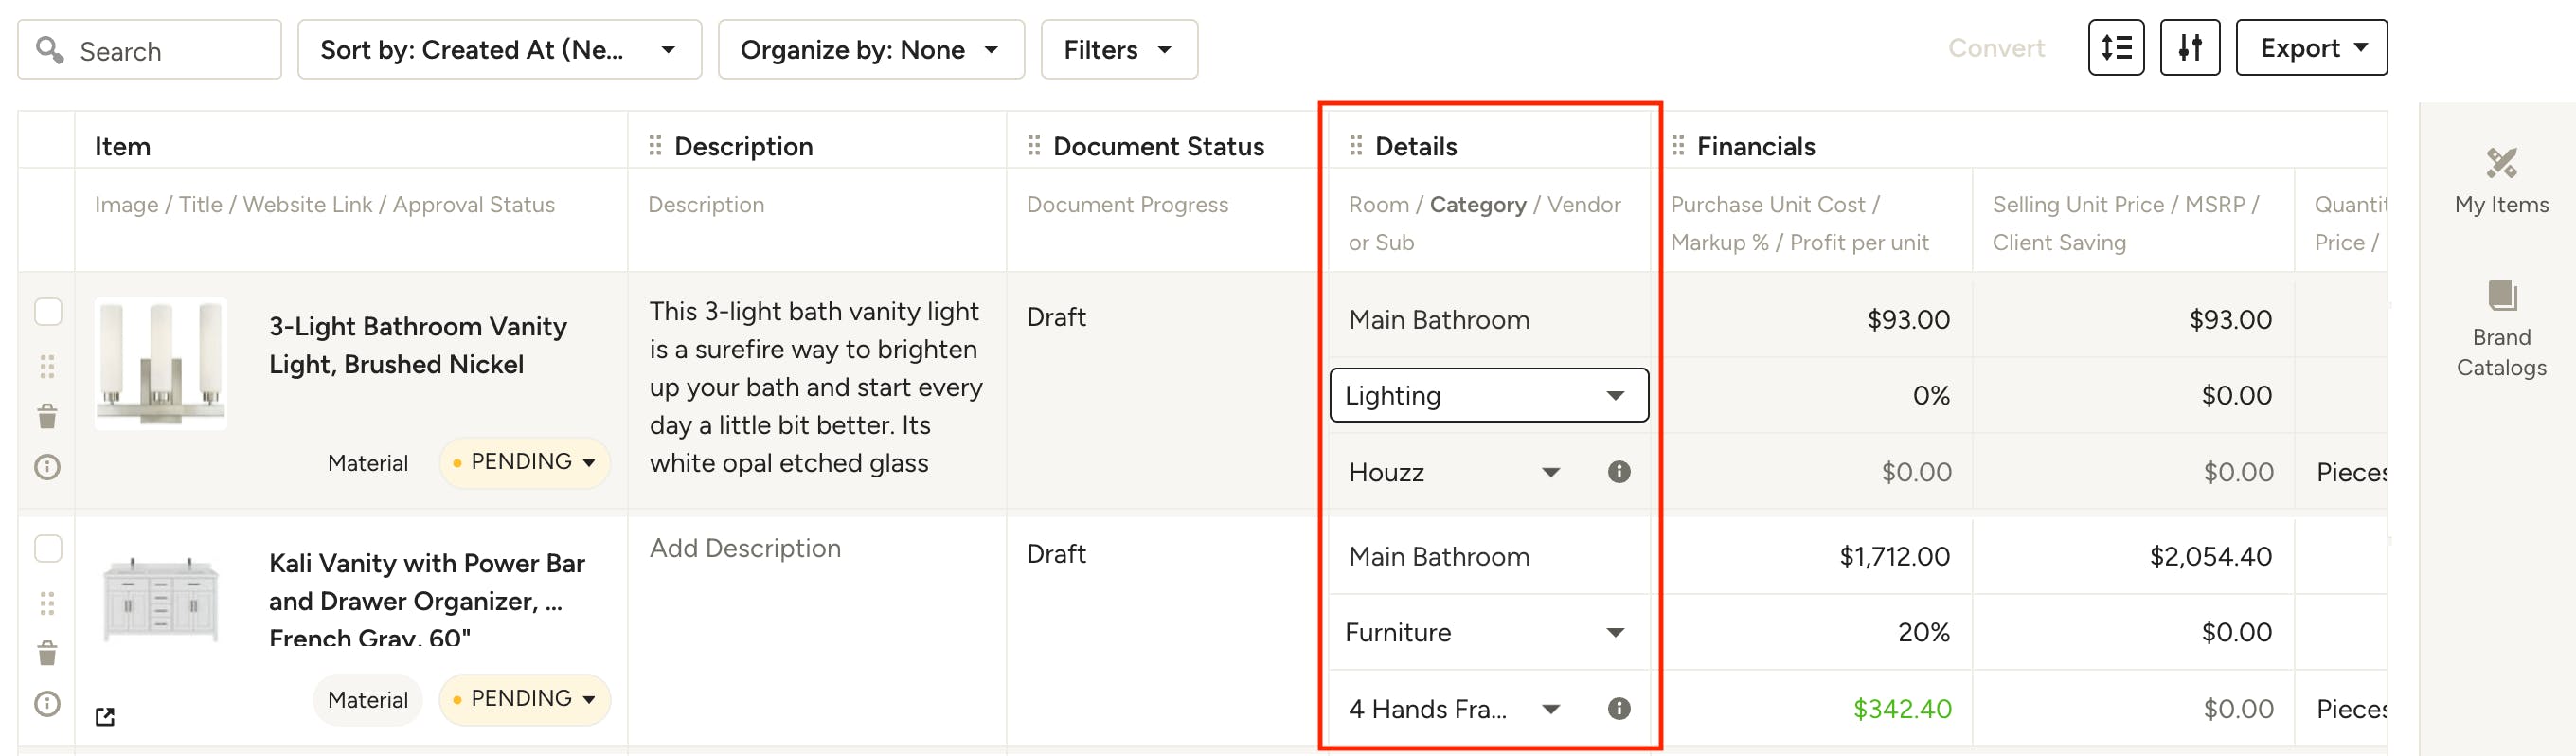
When you set up your categories, rooms, and vendors/subcontractors properly, the Selections Tracker becomes a multi-use tool that can replace spreadsheets, endless email threads, and scattered notes. Categories, rooms and vendors/subs, specifically, are the three most useful item details for sorting and filtering selections. When each item is assigned correctly from the start, the rest is a breeze. Categories can be managed from Company > Library > Categories, and assigned to items in My Items, as well as in the Tracker for draft items not yet in a document. Vendors and Subcontractors can also be managed from Company > Collaborators > Vendors / Subcontractors, and assigned to items in My Items, documents and the Tracker.
Pro Tip: When using the Clipper, take the extra second to assign your item to the appropriate category, vendor/sub and room where applicable. This small investment pays off for faster ordering, clearer communication, and fewer mistakes in the field.
Organize and Sort Your Selections
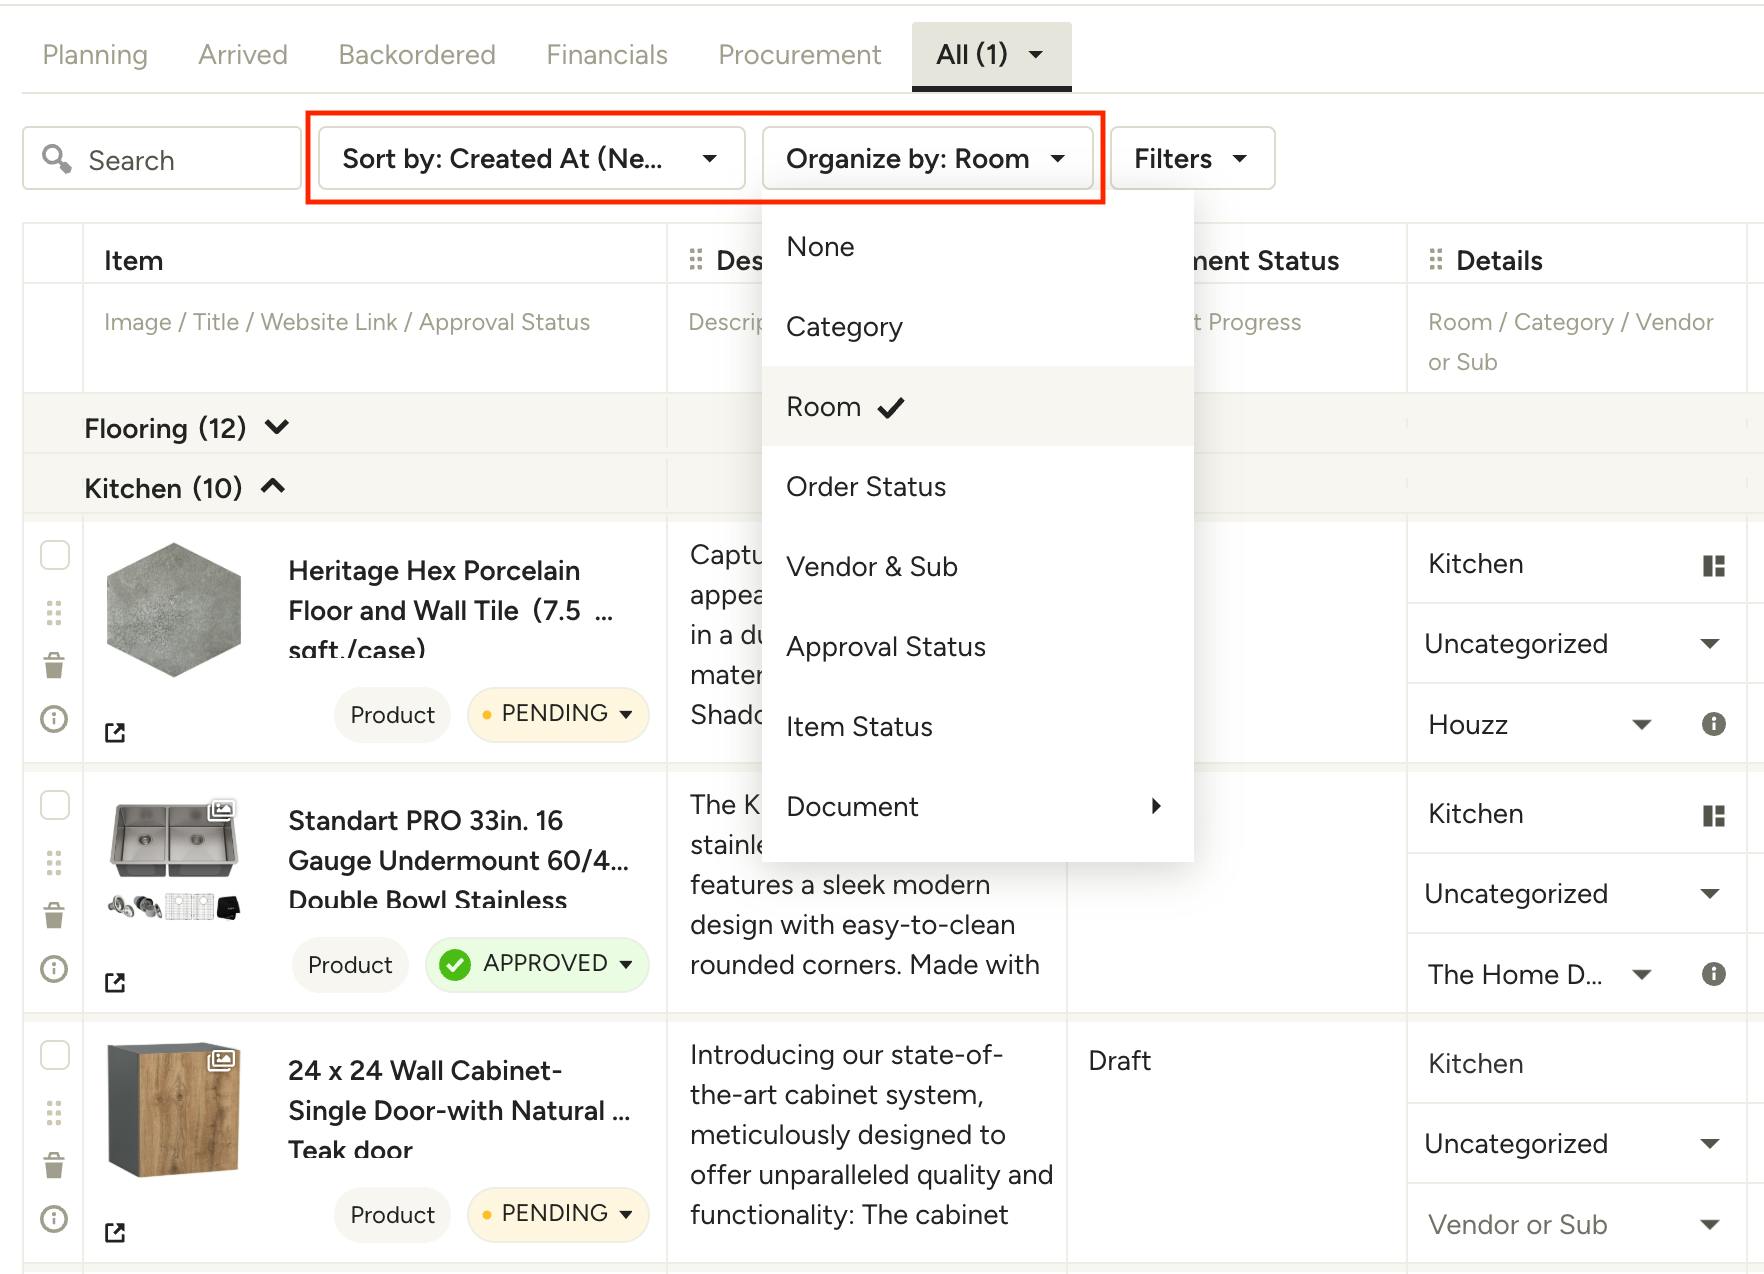
The Organize and Sort functions let you change the project view in just a click. If your details are set up properly, as mentioned above, the following organize and/or sort options can help you take full advantage of the Selections Tracker.
- By Room – See a birds-eye view of everything going into a specific room. Great for reviewing design consistency or confirming you haven’t missed any finishes.
- By Category – Sort by trade categories (plumbing, lighting, electrical, etc.) to review the project by scope of work.
- By Vendor – Quickly update order statuses after placing orders, or create a complete list of all vendors and what still needs to be purchased.
- By Approval Status – Instantly see what’s approved vs. still pending client sign-off.
Filter for Exactly What You Need
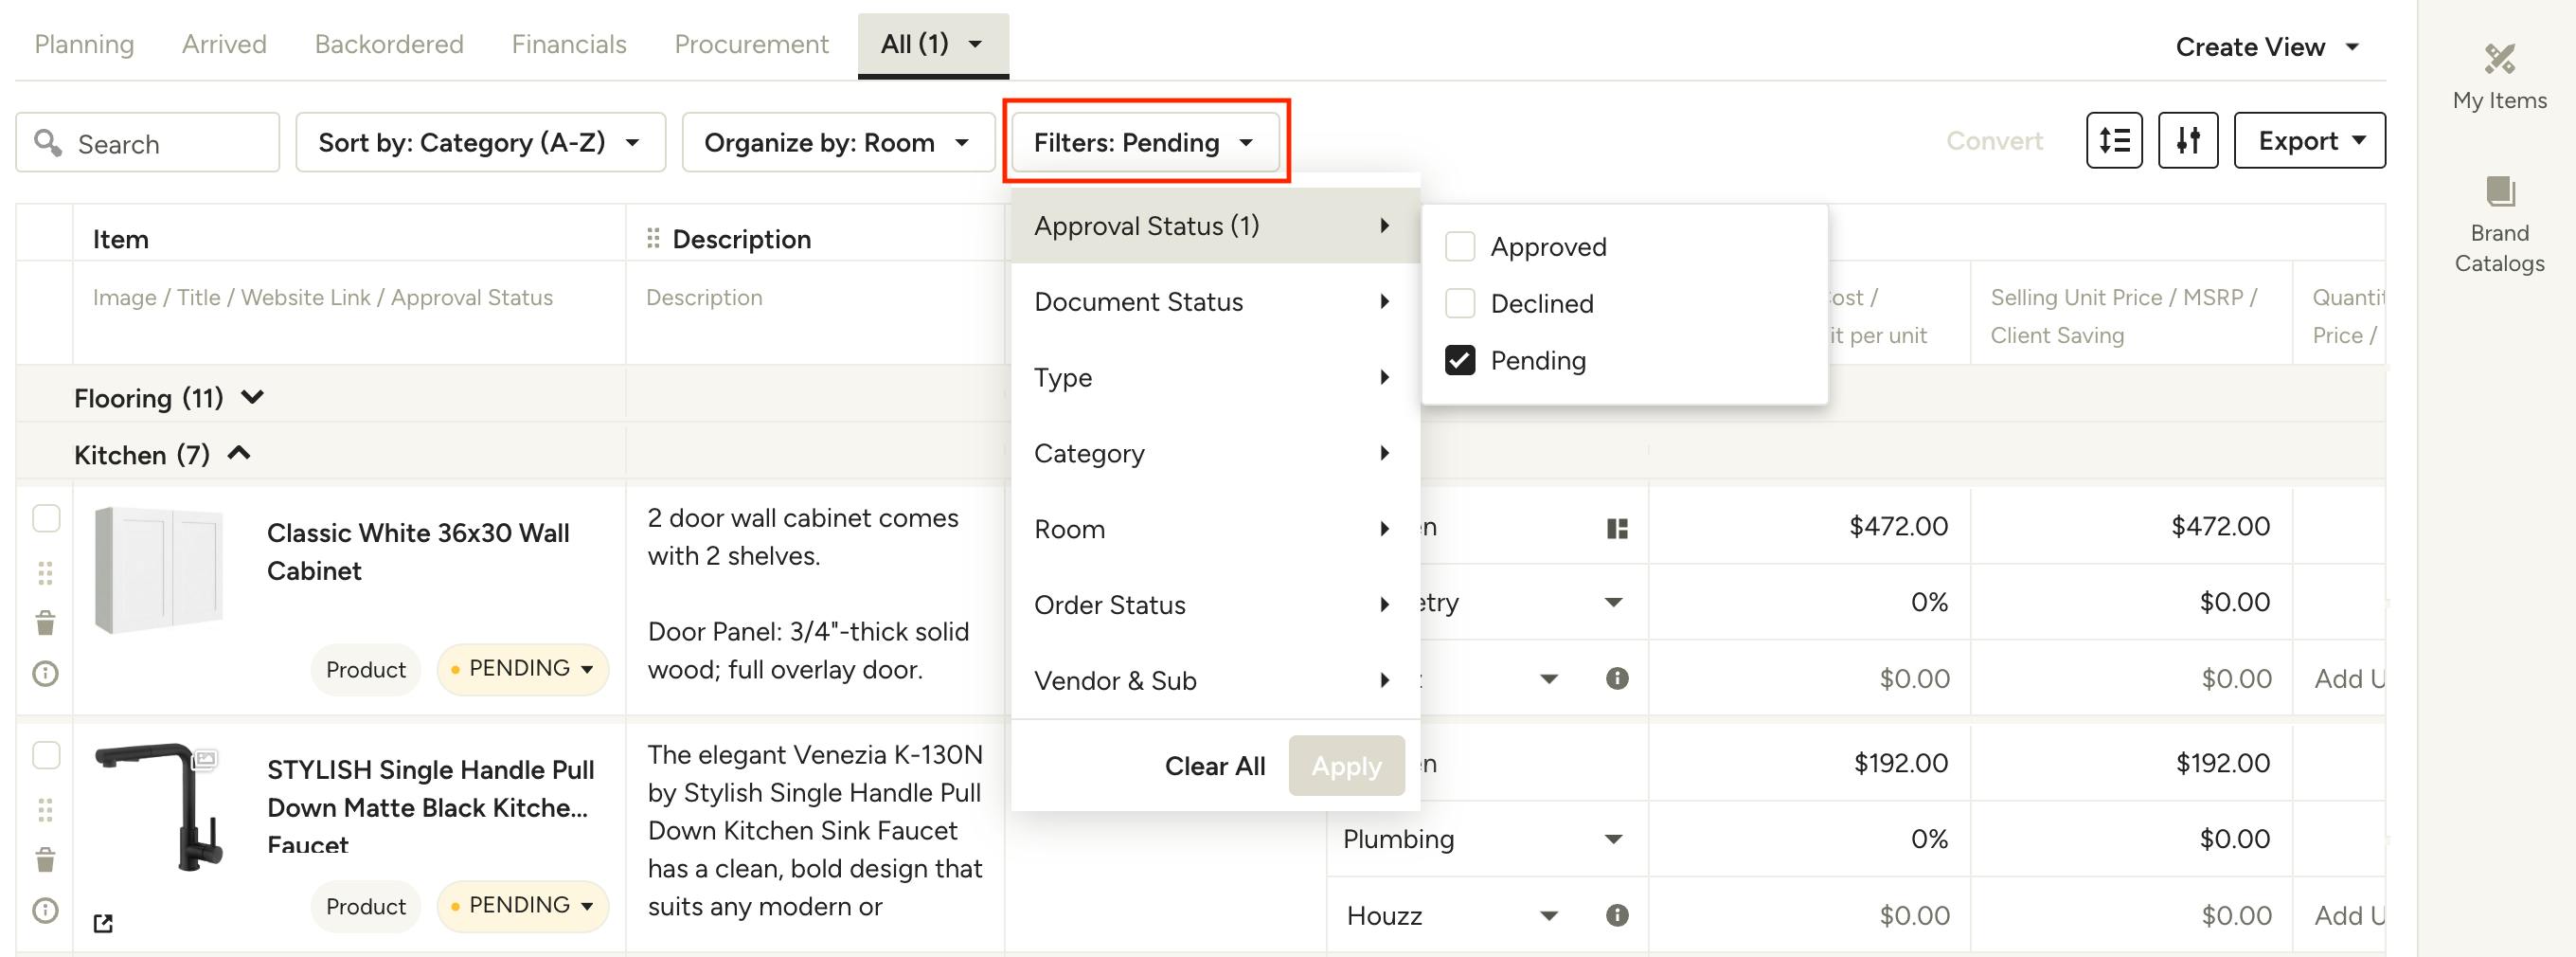
Filters are perfect when you only want to see a specific subset of items, either for internal use or for sharing certain items with relevant stakeholders. Here are a few examples of how filters in the Tracker can help with your workflow:
- Approved Items – Pull only approved selections so you can start ordering without second-guessing.
- Pending Items – See just the selections that still need client approval.
- Document Status – Check which items have purchase orders sent or invoices created (or still need them).
- Type – View only materials, only labor, or only products that need to be ordered or scheduled.
- Category – Generate trade-specific schedules for your field crew. For example, export all plumbing fixtures for the plumber or all tile for the tile installer.
- Room – Share room-specific selections with subcontractors on site.
- Order Status – Quickly batch and view what’s ordered, what’s not, and what’s backordered.
- Vendor – Focus on everything you need from a single vendor to streamline ordering.
Add Key Details and Custom Fields
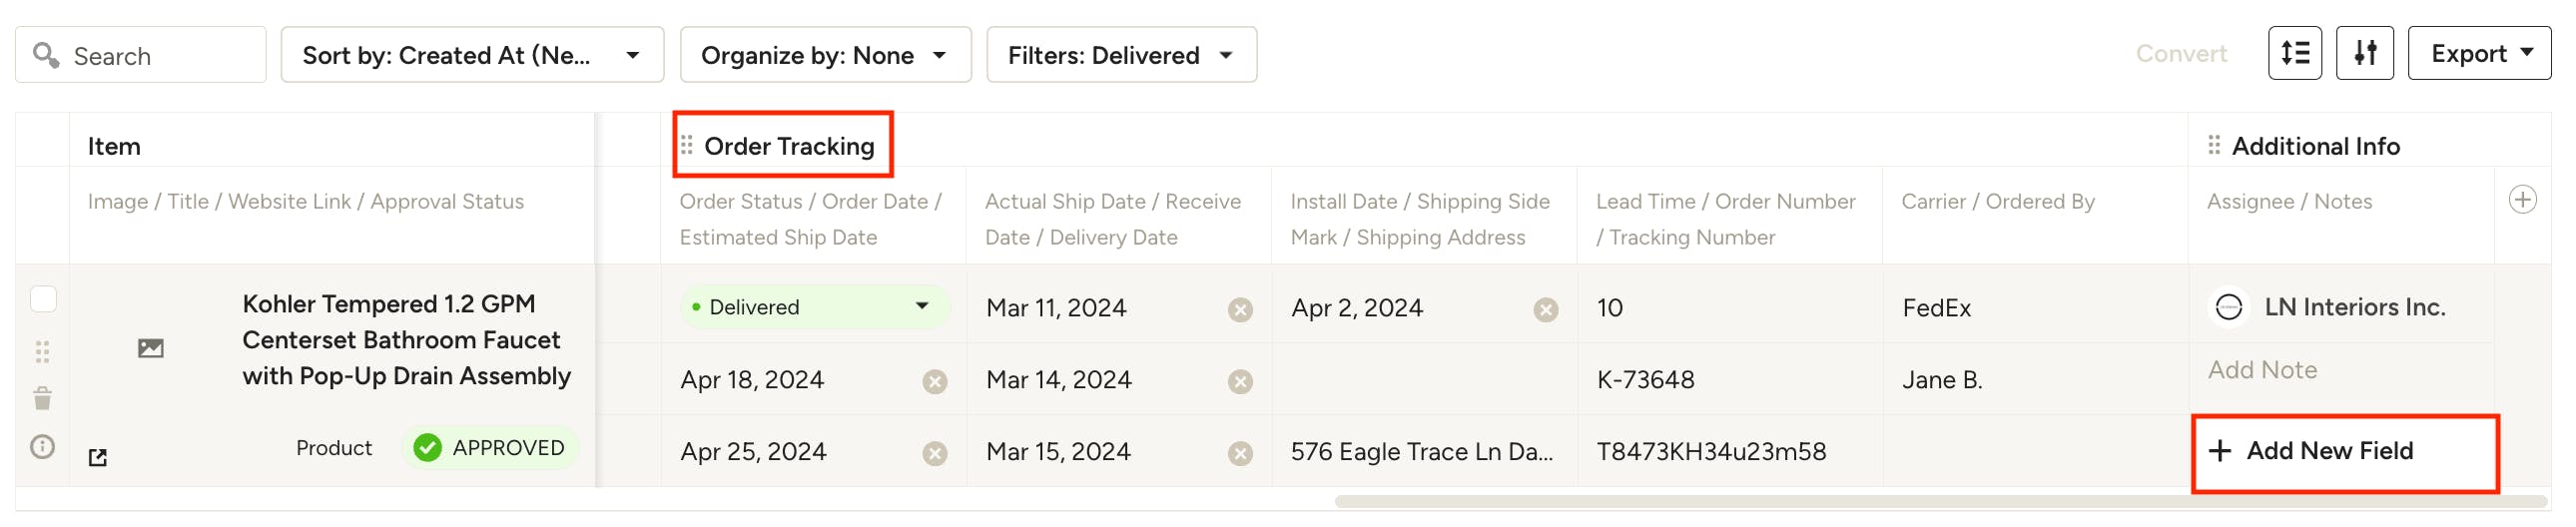
The tracker isn’t just for you — it’s a tool for your whole team, from project managers to subs and field crew. To make it the source of truth that everyone can reference, from planning to procurement and installation, make sure you fill out relevant item details and take advantage of custom field options. Here are a few ideas:
- Use Custom Fields – Add details like installation heights, locations, grout colors, or lay patterns. Subs can use this during install to make sure nothing is missed.
- Add Direct Links & Product SKUs – Make procurement faster and reduce ordering mistakes.
- Update Tracking Info – Log shipping and delivery details so your whole team knows the status.
Create Field-Ready Finish Schedules
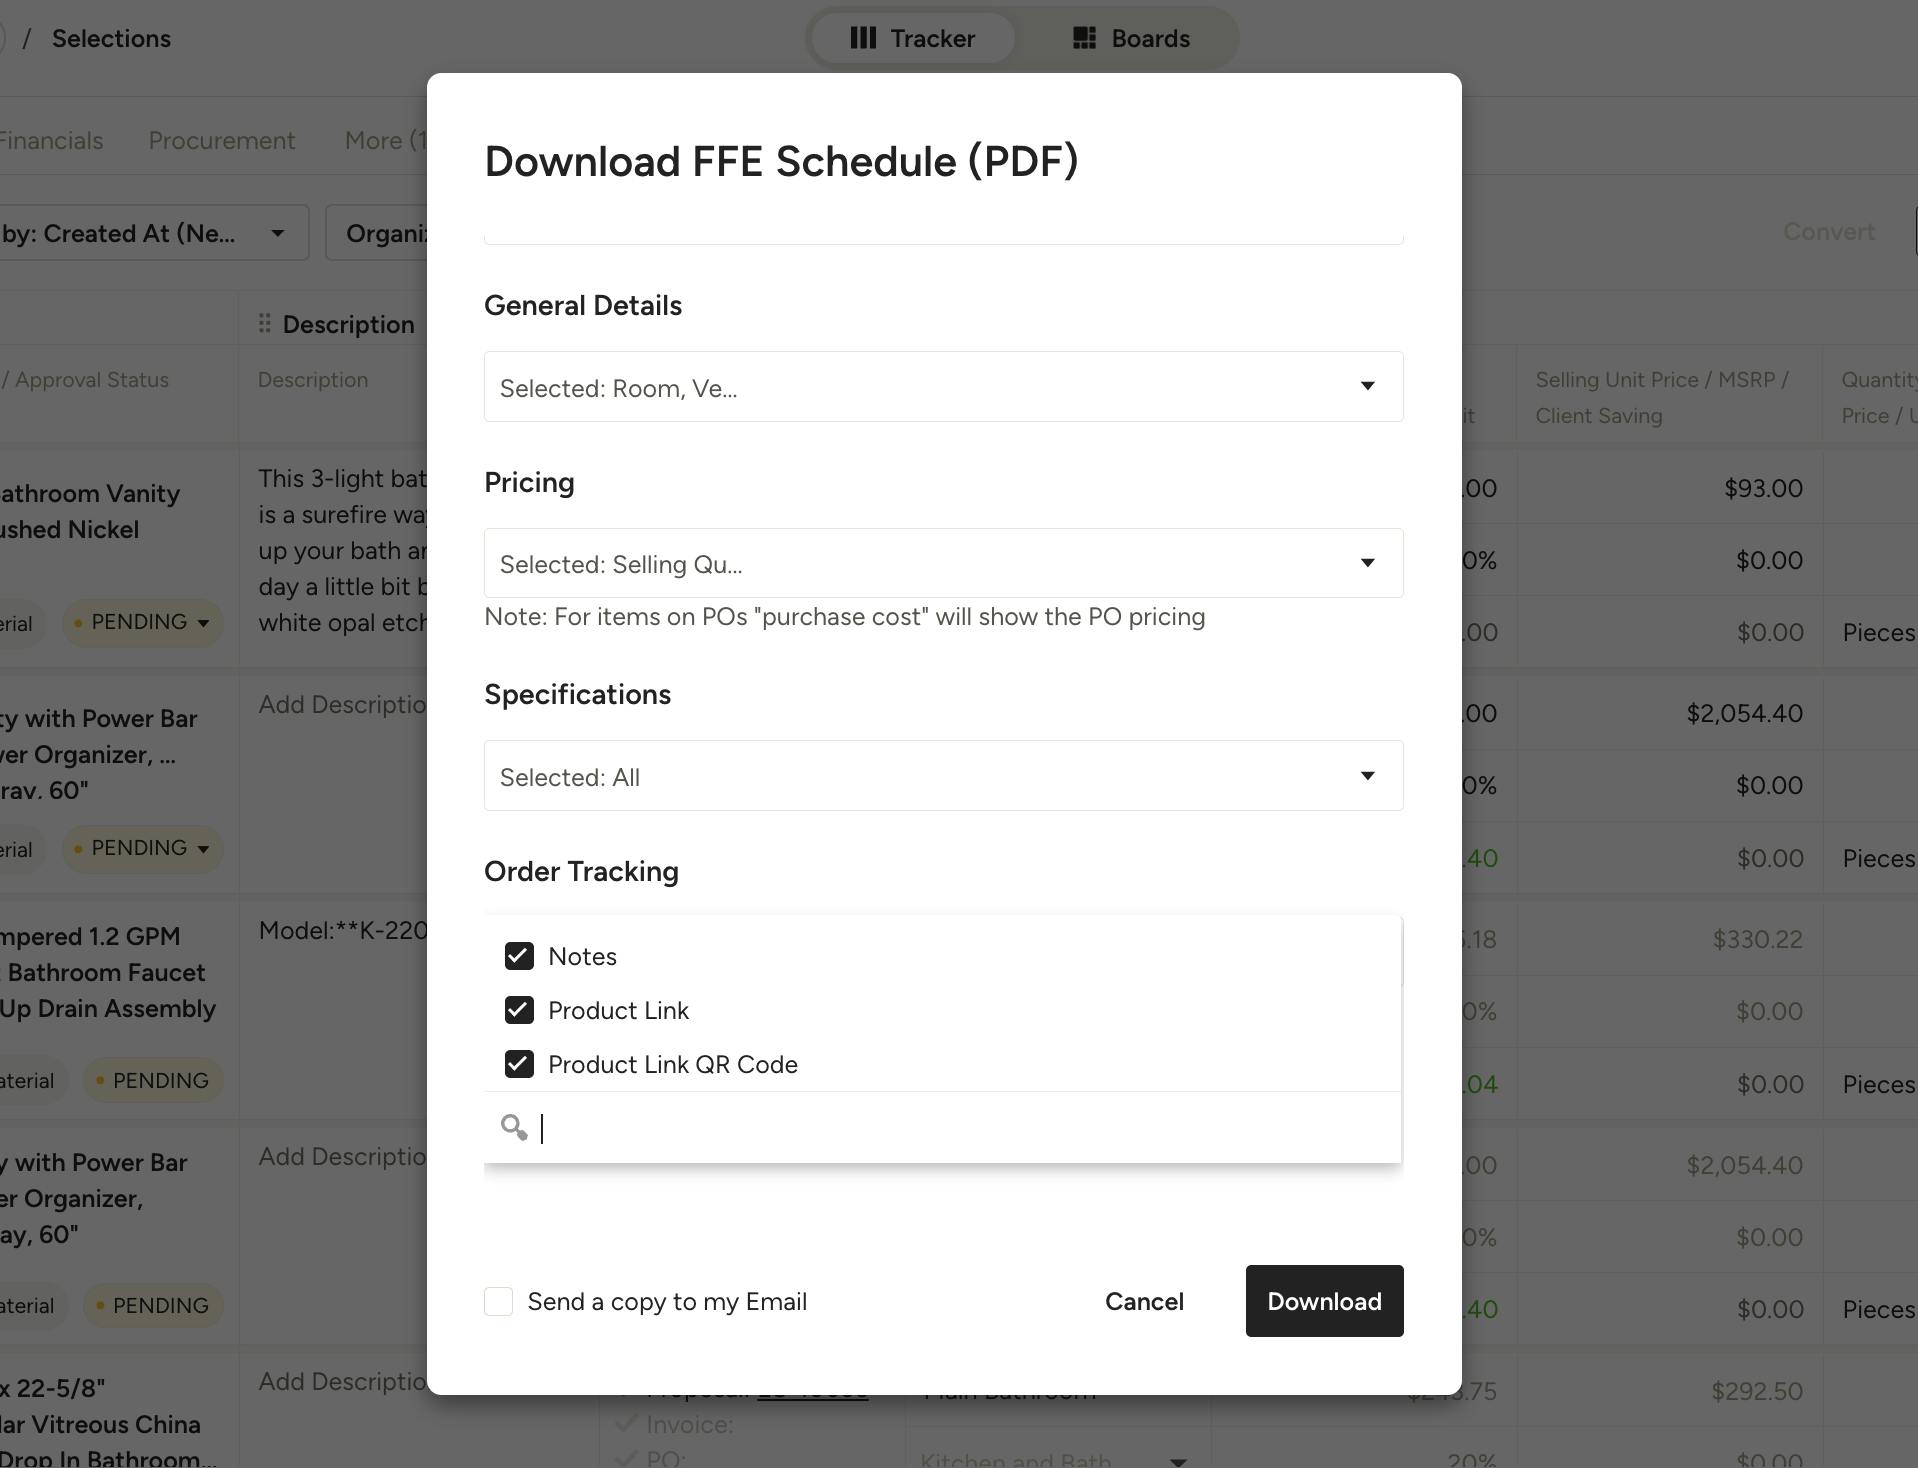
For subcontractors and field crew working on-site, you can easily export items from your Tracker to FF&E, or finish schedules, either in digital format or physical printouts. You can customize exactly what to include or exclude based on what you want to share, such as pricing, ordering, or spec data. Here are a few details to consider including in your export:
- Product Images – Ensure everyone sees exactly what’s being installed before the wrong product gets installed by mistake.
- Direct Links & QR Codes – Let subs access manufacturer installation guides by clicking a link on a digital PDF or scanning a QR code from a printout.
- Install Notes– Any custom fields or notes relevant to the item placement or install, like height, location, grout colors, or lay patterns, will help ensure a smooth project.
Track Costs and Profitability
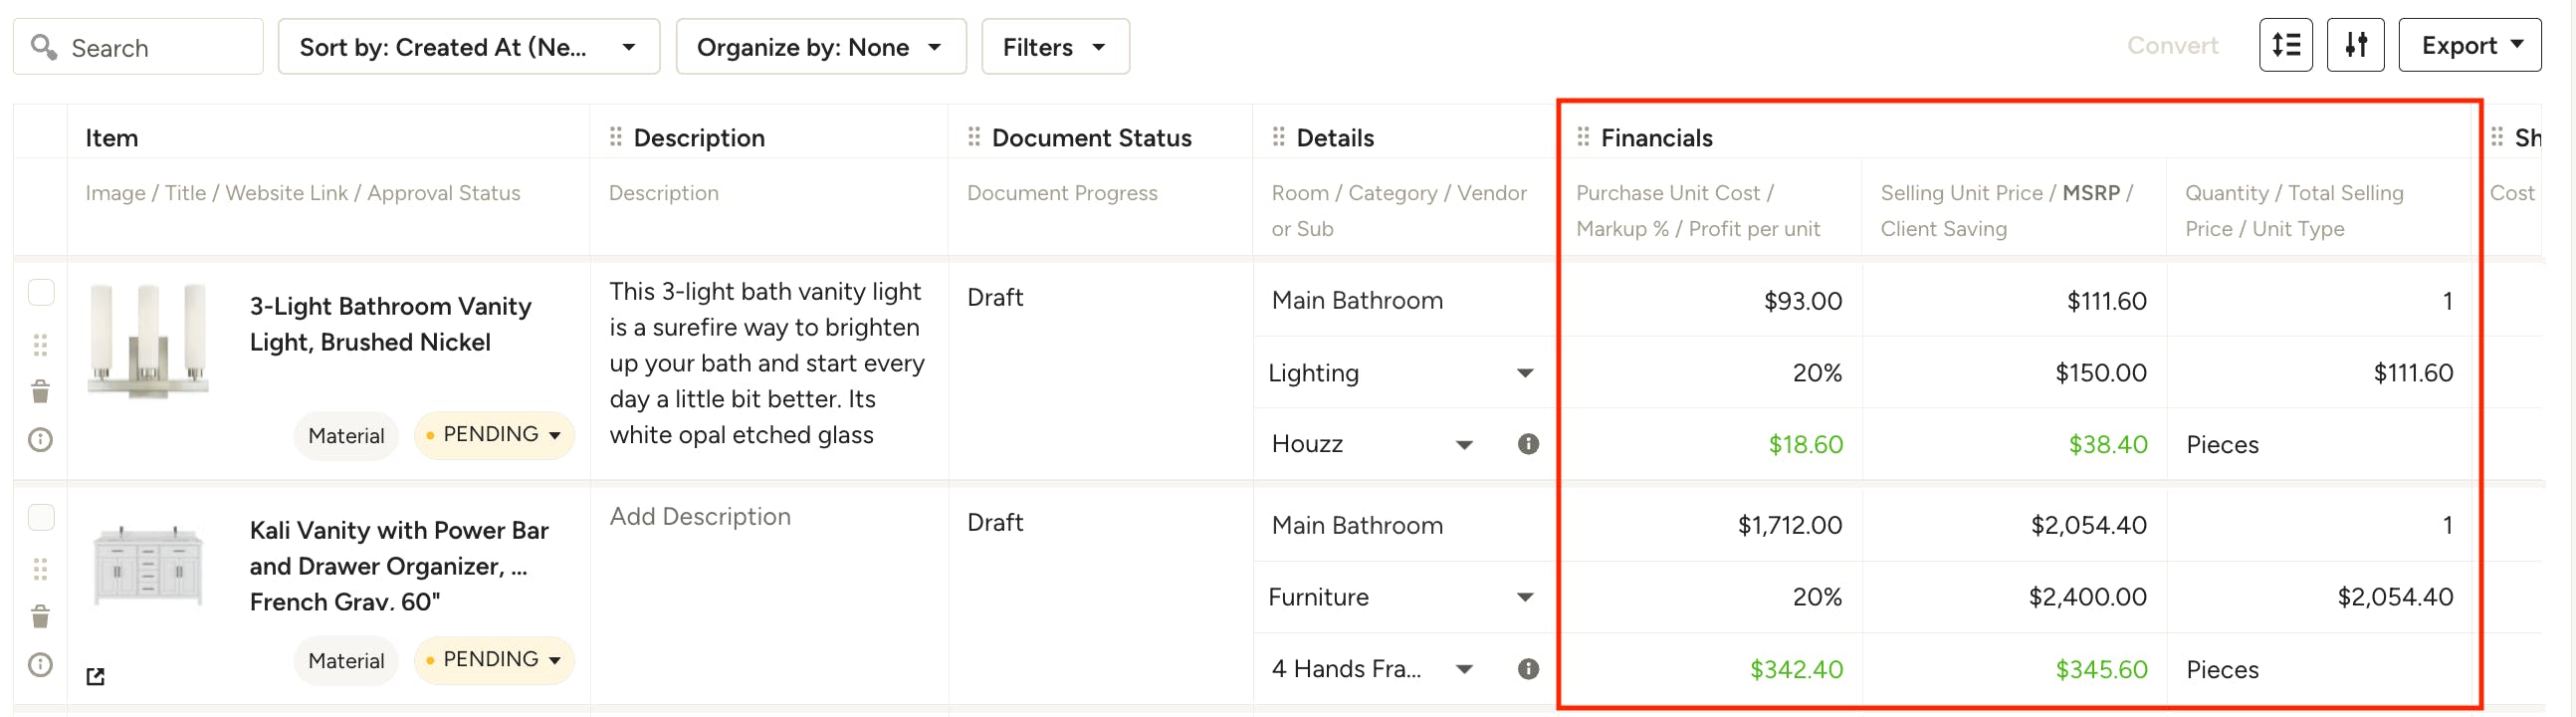
The Selections Tracker can also help you keep an eye on the numbers.
- Check/Edit Markup – Quickly view markup and make necessary changes across multiple items before client approval.
- Cost Review – See profit per unit and compare total selling price vs. cost.