How to Create Purchase Orders on the Mobile App
On the Houzz Pro mobile app, you can create purchase orders to order products, materials, and services from vendors or subcontractors, whether you're at the jobsite, in the office, or on-the-go. You can also keep track of each item's order status and billing. Follow the steps in this tutorial to create a purchase order on the app.
Purchase orders on the mobile app are currently for iOS only.
Please Note: You can only create a purchase order from scratch on the mobile app. Purchase Orders cannot be created directly from an estimate, proposal or invoice, from a template, or using AI on the mobile app — this will need to be done on desktop.
Create New Purchase Order
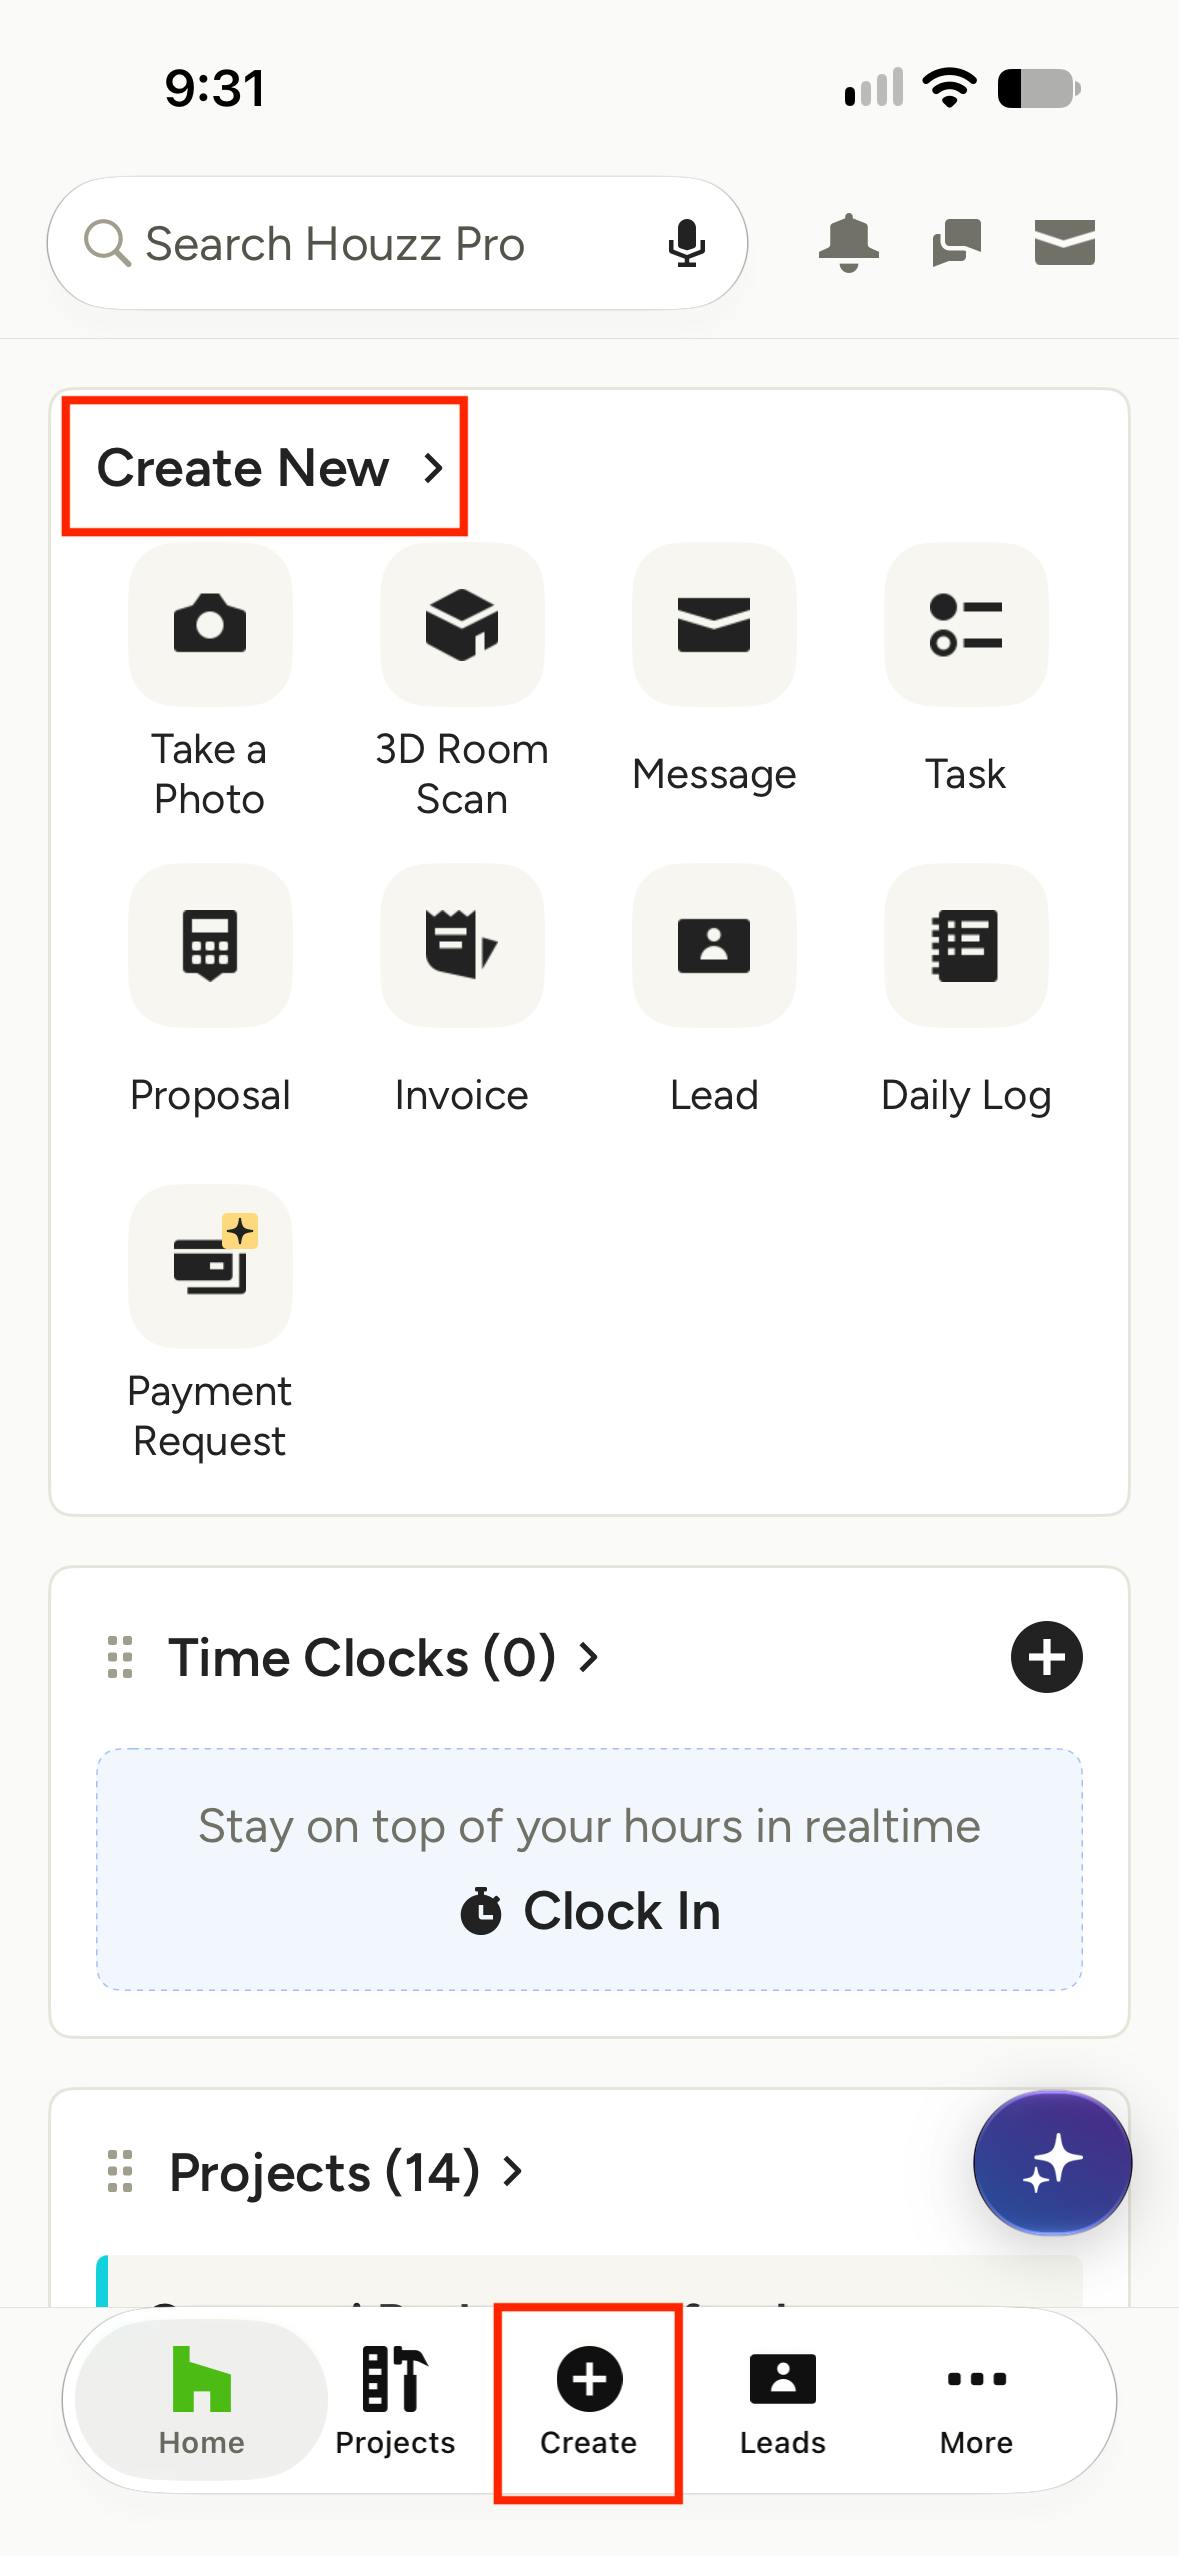
To create a new purchase order, go to the app homepage, then select then select Create New from either the top or bottom of the homepage.
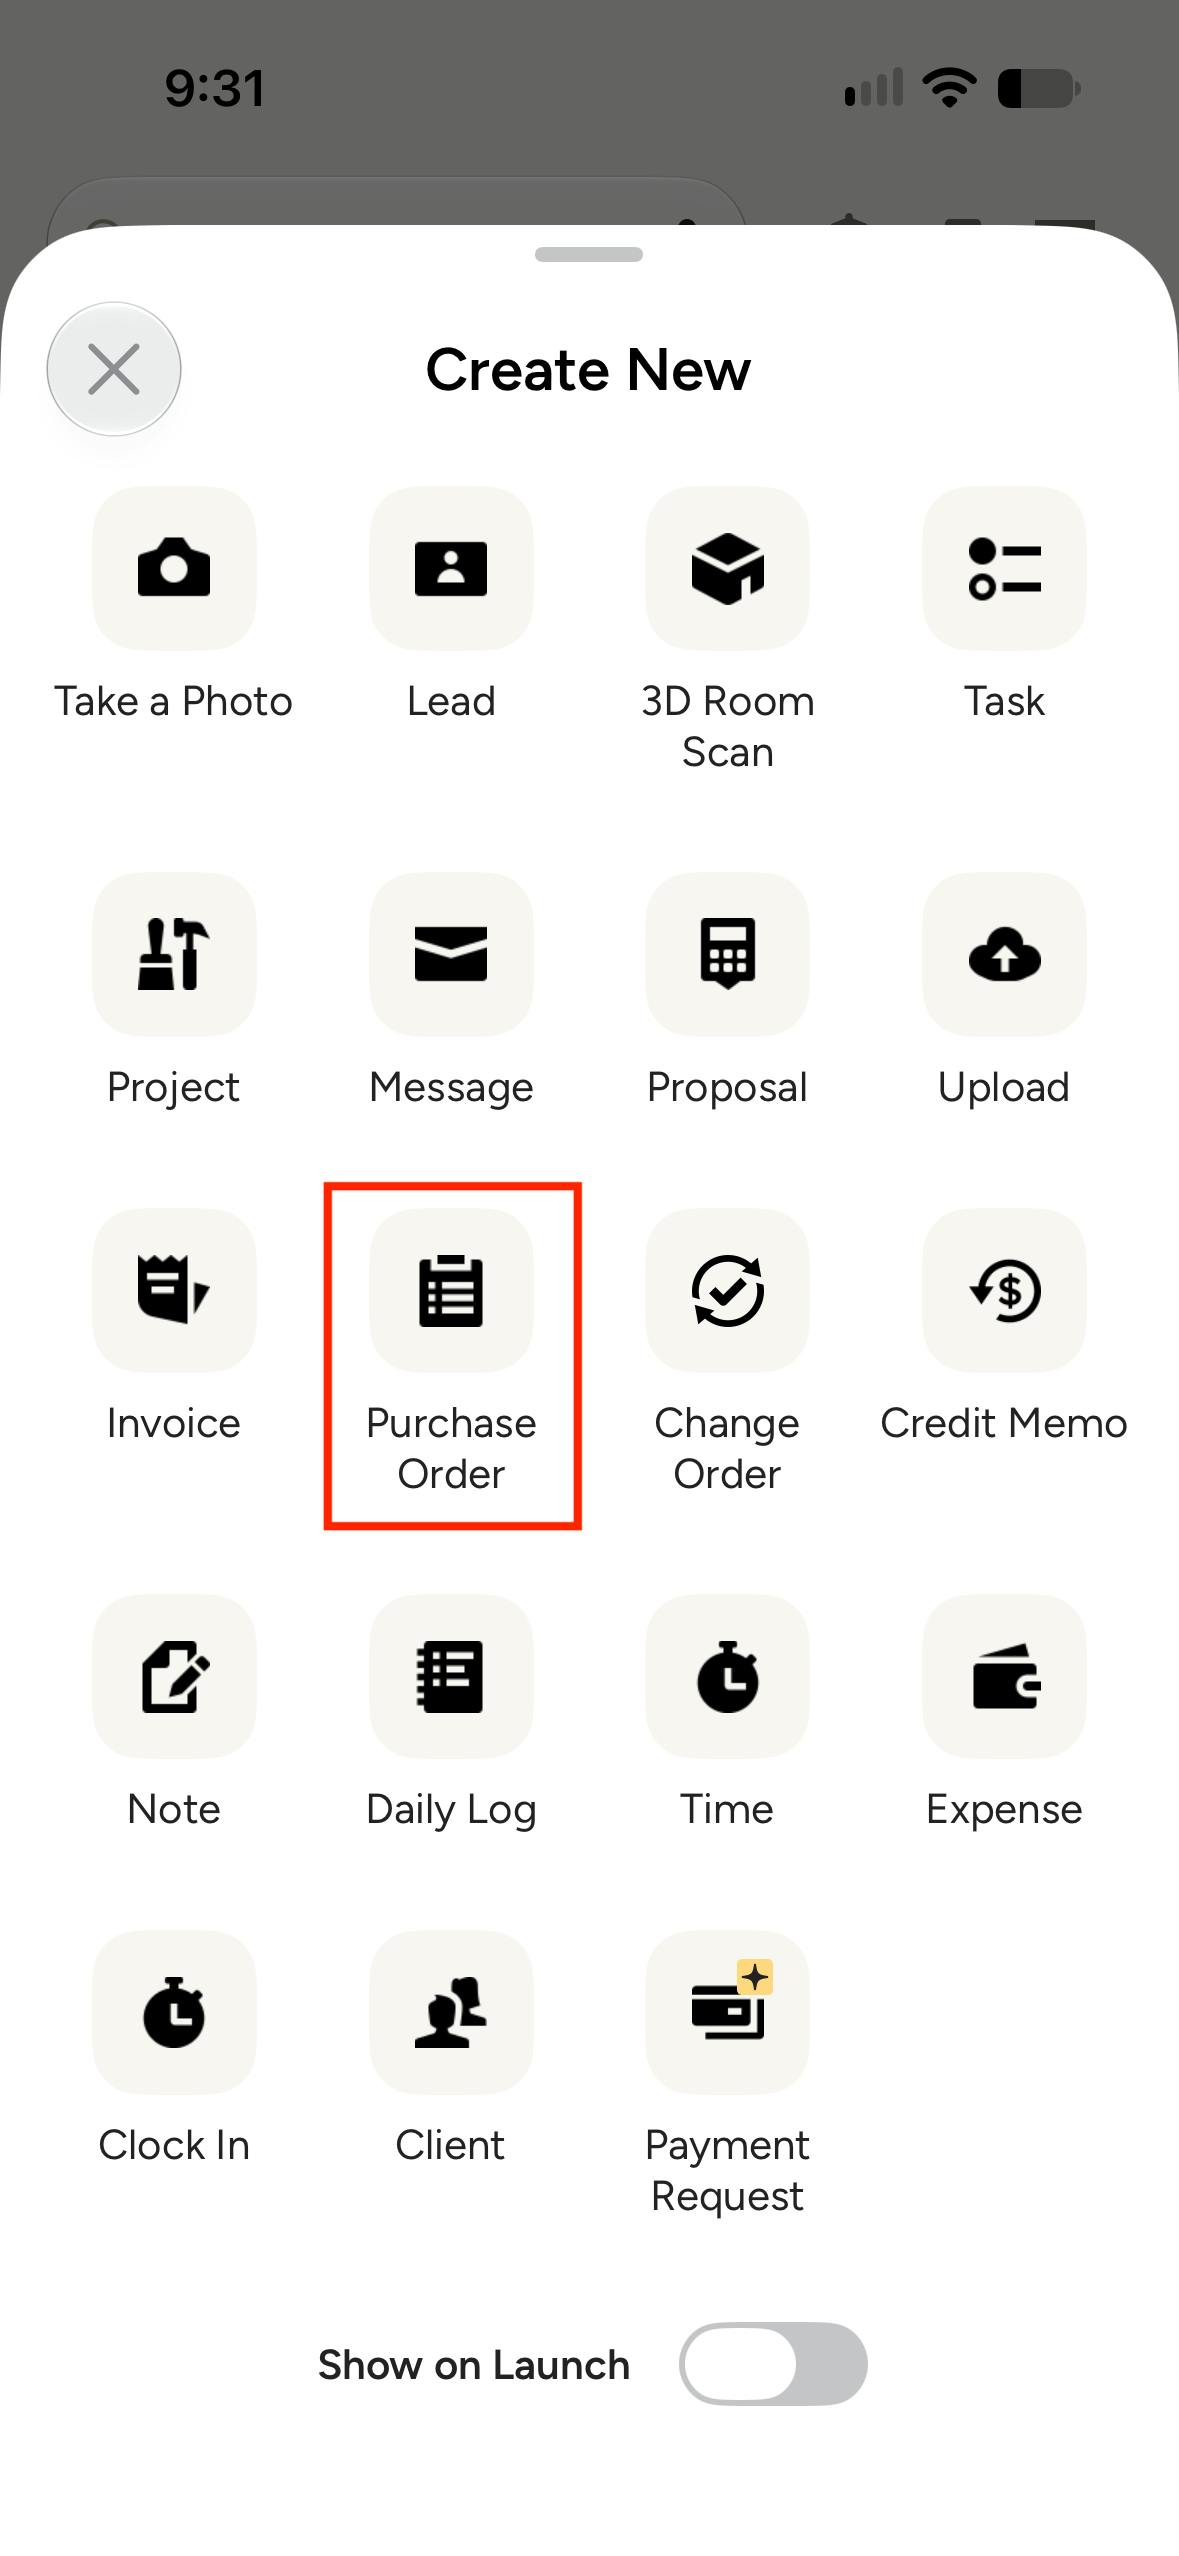
Select Purchase Order from the Create New menu.
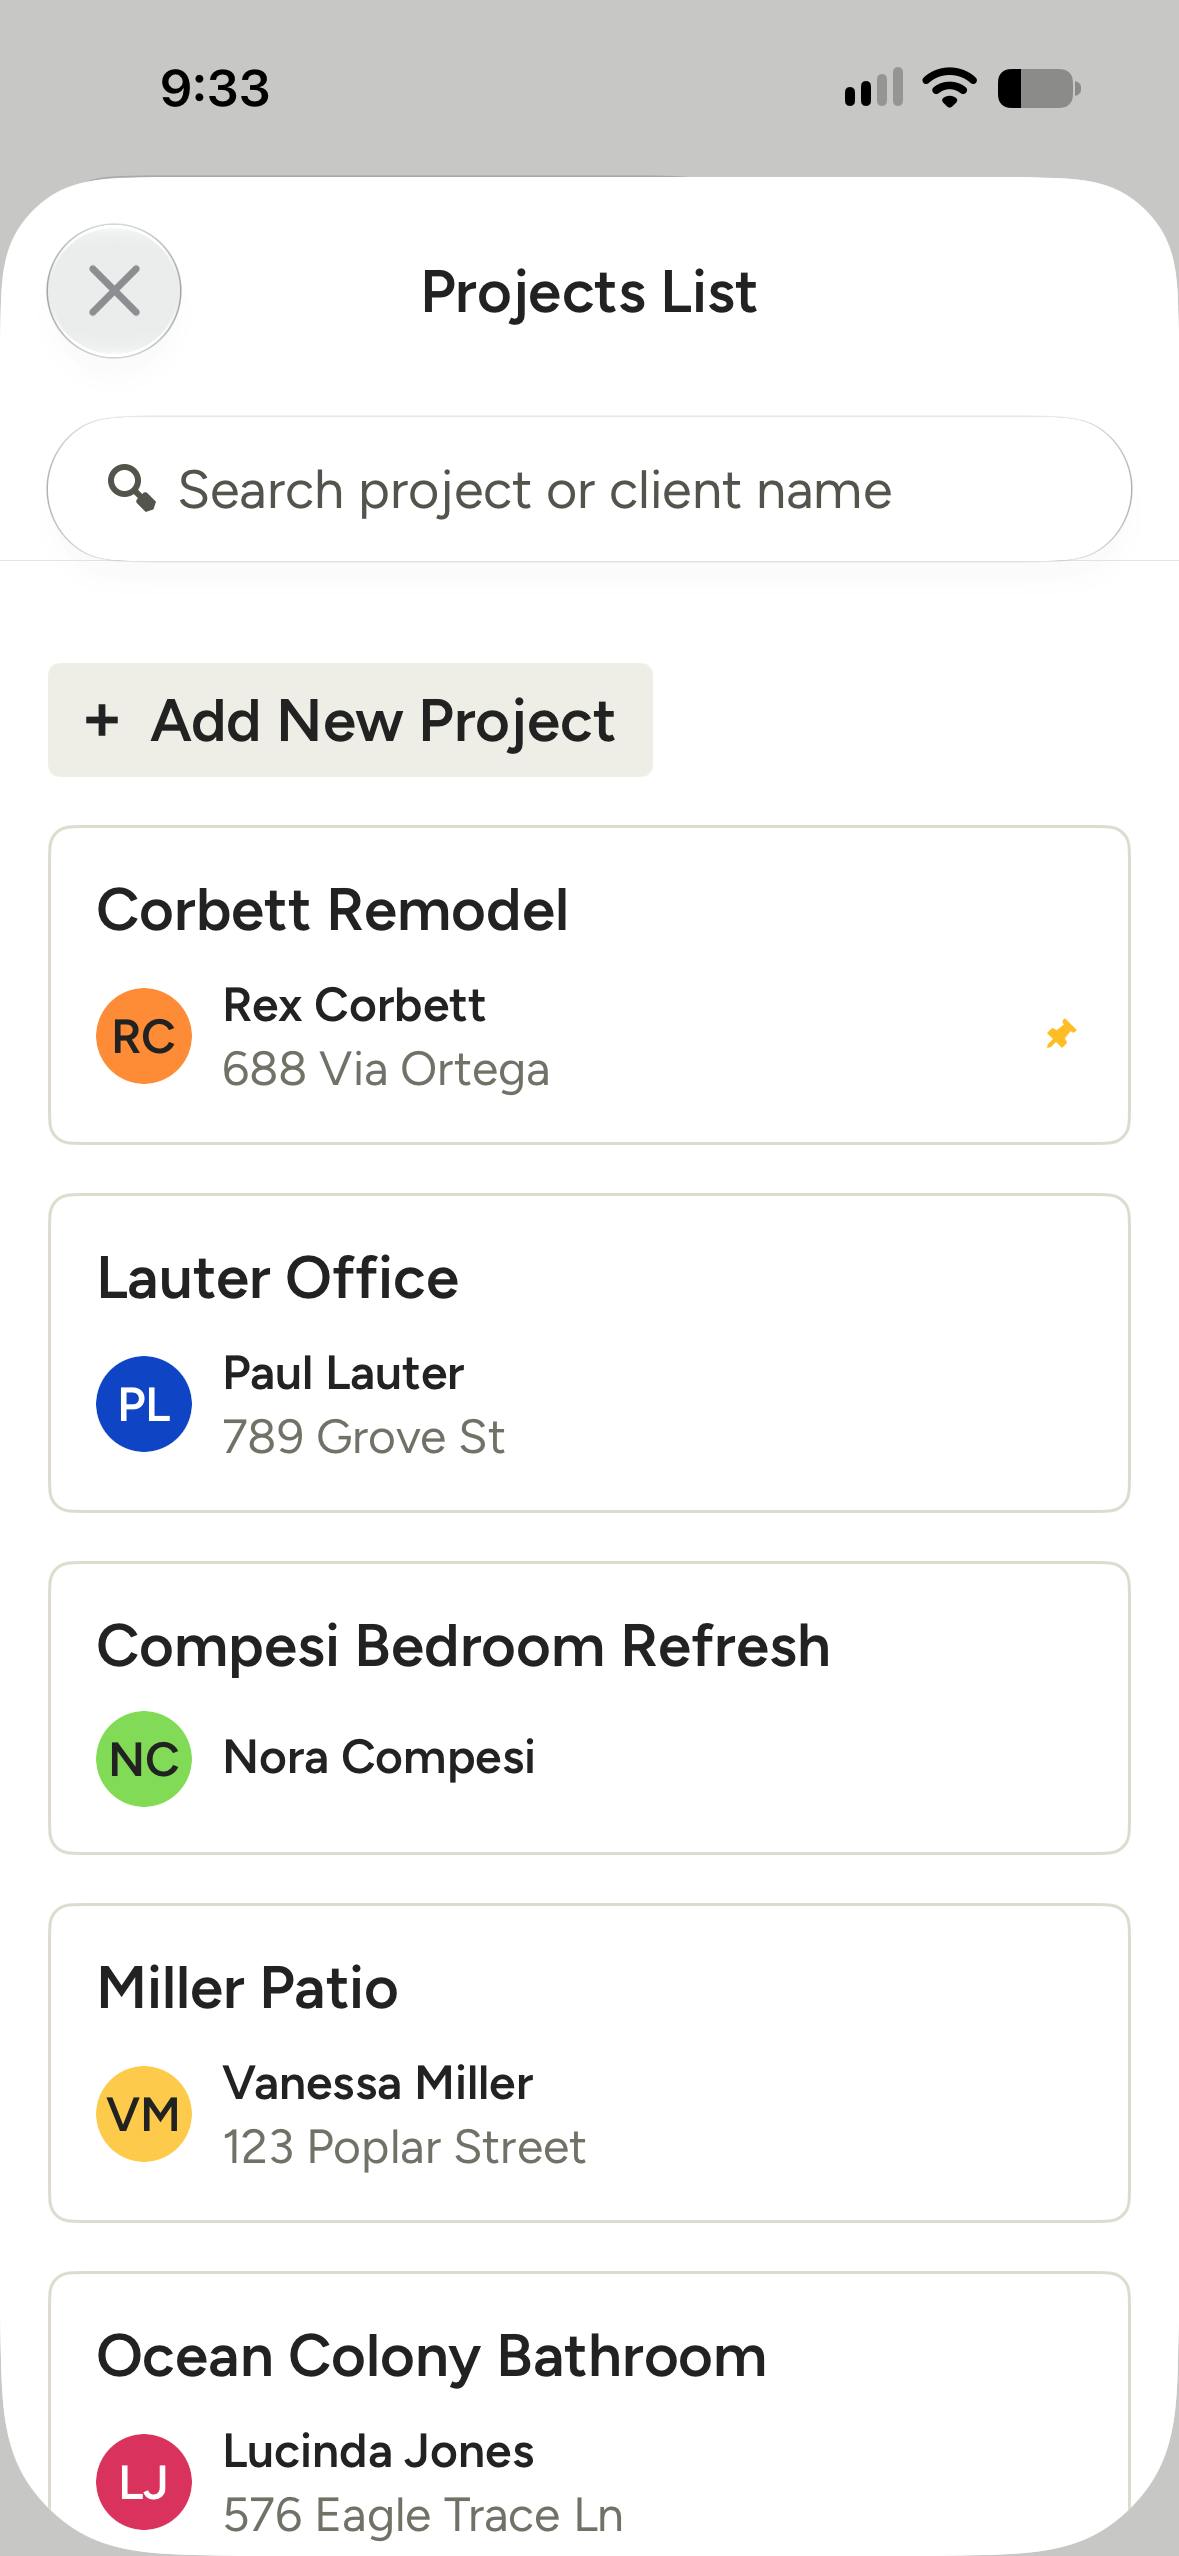
Next, choose an existing project from your list, or select Add New Project to create a new one for this purchase order.
Select a Vendor or Subcontractor
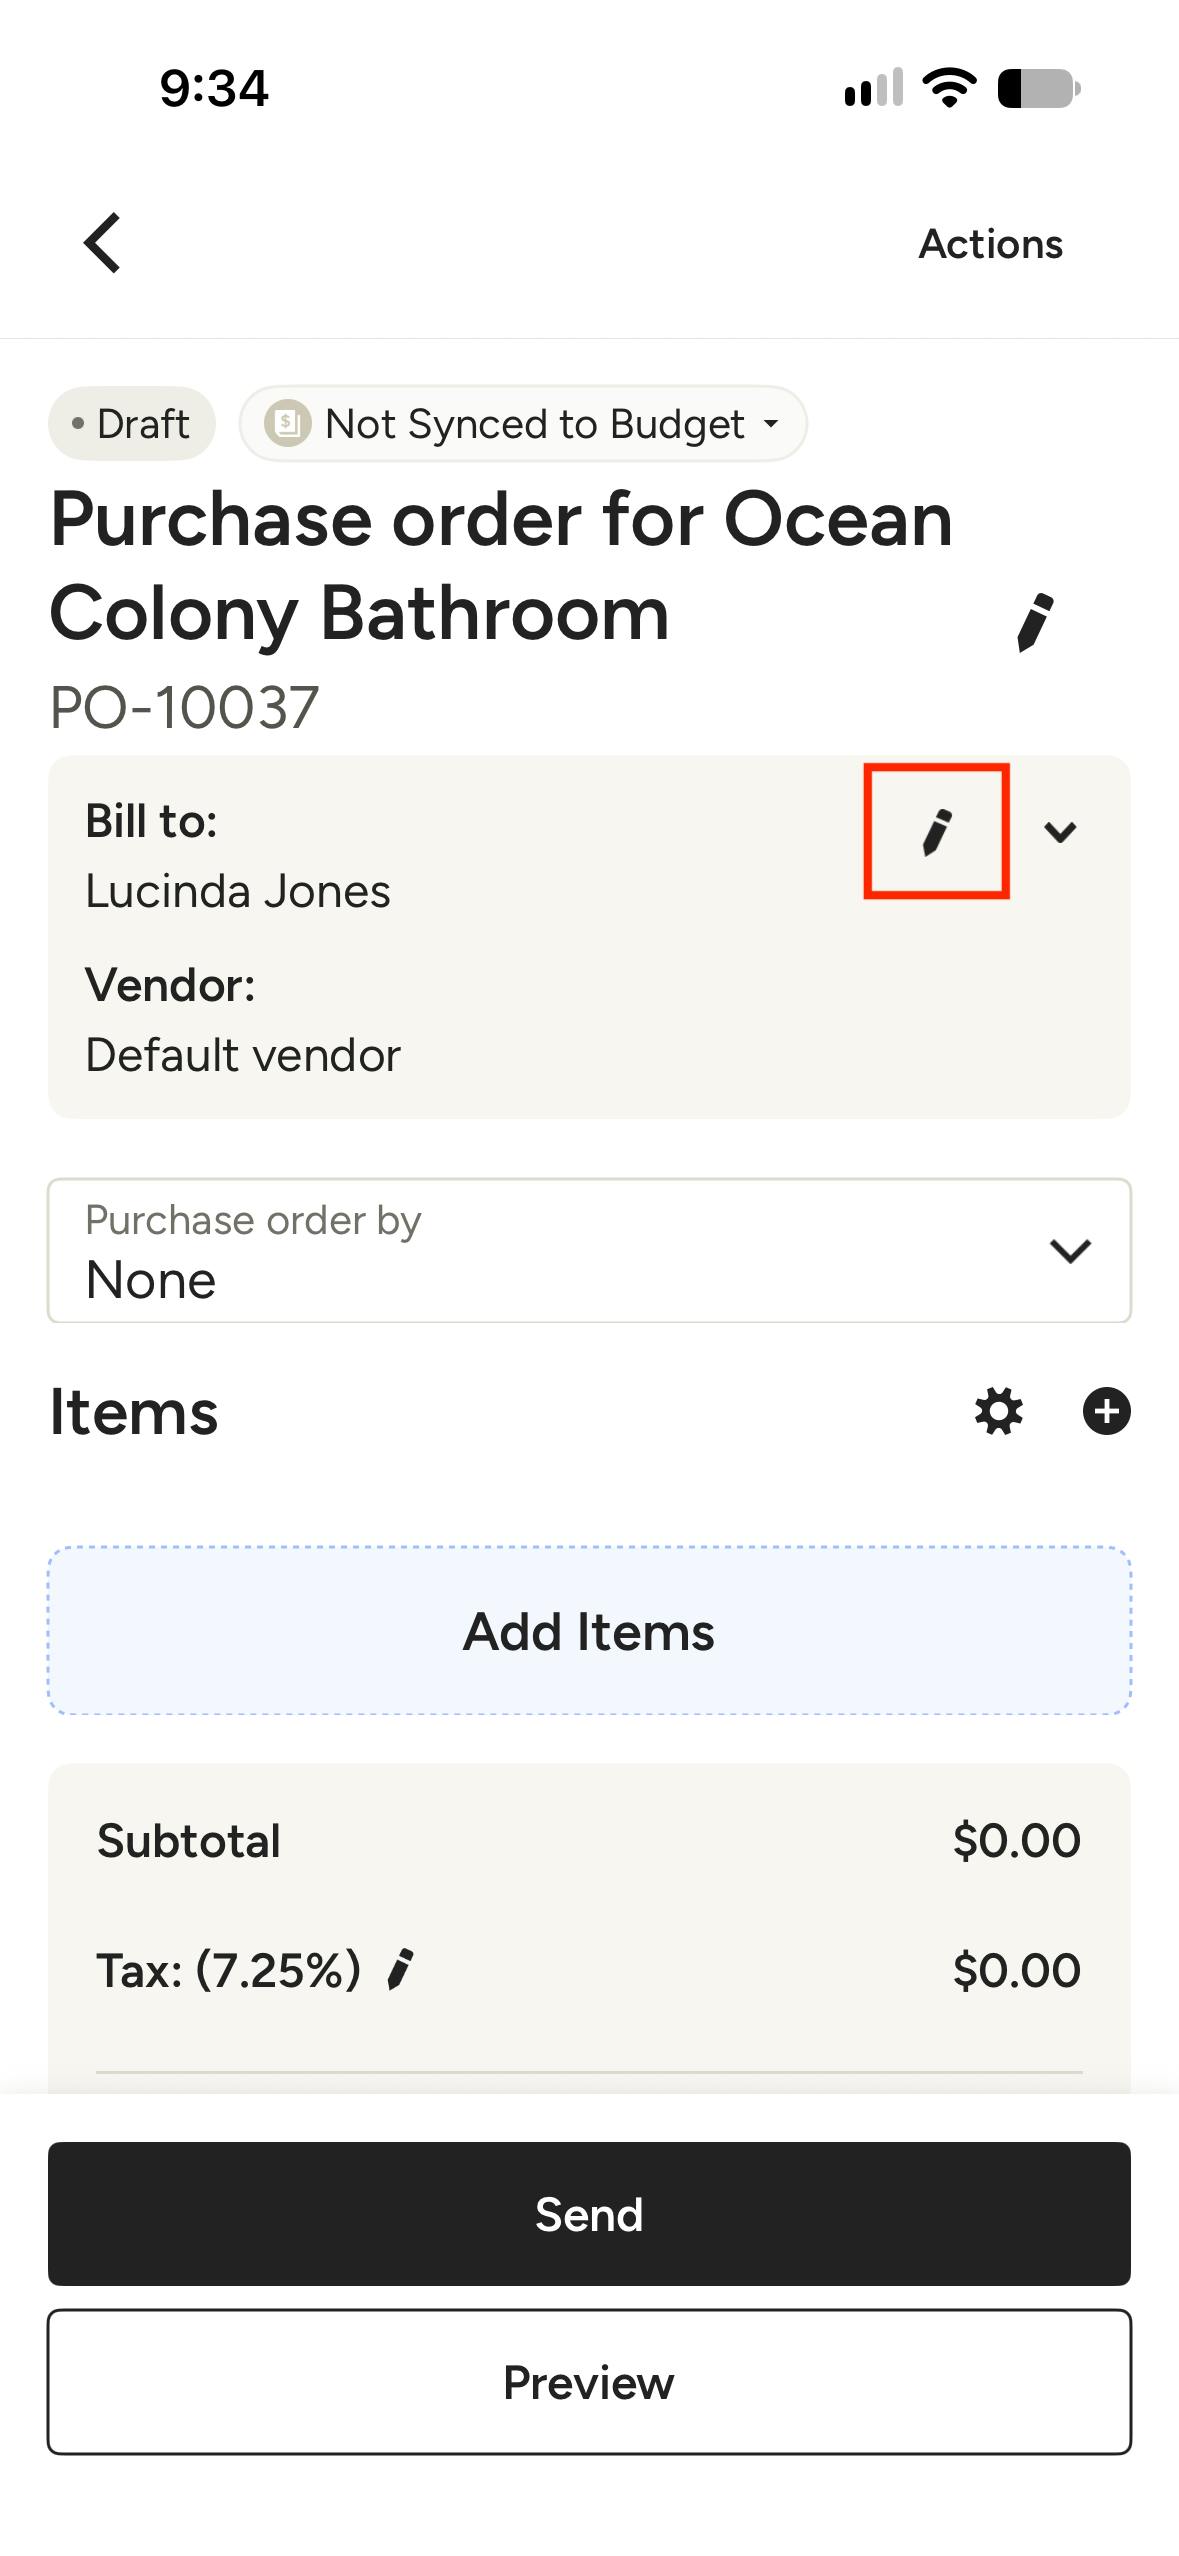
Next, you'll need to select a vendor or subcontractor for the purchase order. Tap the edit icon in the Ship To/Vendor section.
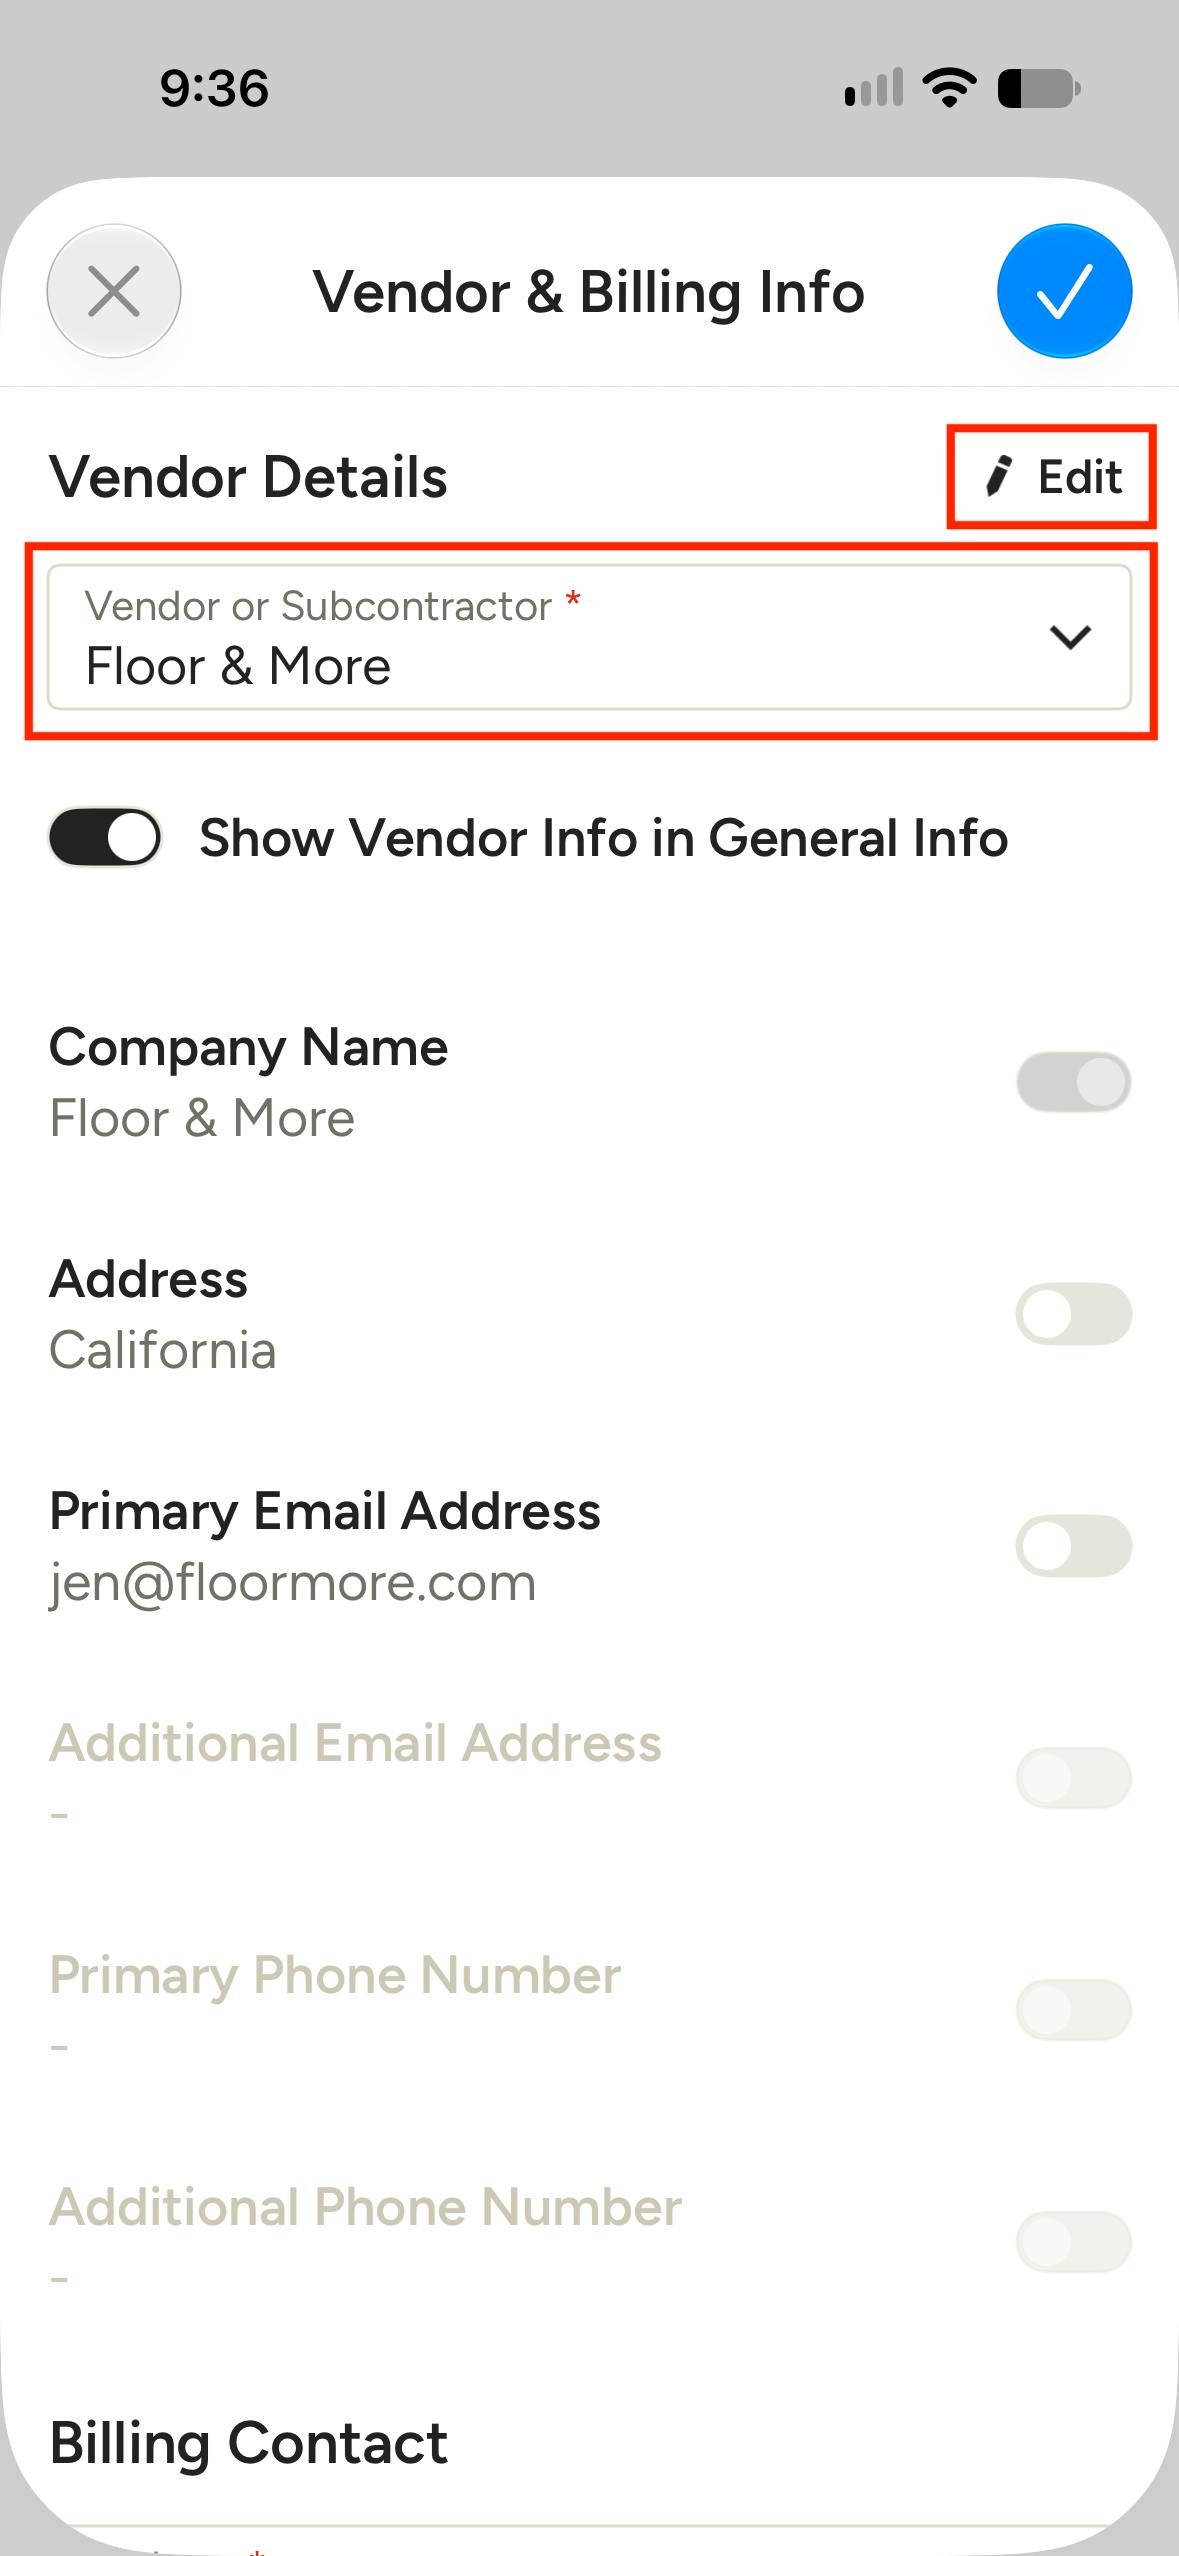
Use the Vendor or Subcontractor dropdown to search by name or select from your list. This auto-populates their information, which you can edit directly on the purchase order by tapping Edit within the current screen.
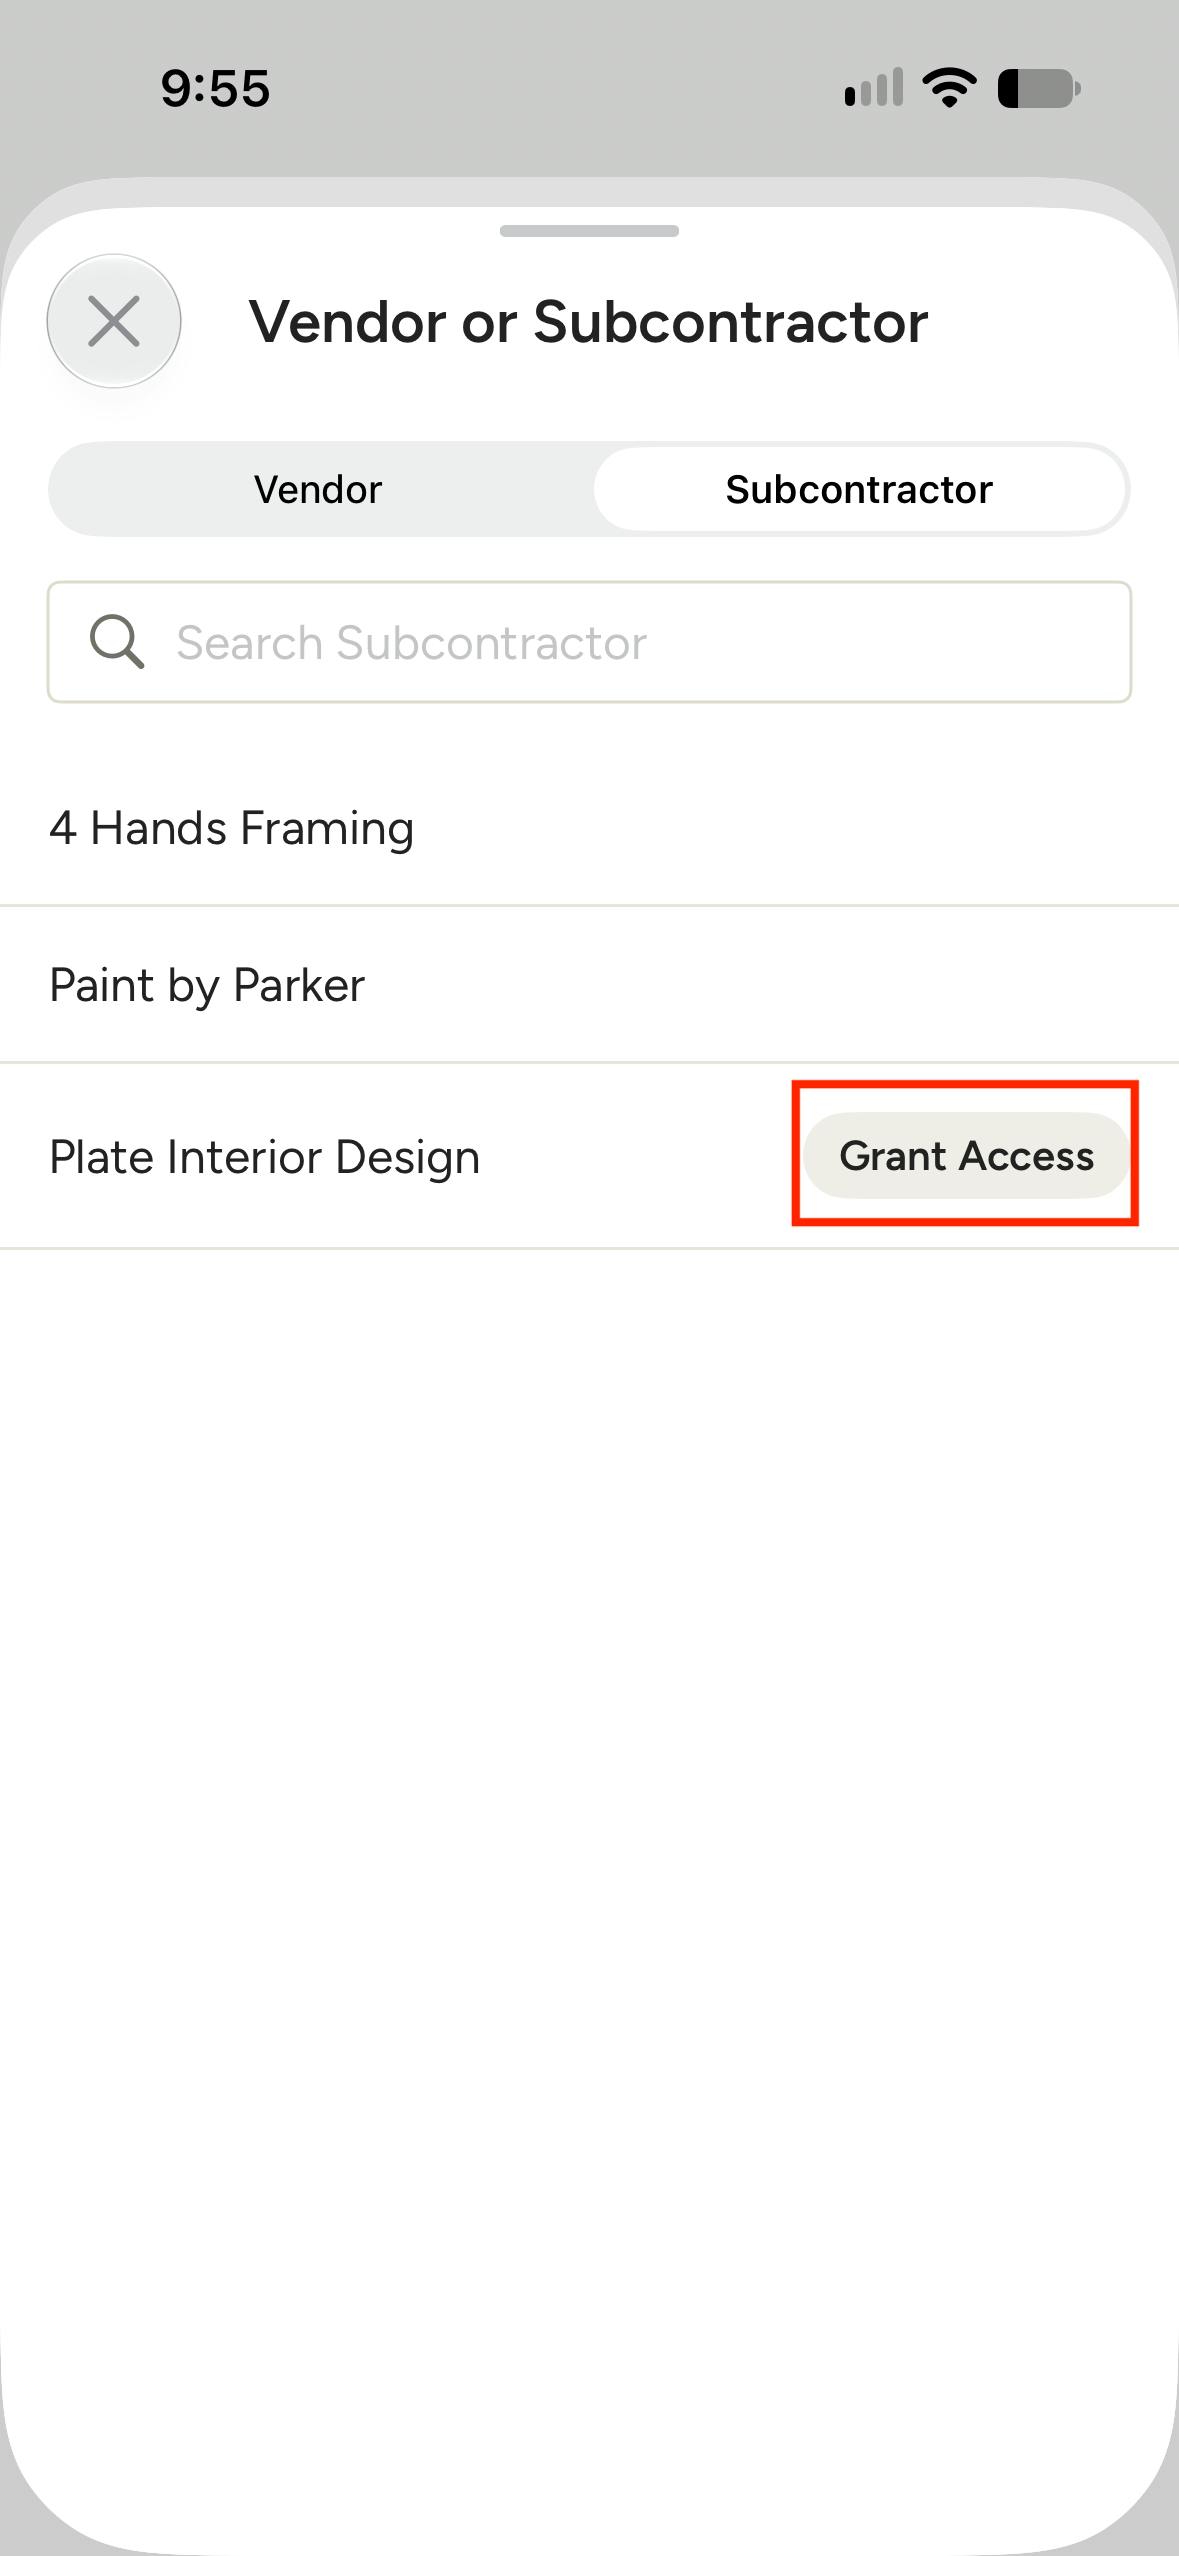
If you are sending the purchase order to a subcontractor, they need to be invited to the project. If they have not been invited yet, you will see Grant Access next to their name. Select it to add them to the project and assign them to the purchase order.
Edit Purchase Order Details
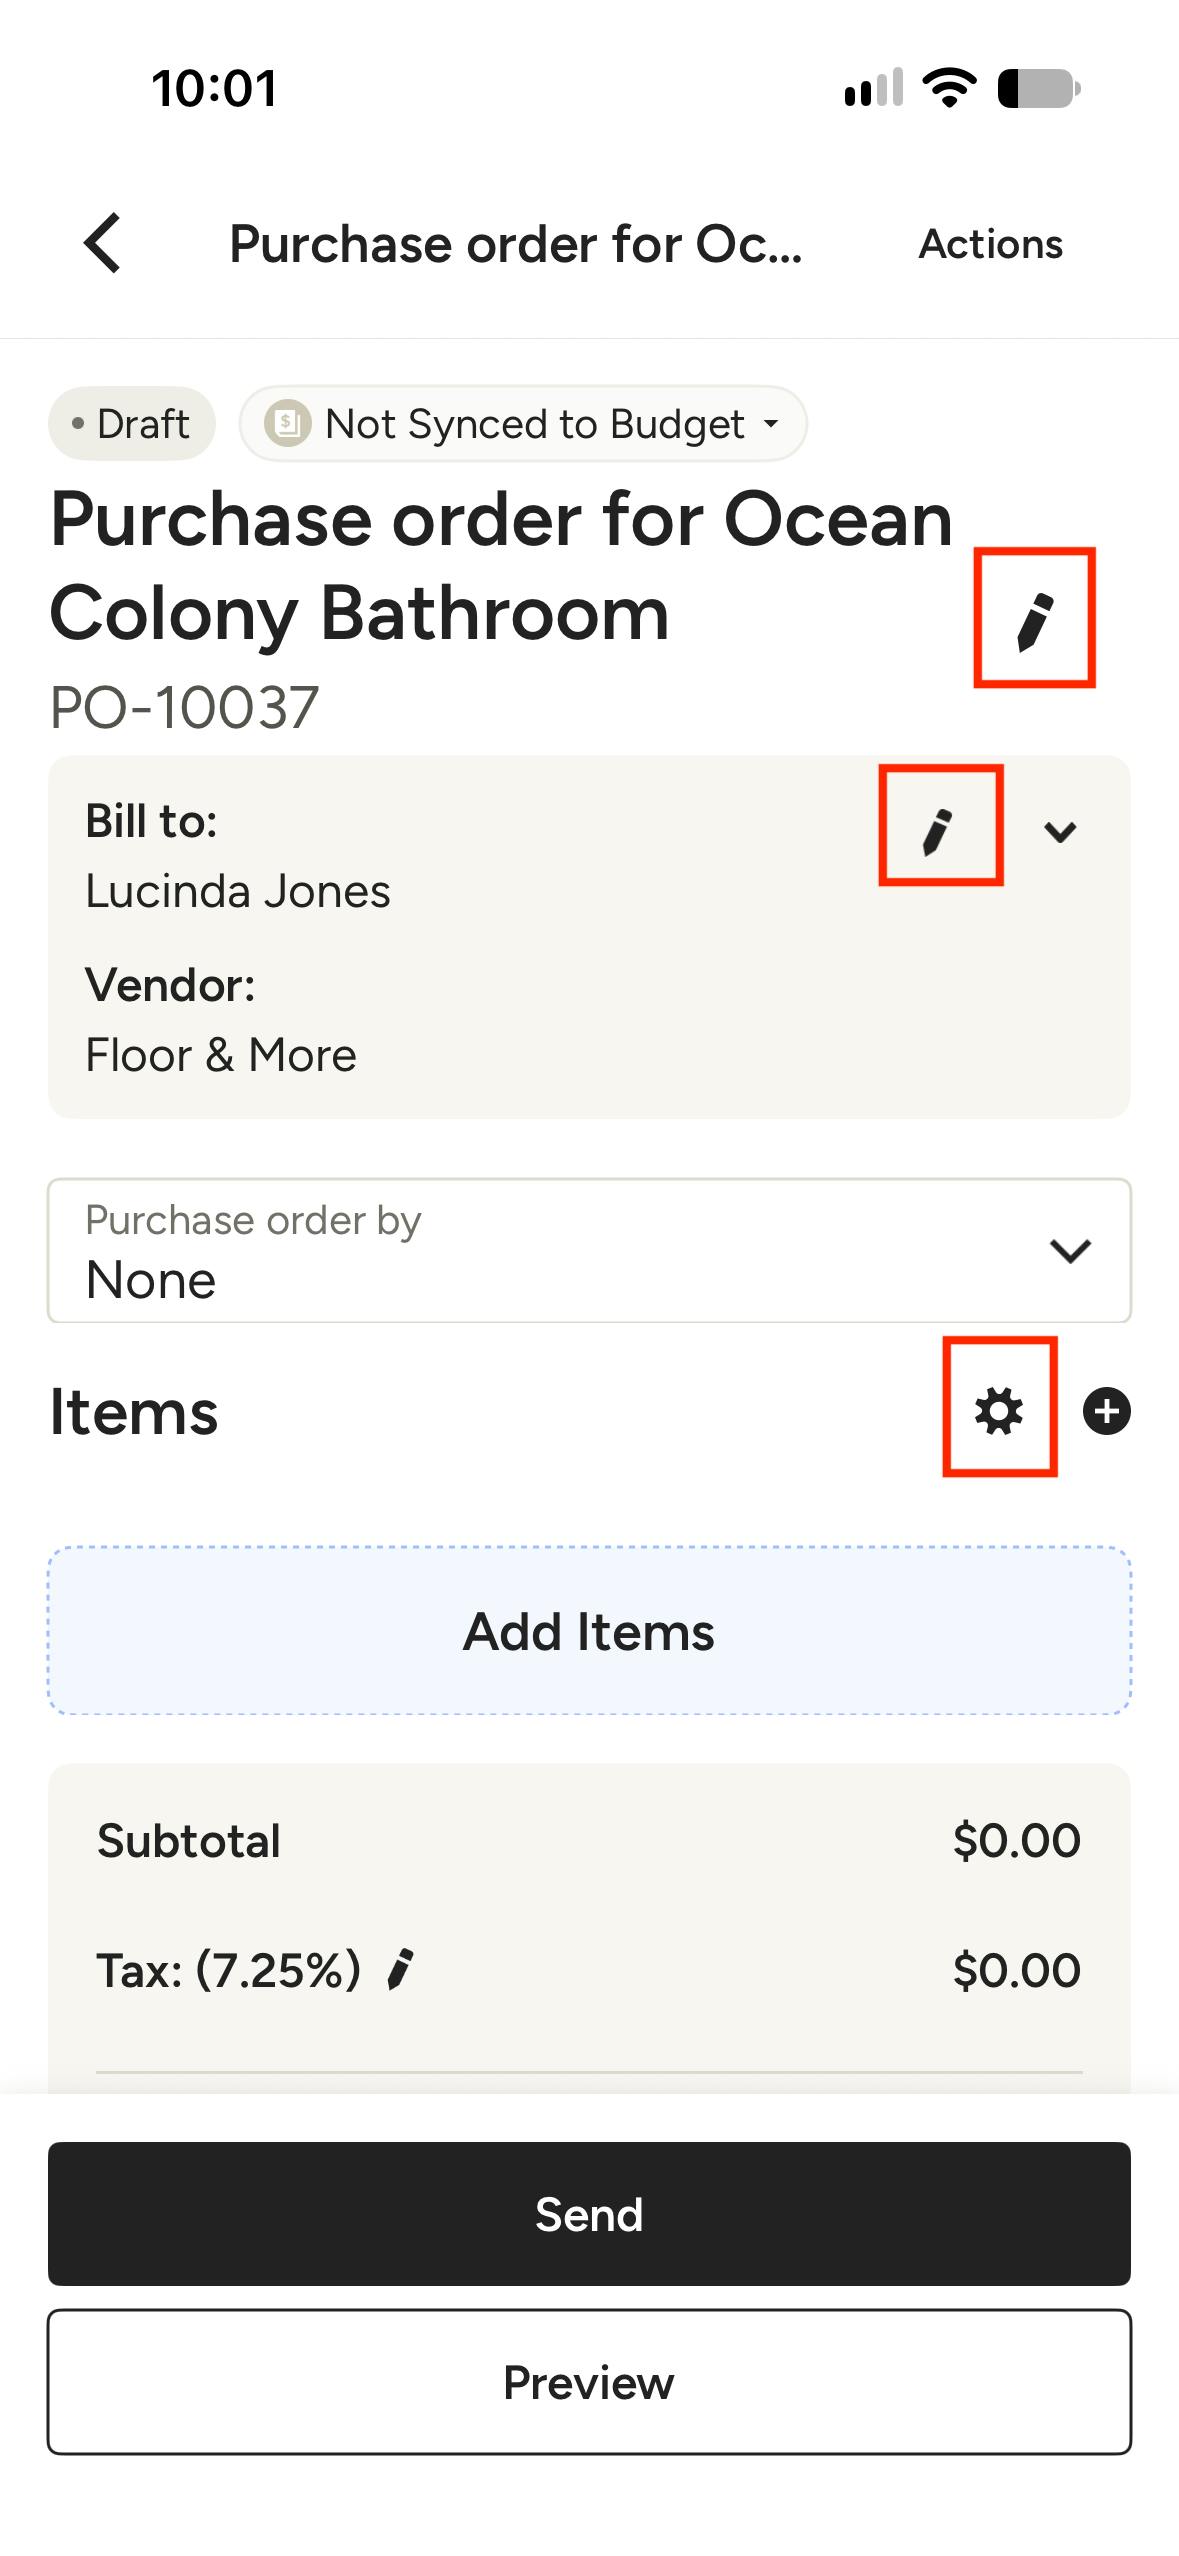
Within the mobile app, you can adjust the document name, vendor or subcontractor info, and shipping info by selecting the pencil icon next to the respective field. You can also choose to show/hide images and descriptions, as well as manage your columns, by selecting the settings (gear) icon at the top of the Items section.
For more information about shipping addresses, read How to Add an Additional Address for a PO.
Add Items to Purchase Order
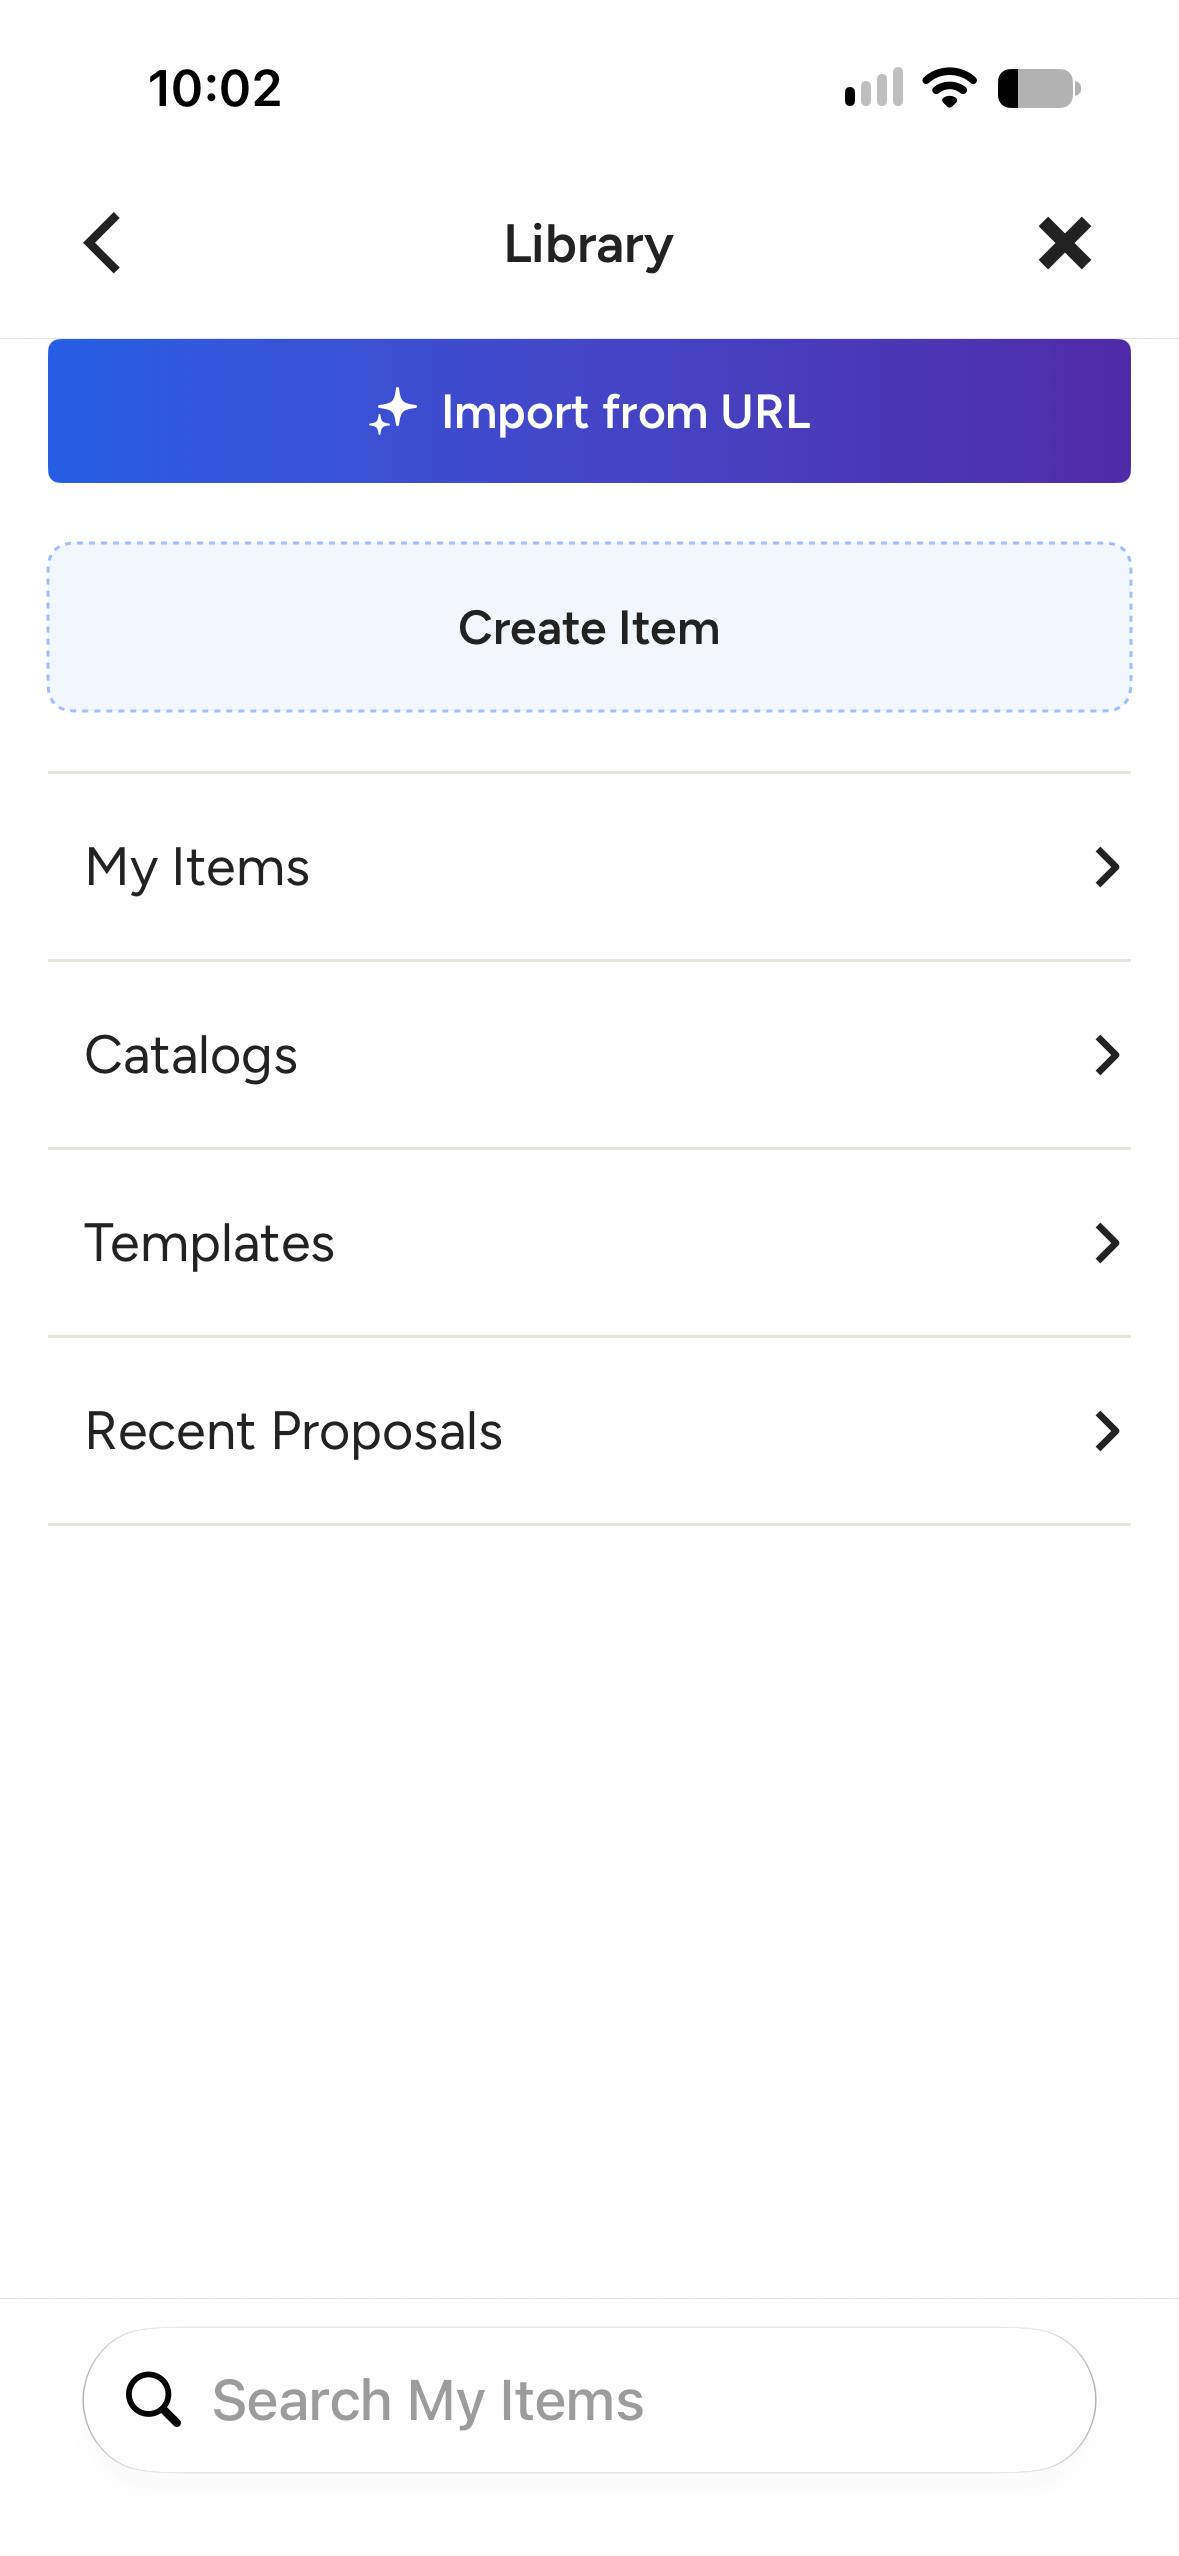
To add line items to your purchase order, select Add Items under the Item section, or select the + icon next to the settings icon. From here, you can Import from URL using Houzz AI, manually create a new item, or choose from your My Items library, Catalogs, Templates or Recent Estimates/Proposals.
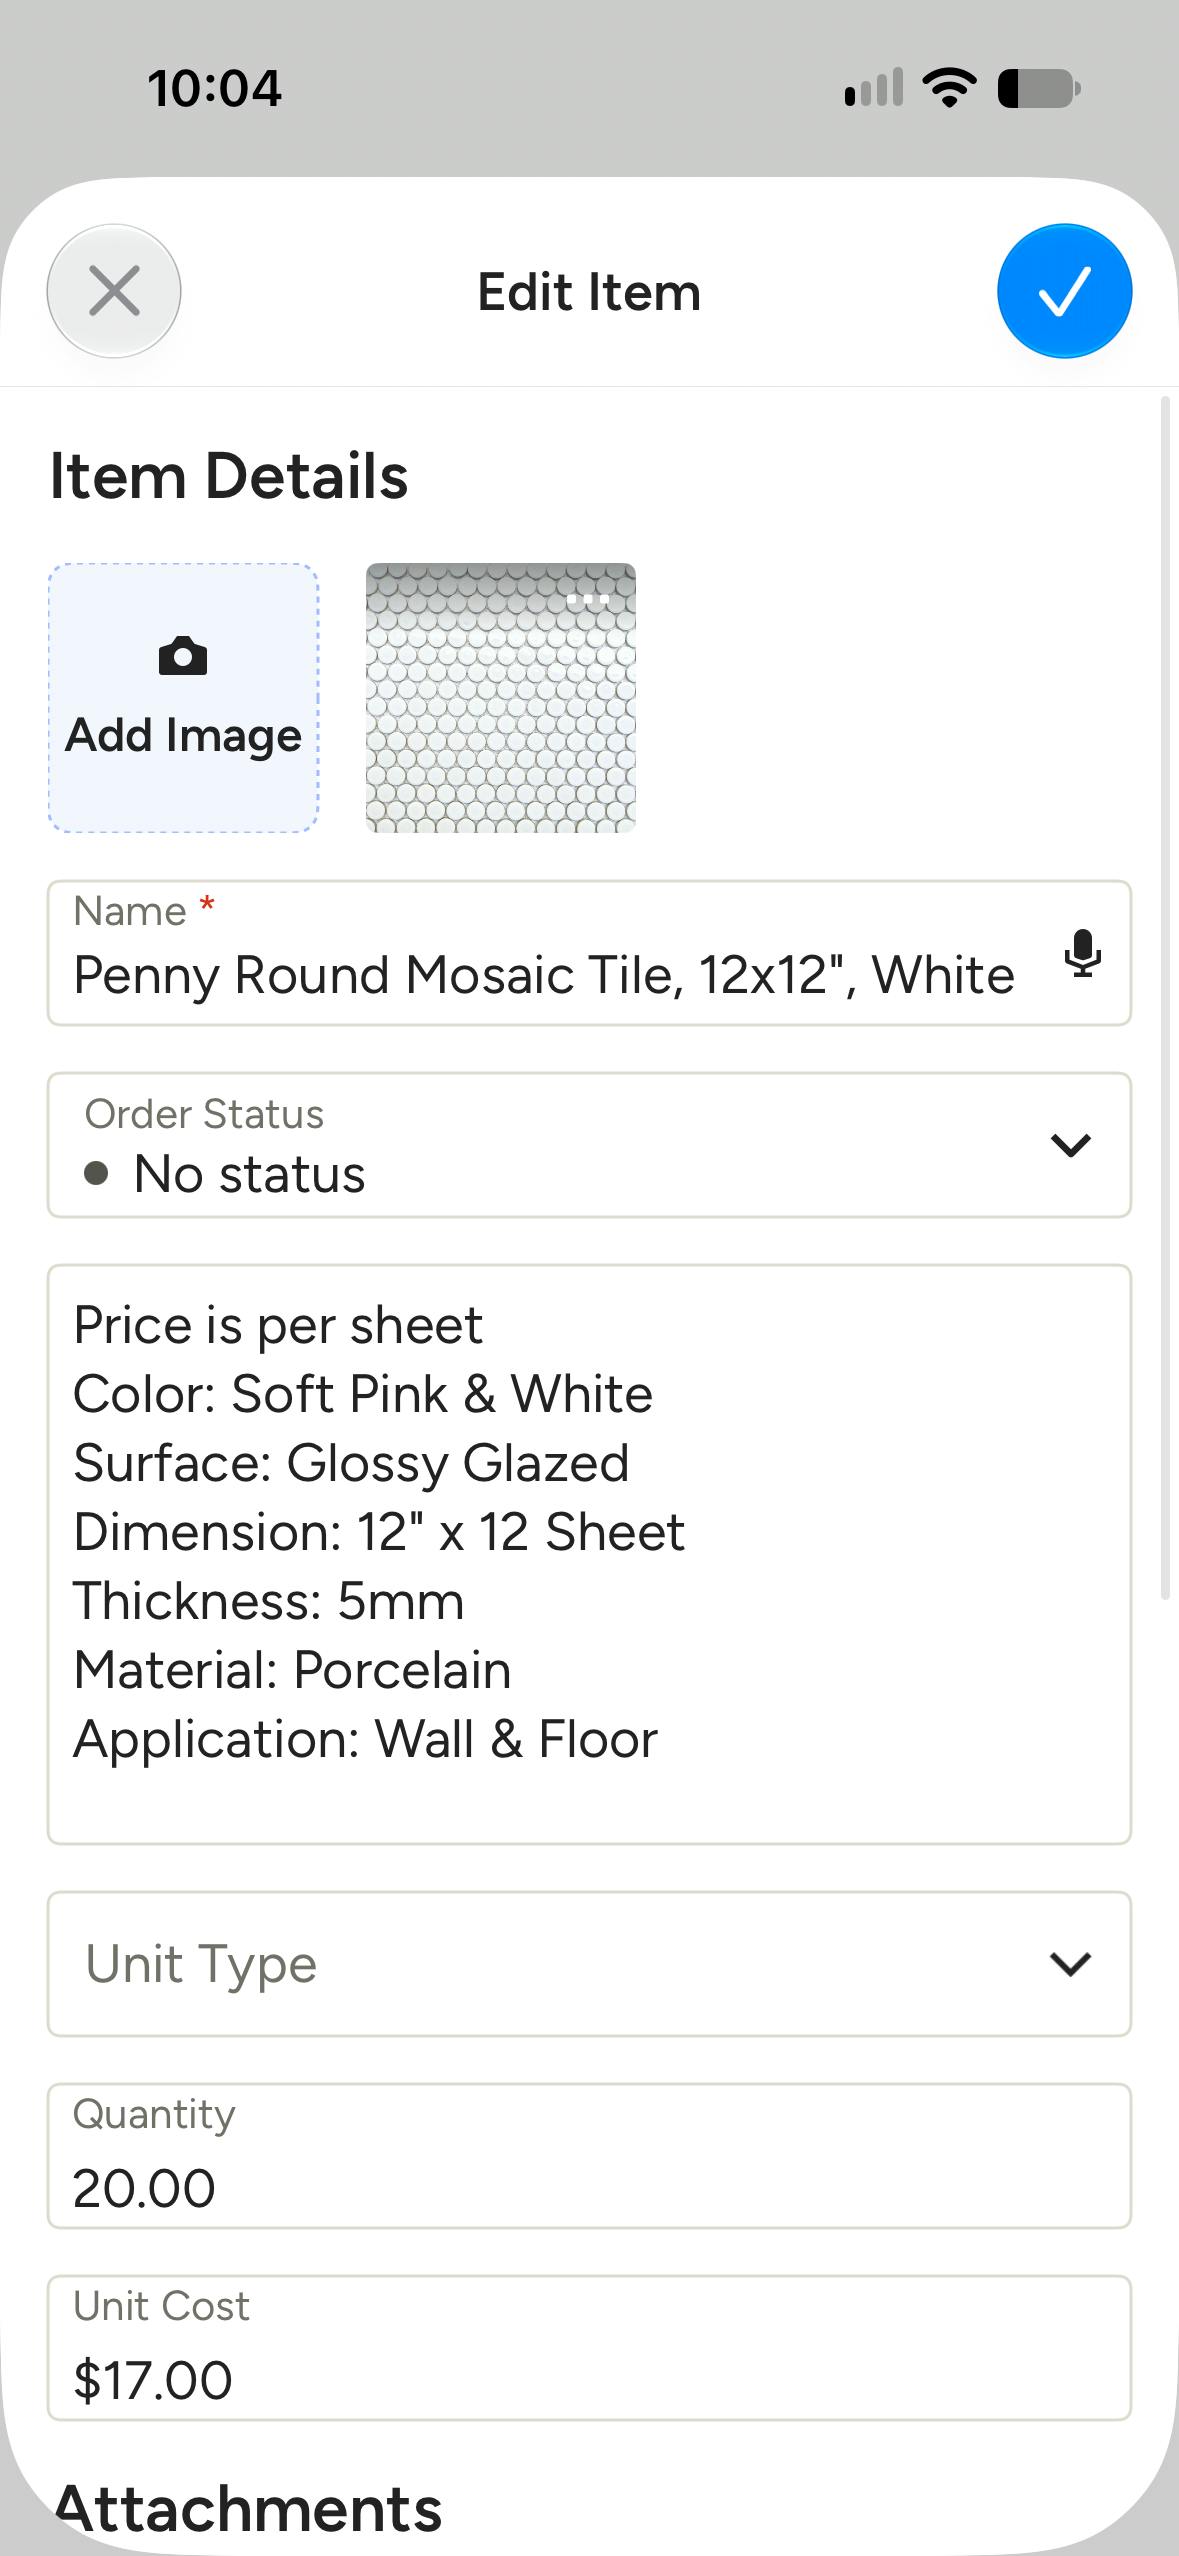
Once added, select any item to update details such as the description, quantity, or cost.
Track Order Status
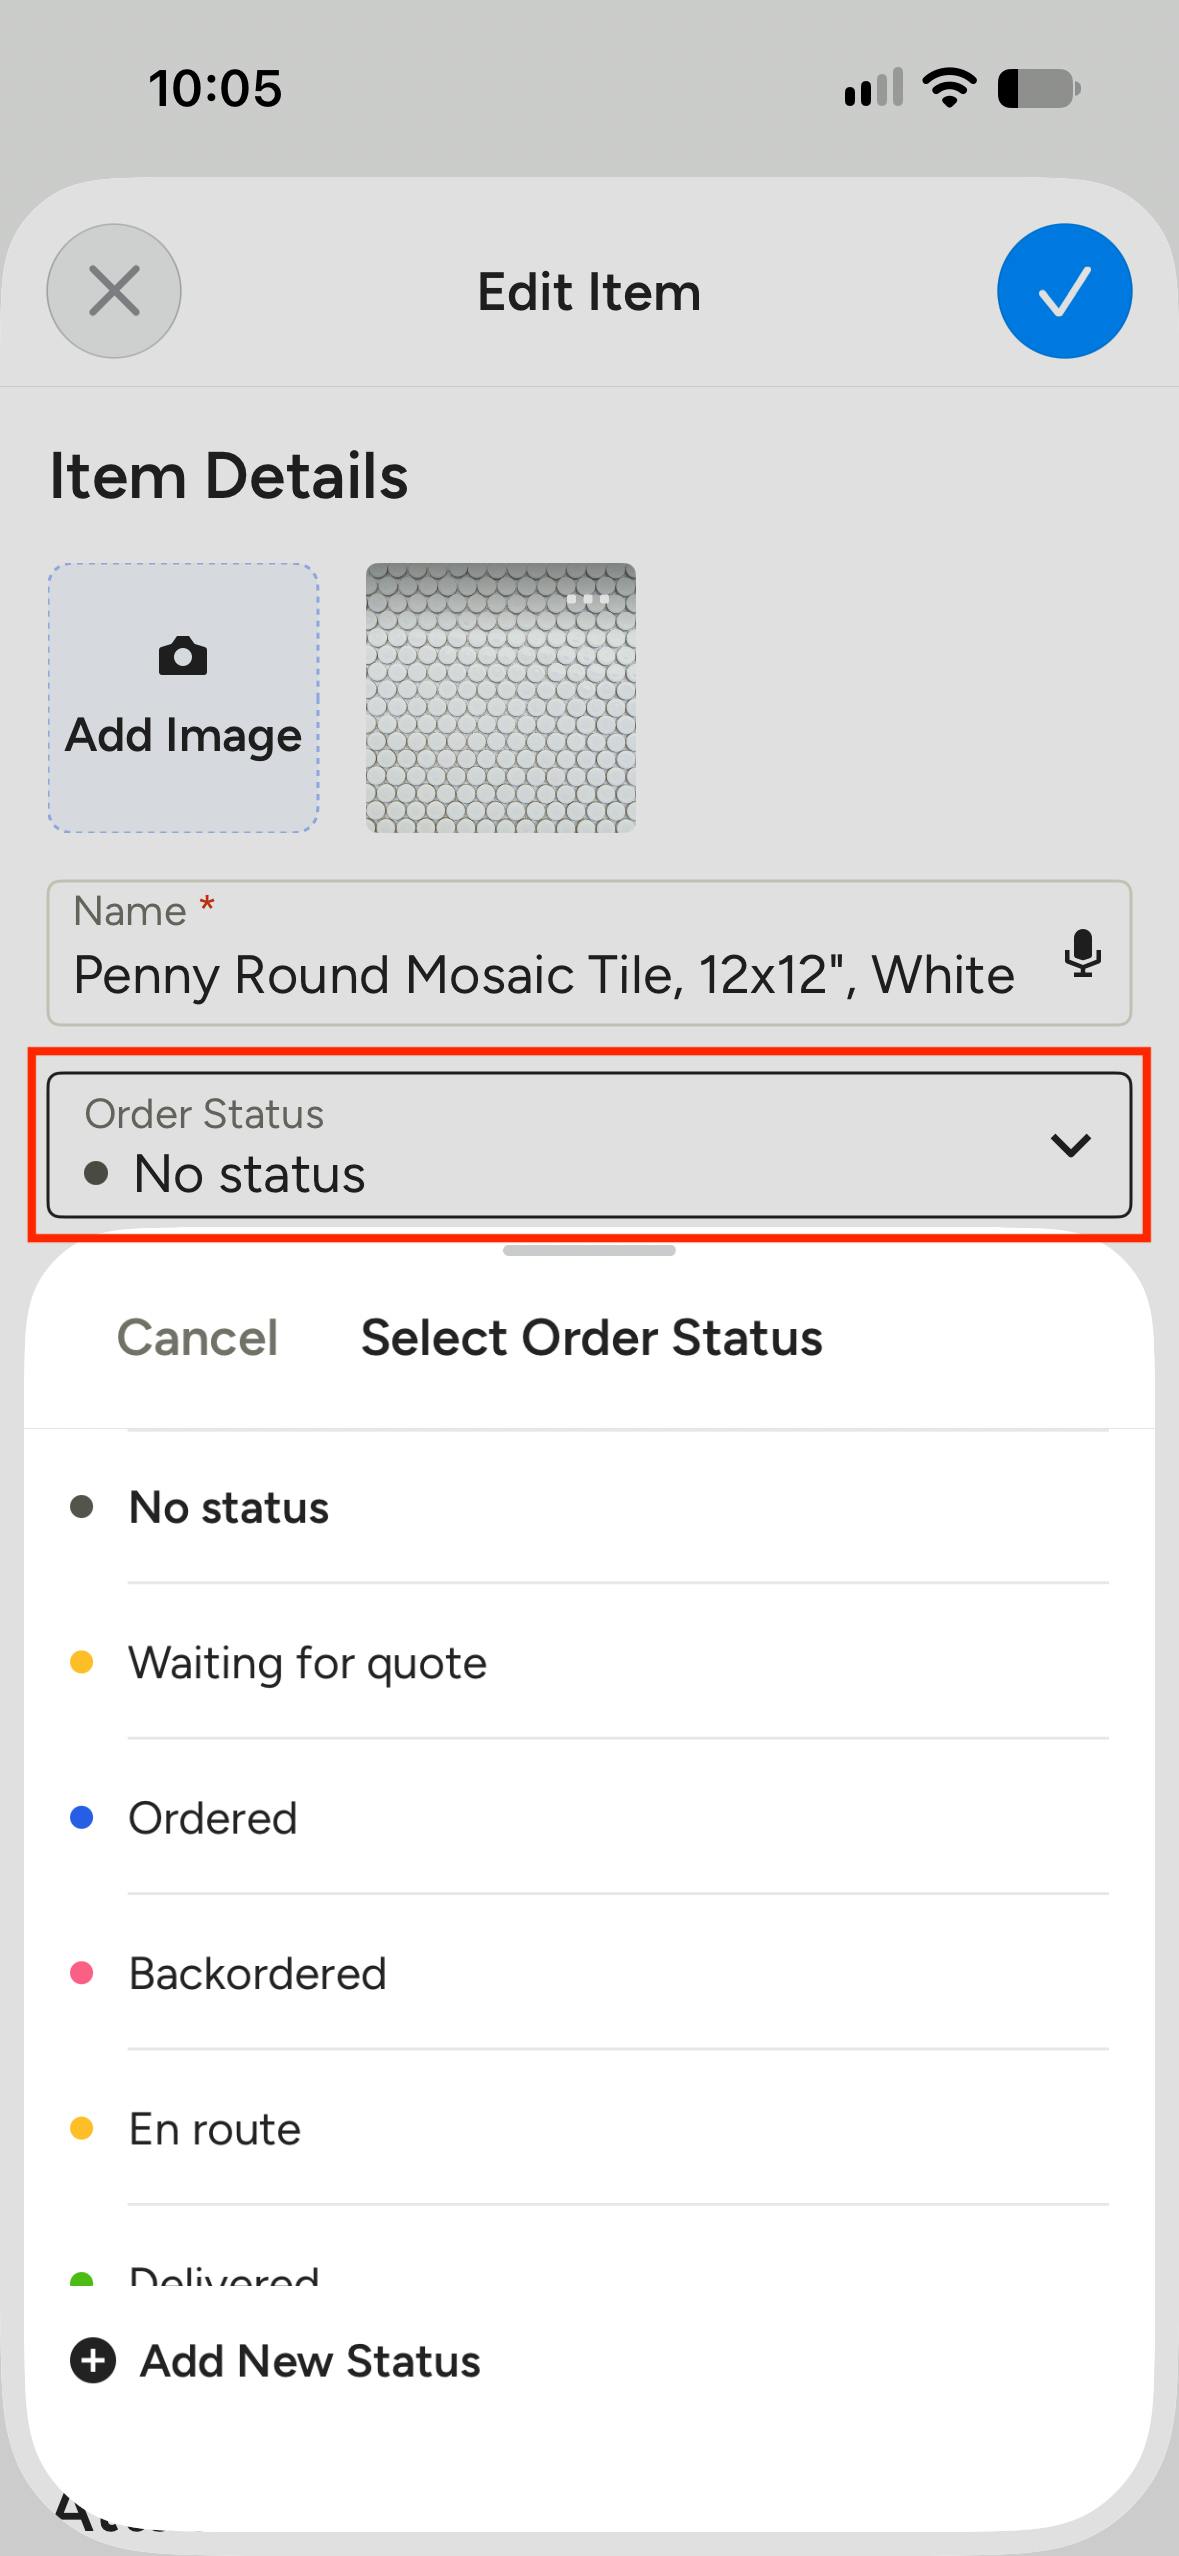
On the mobile app, you can track the order status of individual line items. To do so, tap any item to open it's details, then select the relevant status from the Order Status dropdown. You can also create a custom status by selecting + Add New Status.
Order statuses are shared with the project's Selections Tracker, so a change made in either place updates the other.
Schedule Purchase Order Payments
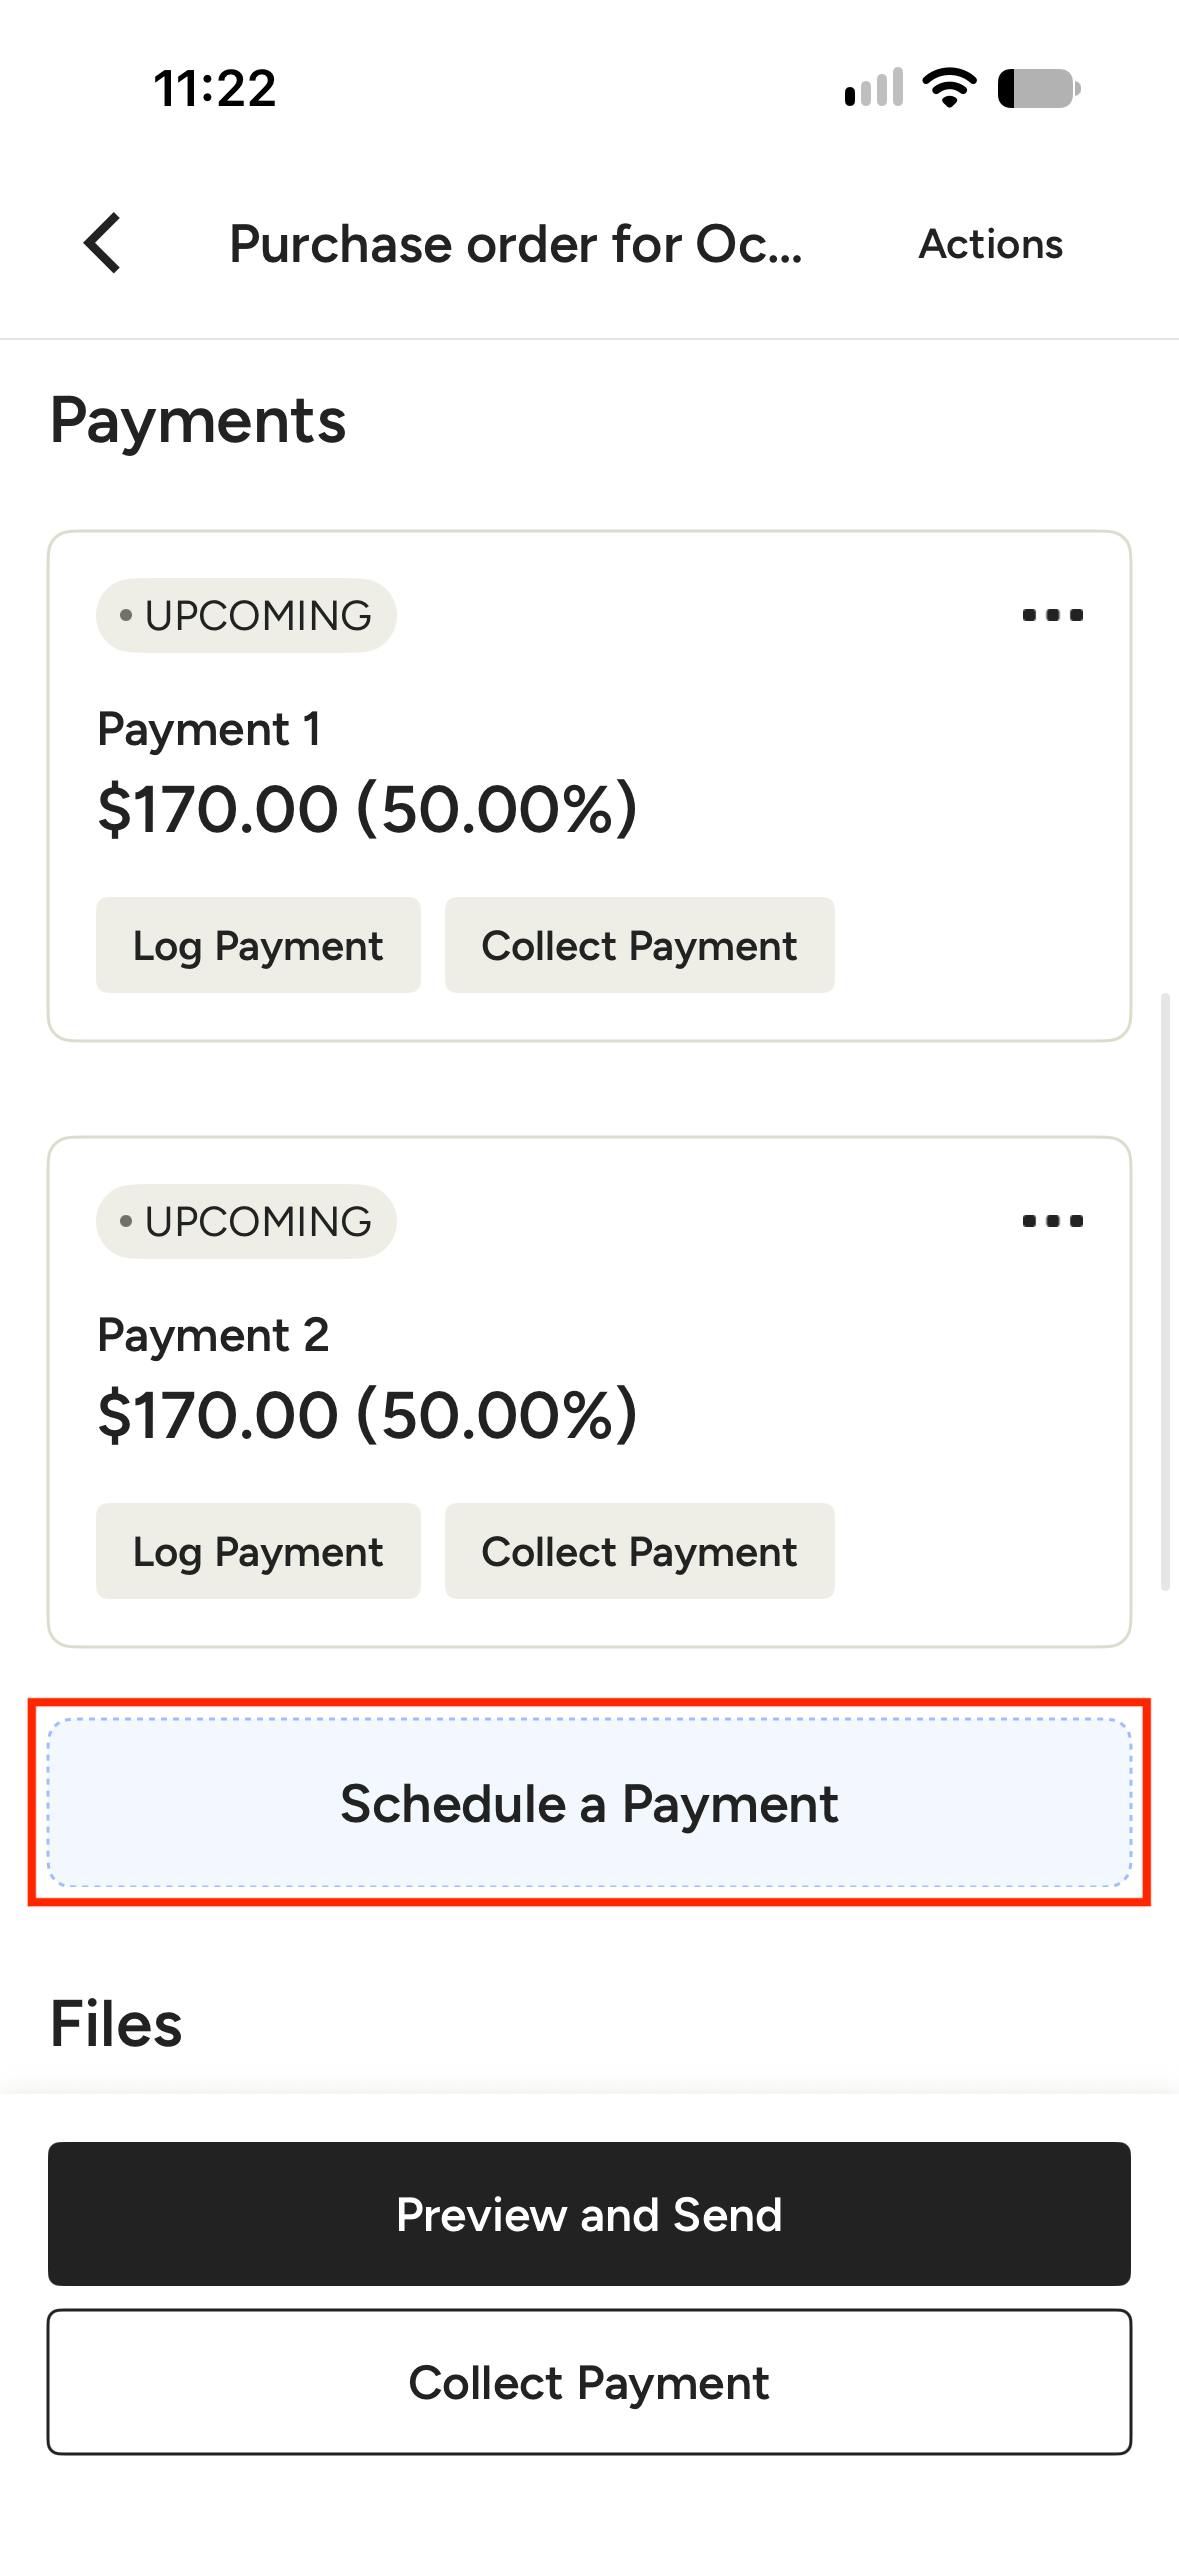
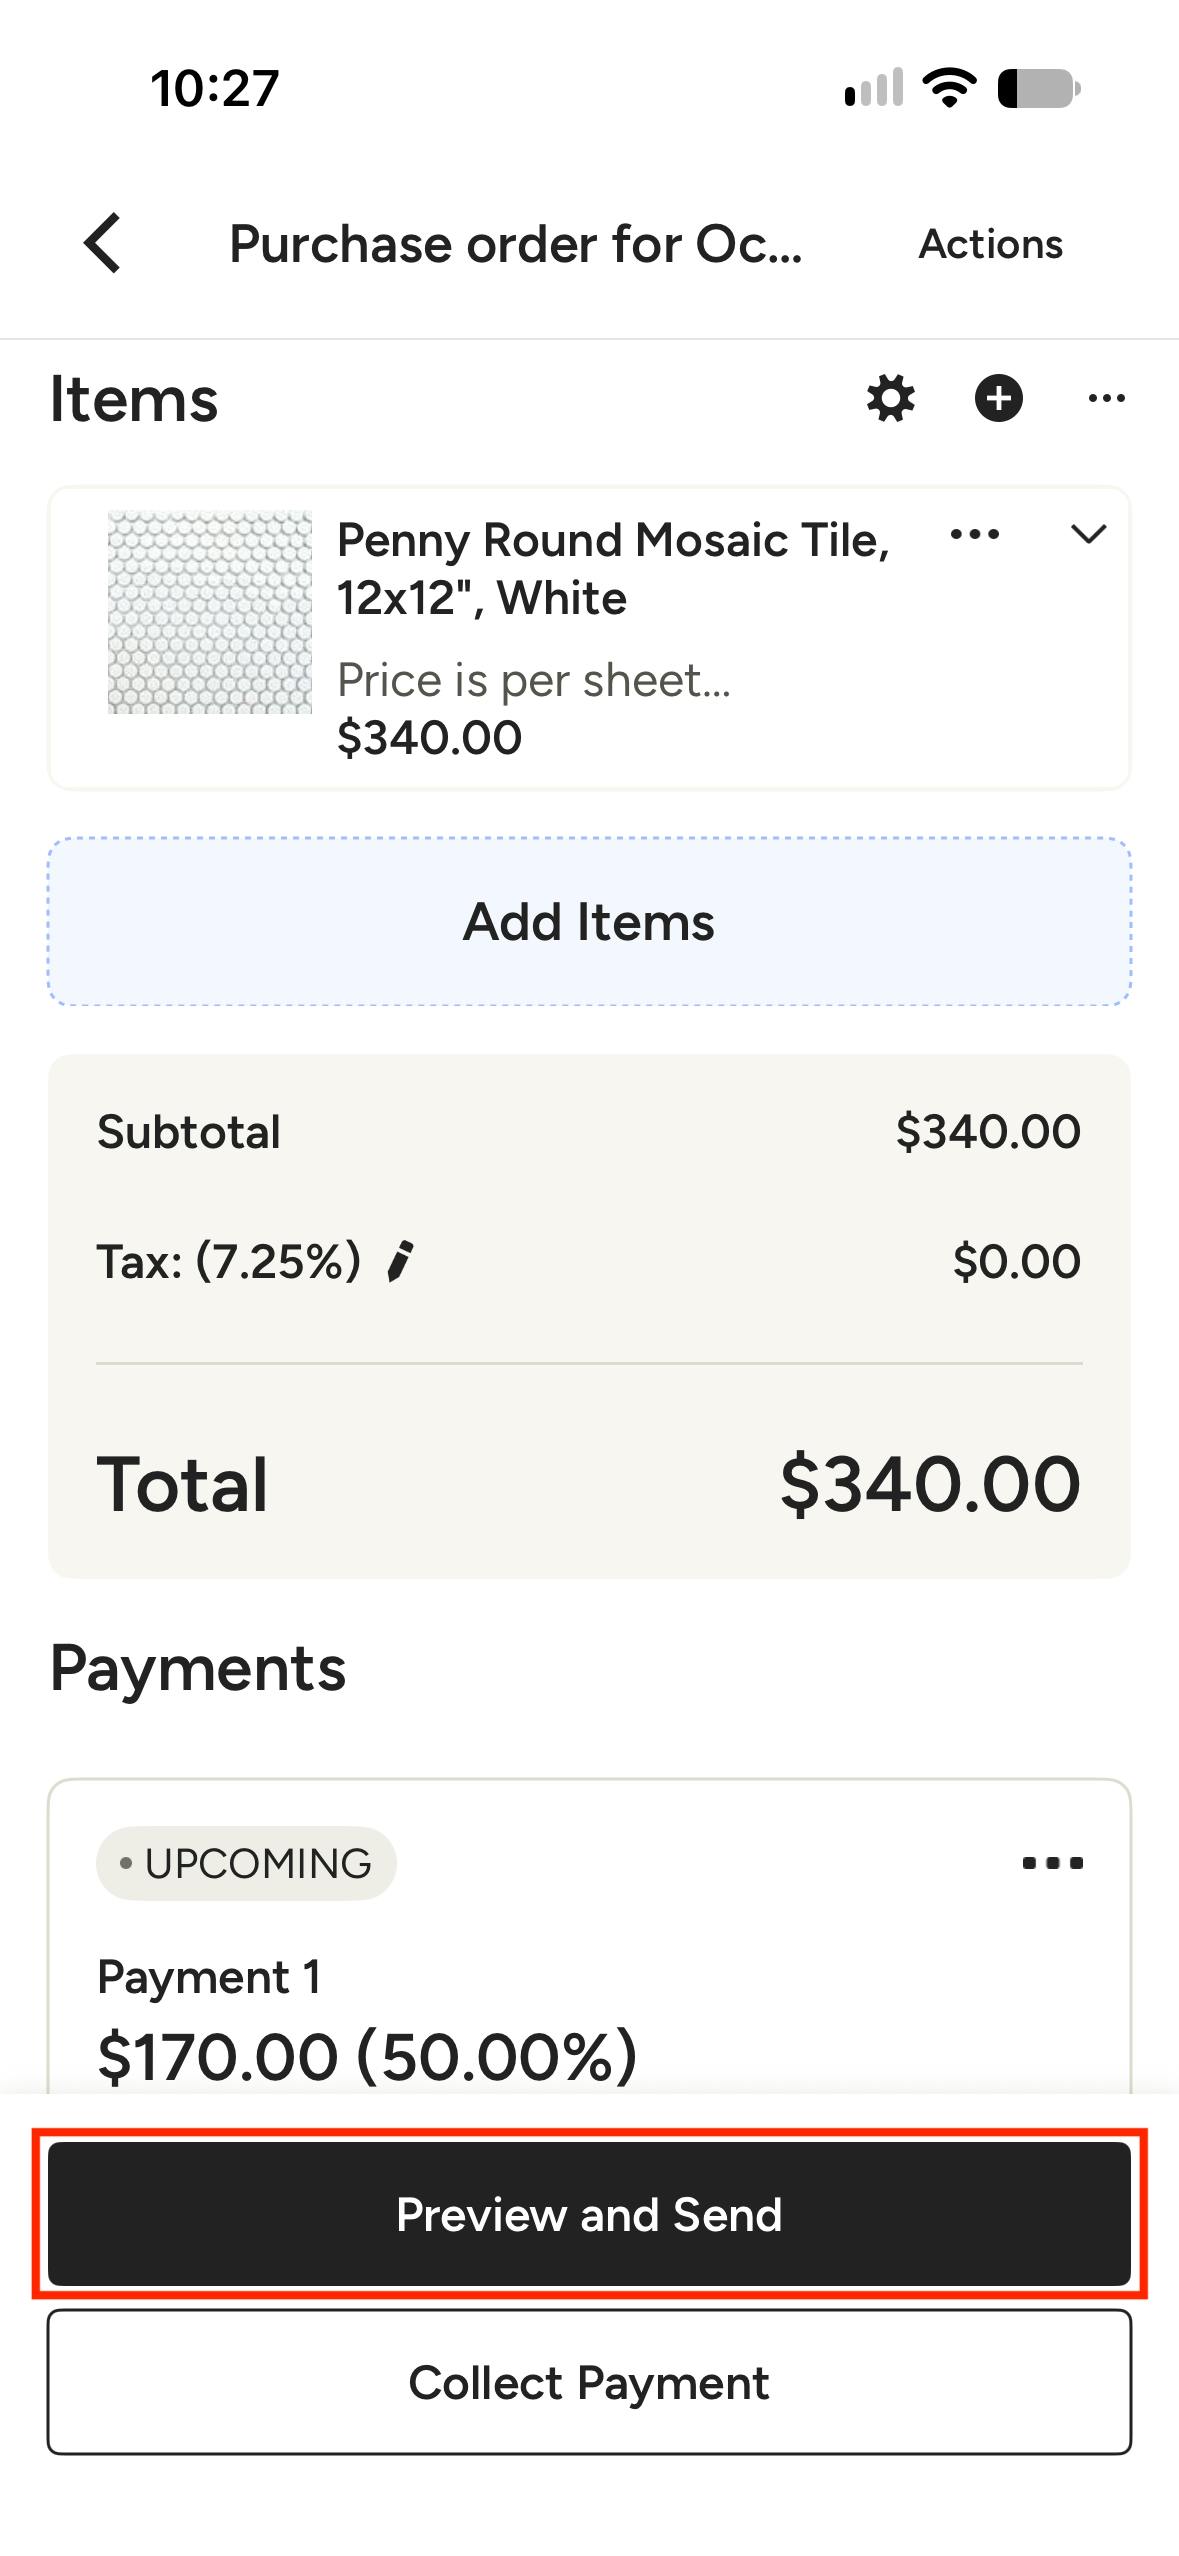
Once your items are set, you can create a payment schedule for the order. Select Schedule a Payment in the Payments section to create a single payment for the total amount. Select it again to add multiple payments. The payments are automatically split evenly by the number of scheduled payments. Select any payment to adjust the name, amount, and payment terms.
Payments logged on a purchase order are for your own financial records. Your vendor or subcontractor will not see them.
Attach Files to Purchase Order
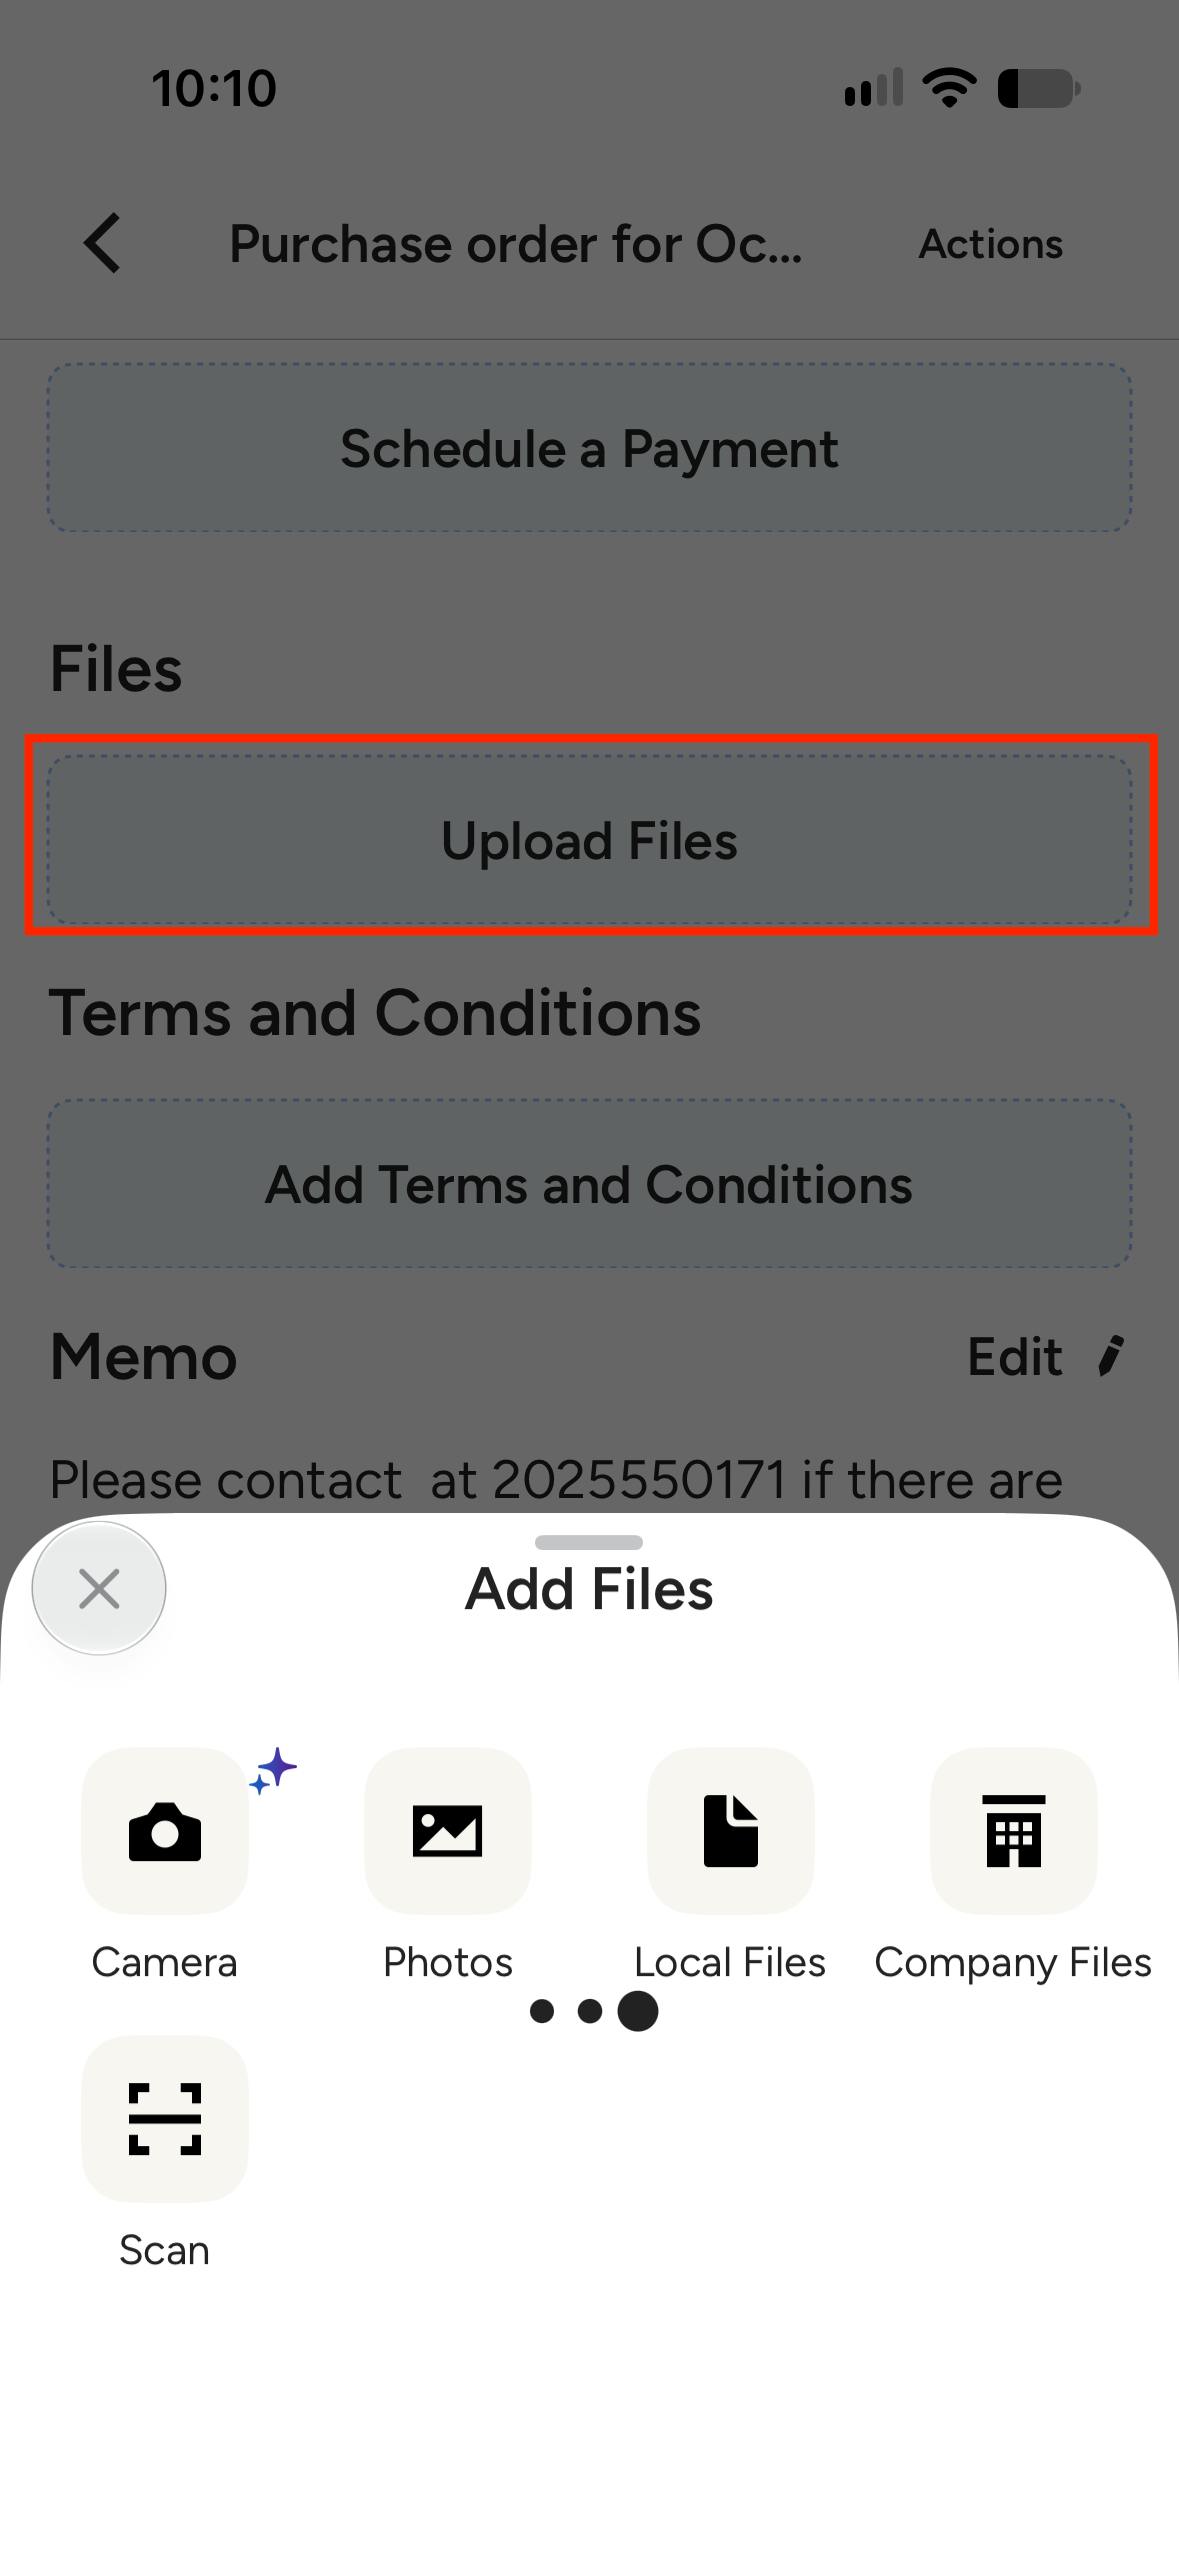
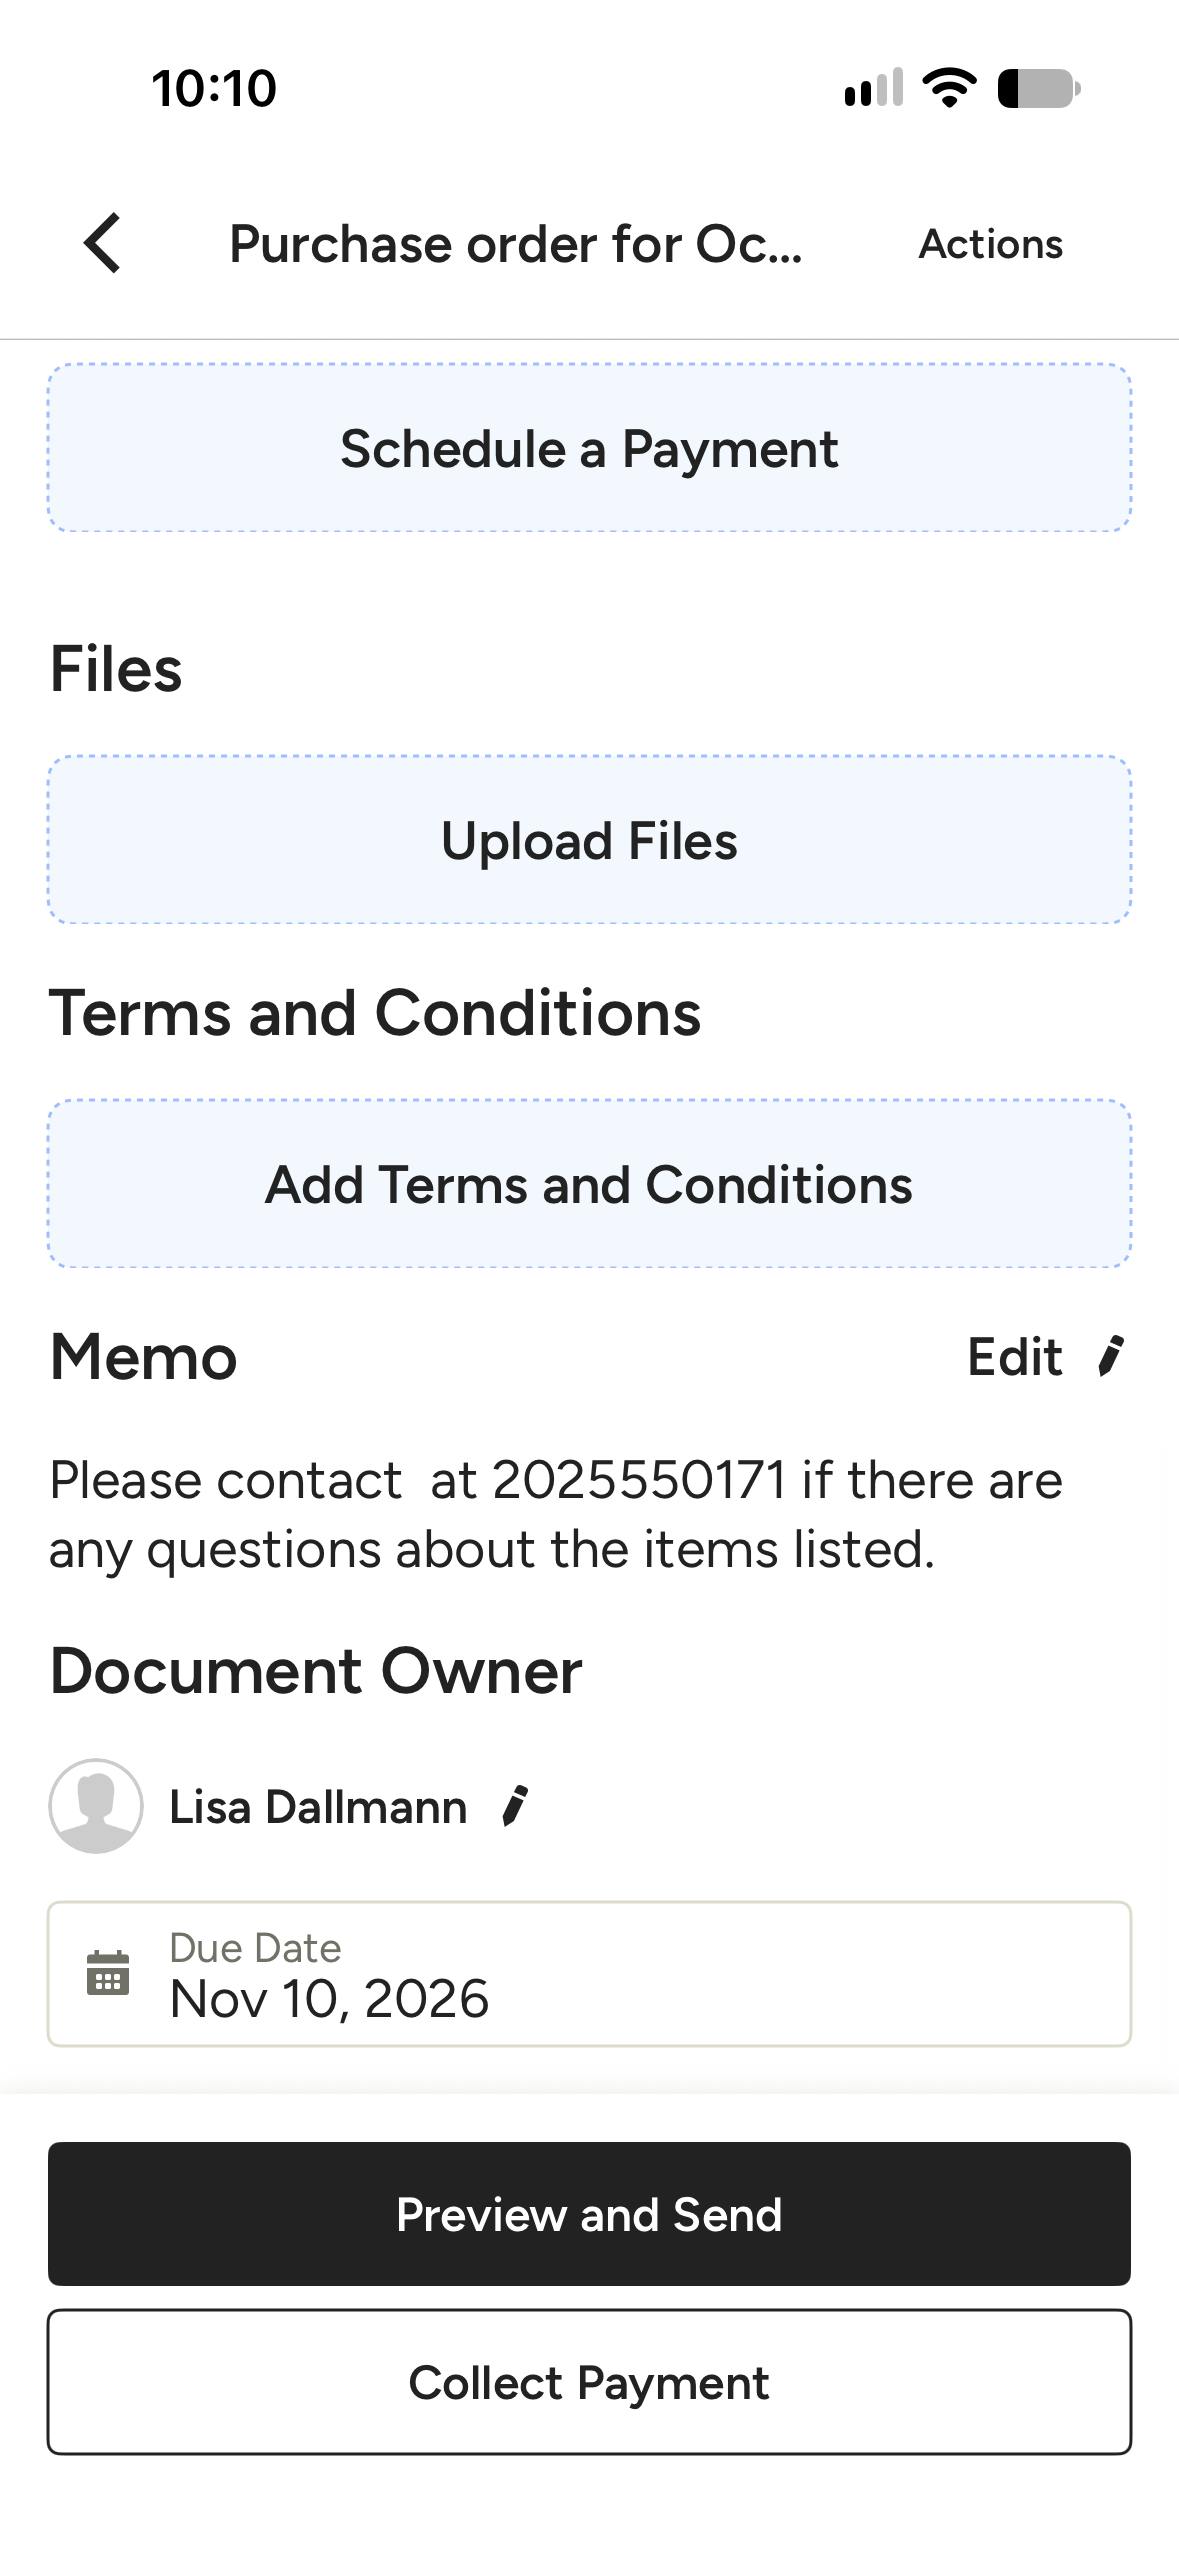
Add any relevant files to your purchase order, such as product photos, specs, or images of the space that you've captured on your phone, by selecting Upload Files under the Files section. You take a photo, select from your camera role or local files, or choose from project files or company files.
Add Terms & Conditions, Memos, Due Date
To add terms and conditions and/or memos to the purchase order, select Add under the respective section. You can format the text with various options to present a professional layout to your vendor or subcontractor.
Next, confirm the document owner and pick a due date for the purchase order.
Preview & Send the Purchase Order
Before sharing your purchase order, you can preview it and choose exactly how it will look to your vendor or subcontractor. Select Preview and Send at the bottom of the screen.
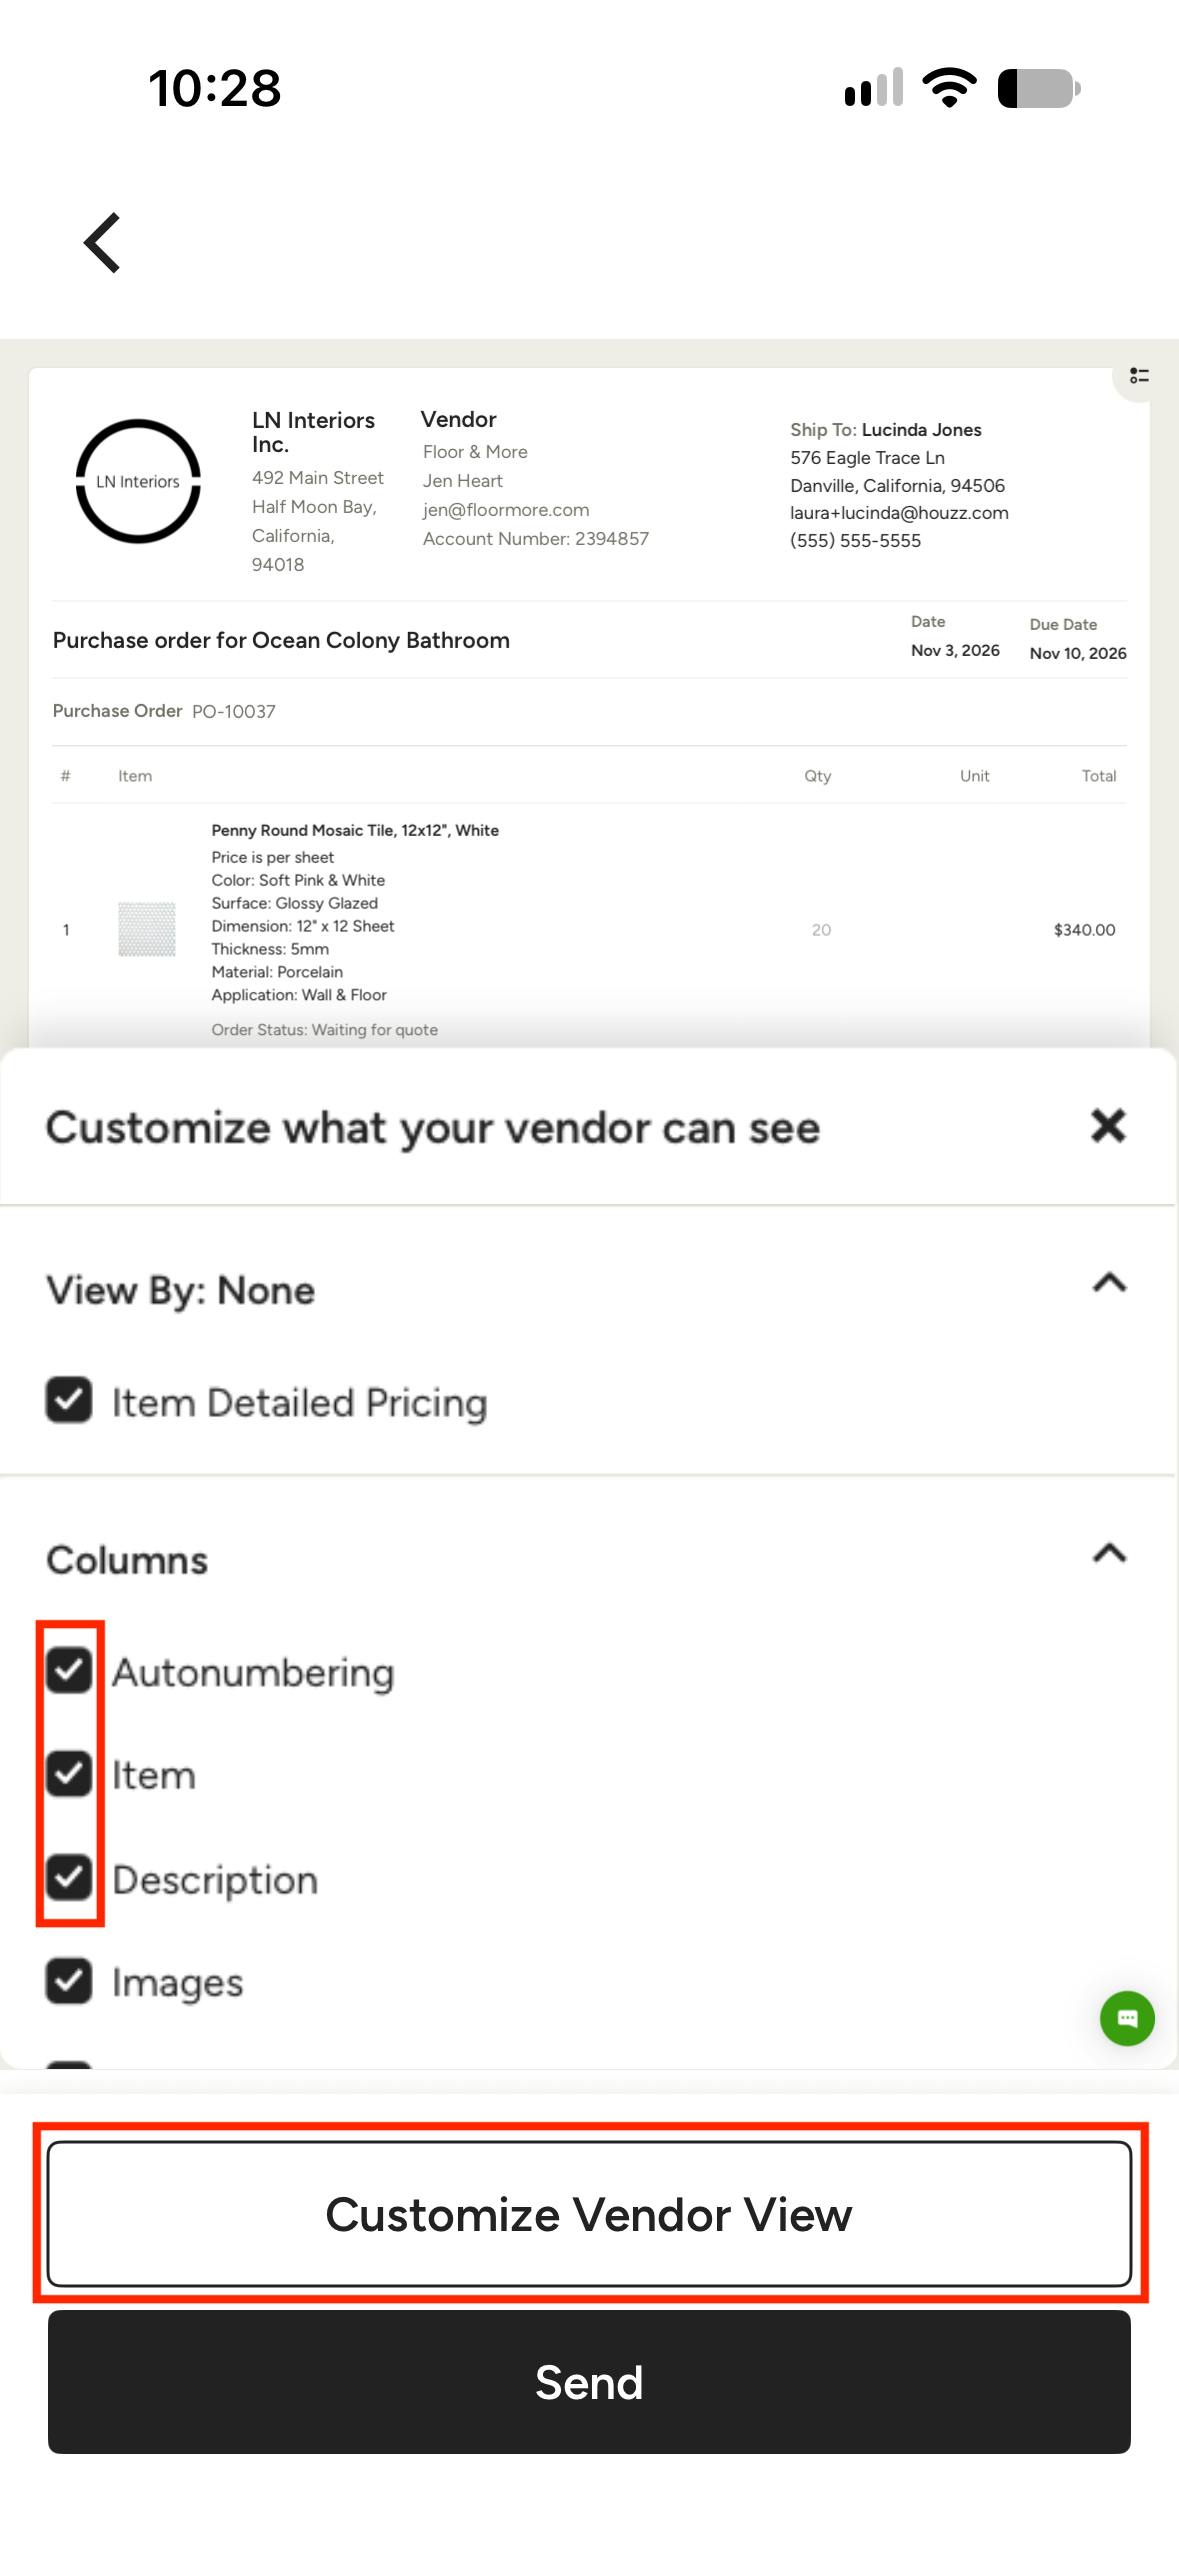
Tap Customize Vendor/Subcontractor View to open the view settings. Use the checkboxes to show or hide information.
When you're ready, select Send at the bottom of the preview to share the purchase order.
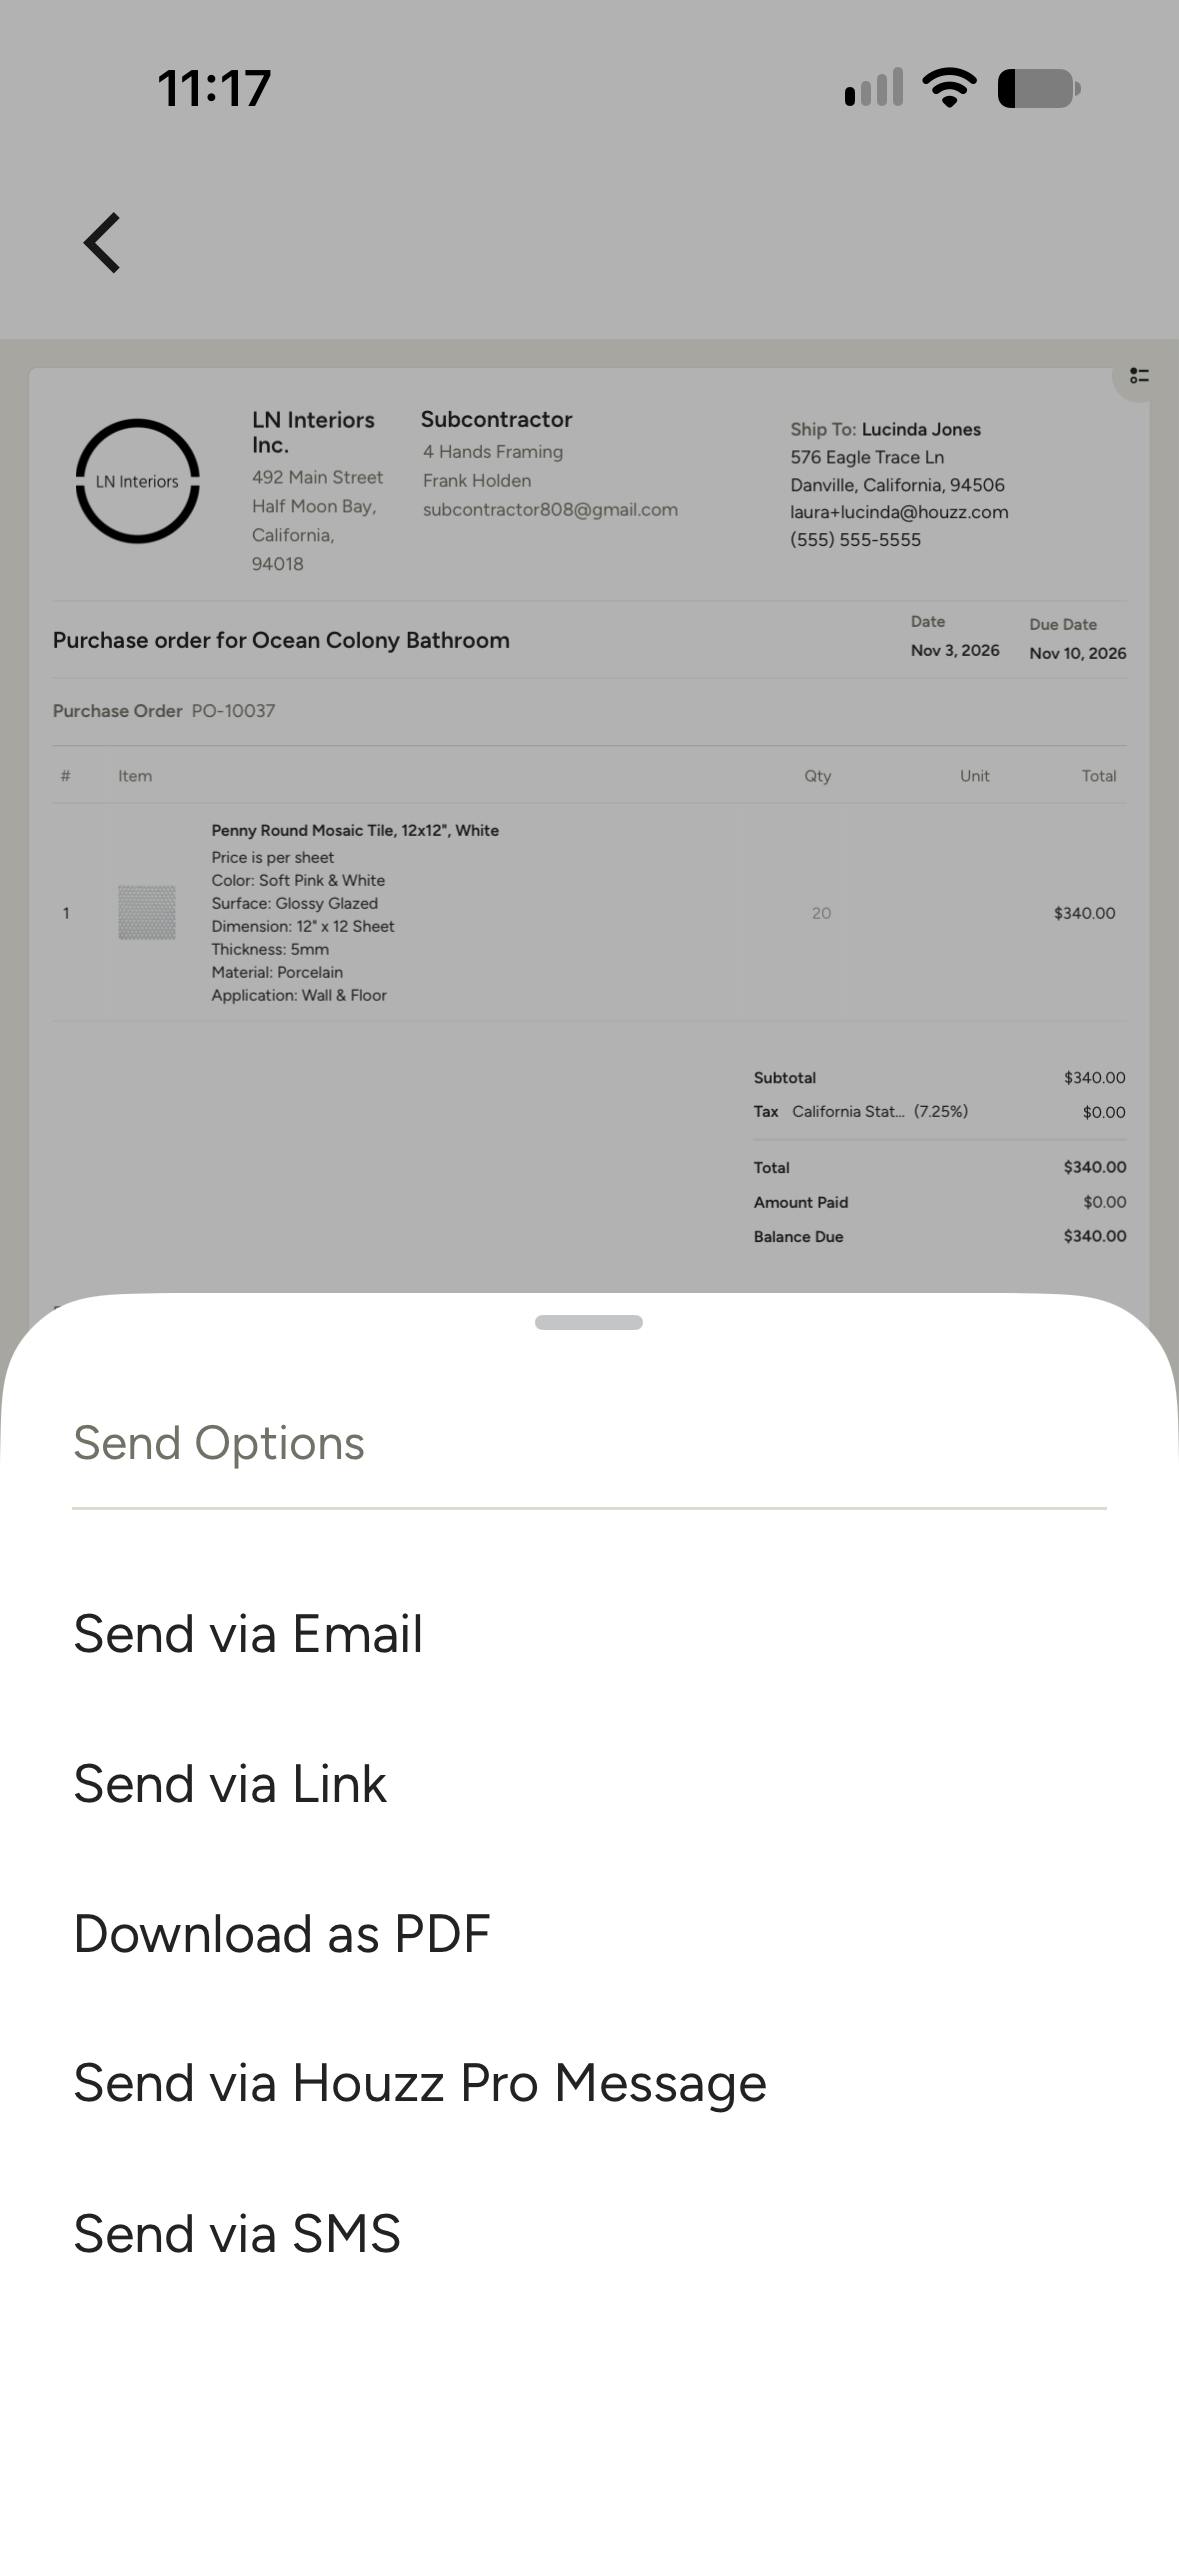
Next, select the delivery method for the purchase order. These methods will vary depending on the information you have entered for your recipient, but can include email, link, download PDF, Houzz Pro message, or SMS. Your vendor or subcontractor can view the purchase order directly from their computer, phone, or tablet.
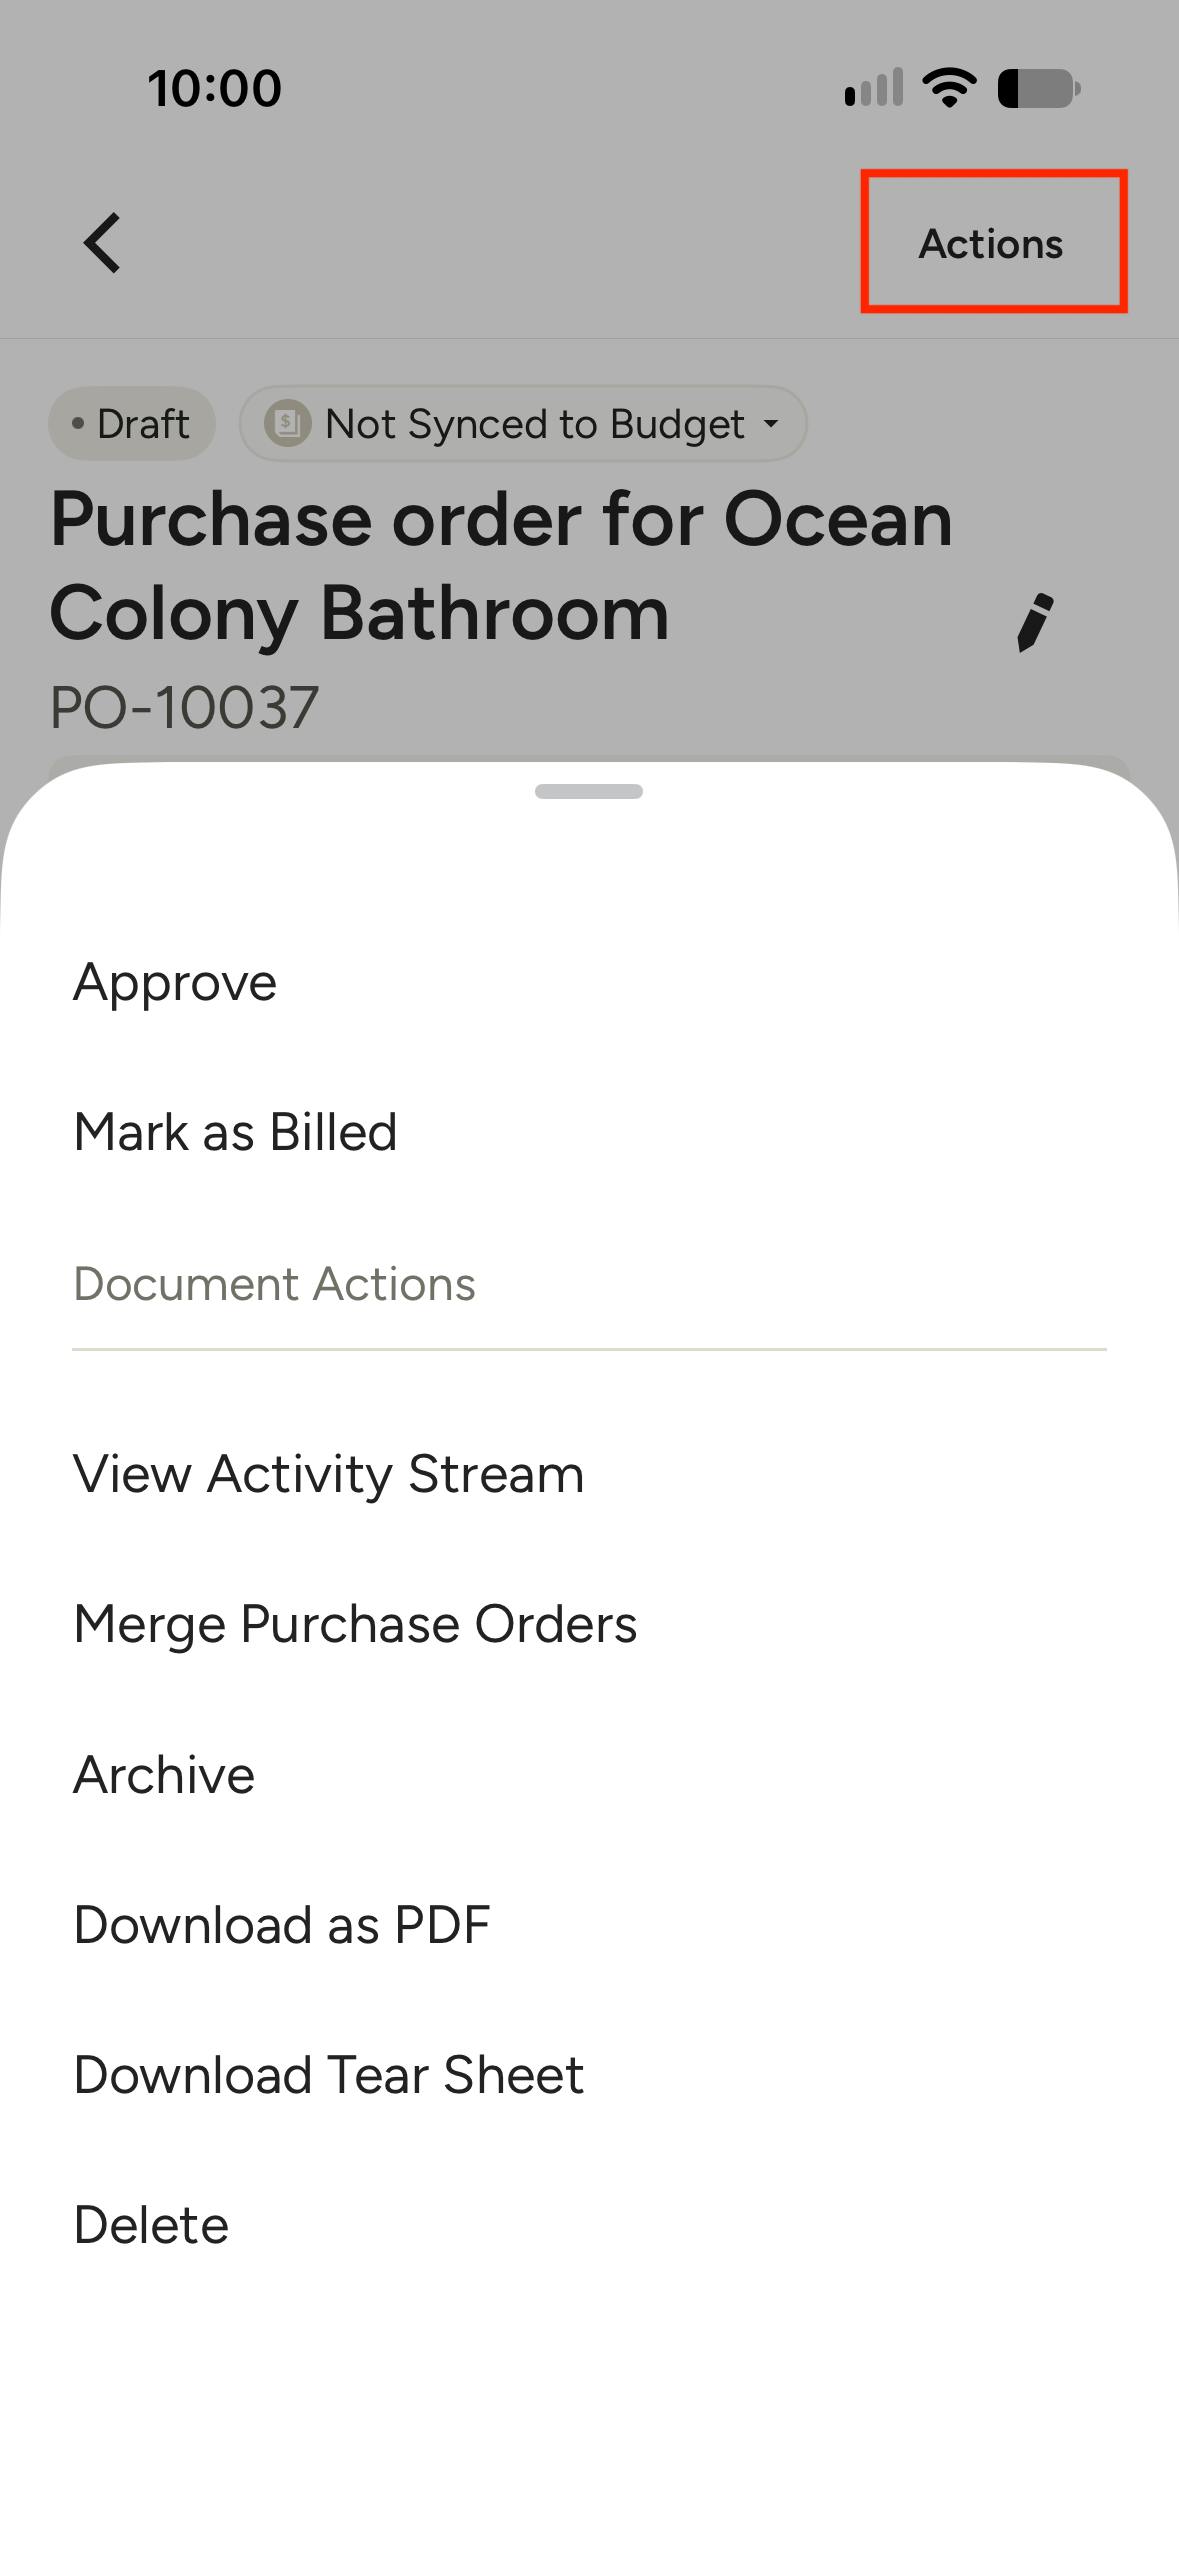
More Actions on Purchase Orders
Under the Actions menu, you can access more actions, such as: approve, mark as billed, view activity stream, merge purchase orders, download as PDF, download tear sheet, archive, and delete.
If you need to change a purchase order after it has been approved, you will need to reopen it for editing. Reopening removes e-signatures and approval, and you will need to reshare the purchase order with your vendor or subcontractor. They are not notified of the reopen until you reshare.