How to Add Custom Columns, Line Item Descriptions, and Images
Houzz Pro allows you to customize financial documents to ensure you show all the relevant information to clients or leads. You can easily add your own custom columns, line item descriptions, images, and even adjust the client view of your document before sending.

Add Custom Columns
If the current format of your document is missing a relevant column, you can add a custom column. Creating a new column can be accessed from two places:
Scroll to the far right of your screen until you get to the end of all your document columns. In the column header, you will see a + icon. Click on this icon to add a new column.
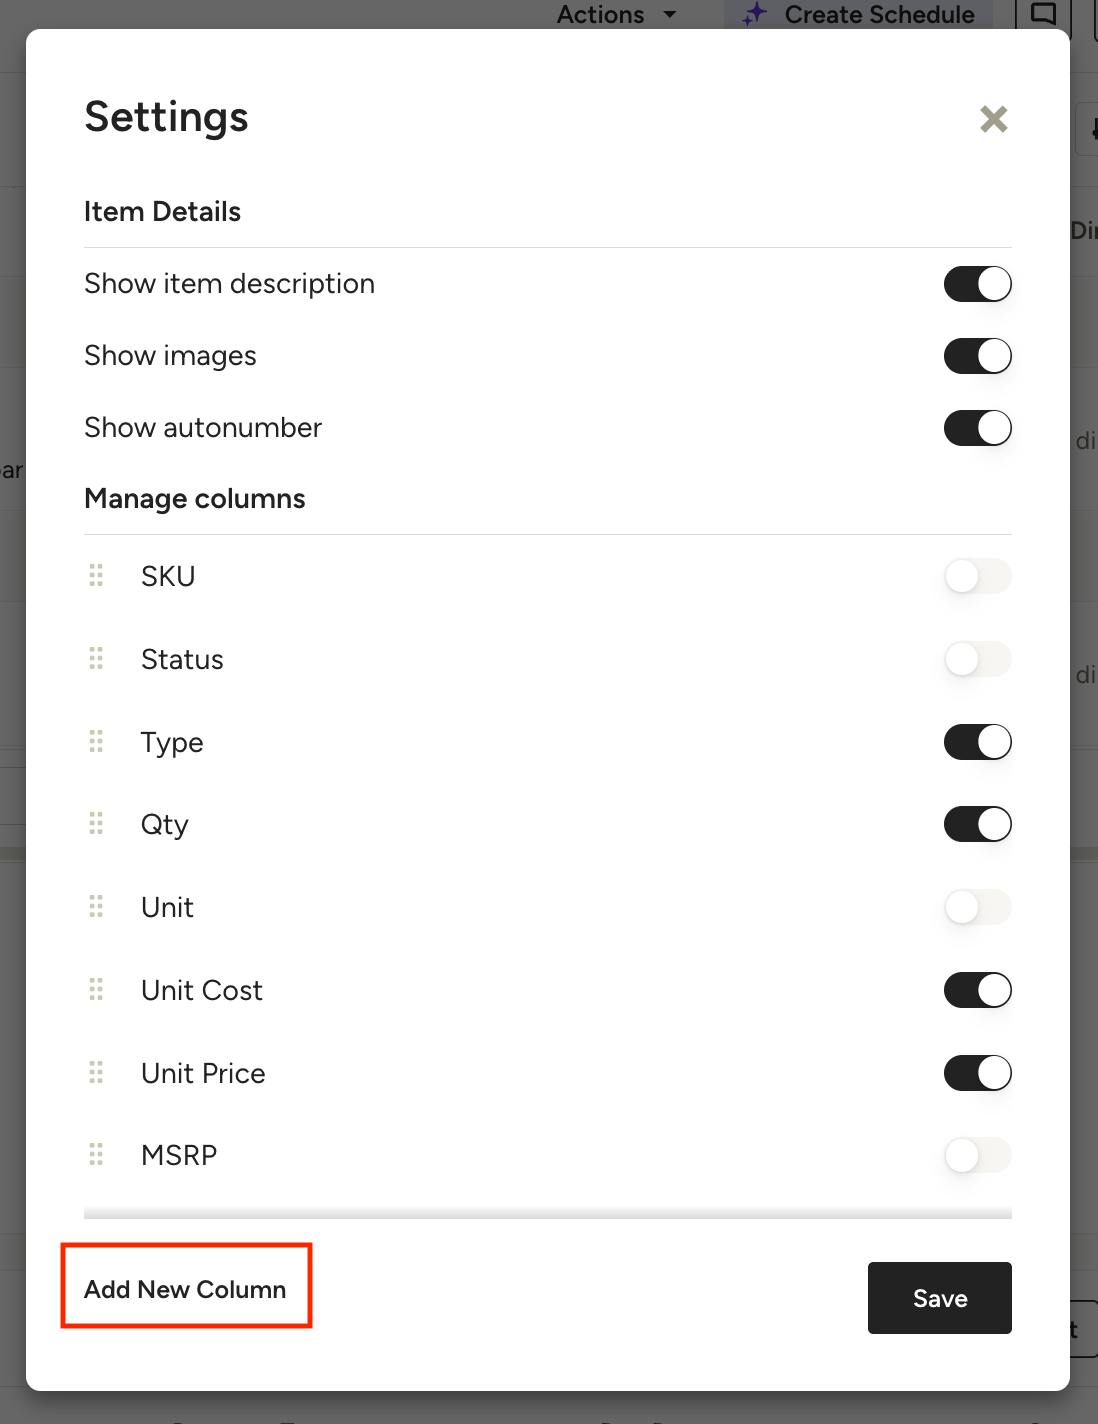
You can also access this by clicking the Customize icon at the top of your items table, then selecting Add New Column at the bottom of the modal.
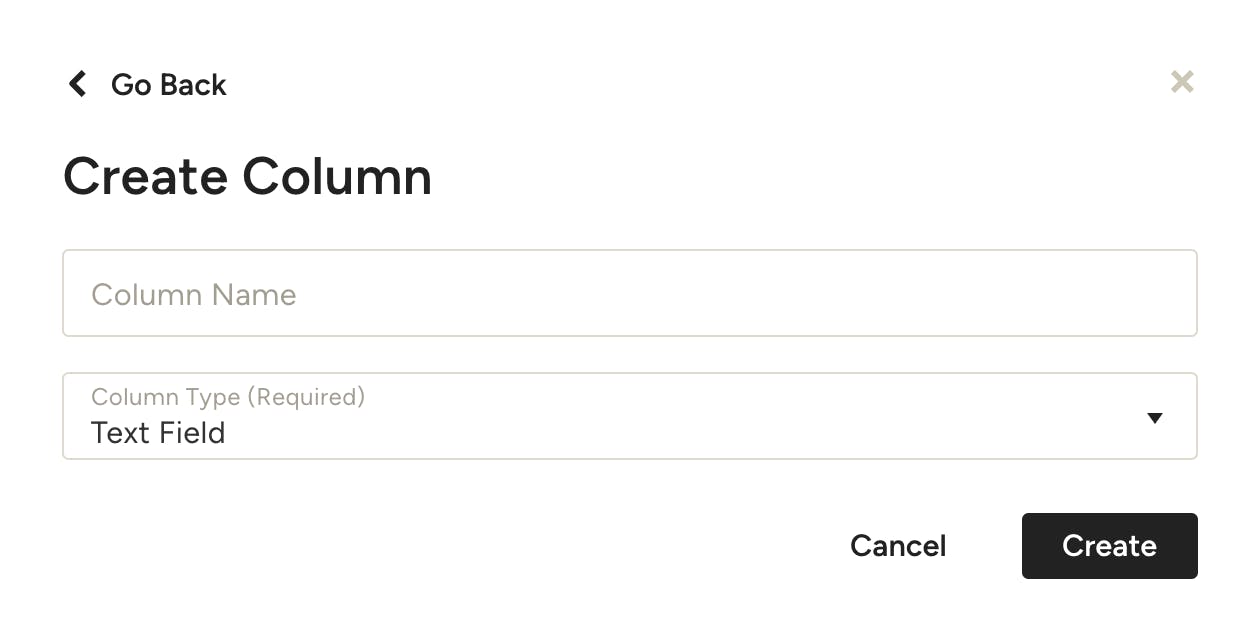
Input the column name and the column type — Text, Check Box, Single Select, Date, Duration or Link. The column type will determine the format you can use in the column and might require you to add more formatting information (for example, naming available options for single select). Click Create once complete.
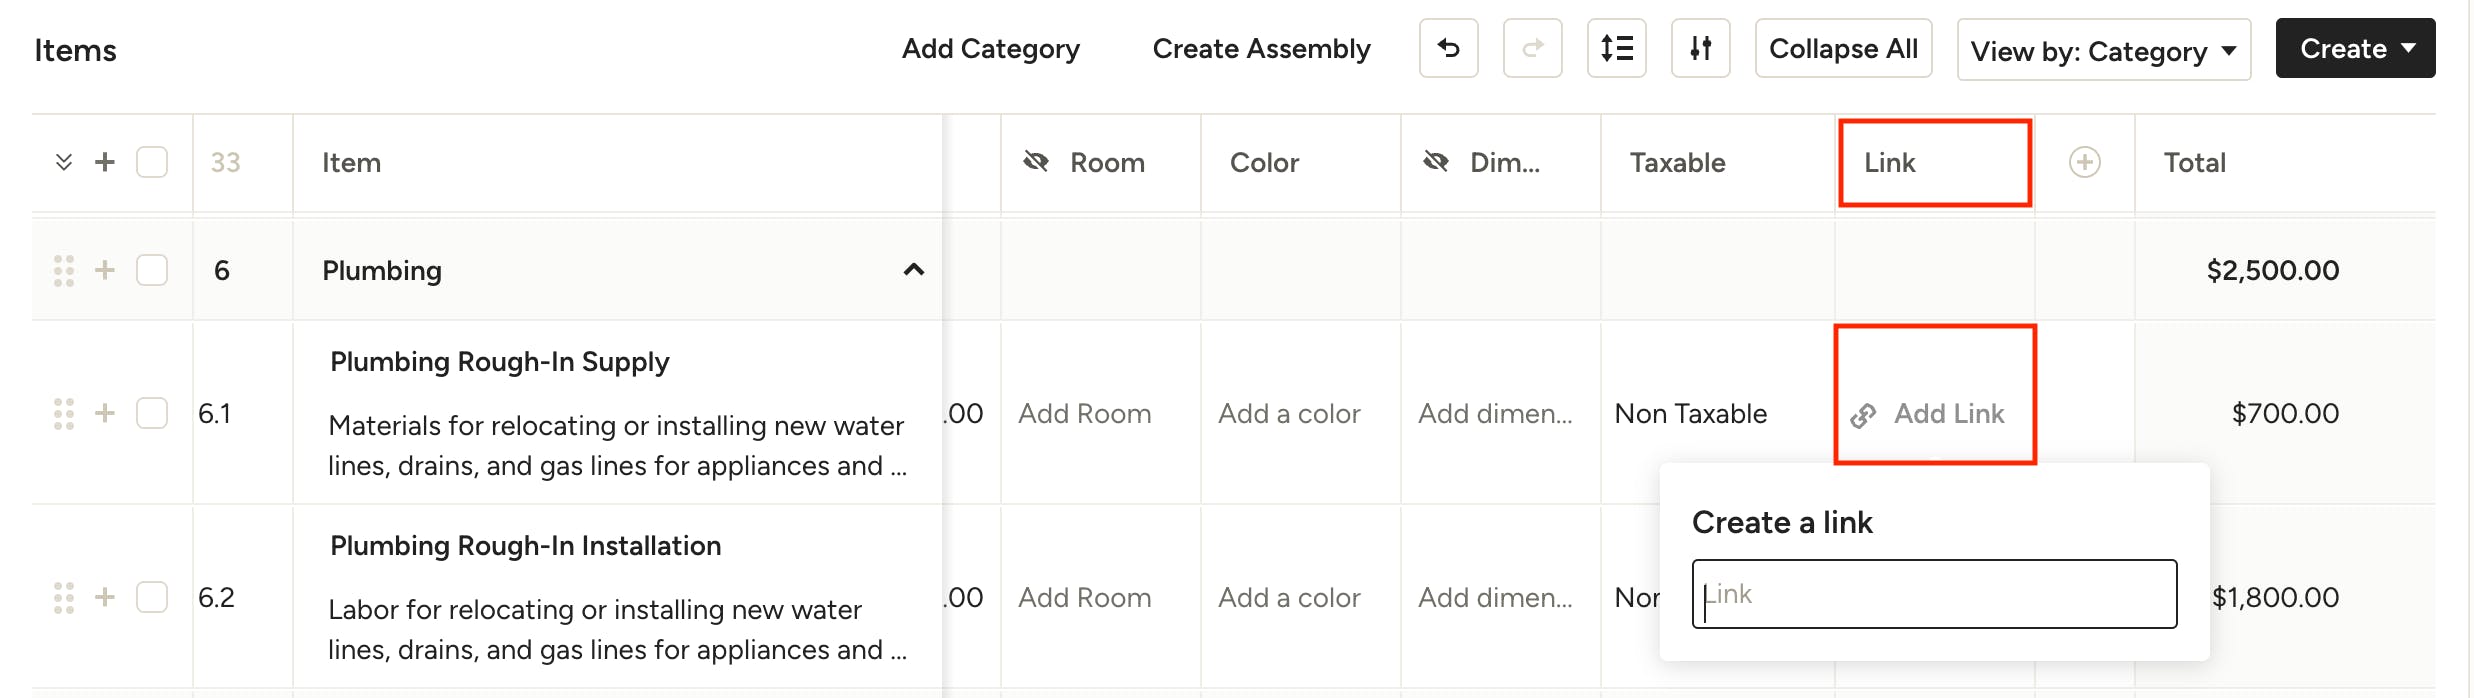
The new column will now show up in your document. You can add content by directly clicking on each cell, and then inputting the relevant information.
Please Note: Custom columns won’t sync to your integrated accounting platform, such as QuickBooks Online or Xero.
Add Line Item Descriptions
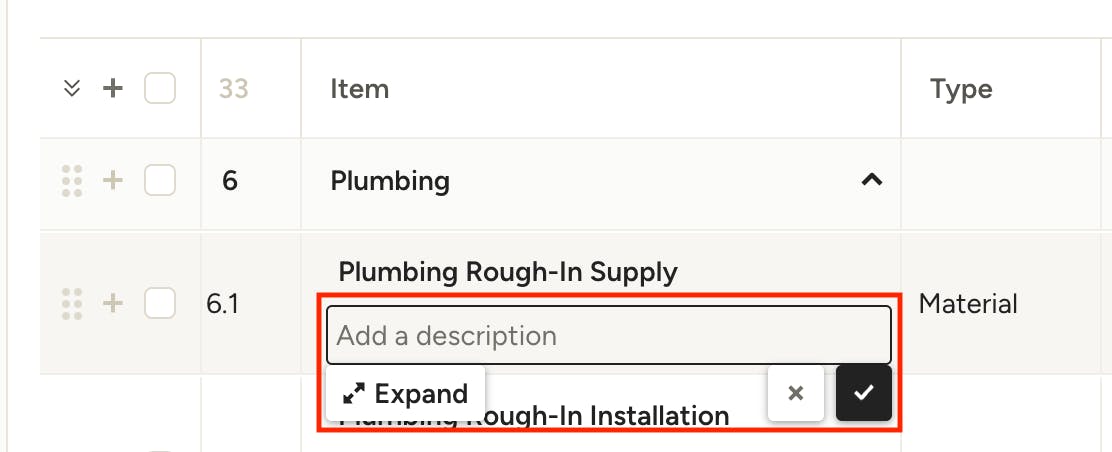
You can add custom descriptions for individual line items to better explain the product, material, labor or service to your client.
Go to the line item and click directly in the description field to start typing. Hit return/enter on your keyboard to save the description, or click the checkmark. Alternatively, you can click Expand to open the description modal with a larger text input view and more options.
If you don't see this options, make sure "Show item description" is toggled on under Settings, accessible via the Customize button.
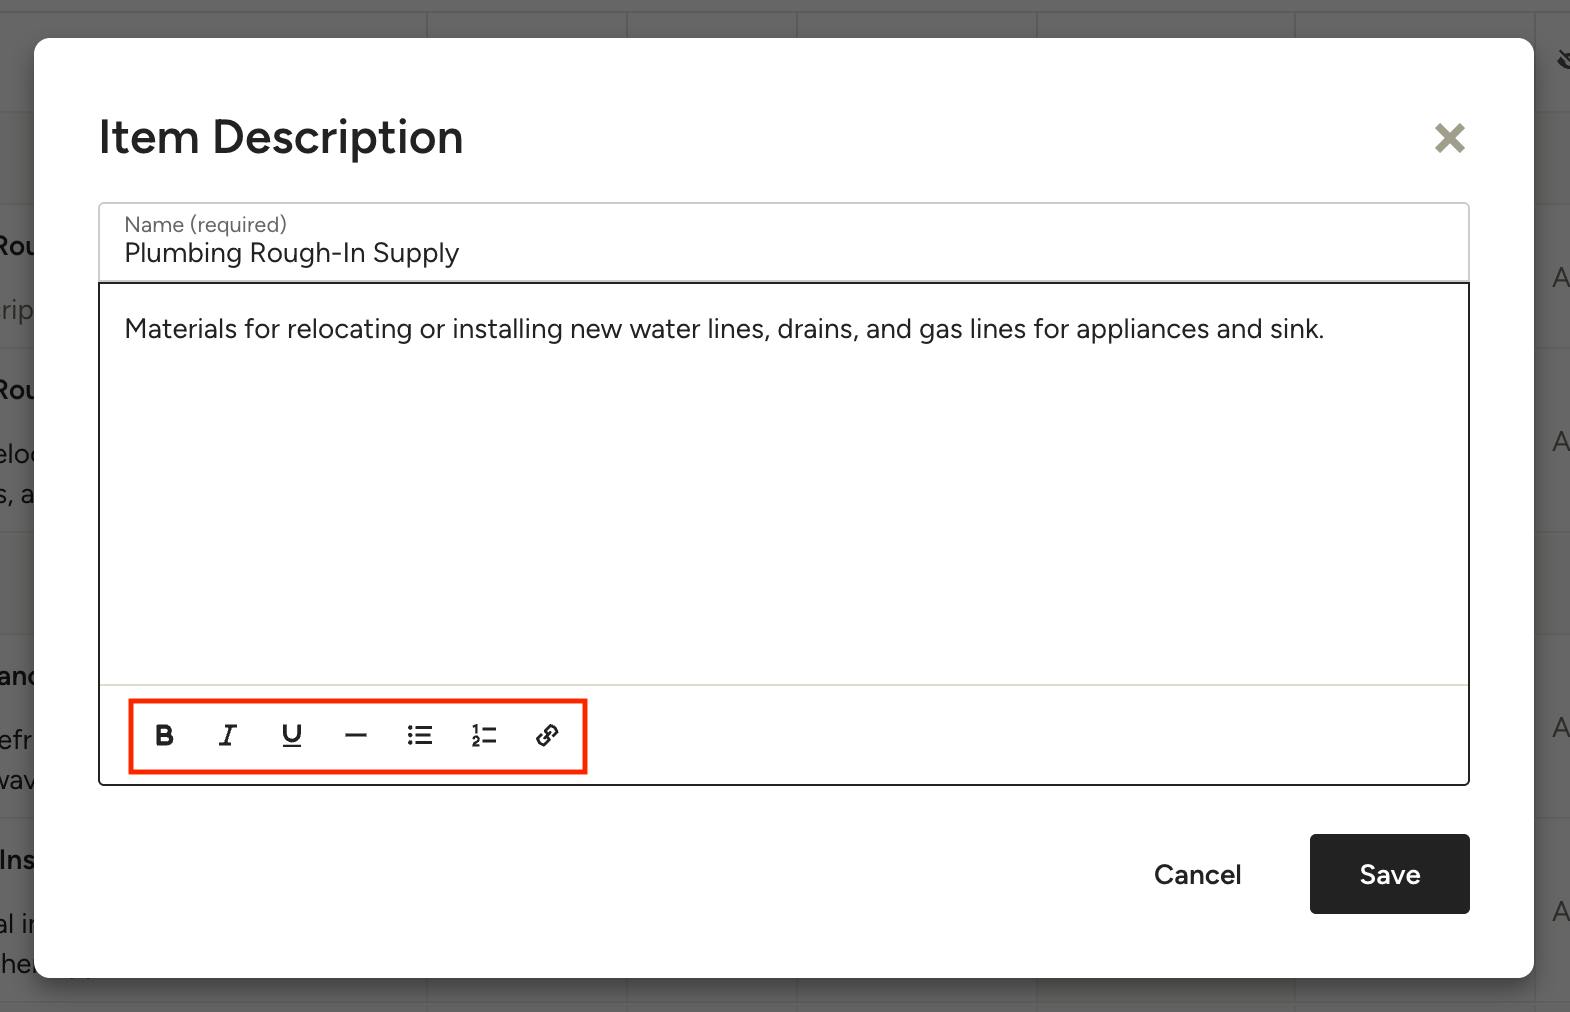
If you click Expand, a screen will pop up where you can input the description, including text formatting options like bold, italics, lists and links. Click Save, and your line item description will now show up directly in your document.
Add Images
You can add up to 5 images for individual line items, including logos or icons.
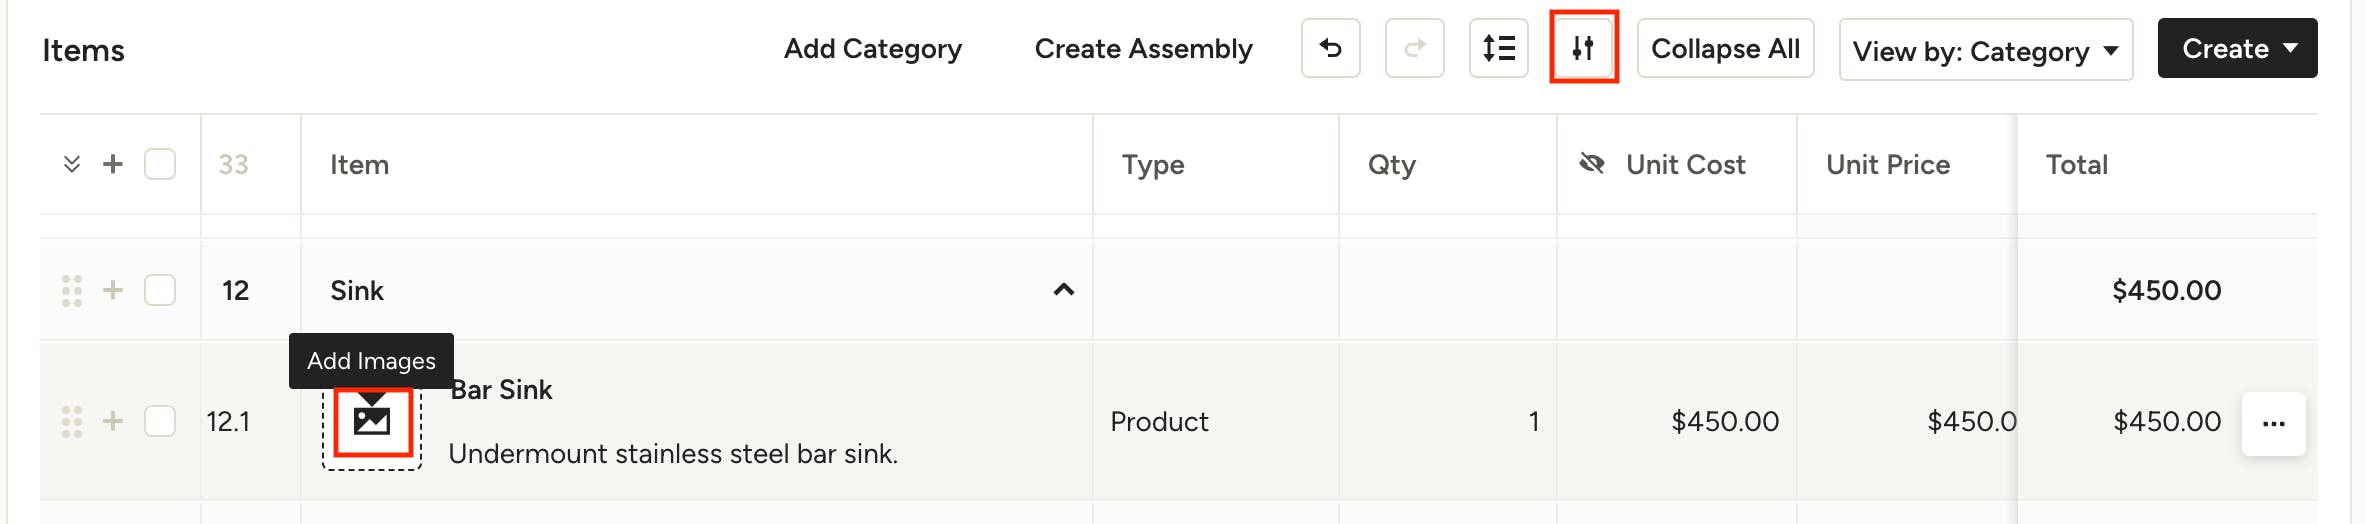
Go to the line item and click the Image icon.
If you don't see this option, make sure "Show images" is toggled on under Settings, accessible via the Customize button.
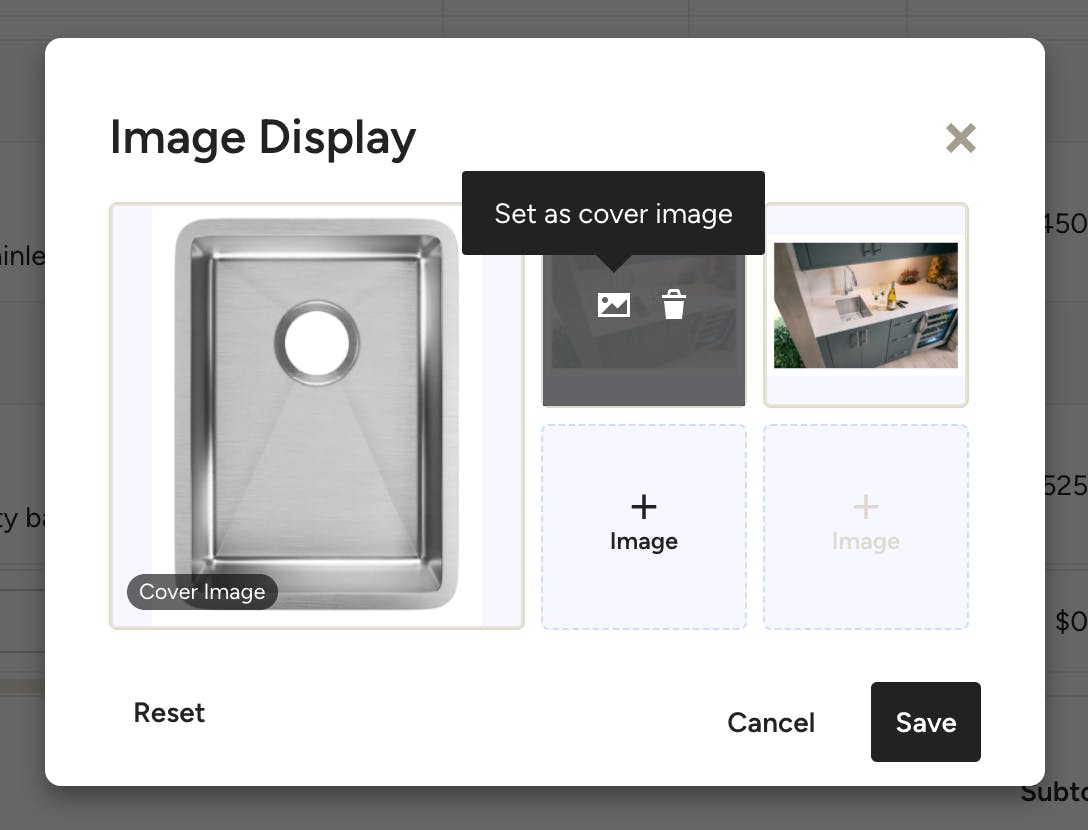
A screen will pop up where you can add up to five images. Click + Image and select from the options to upload an image, pick an icon or use your logo.
The large one on the left will display as the cover image for the item. To swap the cover image, hover over one of the smaller images and click Set as Cover Image. Once your images are added, click Save, and your line item images will now show up directly in your document.
How to Customize Document Format
You can customize a document's format to suit your company's needs, including adding or removing columns, reordering columns, setting line height and adjusting column width.
Your document format settings are automatically saved as default for next time, including your column names and column order. It’s saved based on the last document created of each document type.
Add/Remove Columns
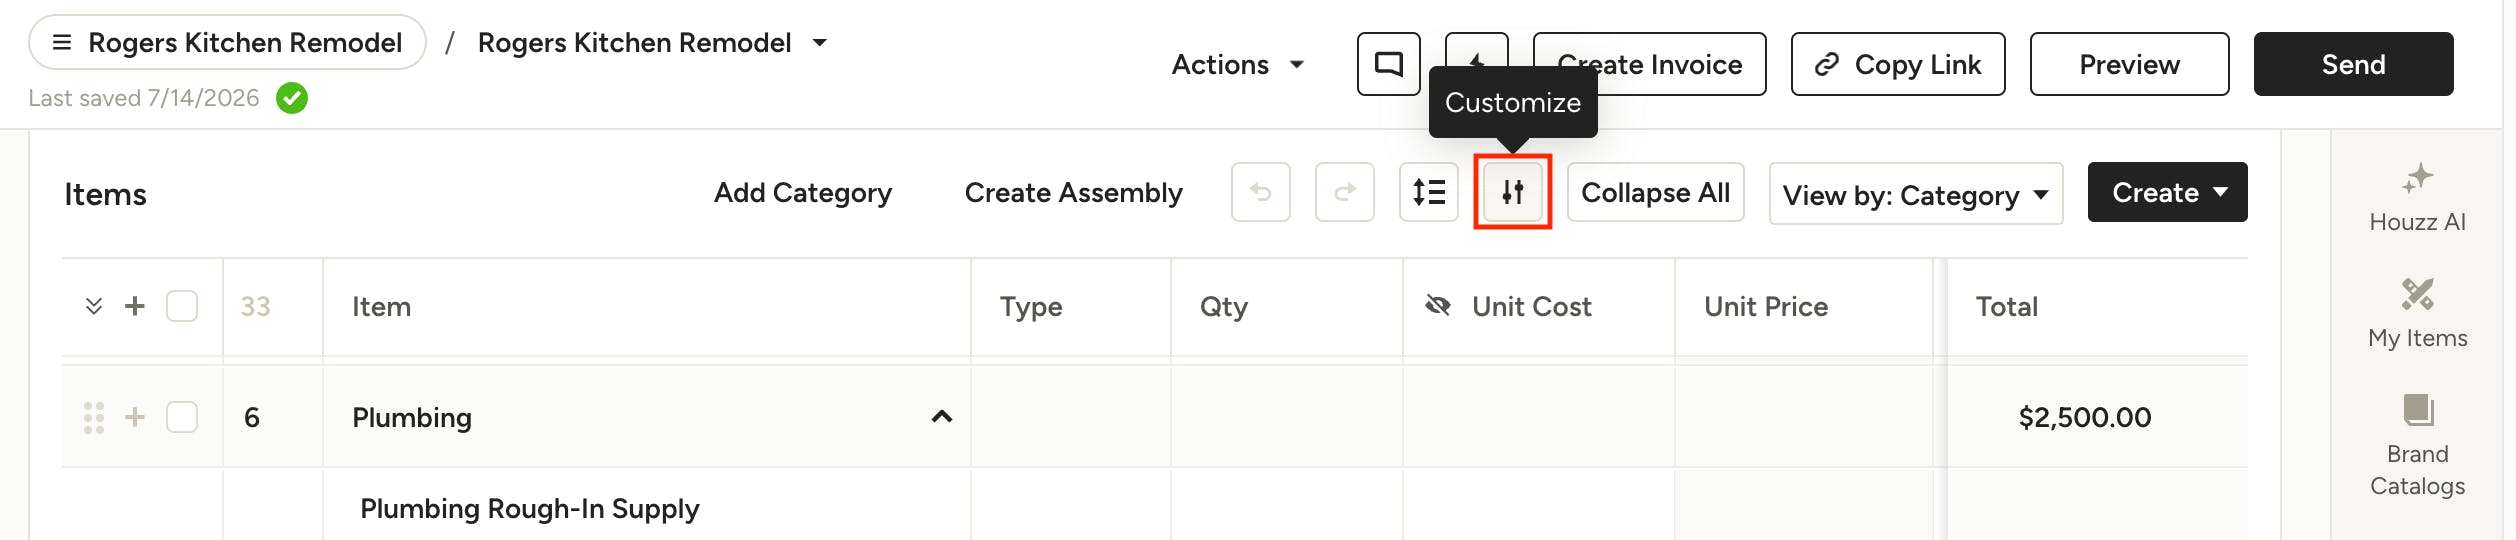
To add or remove columns from the document view, like item descriptions, images or numbering, select the Customize button near the top of your document.
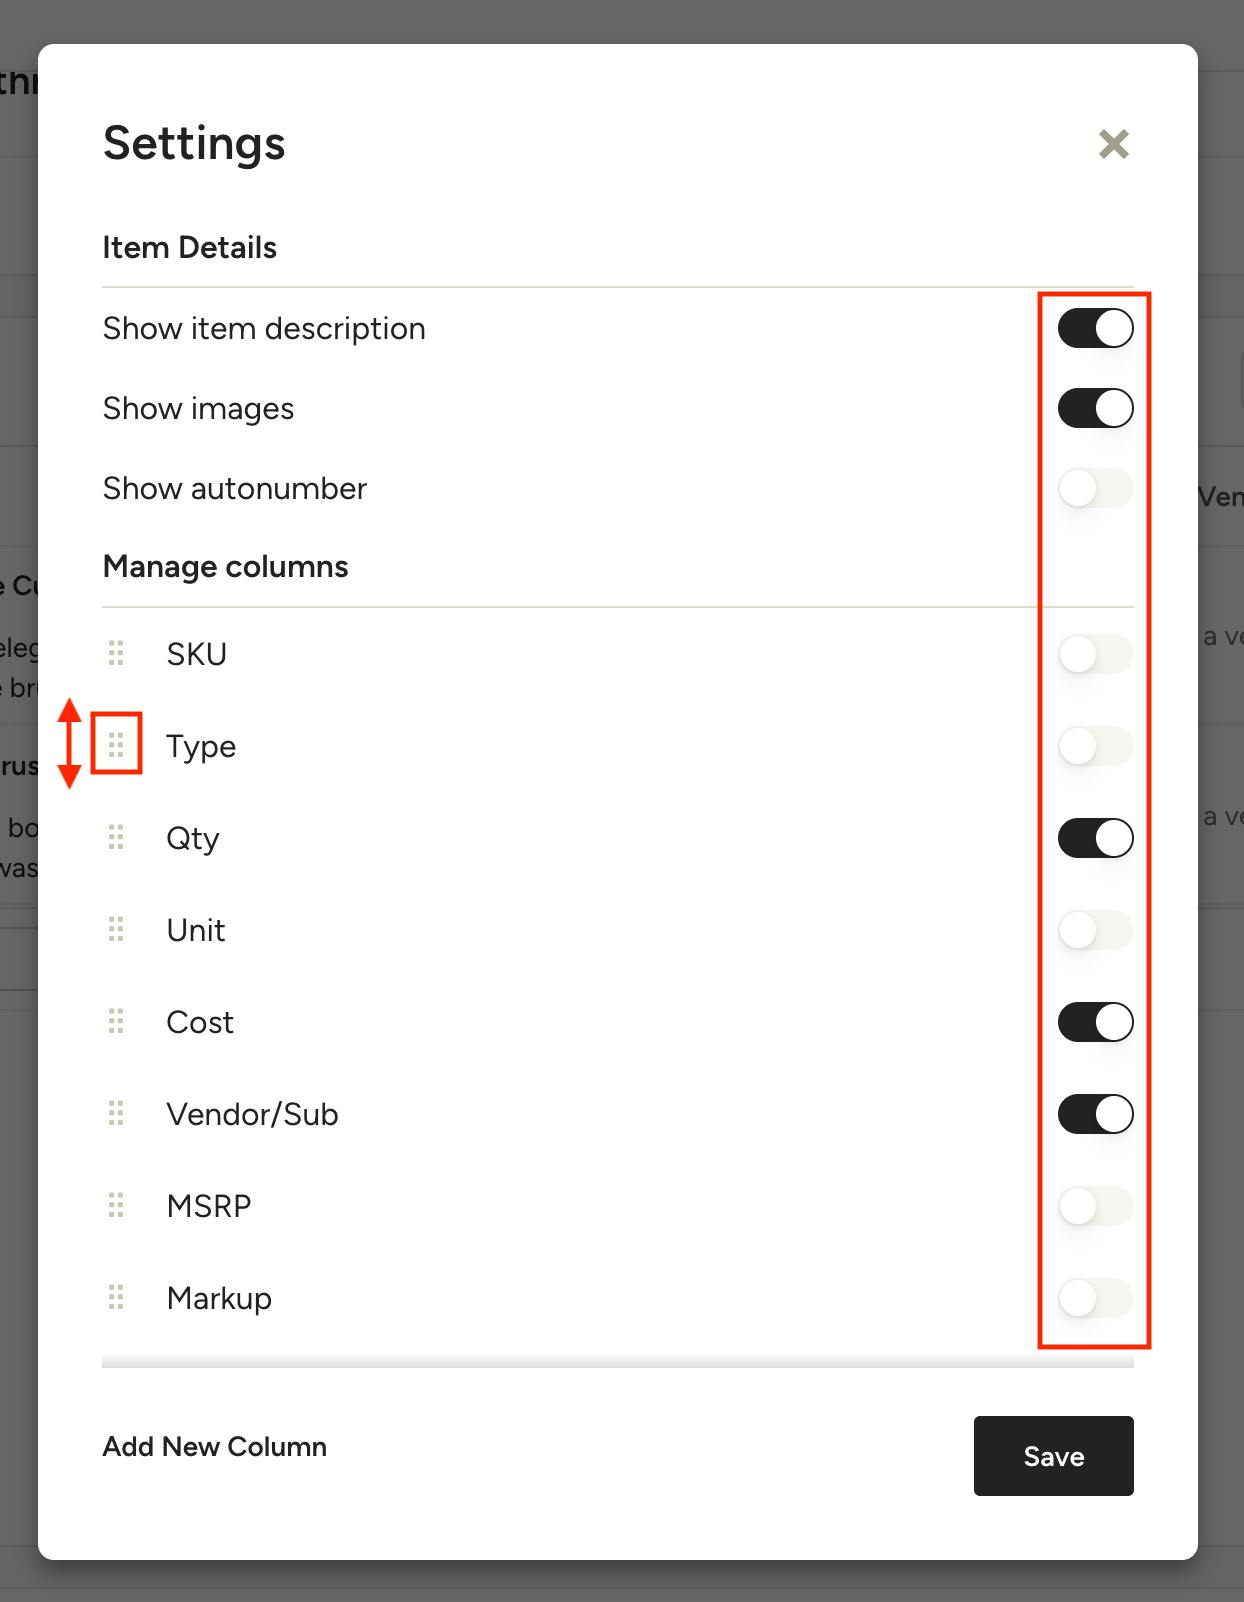
From here, you can toggle on and off columns, item descriptions, images and autonumbering based on what information you actually need. You can also reorder the columns by dragging and dropping them into the desired order using the six dots to the left of each column name.

Reorder Columns
To change the order of your columns, you have two options. You can open the column settings and drag/drop them into order, as detailed above, or you can click the six dots directly on the column header in the document and drag it left or right to the desired position.
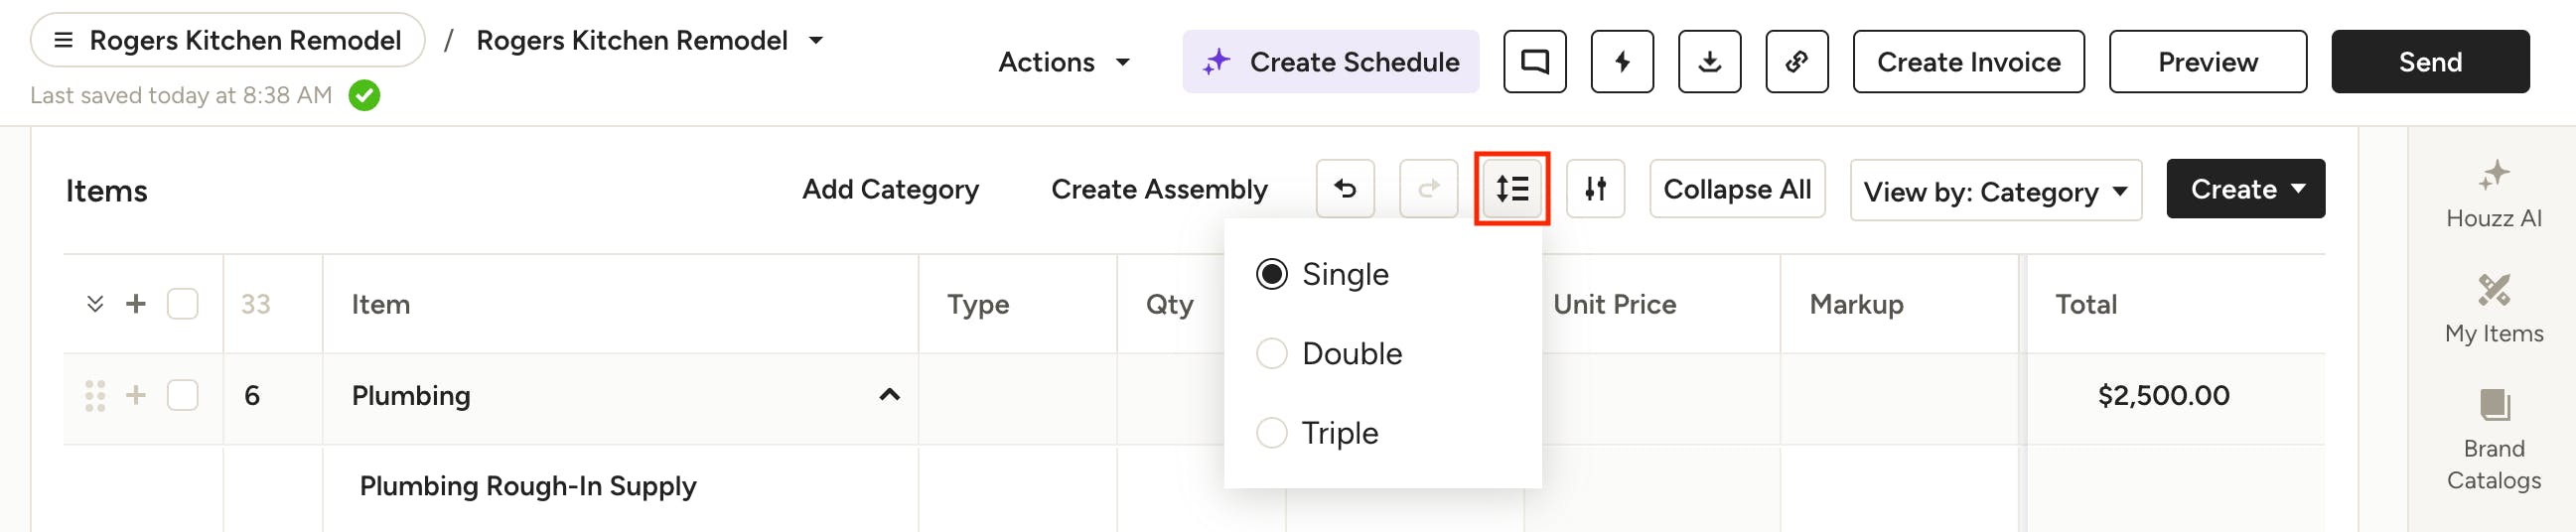
Set Line Height
To set the line height on your items, click the line height icon at the top of the items table and set your desired height.

Adjust Column Width
To adjust column width, place your cursor on the right edge of the column you want to resize, then click and drag it left or right to achieve the size you want.
Wrap or Clip Text
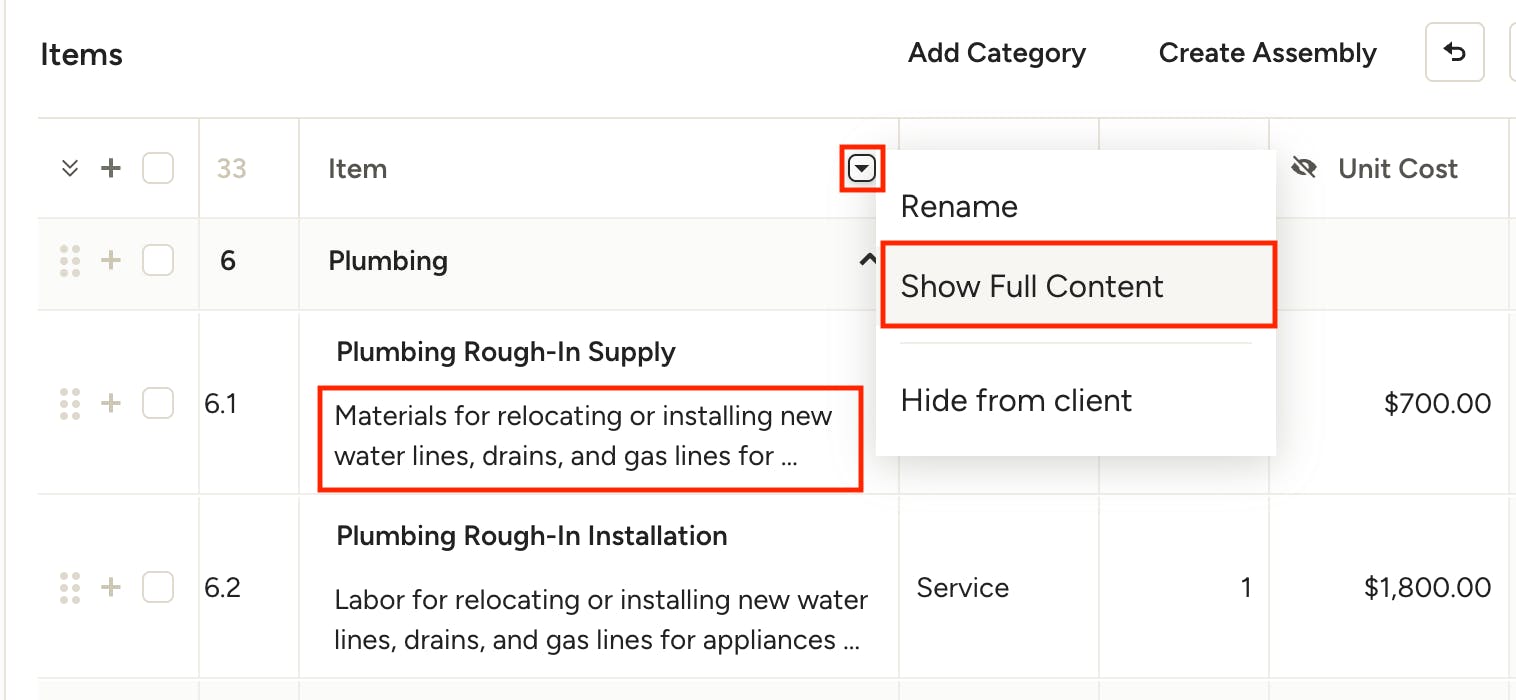
You can choose to display shortened content (clipped text) or show full content (wrapped text) on each column. To do so, click the arrow icon at the top of the column you wish to set this for, then select Show Full Content (wrapped) or Shorten Content (clipped). Show Full Content is helpful for text-heavy columns, like descriptions or notes, so you can see all your details without clicking back and forth.
Shortened Content Example:
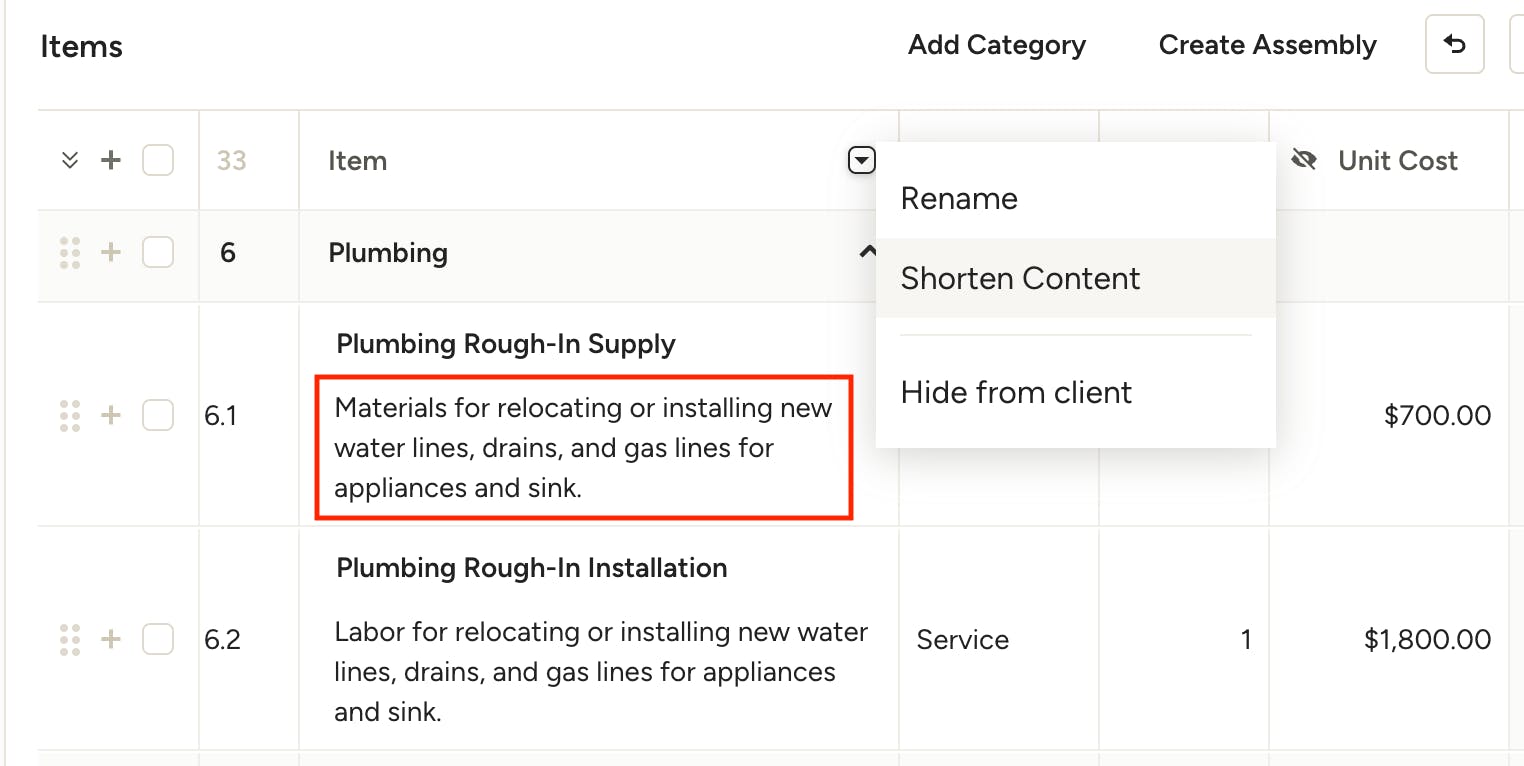
Full Content Example:
How to Customize Your Client's View
With just a few simple clicks in preview mode, you can easily adjust which details your clients can and can't see on your document. This feature ensures that relevant information stays on the document for your records, but you are still able to hide elements from the client if needed.
Read this article to learn more about this process: How to Customize What Your Client Sees on Financial Documents