How to Add Multiple Addresses for a Project
Projects often use multiple addresses for different purposes, such as a client's address, the job site address, billing address or shipping address. Houzz Pro makes it easy to manage all relevant addresses for each project — even adding custom addresses for individual documents — so you can ensure all estimates, invoices, purchase orders or deliveries make it into the right hands.
By default, the client's address (the one included in their contact details) will be copied into the primary project address if there is not already a project address present. If you want to add additional addresses to a project, there are two spots where you can do so:
- From Project Details (plus set default billing and shipping address)
- From a Document
You can also set company-wide shipping addresses from your Company Settings, which will appear in purchase orders across all projects.
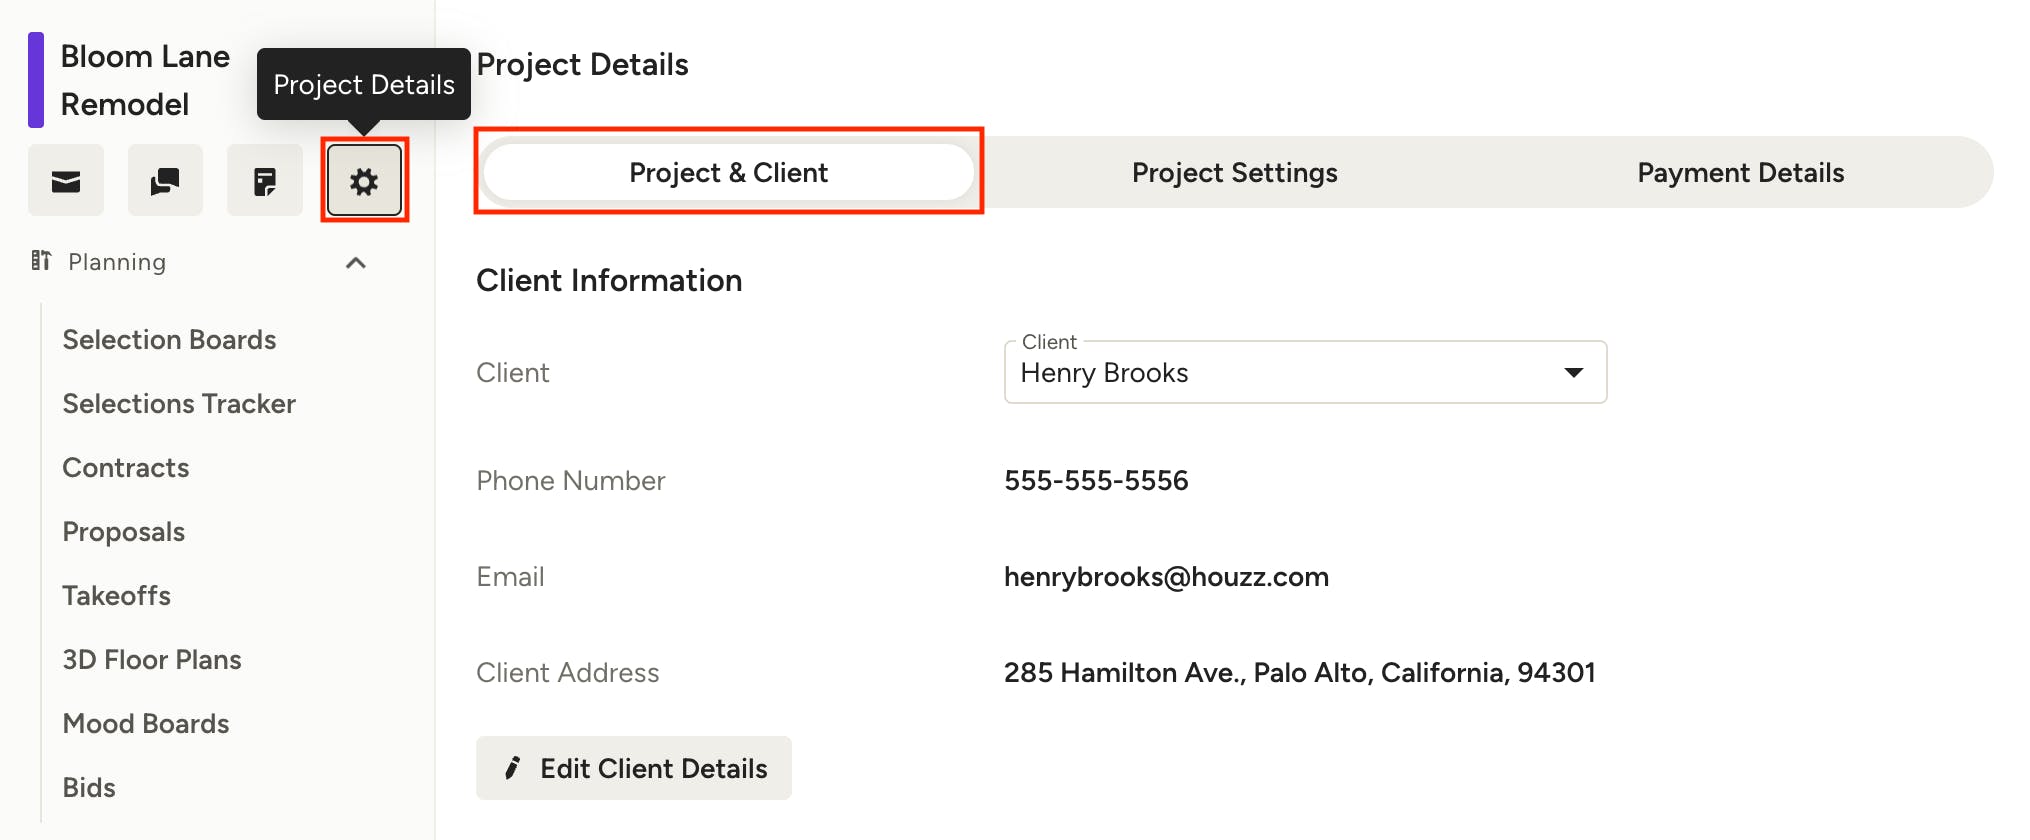
From Project Details
Within a project's details, you can add, edit or delete project address(es) as well as set default billing and shipping addresses.
Click the Projects icon from the left navigation, then select the relevant project. Once you are on the project overview page, click the Gear icon at the top left to edit project details. Make sure you are on the Project & Client tab at the top, then scroll down to the section you want to make changes in: Project Addresses or Default Billing and Shipping Addresses.
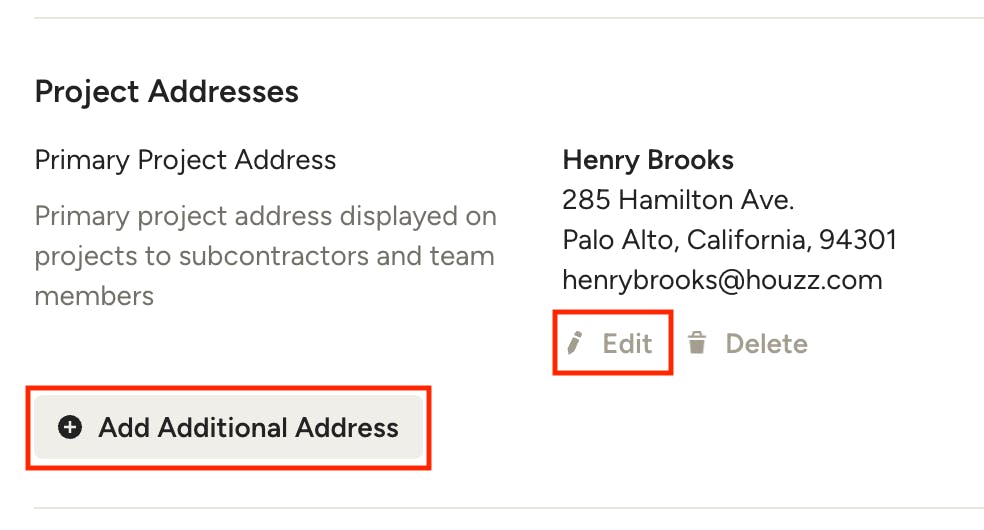
Project Addresses
You can have multiple project addresses for a single project, but only one can be designated the Primary Project Address — the address displayed on projects to subcontractors and team members. Typically this would be the address of the physical job site where the work is taking place. By default the client's address is copied into the primary project address if there is no existing project address. You can edit this here to change it, or add a new one.
To add a new project address, click Add Additional Address.
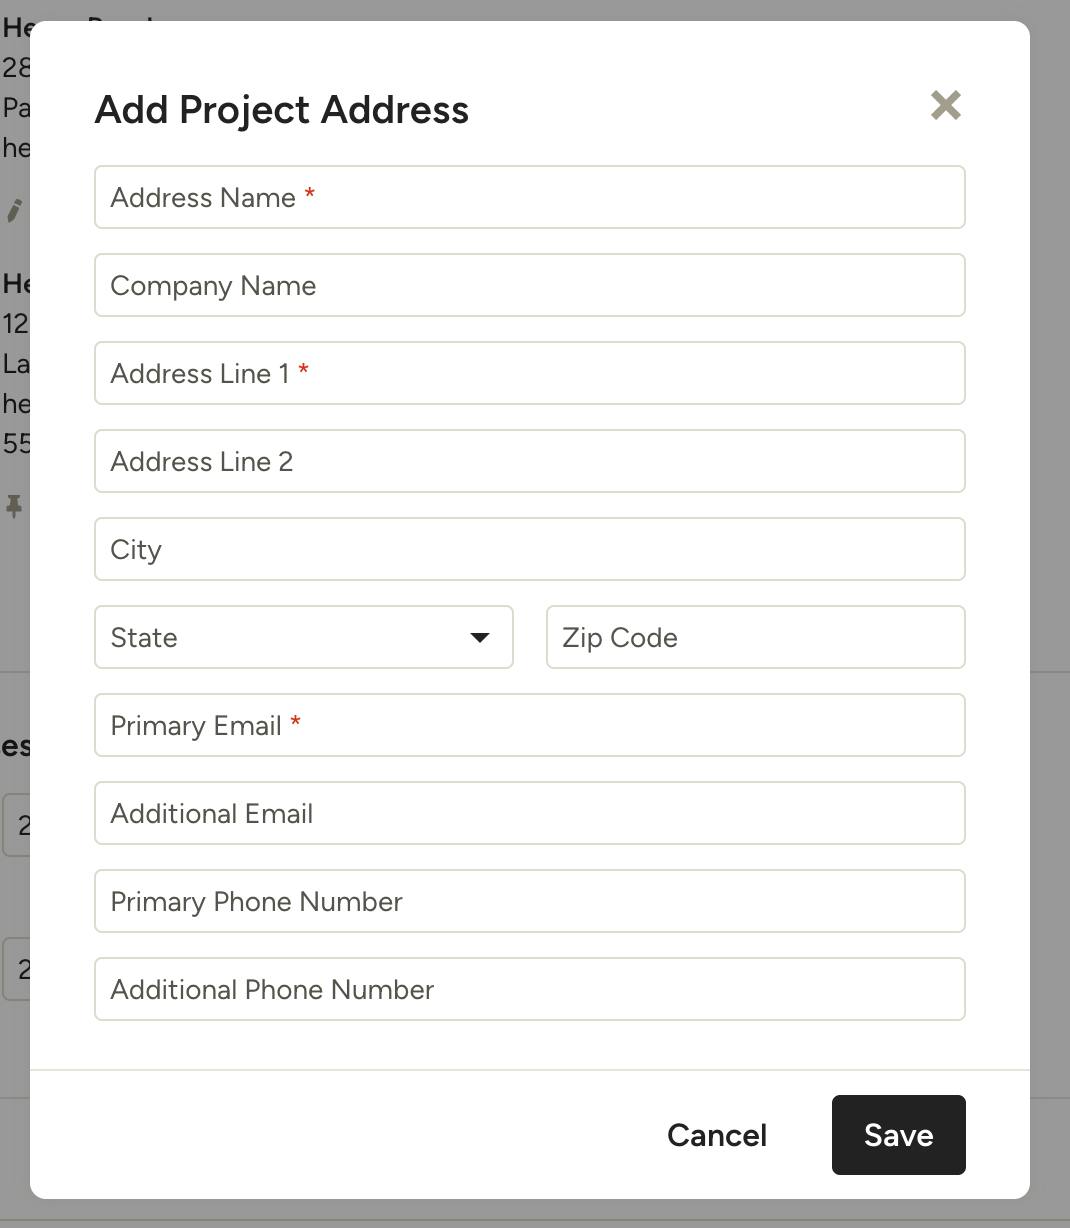
Fill in the address details. Address Name, Address Line 1 (street number/name) and Primary Email are the minimum requirements for a new project address. Click Save to add.
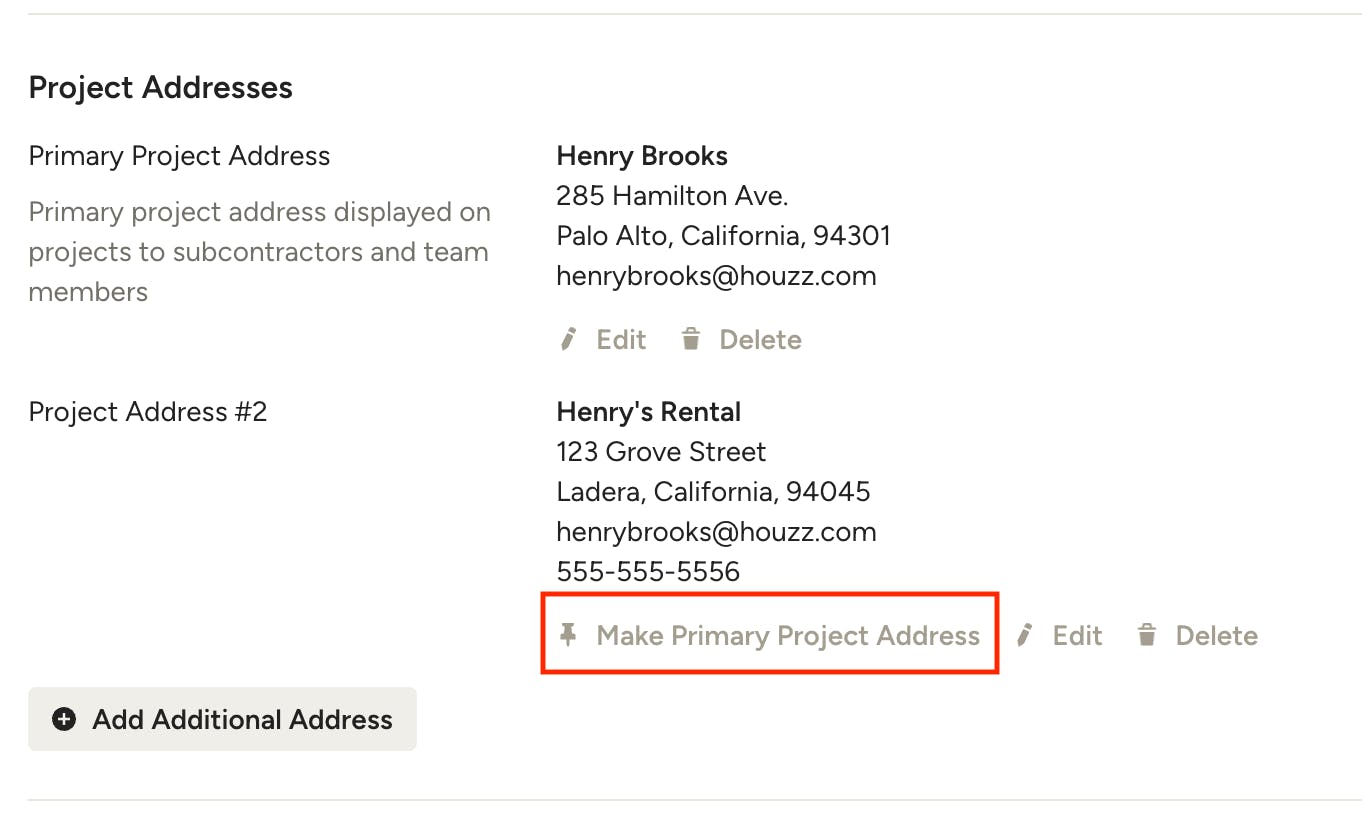
Once you have more than one project address added, you will see the option to change the primary project address. Click Make Primary Project Address on the one you want to appear to subcontractors and team members as the main address.
Editing Project Addresses
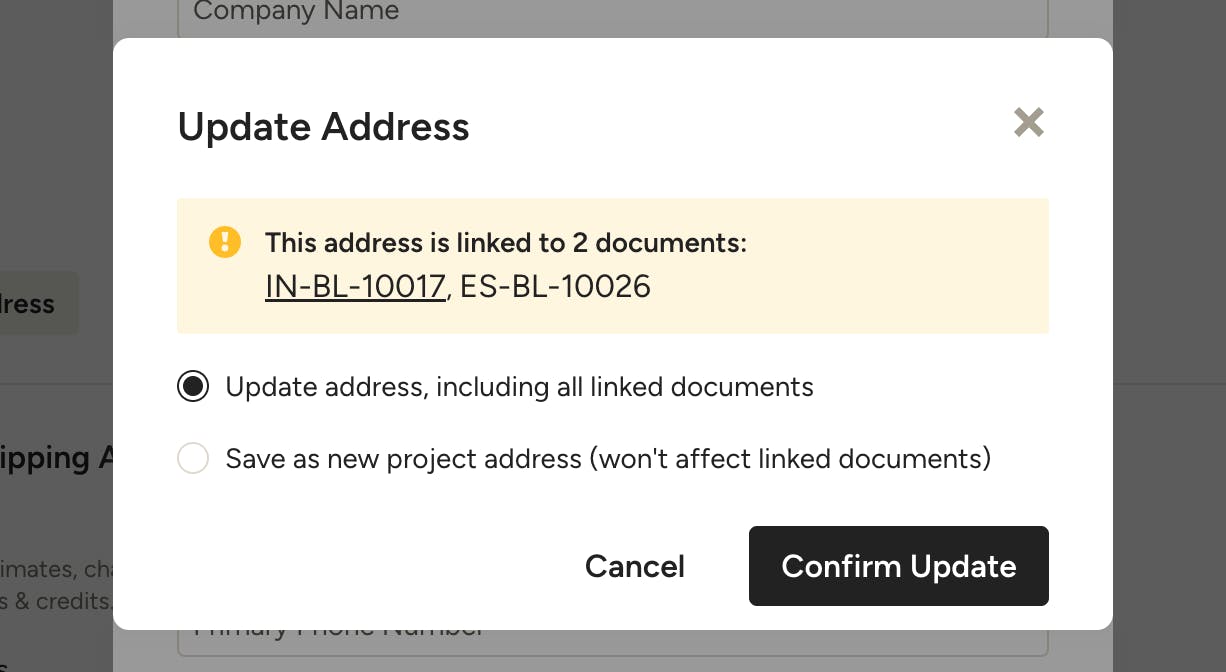
Project addresses can be edited whether they are connected to any documents or not. However, once a project address is used on a document, if you make any changes to the address you will need to choose one of two options:
- Update the address on all linked documents (good for cases like spelling mistakes or incorrect unit number)
- Save as a new project address (this option will not affect any linked documents)
The Update Address modal will show you exactly which documents are linked to the affected address. Choose one of the options and click Confirm Update to confirm the address edits.
Default Billing and Shipping Addresses
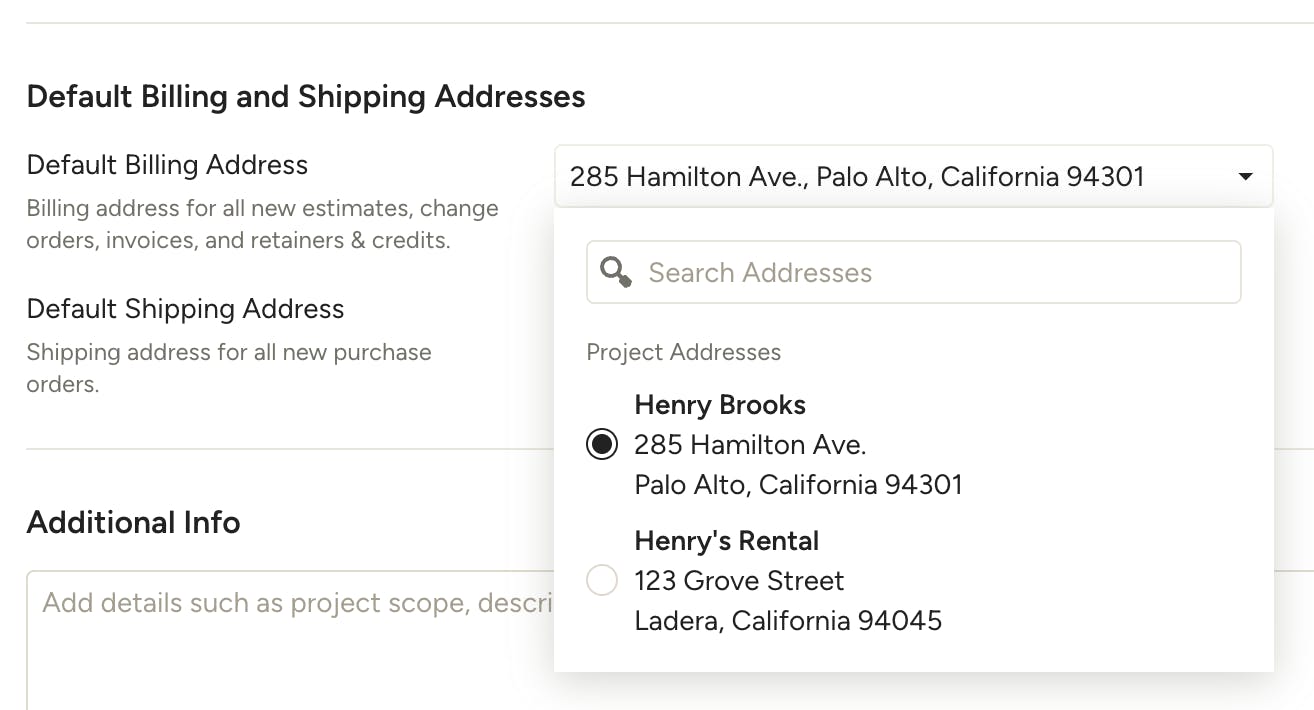
This section allows you to set a default address for the Bill To and Ship To fields on documents. These will be set to the primary project address initially, but can be changed to any other project address that is added to the project. Simply select the desired default address from the dropdown for each one.
- Default Billing Address: Billing address for all new estimates, change orders, invoices, and retainers & credits.
- Default Shipping Address: Shipping address for all new purchase orders.
Note: Only newly created documents will have these addresses set by default — you can always change the address on the document itself. Any existing/past documents that already have an address set will not be impacted.
From a Document
Within a document, you can add or edit the client address and project address(es). Deleting project addresses, setting the primary project address and setting default billing and shipping addresses must be done from the Project Details, as mentioned above.
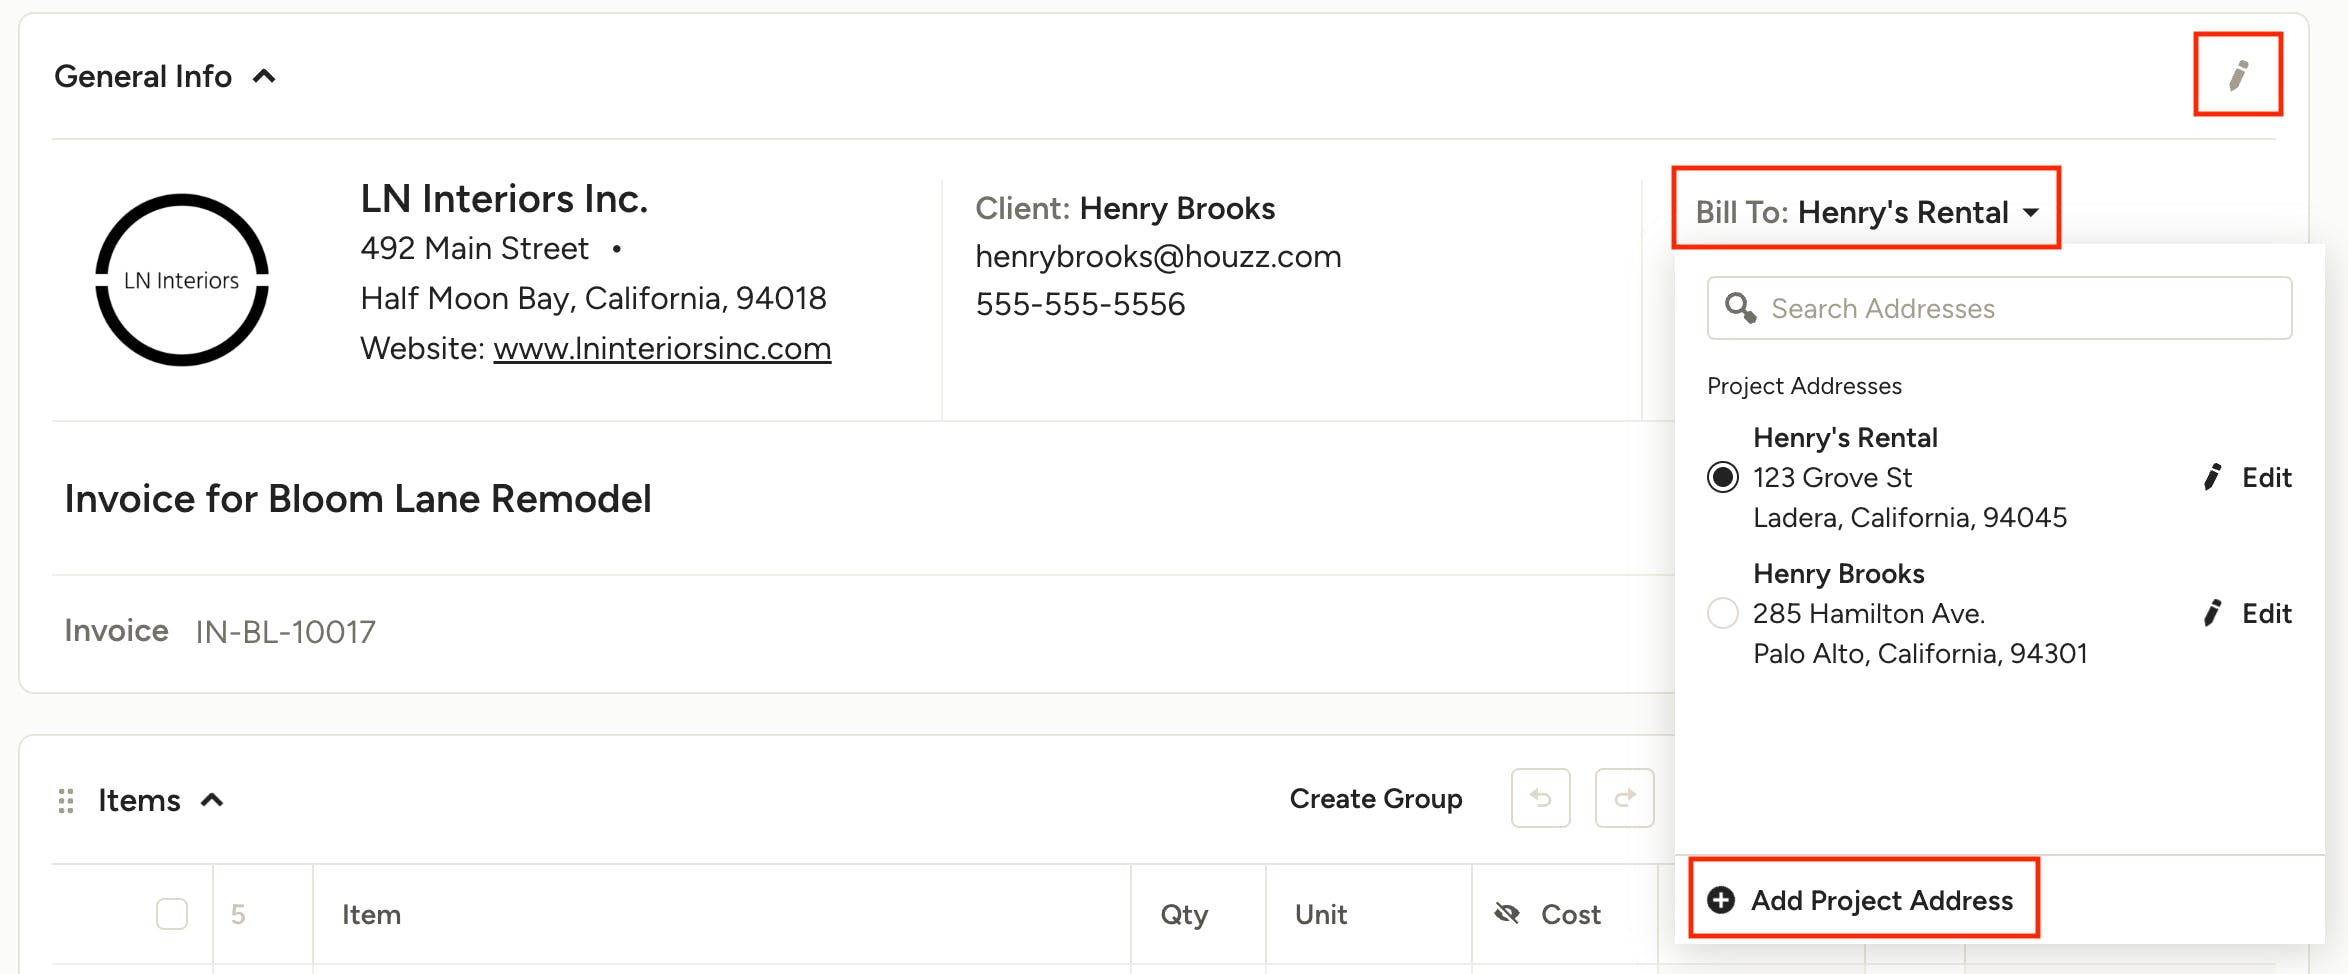
To add a project address from a document, you can either open the Bill To dropdown and click Add Project Address, or click the pencil icon at the top right of the General Info section the open the main editor.
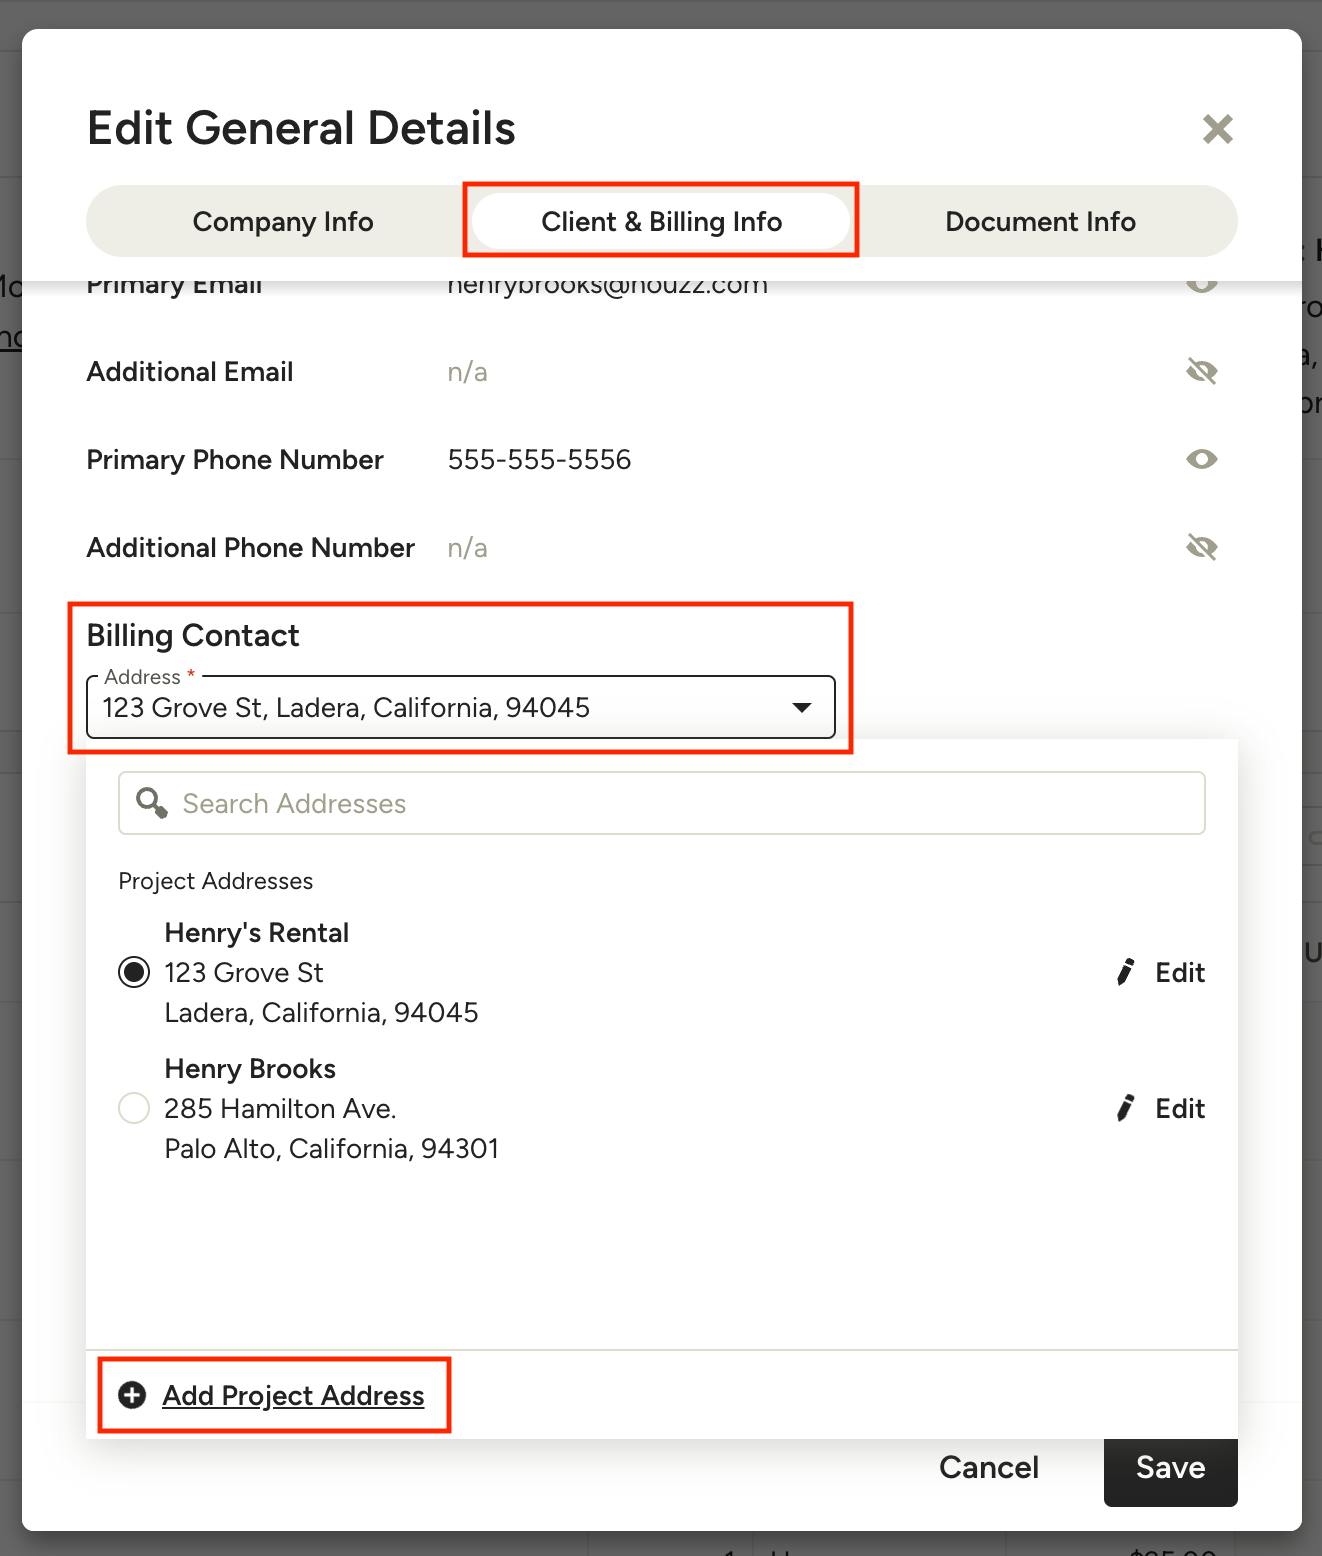
In the General Details editor, click the Client & Billing Info tab, then the dropdown for Billing Contact, then click Add Project Address.
From both places, the Add Project Address modal will open. Fill in the address details. Address Name, Address Line 1 (street number/name) and Primary Email are the minimum requirements for a new project address. Click Save to add.
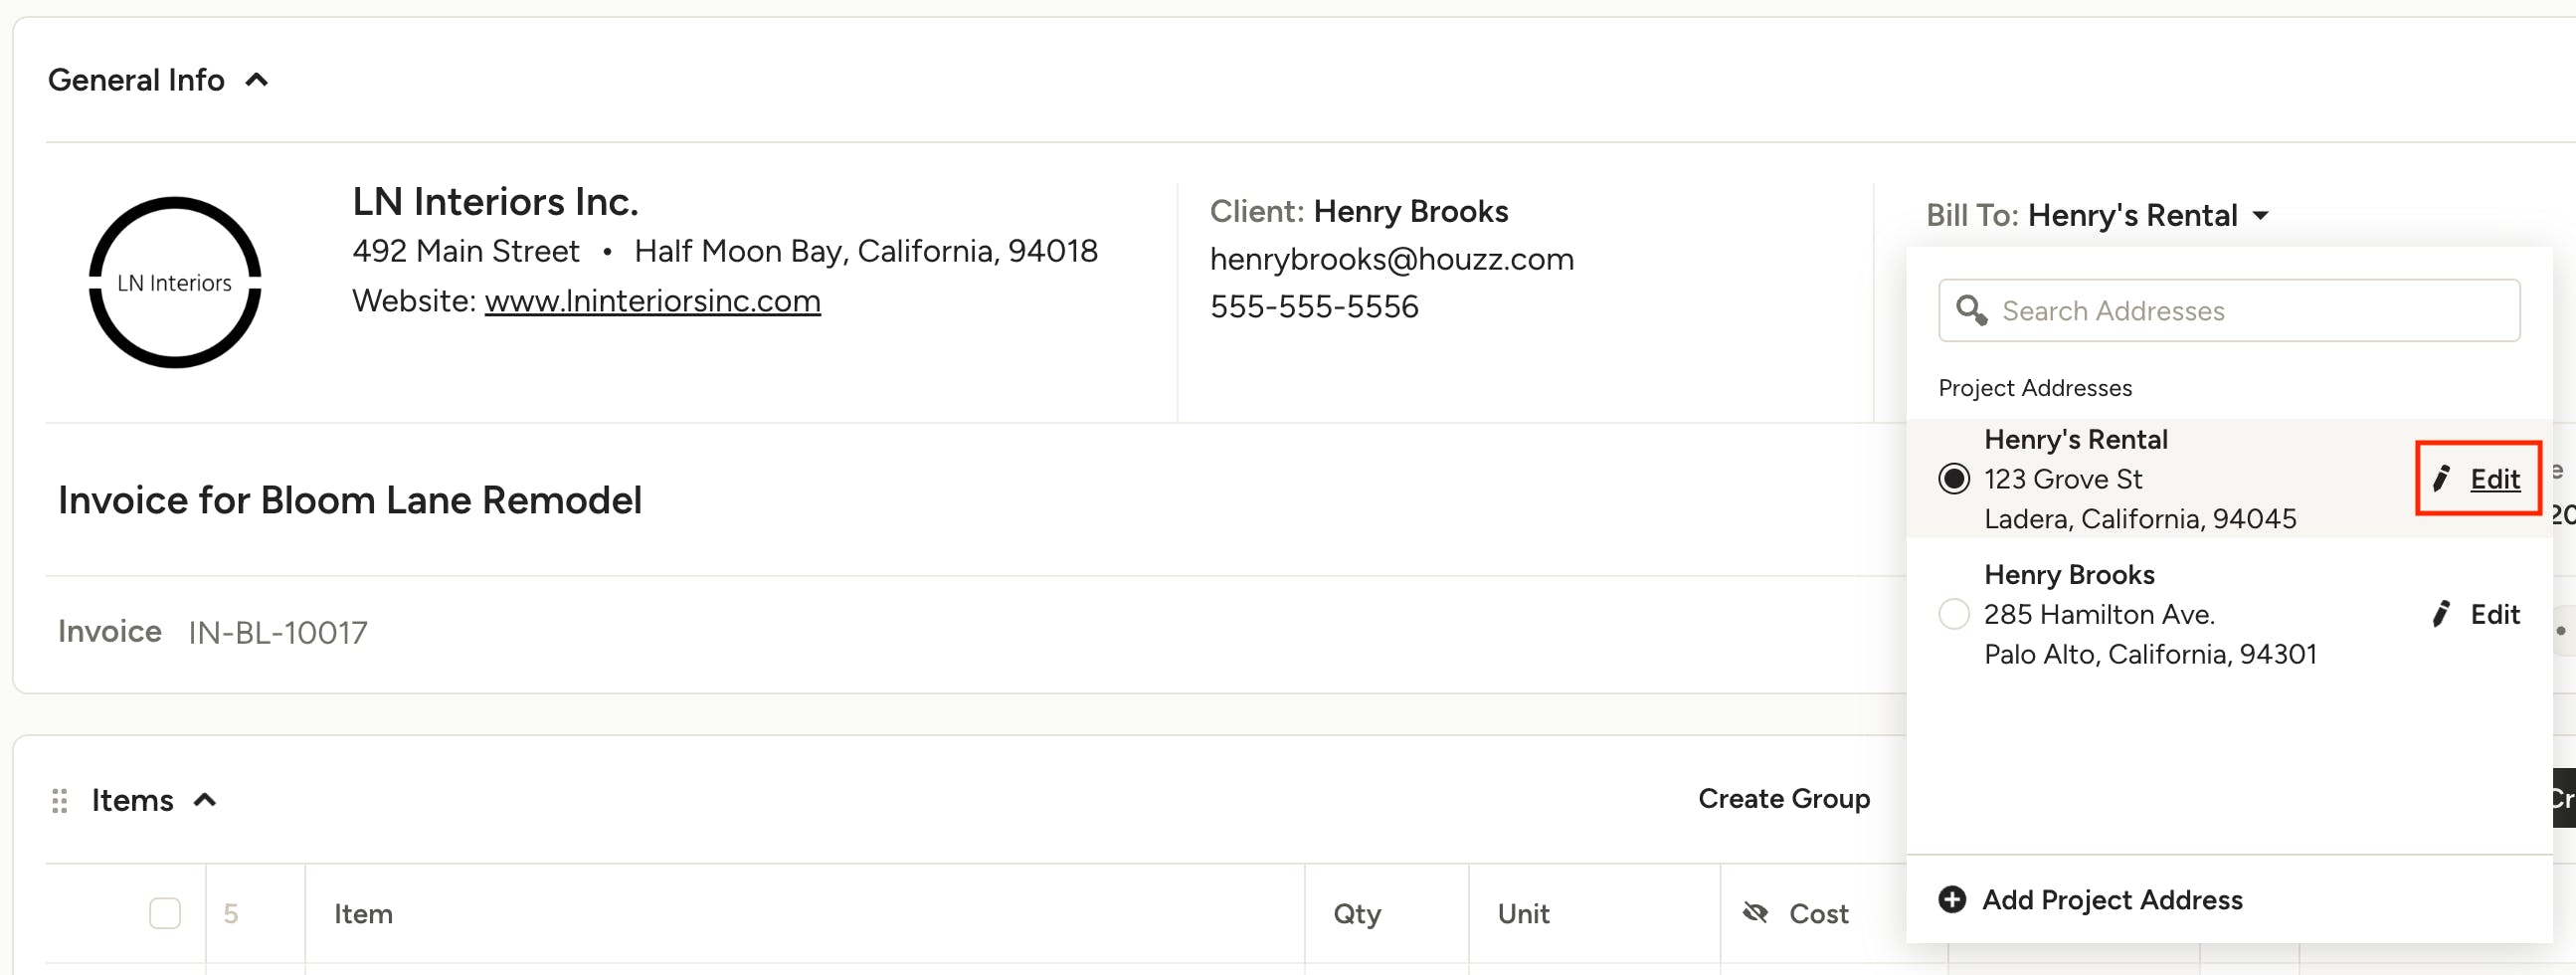
Once added, you will see the new address automatically applied to the Bill To section of the document.
You will see this new address in the Project Addresses section of the Project Details, as mentioned above.
Editing Project Addresses
Project addresses can be edited whether they are connected to any documents or not. However, once a project address is used on a document, if you make any changes to the address you will need to choose one of two options:
- Update the address on all linked documents (good for cases like spelling mistakes or incorrect unit number)
- Save as a new project address (this option will not affect any linked documents)
To edit an address from a document, click the pencil icon next to the address in the Bill To dropdown or in the main General Details editor.
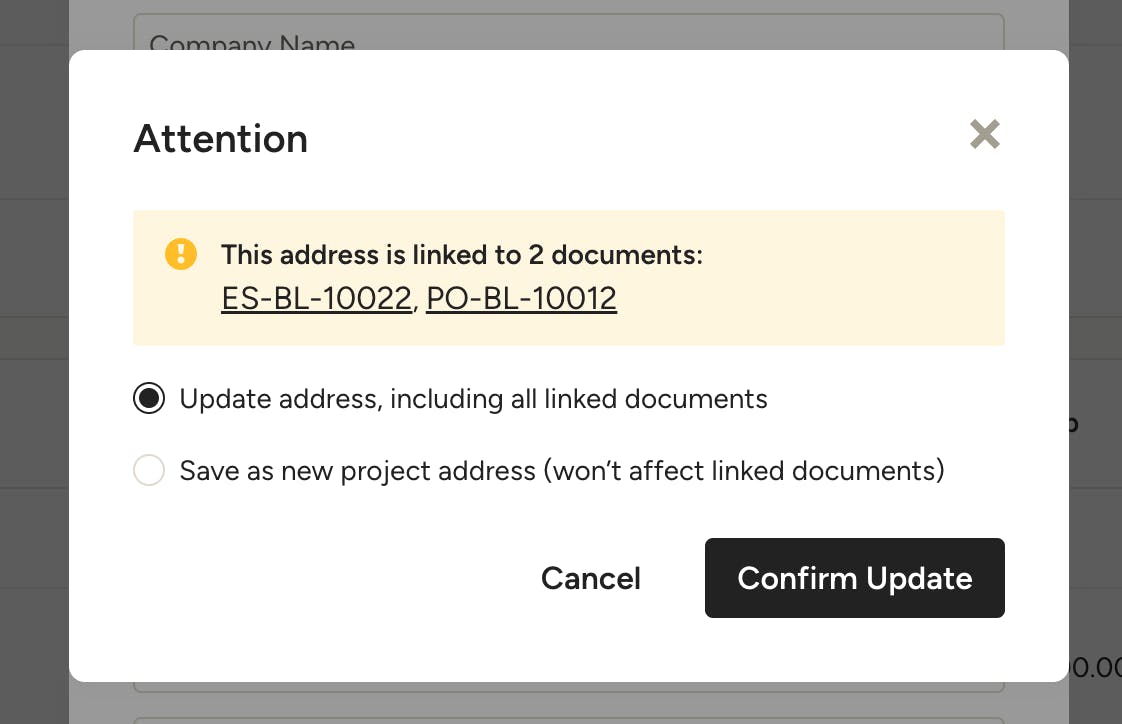
Once you make your edits and click Save on the edit modal, the Update Address options will show you exactly which documents are linked to the address. Choose one of the options and click Confirm Update to confirm the address edits.
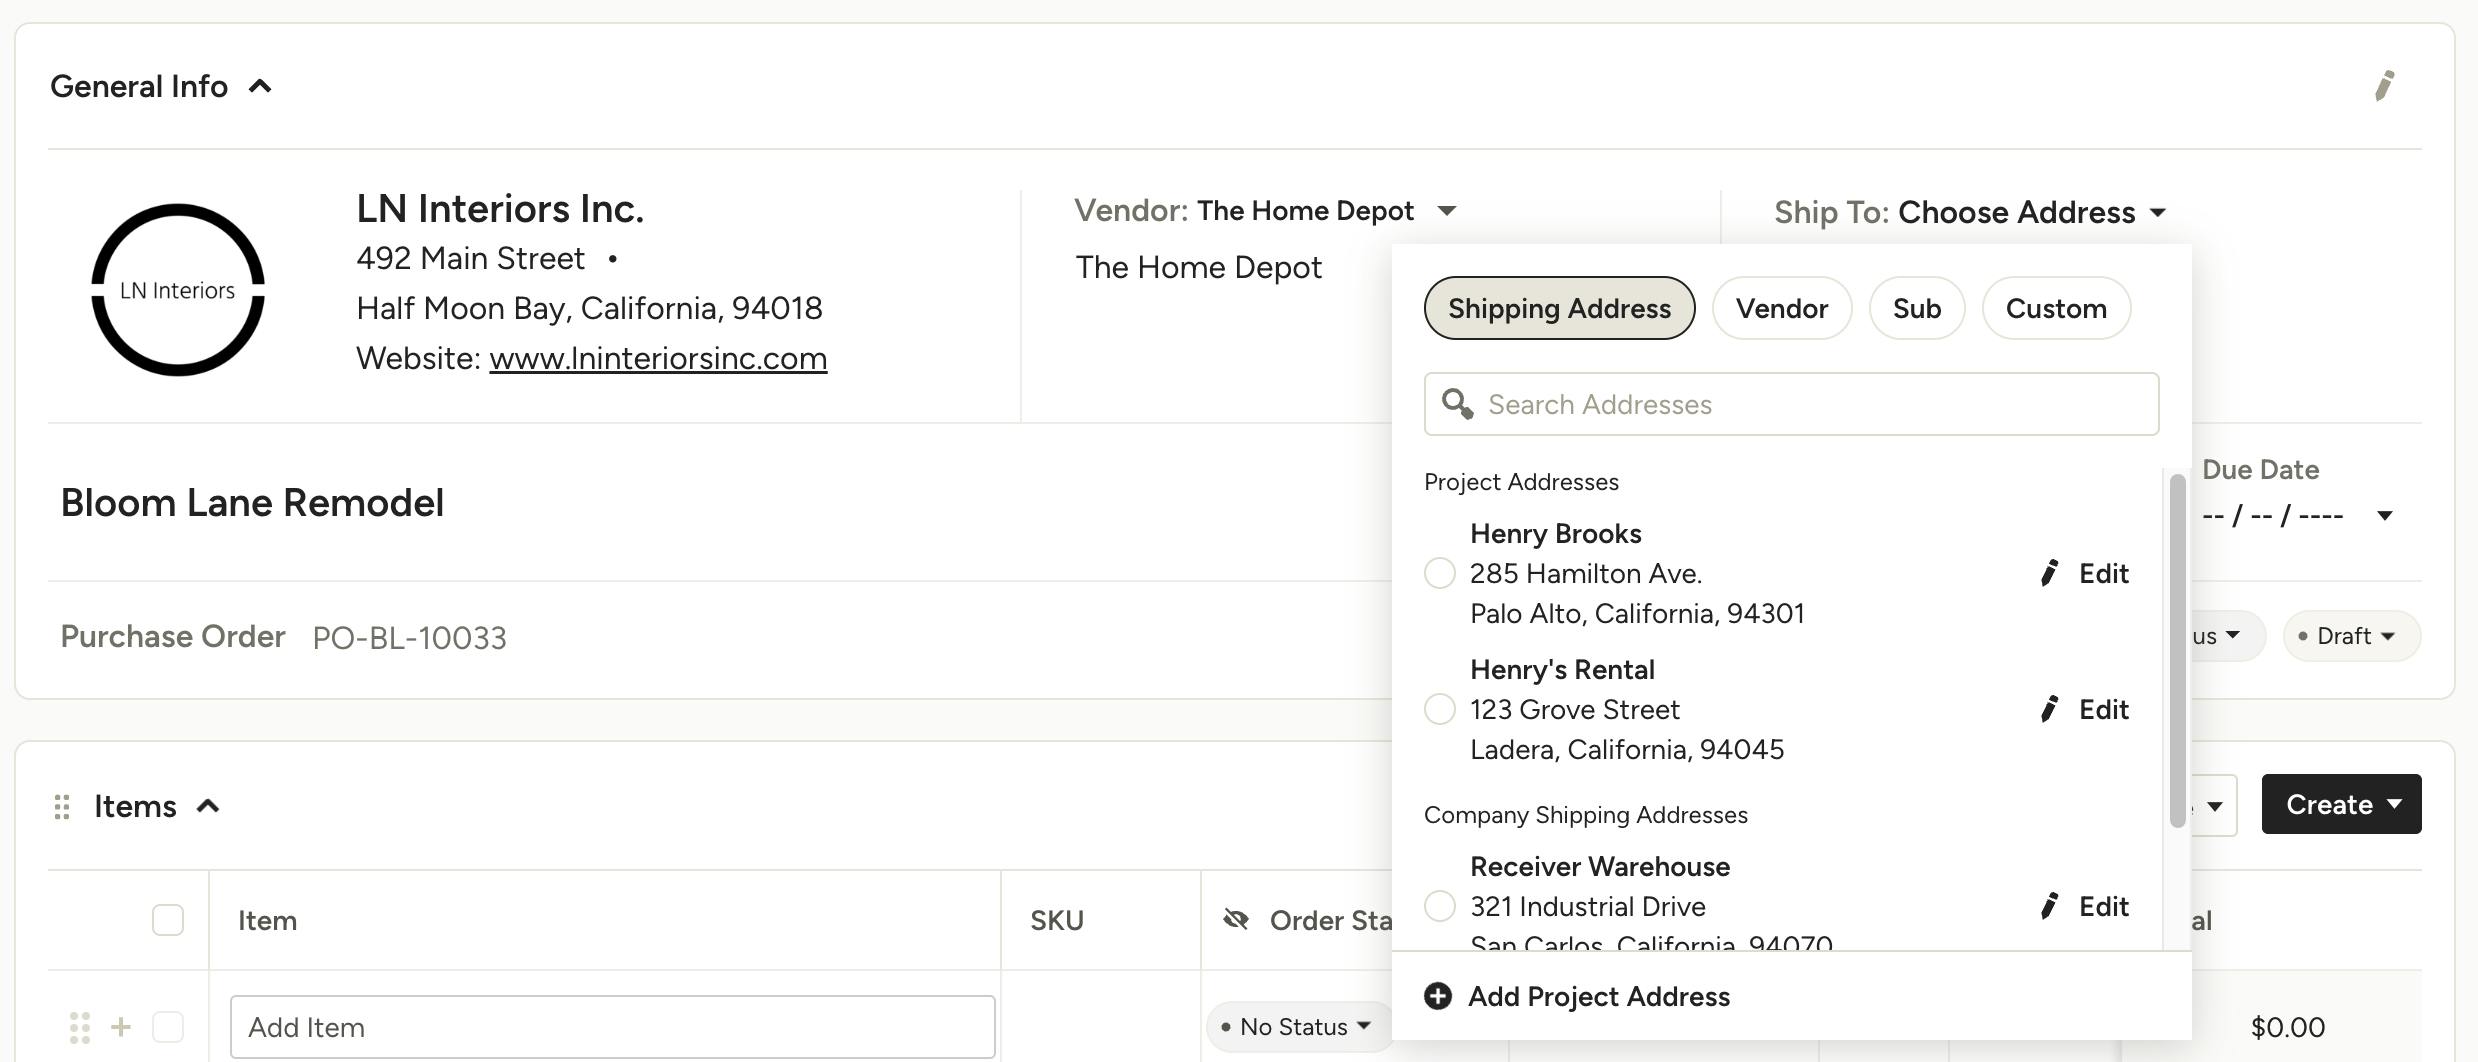
Adding Addresses From Purchase Orders
You can add project addresses from purchase orders the same way as mentioned above, but you will also have the option to choose from Company Shipping Addresses (more below), Vendors, Subcontractors, and Custom Shipping Address for the Ship To field.
Learn more about using addresses in purchase orders in How to Add an Additional Address for a PO.
From Company Settings
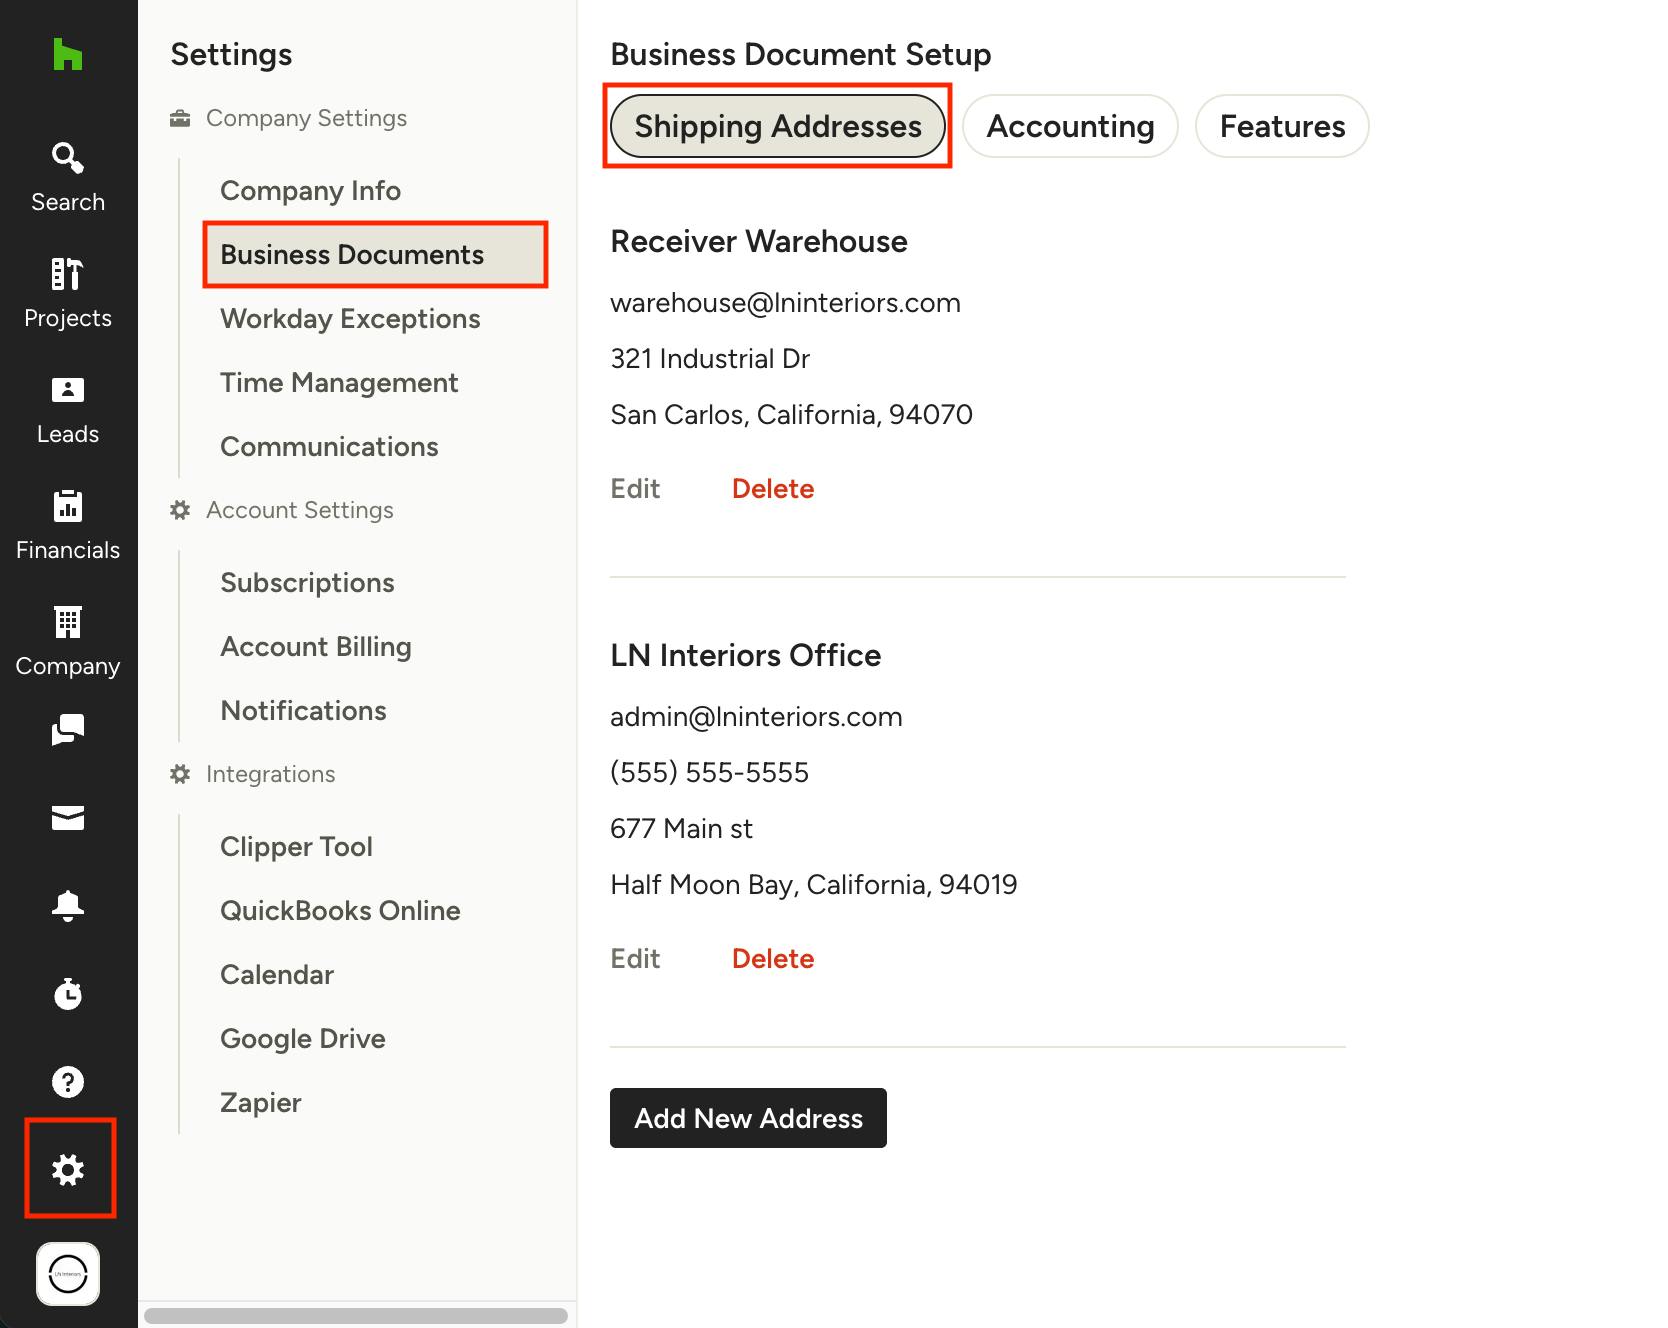
In your company settings you can add one or more company-wide shipping addresses that will be available across all projects. This is an ideal spot to add an office address or receiving warehouse that you commonly use to ship orders to. These shipping addresses will appear as options in the Ship To area in all of your purchase orders, so you don't need to create new addresses for each project.
To add a shipping address, go to your Settings (the gear icon in the left navigation) then select Business Documents from the left menu. Click the Shipping Address tab at the top, and you can add a new address or edit an existing one.
Want to learn more about adding different shipping addresses to purchase orders? Check out How to Add an Additional Address for a PO.
Frequently Asked Questions
What happens when I edit a project address that is already used on documents?
Once a project address is used on a document, if you make any changes to the address you will need to choose one of two options:
- Update the address on all linked documents (good for cases like spelling mistakes or incorrect unit number)
- Save as a new project address (this option will not affect any linked documents)
If you choose to update the address on linked documents, this will impact all linked documents, including any "closed" documents (approved, billed, paid, issued etc). You will see those documents listed in the confirmation modal before the address is updated.
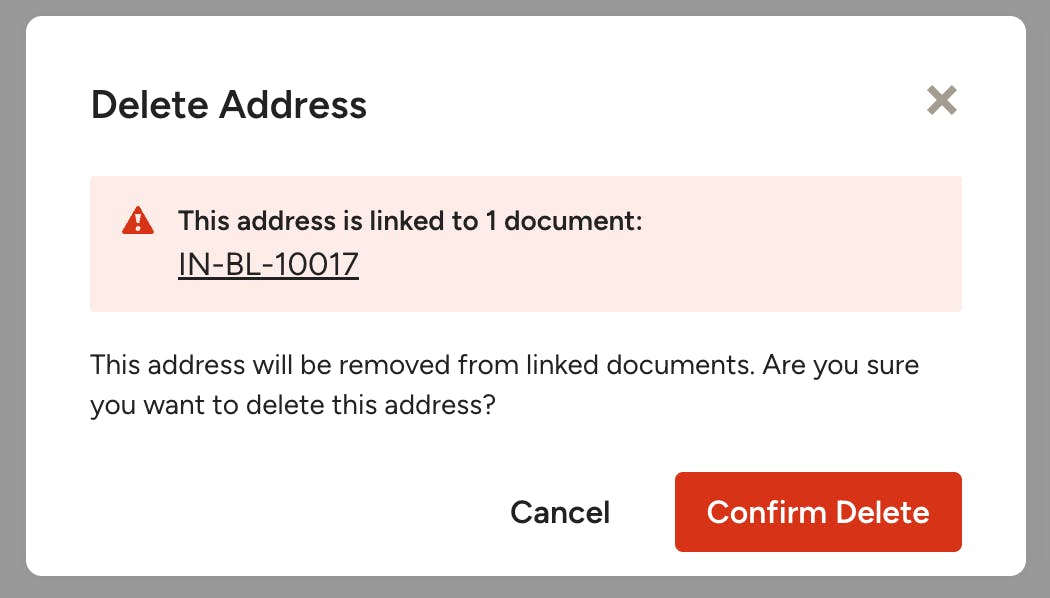
What happens when I delete a project address?
When you delete a project address, it will be removed from all linked documents, including any "closed" documents (approved, billed, paid, issued etc). If there are documents linked to the project address you are deleting, they will be listed in the confirmation modal before the address is deleted.