How to Use Warranty Templates
Using Warranty Templates in Houzz Pro is a great way to standardize your warranty offerings across projects. By saving your most common warranty types, descriptions, and coverage details as templates, you can quickly apply them to new or existing projects without re-entering the same information each time.
You can create, manage, and apply warranty templates from the Company Templates section of your account, as well as save and apply templates directly from a project's warranty page.
Create Warranty Templates
There are three ways to create a warranty template: directly from Company Templates, from the warranty edit view, or from the warranty list within a project.
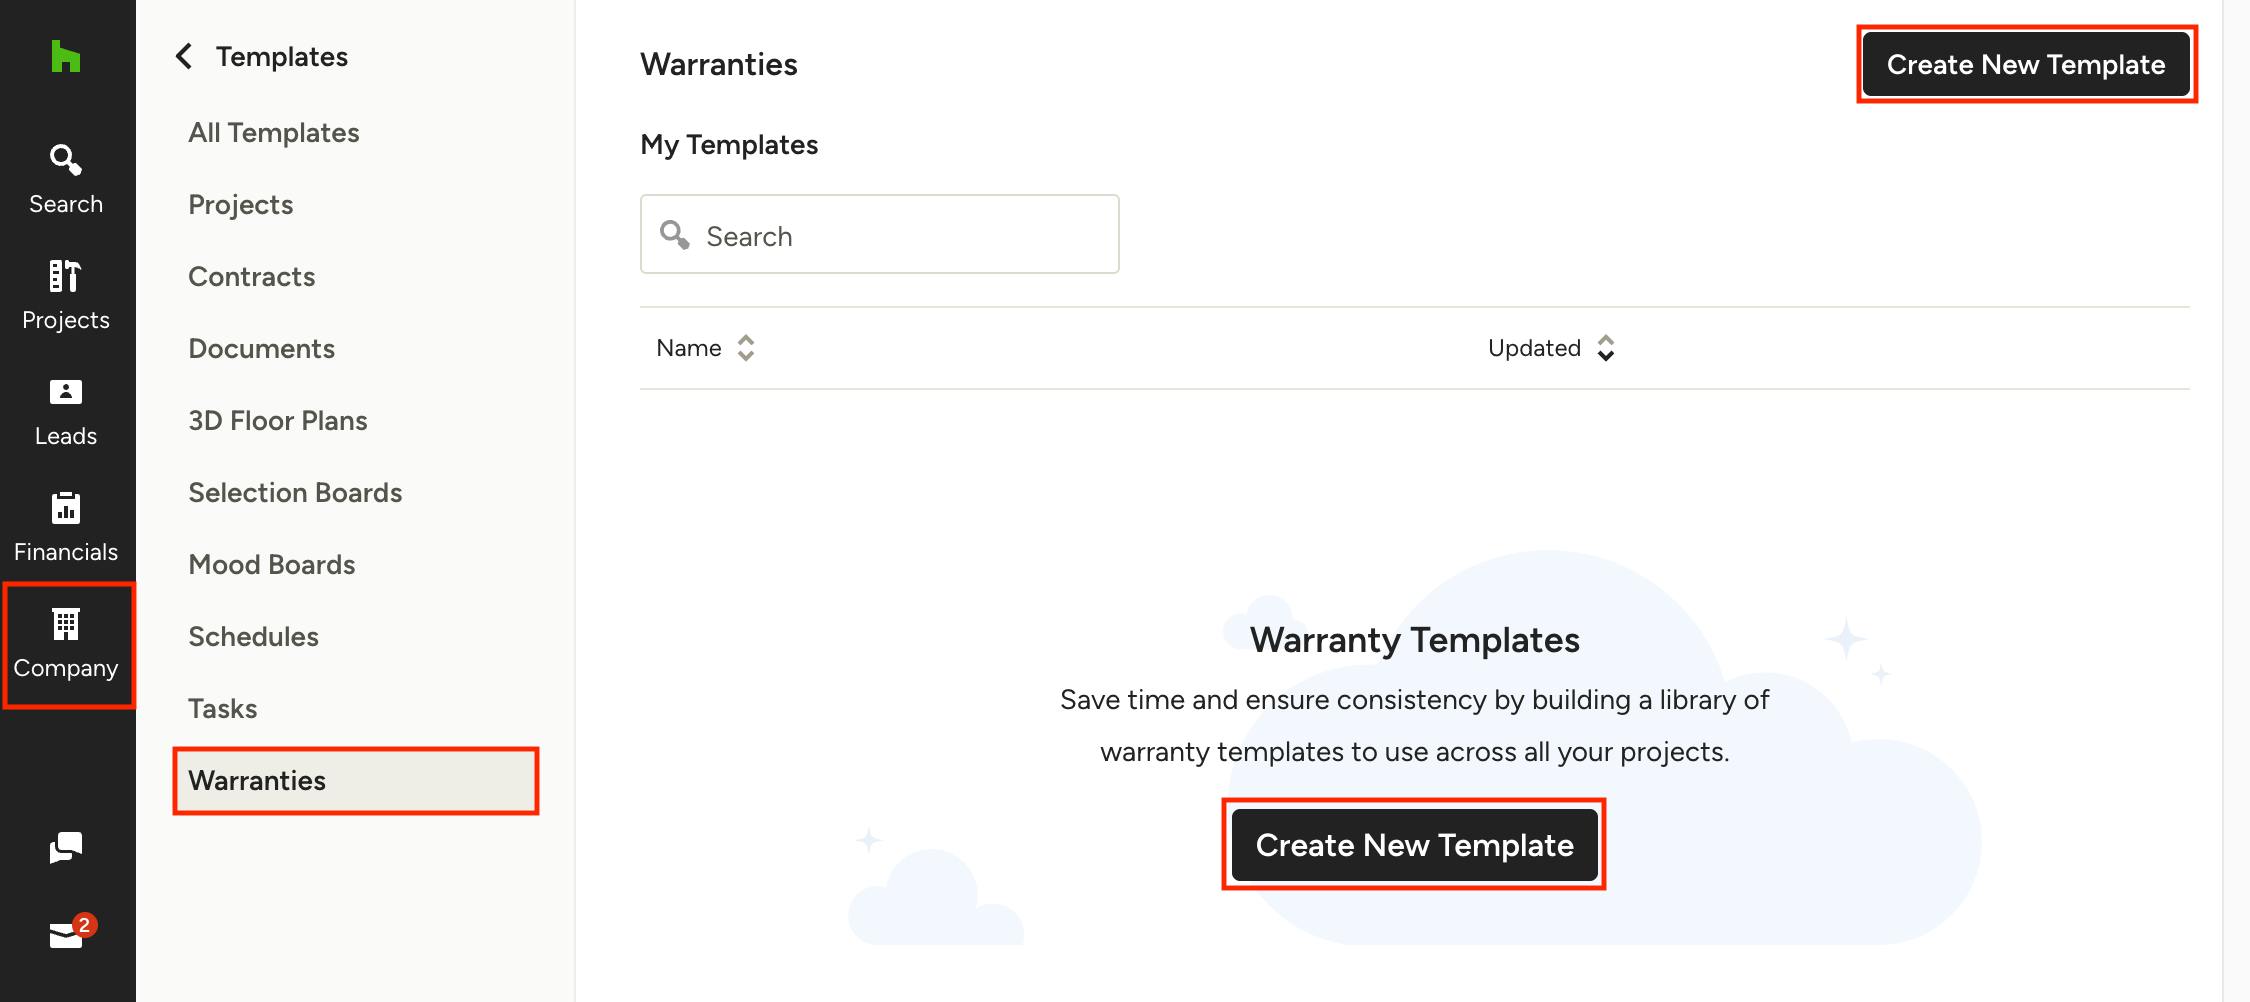
From Company Templates: Click the Company icon in your left navigation and select Templates. Within the Templates Center, select Warranties from the left menu, then click Create New Template. Name the template and click Create, then fill in the warranty details — changes will save automatically.
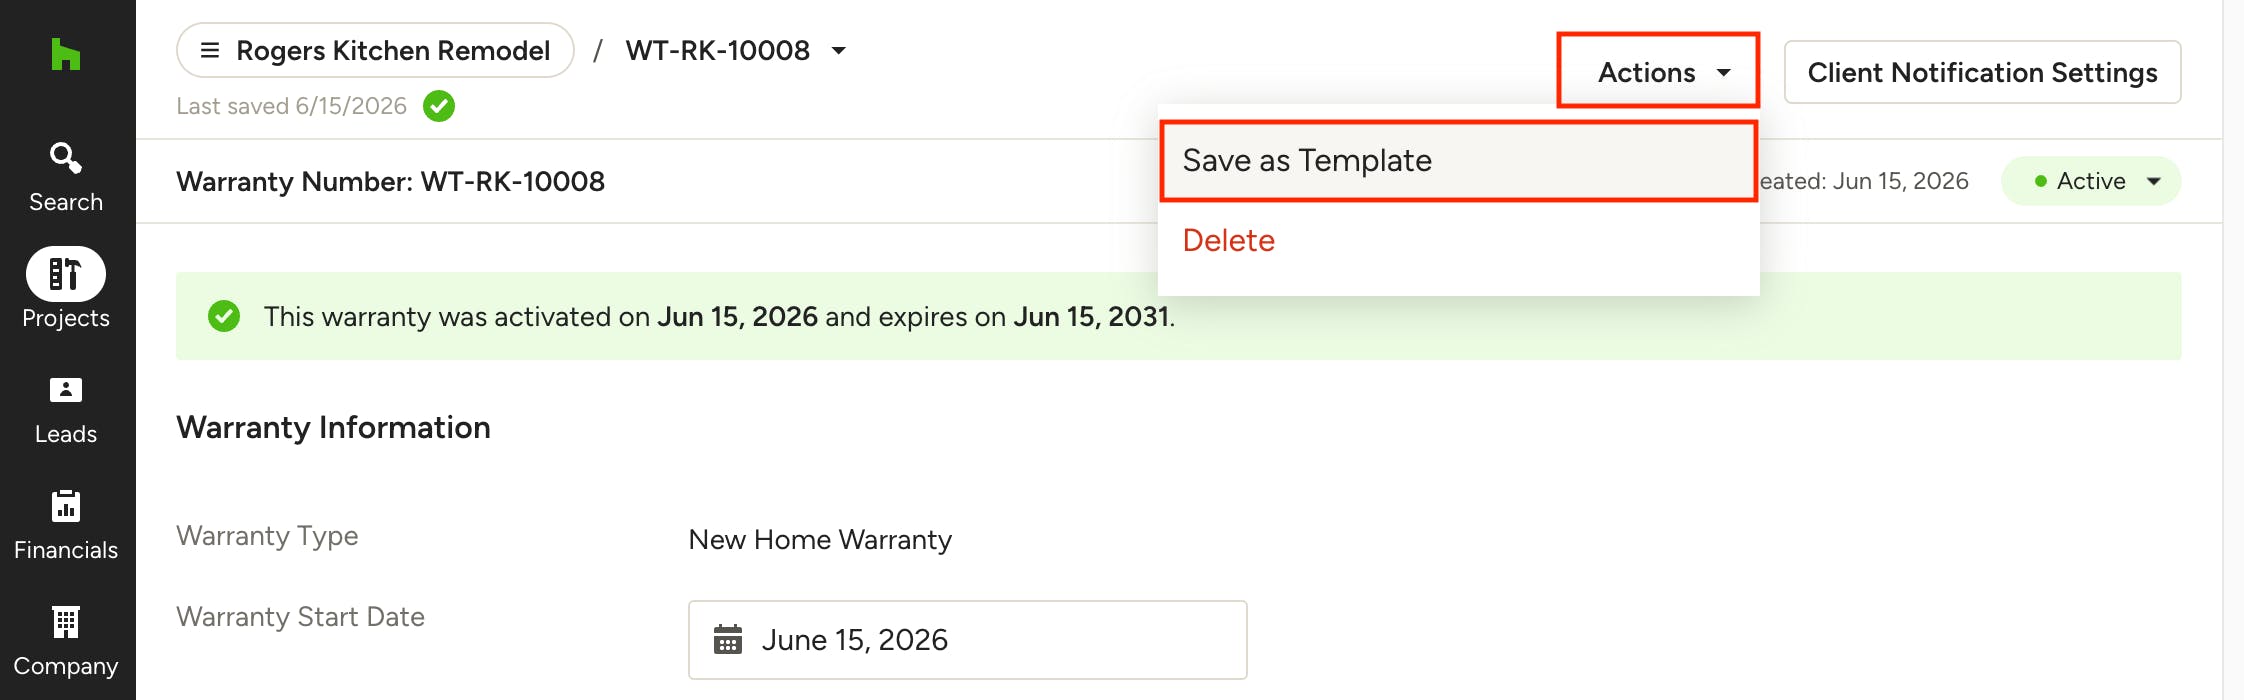
From the Warranty Edit View: While editing a warranty, open the Actions dropdown and select Save as Template. Enter a name for the template and click Save.
Note: When saving from an existing warranty as a template, the following fields will be copied into the template: warranty type, description and coverages.
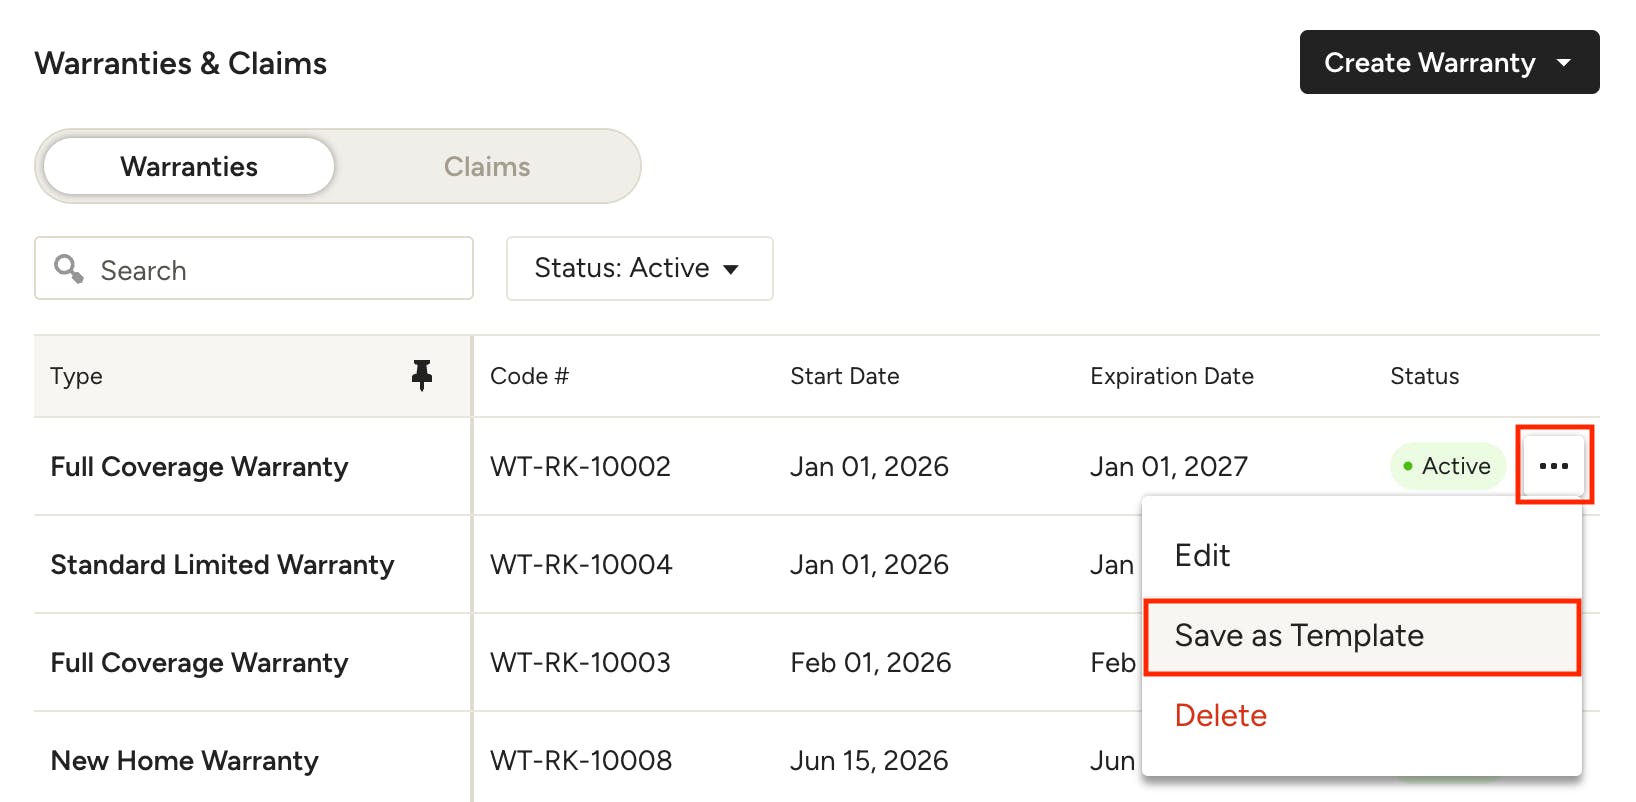
From the Warranty List: In the warranty list for a project, click the three dots icon next to the relevant warranty and select Save as Template. Enter a name for the template and click Save.
Note: When saving from an existing warranty as a template, the following fields will be copied into the template: warranty type, description and coverages.
Edit Warranty Templates
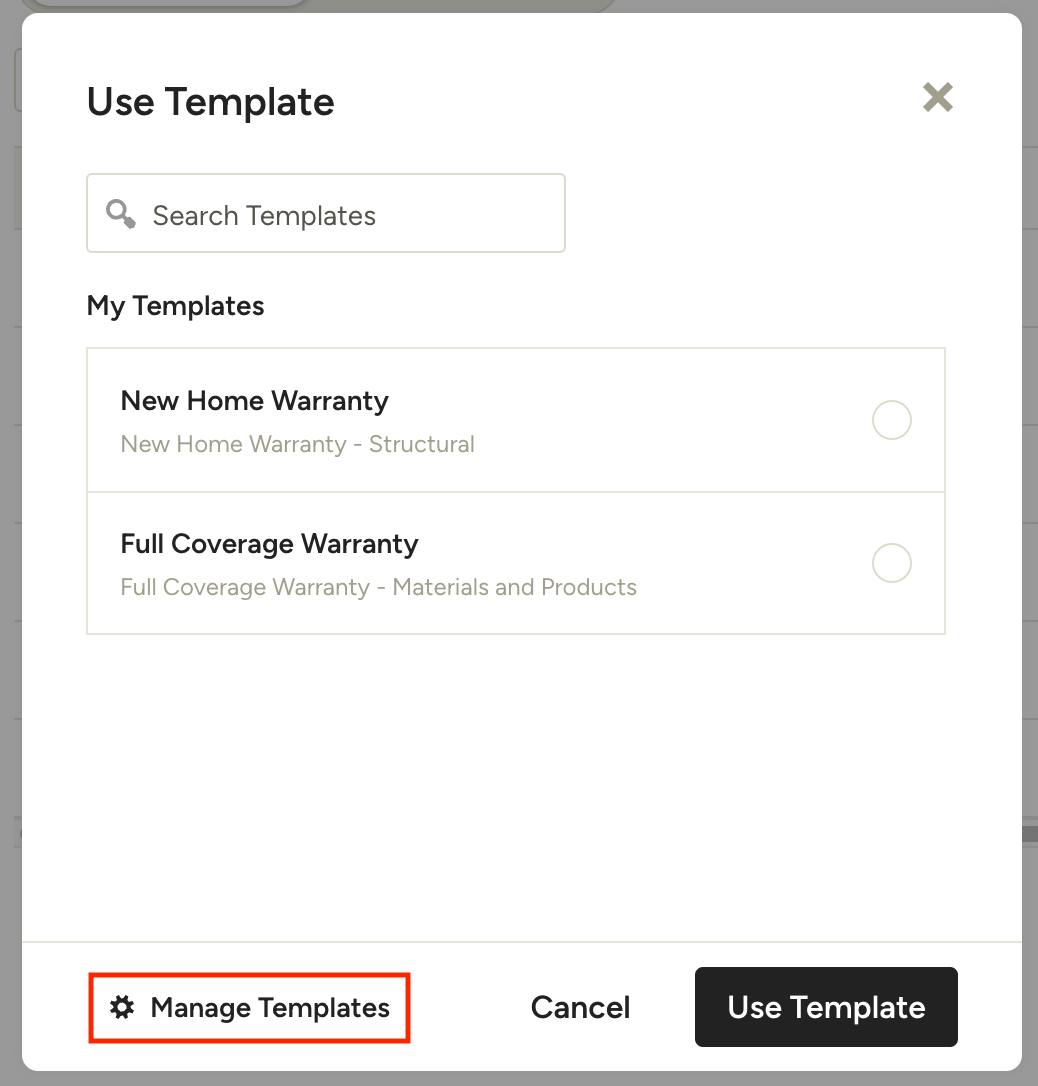
To manage and edit your warranty templates, navigate to your Template Center, found under the Company icon in the left navigation. Click Warranties from the left menu. You can also access your warranty templates by clicking Manage Templates in the Use Template modal.
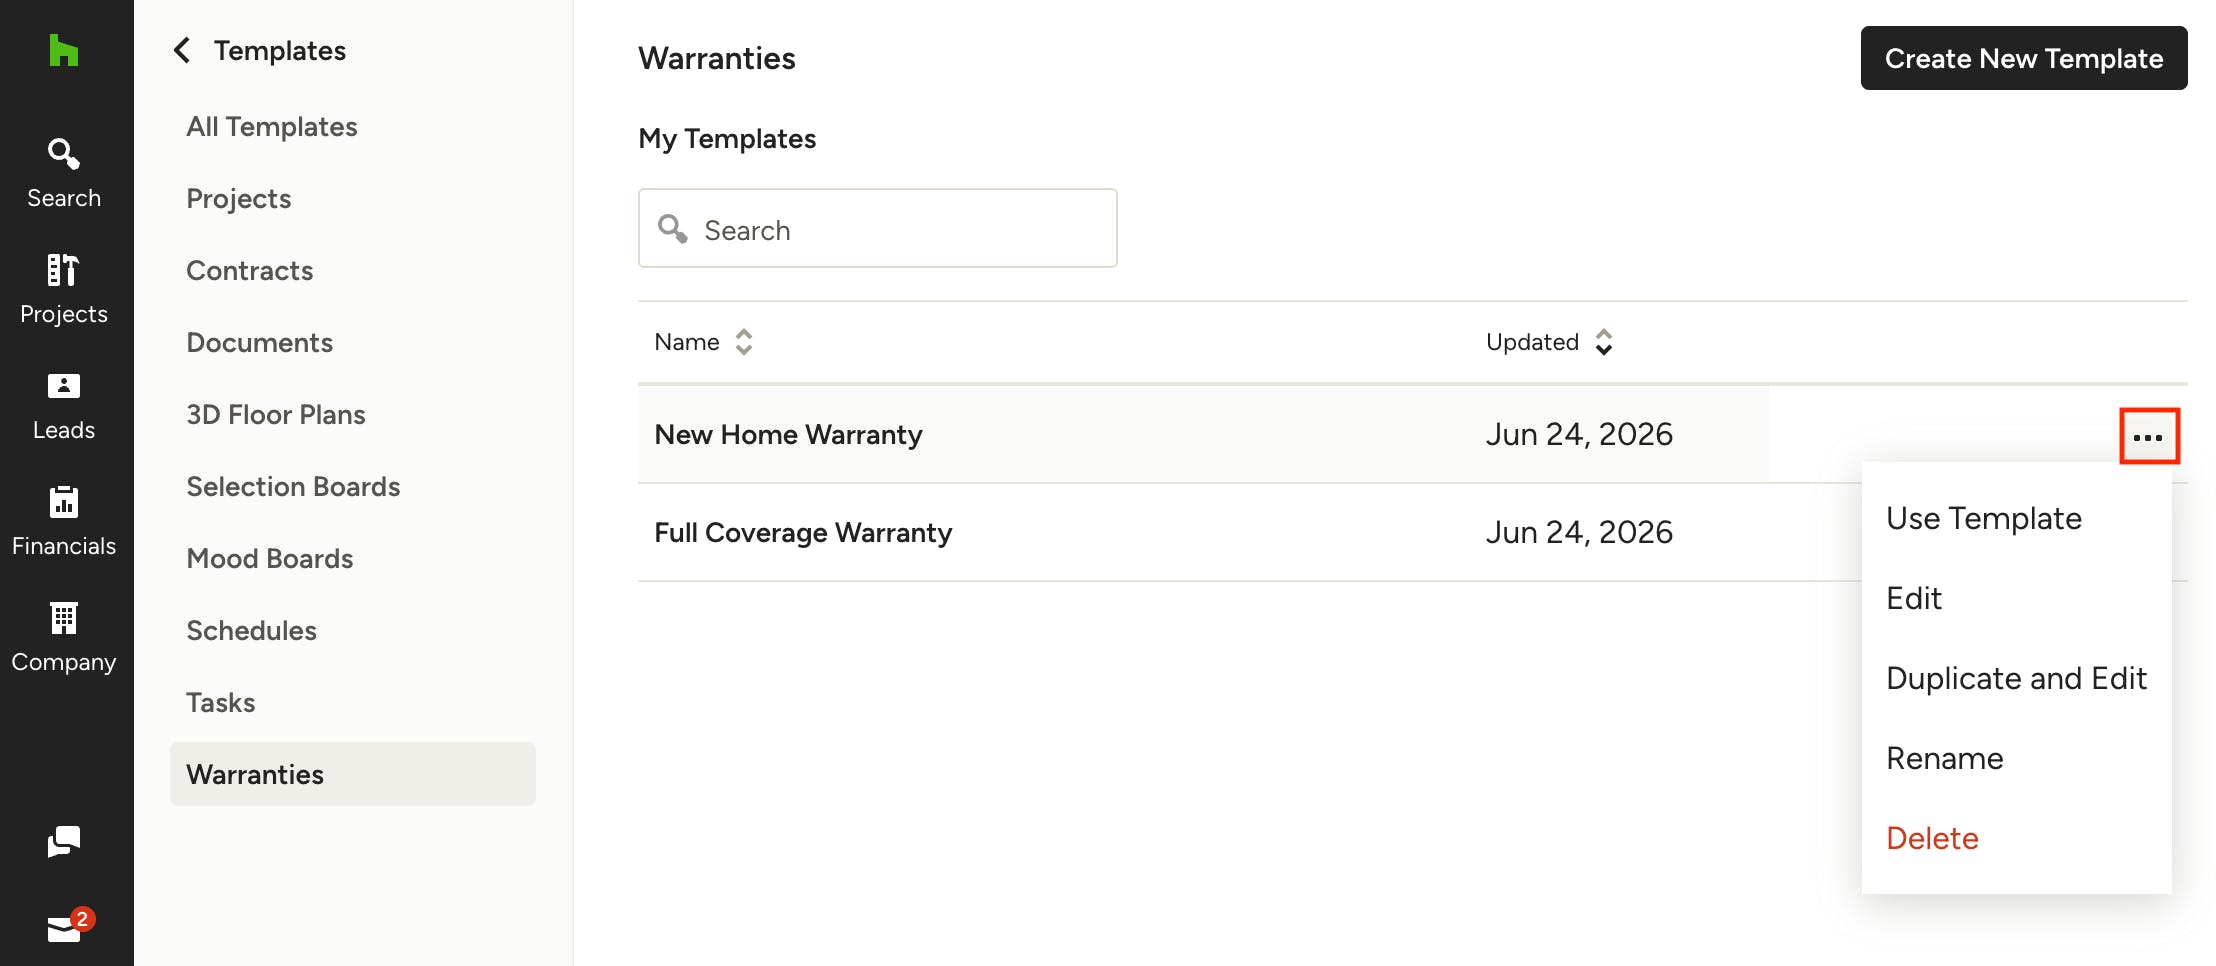
Here you will see a list of all your saved warranty templates.
Click the three dots icon next to any template for quick actions:
- Edit — Open the template for editing.
- Duplicate and Edit — Create a copy of the template.
- Rename — Update the template name.
- Delete — Permanently remove the template.
To edit the contents of a warranty template, click to open the template and make changes. Your changes will automatically save.
Use Warranty Templates
You can apply a warranty template from within Company Templates or when creating a new warranty in a project. Once a template is applied, the warranty will be populated with the fields saved in the template — including type, description and coverages — which you can review and adjust before activating or sending.
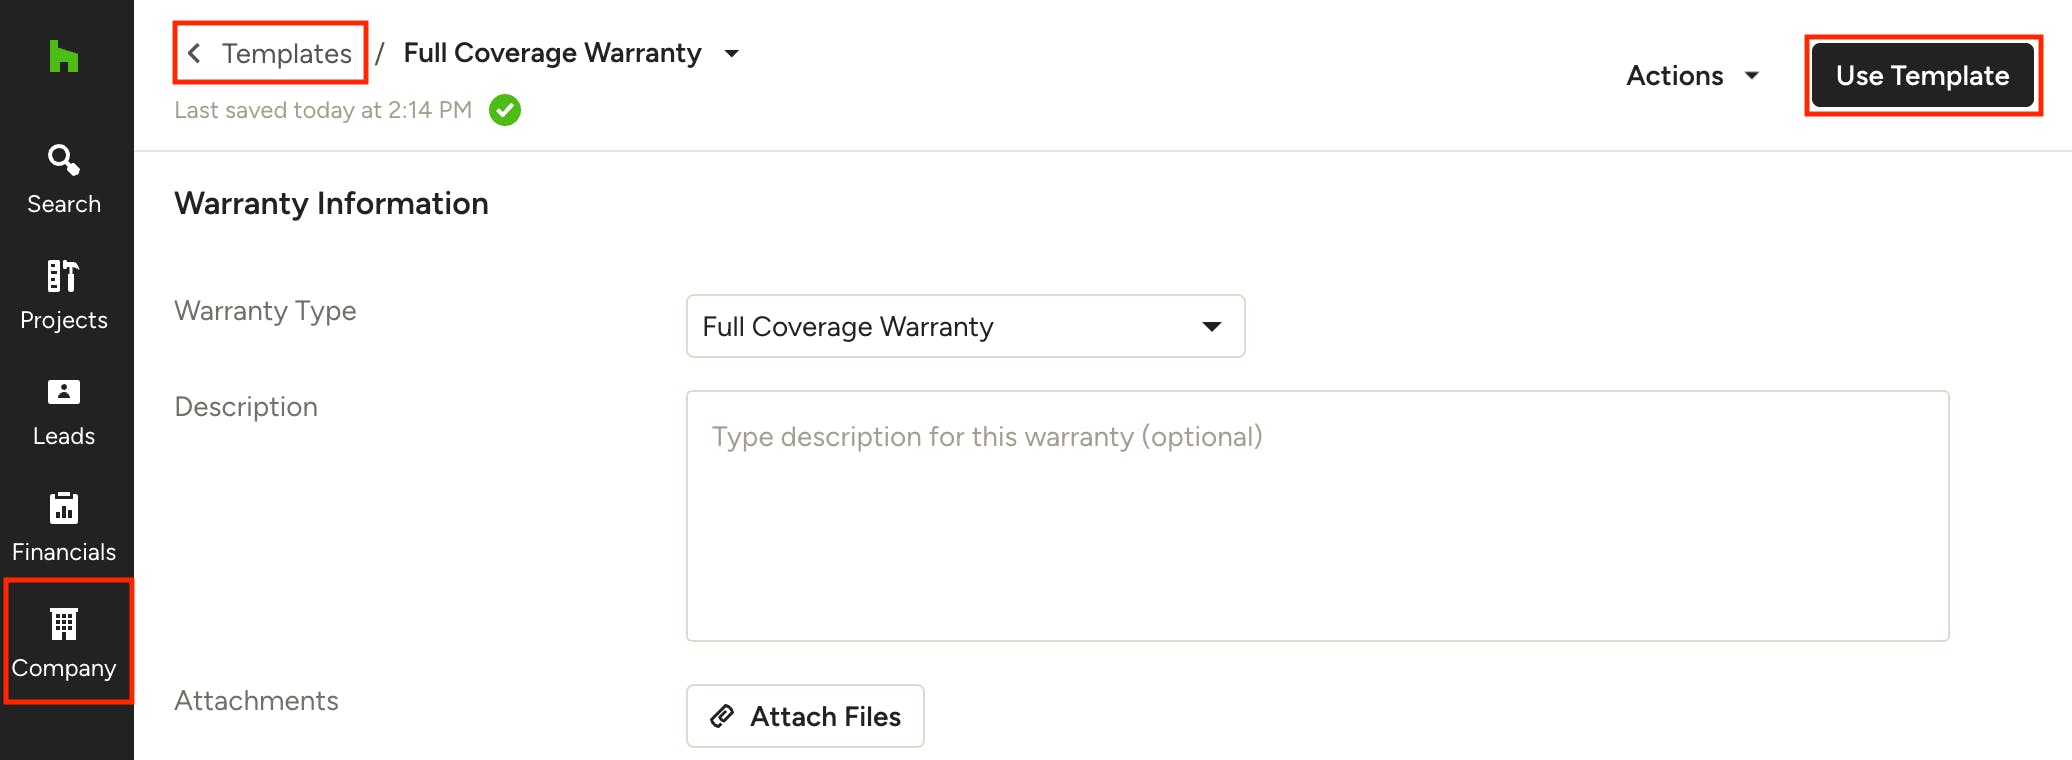
From Company Templates: Click the Company icon in your left navigation and select Templates. Within the Templates Center, select Warranties from the left menu. Open an existing template or create a new one, then click Use Template to apply it.
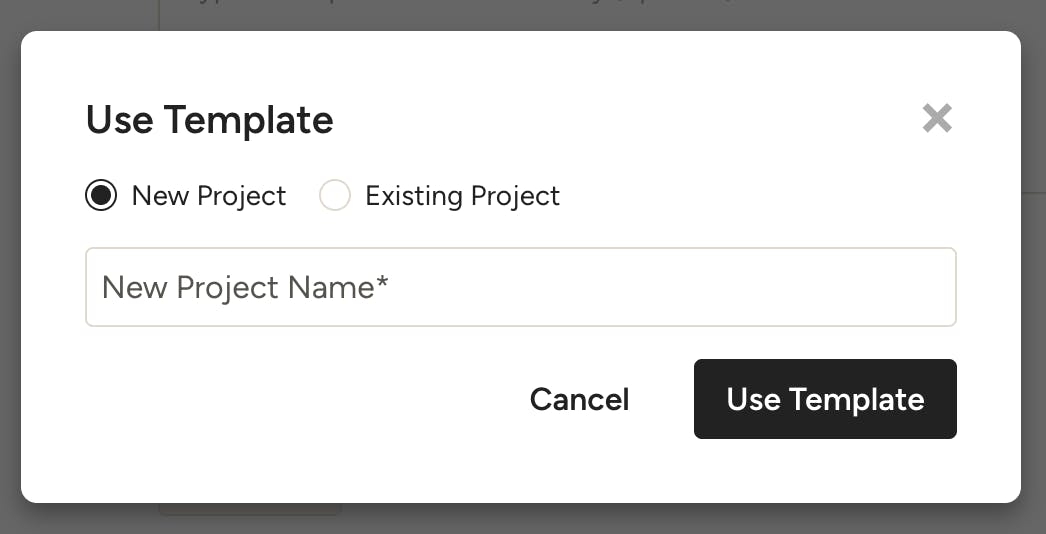
Select the relevant project or create a new one, then click Use Template.
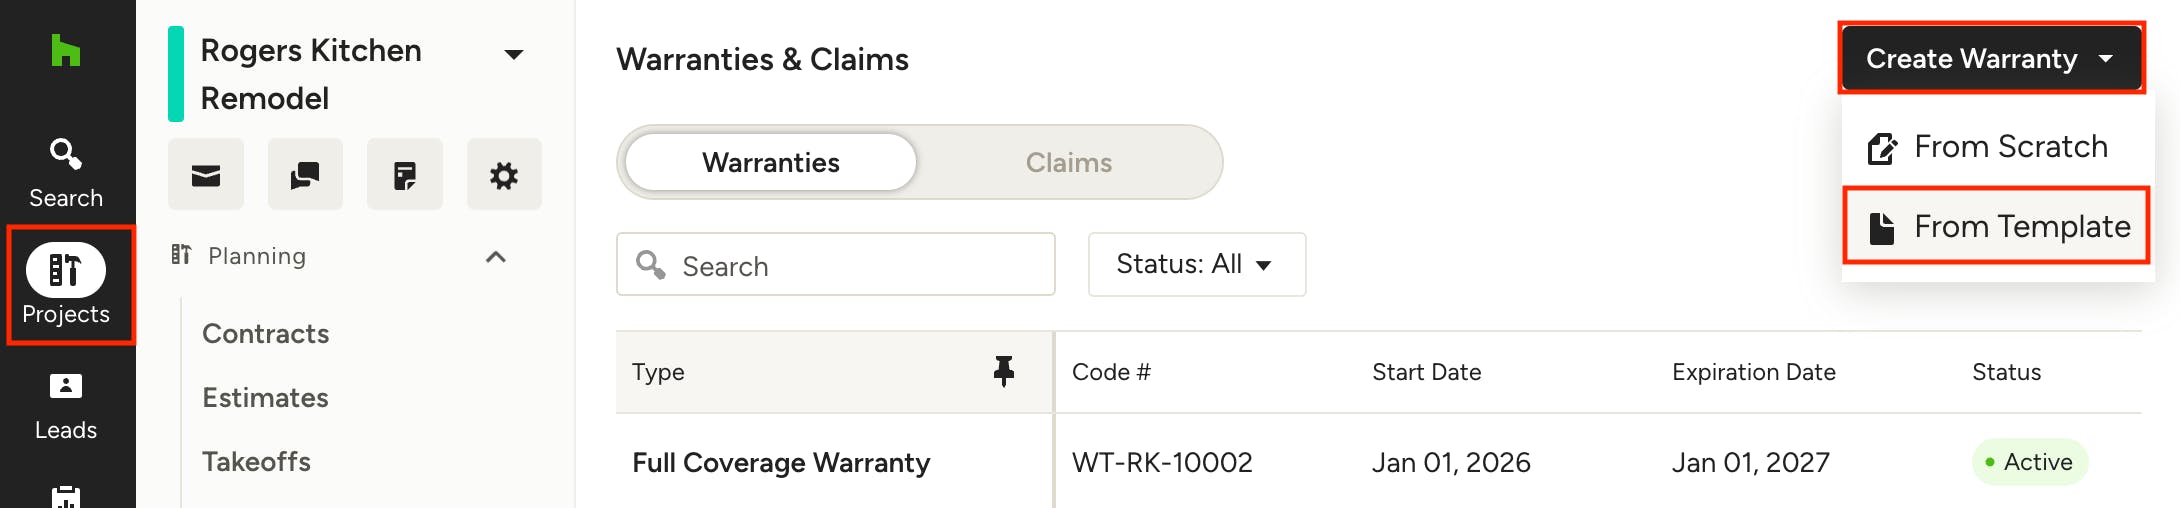
From a Project: Navigate to the relevant project and open the Warranties section from the left menu. Click Create New Warranty, then select From Template.
You can also access this from the All Warranties page, found under the Search icon in the left navigation.
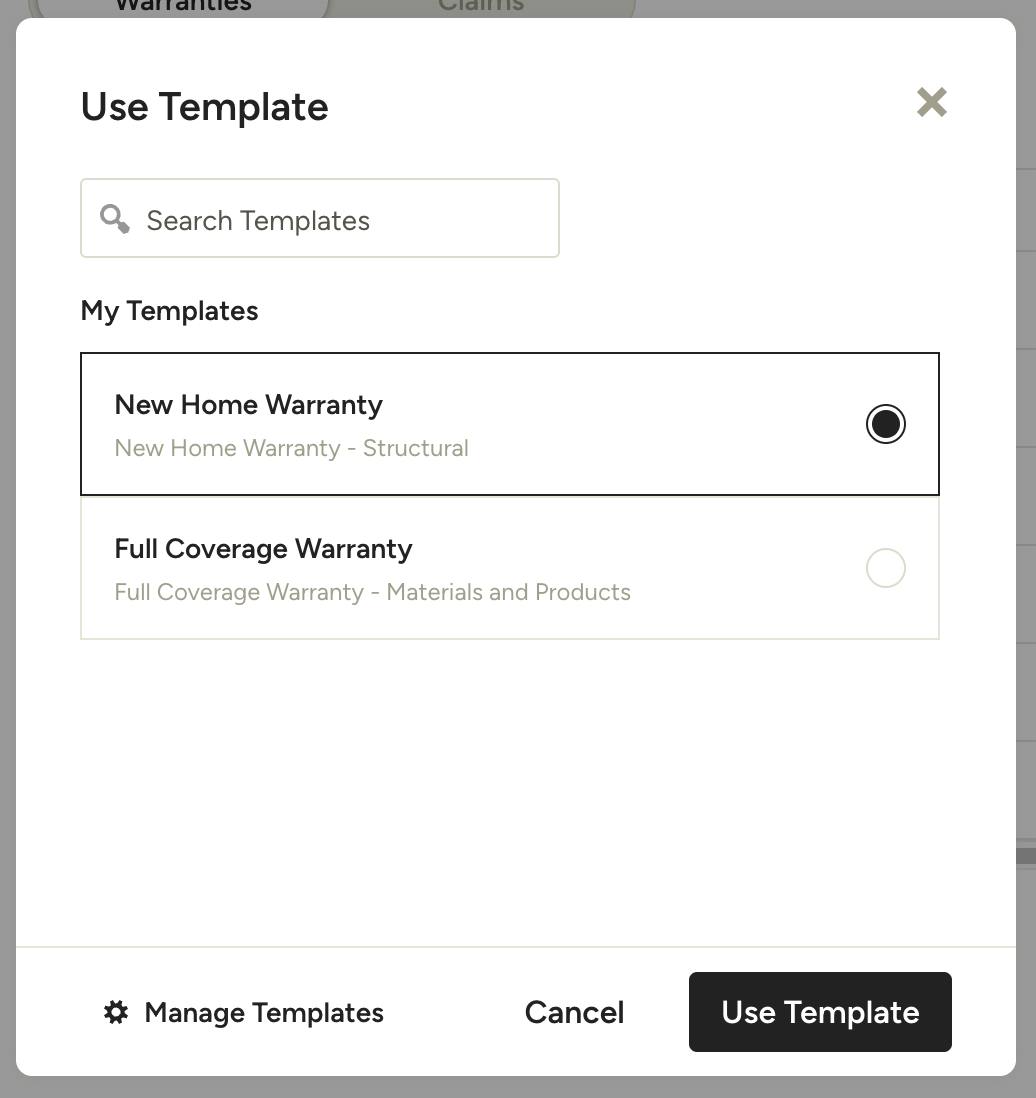
A list of your saved warranty templates will appear — select the one you want to apply, then click Use Template