How to Use Warranties & Claims

The Warranties & Claims feature in Houzz Pro provides a centralized way to issue warranties and manage claims tied to specific projects and clients. You can easily set coverage, track expiration dates, and assign tasks to address claims. This start-to-finish feature helps reduce errors, save time, and keep project records organized and accessible — no more juggling spreadsheets, emails, or separate documents.
Create a Warranty
To create a warranty, open the relevant project and click on Warranties & Claims in the left menu, then make sure you are on the Warranties tab at the top of the page. From here, click Create Warranty in the top right.
If you have warranty templates saved, you can apply them at this step by selecting From Template. Learn more in How to Use Warranty Templates.

Warranty Information
The first section you will fill out is the warranty information, which includes type, start date, client and description.
- Warranty Type: Select the type of warranty or create a custom type. More on warranty types below.
- Warranty Start Date: The date your warranty begins. This will not be available to set until Warranty Coverage is added. If you choose a date in the past, your warranty will automatically activate.
- Client: View and edit client details by clicking the pencil icon. Any changes will also apply to the main client info.
- Document Links: Select project documents related to the warranty. These are for internal reference purposes only. This information remains hidden from the client, even when shared.
- Description: This is an optional field you can use to describe the warranty.
- Attachments: Select existing project files or upload any relevant files to support the warranty.

Warranty Types
You can choose a preset warranty type from the dropdown, or create your own custom type(s) to fit your needs. To create a custom type, select +Add Warranty Type at the bottom of the dropdown, type in the warranty name and press Enter.
You can edit or delete custom warranty types from the dropdown by using the edit or trash can icons. Note that custom warranty types that are in use on existing warranties cannot be deleted.

Warranty Coverage
In this section you will add coverage types to set the warranty terms. This step is required. You can add multiple coverage types in one warranty, including custom coverages.
Click Add Coverage Type to open the options.

In the coverage type modal, you'll select a coverage type from the dropdown, (preset or create your own custom type). More on coverage types below.
You'll also set the coverage term by using the Duration and Time Unit (Year, Month, Day, Week) dropdowns. Add an optional description, then click Create to add the coverage to the warranty.

Coverage Types
You can choose a preset coverage type from the dropdown, or create your own custom type(s) to fit your needs. To create a custom type, select +Add Coverage Type Name at the bottom of the dropdown, type in the coverage name and press Enter.
You can edit or delete custom coverage types from the dropdown by using the edit or trash can icons. Note that custom coverage types that are in use on existing warranties cannot be deleted.

Activate Warranty
When all of the details are filled out, you can activate the warranty by clicking Activate in the top right of the page, or by clicking Set to Activate next to the Warranty Start Date.

In the Activate Warranty modal, select a start date from the calendar, then use the checkboxes under Client Notifications to set if/when the client will be notified of the warranty. Click Activate to confirm. The warranty will go into Active status on the start date you chose.
Note if you set the Warranty Start Date to a past date, the warranty will automatically activate.

Delete or Void a Warranty
Delete Warranty
Warranties in any status, including draft, active, voided and expired, can be deleted. This action cannot be undone and you cannot recover a deleted warranty.
To delete a warranty from the project's Warranties page, click the three dots menu to the right of the warranty and select delete. You will be asked to confirm that you want to delete.

To delete a warranty from within the edit view of the warranty, use the Actions menu at the top of the page and select Delete. You will be asked to confirm that you want to delete.
Void Warranty
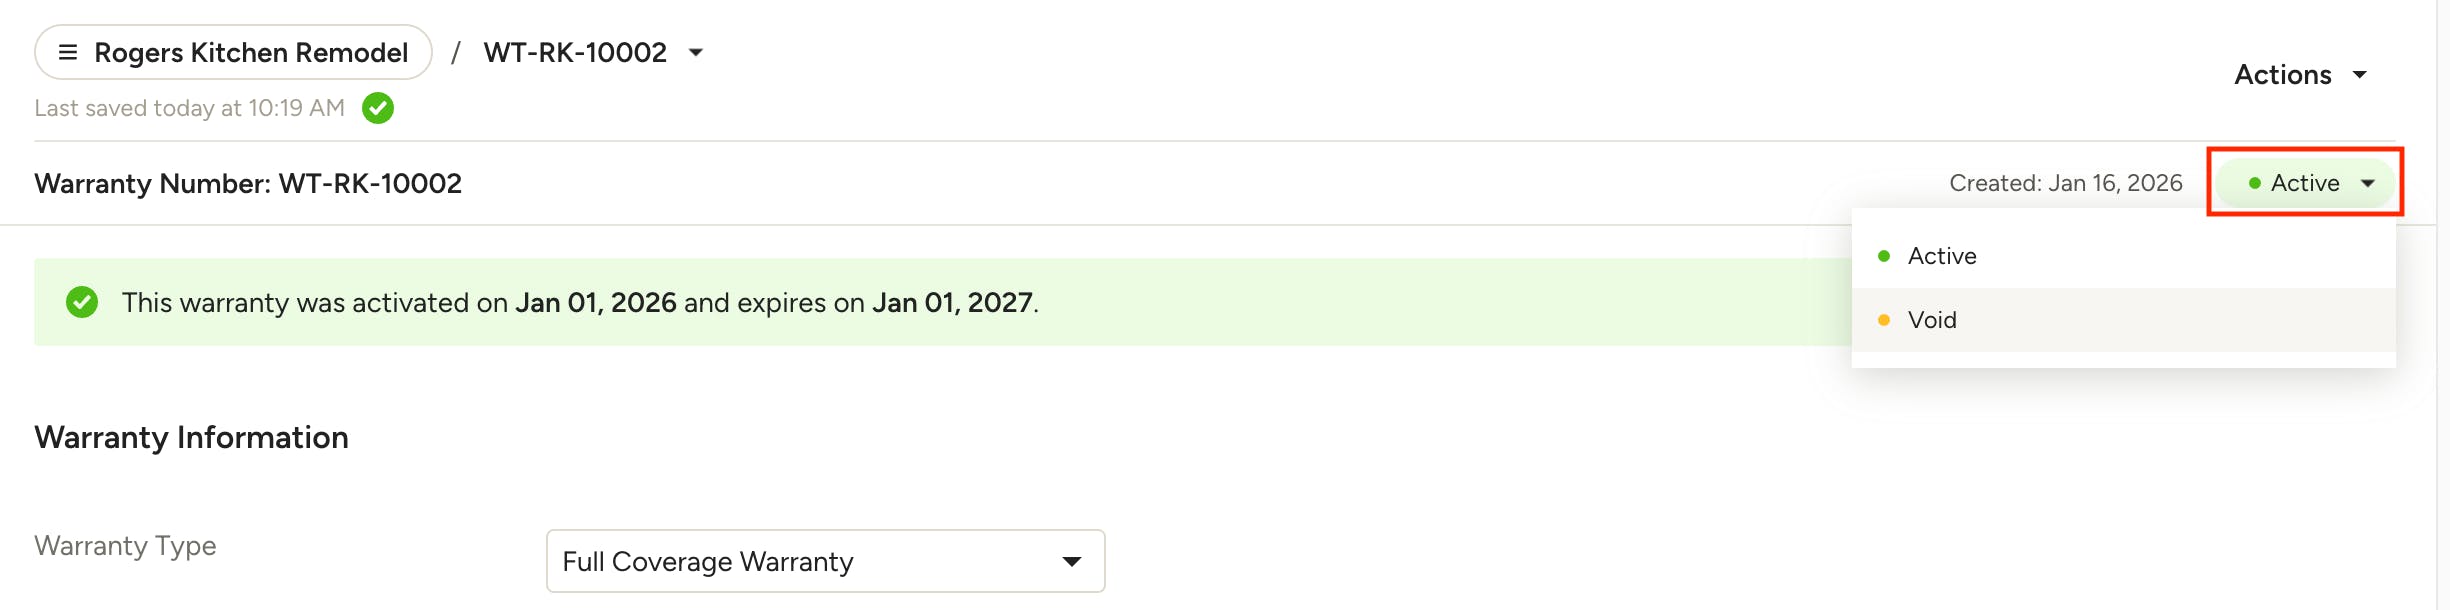
A warranty in Active status can be voided. Voiding a warranty will cancel it immediately and it will no longer be valid.
To void a warranty, open it and click the status dropdown (it will say Active) to select Void. You will be asked to confirm the action and be given the option to notify the client that the warranty is now void.

Reactivate Voided Warranty
Once a warranty is void, you do have the option to make it active again. Reactivating a voided warranty will set its status to Active using the original start date. You can adjust the start date or coverage terms once it's active again.
To do so, open the warranty and click Re-Activate in the top right, or use the status dropdown (it will say Voided) to select Re-Activate. You will be asked to confirm the action.

Create a Claim
Warranty claims can be created by you, the pro, or submitted by the client. Note that claims must first be shared in the client dashboard to allow clients to view and submit claims for a project. This section goes over creating a claim as a pro. For how to handle client-submitted claims, see the next section.
To create a claim, open the relevant project and click on Warranties & Claims in the left menu, then make sure you are on the Claims tab at the top of the page. From here, click Create Claim in the top right.

Information
The first section you will fill out is the claim information, which includes claim date, client, claim manager and document links.
- Claim Date: This is the date the claim was created; it cannot be changed.
- Client: View and edit client details by clicking the pencil icon. Any changes will also apply to the main client info.
- Claim Manager: Use the dropdown to select one or more team members to manage the claim.
- Document Links: Select project documents related to the claim. These are for internal reference purposes only. This information remains hidden from the client, even when shared.

Link Warranty and Claim
To link a warranty to a claim, click Add Document Link in the Information section of the claim, then select the relevant warranty from the document list.

You will see the warranty linked in the claim, as well as the claim linked in the warranty, as shown below.

Problem/Description
In this section you will describe the reason for the claim and attach any images or files.
- Client Problem Description: Description and attachments will be visible to the client
- Internal Notes: Optional field to record notes for you and your team. Internal notes and attachments will not be visible to the client.

Work Assignments
In this section, you can create, assign and track tasks associated with this claim. Once you create a new task, add a due date and assignee to the right of the task.
Note that task and assignment notifications will only be sent when the claim is in "Open Status."

Submit Claim
When all of the details are filled out, you can submit the warranty claim by clicking Submit Claim in the top right of the page, or by using the status dropdown (it will say Draft) and selecting Open.

In the Submit Claim modal, use the checkbox to set whether the client will be notified of the claim via email. If selected, you can customize the preset subject and body of the email. Click Submit to confirm. The claim will go into Open status as soon as it's submitted, and any work assignments notifications will be sent.

Comment on Claims
For quick collaboration and communication with your client and/or team on a claim, you can use the comment feature. Click the comment icon at the top of the claim, then select the Client or Team tab at the top of the comment modal. Clients won't see any comments in the Team tab, but will be notified of any comments made in the Client tab, with the ability to respond.
Client Submitted Claims
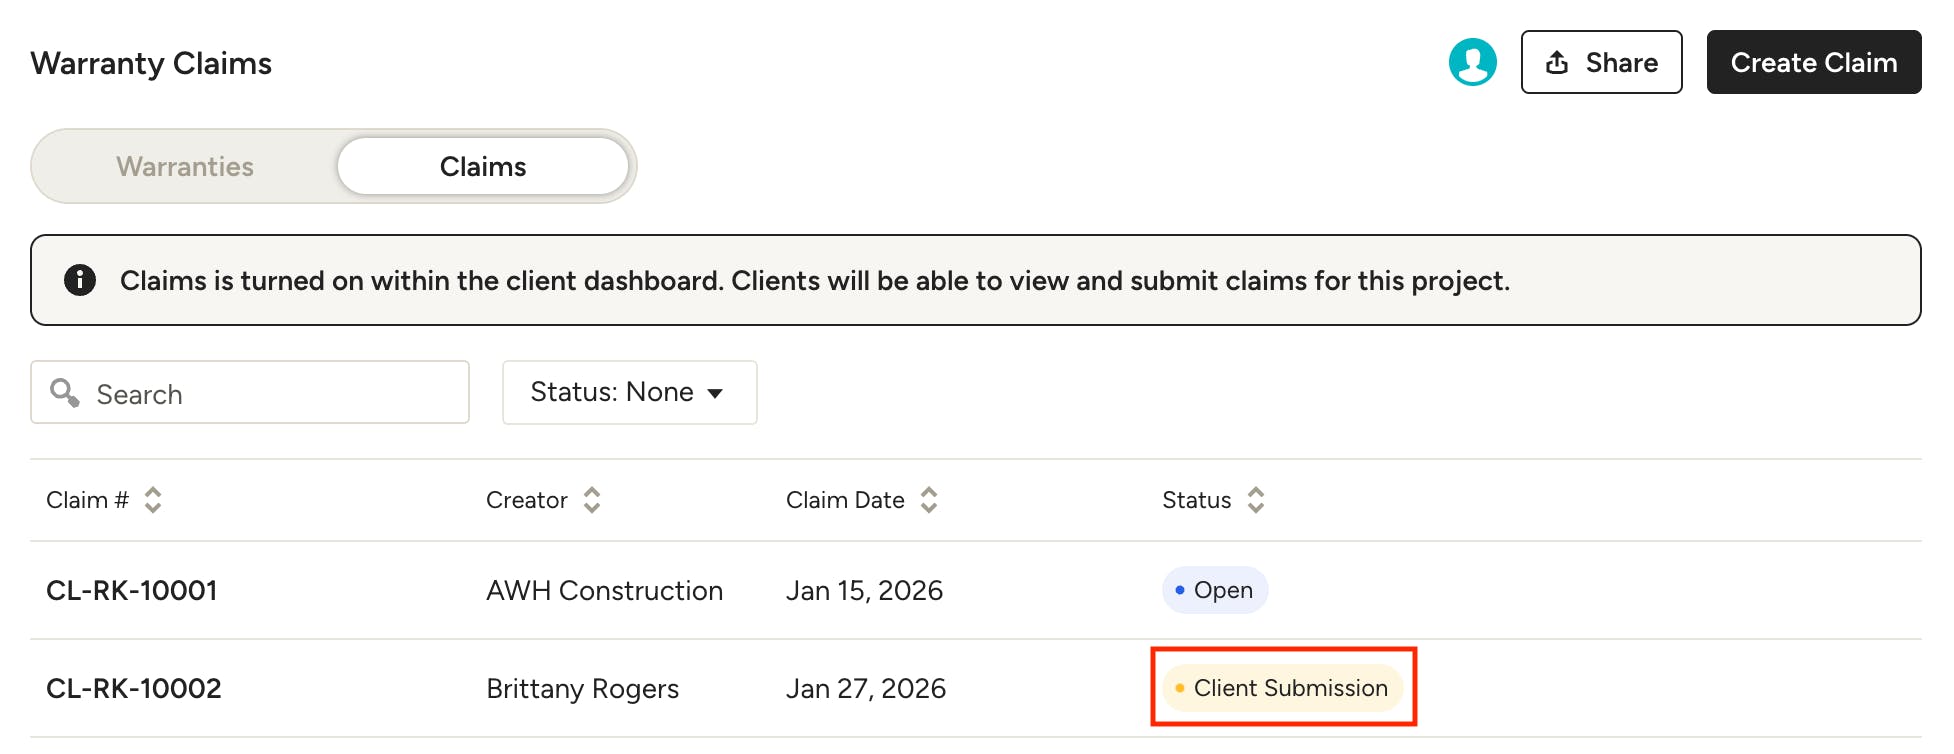
If you have opted to share claims in the client dashboard, your client can view existing claims and submit their own claims. You will have the option to approve or deny a claim submitted by the client.
Once they have submitted a claim, you will be notified and see the new claim in the project, denoted by a Client Submission status. Click the claim to review.

Within the client claim, you can select Mark as Not Covered or Approve Claim.

Either option will open a modal where you can choose to notify the client of the decision or not, including customizing the message they receive.
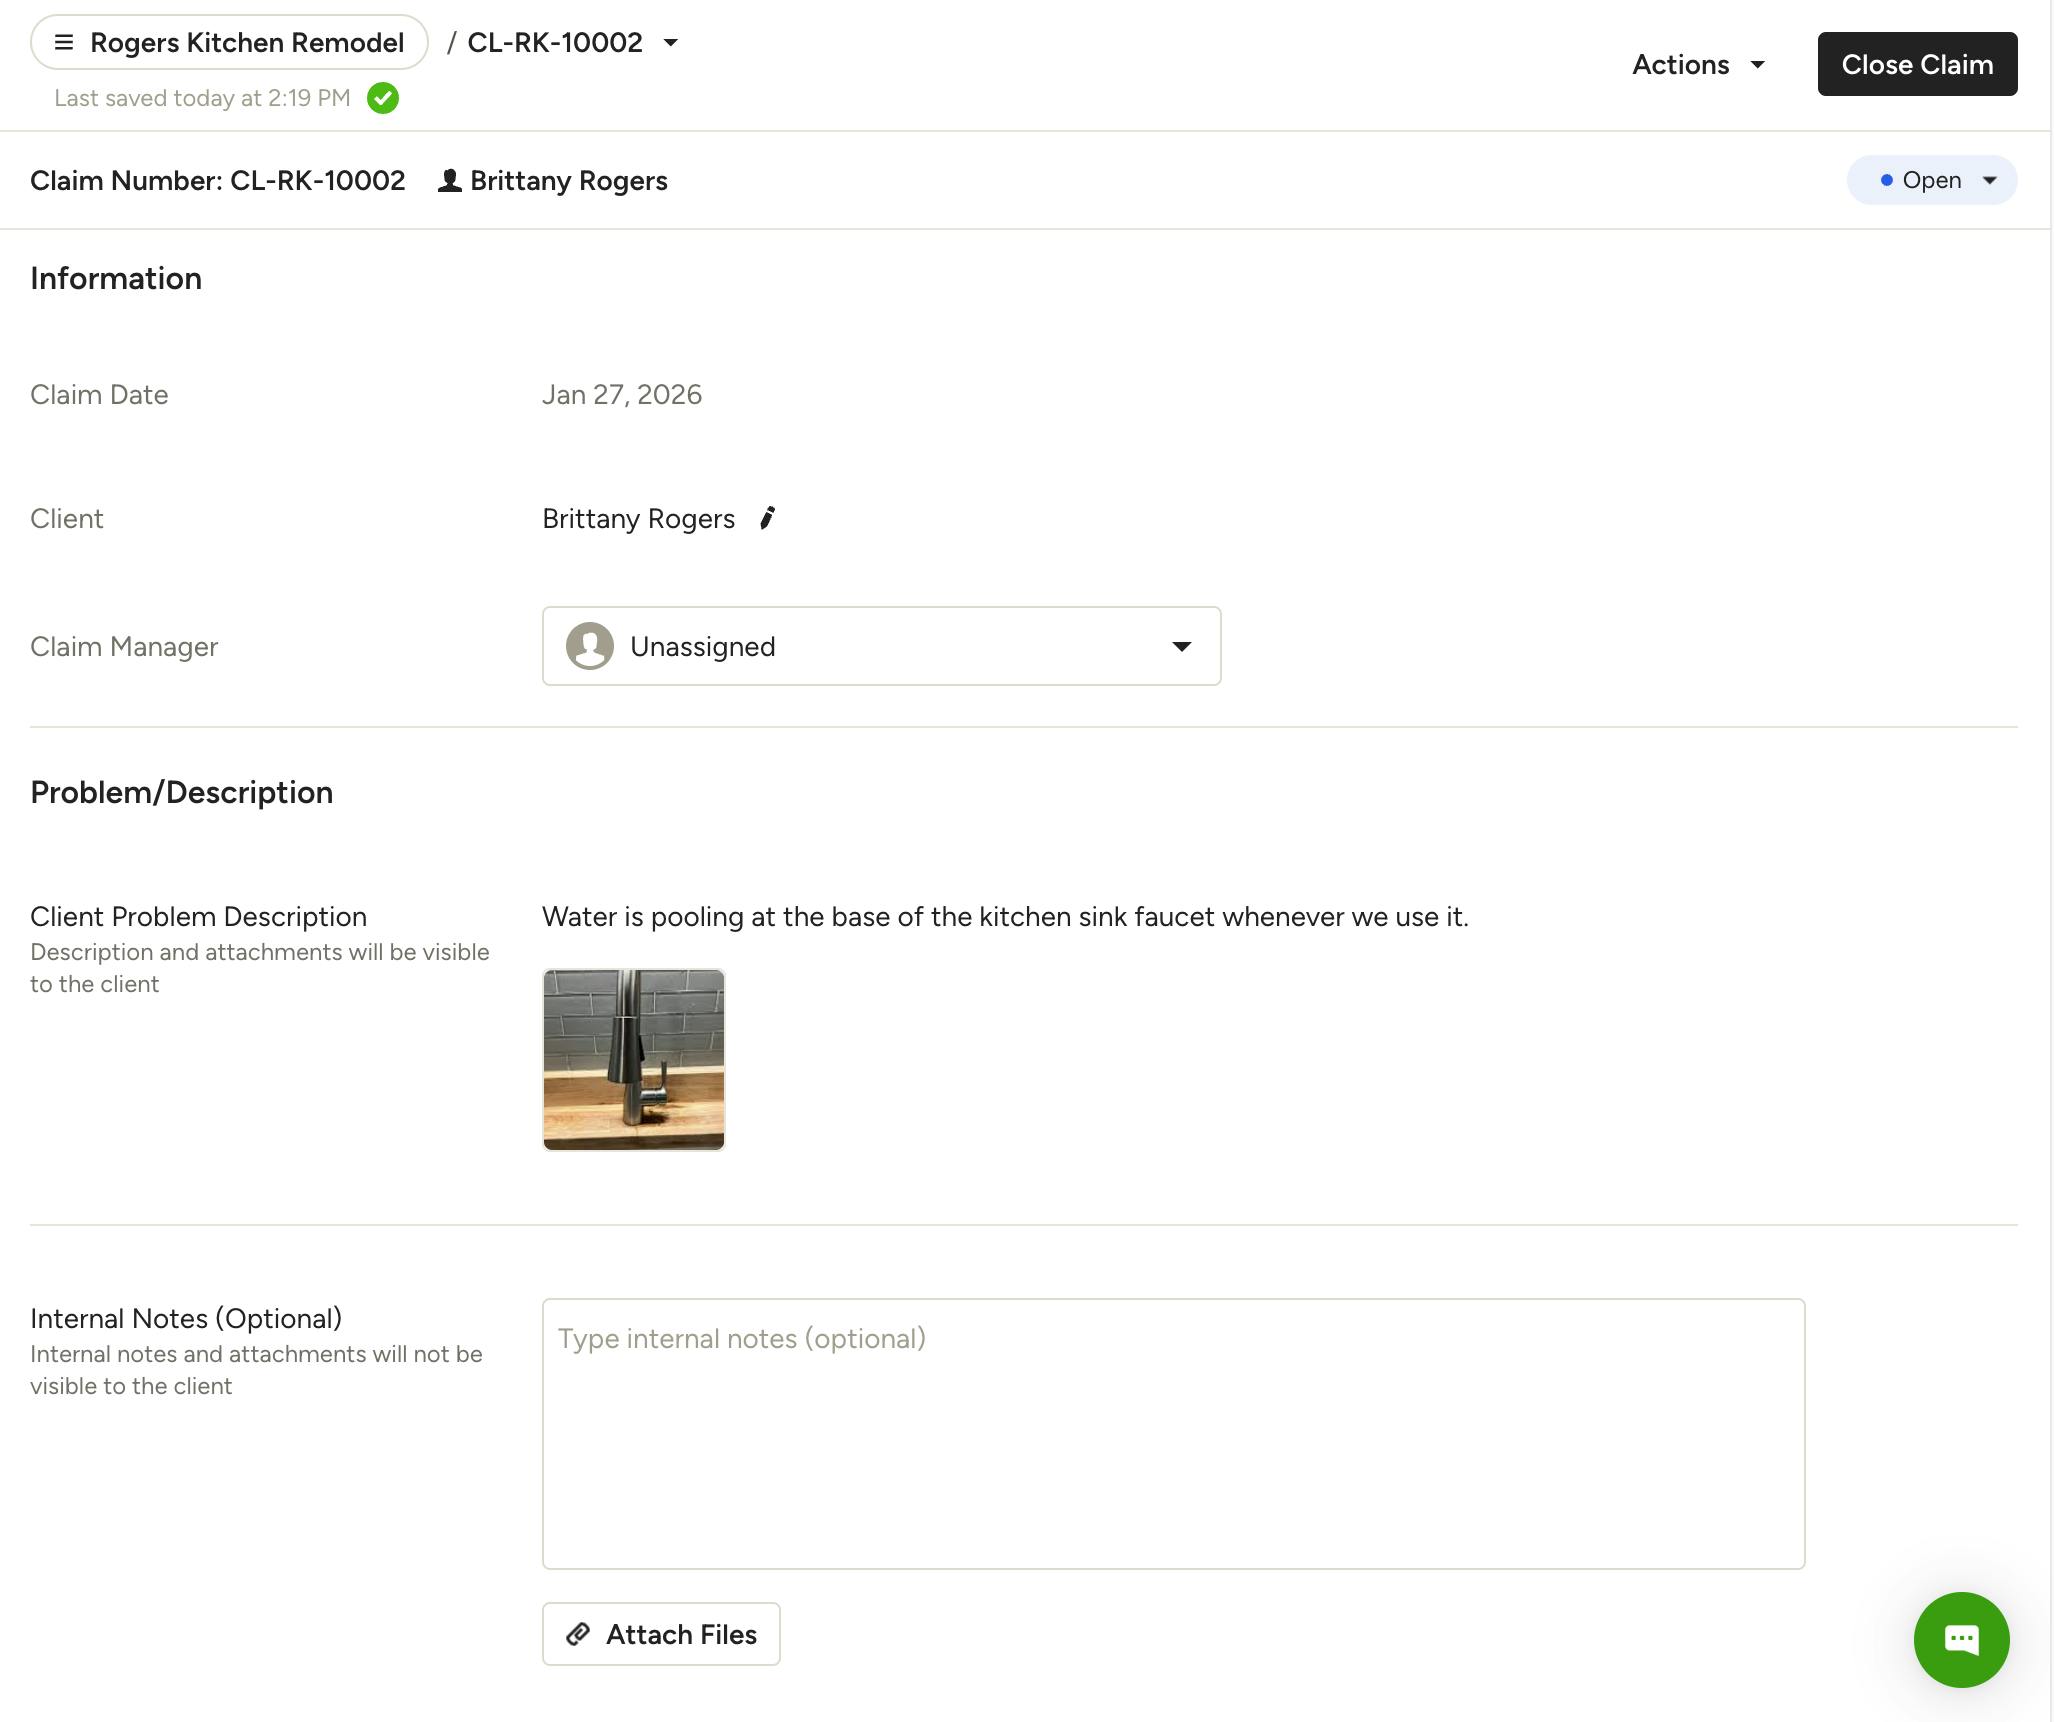
If you decline the claim, there is no further action needed on your part. If you approve the claim, the status will change to Open and you can add addition details and notes, assign a manager and create work assignments.
Track Activity
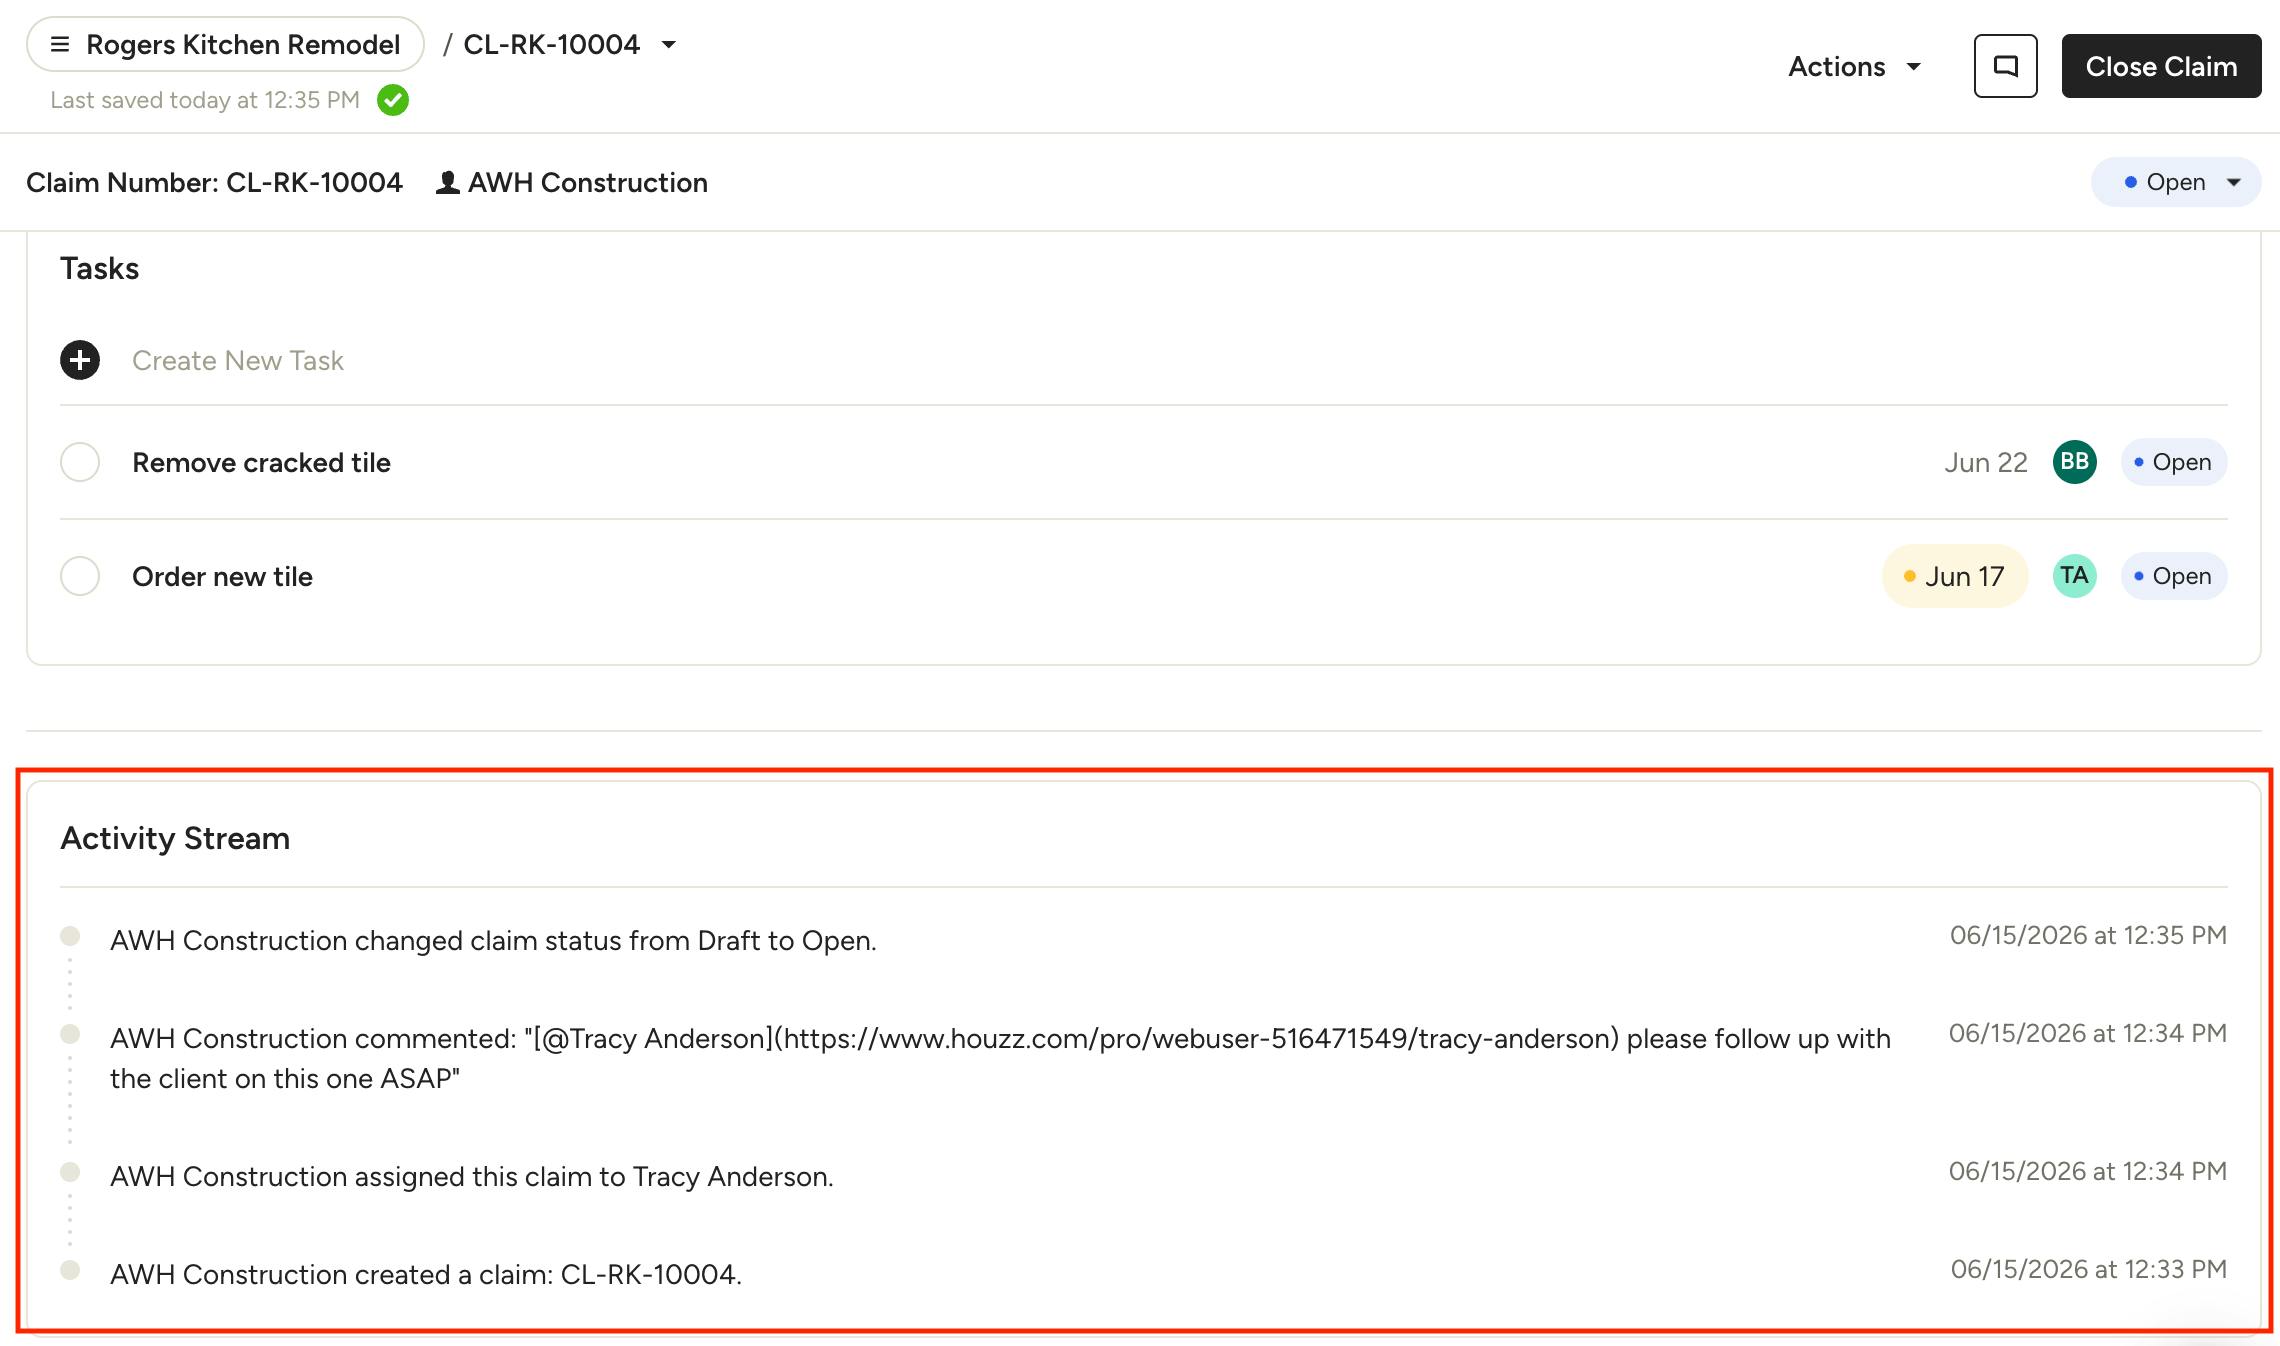
Actions taken on a warranty or claim are automatically logged in the activity stream, giving you a clear timeline of what's happened and when. This includes events like:
- Warranty/Claim created
- Shared to the Client Dashboard
- Status changed (e.g., from Draft to Active, or Active to Voided)
- Manager assigned
- Comment added
These entries appear on the bottom of the relevant warranty or claim page, and certain actions also appear in the project's overall activity feed, with links that take you directly to the corresponding warranty or claim for more detail.