How to Log & Manage Time on Houzz Pro
In the Time section of Houzz Pro, you can log time spent on projects and manage your rates and activities for the entire team. This article will cover how to create, edit and manage time entries. If you need help to use the stopwatch to track your time, read this article.
Watch the video and read the tutorial below for all the ins and outs of time tracking.
Access Time Page
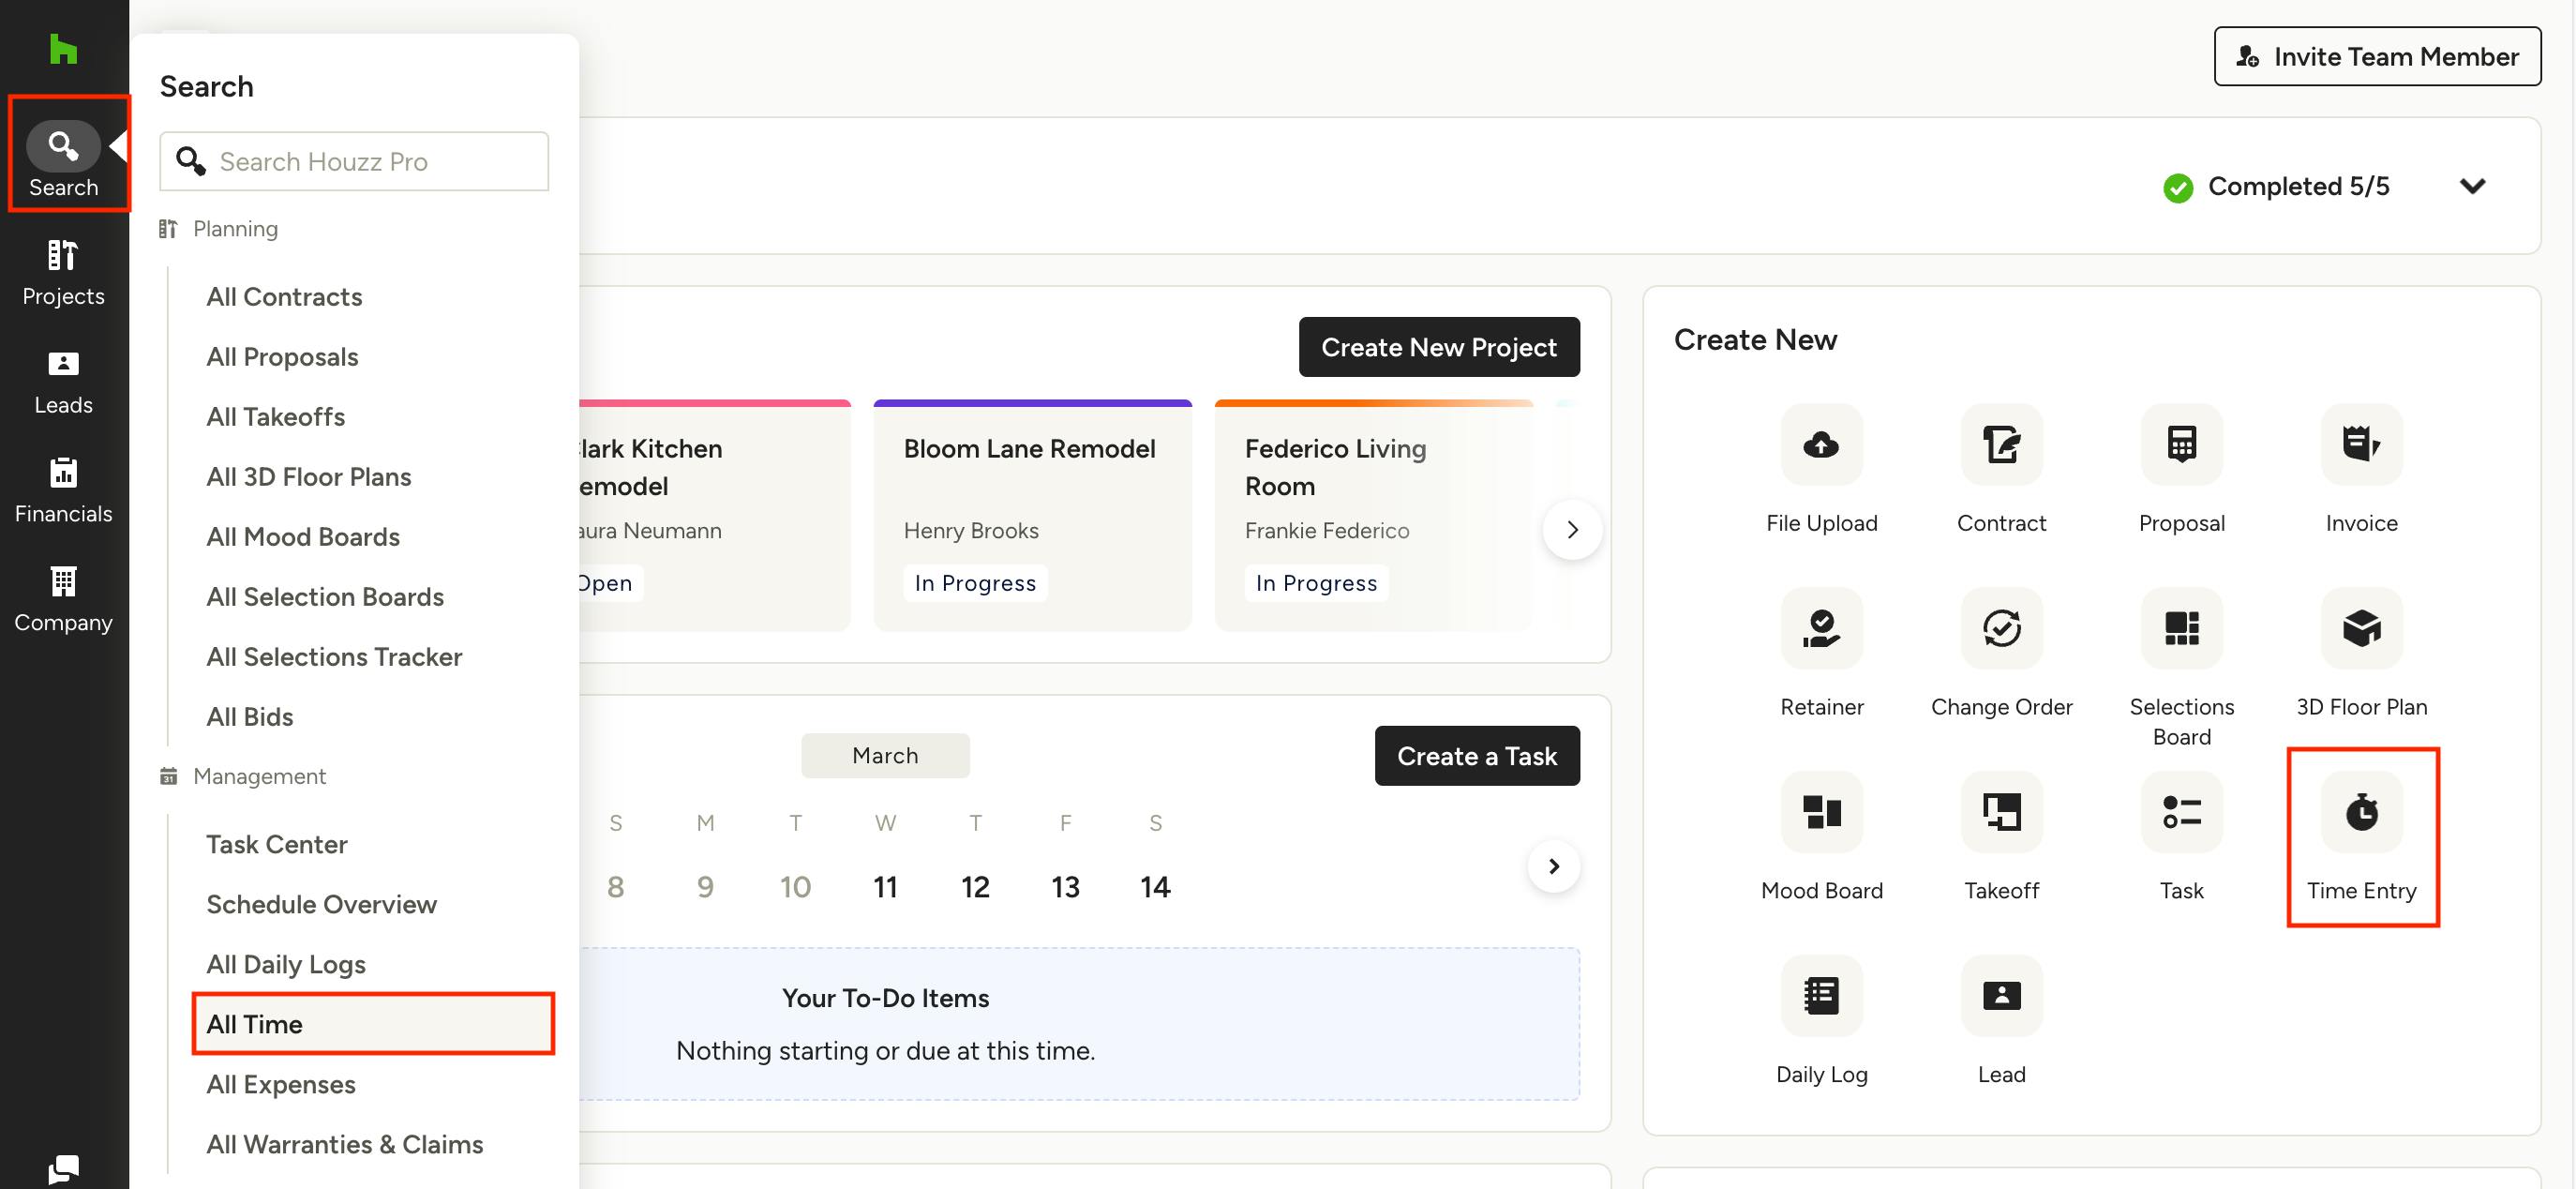
To access your main Time page, click on All Time under the Management section found under the search icon in the left navigation. You can also click on the Time Entry icon in the Create New tile on your homepage.
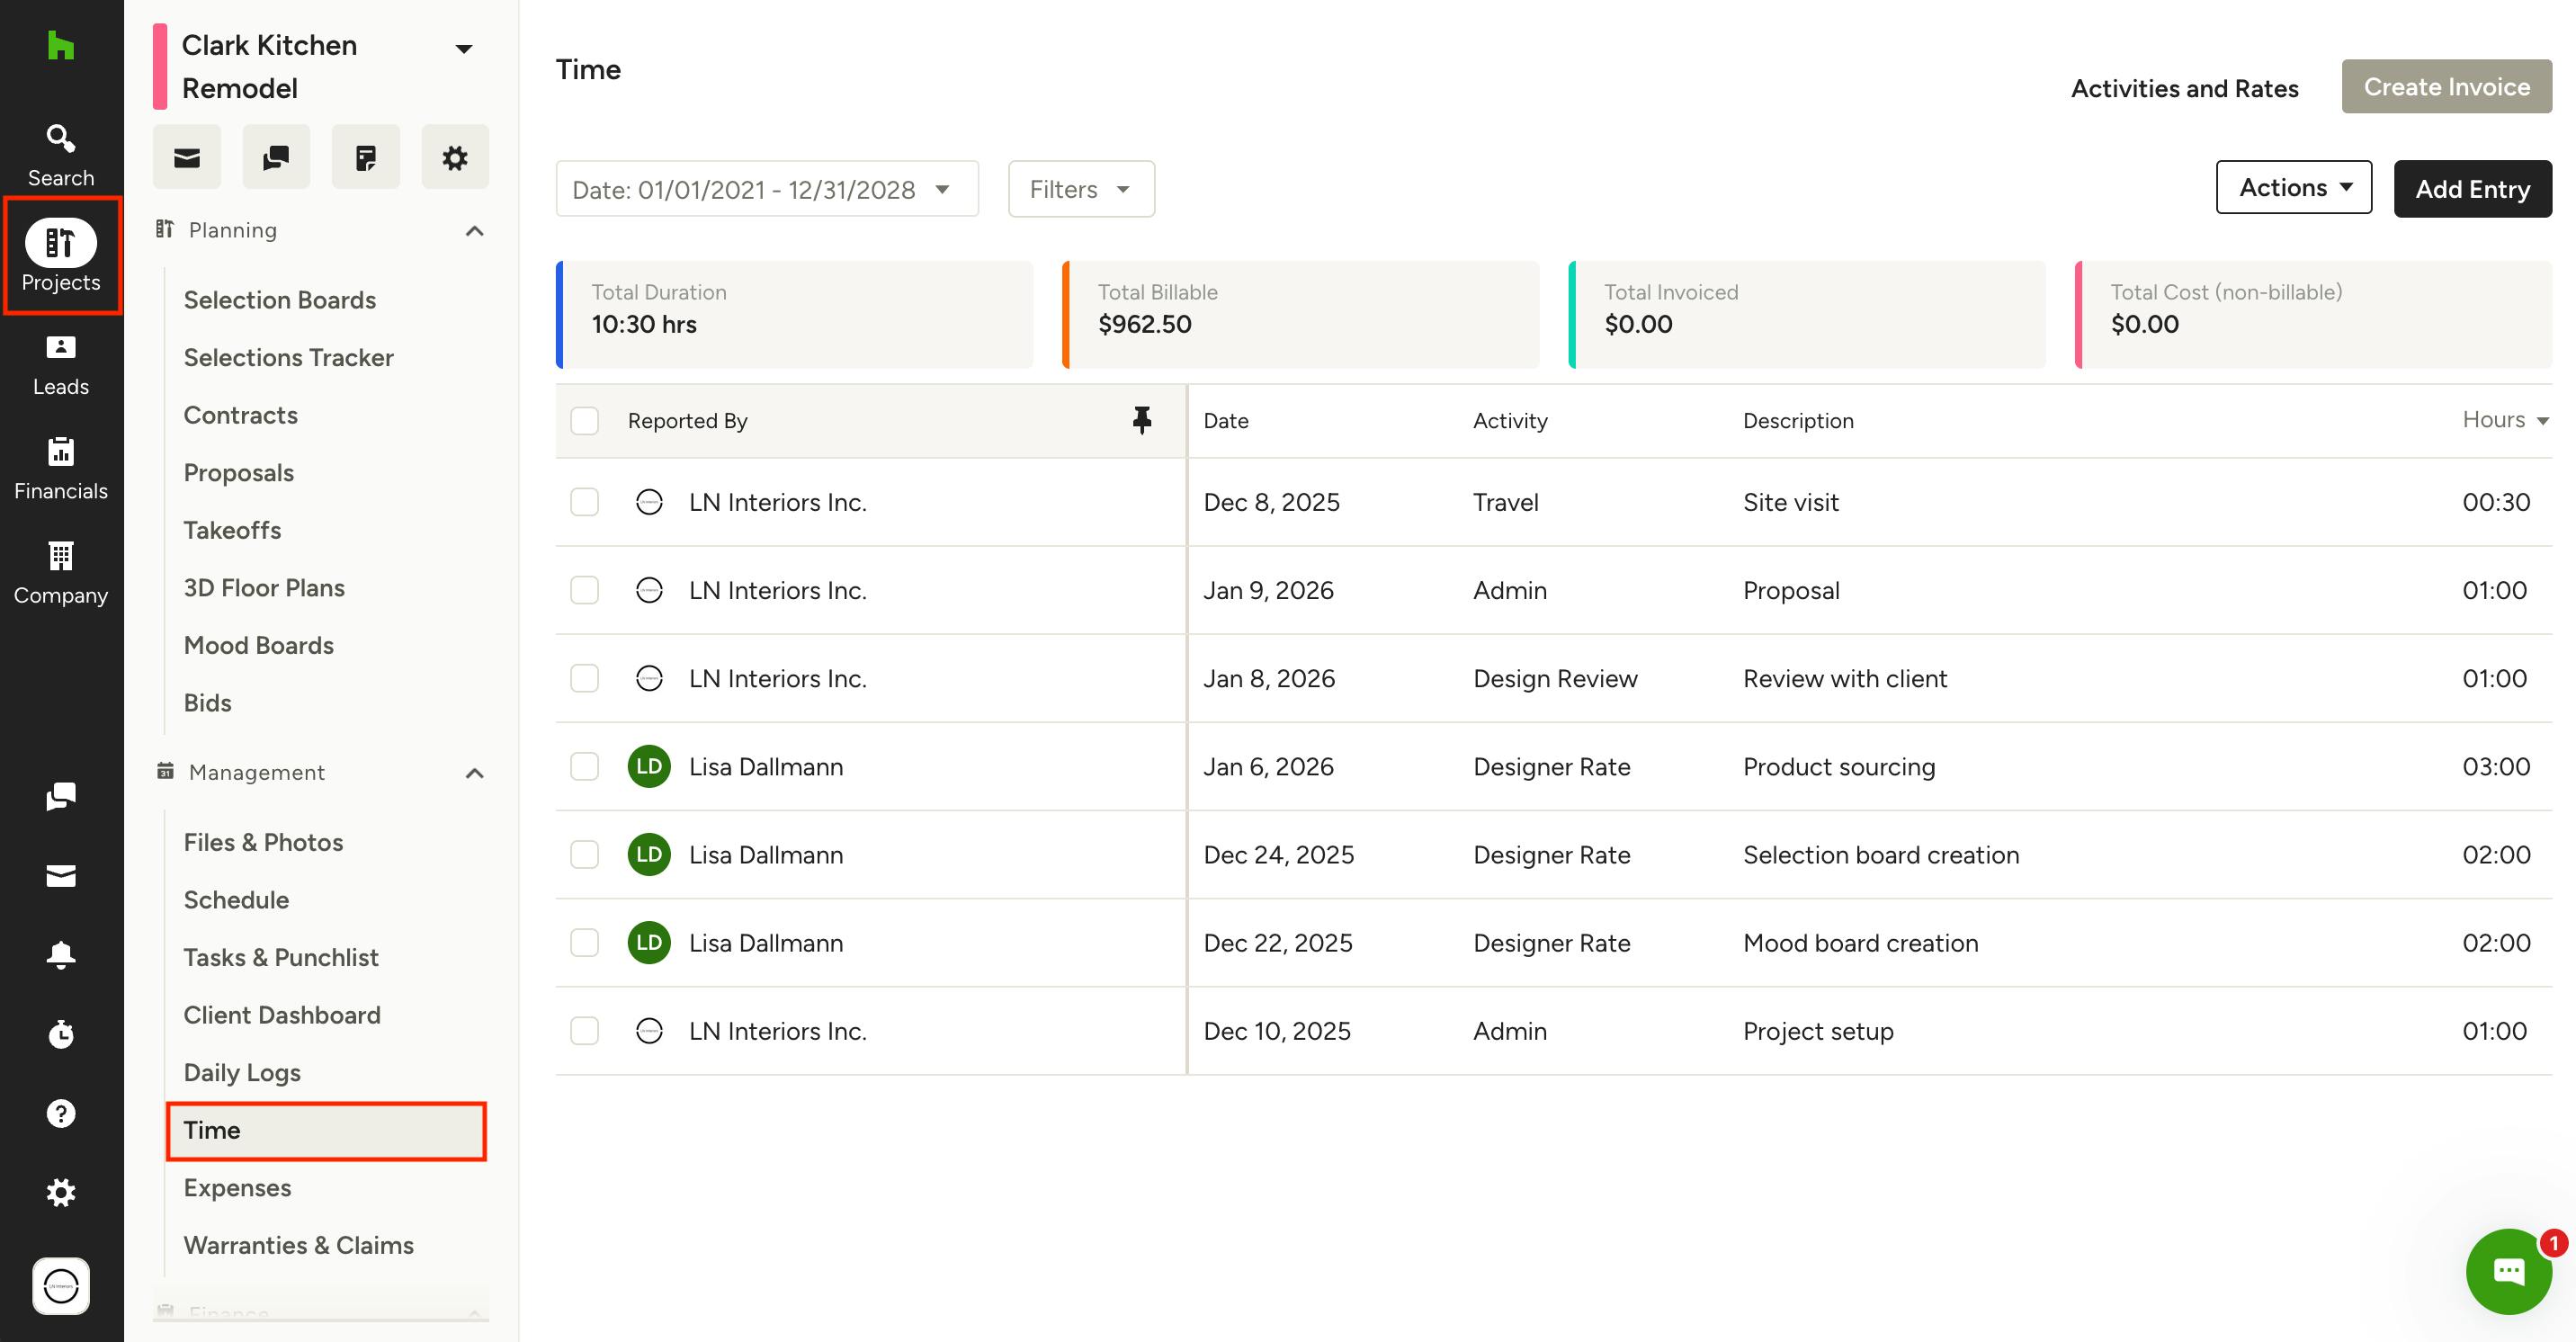
You can access the Time page for a specific project by clicking Time under the Management section in the left menu on any project overview page. This will only show you entries from the corresponding project.
Manage Activities & Rates
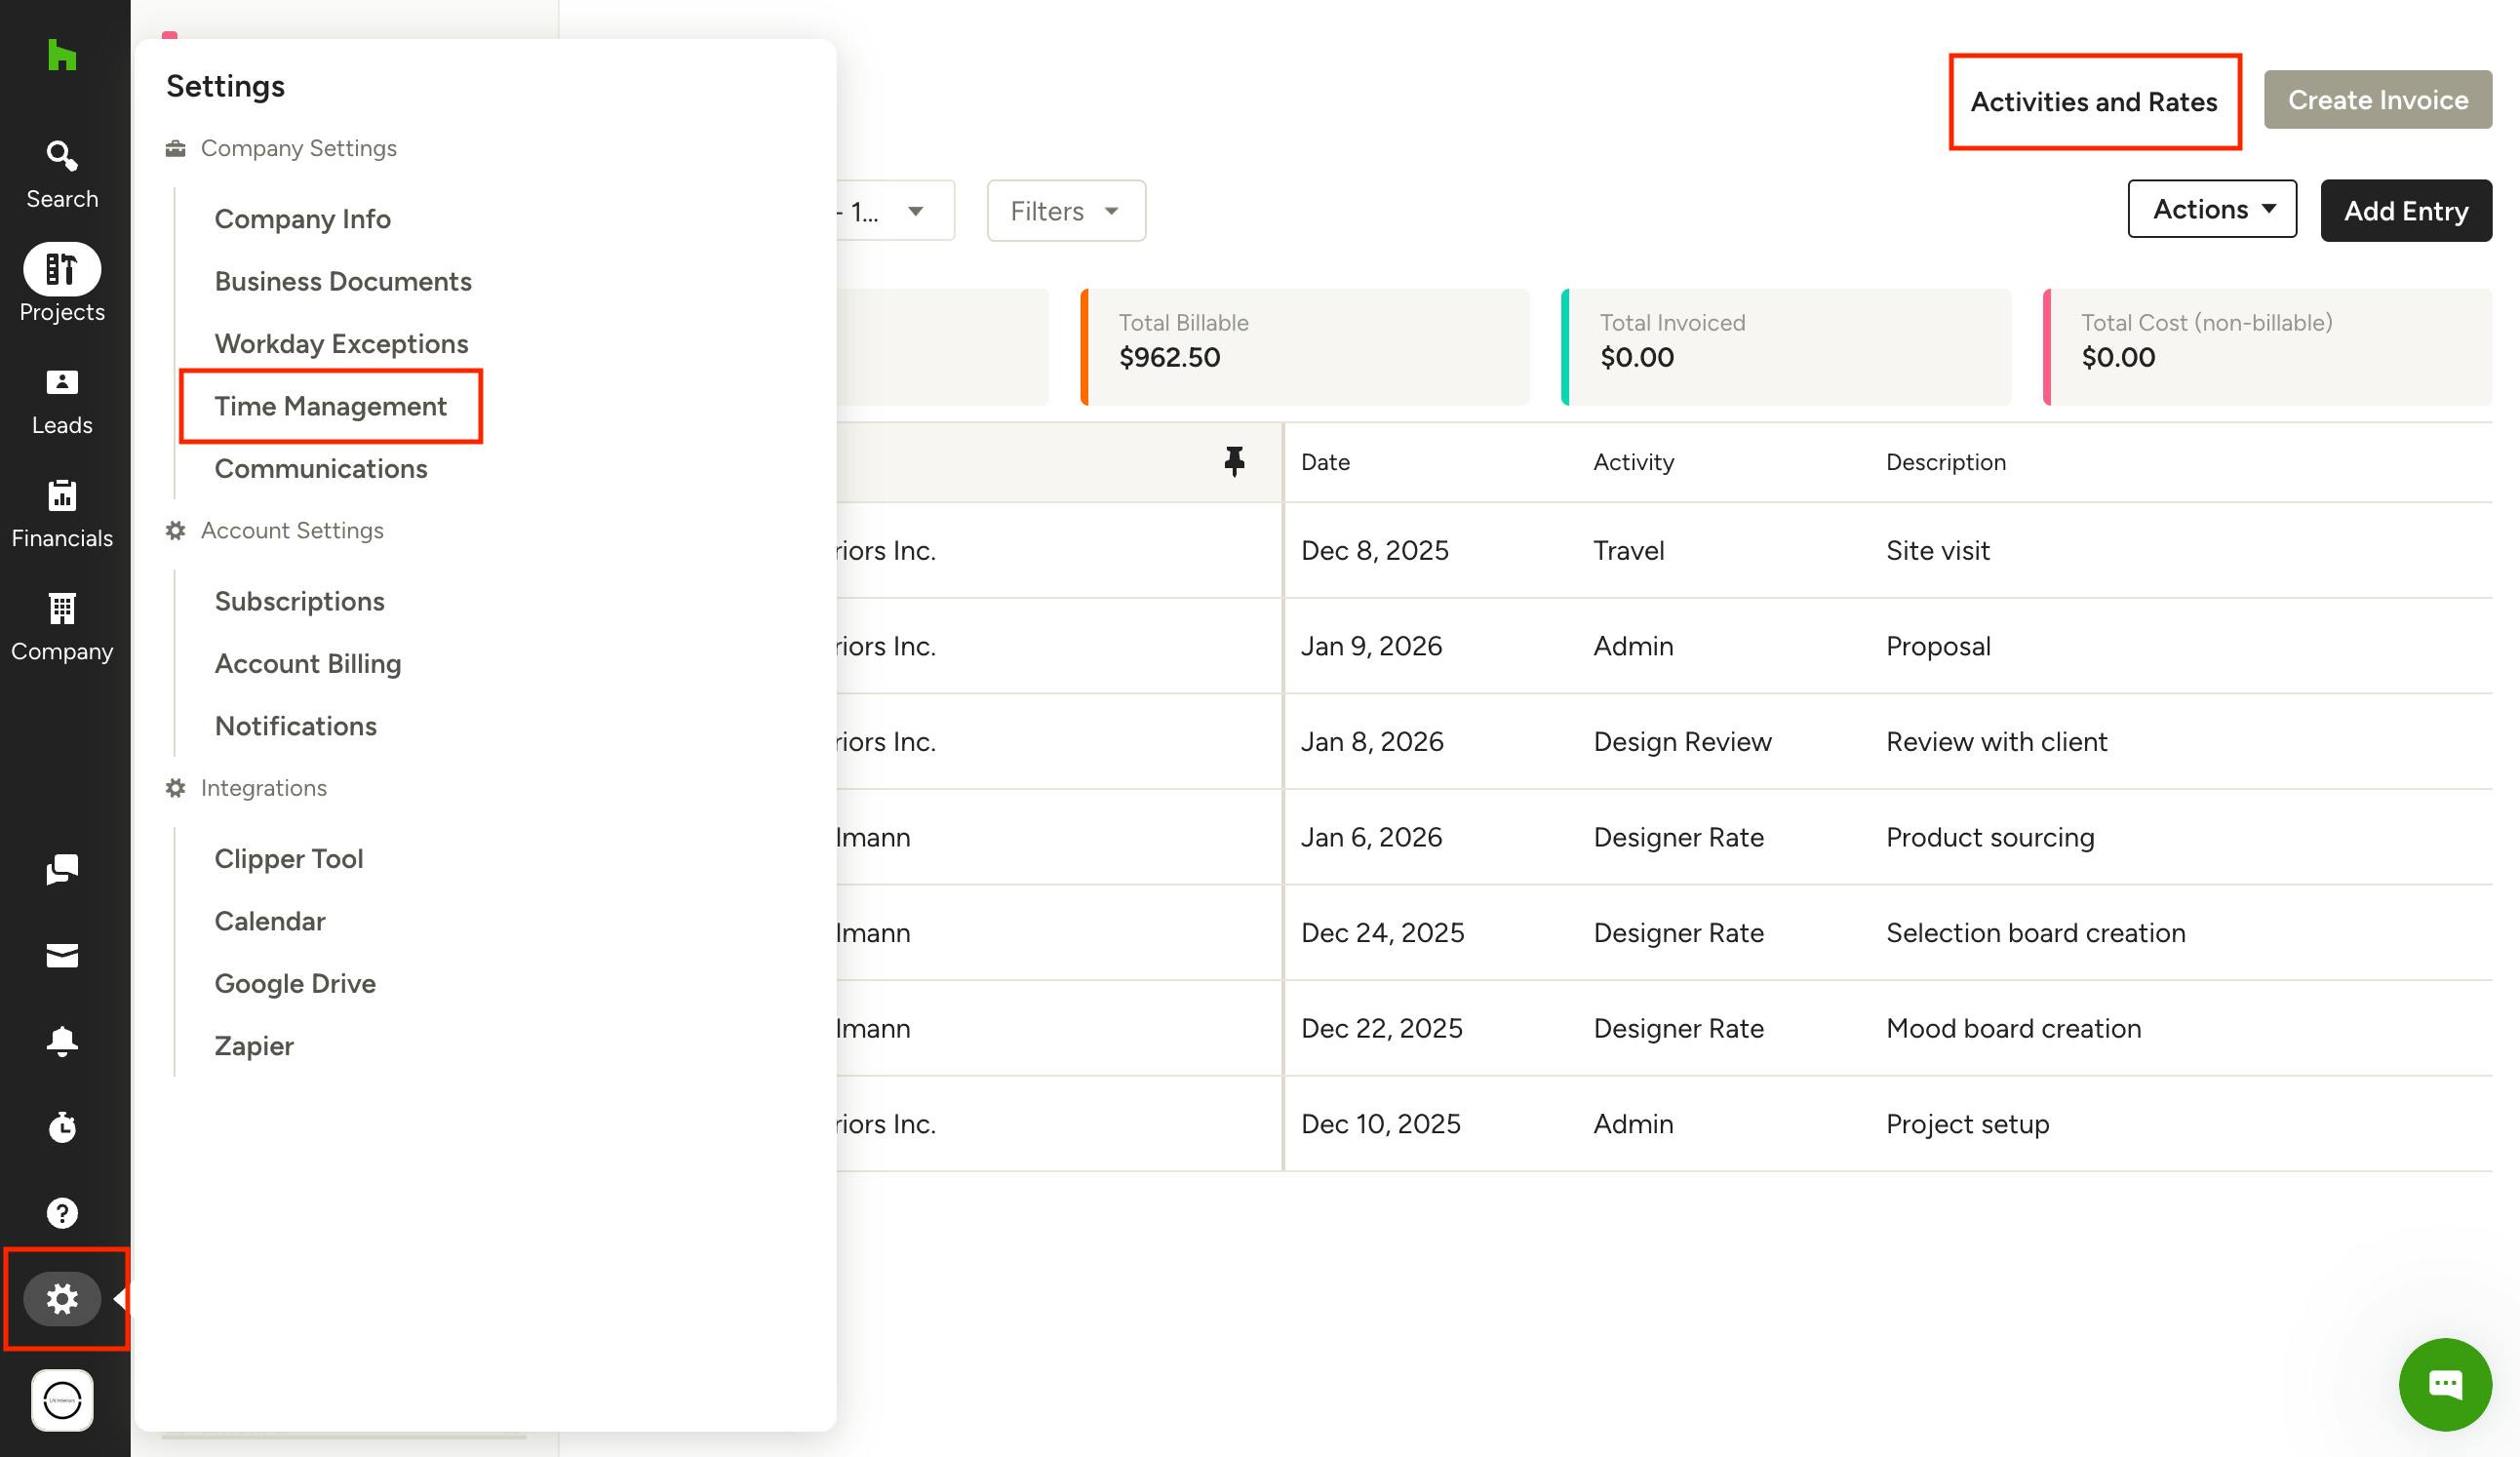
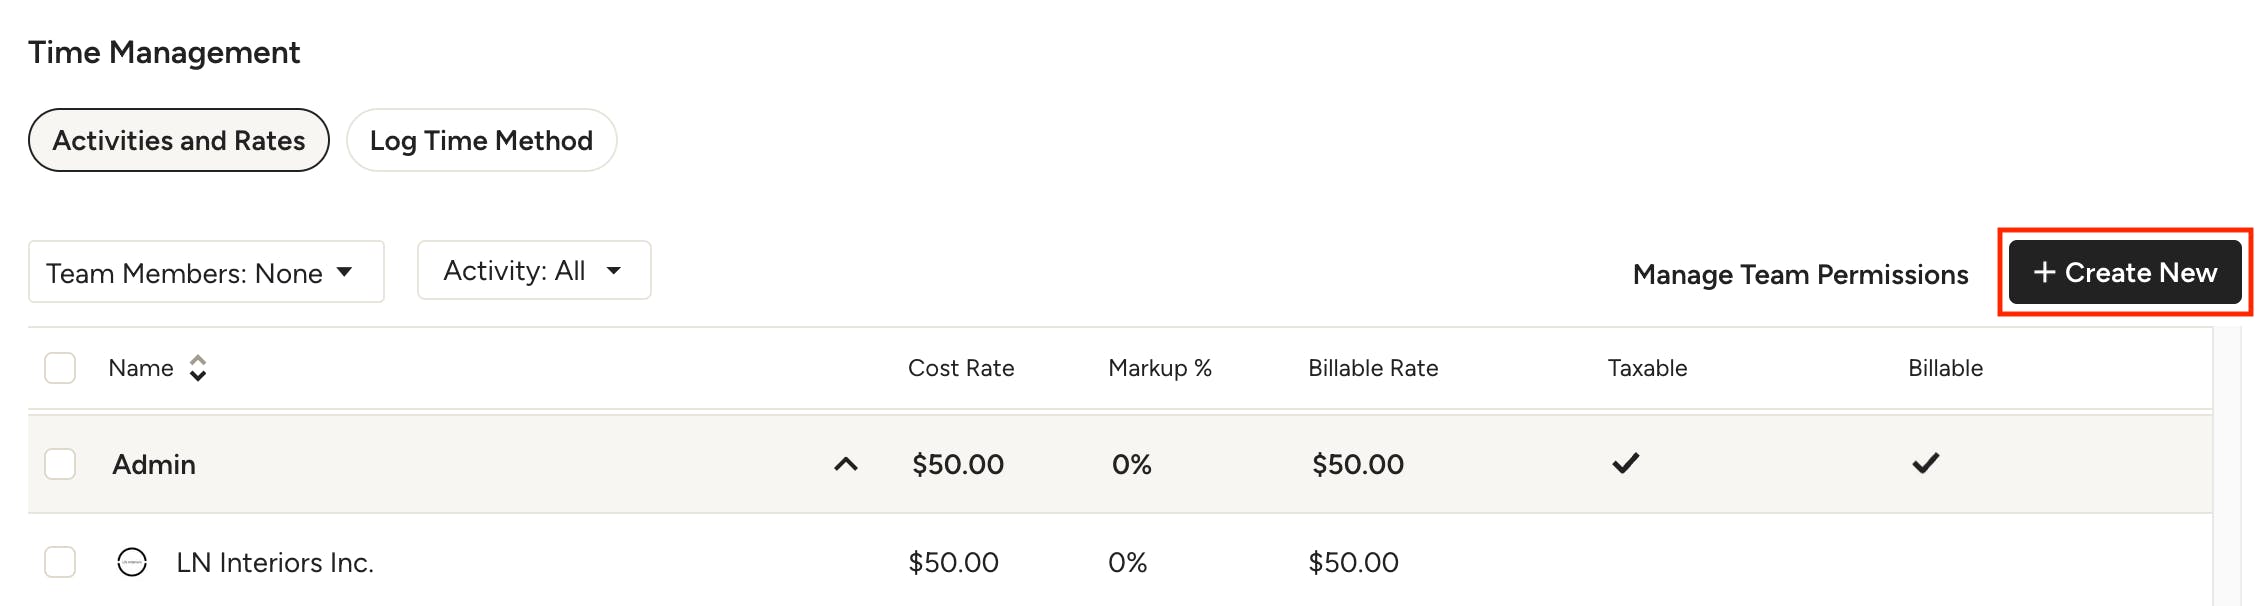
In order to properly log time, you need to set up activities (previously called services) and rates. You can create, edit and delete time activities and rates in the Time Management page. To access this page, click Activities and Rates from top of any Time page, or click Time Management from the Settings menu in the left navigation.
Create Activity
To add a new activity, click the Create New button in the top right of the Time Management page.
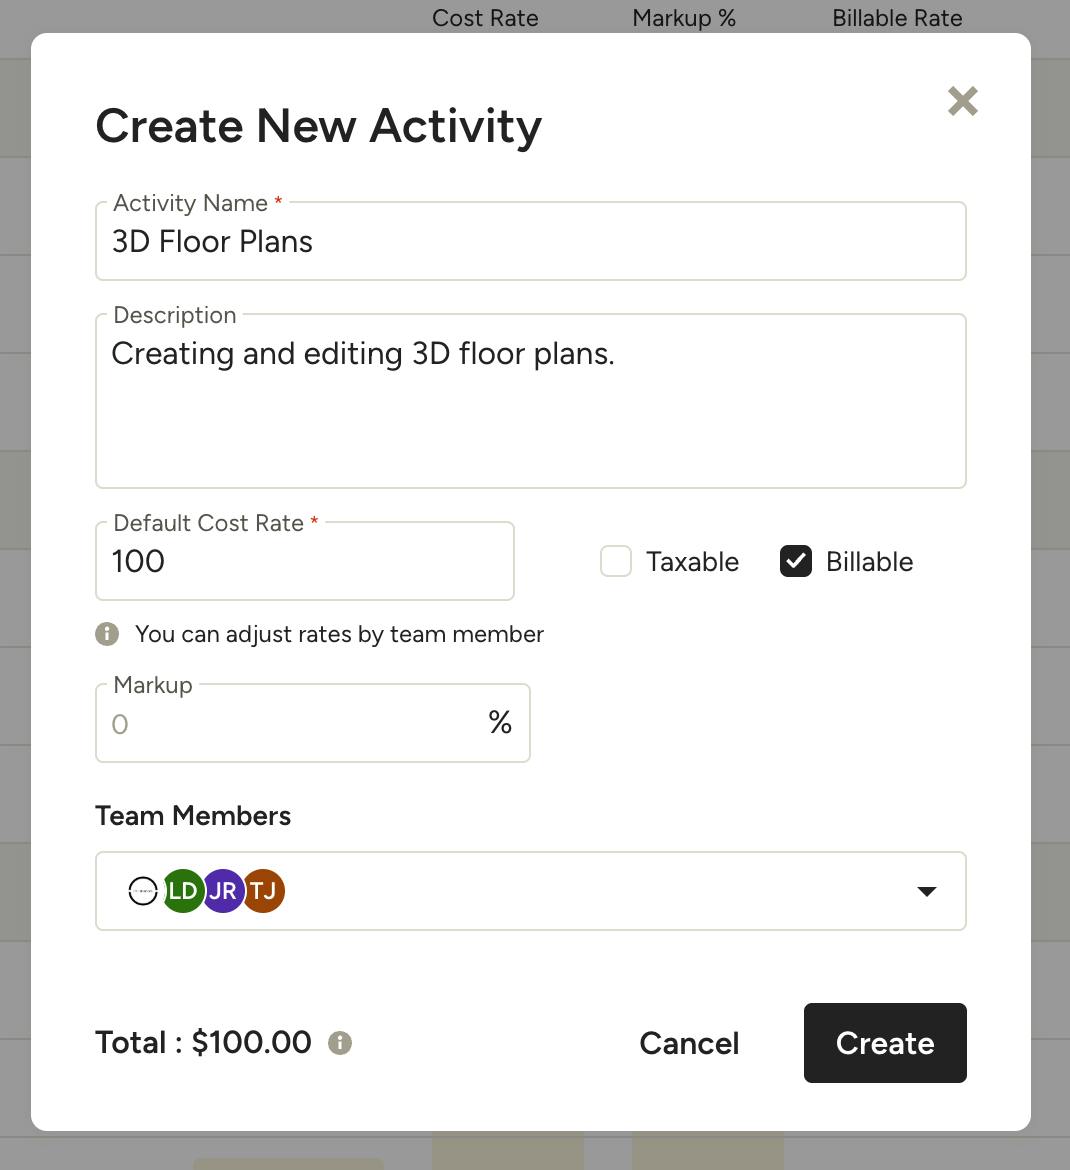
Fill in the information for the new activity, including:
- Activity Name
- Description
- Default Cost Rate (You can adjust rates by team member in the next step)
- Taxable / Billable
- Markup
- Team Members
Click Create to add the new activity.
Set Custom Rates Per Team Member
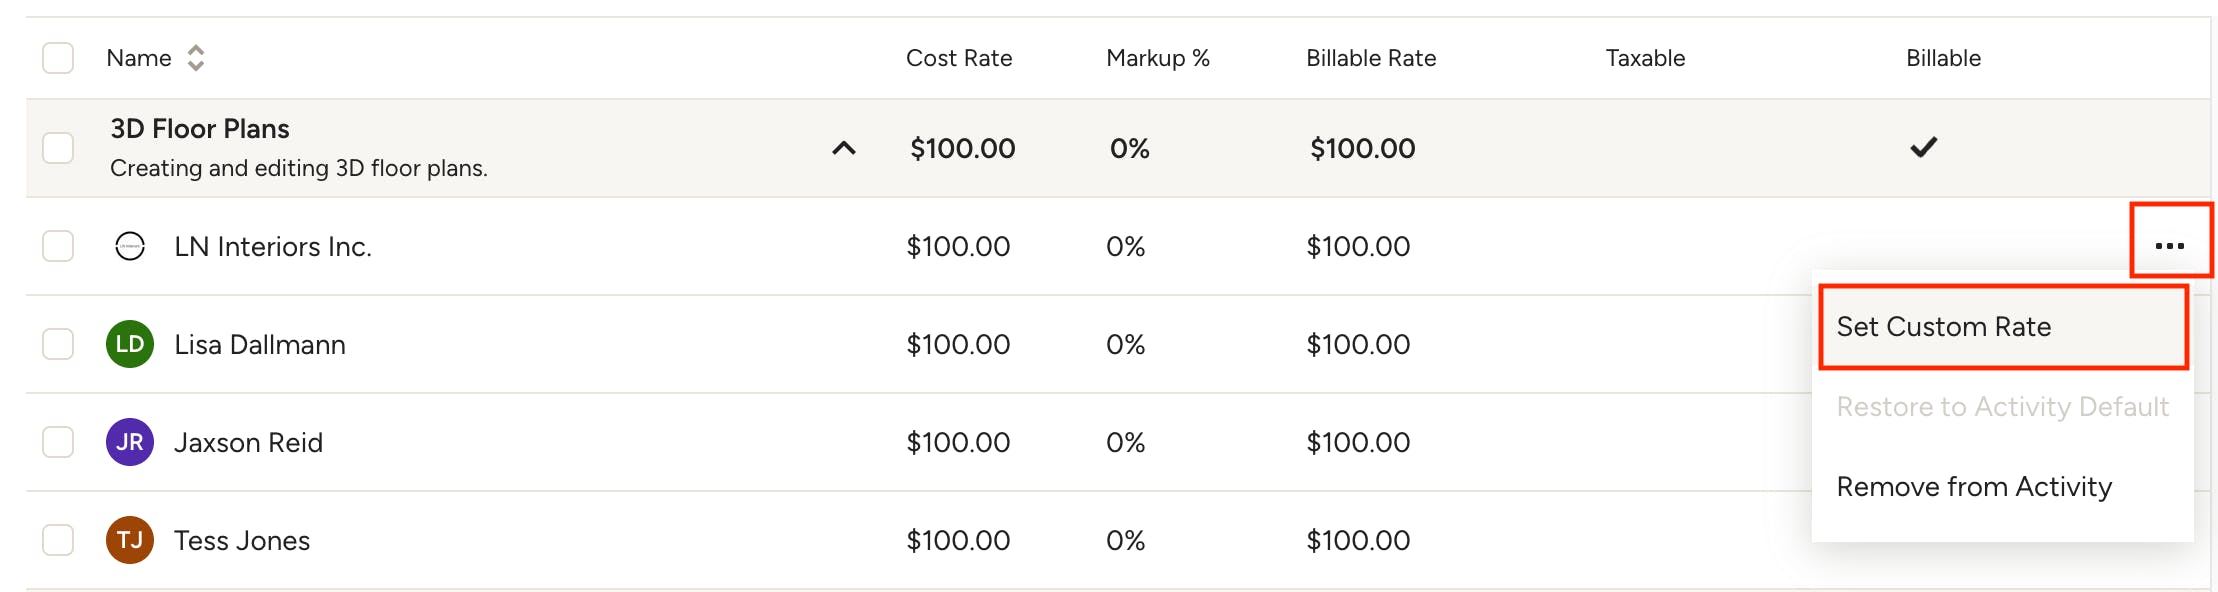
Each time activity will have a default cost rate that is automatically applied to all relevant team members. You can easily set a custom rate for each team member, which is useful if you have employees at different levels, such as junior, senior, principal etc. To set a custom rate, hover over the team member and click the three dots menu to the right, then select Set Custom Rate.
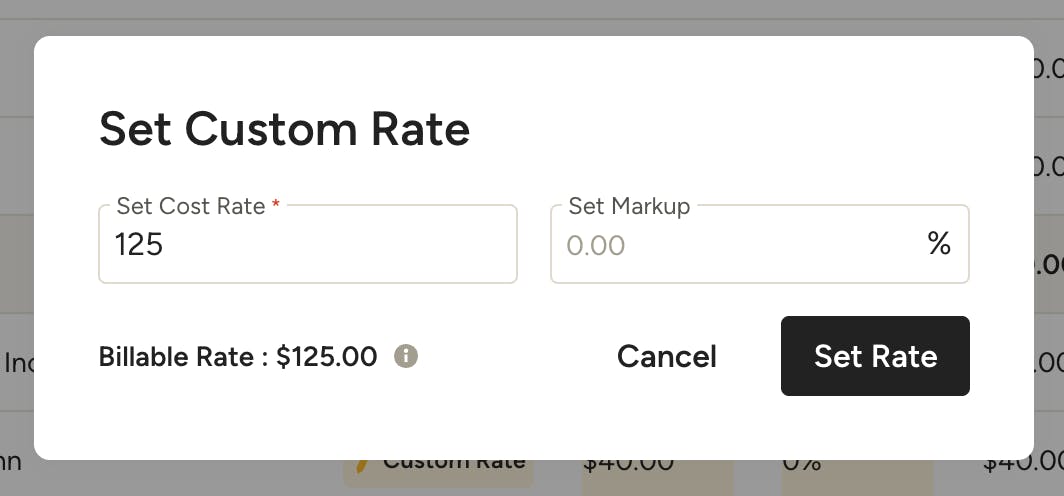
Enter the custom rate and markup, if applicable.
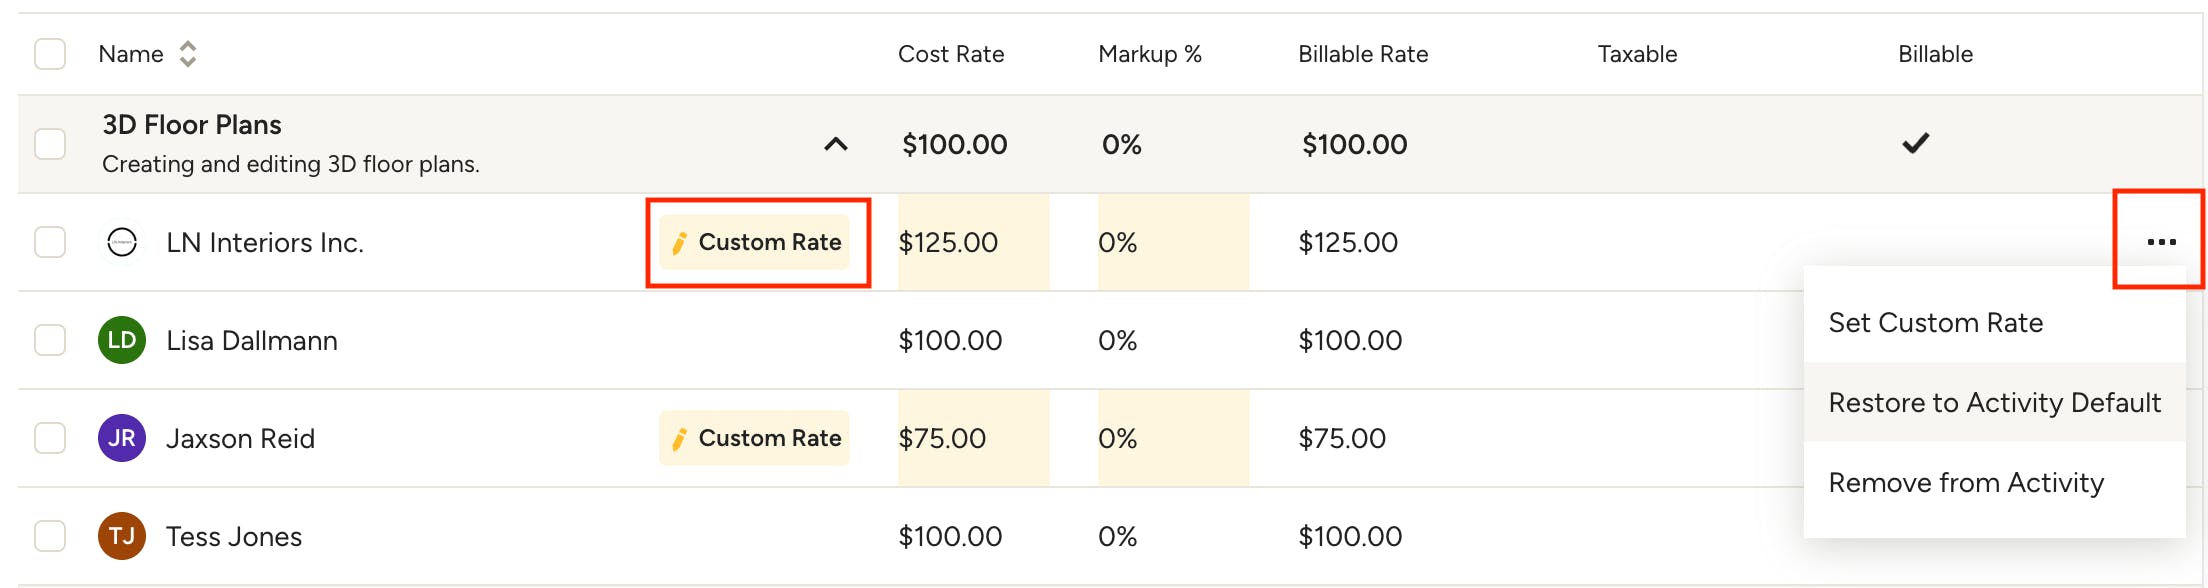
Once a custom rate has been set, you will see it clearly noted on the team member's row. You can easily change or Restore to Activity Default rate by using the three dots menu.
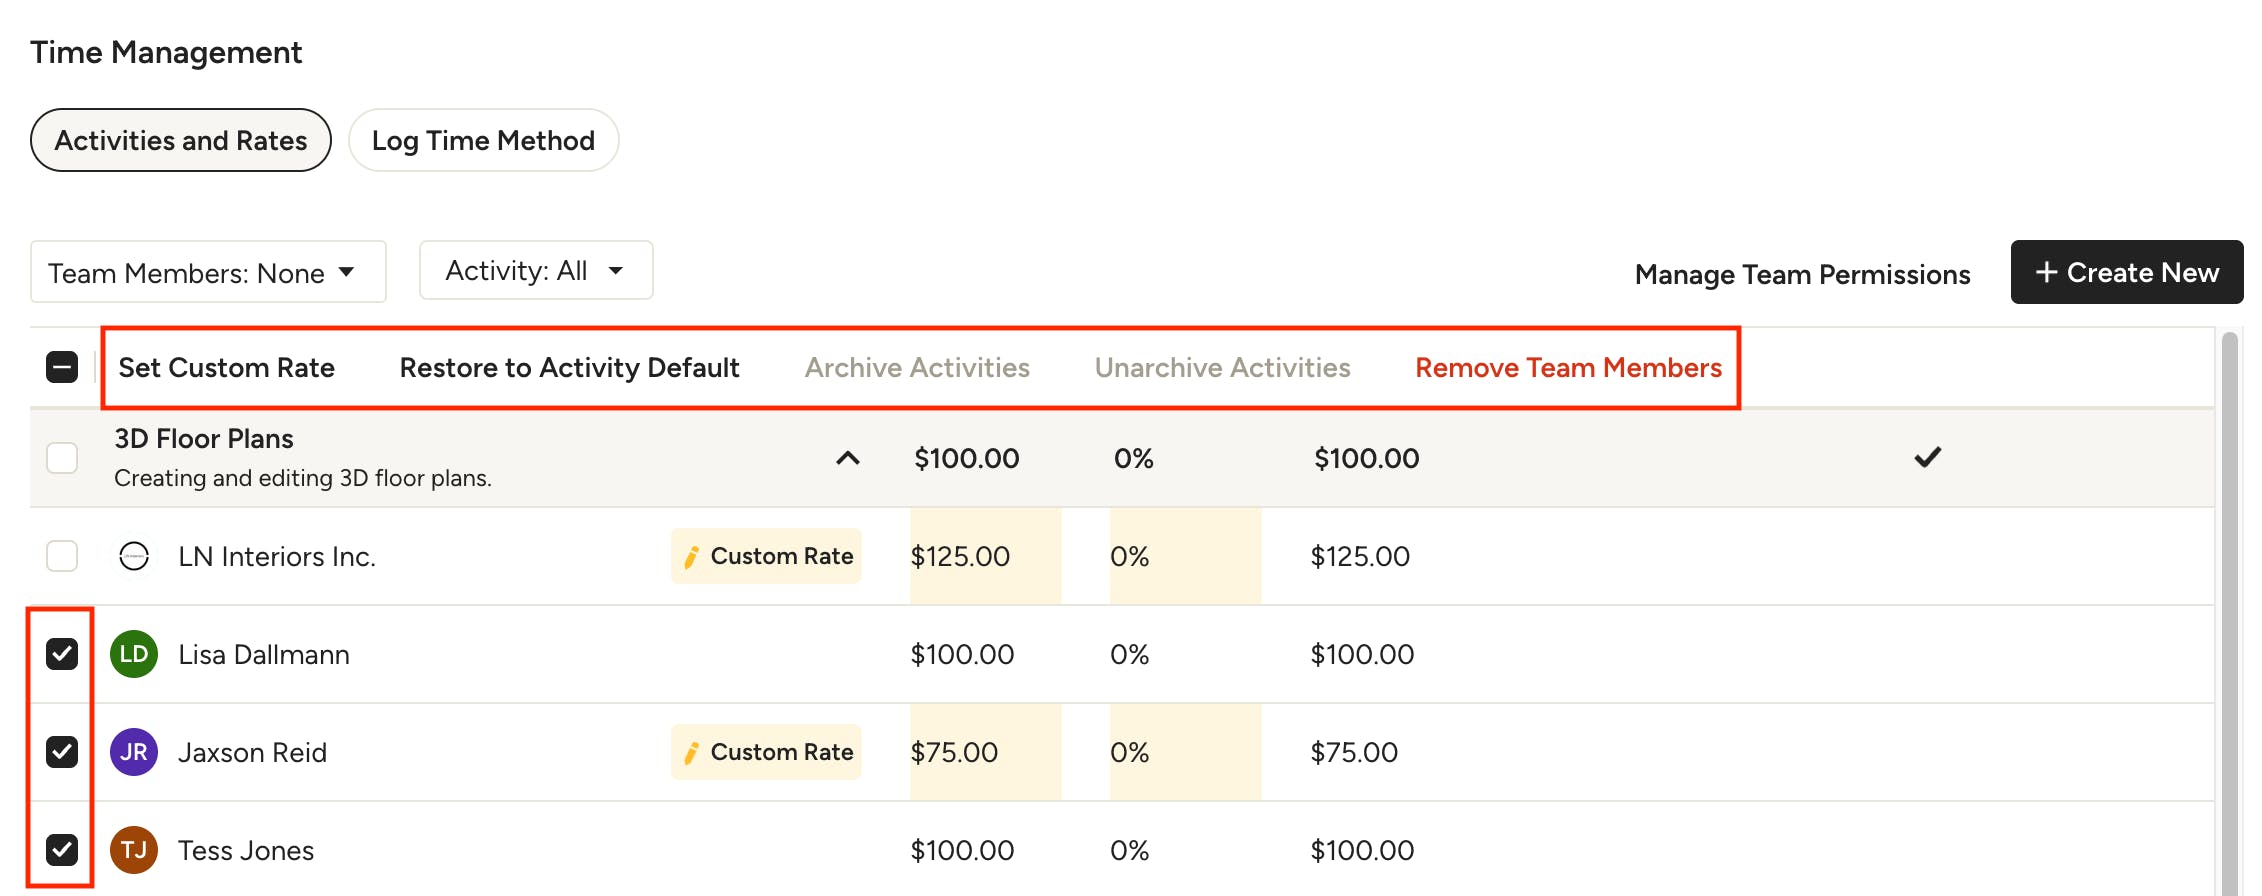
You can also make changes in bulk by selecting multiple team members and choosing from the options that appear at the top of the activities list.
Edit Activity
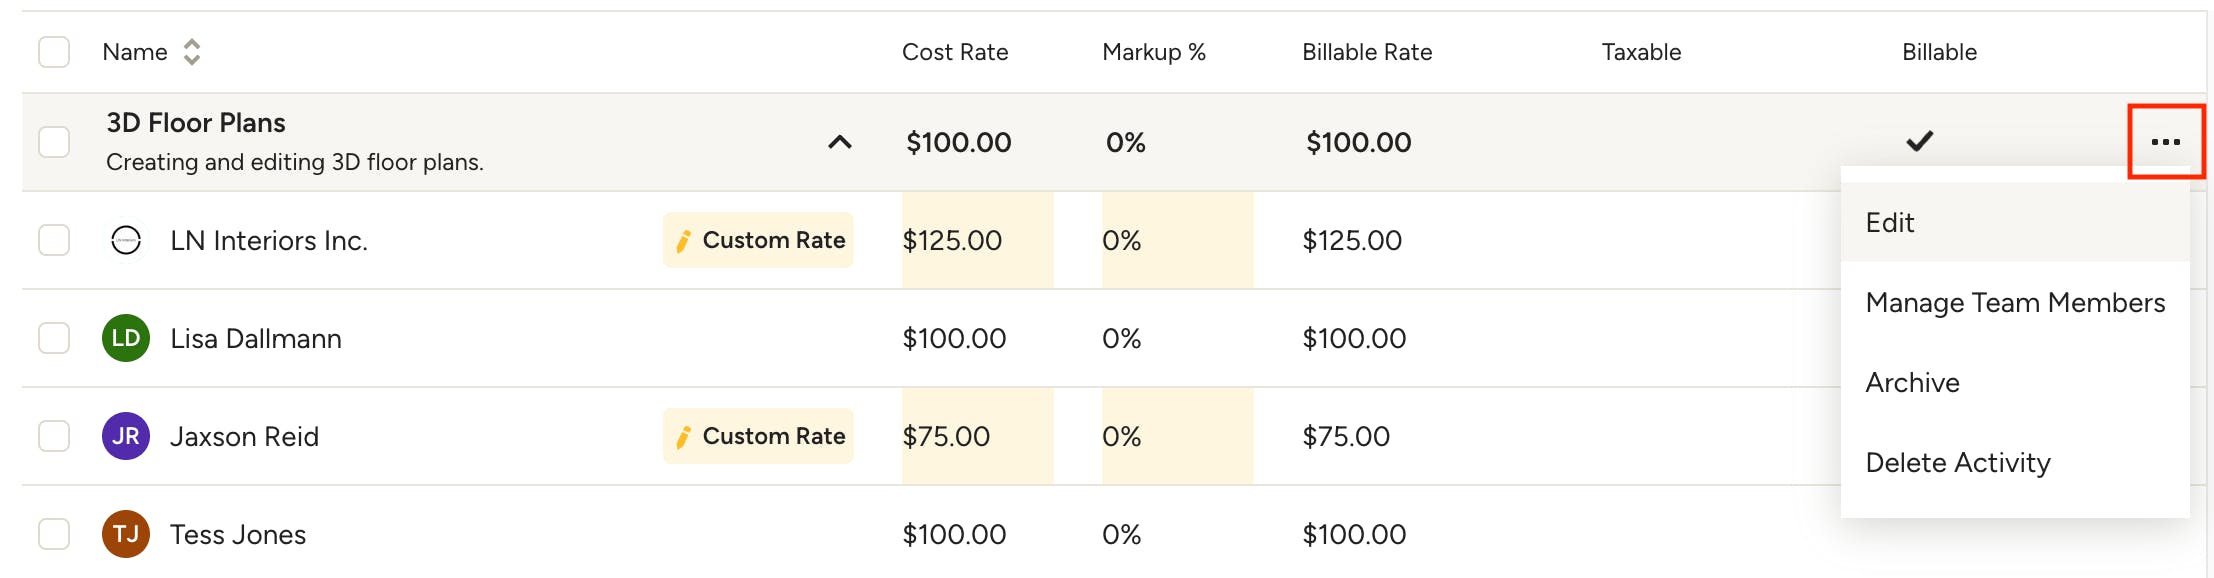
To edit an activity, hover over the activity name and click the three dots menu to the right. You can select Edit to update the default settings for the activity, Manage Team Members to quickly add or remove them, and Archive or Delete the activity.
Note that for proper record-keeping purposes, an activity cannot be deleted once it’s linked to an entry.
Set Custom Project Activity Rates
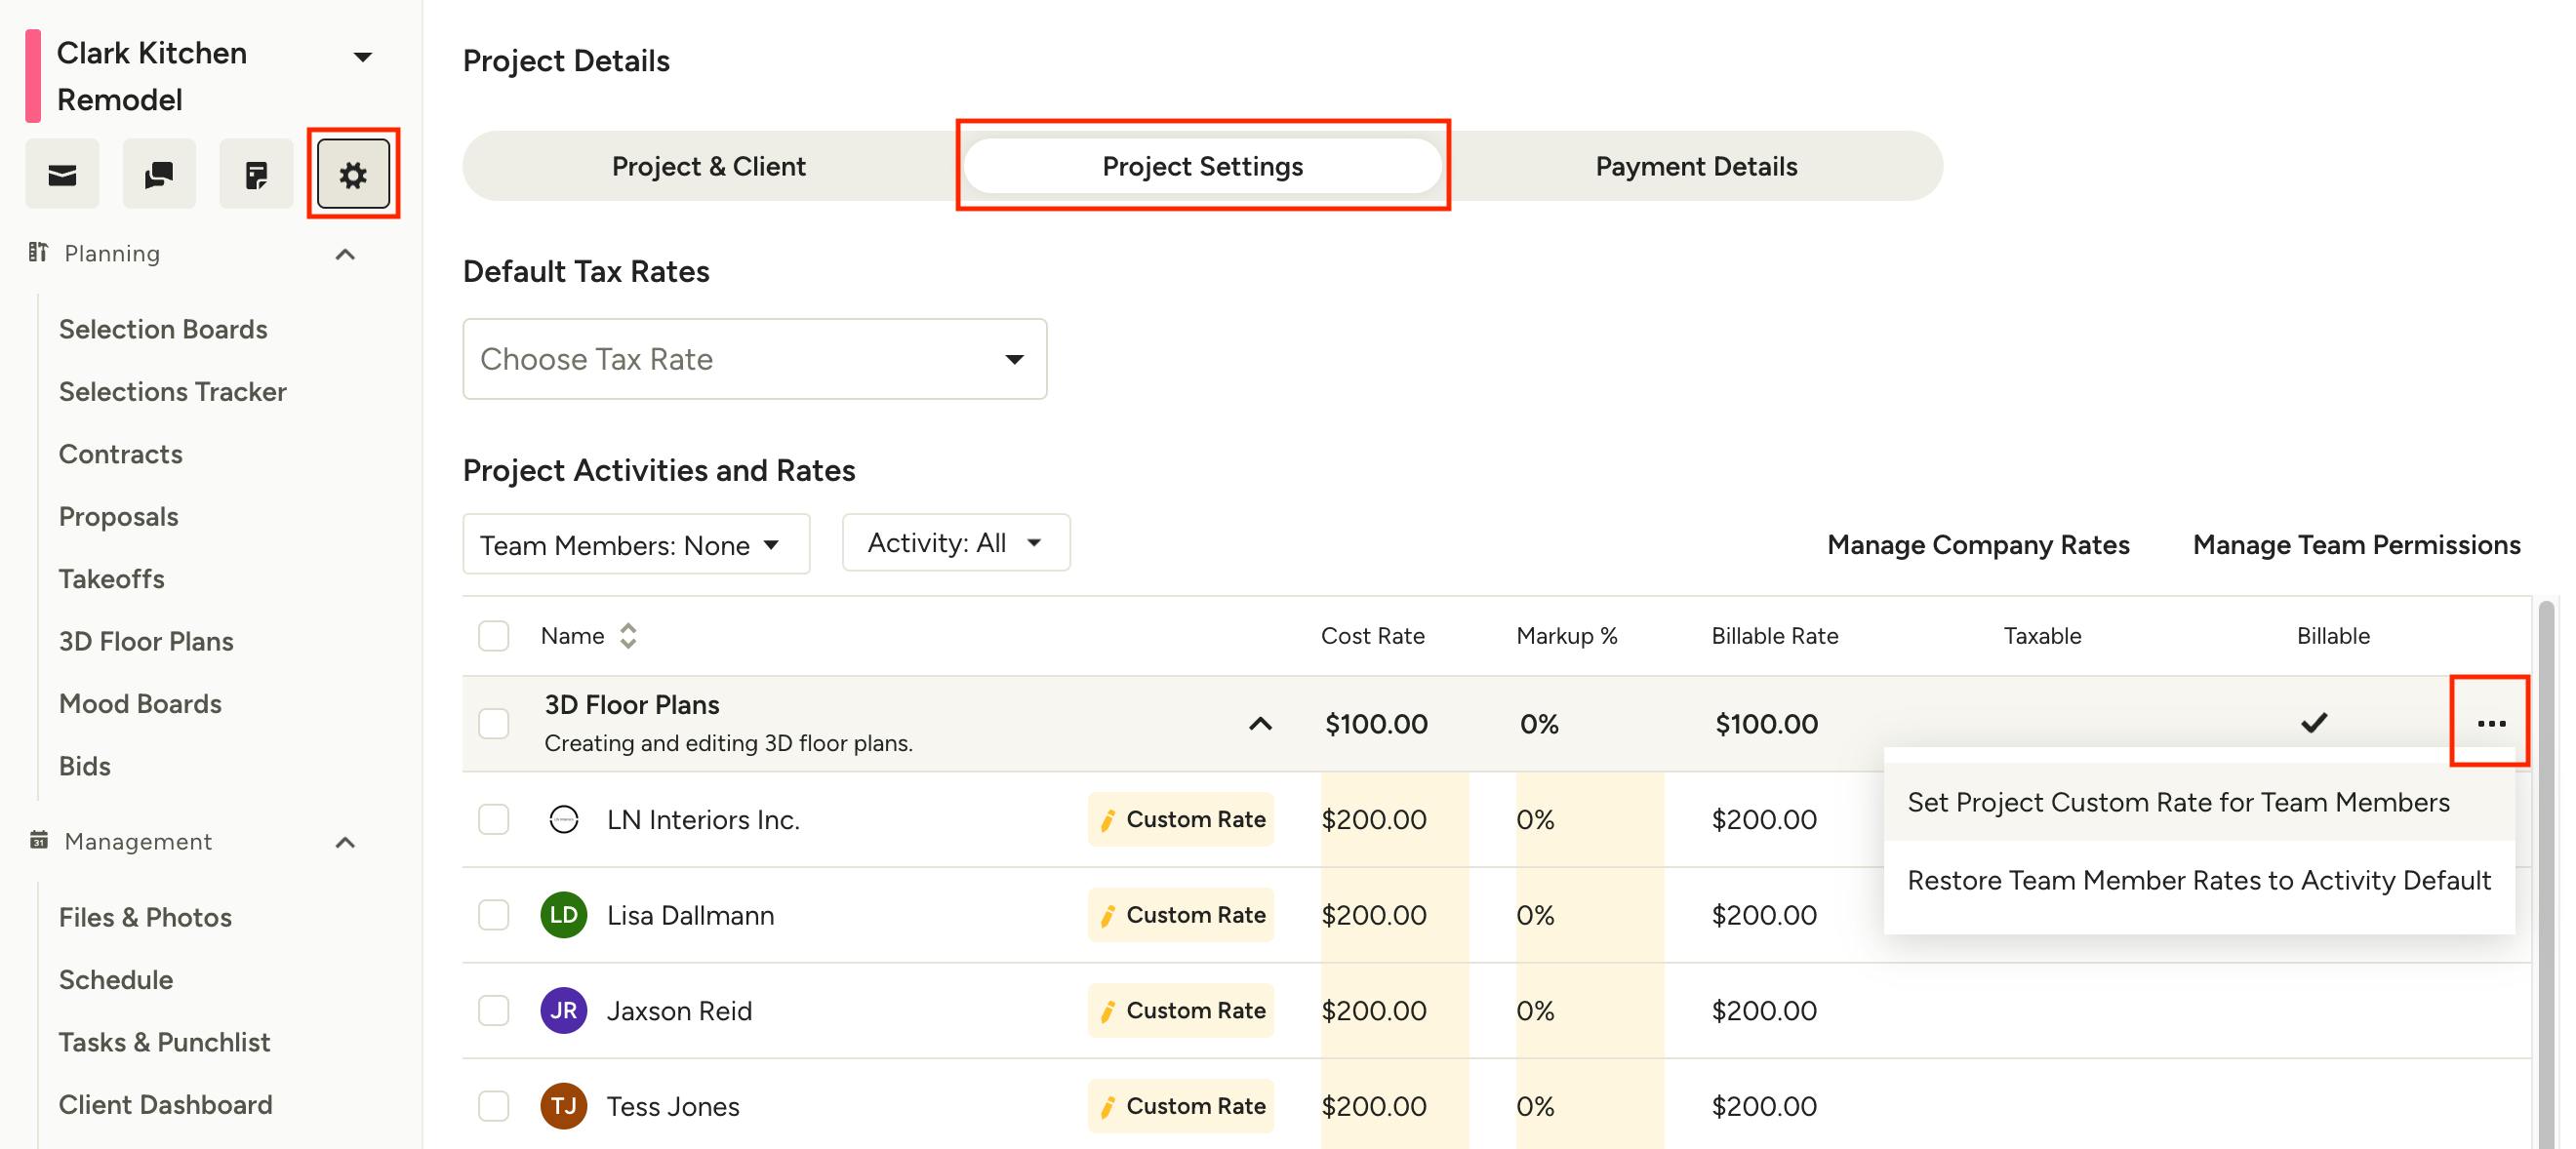
You can set custom rates for individual projects without impacting the company rates. To do this, open the relevant project details and select the Project Settings tab. Under Project Activities and Rates, you will see all existing company activities.
Use the three dots menu on an activity to set a project custom rate for all team members, or set a project custom rate individually on relevant team members. These rates will only apply to the specific project they are set on.
Create a New Time Entry
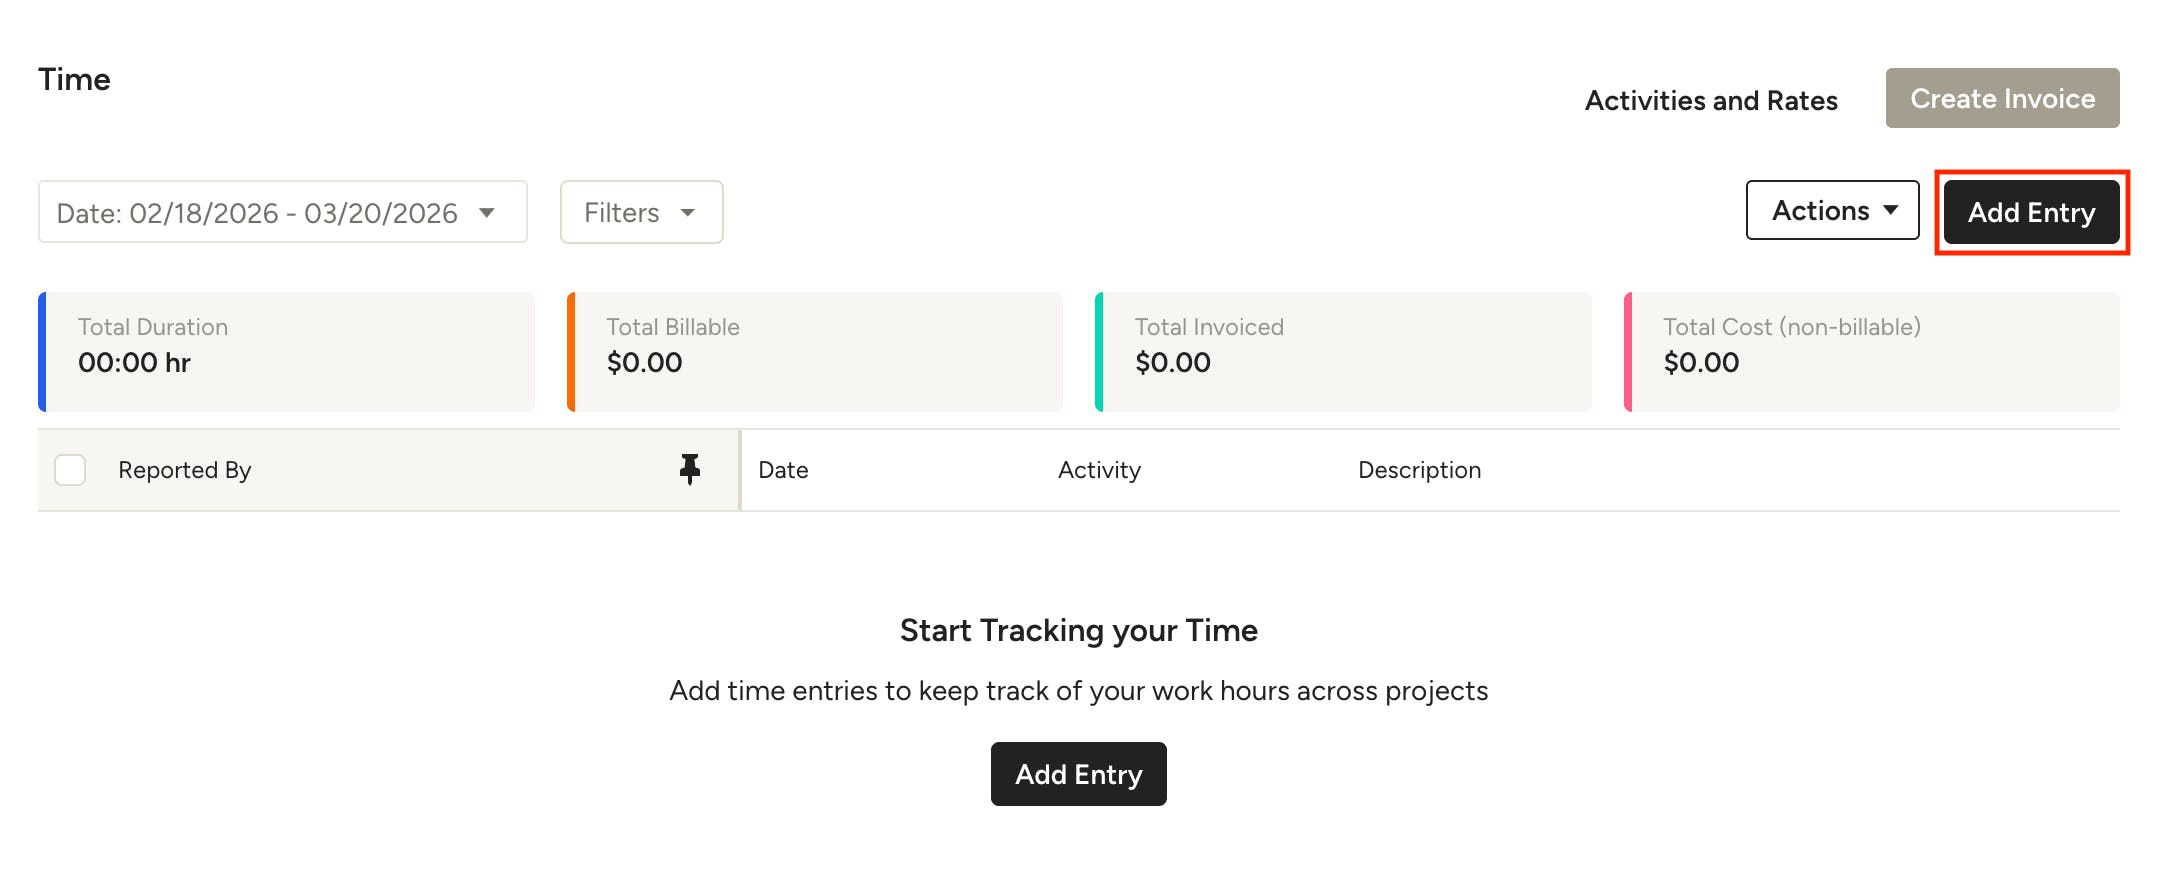
To create a new time entry, click the New Entry button in the top right on your Time page. This can be done from the All Time page or a project specific time page.
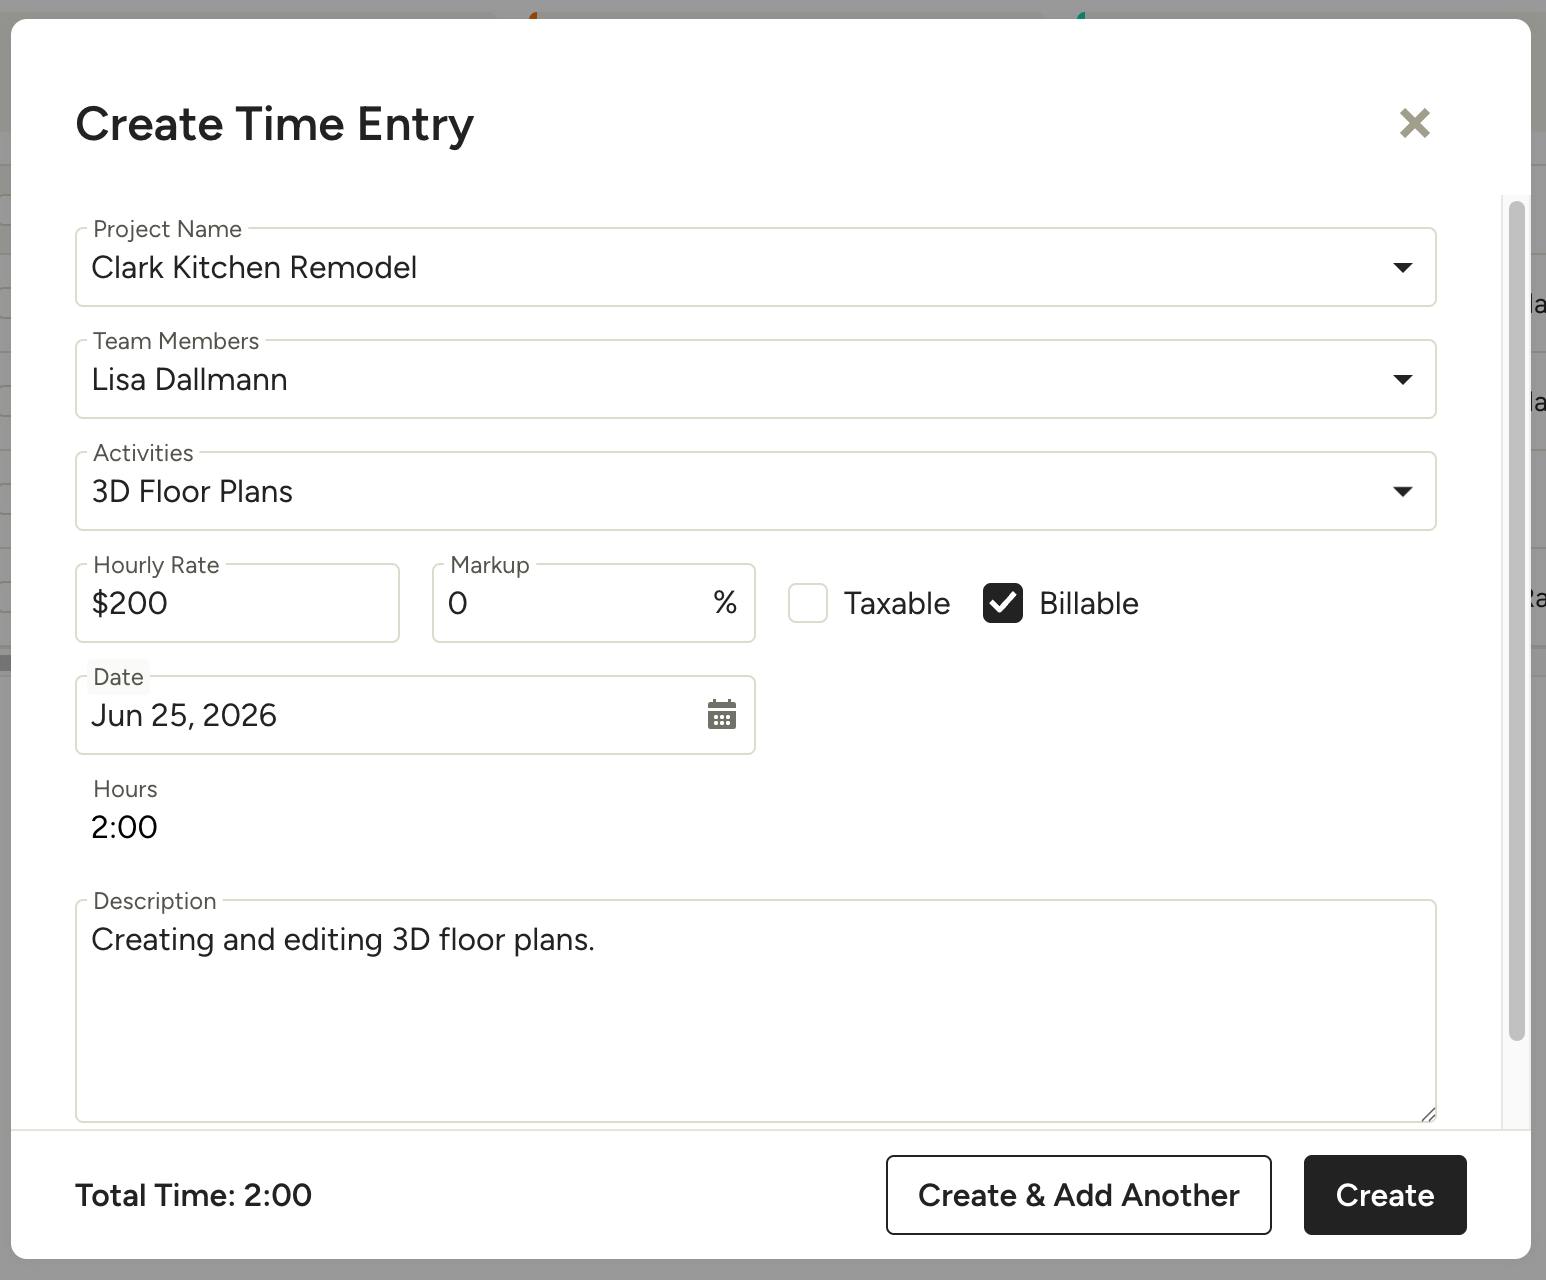
Note: The time entry modal will have different fields depending on your permissions. The following are examples of what the super admin, team members with Time Management permissions, and team members without Time Management permissions will see. Learn more in Team Permissions section below.
Super Admin / Team Members with Time Management Permissions
In the modal that pops up select the project (if creating from All Time page) team member, and activity. The hourly rate, mark up, taxable/billable, and description for the team member and activity you selected will automatically populate. Set the date, hours and any additional description necessary.
If you are logging time for an activity that doesn't exist, simply type the name of the activity you wish to add/create and hit Enter. (Available for super admins and team members with Time Management permissions only).
Click the Create button and you will see the new time entry listed on the Time page. You can also click Create and Add Another to save the current entry and immediately open a new one with pre-filled data: Project, Team Member, Date, and Activity.
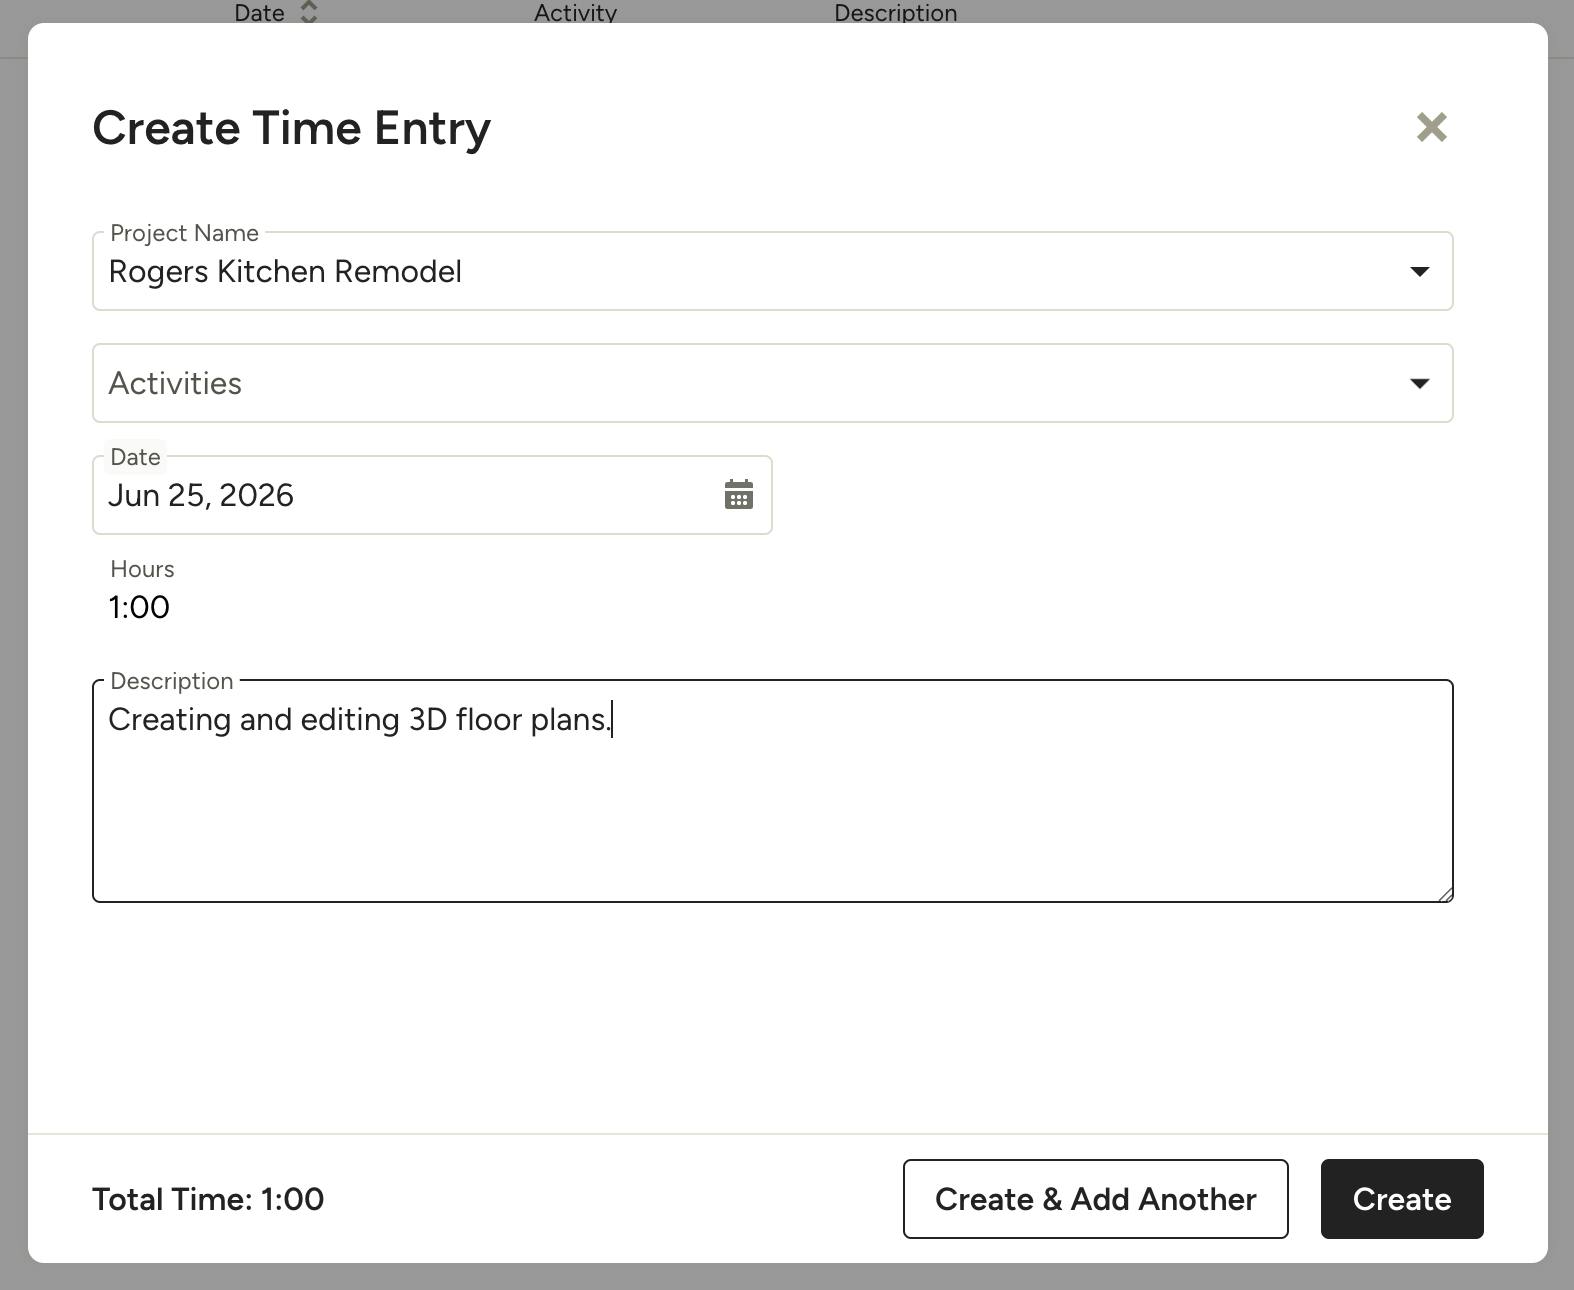
Team Members without Time Management Permissions
In the modal that pops up select the project (if creating from All Time page) and activity. The activity description for the one you selected will automatically populate, if applicable. Set the date, hours and any additional description necessary.
Click the Create button and you will see the new time entry listed on the Time page. You can also click Create and Add Another to save the current entry and immediately open a new one with pre-filled data: Project, Date, and Activity.
Attach Files
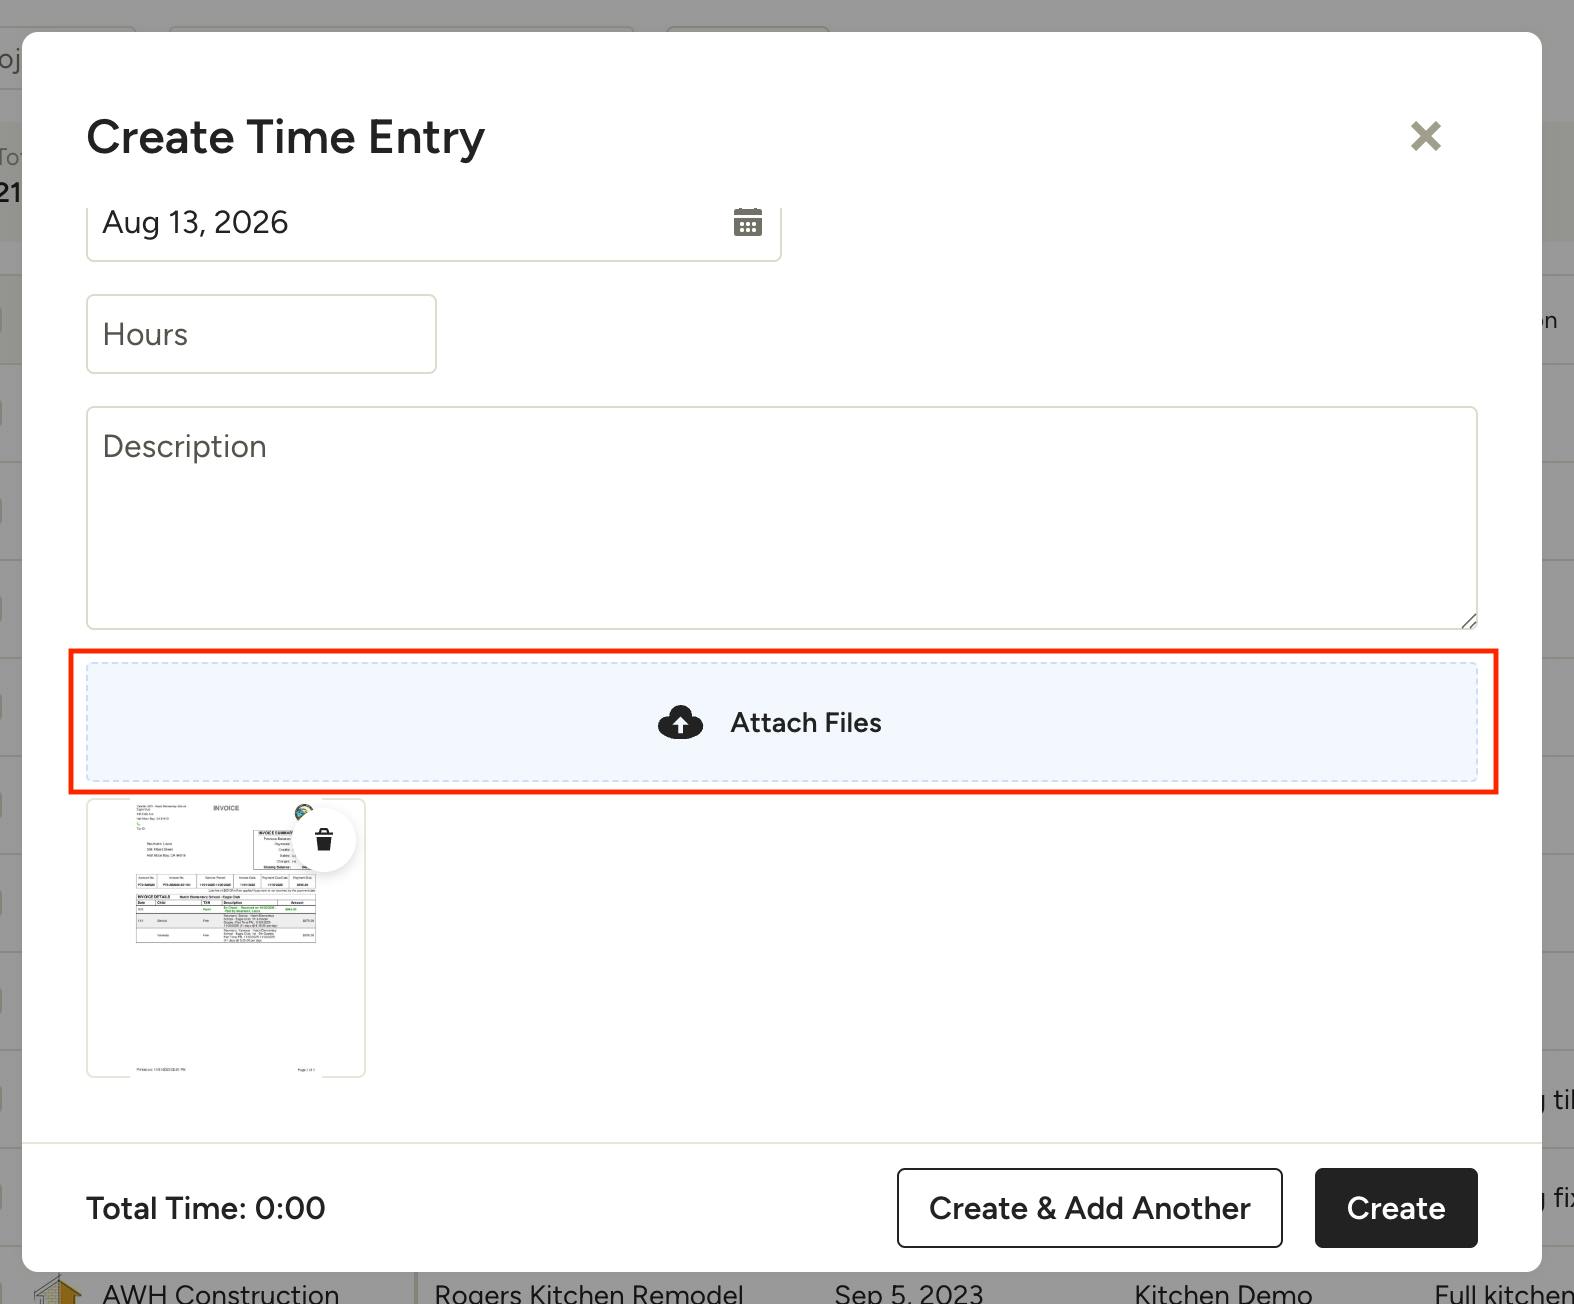
You can attach relevant files directly to a time entry, allowing you to keep supporting documents and information organized alongside your work logs. To do so, click Attach Files at the bottom of the time entry modal. You can upload from local files or choose from existing project files, company files or Google Drive.
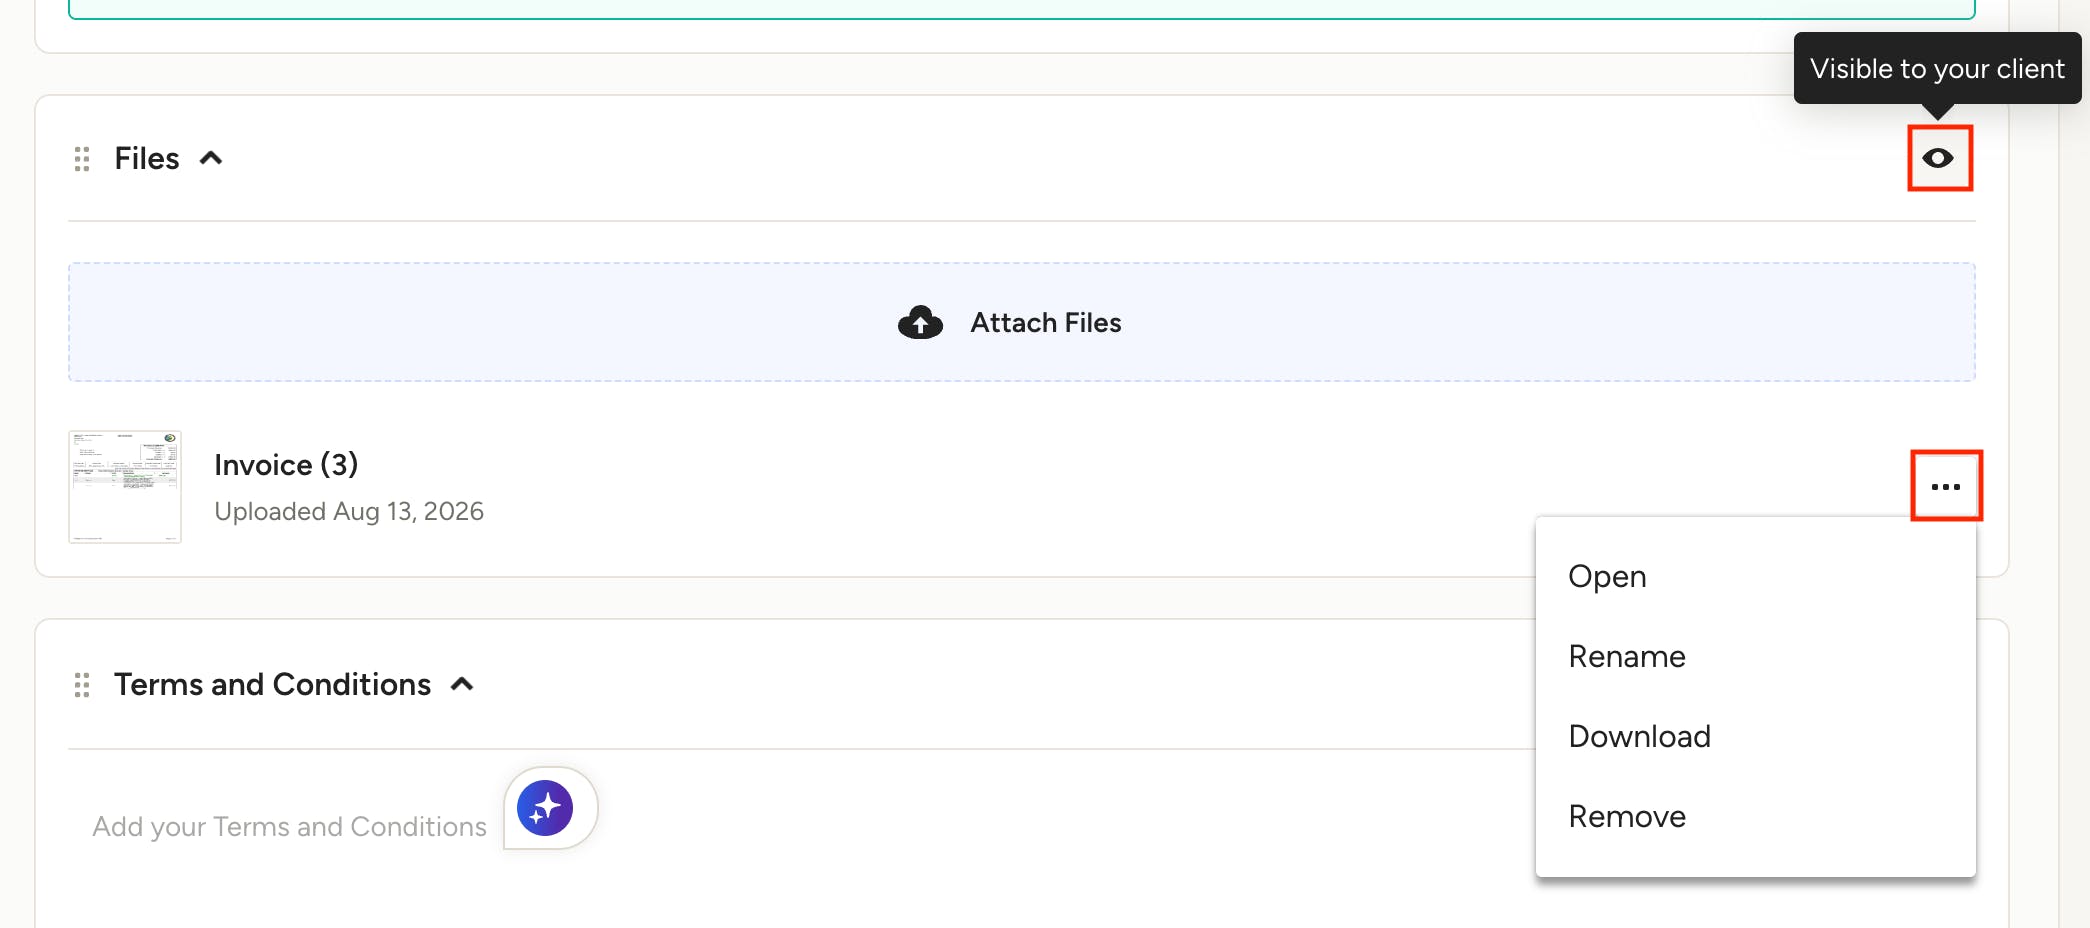
Files attached to time entries will carry over to the Files section of an invoice when the entry is invoiced. You can choose to hide the section from the client or Open, Rename, Download or Remove the file. Removing the file from the invoice will not remove it from the time entry itself.
Edit or Delete Entries
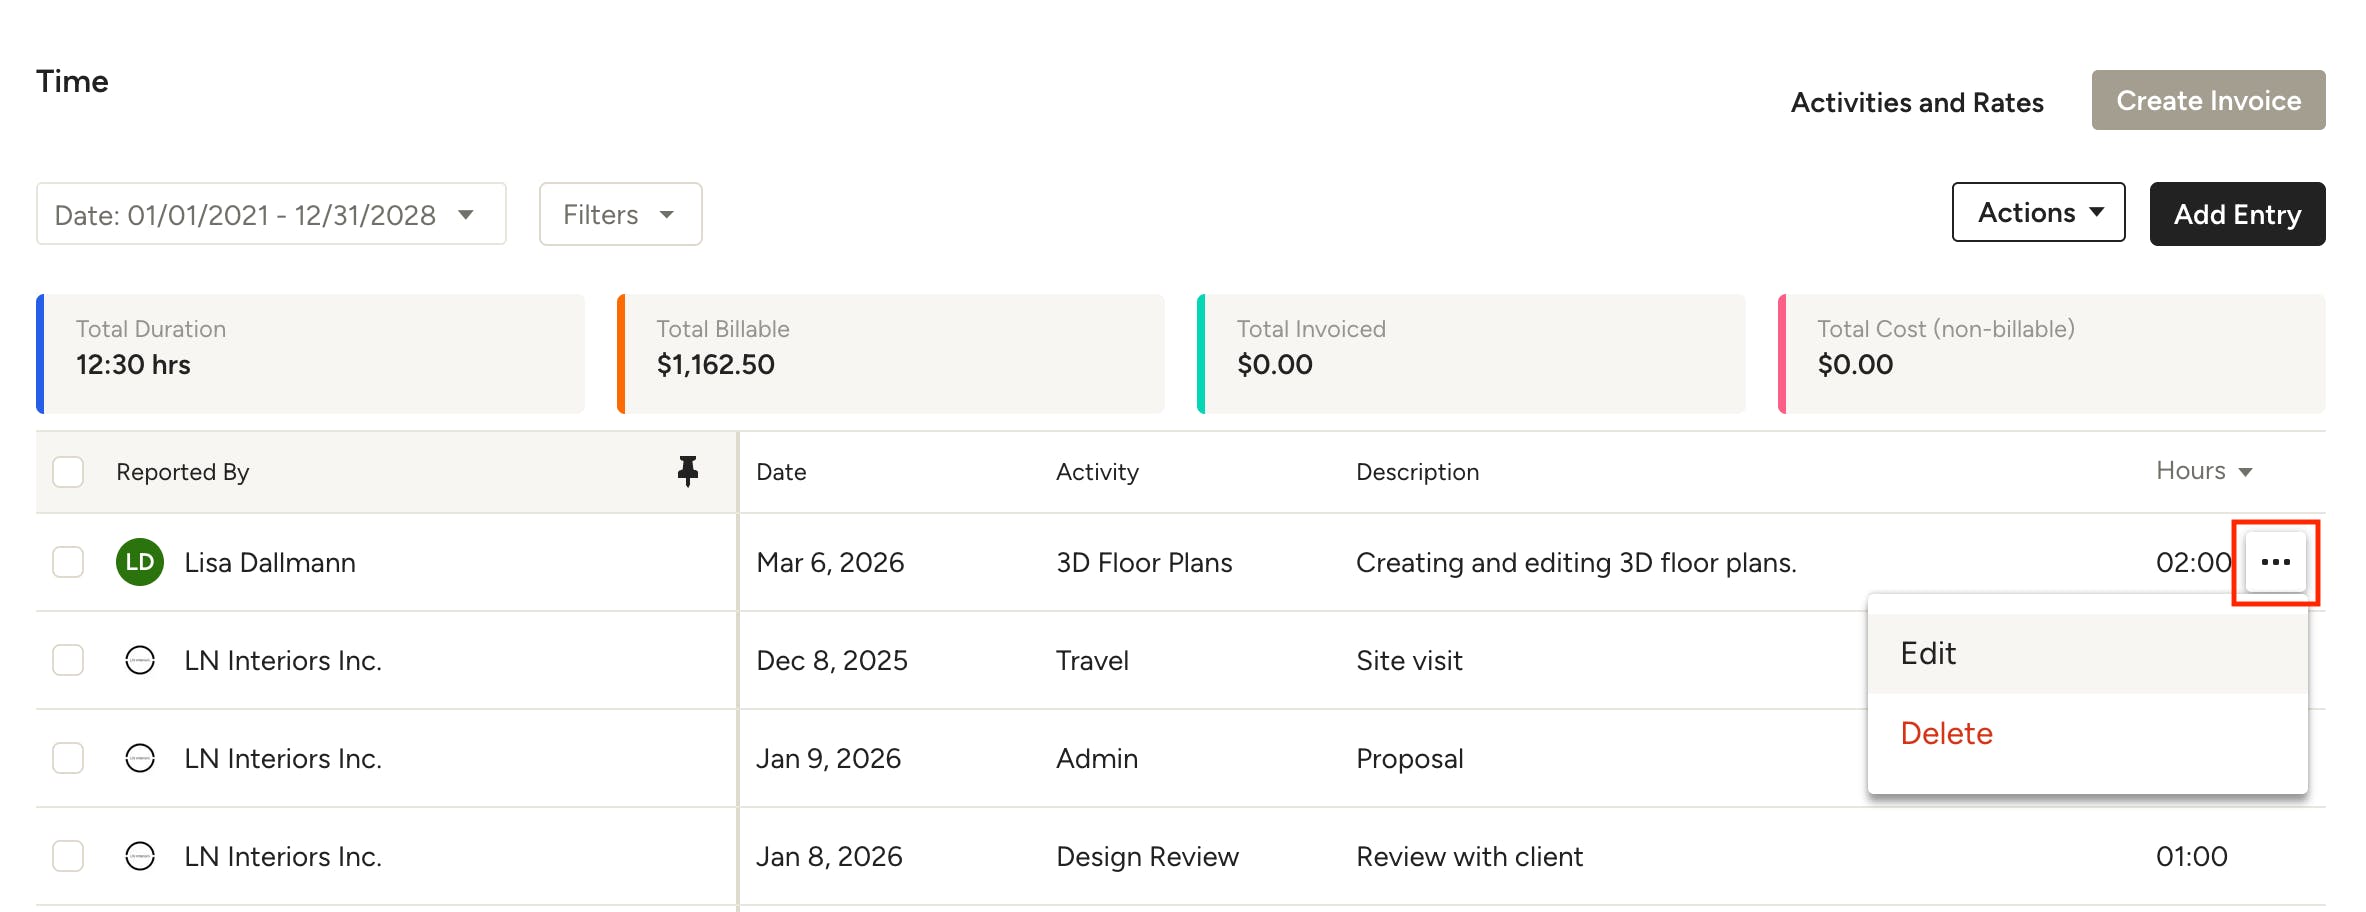
You can edit or delete an entry by clicking the three dots on the right side of the entry and selecting the action you want to take.
Note that for proper record-keeping purposes, an entry cannot be deleted or edited once it’s linked to a document, such as an issued invoice.
Sort and Filter Time Entries
Filter Entries
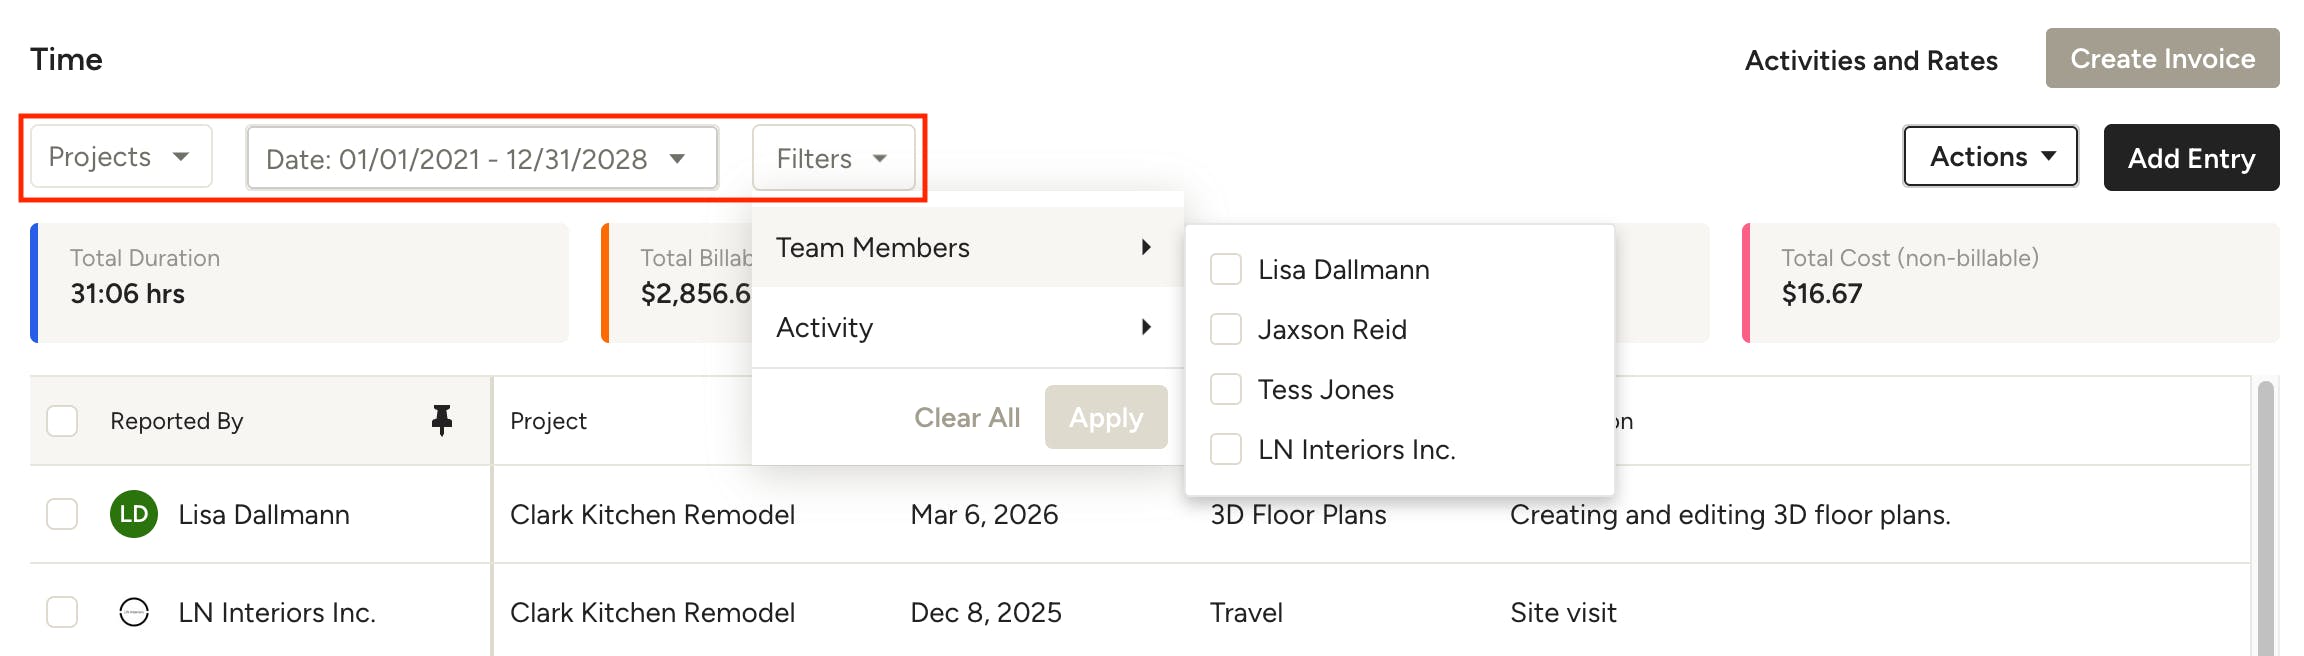
You can filter your time by project (on the All Time page), date, team member and activity by using the dropdown menus at the top of your Time page. You’ll see a summary of the total time duration, total billable dollar amount, total invoiced dollar amount, and total cost (non-billable), and this will adjust according to the filters you apply.
Sort Entries
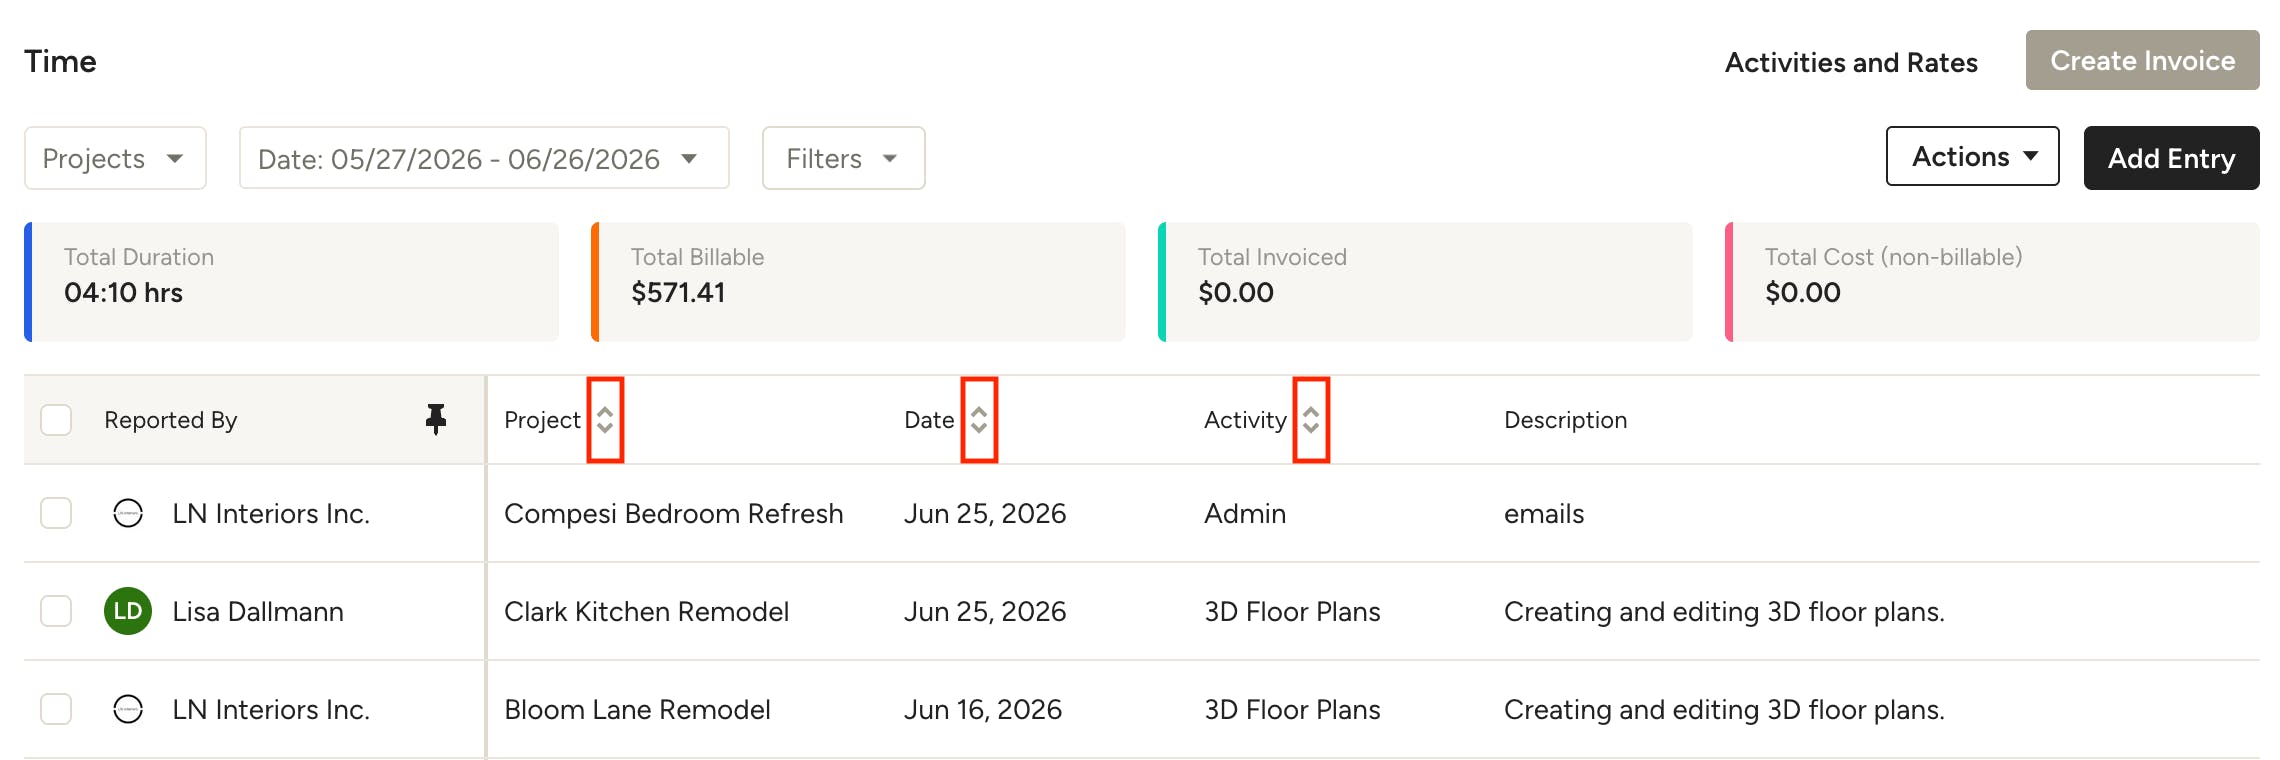
To adjust the order your time entries are sorted in, use the arrows on the column you wish to sort by (Project, Activity, Date, Hours, Rate etc.)
Organize Columns
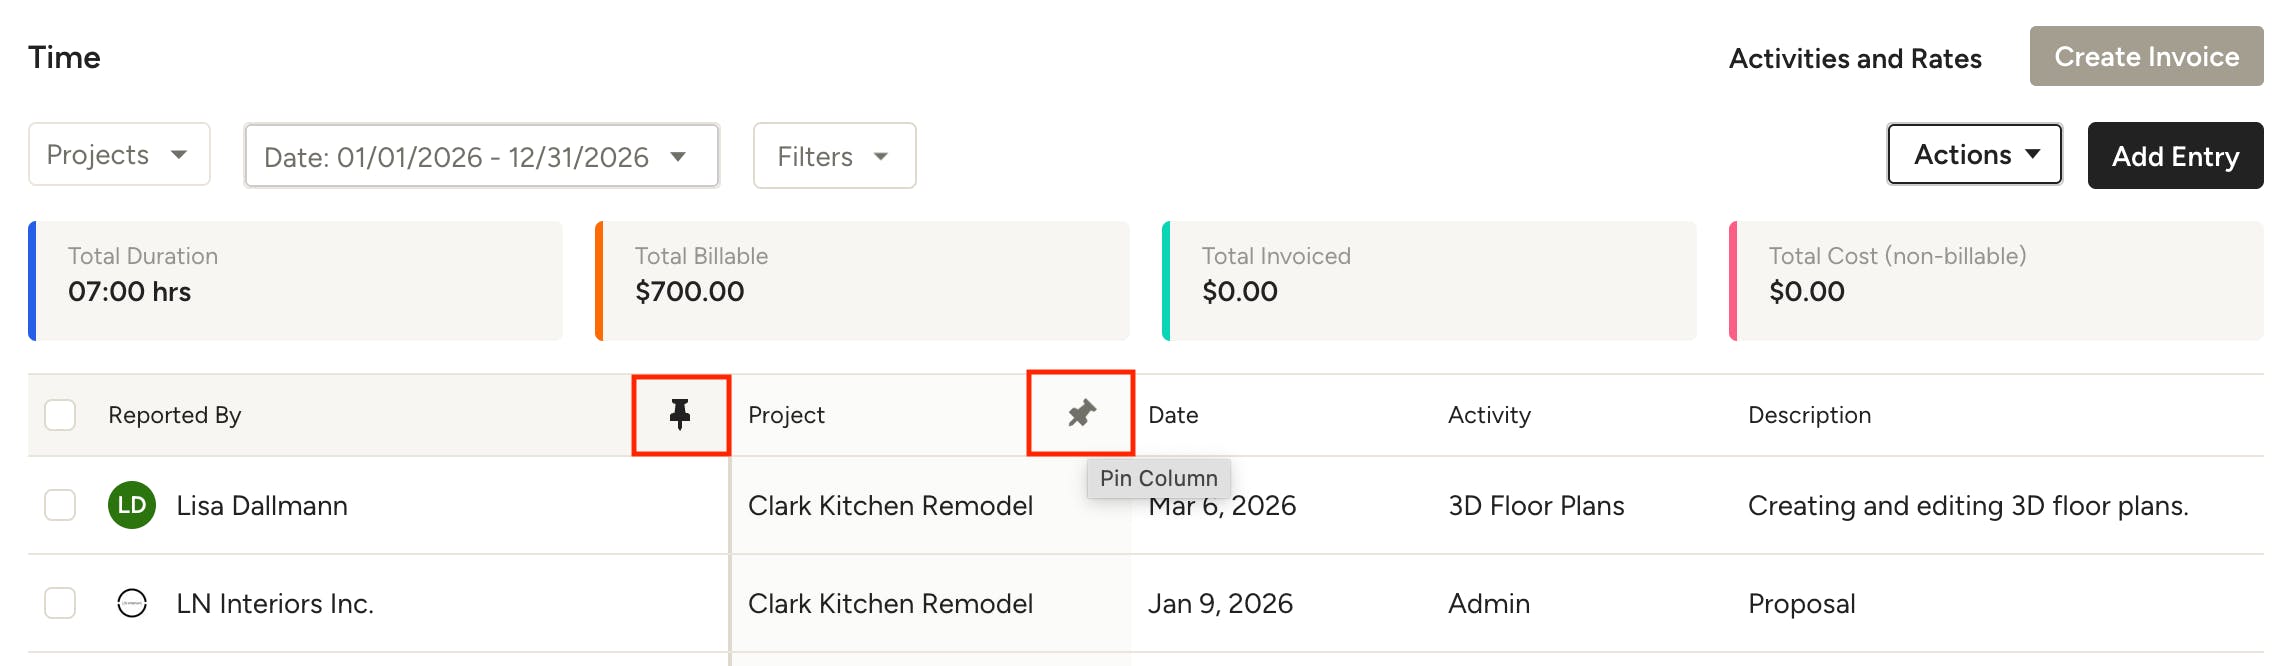
You can organize the columns on your time pages by clicking on a column header and dragging it to the desired position. You can also pin one or more columns to the left of the table by clicking the pin icon at the top of the column. To unpin a column, click the pin icon again.
Adjust Time Format (Hours vs Duration)
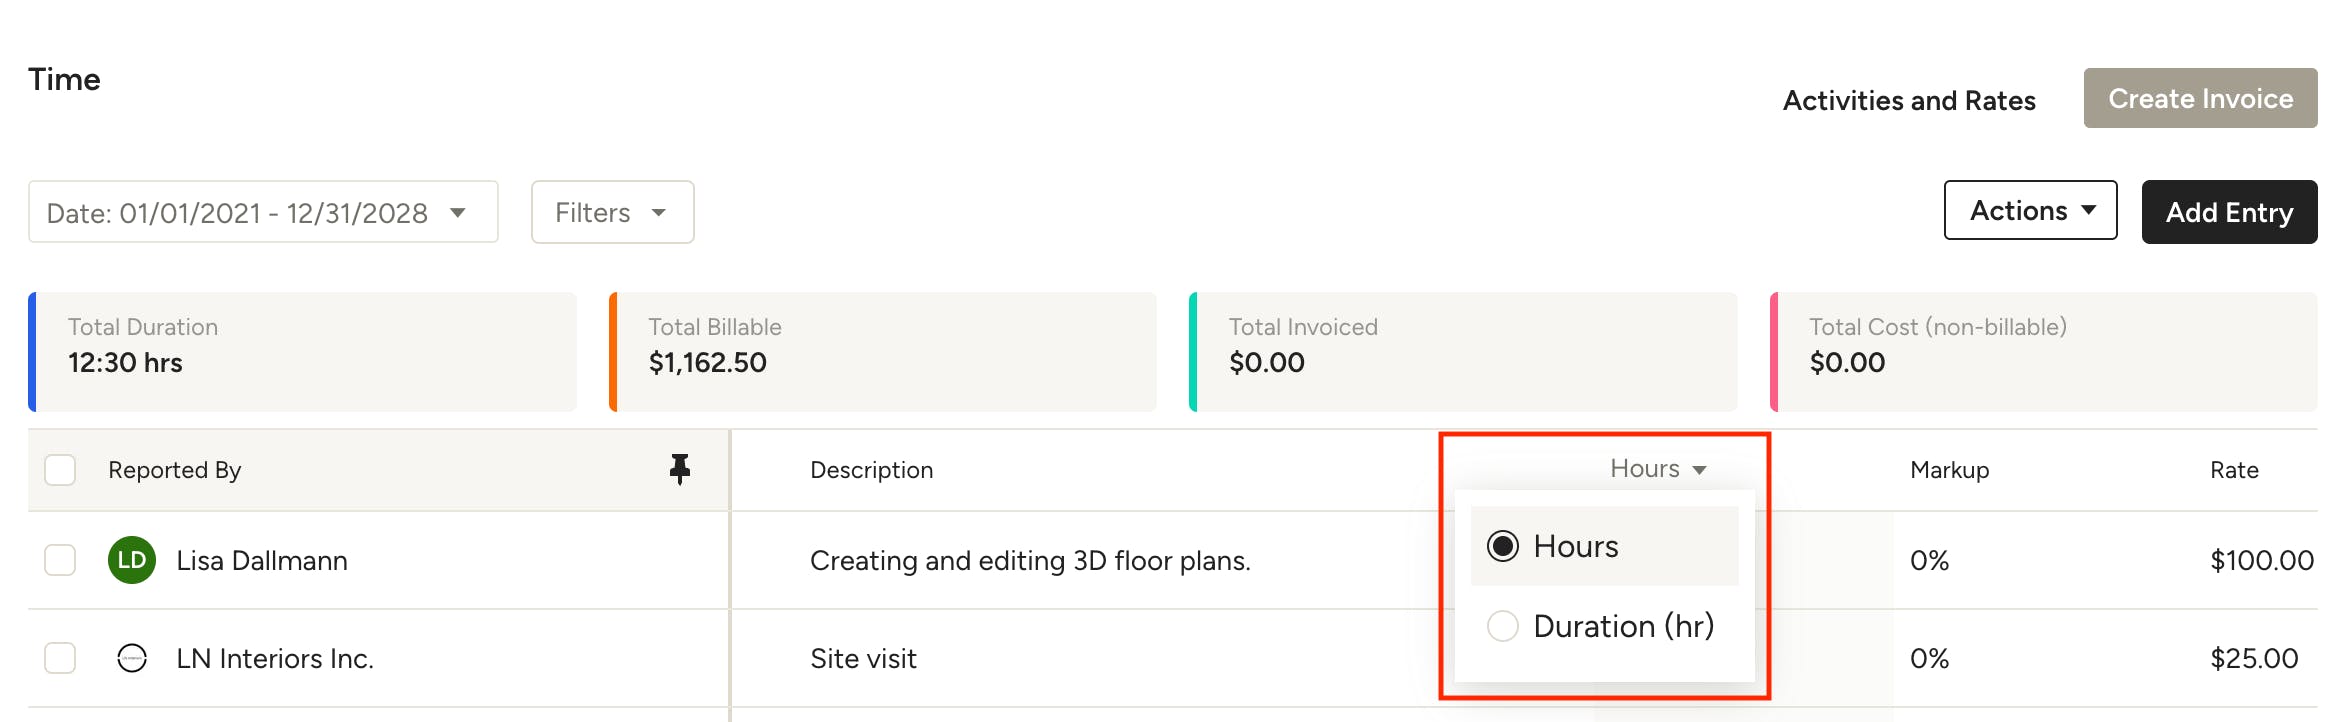
To adjust the format your time is shown in, click on the title in the time column (it will say Hours or Duration (hr) depending on what is currently selected). Choose whether you want the time shown in hours (e.g., 02:30) or decimal durations (e.g., 2.5). The duration format can be particularly helpful when exporting time entries to Excel for payroll purposes.
Time Approval
If you're working with a team and want to ensure that all hours worked are accurately tracked and approved, you can enable time approval. This requires your team to submit their time for review, which you can then approve or decline.
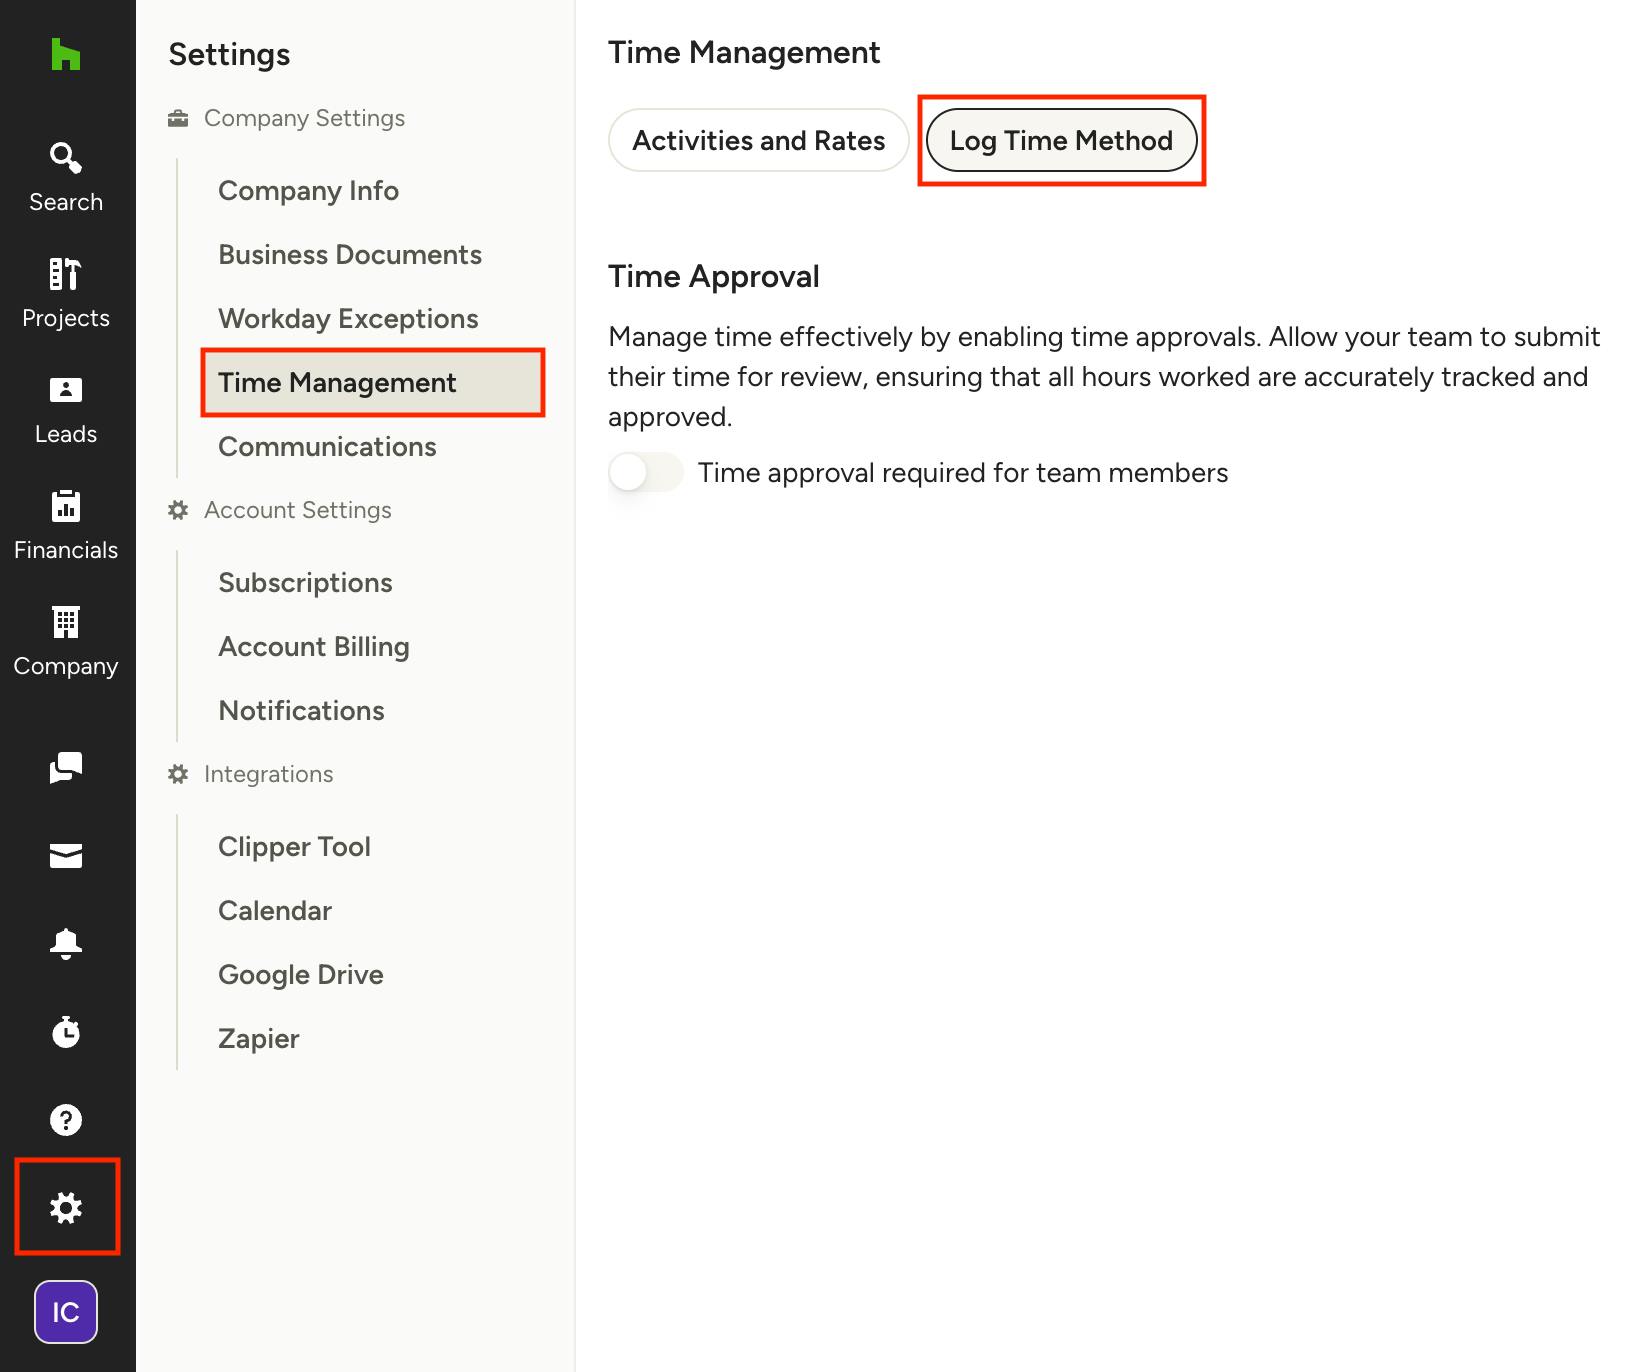
To require time approval, go to your Time Management page, found under your settings icon in the left navigation, and click the Log Time Method tab at the top. From here, you can use the toggle next to "Time approval required for team members" to enable the approval feature.
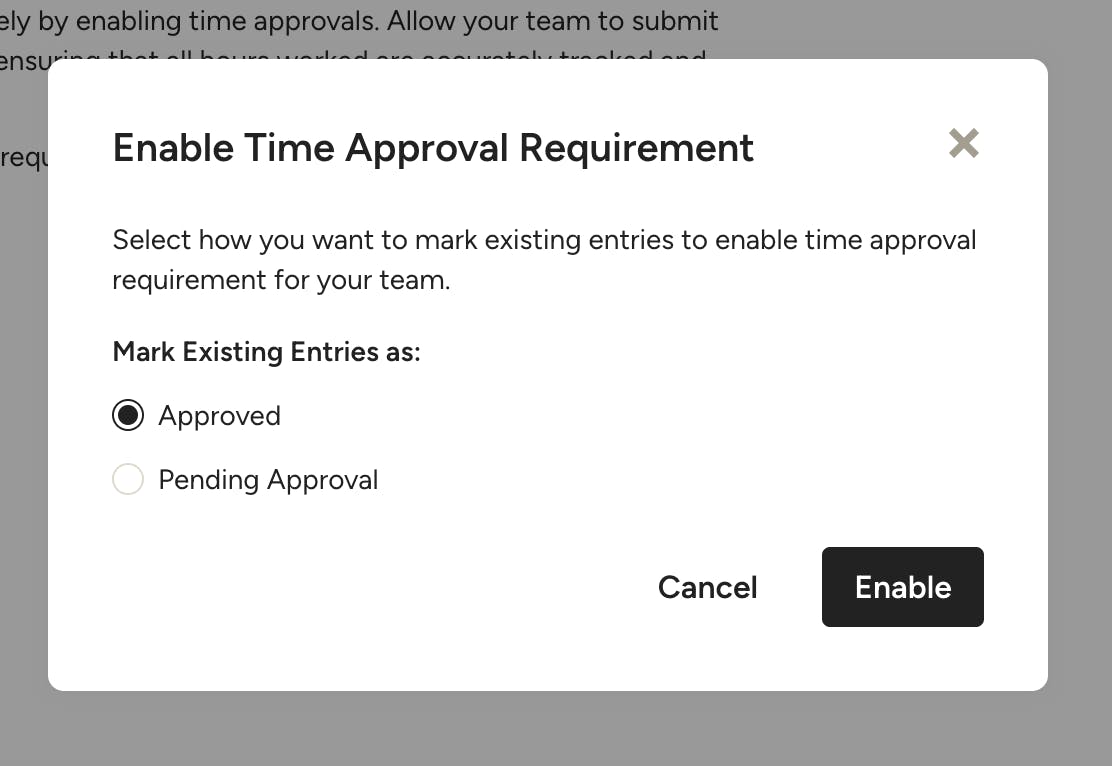
If you have existing time entries, you will be prompted to mark them as approved or pending approval. If you mark them as pending approval, all existing entries will be appear with the option to approve or reject.
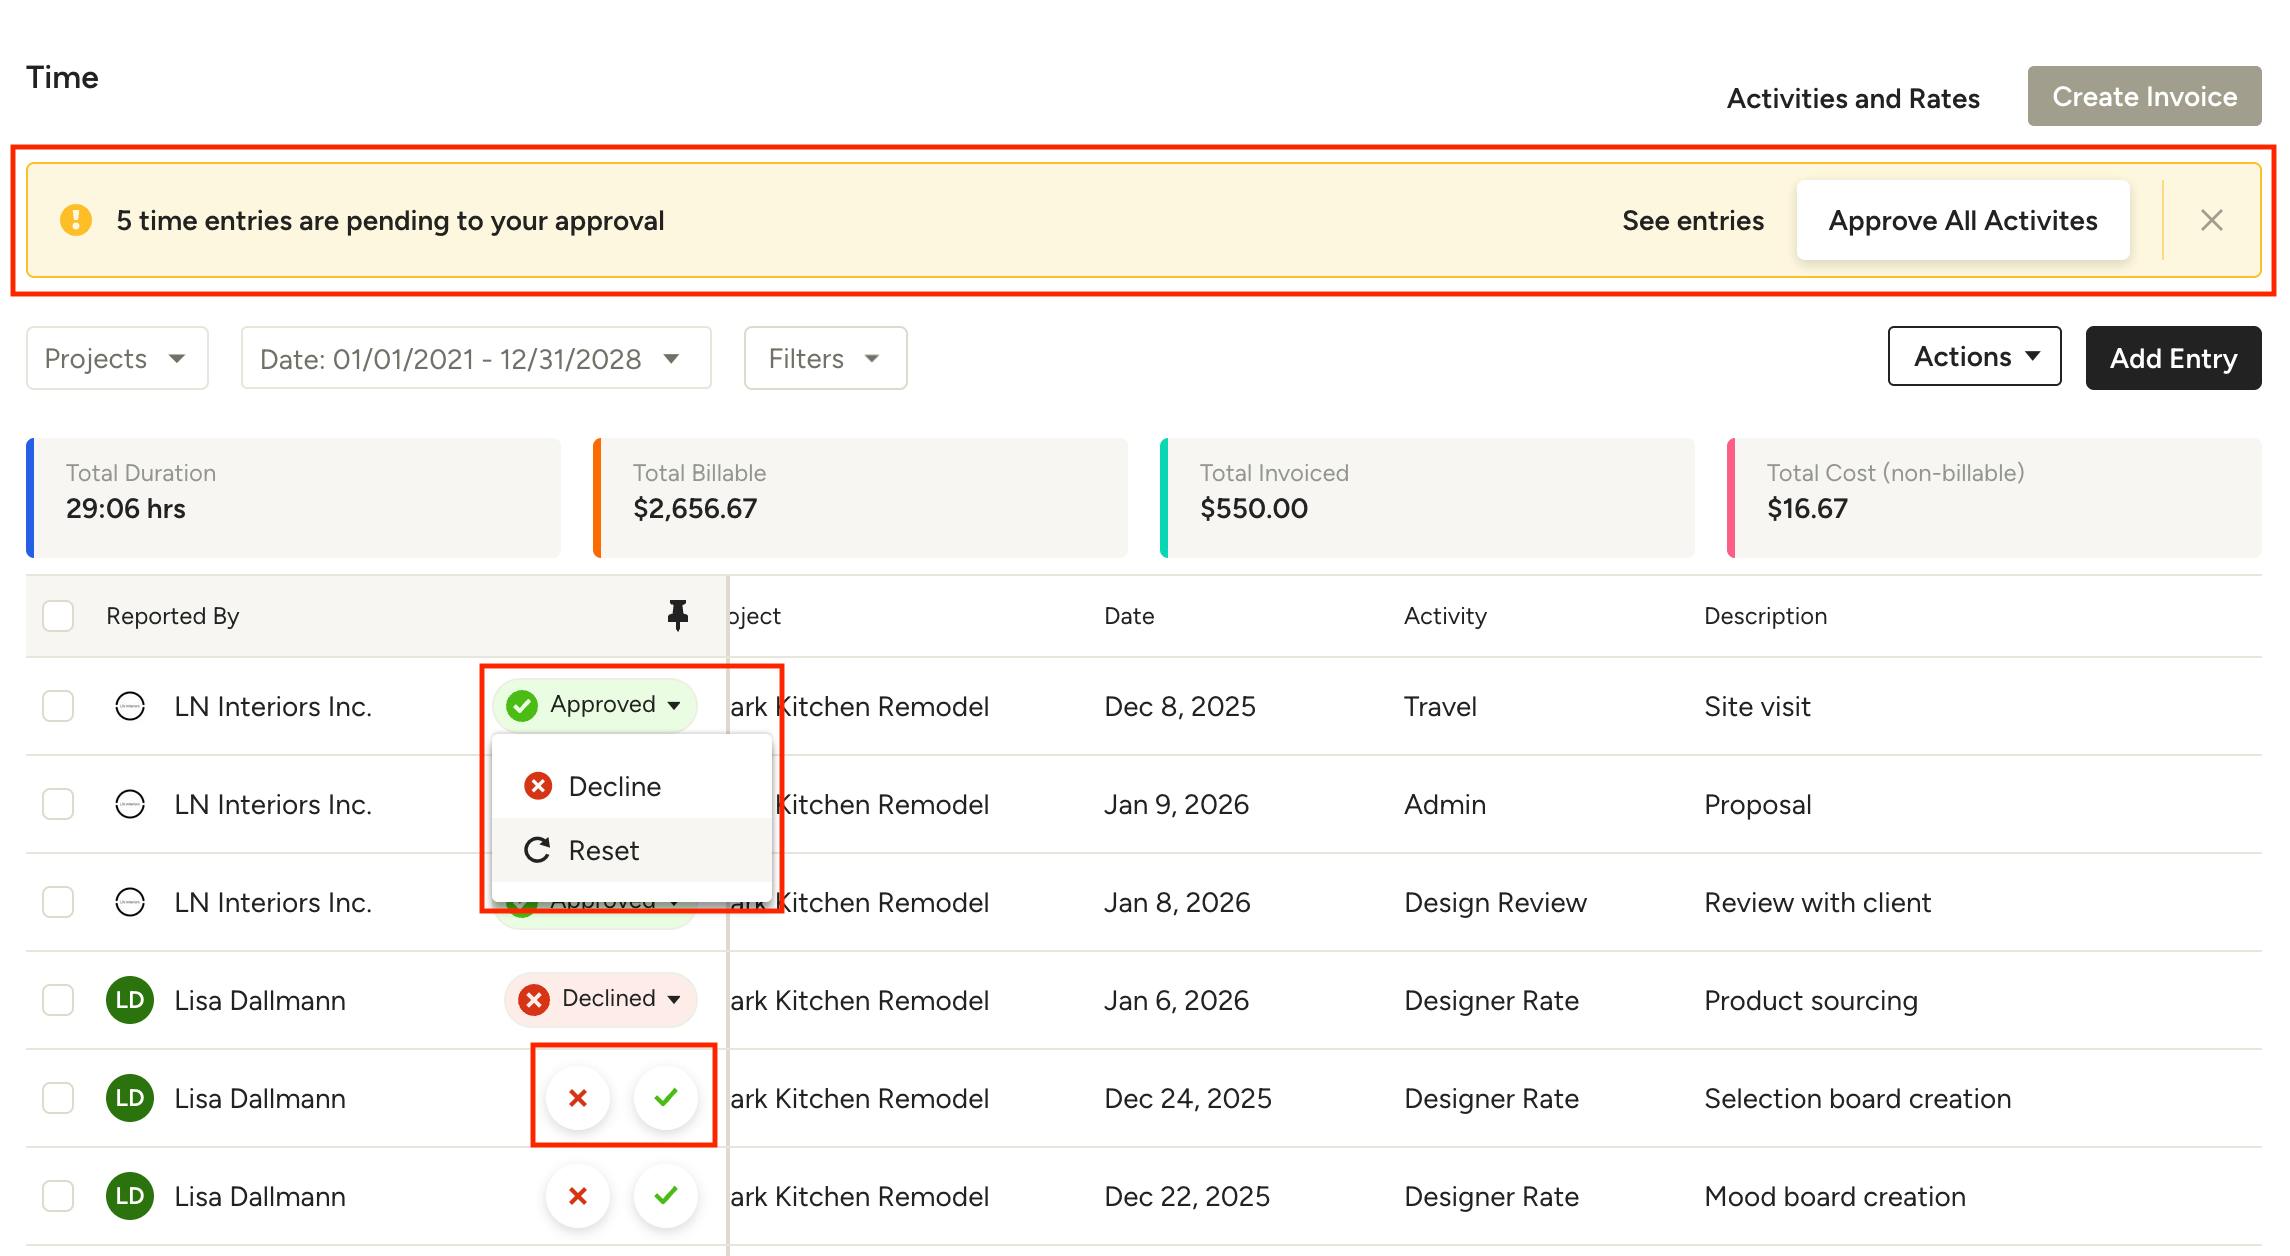
Once time approval is enabled, you will see the option to approve or decline on all submitted time entires. A summary of any pending entries will appear at the top of your time page. Here you can easily approve all activities, or click "See entries" to filter entries so you only see those with a pending status.
You can change the approval status, or reset it, by clicking the status next to an entry and selecting an option from the menu.
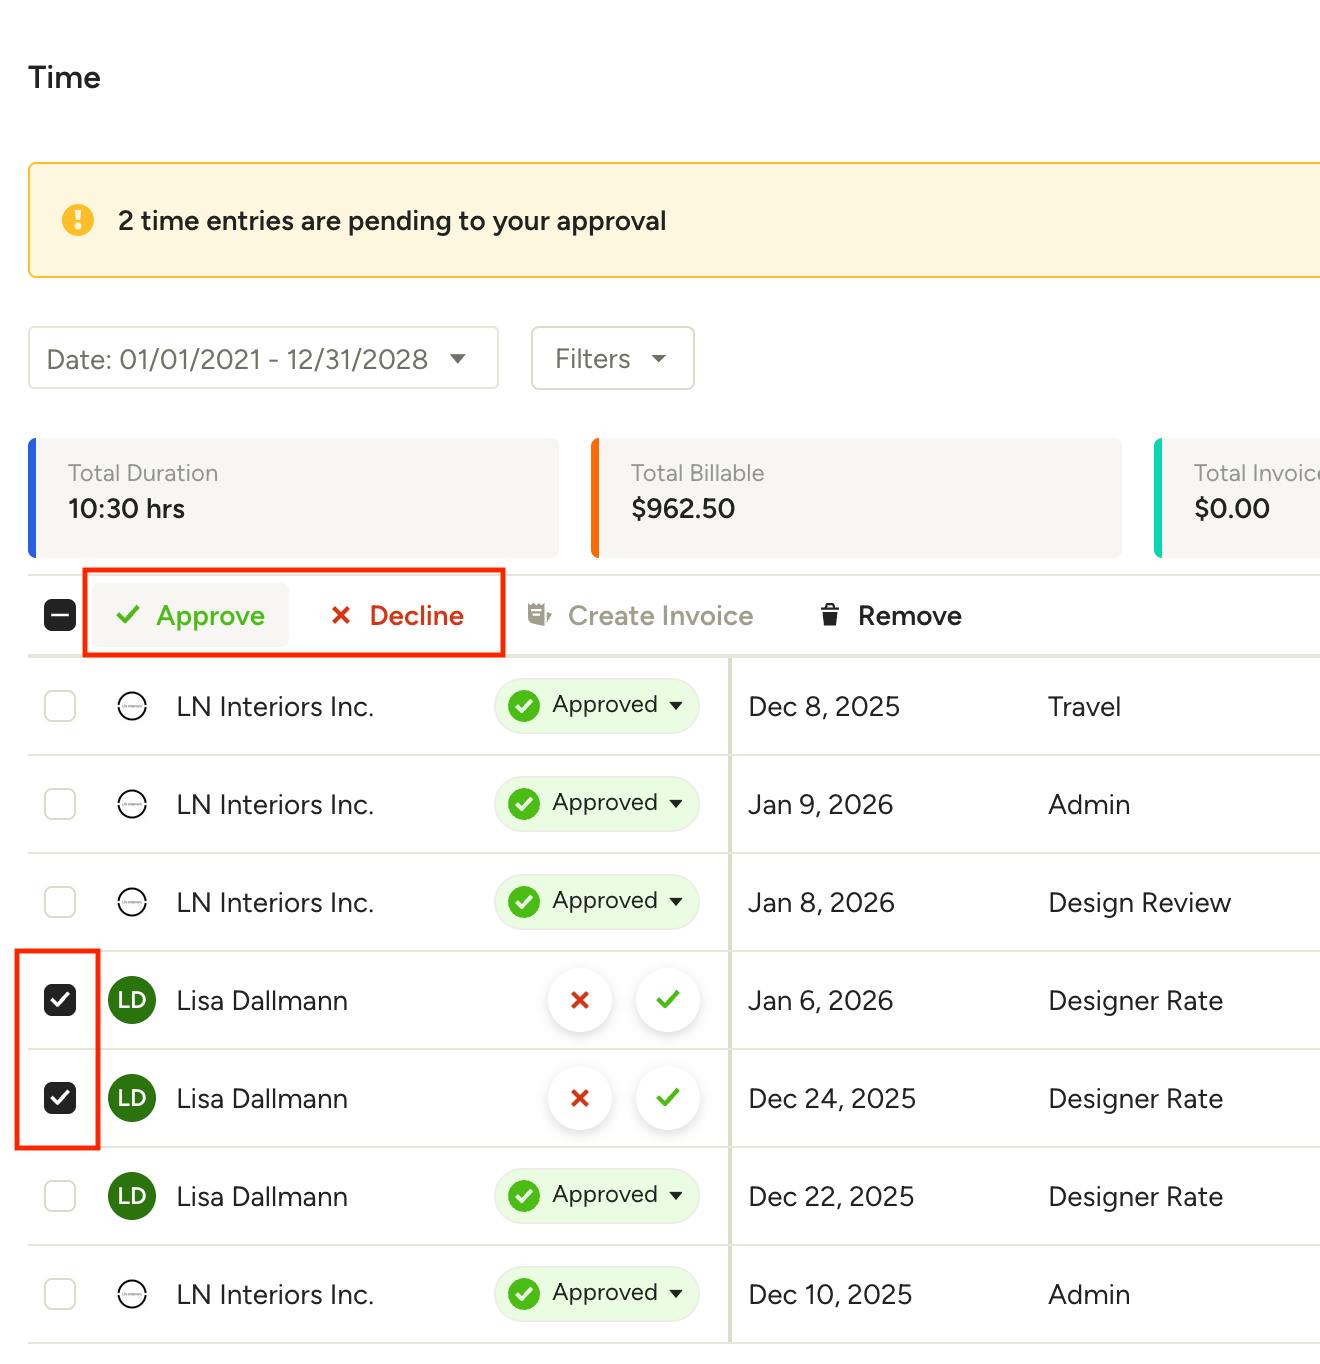
To make changes to multiple entries at once, select the checkbox to the right of each entry, then select Approve or Decline from the bulk options that appear at the top of the entry list.
Team Permissions
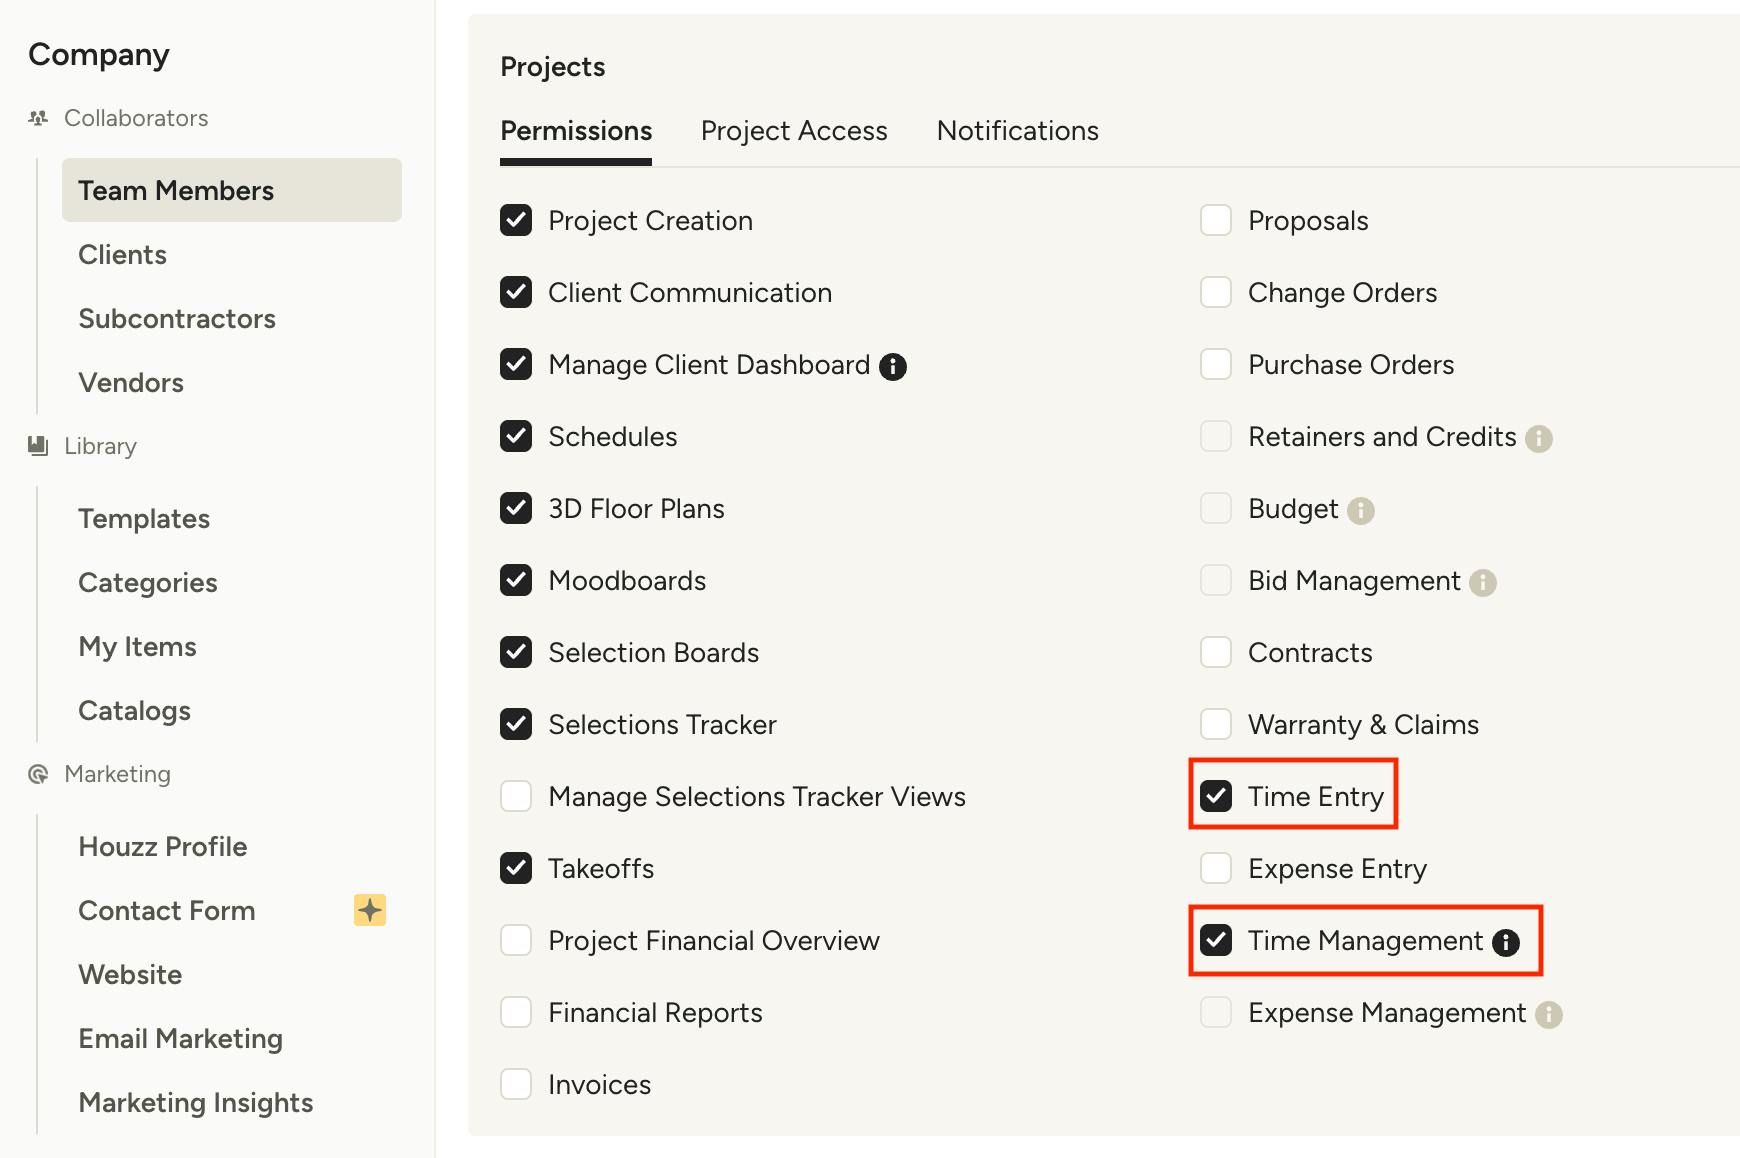
To enable time-related permissions for team members, navigate to the Team Members page under your Company section. Click a team member to view or edit their permission.
Under the Projects Permissions, you will see two time permissions:
- Time Entry: Allows the team member to create time entries for themselves only.
- Time Management: Allows the team member to manage activities and rates, log time, and approve or decline time entries for other team members.
Create an Invoice From Time Entries
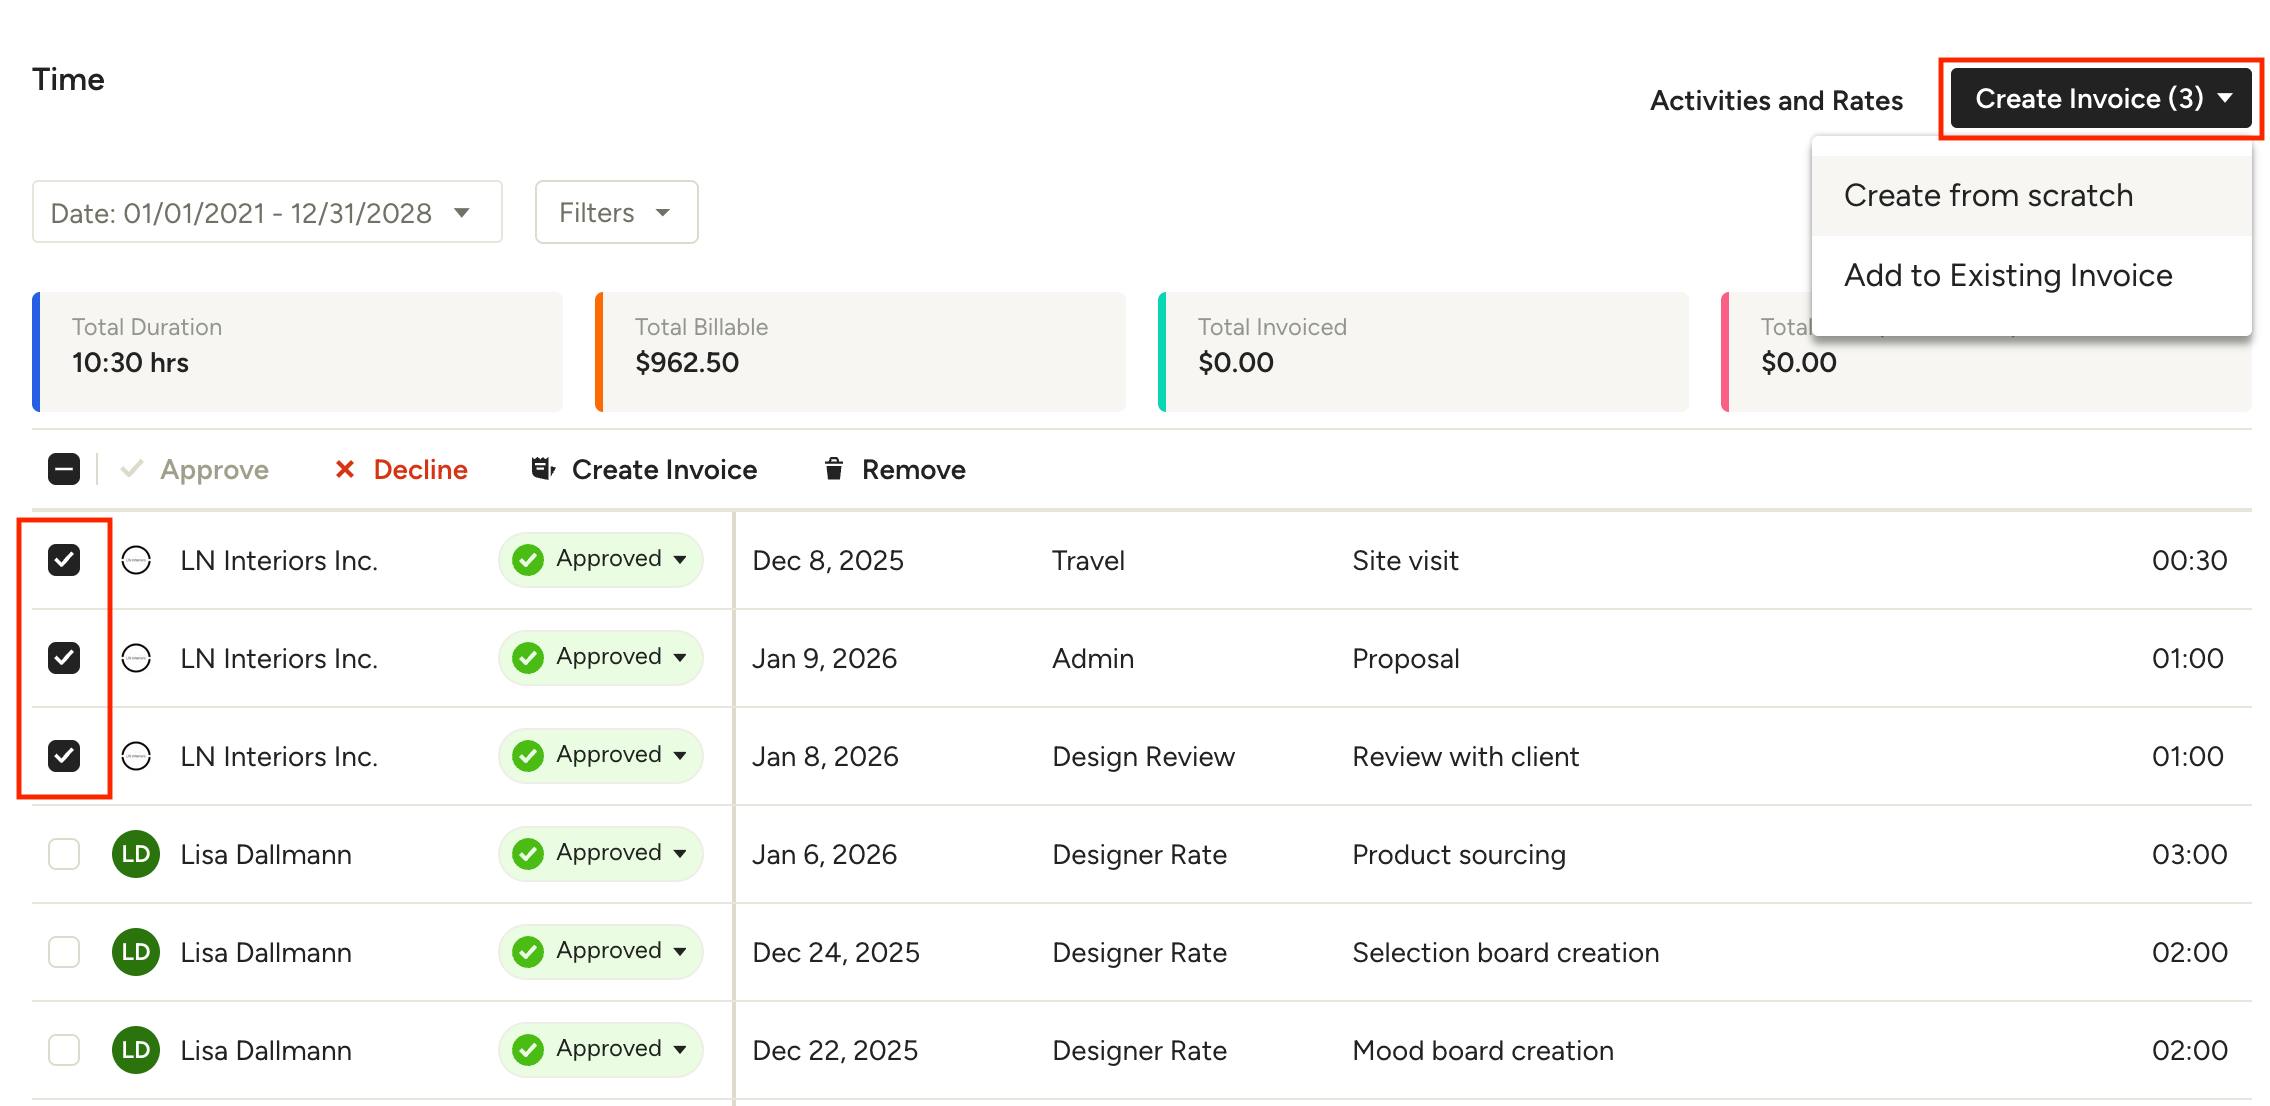
From the Time section, you can create an invoice from your entries simply by checking off the ones you want to include and clicking the Create Invoice button in the top right.
Select Create from Scratch to create a new invoice. If the project has open invoices, Add to Existing Invoice will also be an option.
Looking to add time entries to an existing invoice? Check out this article to learn how.
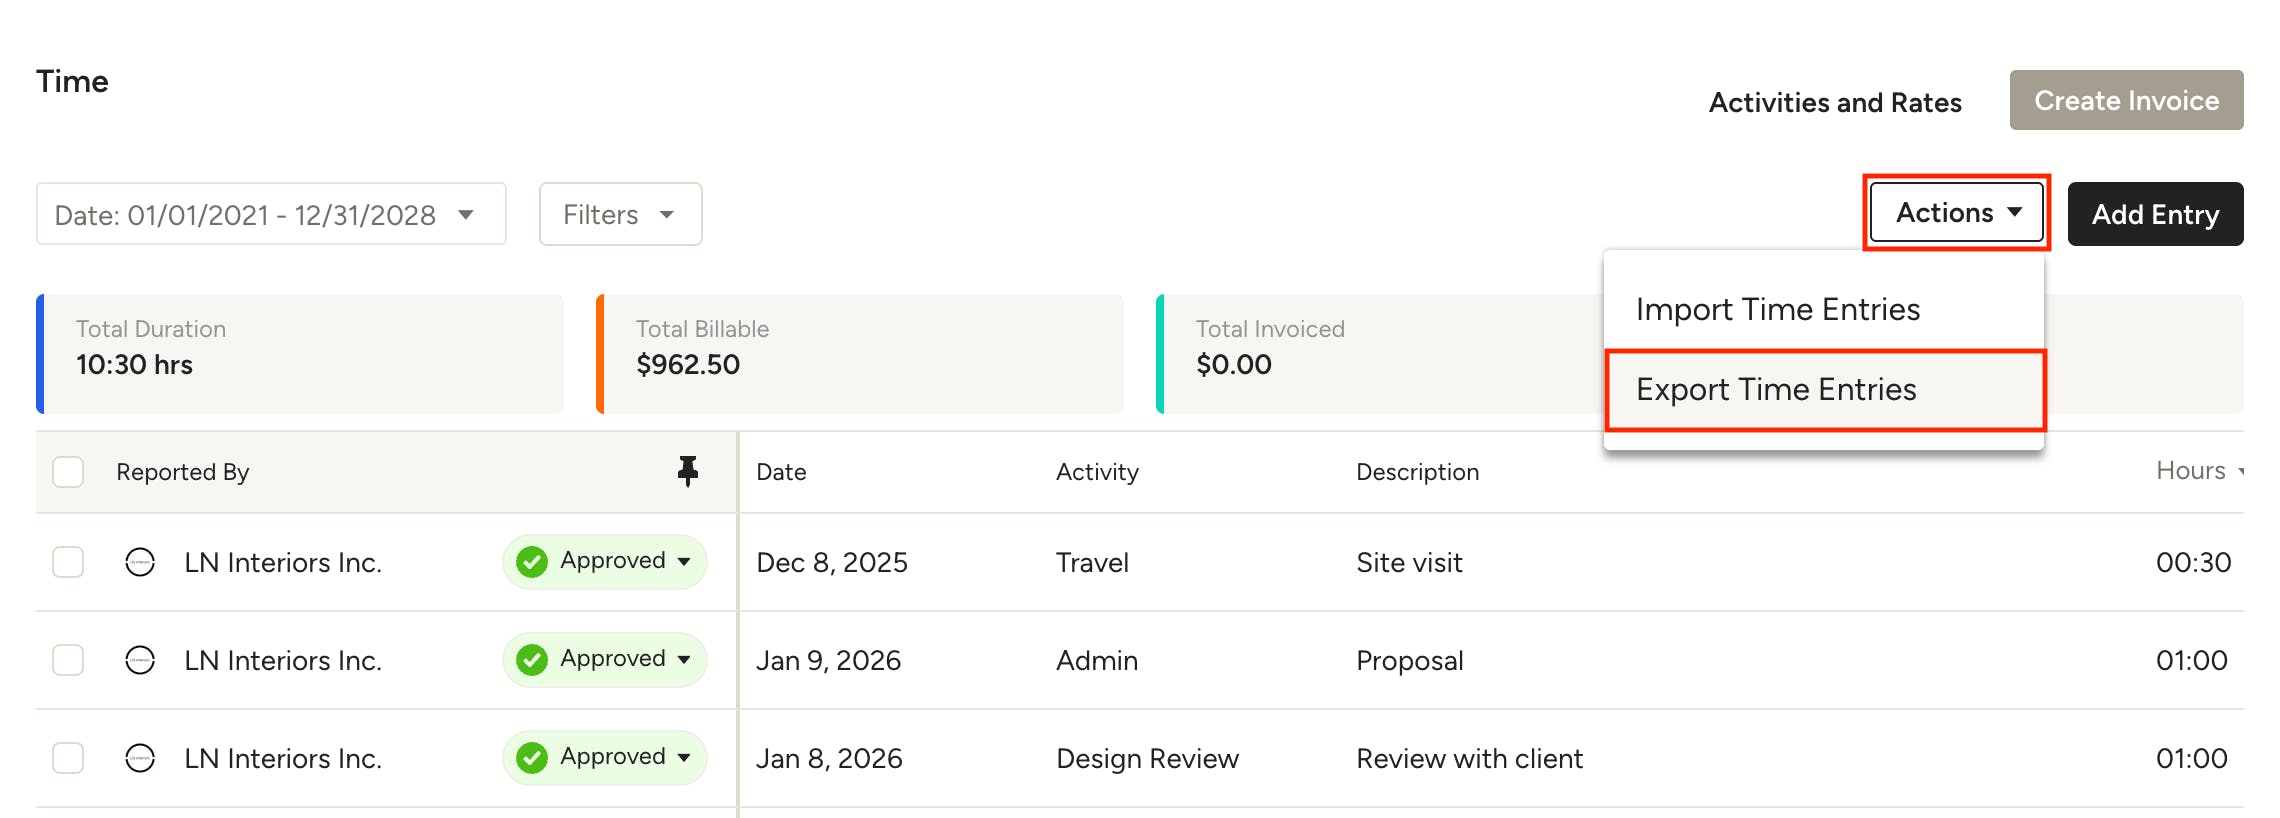
Export Time Entries to Excel
You can export time entries to Excel for accounting purposes — this is an excellent way to download time per project or per team member for payroll. To do so, select Export Time Entries under the Actions dropdown..
This will export all entries that are currently shown on the screen, so if you would like to download entries for a specific project or team member, make sure you filter the entries beforehand.
Note: Time billing reports can also be generated per team member or project under your Reports section of Houzz Pro. See How to Generate Time Billing Reports for more information.
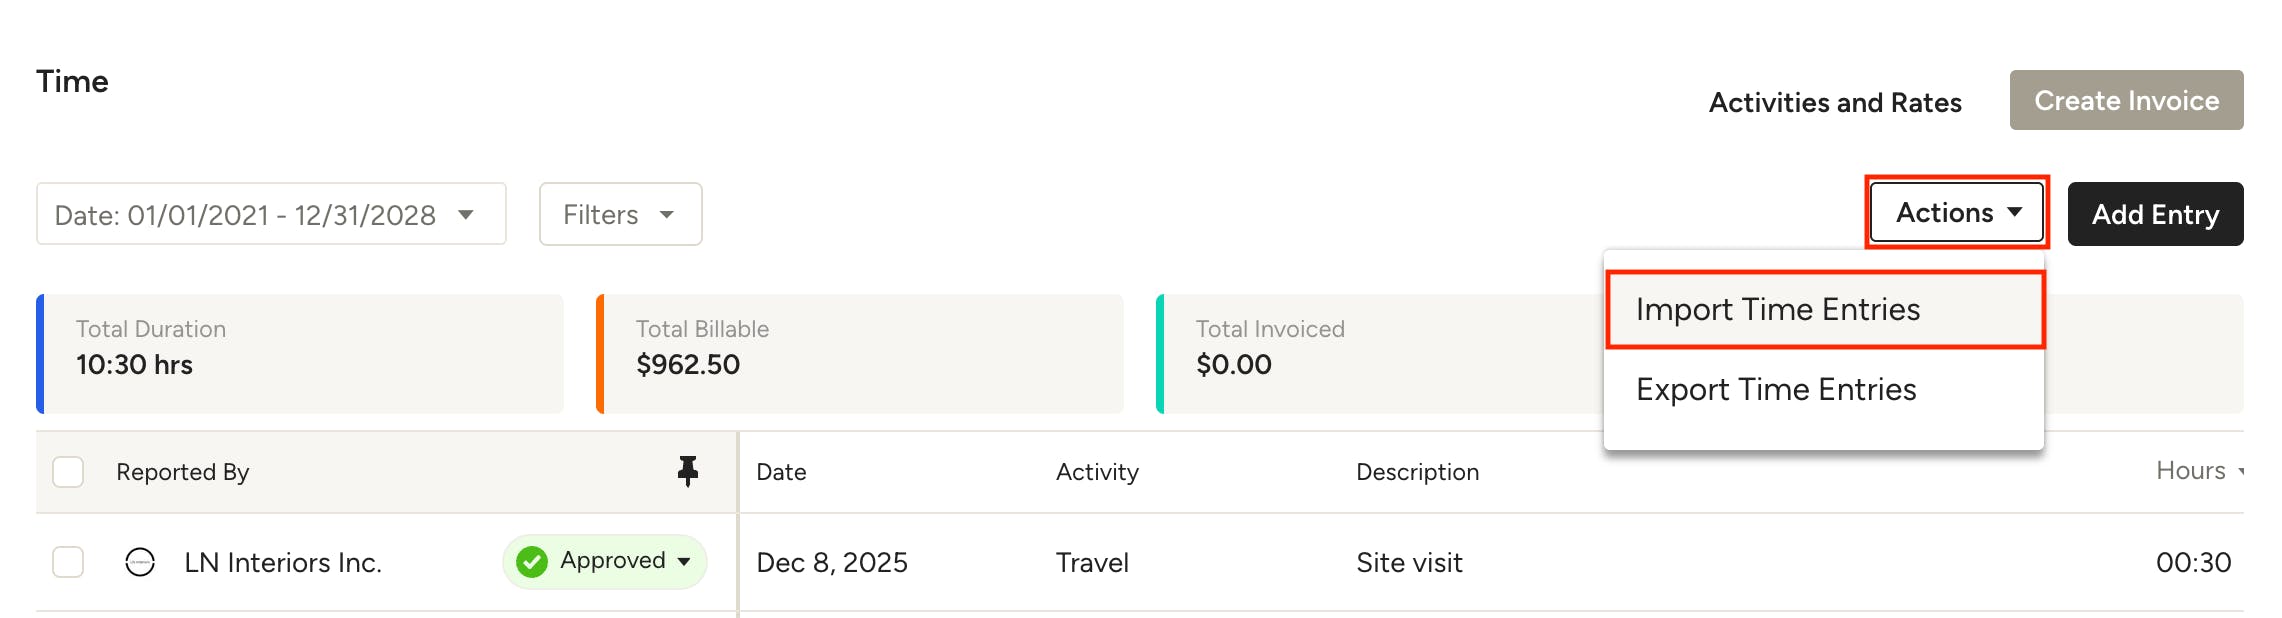
Import Time Entries From Other Software
From the Time section, you can import time entries from other software services, such as Harvest. Learn more about this process in How to Import Time Entries.