How to Log Time on the Mobile App
With the Time feature on the Houzz Pro mobile app, you can create and edit time entries while you’re on the go. This article will cover how to create, edit and manage entries on the mobile app. If you need help to use the stopwatch to track your time on the app, read this article.
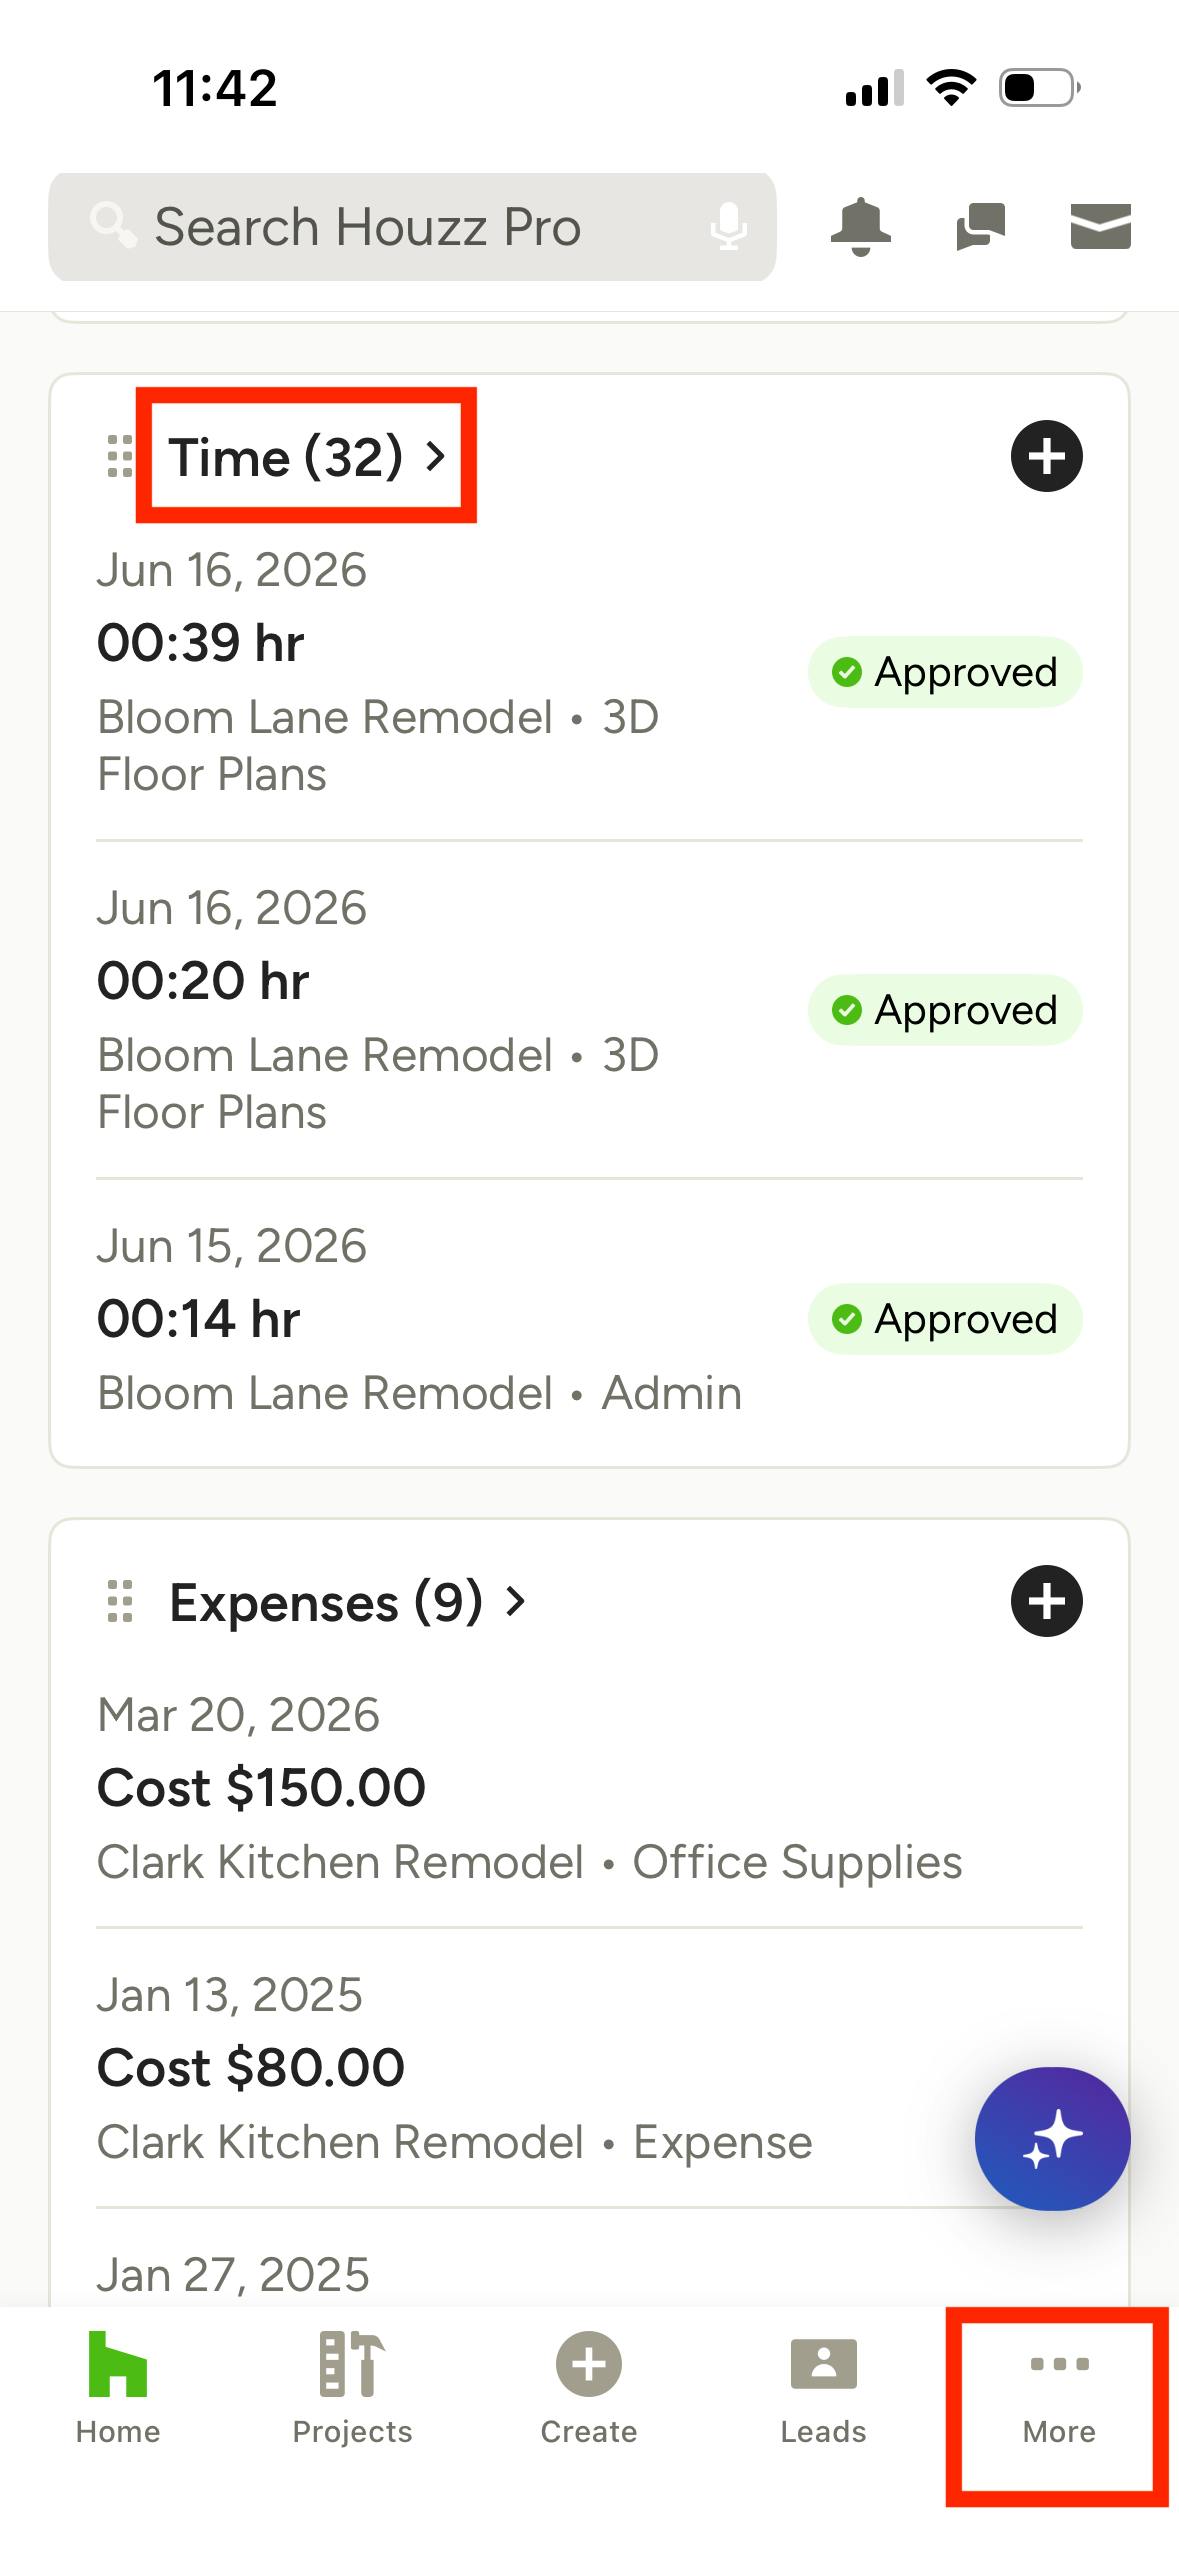
To access your main Time page on the app, scroll down to the Time section on the homepage and tap the title. You can also tap the More icon in the bottom navigation, then select Time.
Create a Time Entry
You can easily track time on the mobile app using the stopwatch or by logging it manually. To manually create a time entry on the Houzz Pro app, follow these steps:
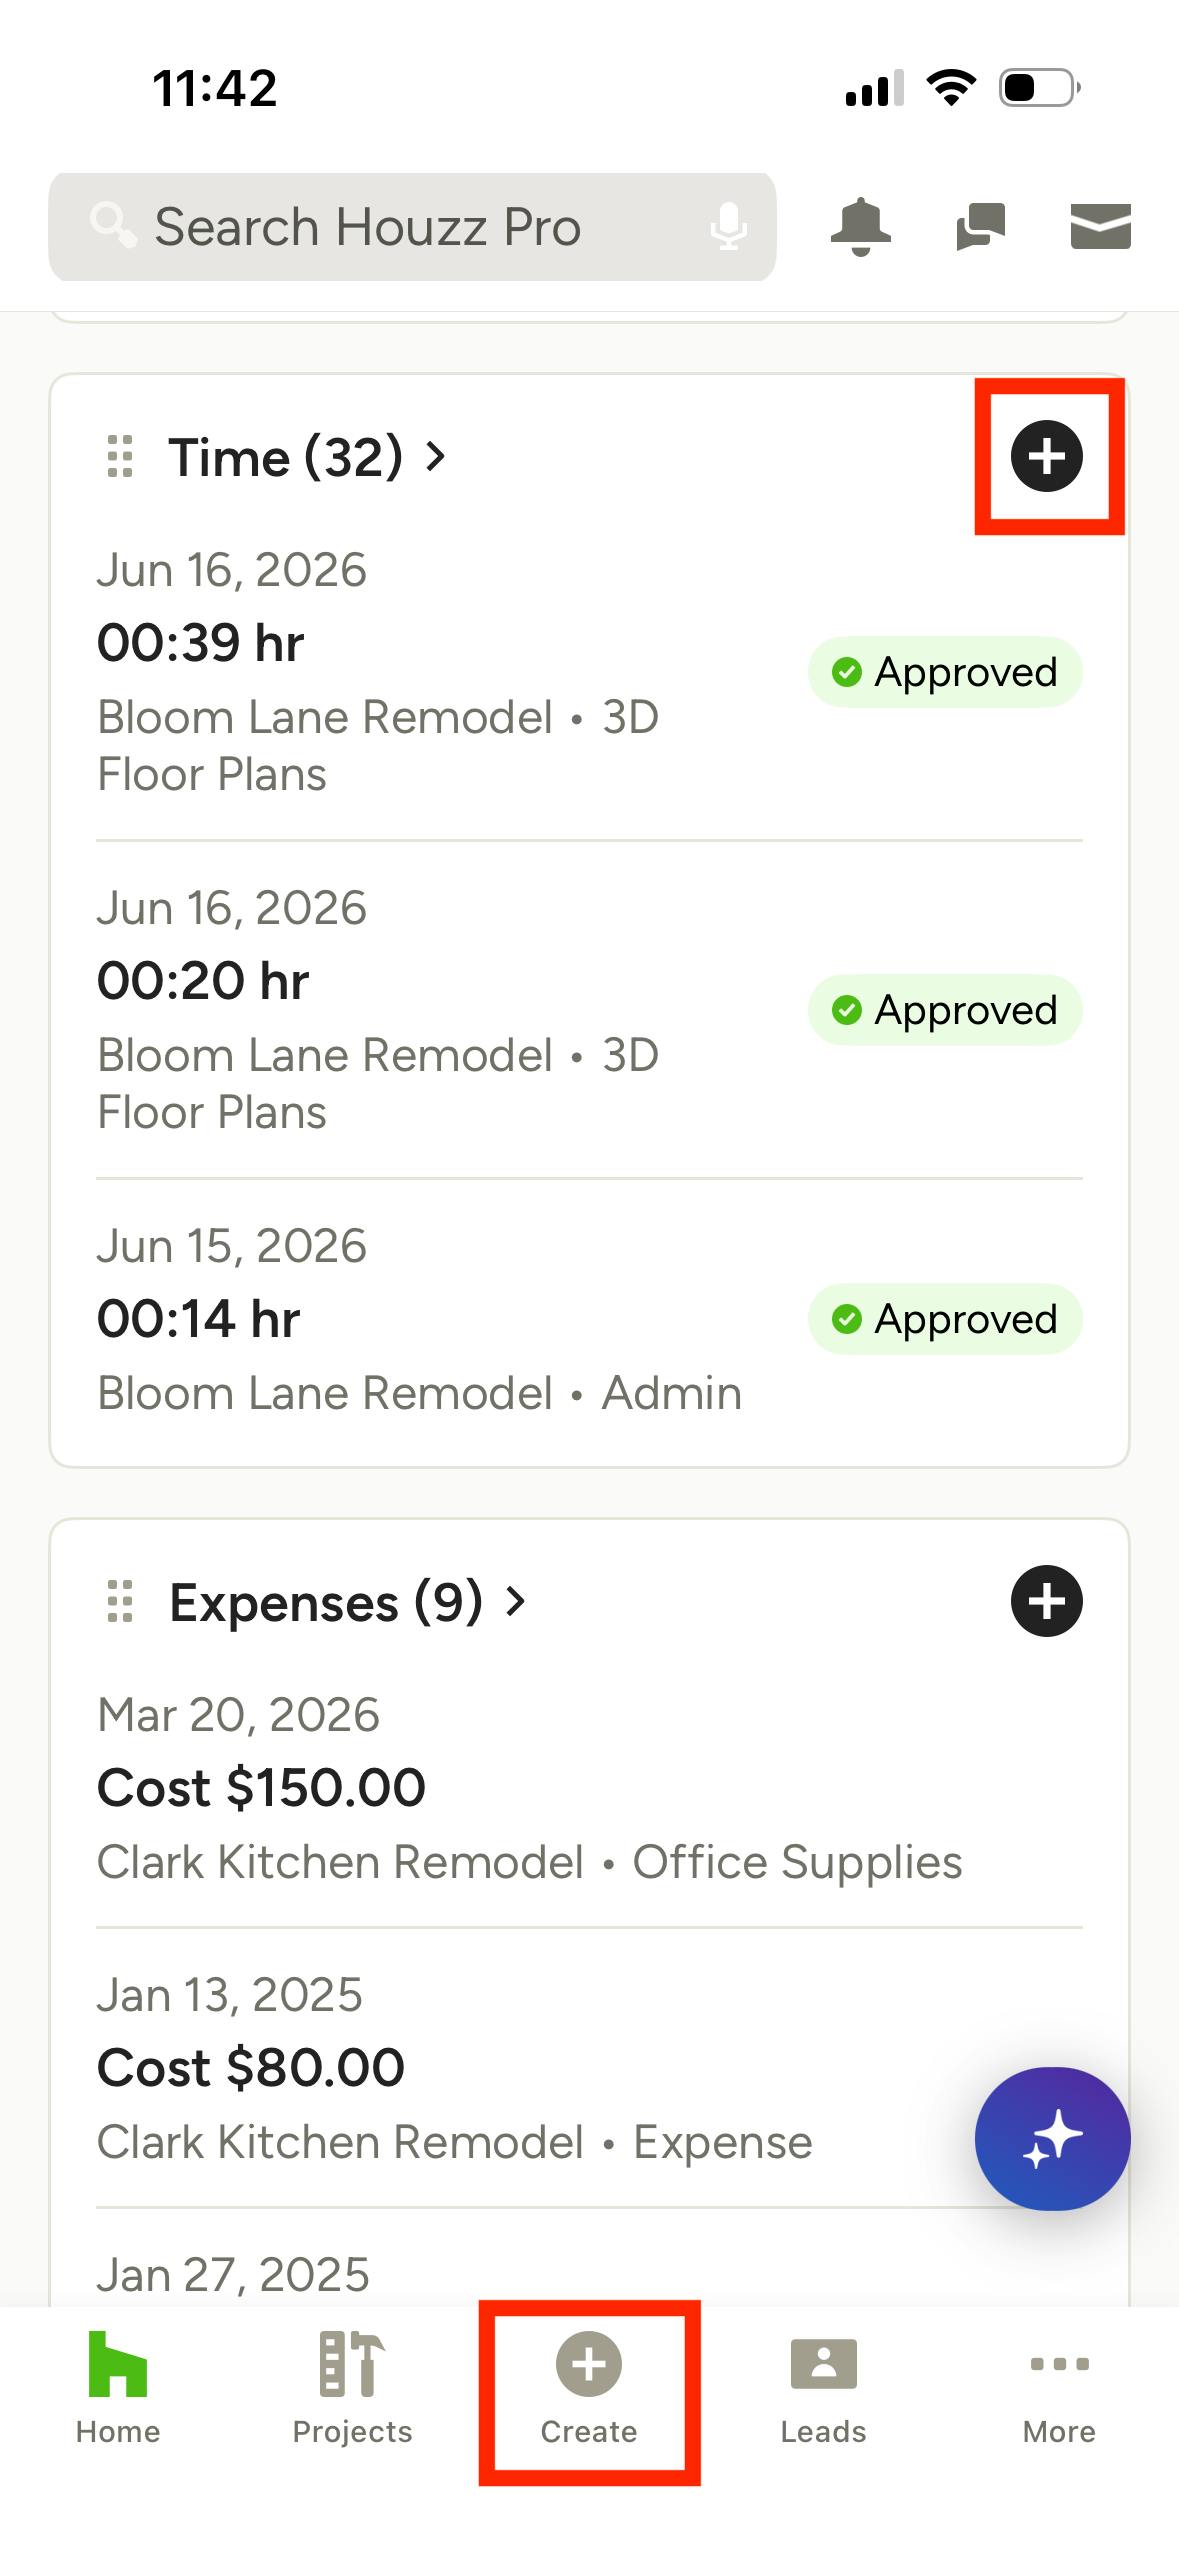
From the app's homepage, tap the + icon in the Time section, or tap the Create icon in the bottom navigation, then select Time.
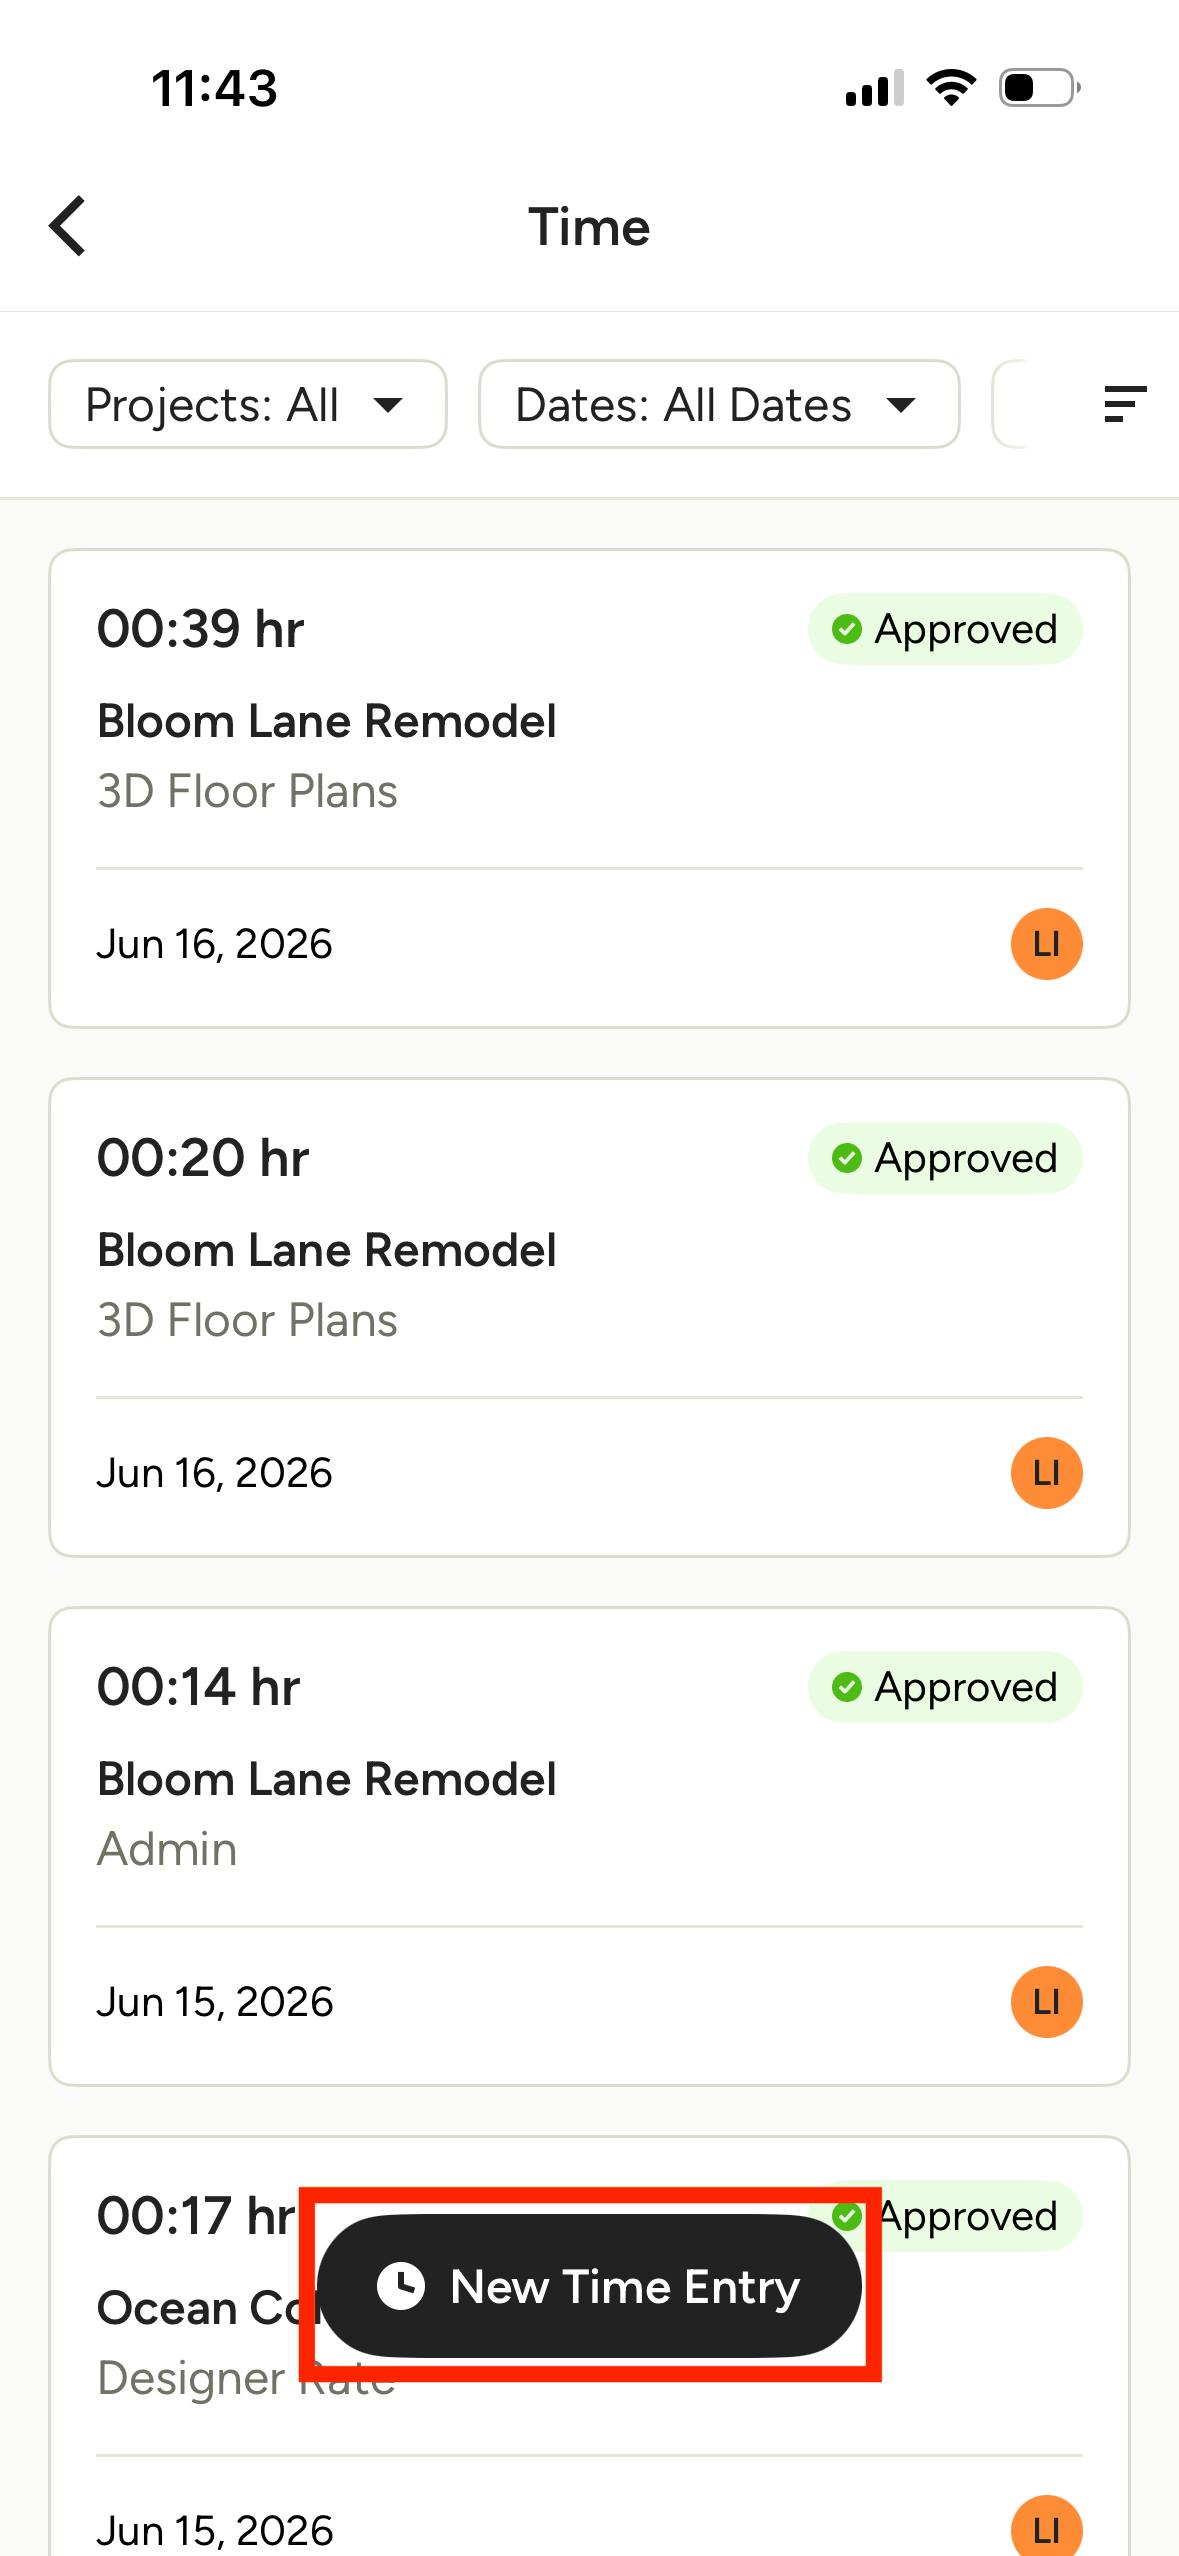
You can also tap New Time Entry on the bottom of the main Time page.
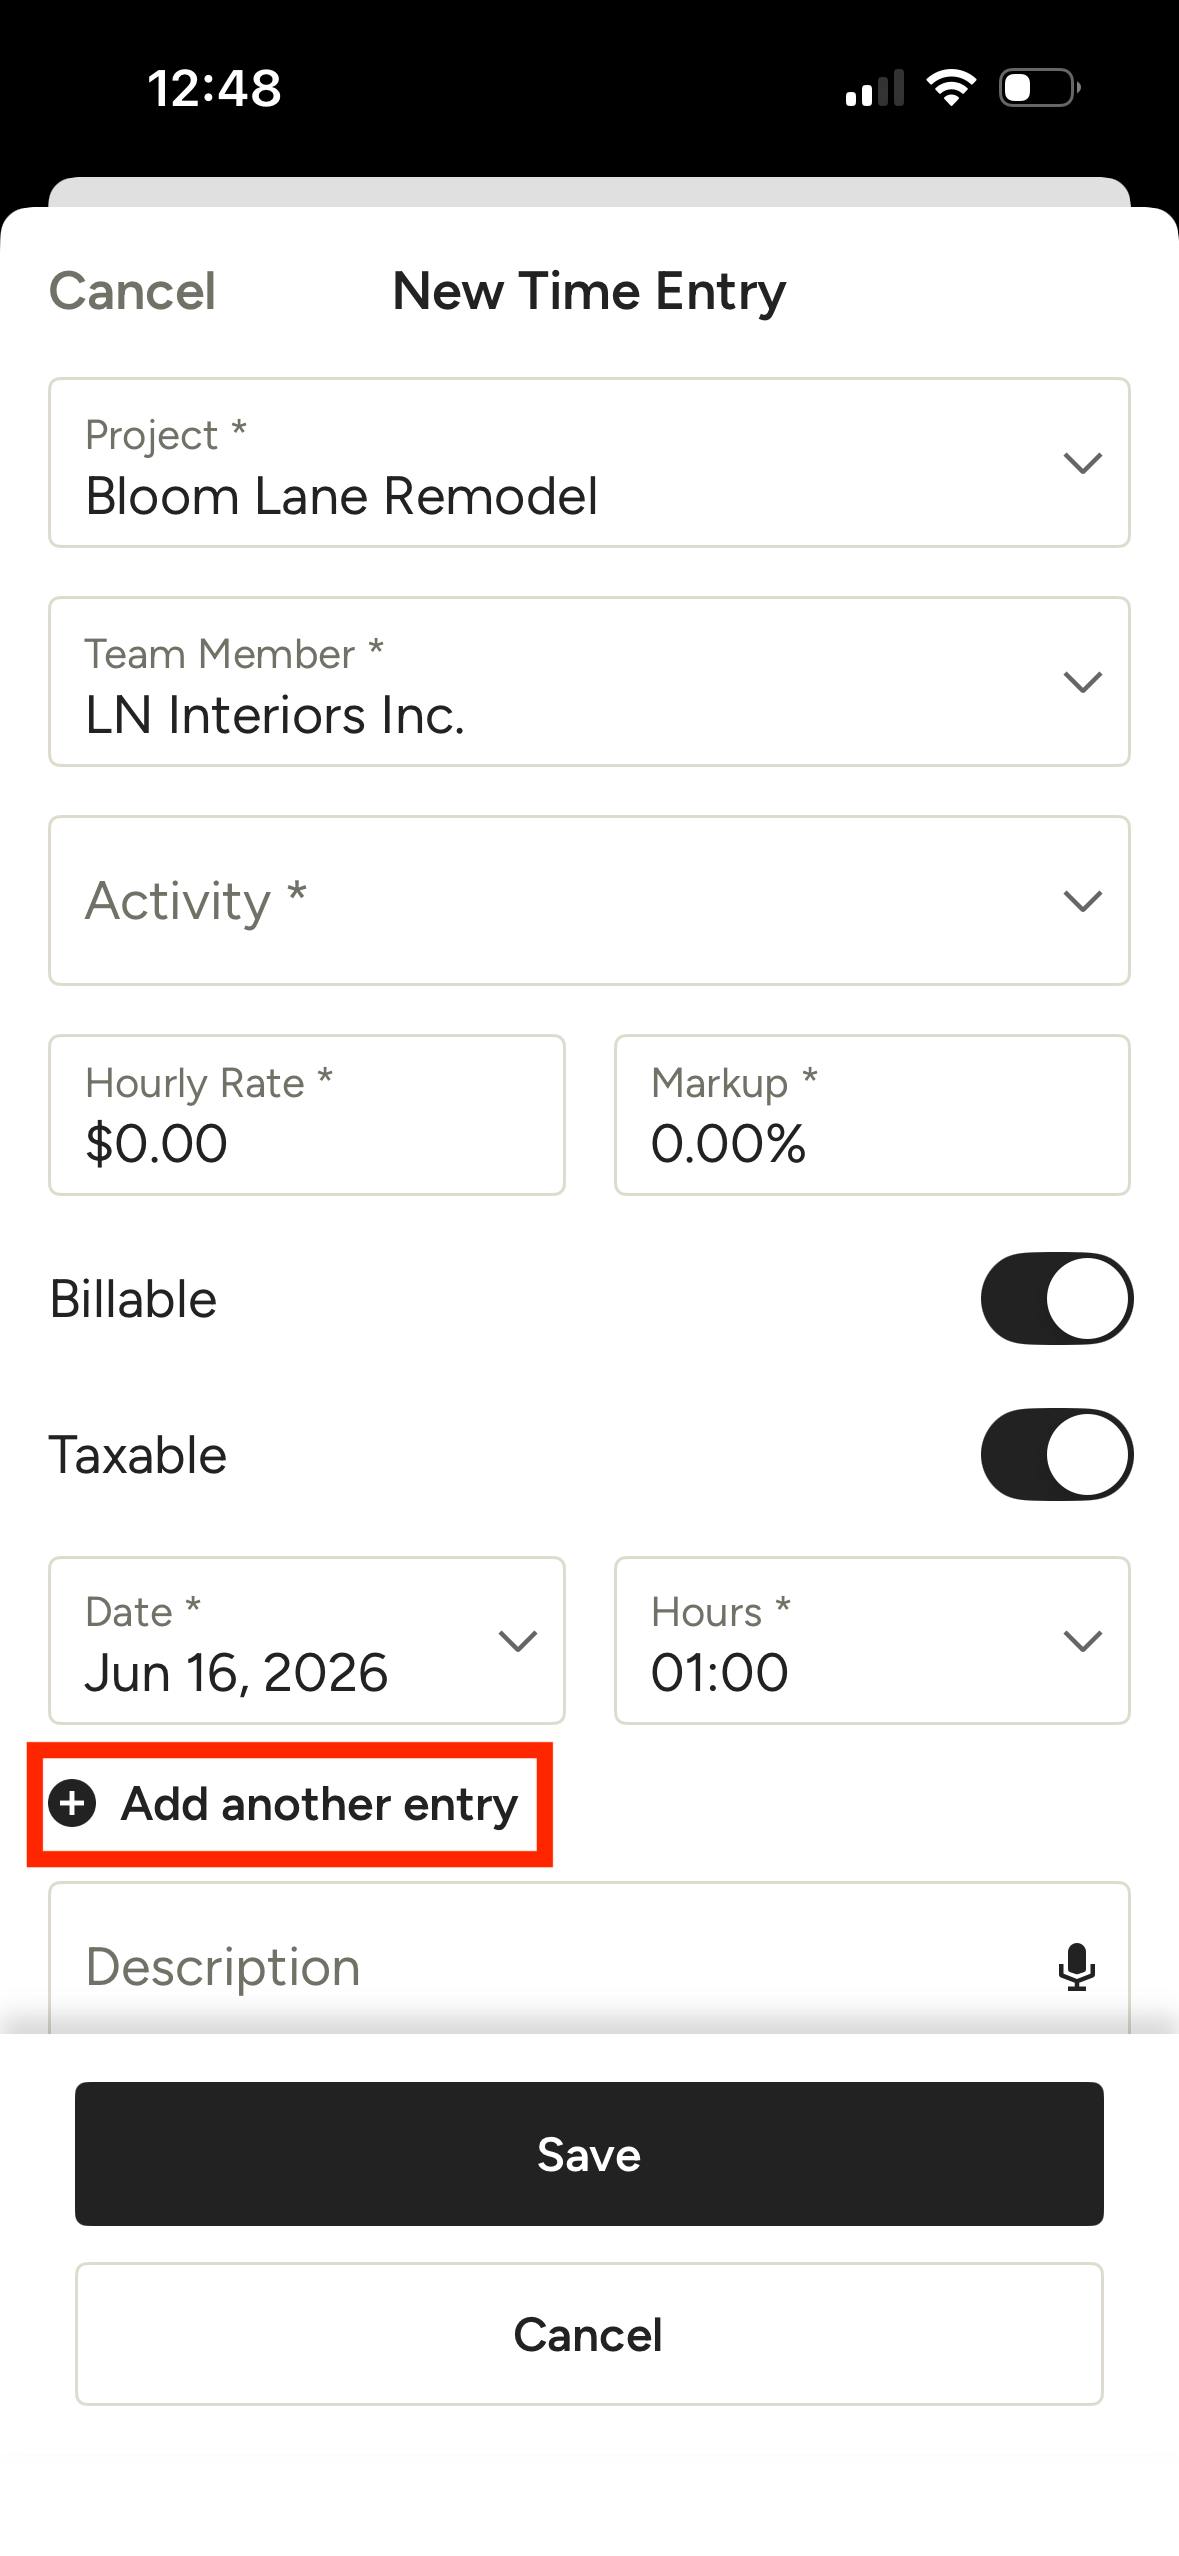
Enter the relevant details, including project, activity, hours and any description necessary. You can add multiple time entries for the same team member and activity by tapping Add Another Entry. Note that team members and admins will see different fields in their time modal depending on their permissions.
If there are no existing activities, or you wish to create a new one, you or your admin will need to use the desktop version of Houzz Pro to manage activities and rates.
Once the details are entered, tap the Save button and you will see the new time entry listed on the Time page.
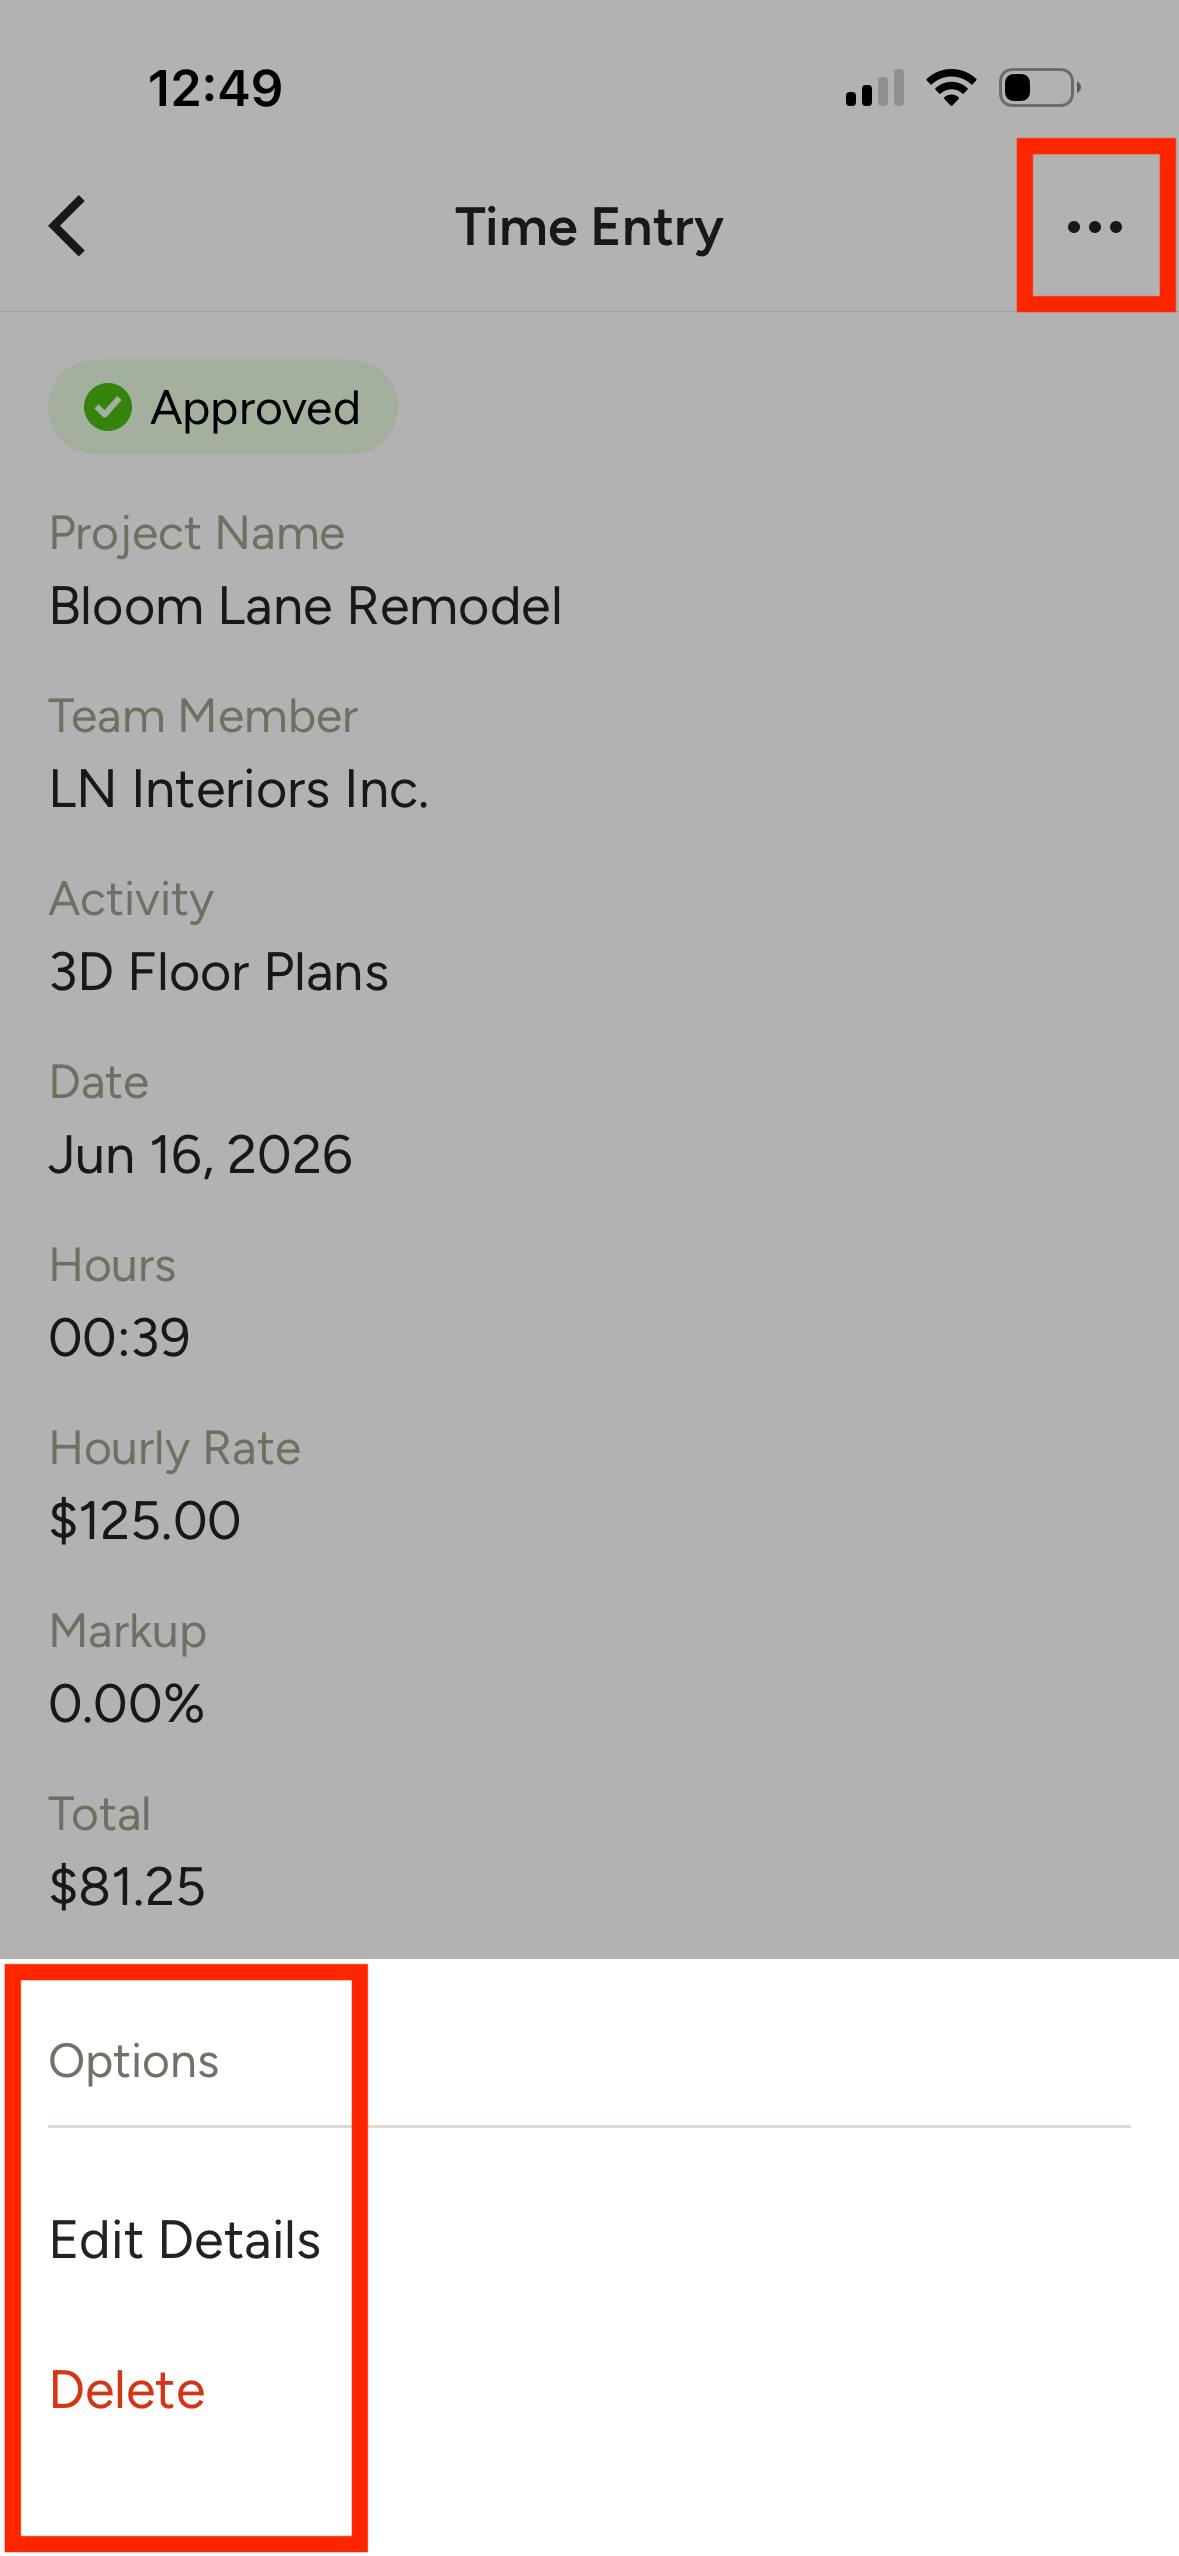
You can edit or delete an entry by tapping the desired entry, and opening the Options menu at the top and selecting the action you want to take.
Note that for proper record-keeping purposes, an entry cannot be deleted or edited once it’s linked to a document, such as an issued invoice.
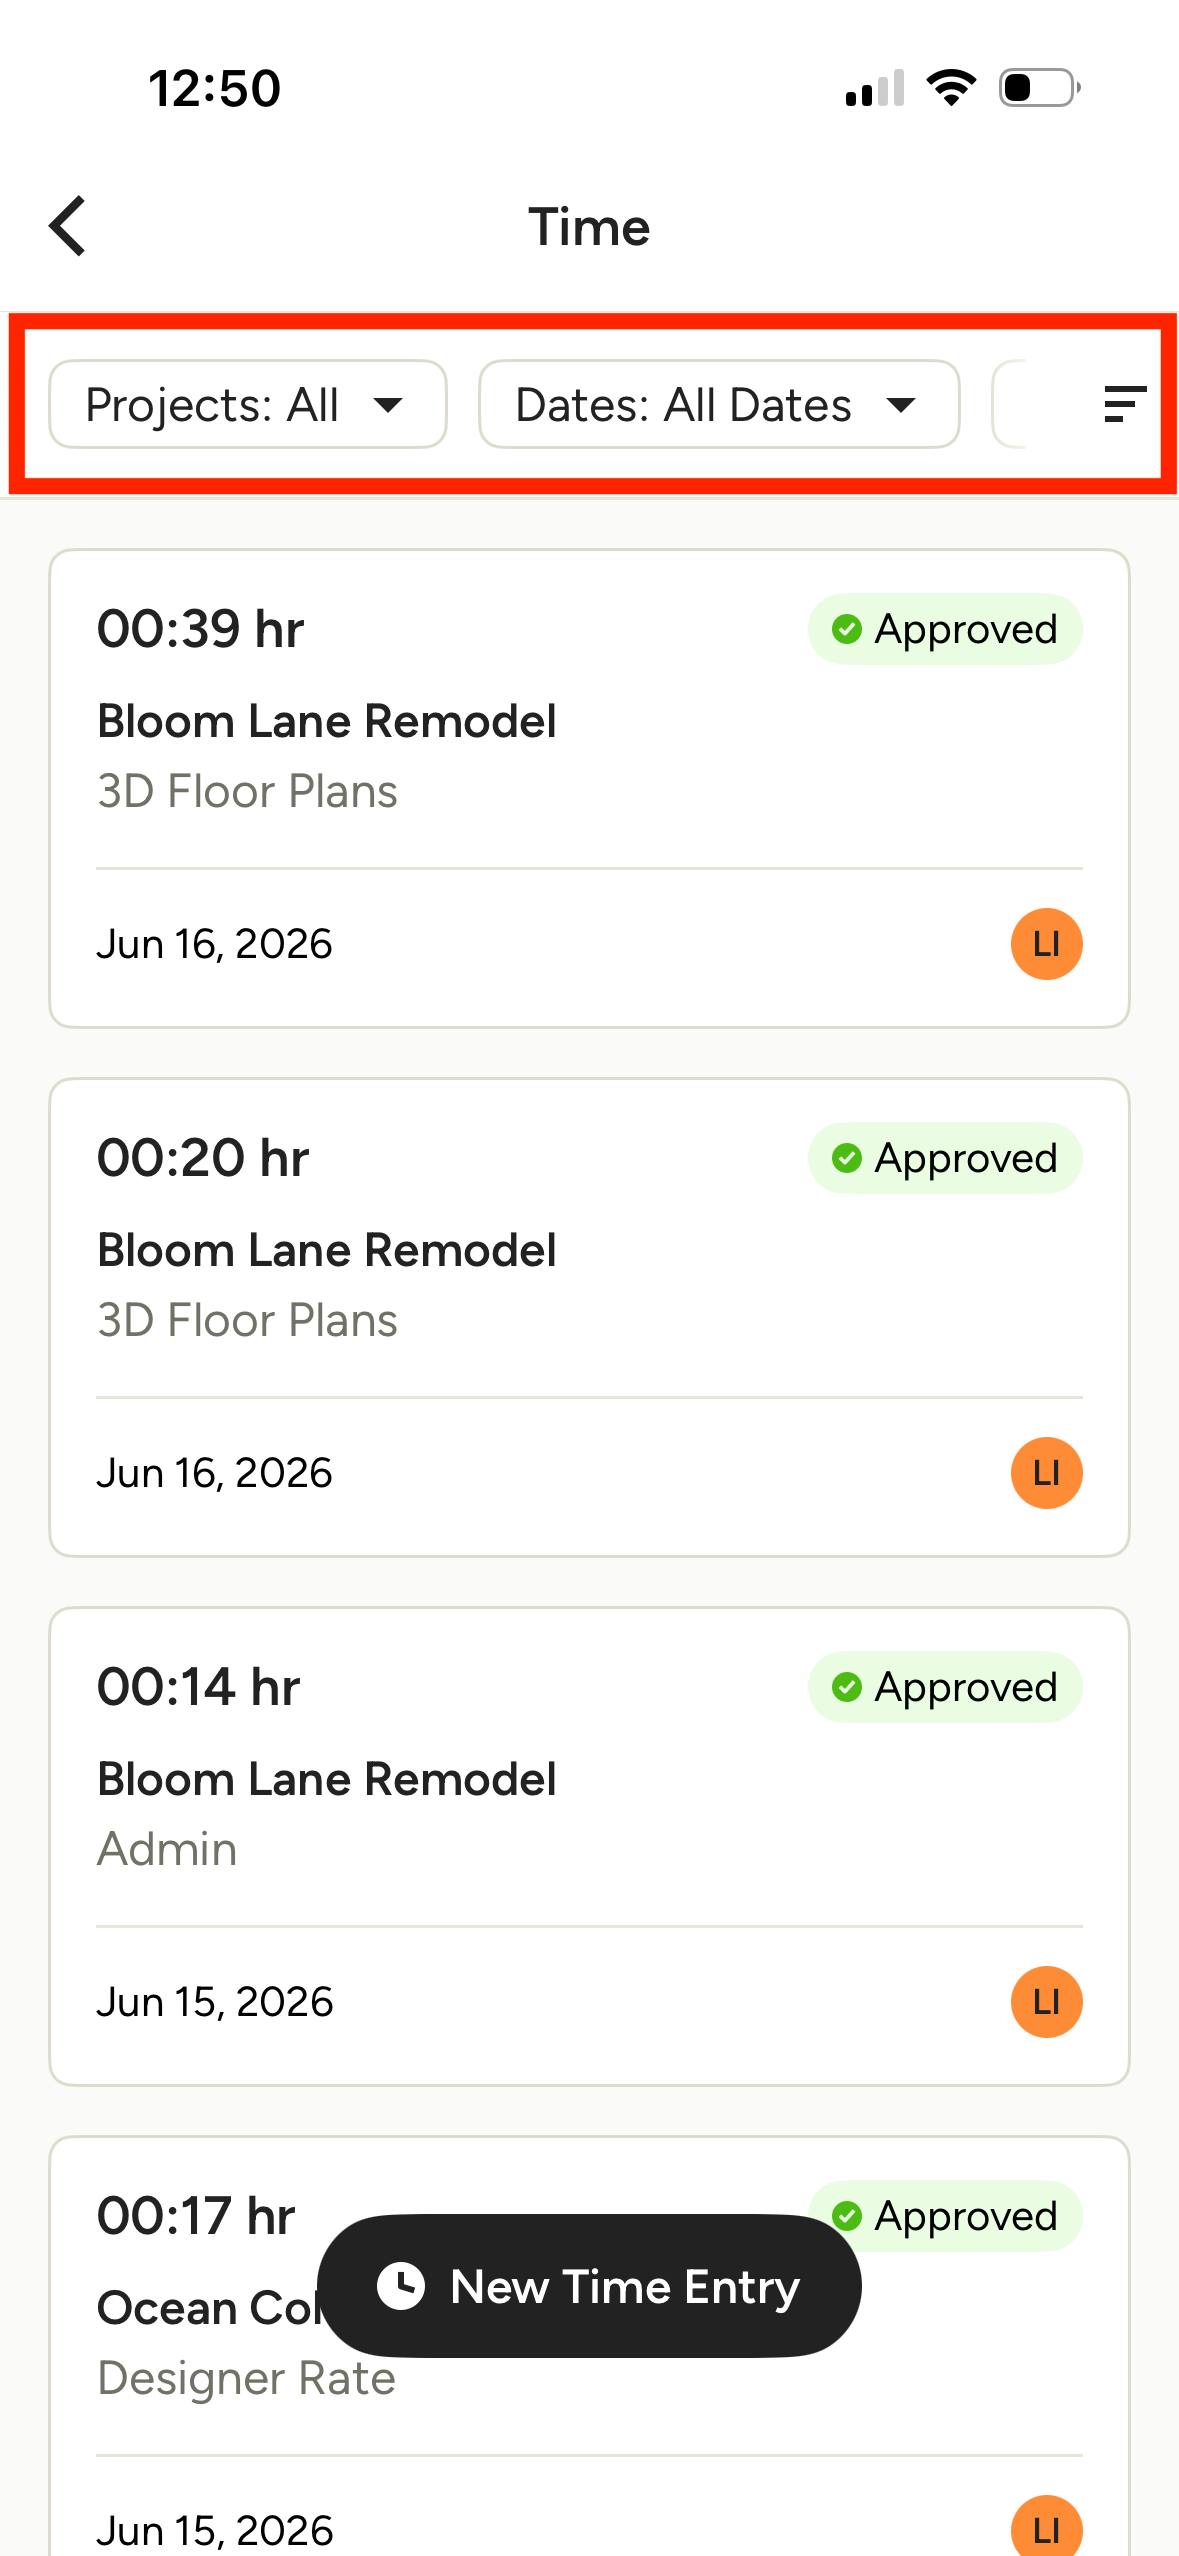
Filter and Sort Entries
You can filter time entries by project, date, activity type, team member, and whether they’ve been invoiced or not, and sort according to your needs by using the options at the top of the page.
Manage Time Activities
To manage activities and rates, including add, edit or delete, you need to use the desktop version of Houzz Pro. See this article for more information on managing time activities for you and your team members.
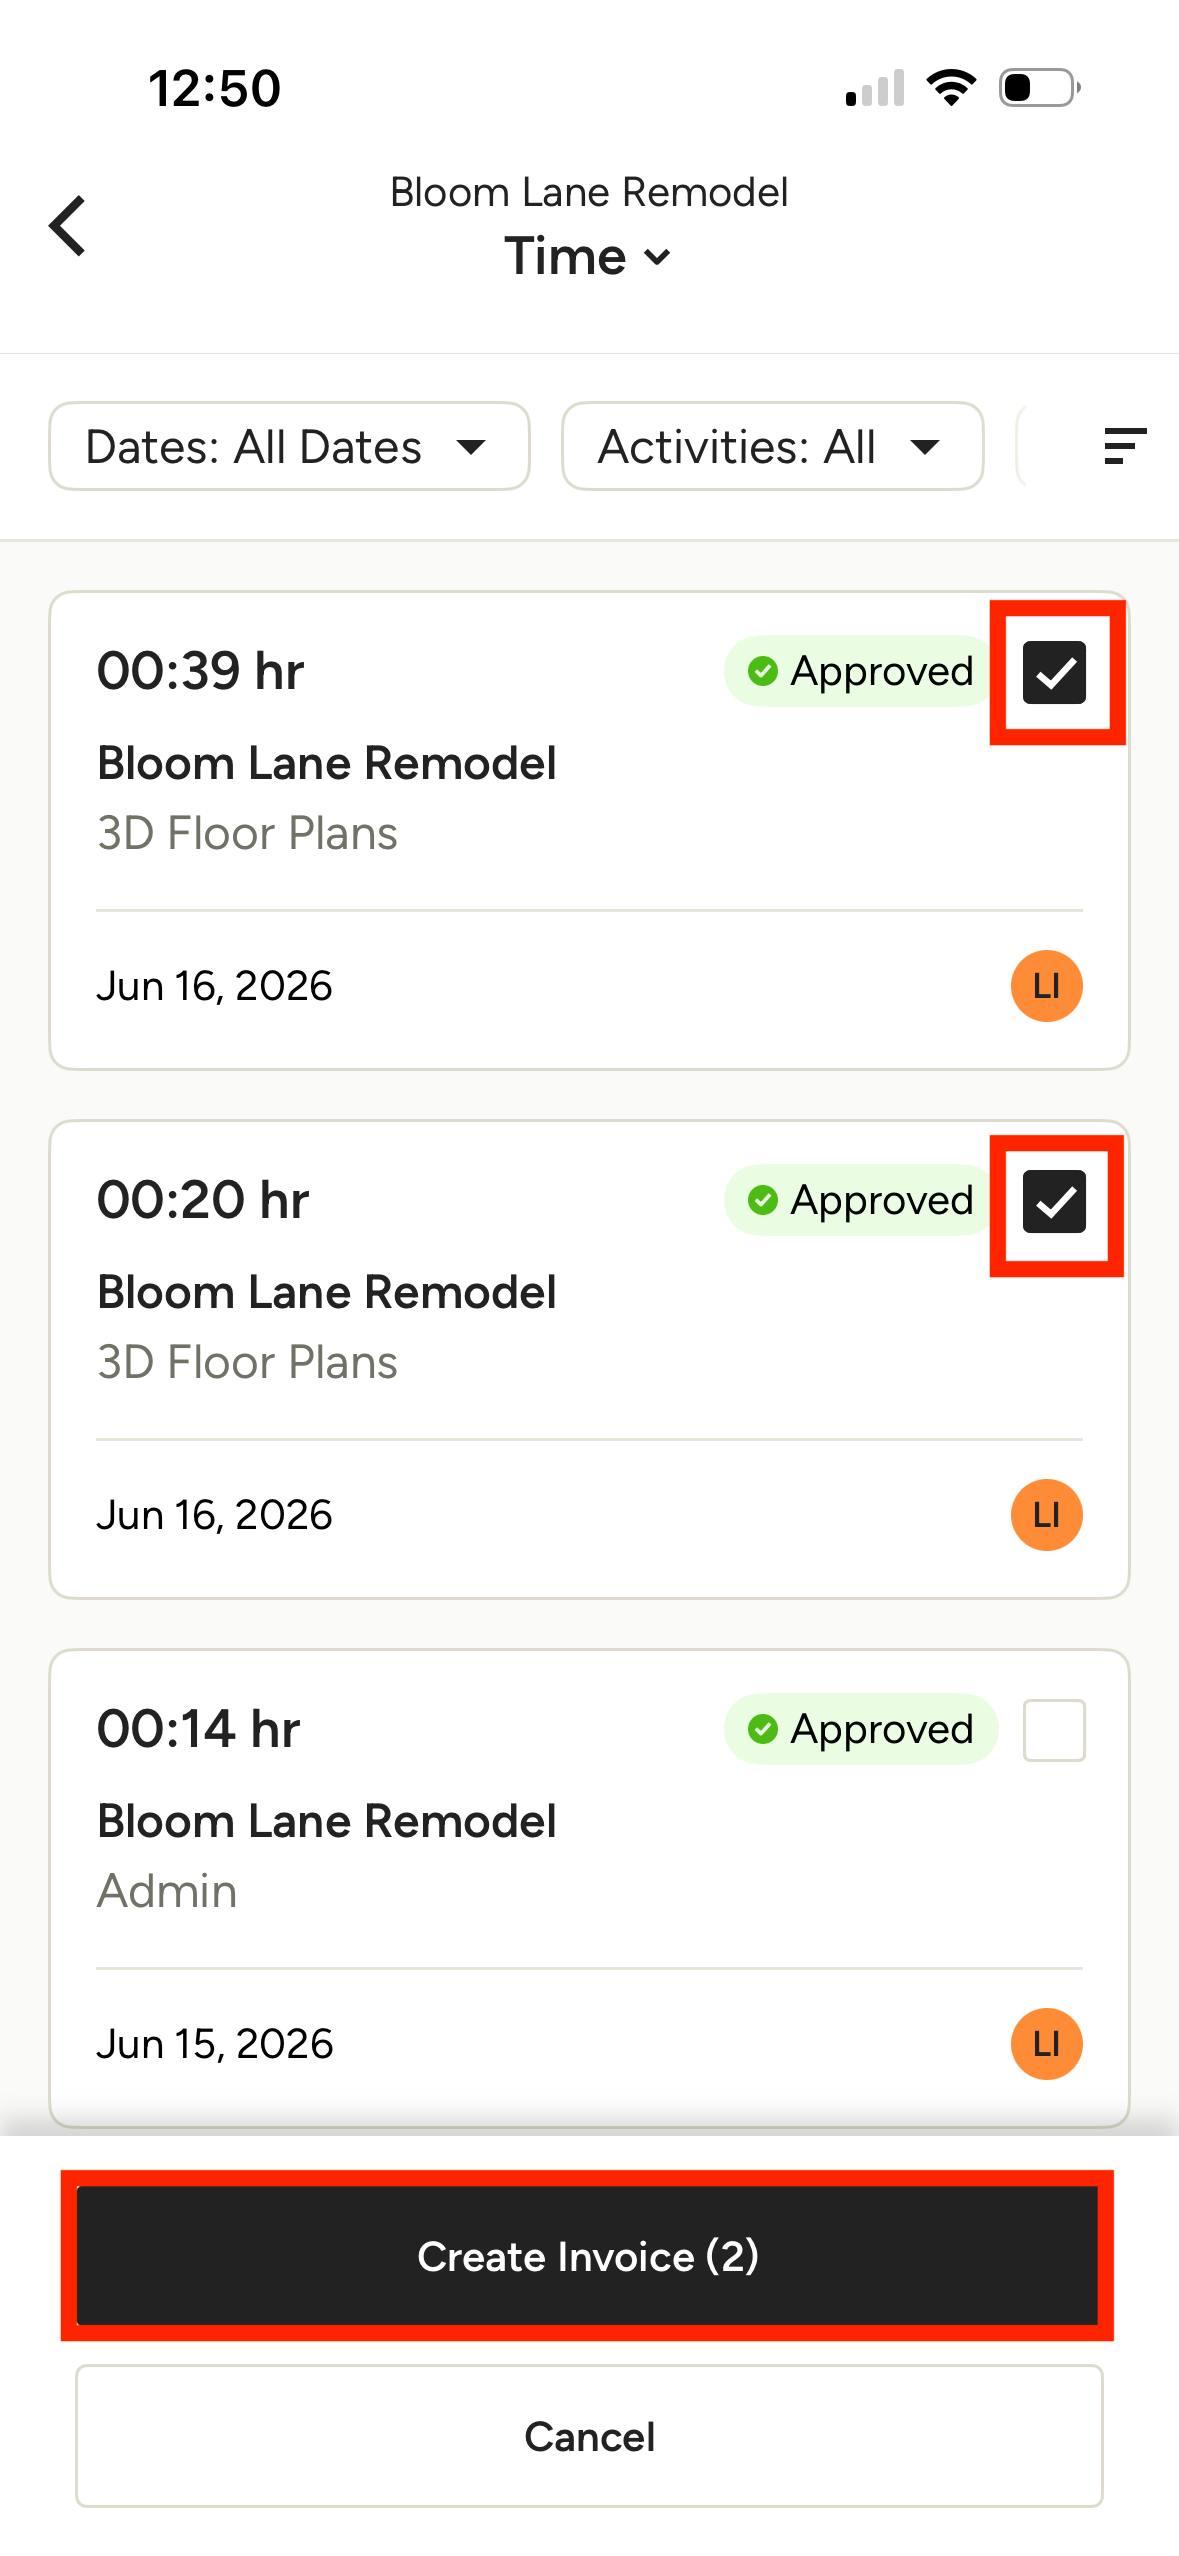
Invoice Time
If you want to invoice entries within the app, you must first navigate to a specific project page — this action cannot be done from the main Time page in the app. From a project overview page, you can tap on the Time section, select the entry(s) you wish to invoice by tapping the checkbox on the right, then tap Create Invoice in the menu that appears.