How to Use Project Templates
Even though every project has nuances, many projects follow the same documentation and structure. If you have a recurring project workflow, you can easily create a project template to save time and improve consistency across projects.
When you create a project template, you can build one from scratch or turn an existing project into a template. Either way, you can use existing templates from other Houzz Pro features (Contracts, Documents, Schedule, and more) to pre-populate and build a comprehensive project template. You can even set default project settings and add relevant files and folders to include.
Once created, your project template can be implemented for a new project with a few simple clicks. Let's go over the process.
Create Project Template from Scratch
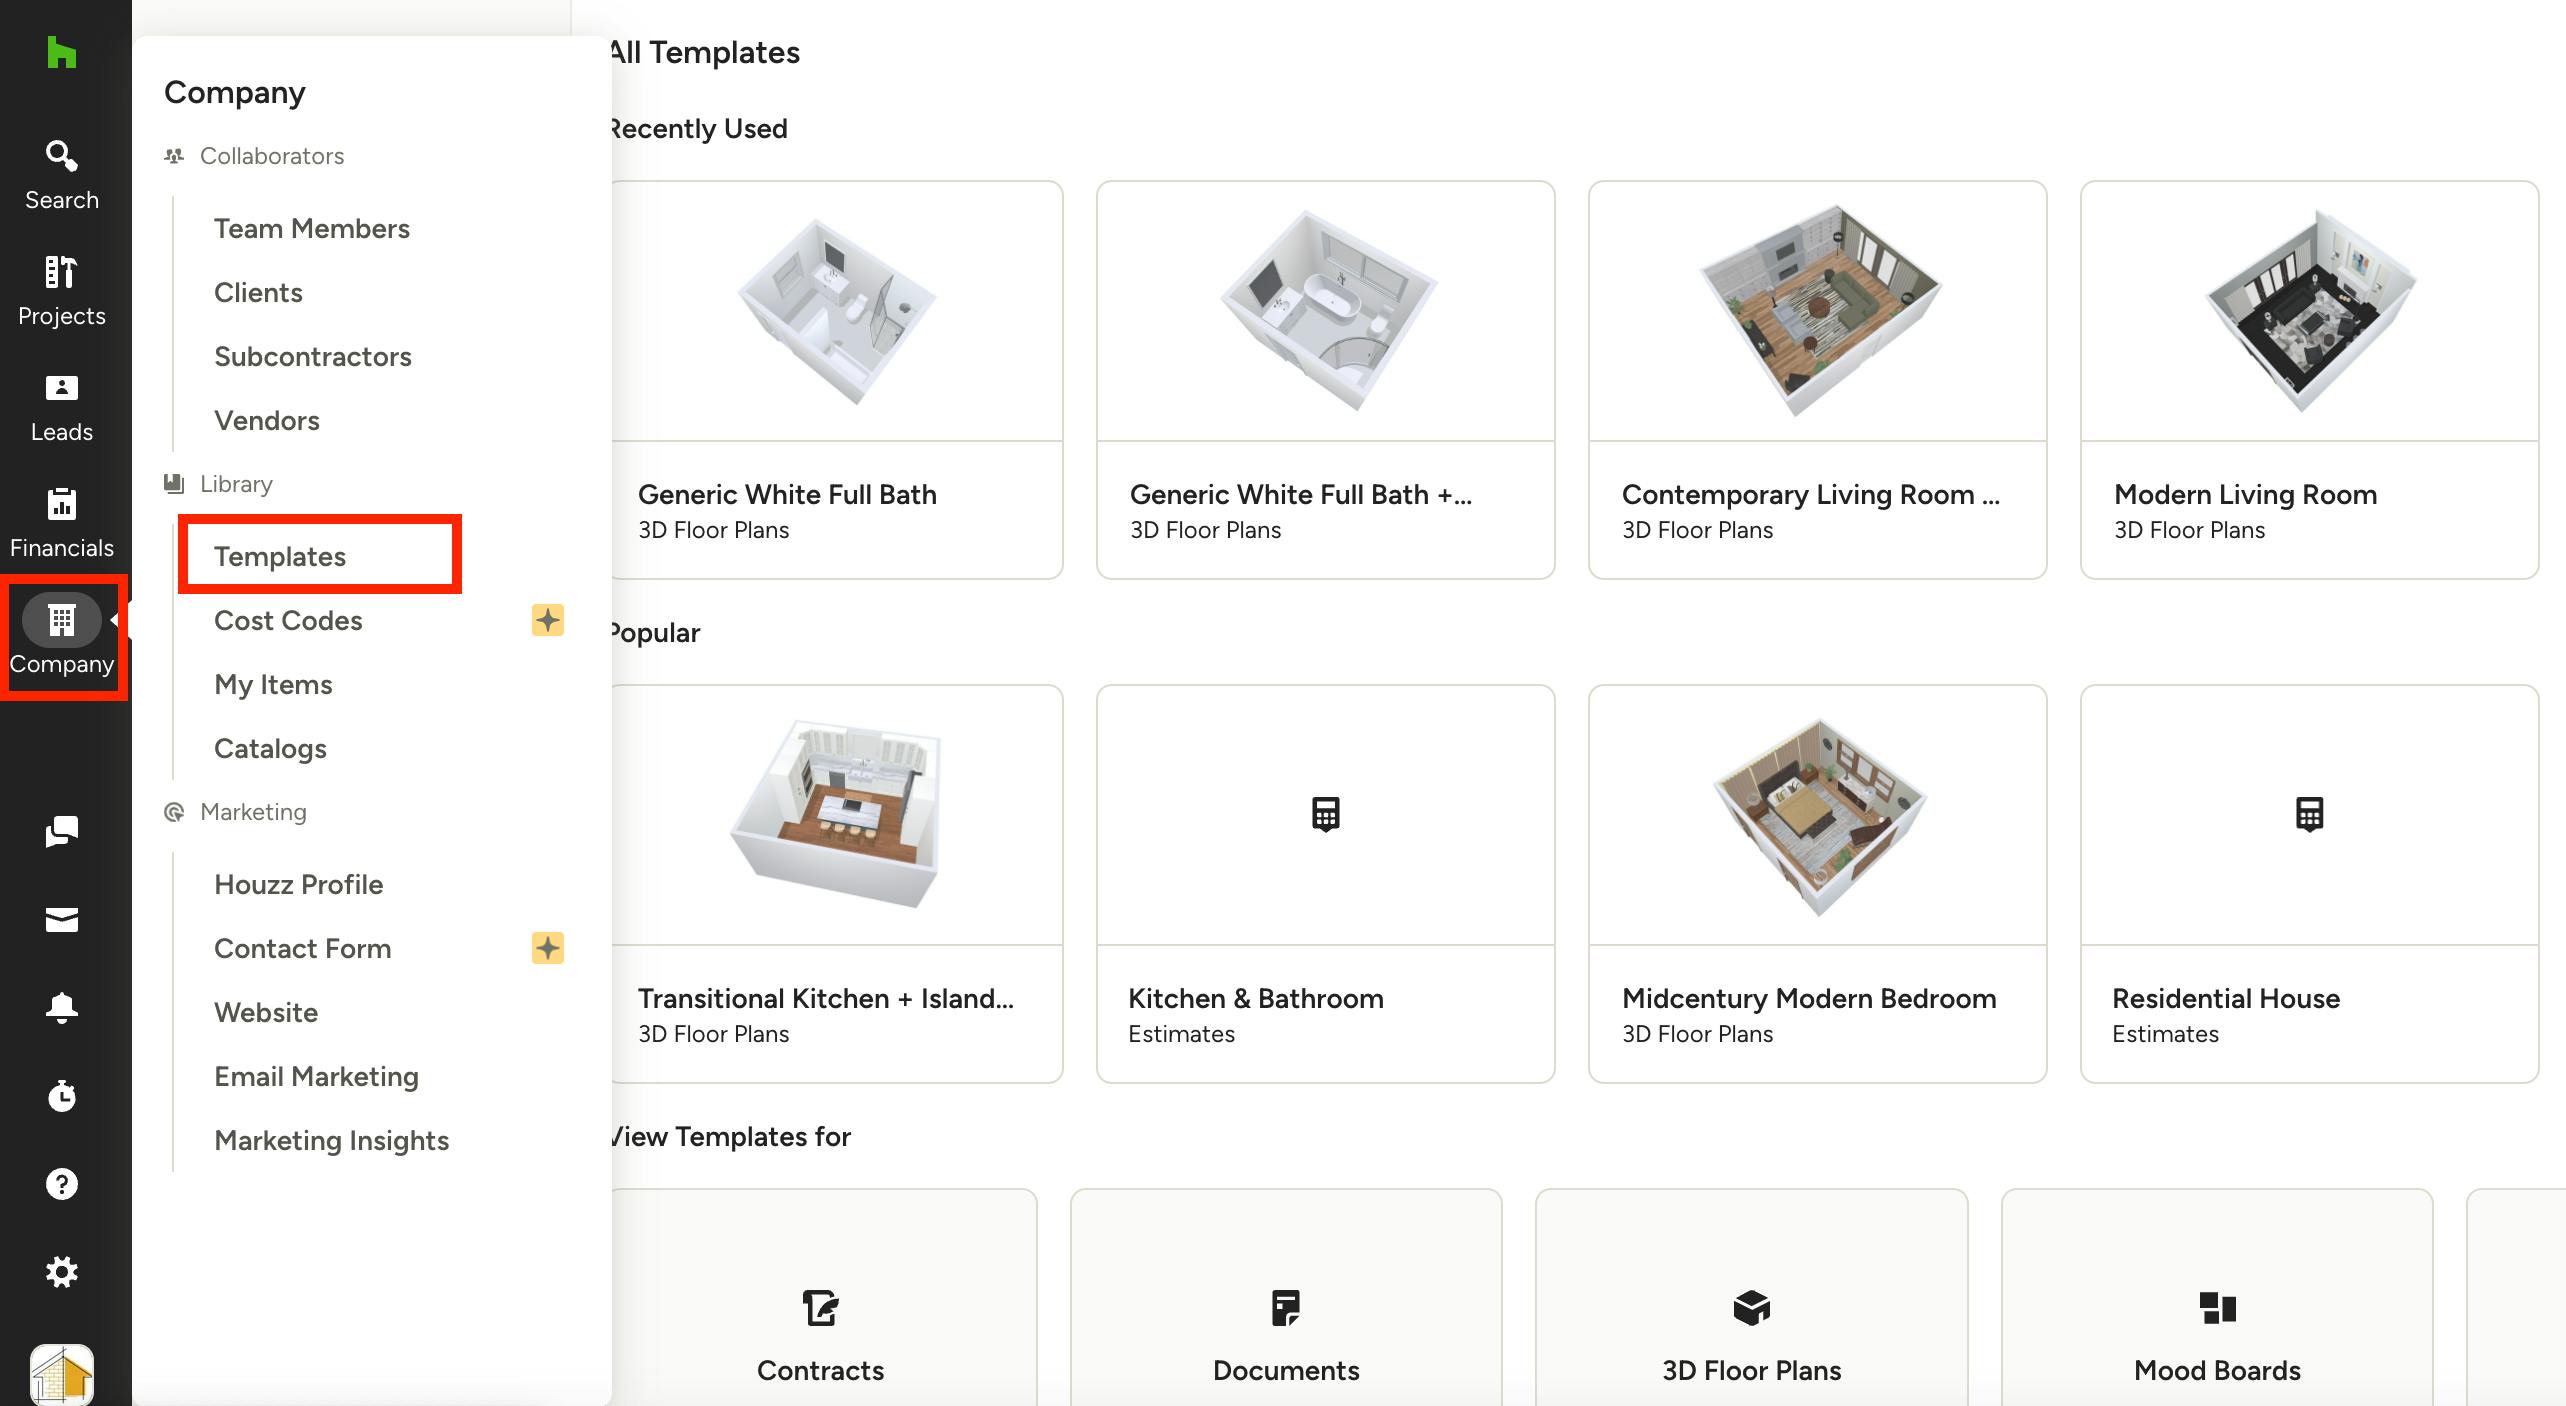
To create a project template from scratch, you will first need to access the Template Center. Select the Company icon from your left navigation, then click Templates in the menu.
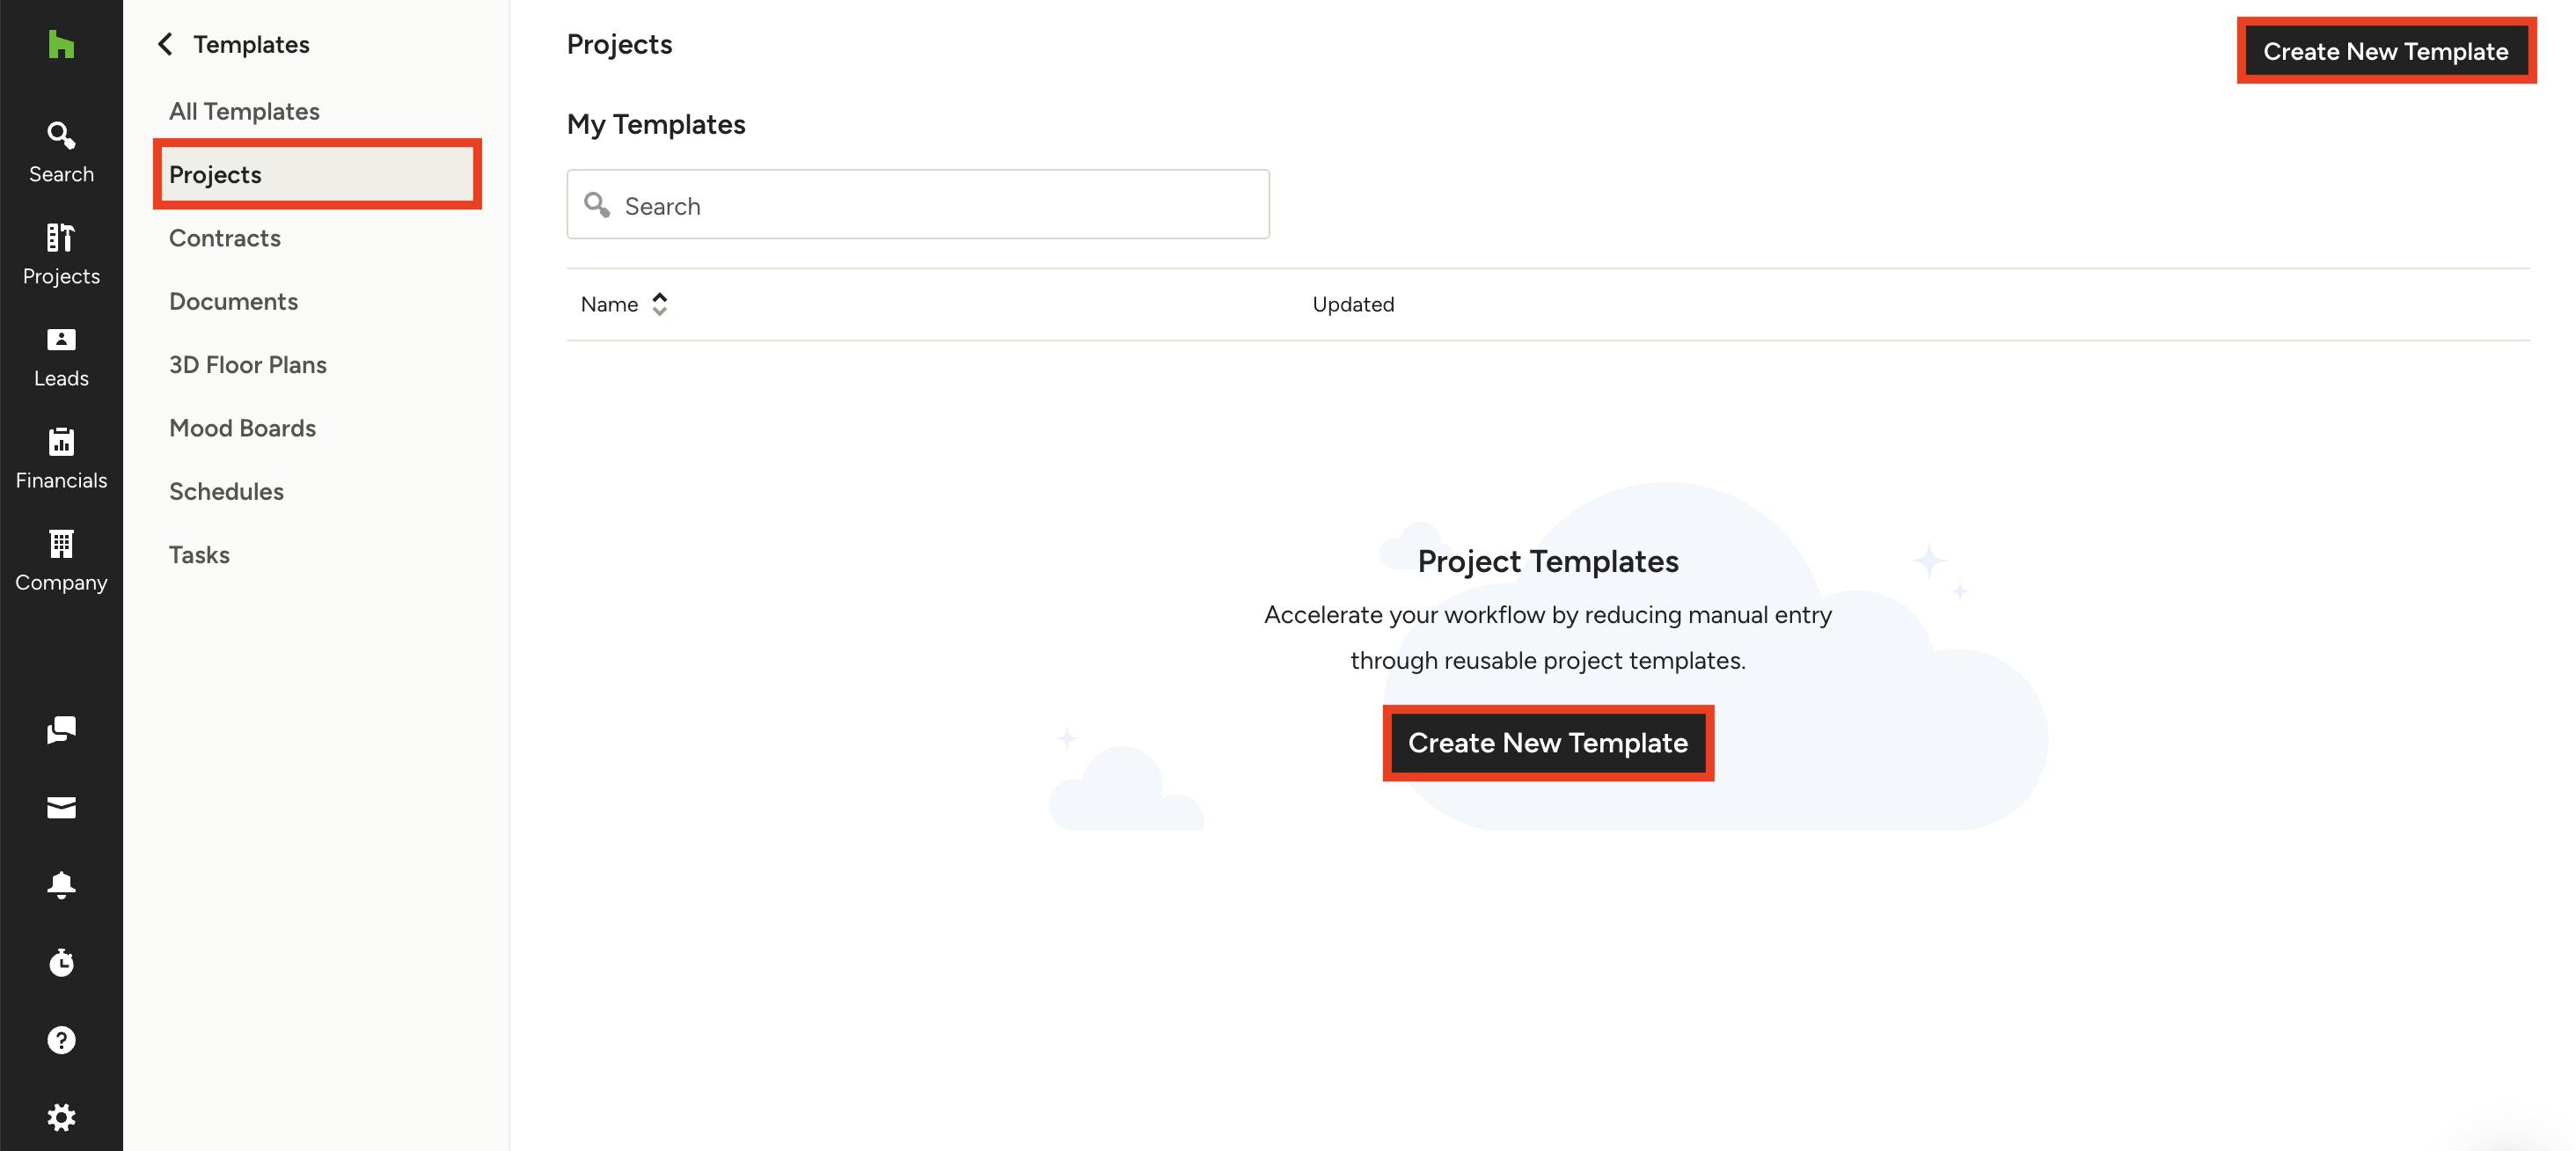
In the Template Center, select Projects from the left menu.
If this is your first project template, the page will be empty. Click Create New Template in the middle or top right of your screen to get started.
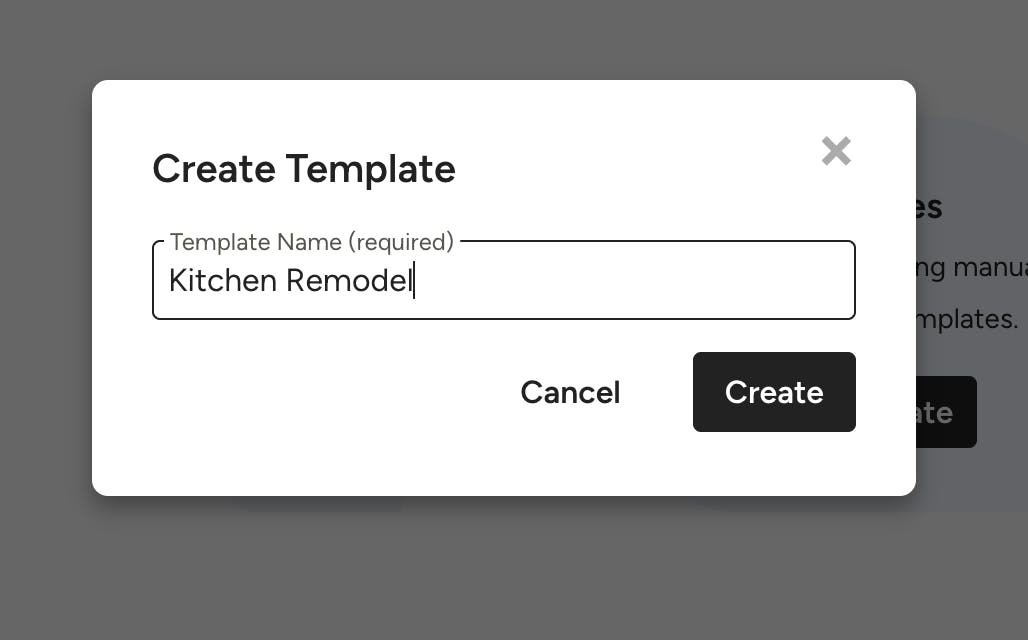
Type in a name for the template, then click Create.
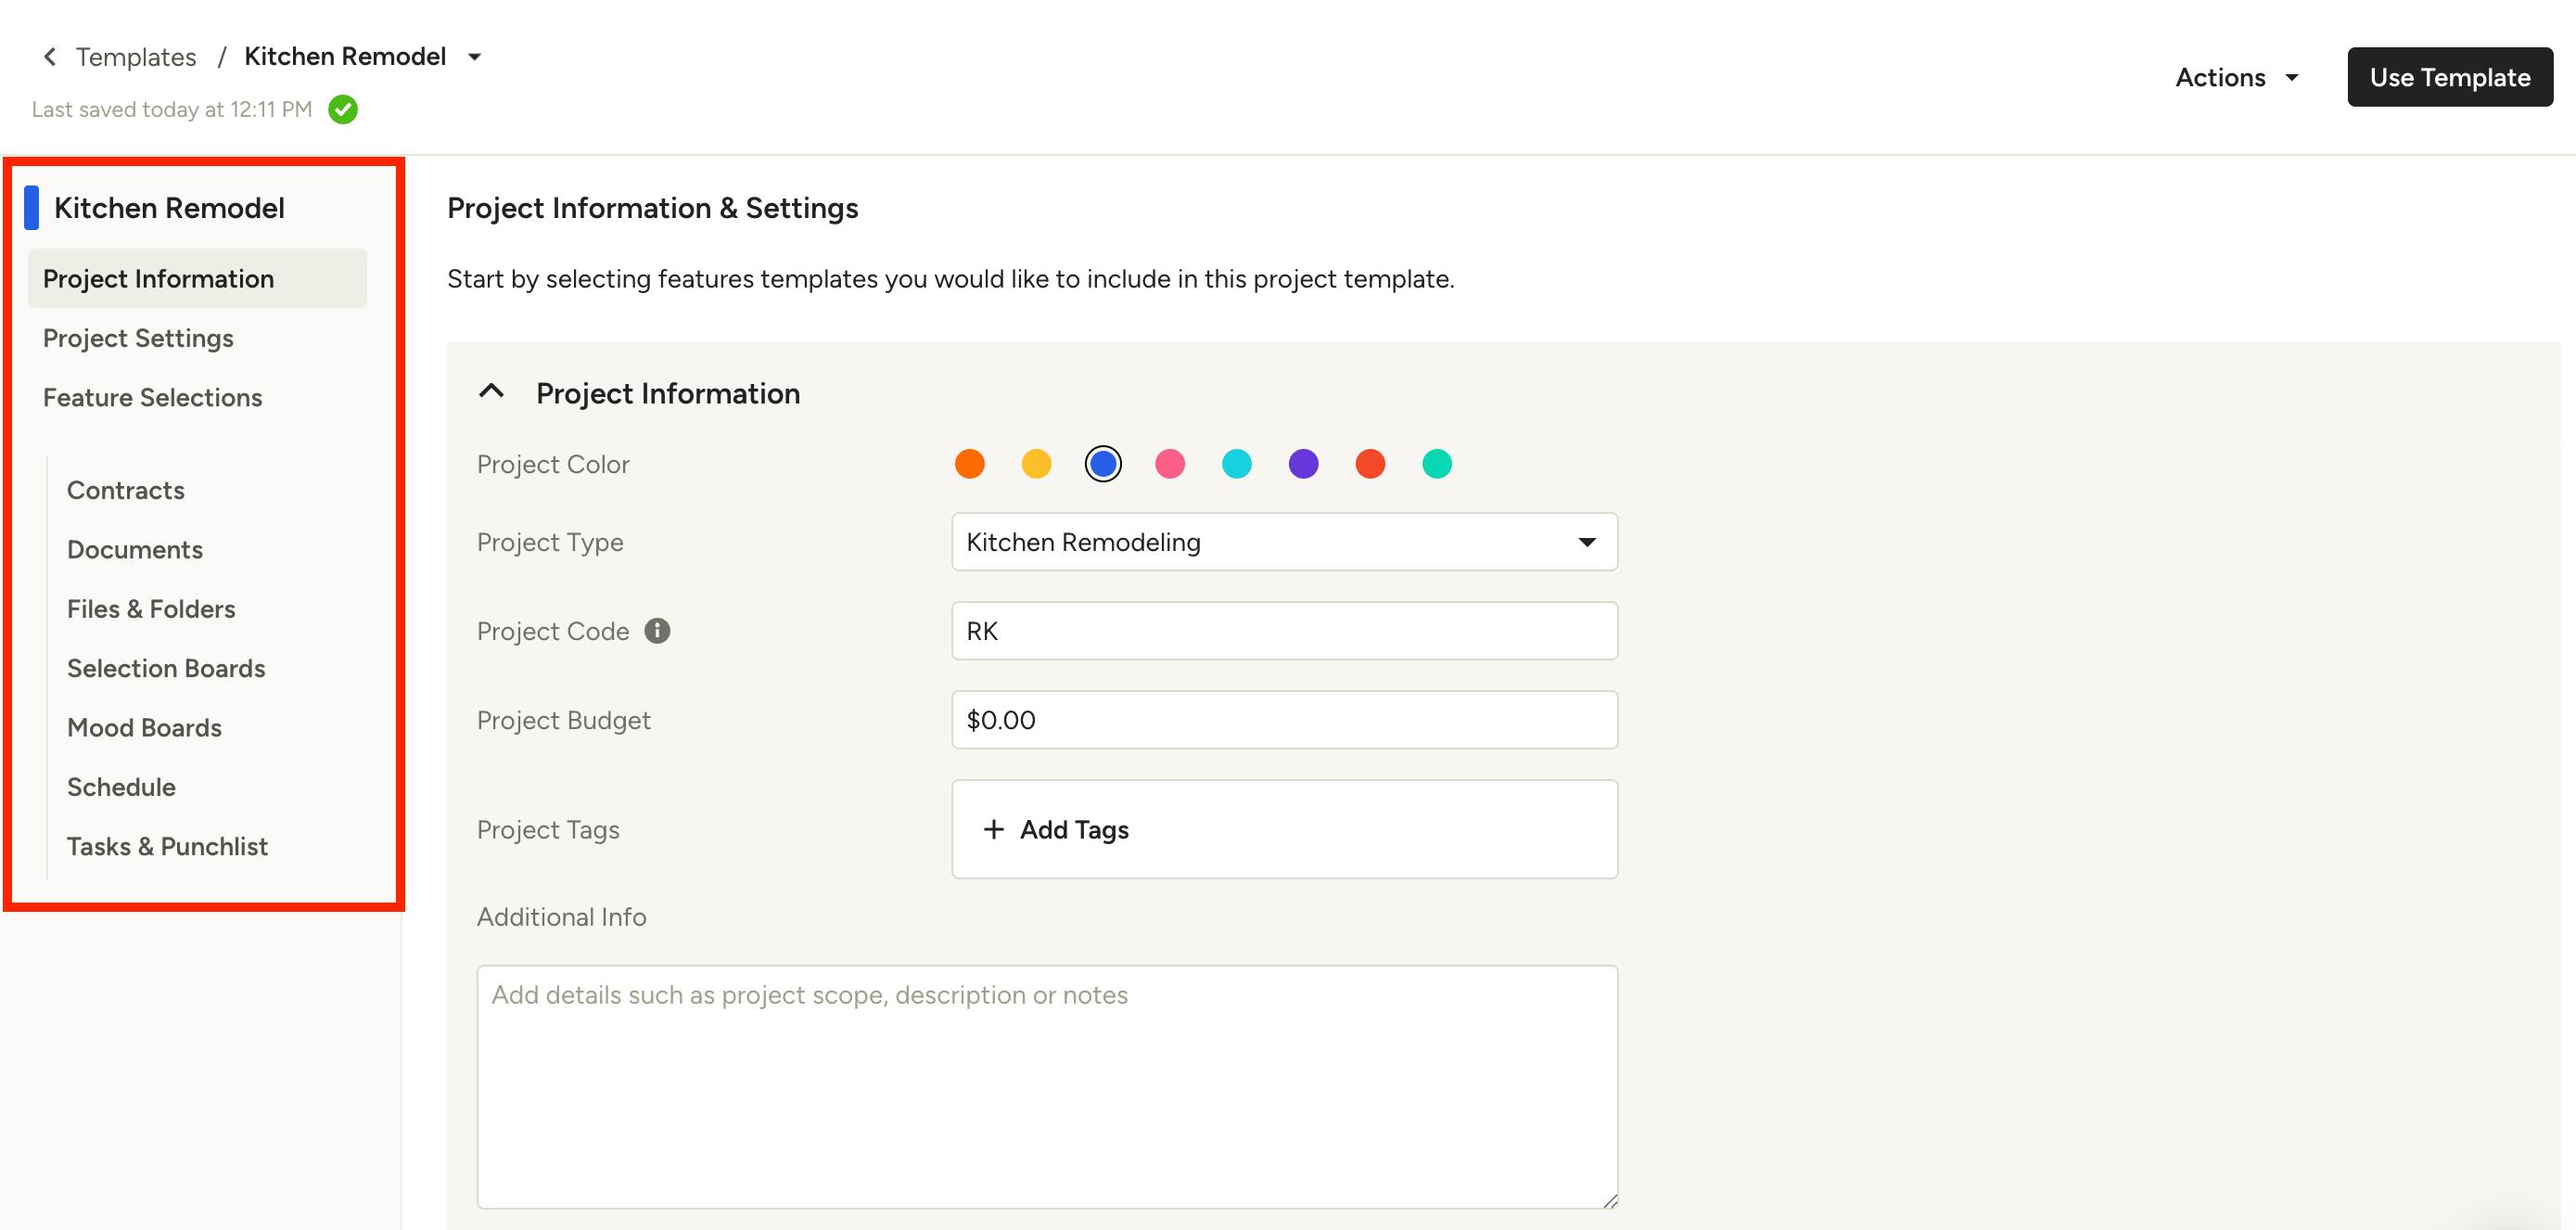
Your project template details will load. Here, you can adjust everything from general project information, project settings, and individual feature templates to include.
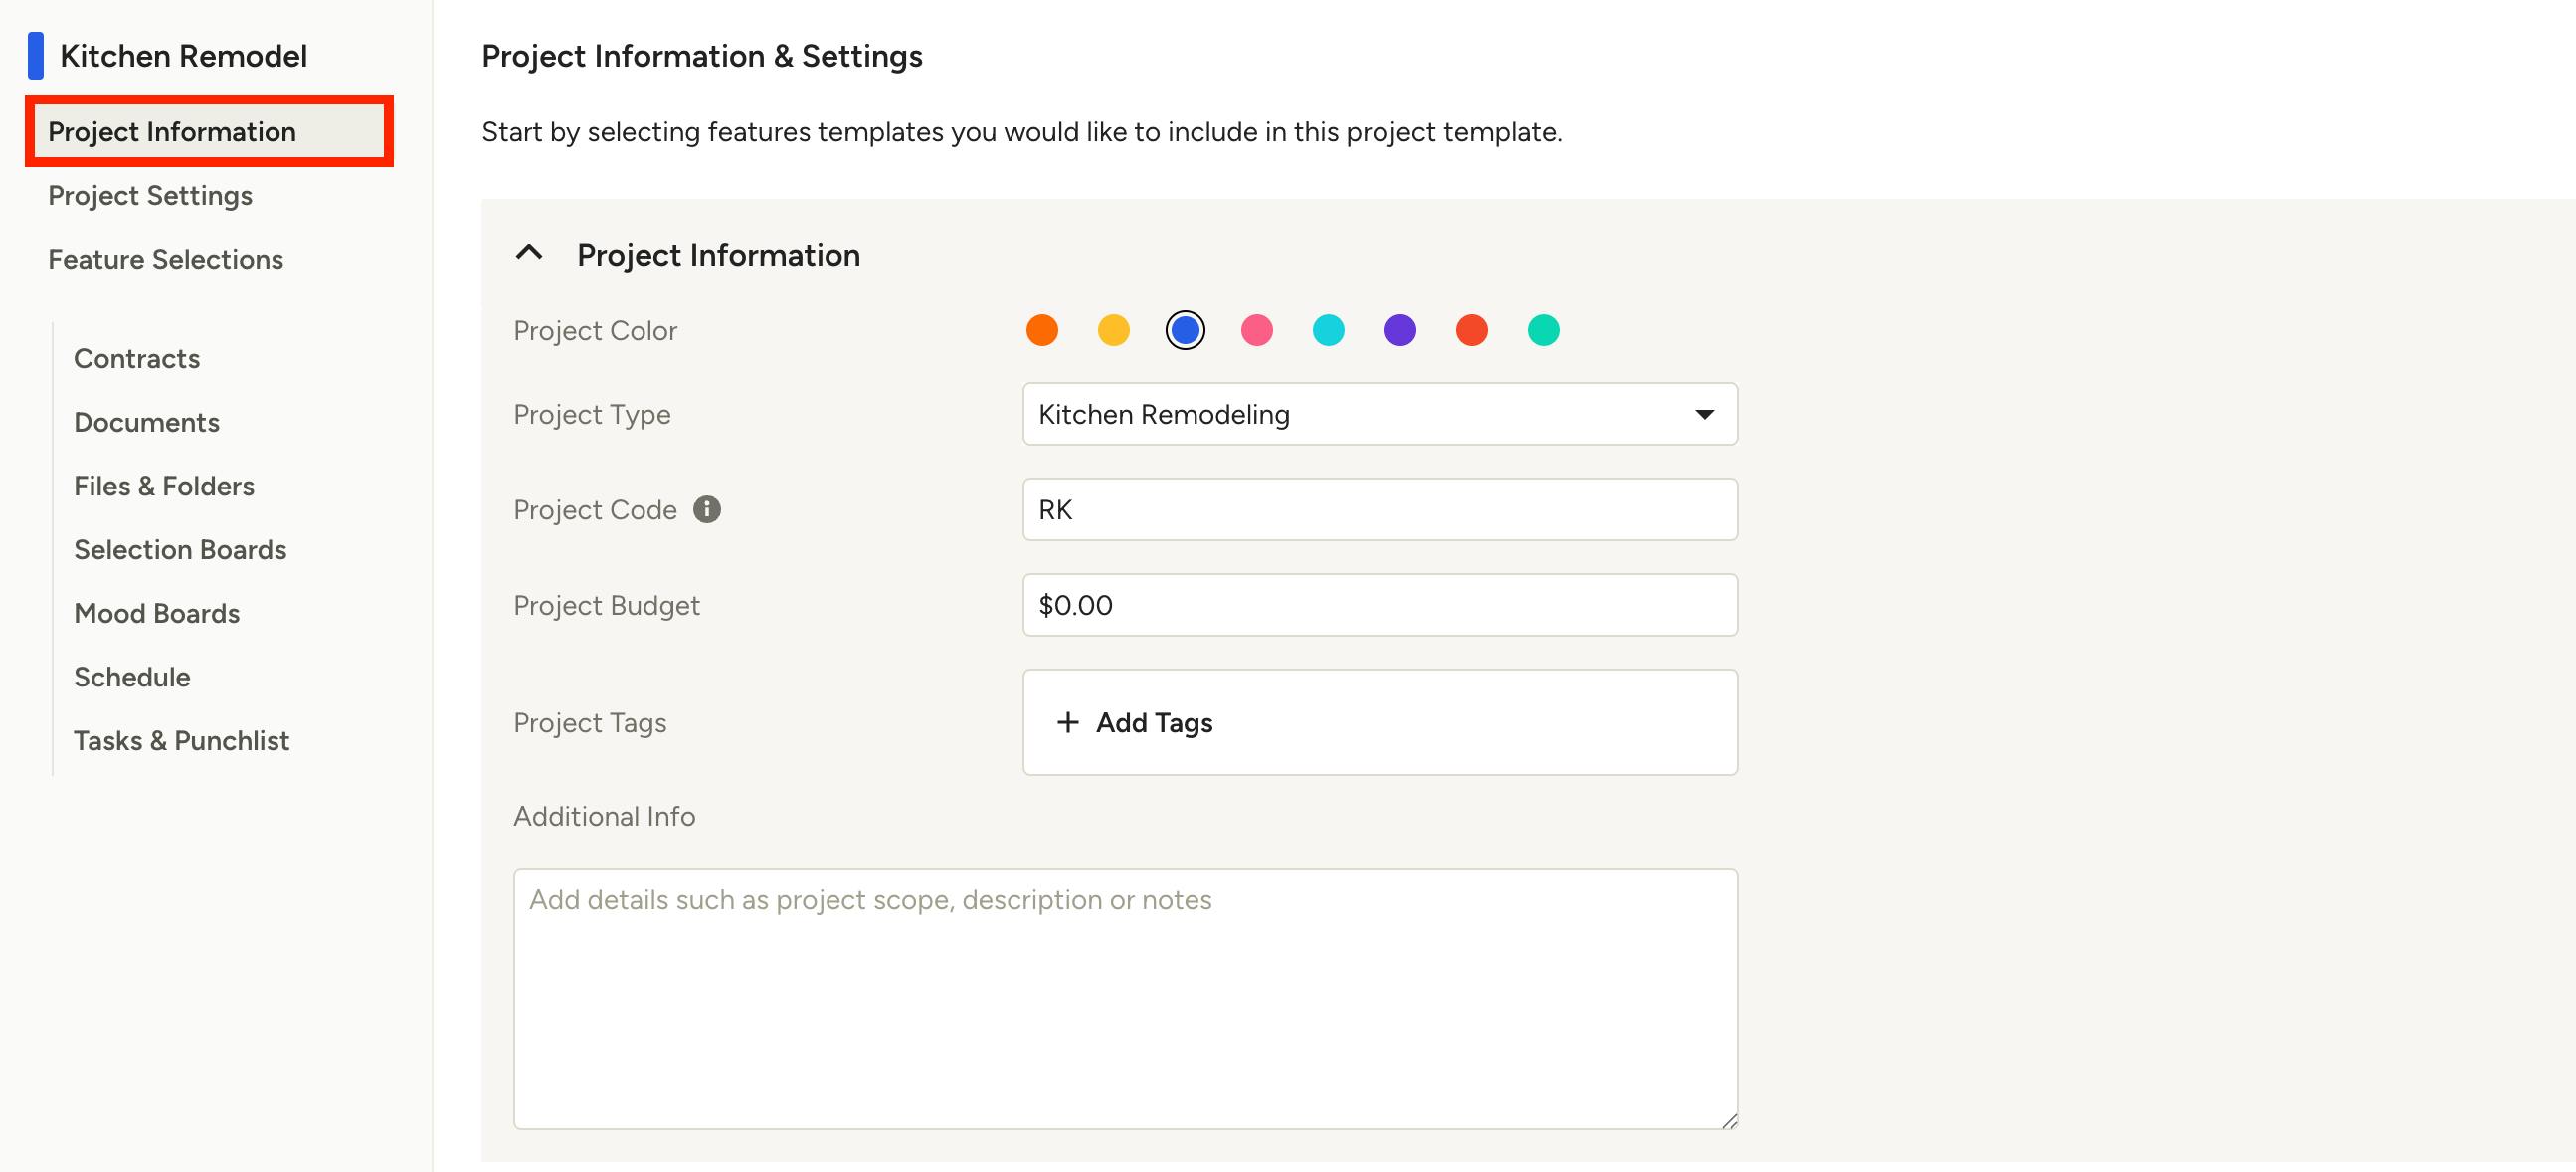
Project Information
Under Project Information, you can adjust the template color, type, code, budget, tags, and additional information. Changes will auto-save.
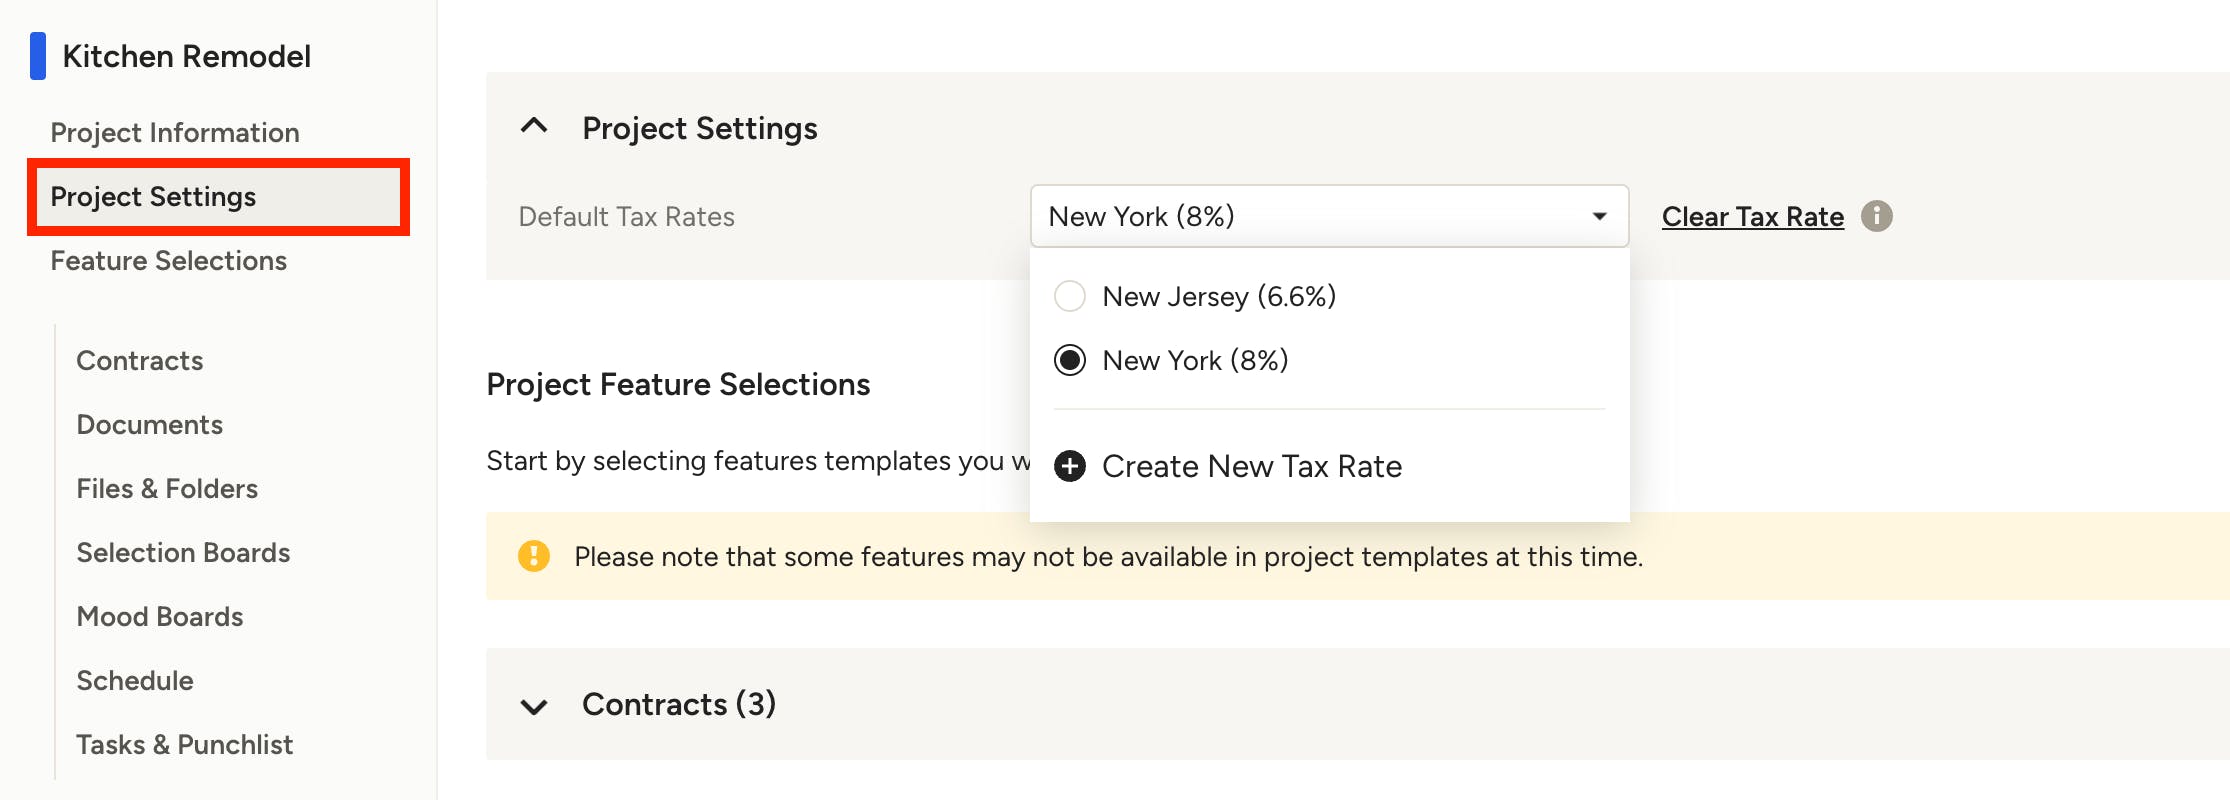
Project Settings
Under Project Settings, you can set the tax rate for your template. You can choose an existing tax from the dropdown menu, or you can create a new tax rate. Changes will auto-save — select Clear Tax Rate to remove your selected option.
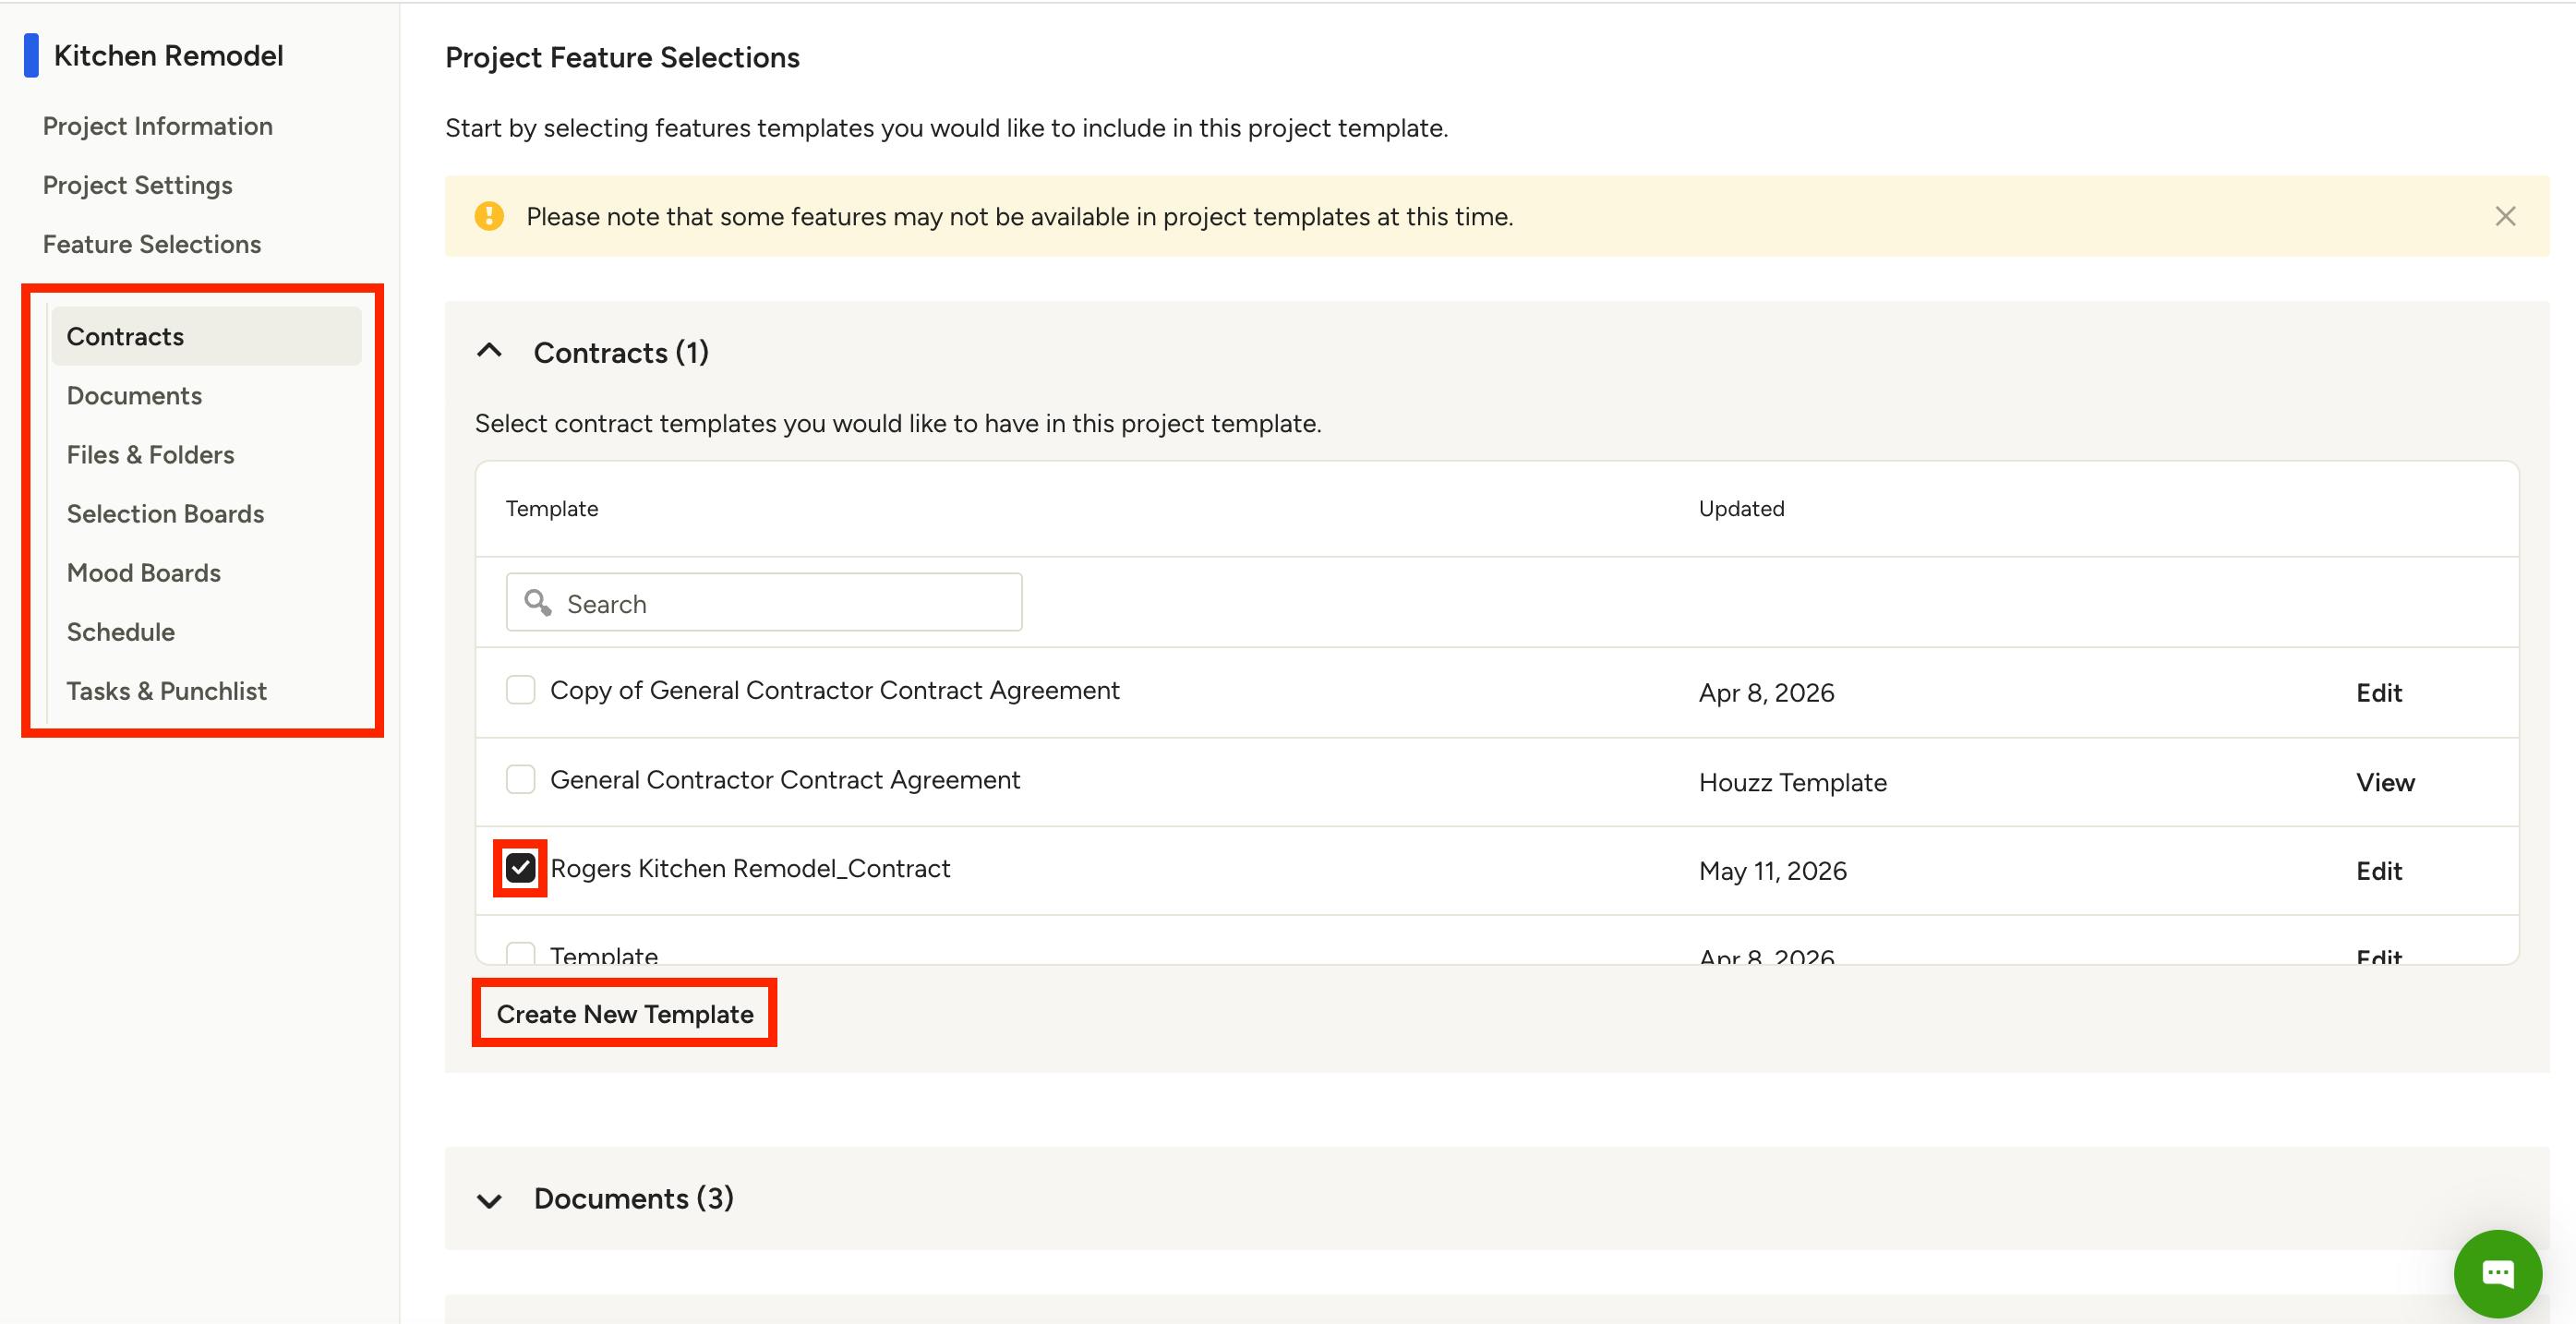
Feature Selections
Under Feature Selections, you can select an existing feature template that you would like to include in your project template.
For Contracts, Documents, Selection Boards, Mood Boards, Schedule, and Tasks & Punchlist, open the relevant section and click the checkbox next to the existing template(s) you would like to include. Select Create New Template if you would like to build a new template to include. Changes will auto-save.
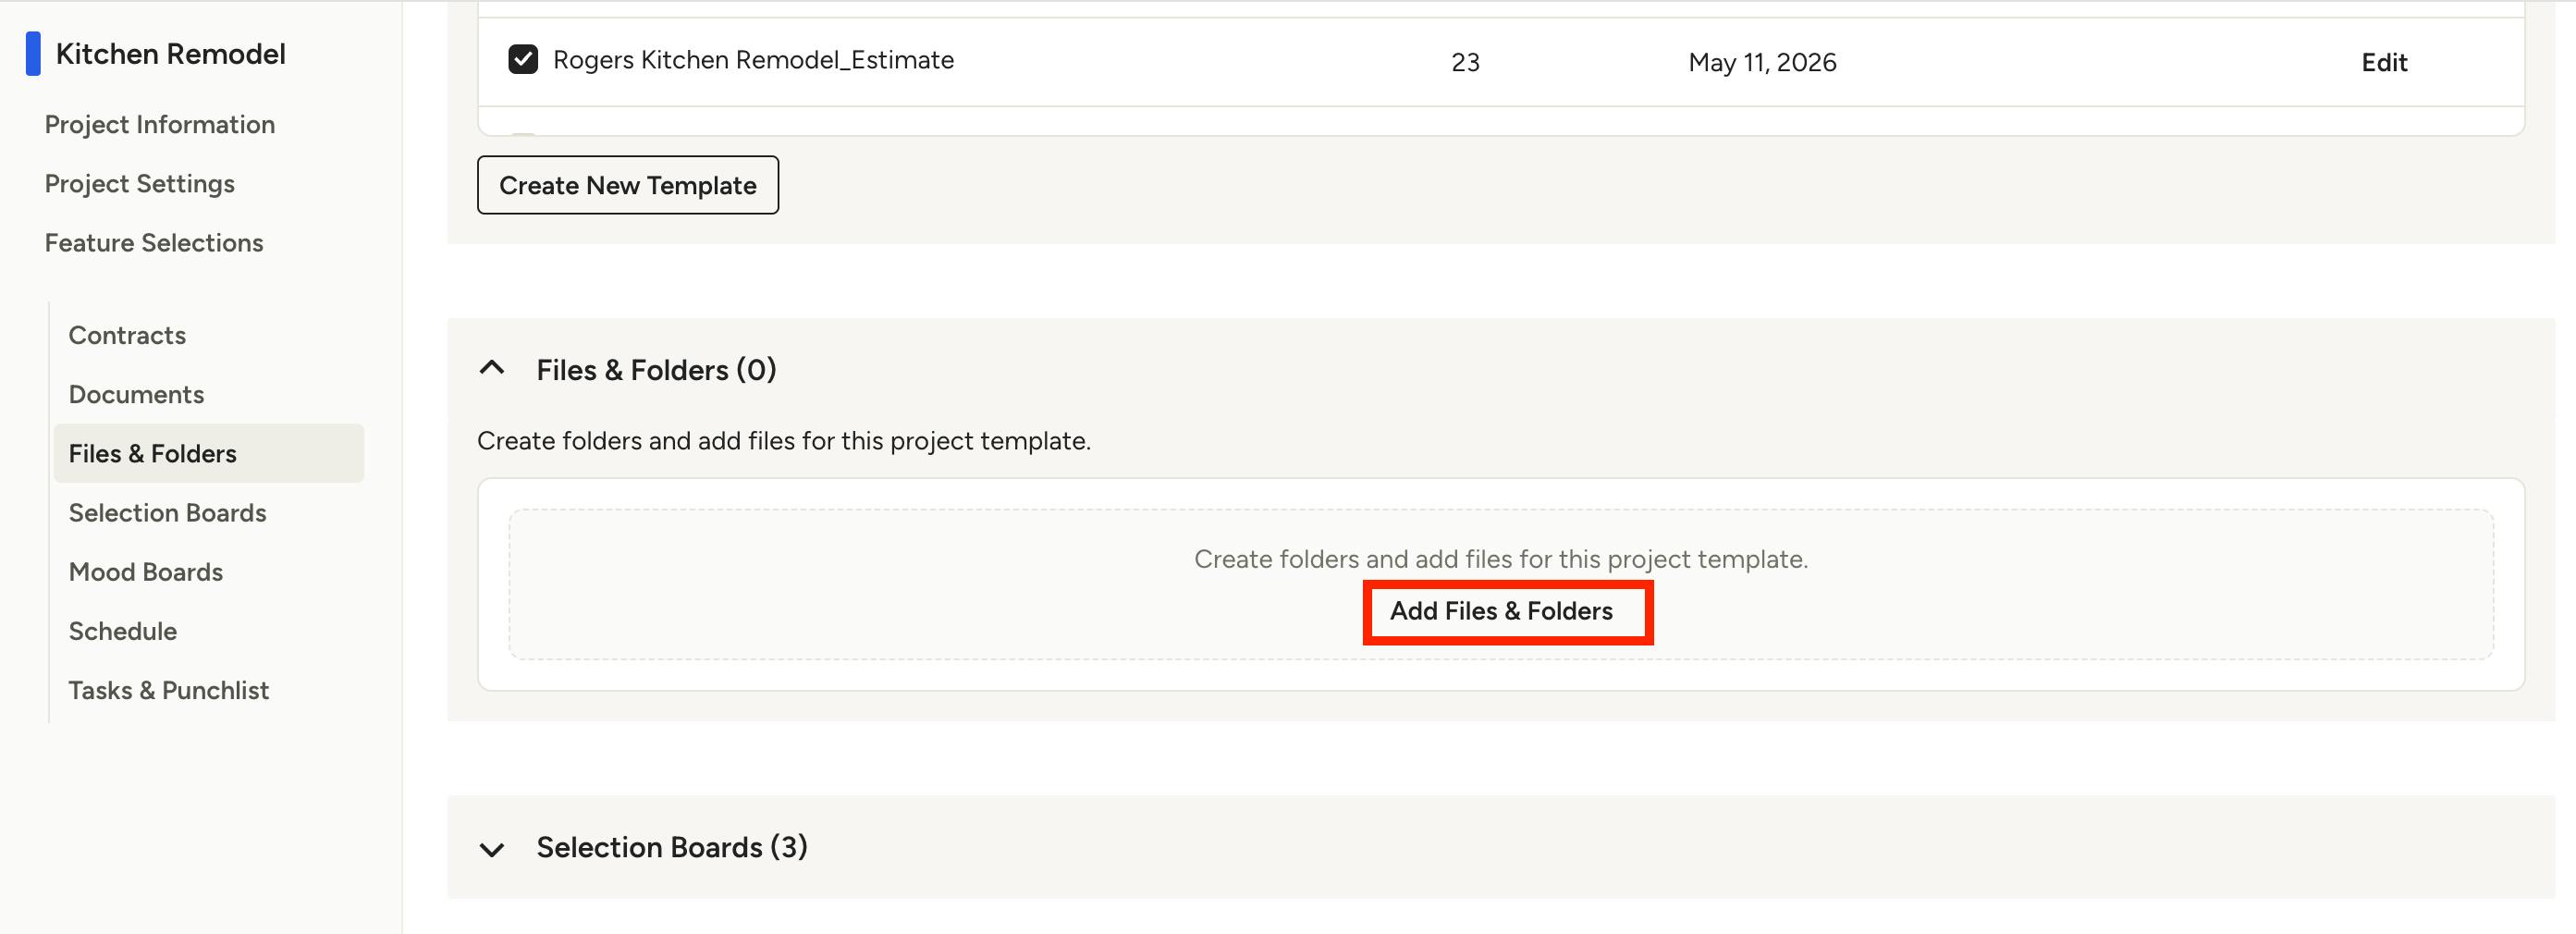
For Files & Folders, there are no template options available. Select Add Files & Folders to pre-select specific folders and/or files to include in your project template.
Create Project Template from Project
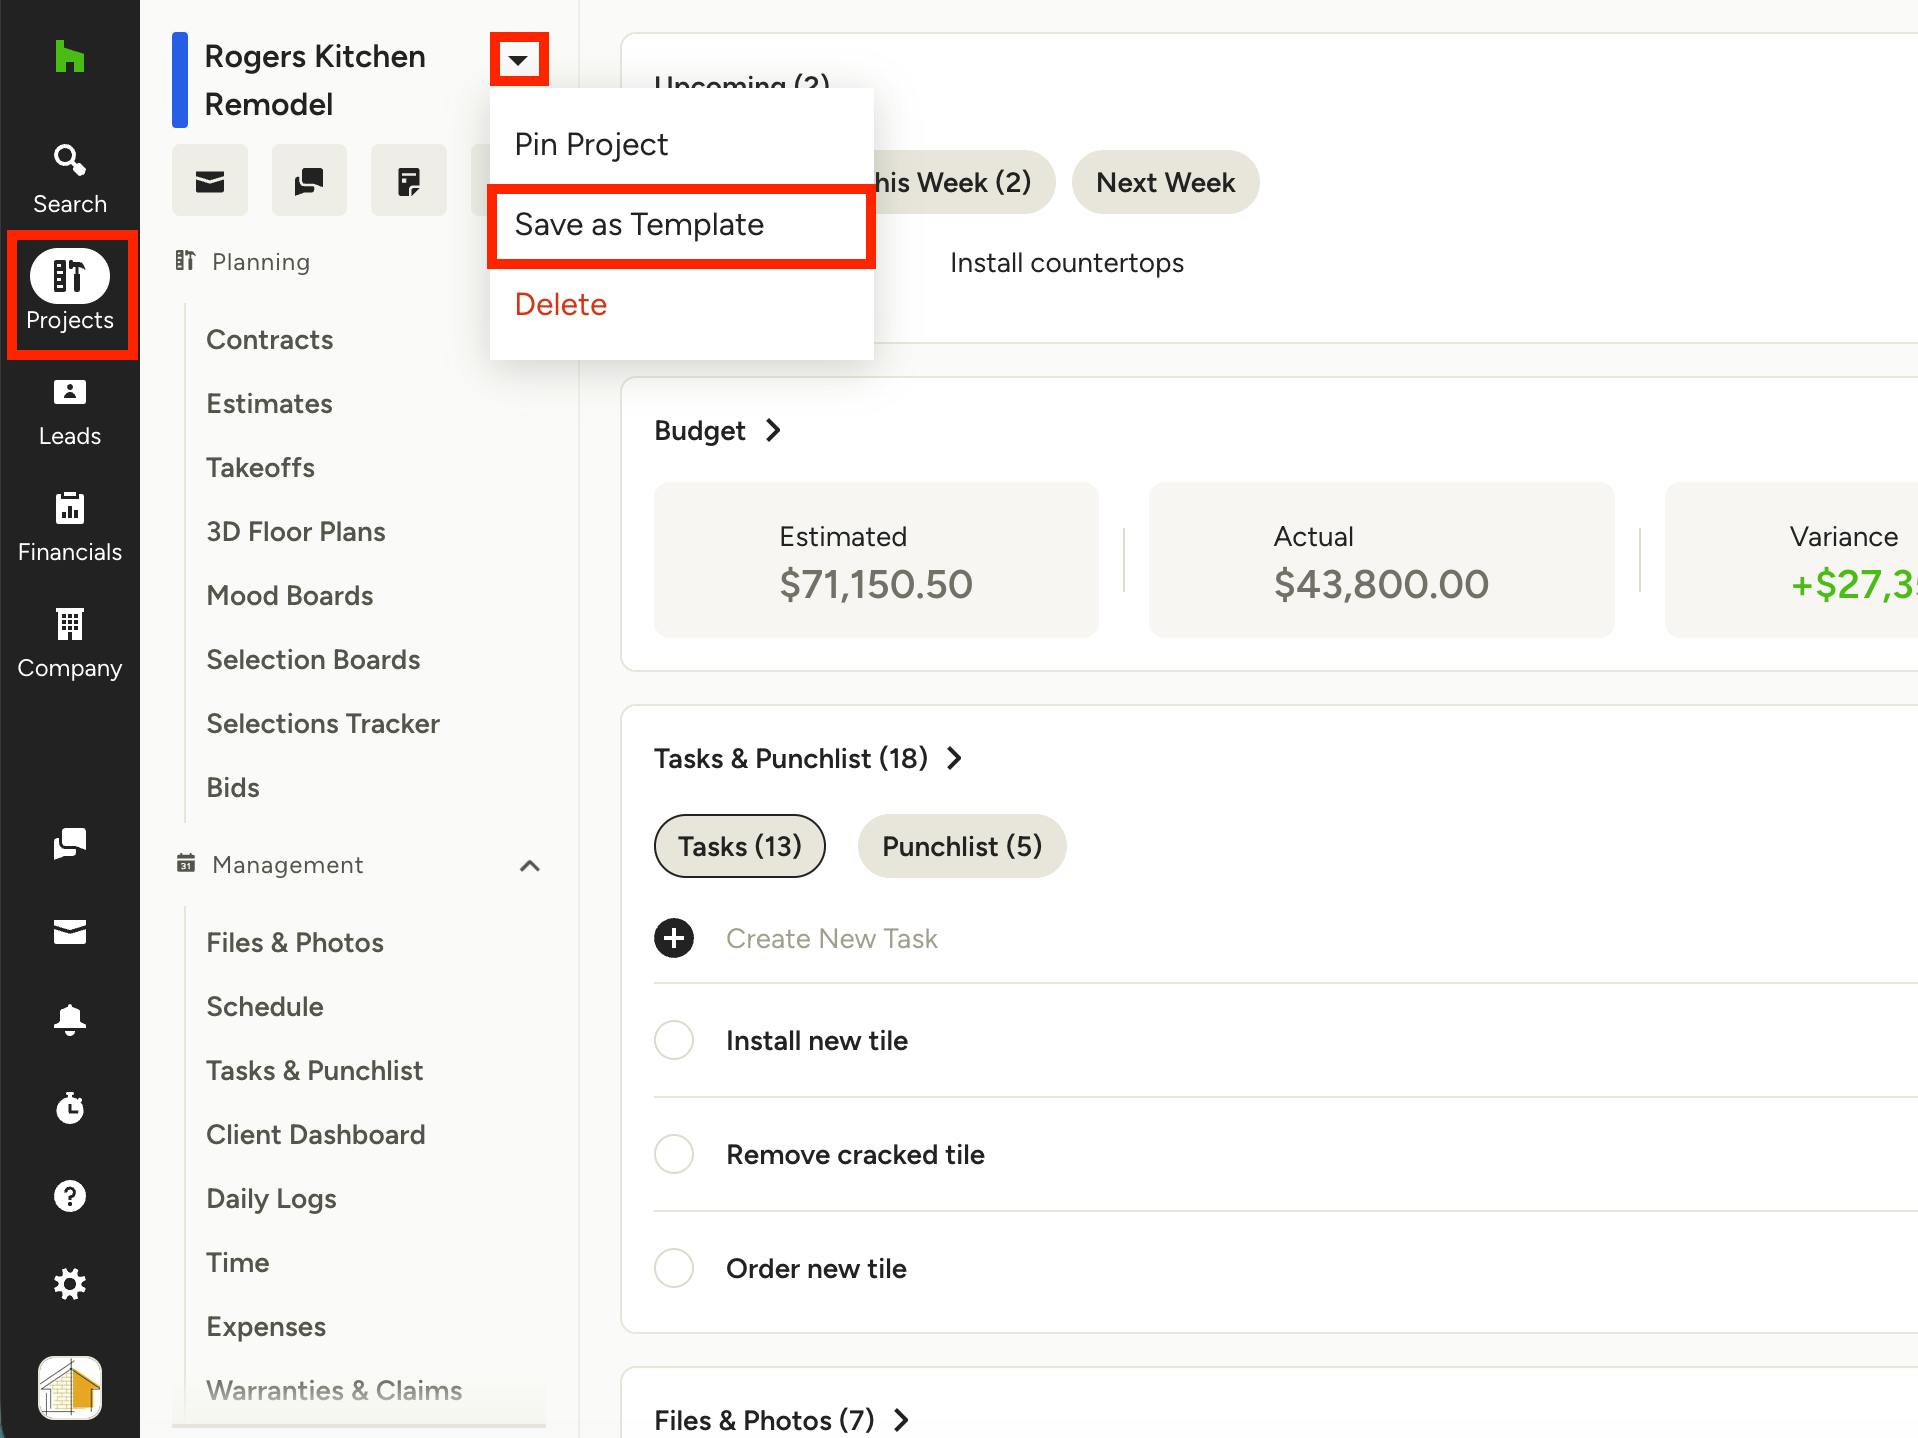
If you want to turn an existing project into a project template for future use, you can do this as well. Select the Projects icon from your left navigation, then click the relevant project to open.
Within the project overview page, click the downward arrow to the right of the project name, then select Save as Template from the dropdown menu.
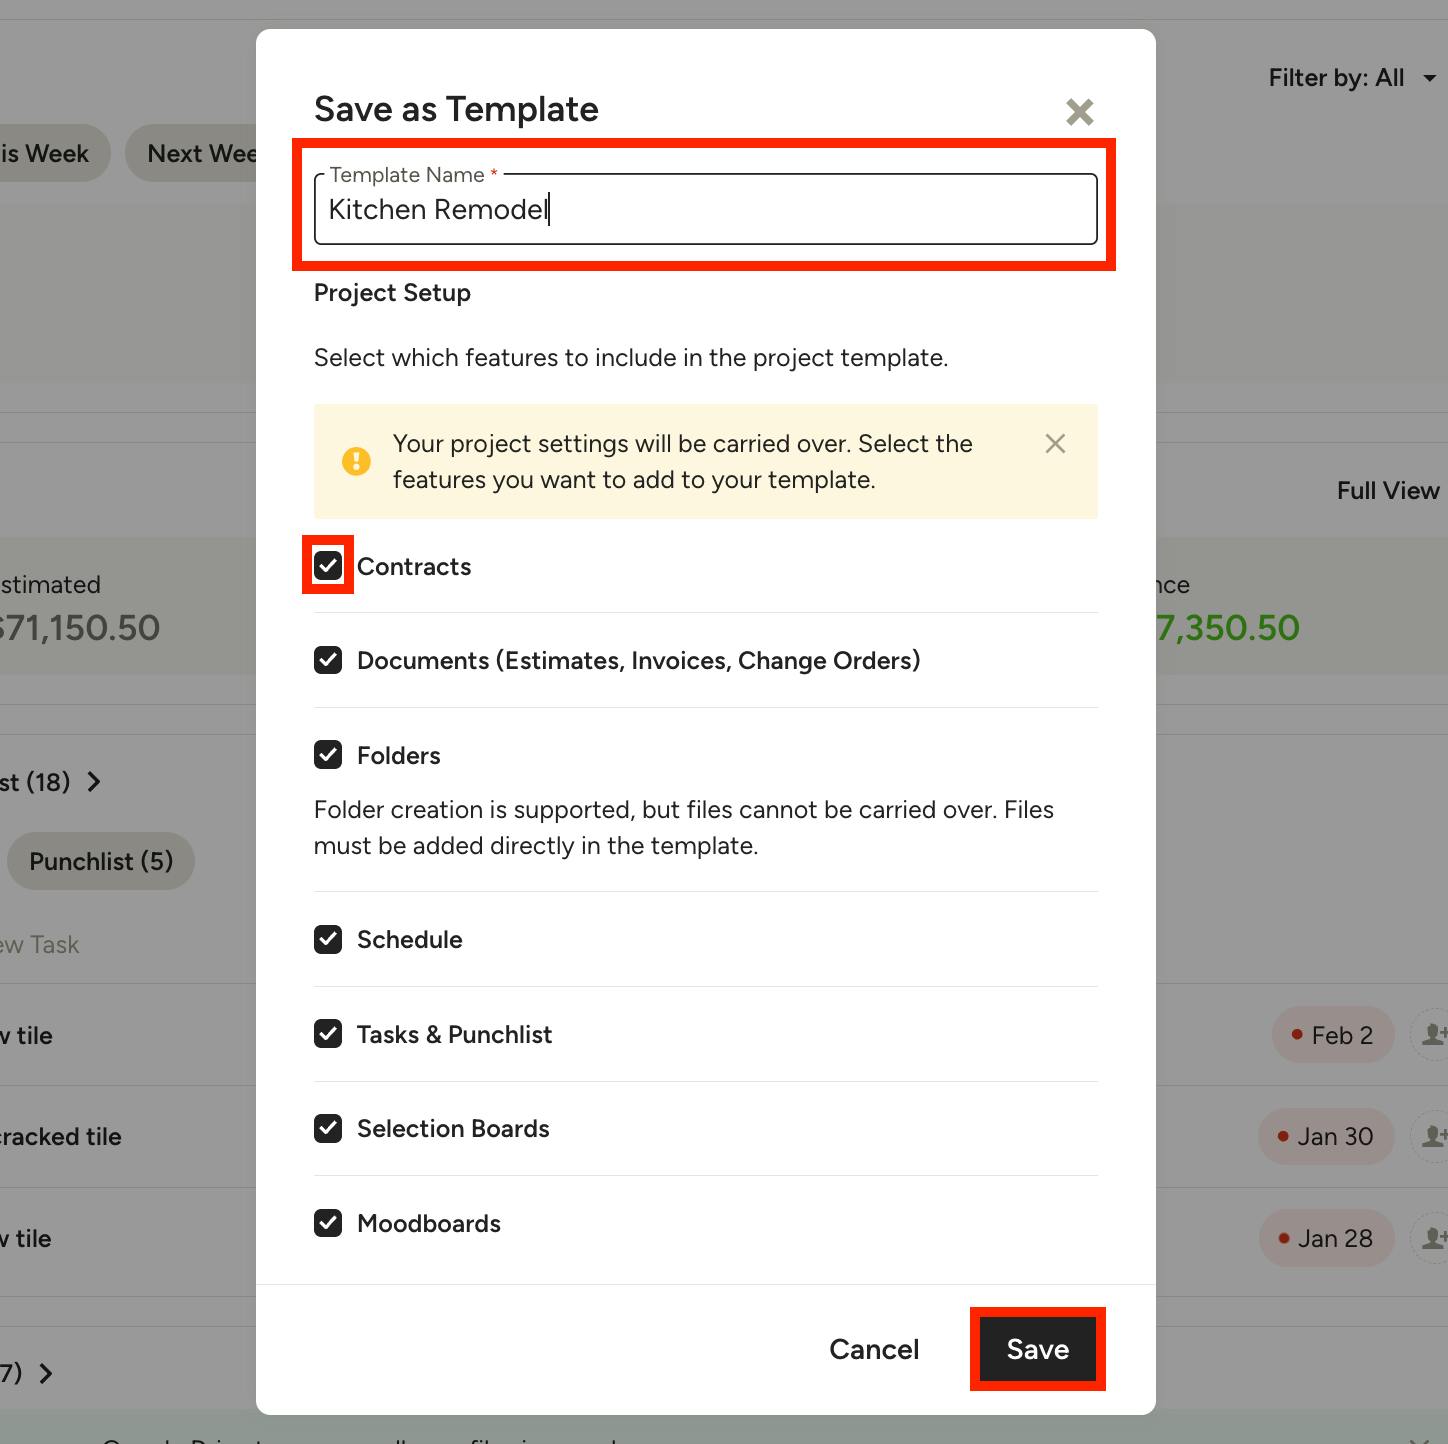
A new screen will appear. Type in the template name at the top. By default, all features will be included in the project template, including Contracts, Documents, Folders (not files), Schedule, Tasks & Punchlist, Selection Boards, and Moodboards. If you would like to remove a feature from your template, uncheck the checkbox next to that feature.
Click Save once Complete.
A new notification will appear at the bottom of your screen to let you know the template was created — click View to see the template.
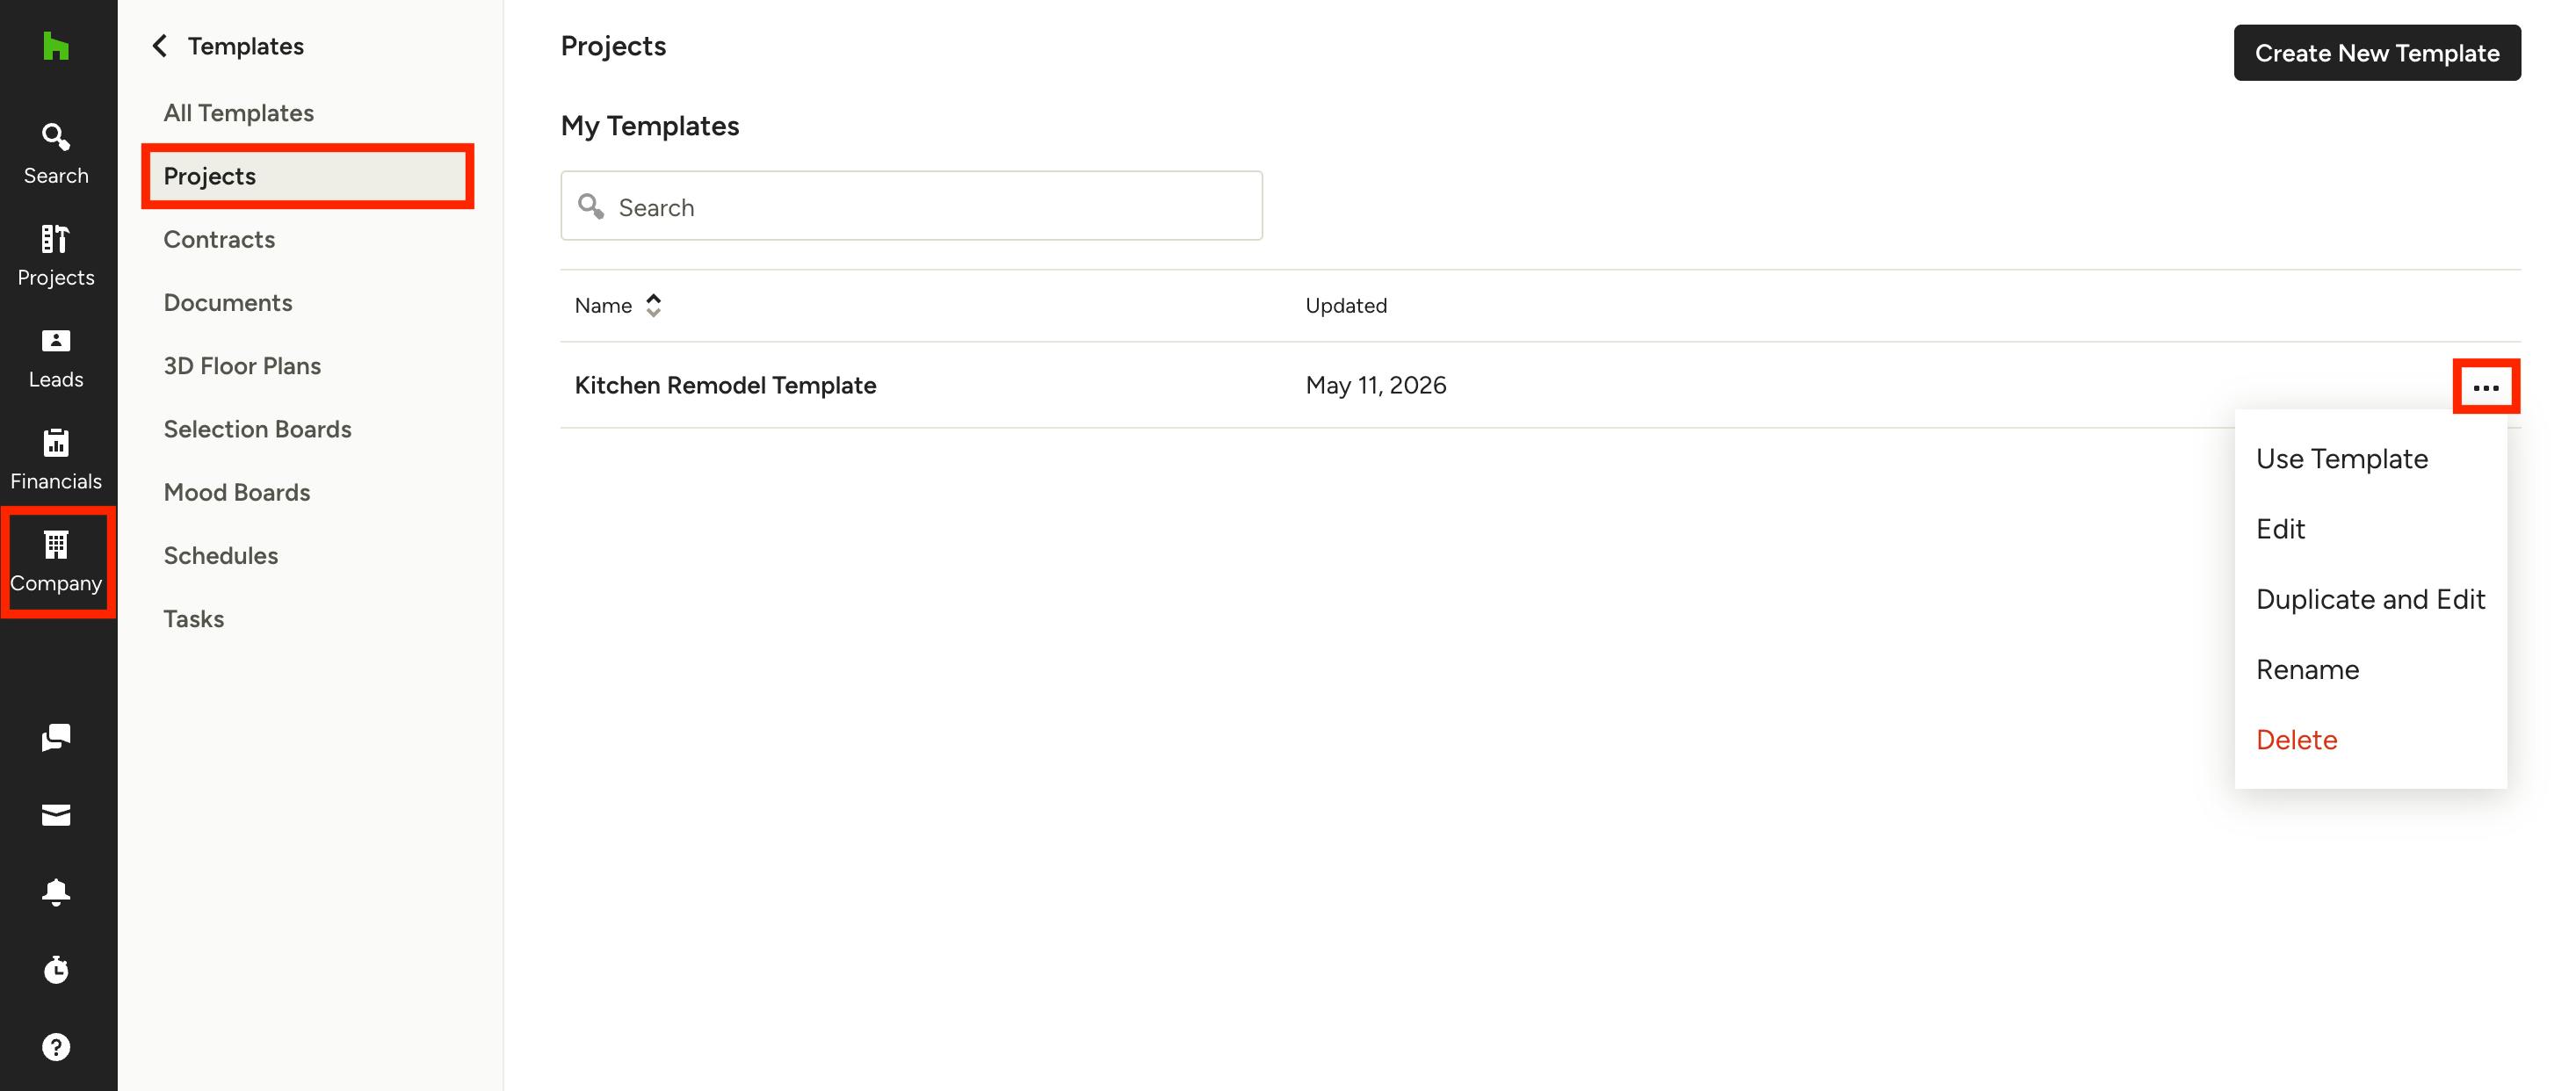
You can also access the template in the Template Center. To do this, select the Company icon from your left navigation, then click Templates in the menu. Once in the Template Center, select Projects from the left menu.
From here, click the three dots icon next to the project template to Use Template, Edit, Duplicate and Edit, Rename or Delete.
Apply Project Template
Once your project template is complete, you can use it to build out your new project.
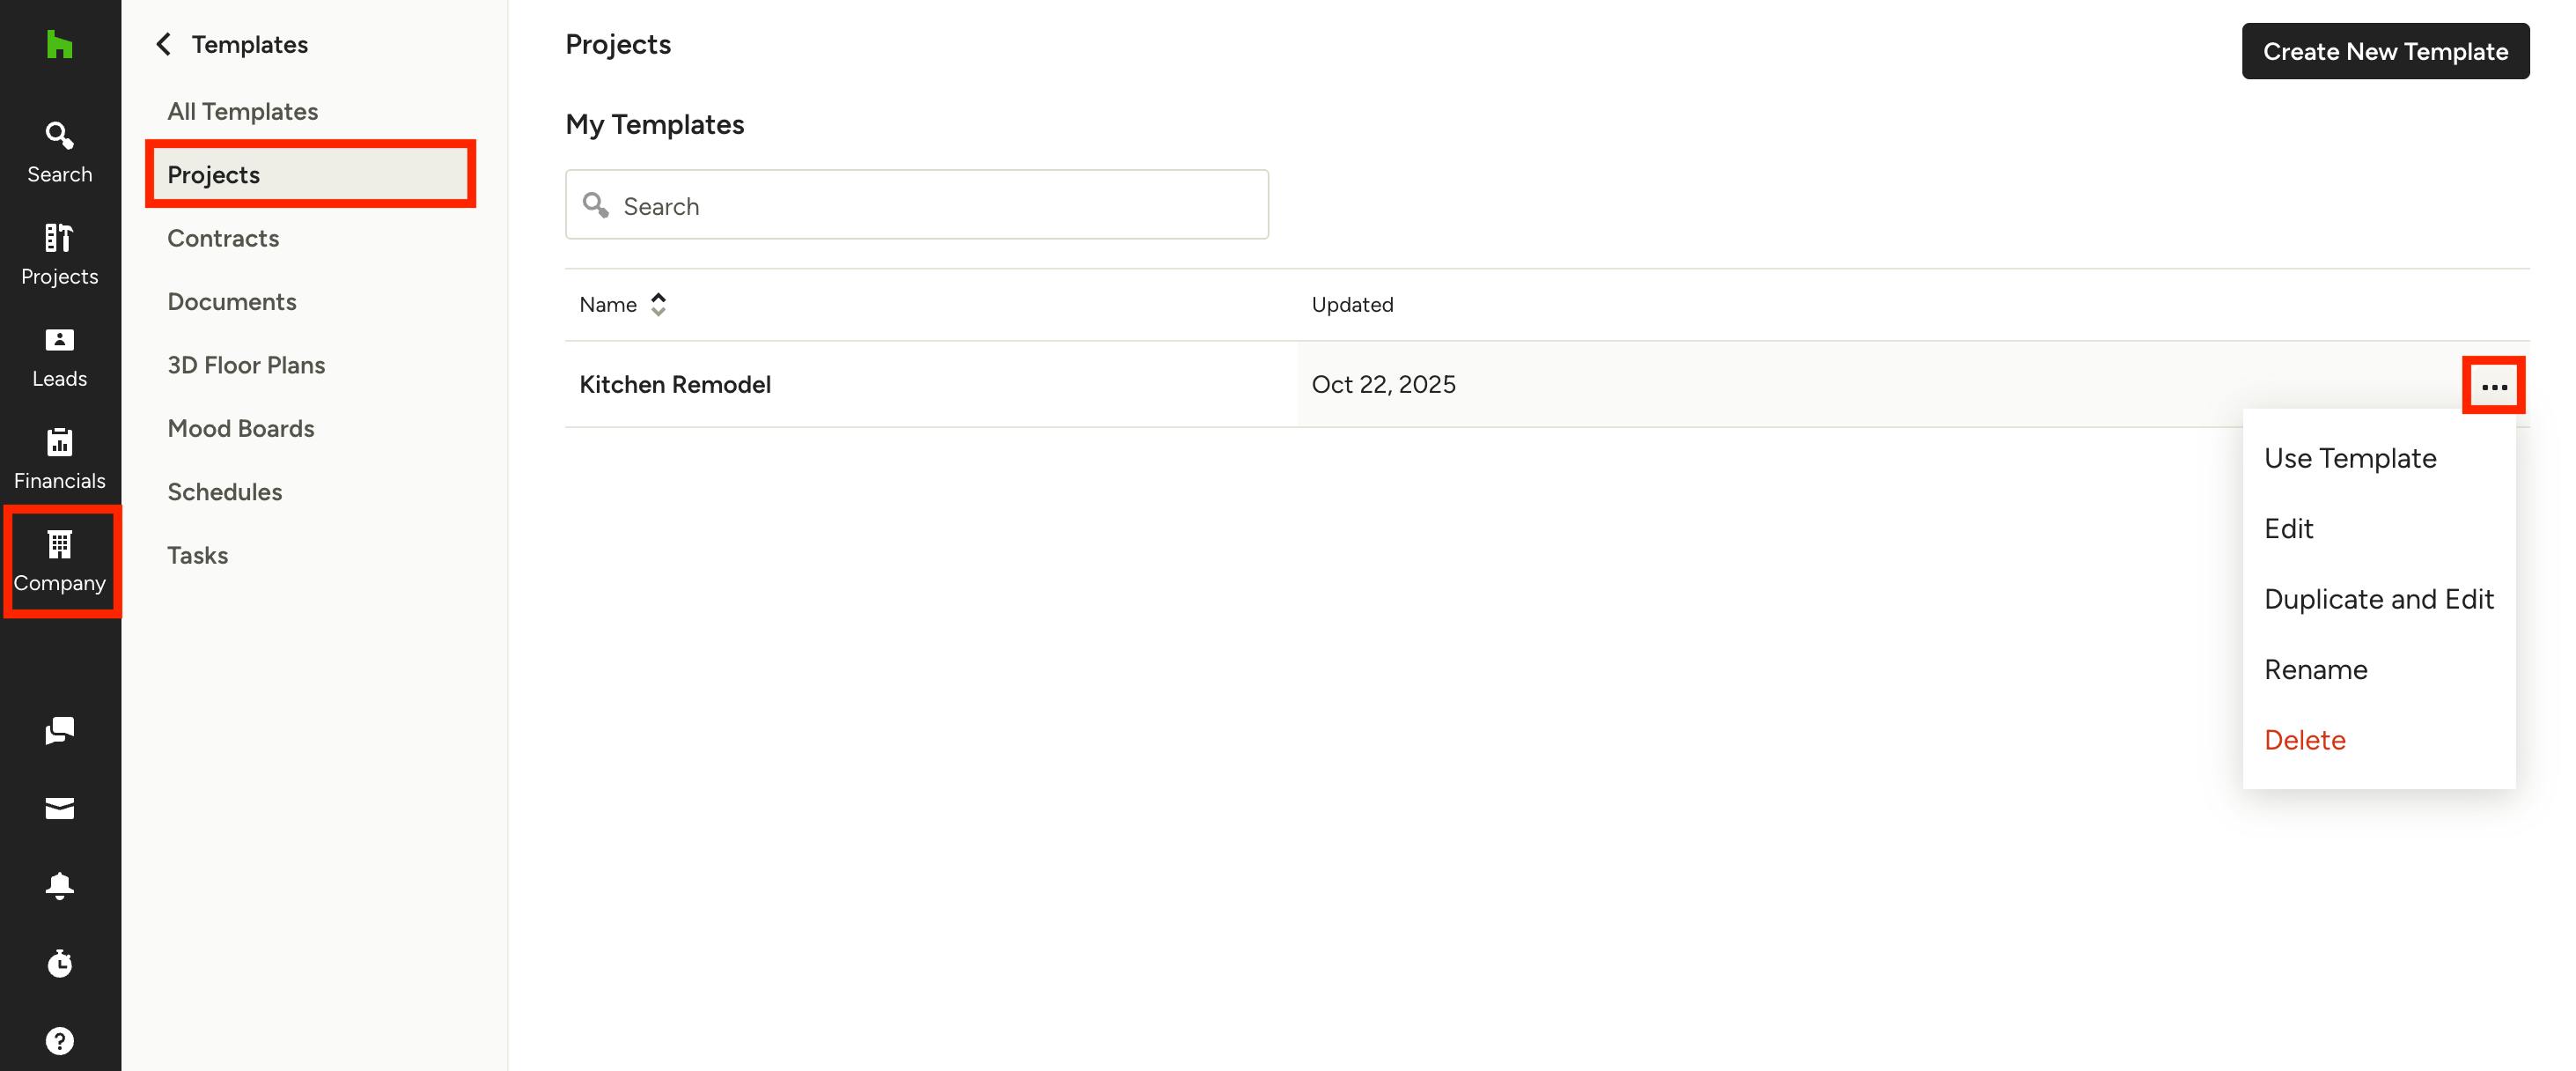
To do this, you will need to access the template from the Template Center — you cannot access from Projects. Select the Company icon from your left navigation. Click Templates in the left menu, then select Projects in the Template Center.
Your existing project templates will appear. Select the three dots icon on the right of your template. Here, you can Edit, Duplicate and Edit, Rename and Delete. Select Use Template to implement with a new project.
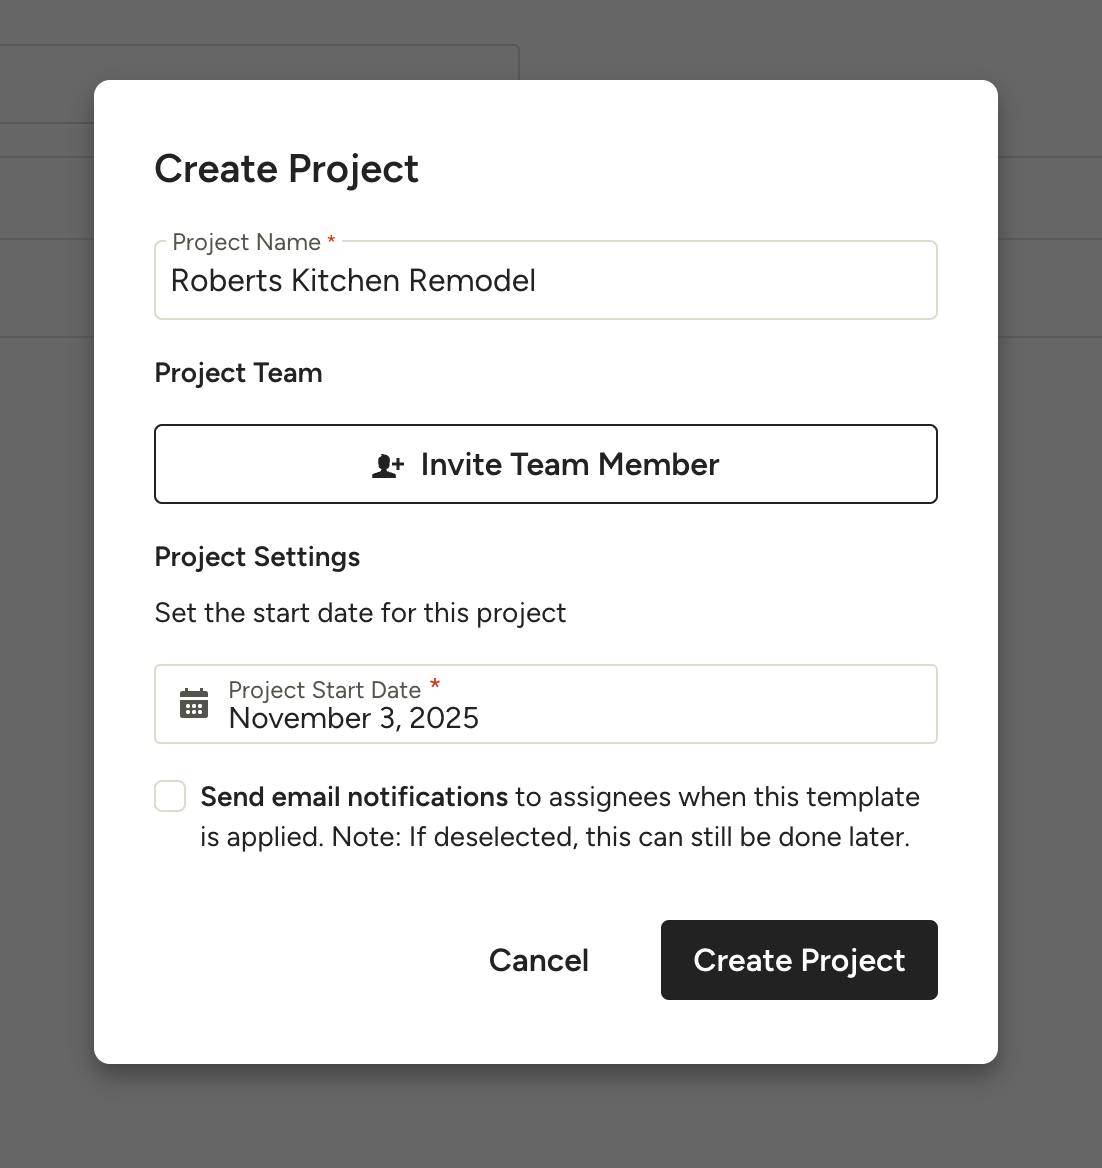
A new screen will appear. Input the project name, invite team members, and add a start date. Click the checkbox at the bottom if you would like to send email notifications to assignees (this can be done later on as well).
Once complete, click Create Project.
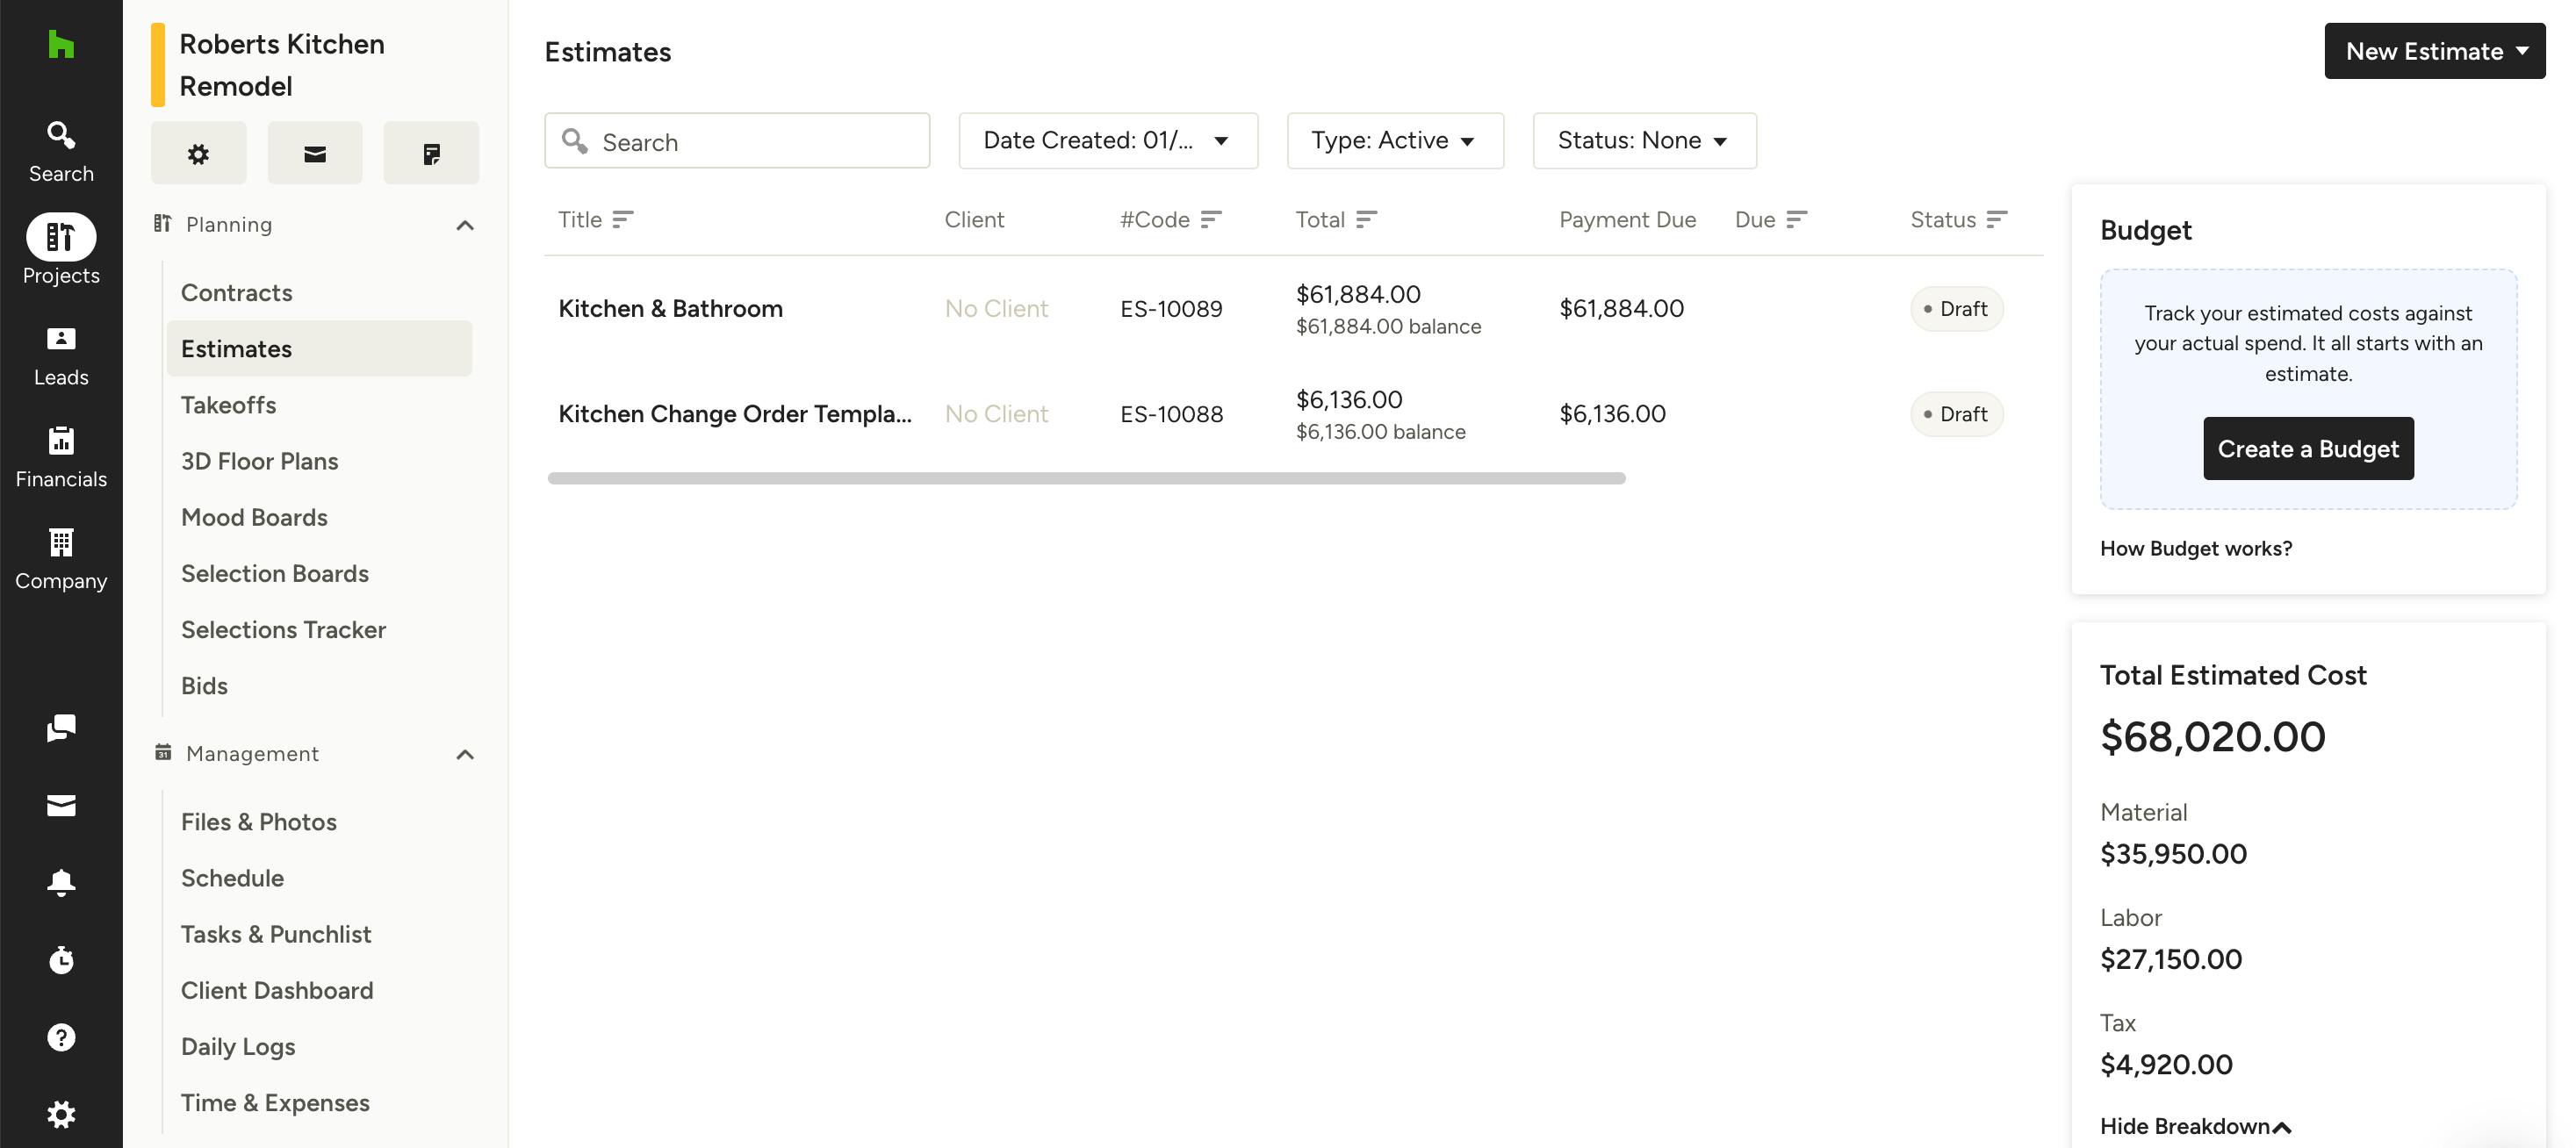
The new project will appear with all the relevant templates and information.