How to Set Tax Rates
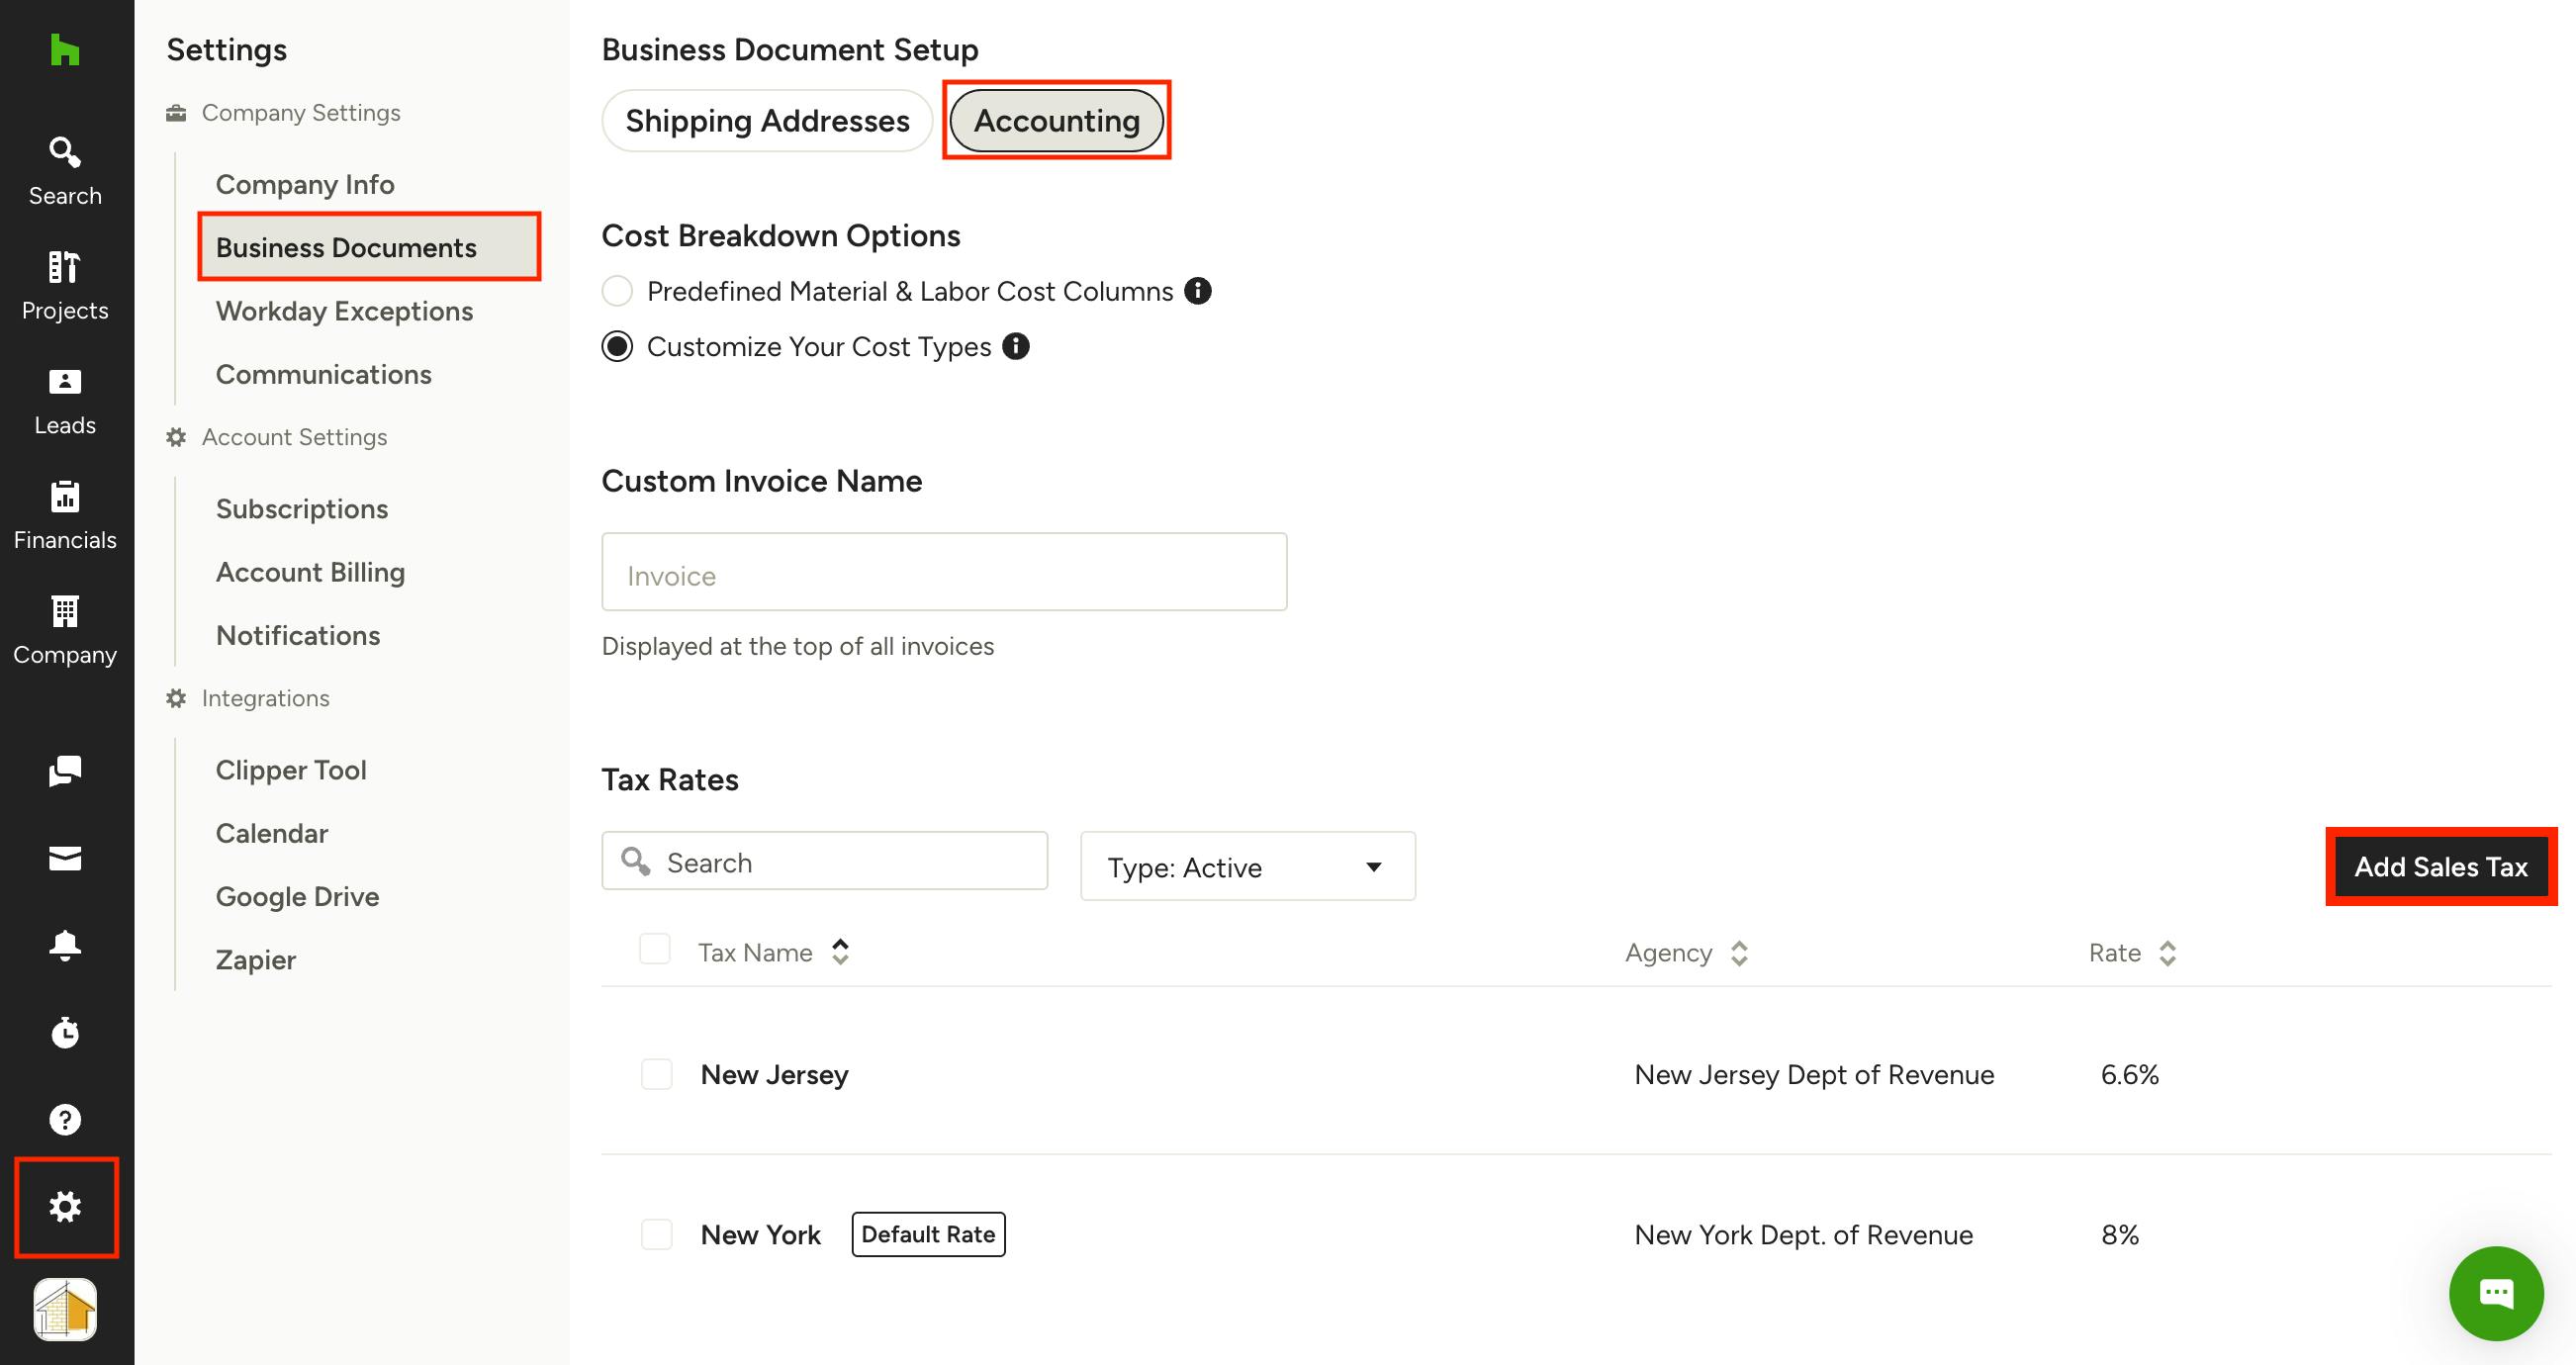
In your Houzz Pro Settings, you can create and save multiple sales tax rates to use as needed in your projects. Here's how to set that up.
To start:
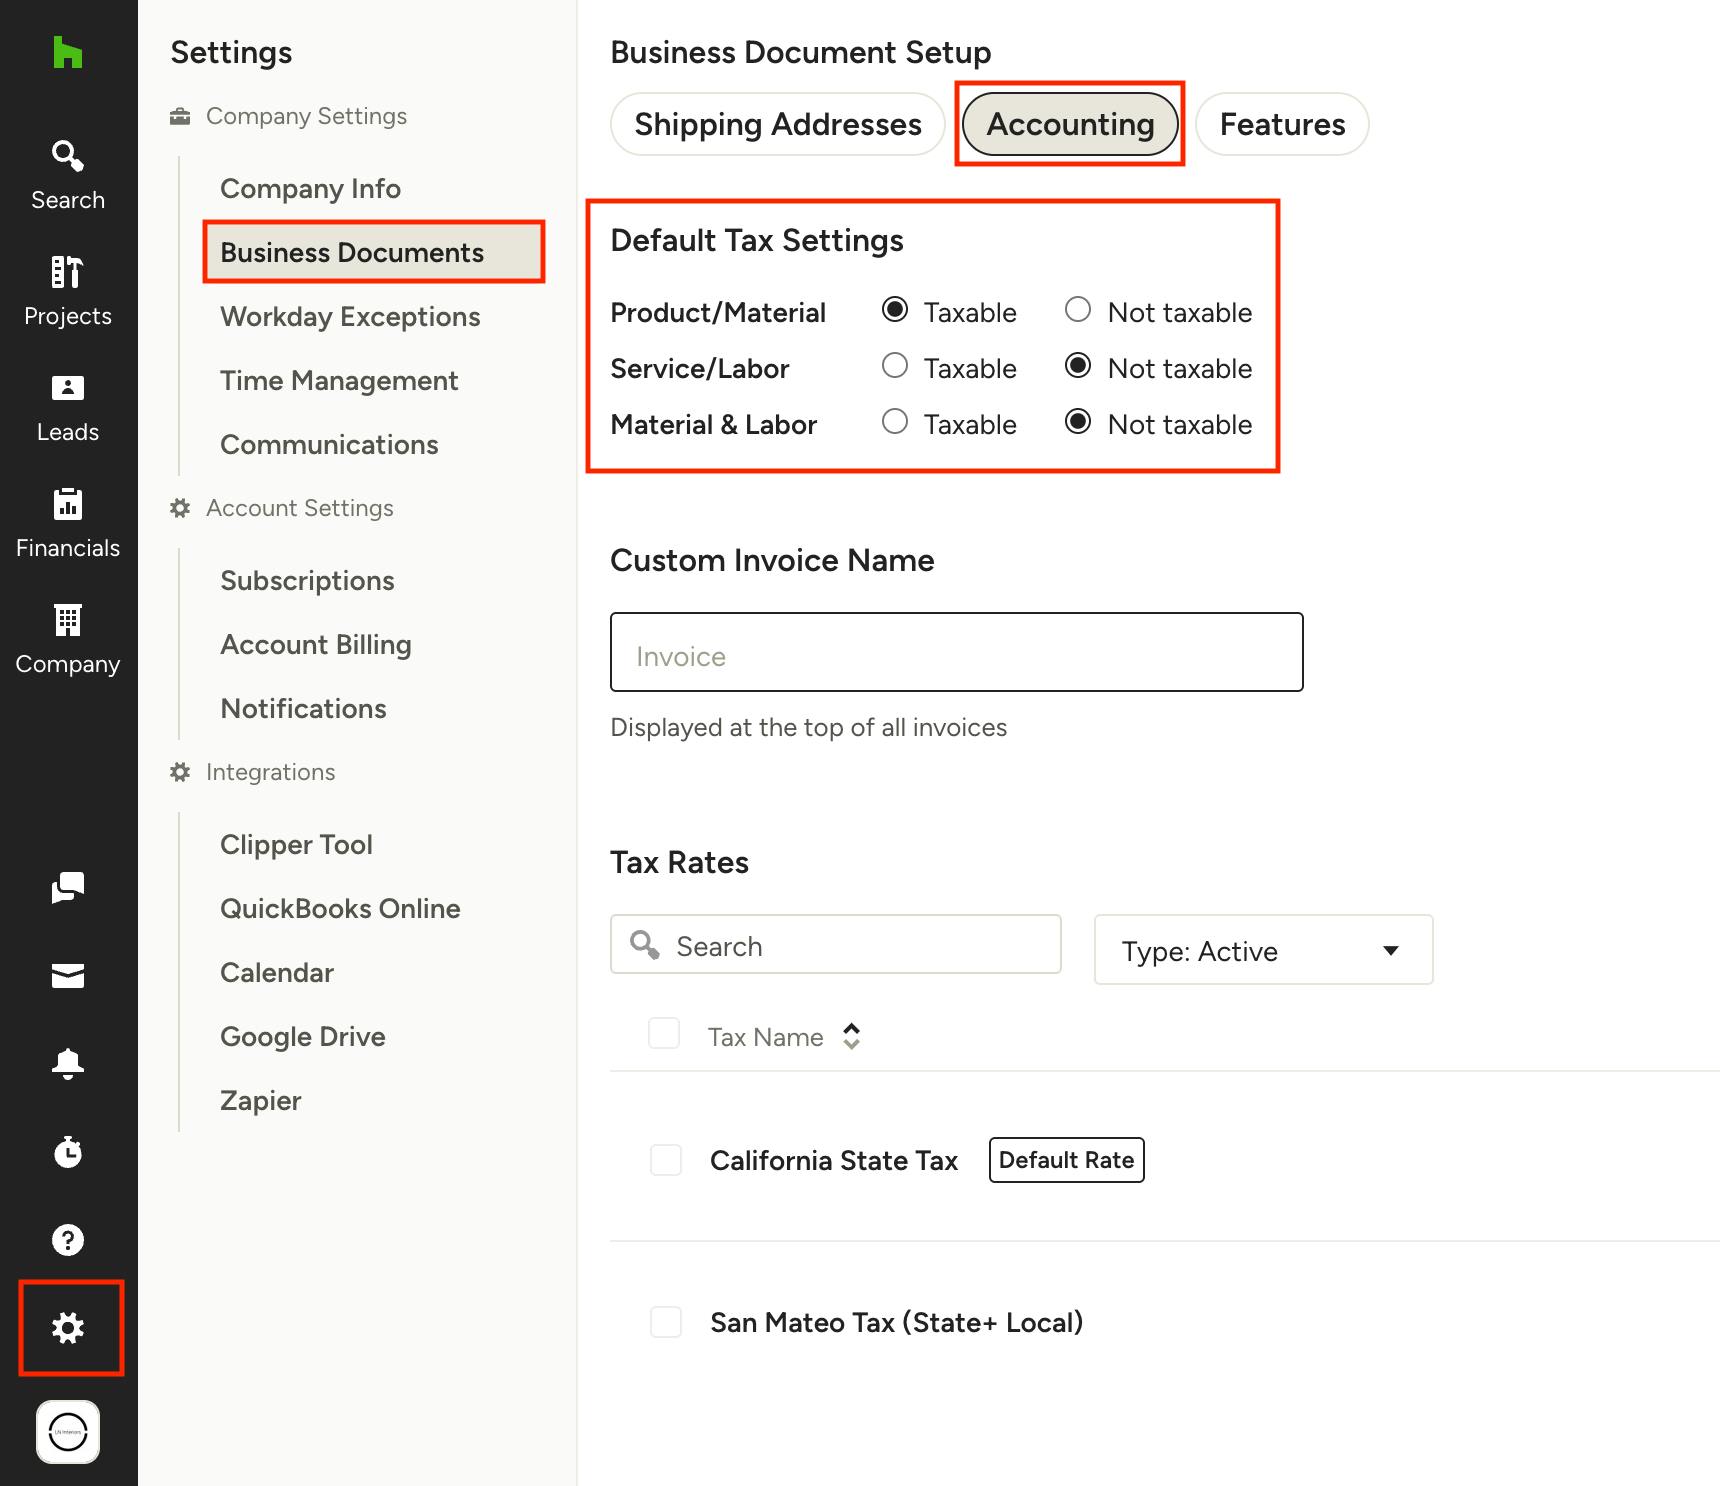
- Select the Settings icon near the bottom of your left navigation, then click on Business Documents in the menu.
- Under Business Document Setup at the top of the page, select Accounting.
- Click Add Sales Tax to add a new tax.
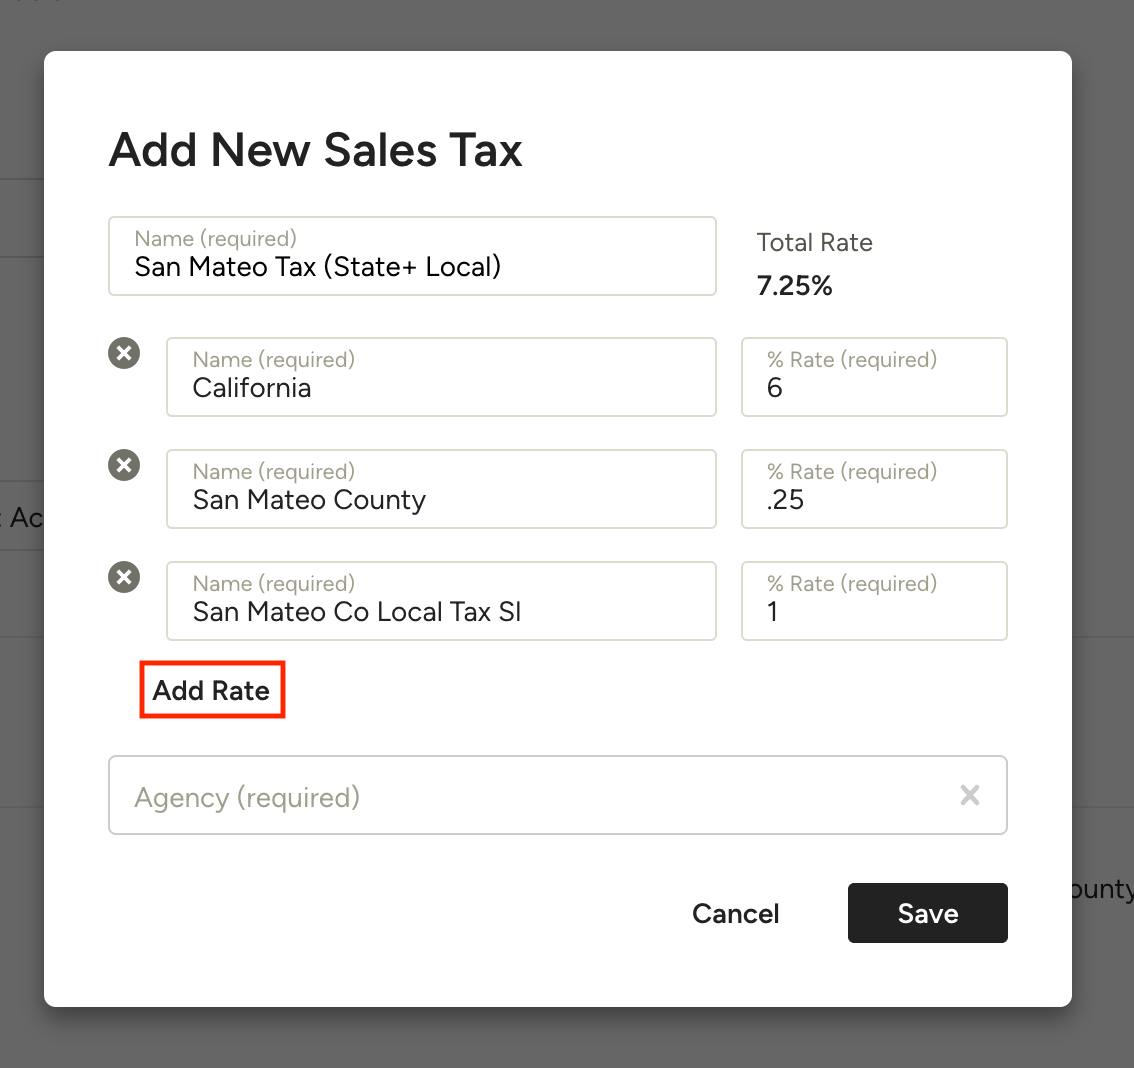
- Give the tax a name, enter the agency (the government organization that collects the tax), and % rate. If you have multiple sales taxes to include in one — for example, state and local taxes — select Add Rates and they will be totaled at the top to give you one rate.
- Once you save the new sales tax, you’ll be able to start using it in your financial documents.
Set Default Tax Rate
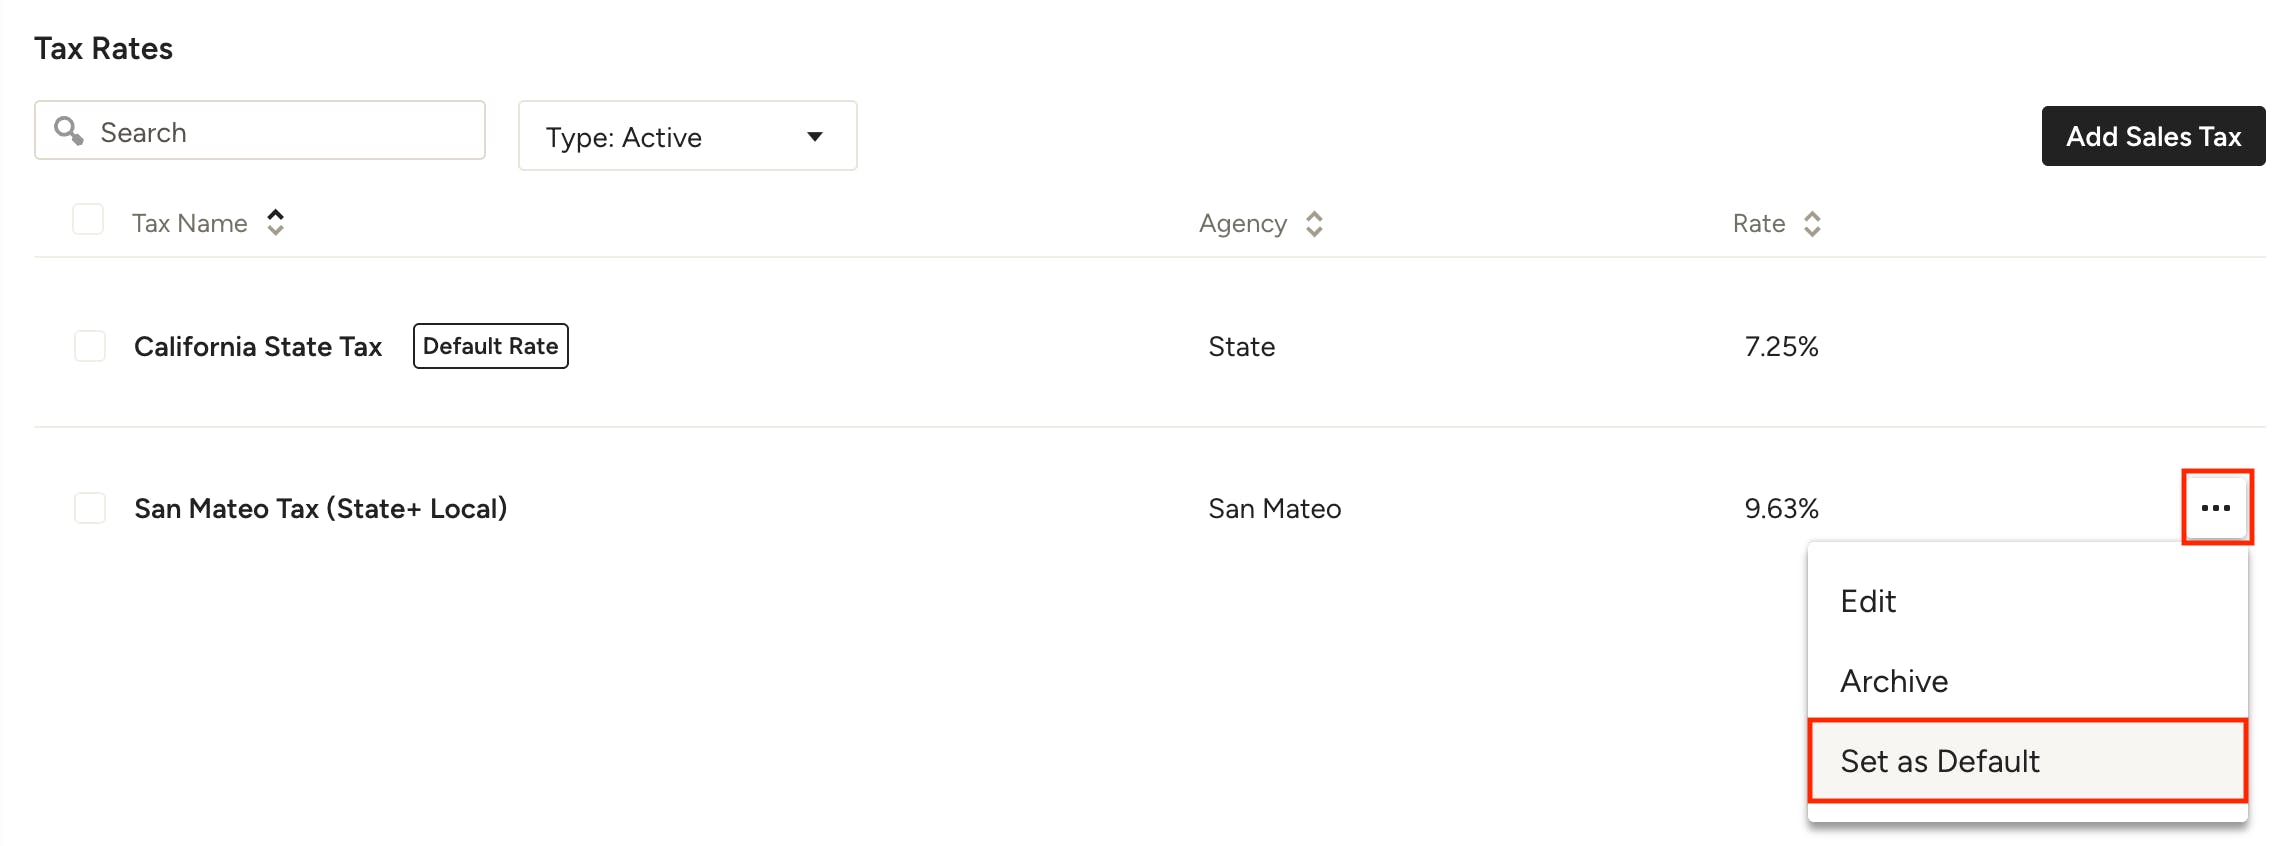
If you only have one tax rate entered, this will be the default rate. If you have more than one tax rate in your Houzz Pro account, you can choose which one you want to set as the default tax rate for all projects. To do so, click the three dots to the right of the desired rate and select Set as Default from the menu.
Set Default Tax Rate Per Project
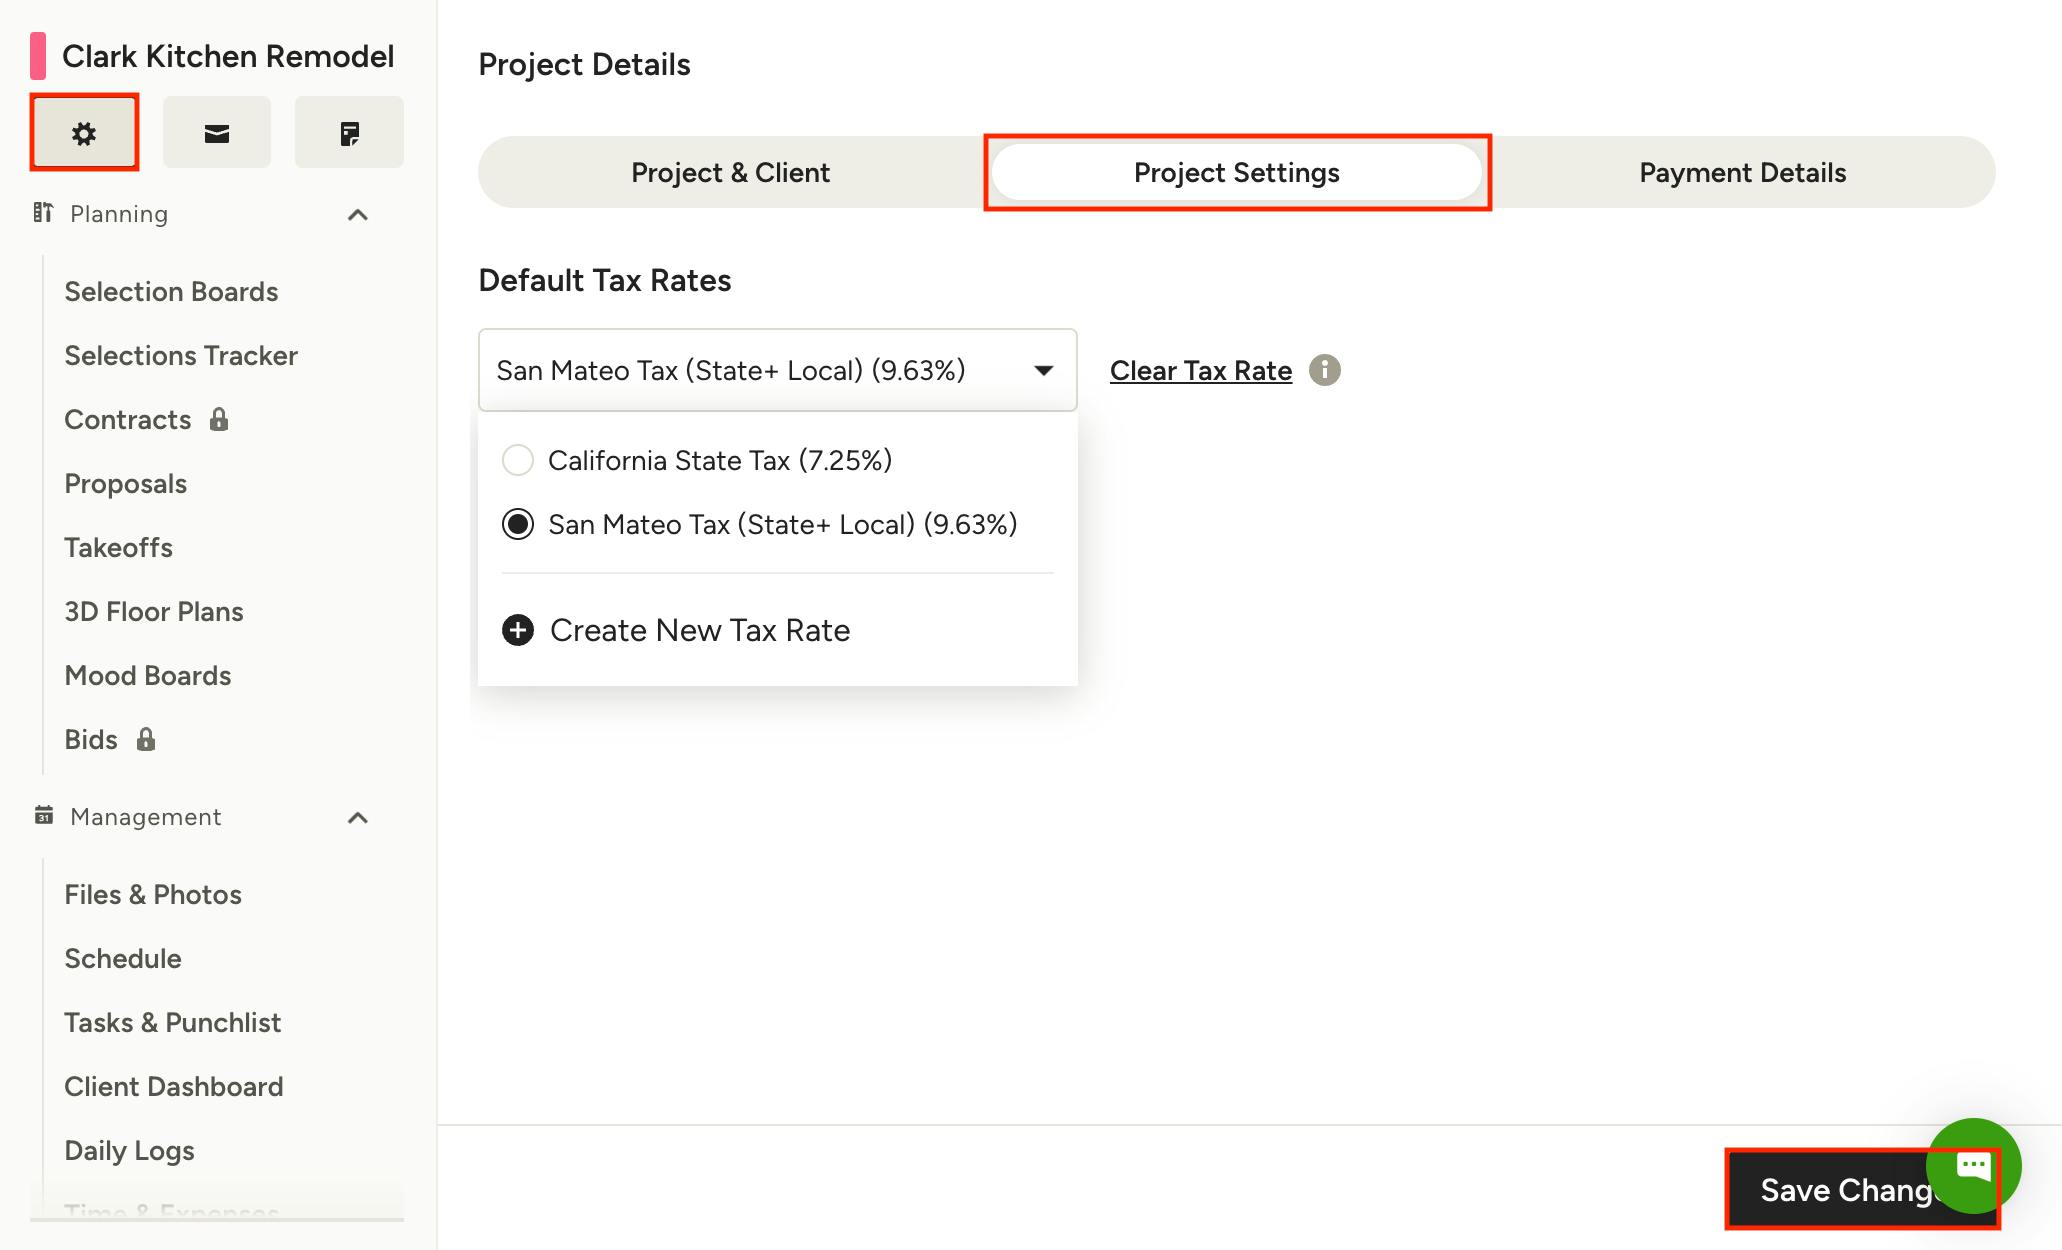
You can also set default tax rates on a project basis, allowing you to use a tax rate other than the company default for all documents in a specified project. To do so, click the Project Details icon on a project overview page, then choose the Project Settings tab at the top. Here you can use the dropdown to select from your existing rates, or create a new one. Make sure to click Save Changes at the bottom when you're done.
This tax rate will be the default for all new documents in that project, including those created from templates. You can click Clear Tax Rate to revert project documents back to the company default rate.
Set Tax Rates in Financial Documents
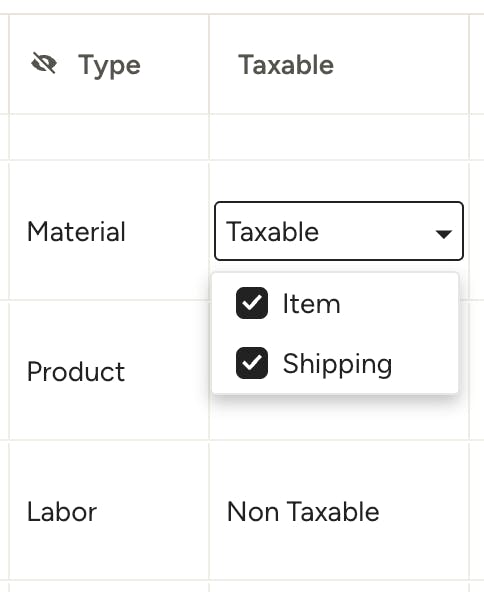
Each line item in your financial documents (estimates, proposals, invoices etc) has a tax column — if you don't see it, you will need to enable it in the Customize Settings at the top of your line items section.
You can adjust the tax column as needed per item, depending on the item type:
- Material, Labor, Product and Service types allow you to tax the Item, Shipping, both or neither.
- Material & Labor type allows you to tax Material, Labor, Shipping, all or none.
To make changes, click the arrow in the tax column for the desired line item and a dropdown will appear. Choose the type of tax that applies to the item. If neither Item nor Shipping are selected, it will show Non Taxable. If both are selected, it will show Taxable.
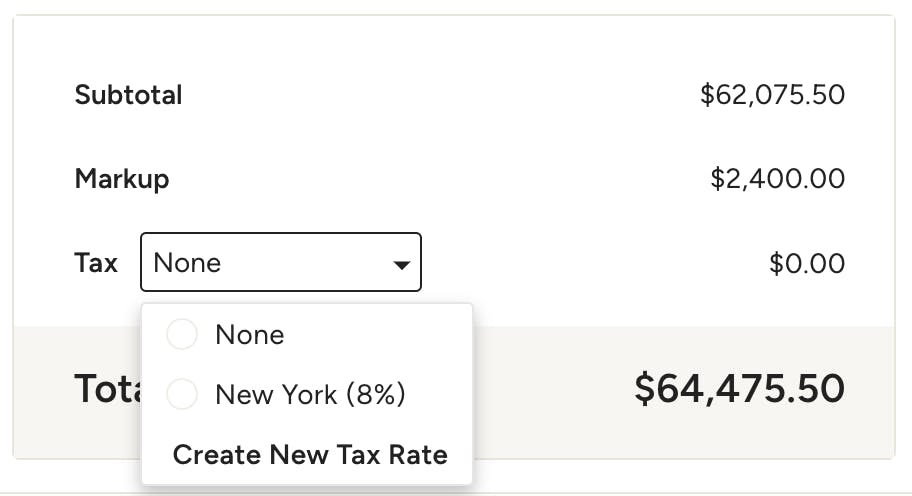
Once you’ve set the tax correctly for your line items, scroll to the bottom of the item list where you’ll be able to determine which tax rate should apply to this document.
Click the arrow next to Tax to choose one of the tax rates saved in your account settings. This rate will be applied to any aspect of a line item marked as taxable, whether it was set on the Item, Shipping or both.
If you’re already working on a document and you need a tax rate that doesn’t yet exist in your account, you can create that new tax rate from within the document — just select Create New Tax Rate from the dropdown. The tax rate will be saved in your account and can be used on future projects and financial document.
Default Tax Settings
You can choose whether certain item types (Product/Material, Service/Labor or Material & Labor) are marked as taxable or not taxable in documents by default. This can help streamline your workflow and prevent you from missing out on charging the client tax on relevant items.
To set the default tax settings for items, navigate to the Accounting tab on the Business Document Setup page, located in your Settings section. Under the Default Tax Settings header, mark Taxable or Not Taxable next to the relevant item type. Changes will be automatically saved and applied to future documents.