How to Manage Your Vendors
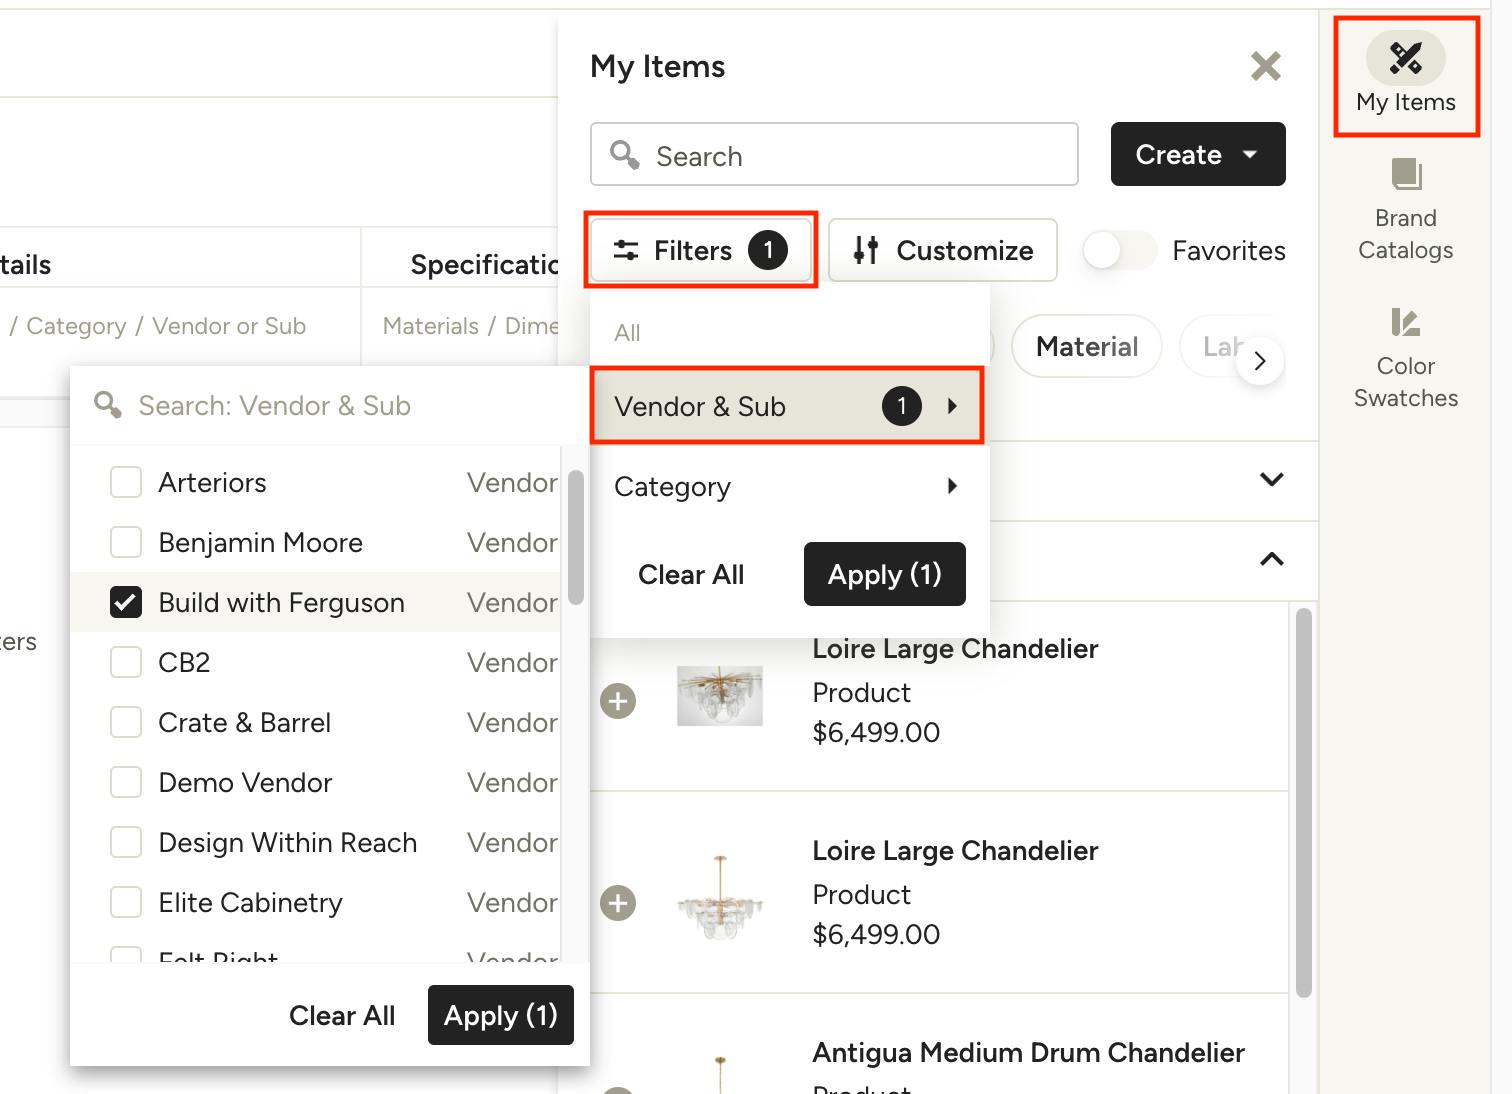
Assigning Vendors to your items allows you to keep your product library organized, find what you need quickly, and track items and expenses in a meaningful way. Let's take a look at how vendors can be useful across various tools:
Use Vendors to Find Items
When adding items from My Items within tools across Houzz Pro, you can use the vendors filter to narrow down results to quickly locate the items you're looking for — this can save you from endless scrolling.
Use Vendors in Documents to Plan Ahead
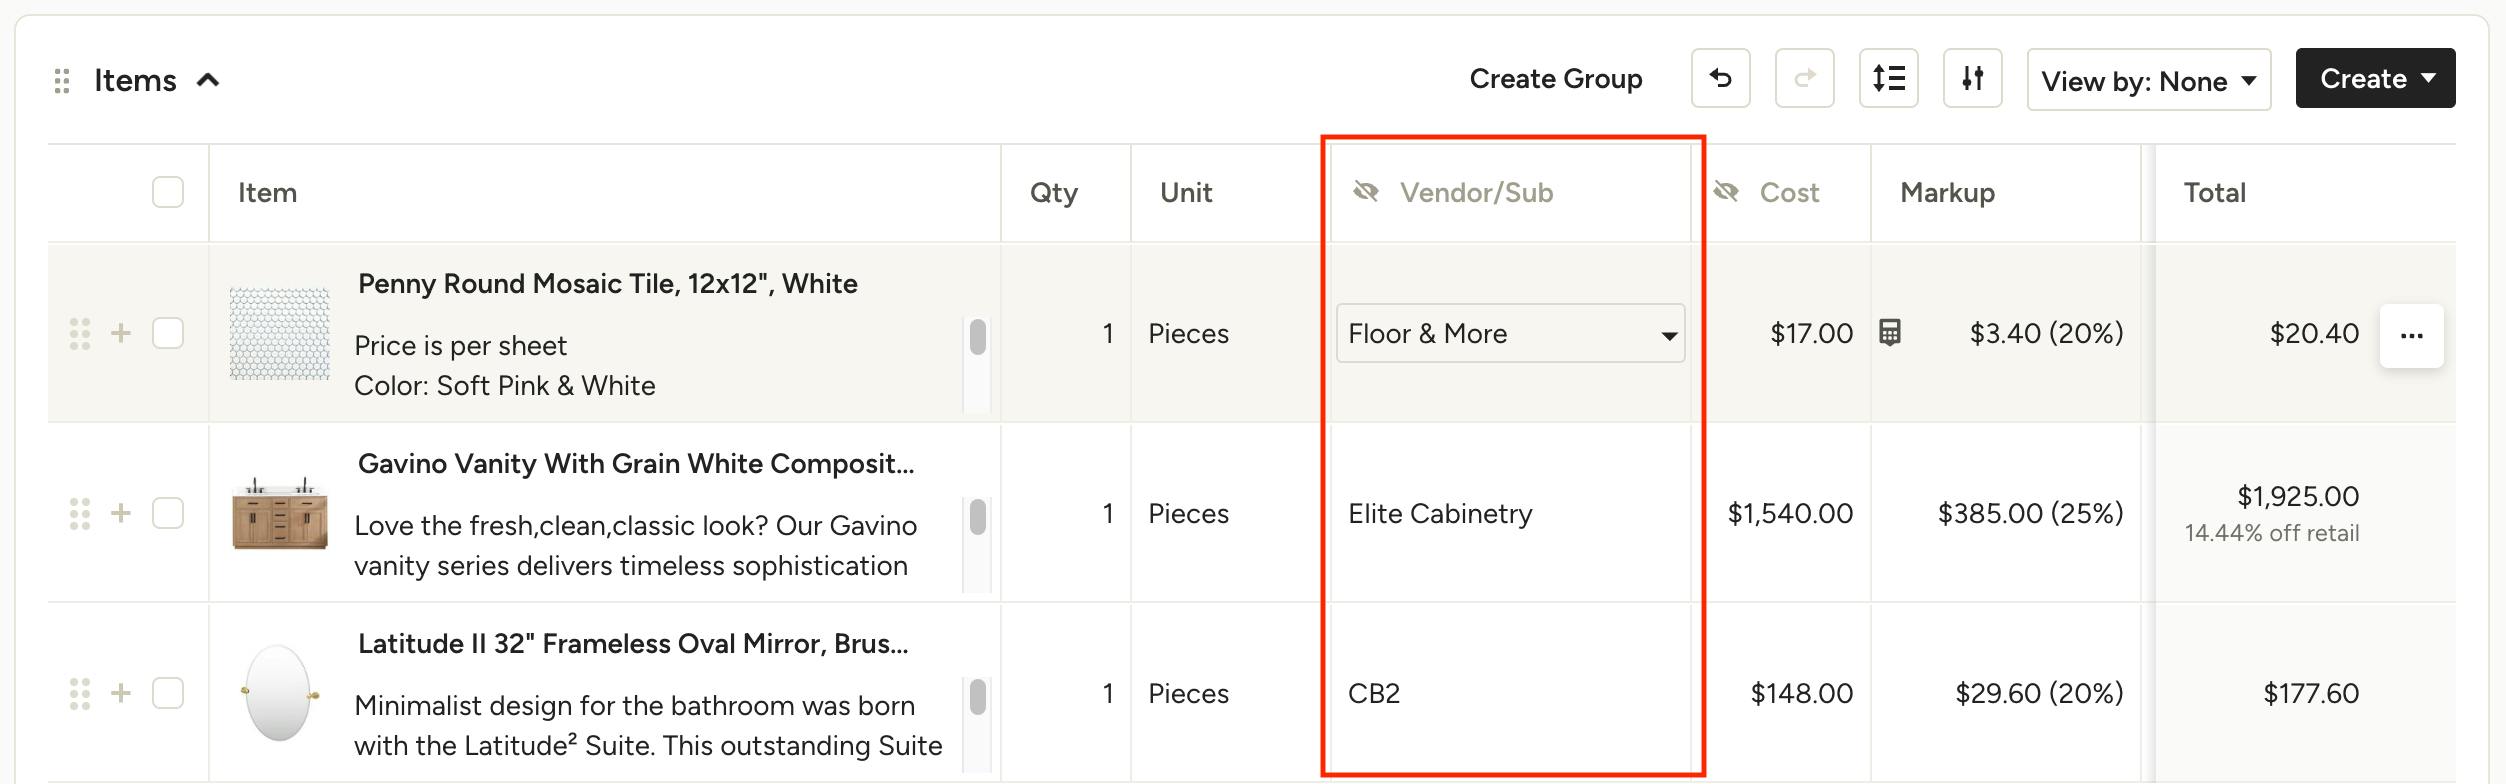
When creating financial documents, you have the option to view and assign vendors directly in the document. This can help keep the whole team informed on which vendor specific items will be sourced and ordered from. When the time comes to create purchase orders, your items are easy to identify by vendor so you don't miss a thing.
Use Vendors to Organize Selections
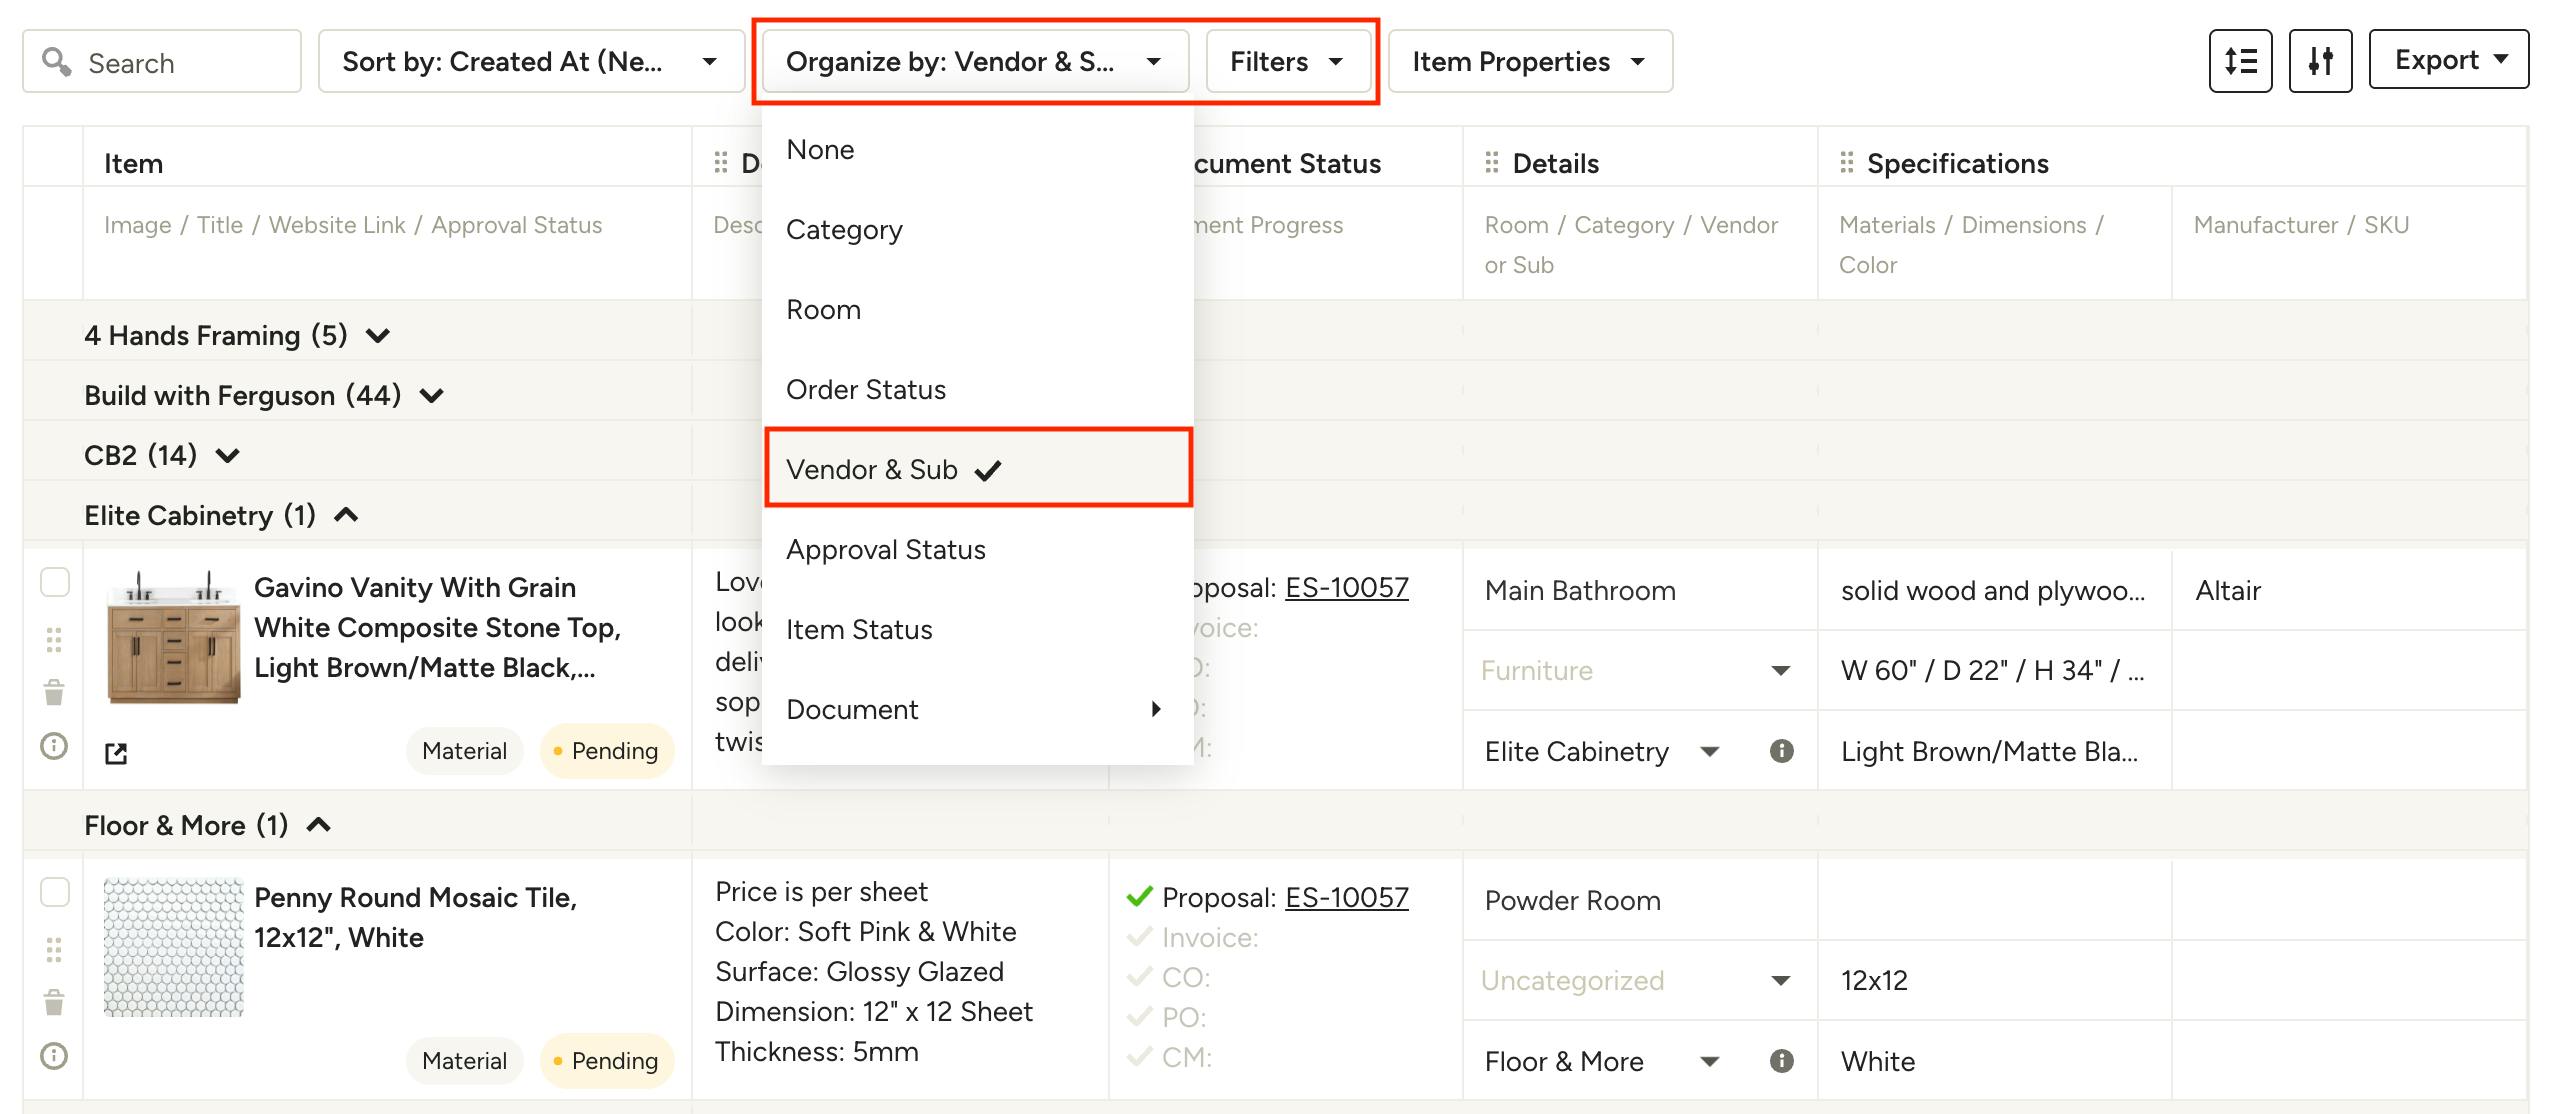
In your Selections Tracker, you can organize and filter by vendor. This lets you focus on everything you need from a single vendor, streamline ordering, or quickly update and track order statuses.
Use Vendors to Track Expenses
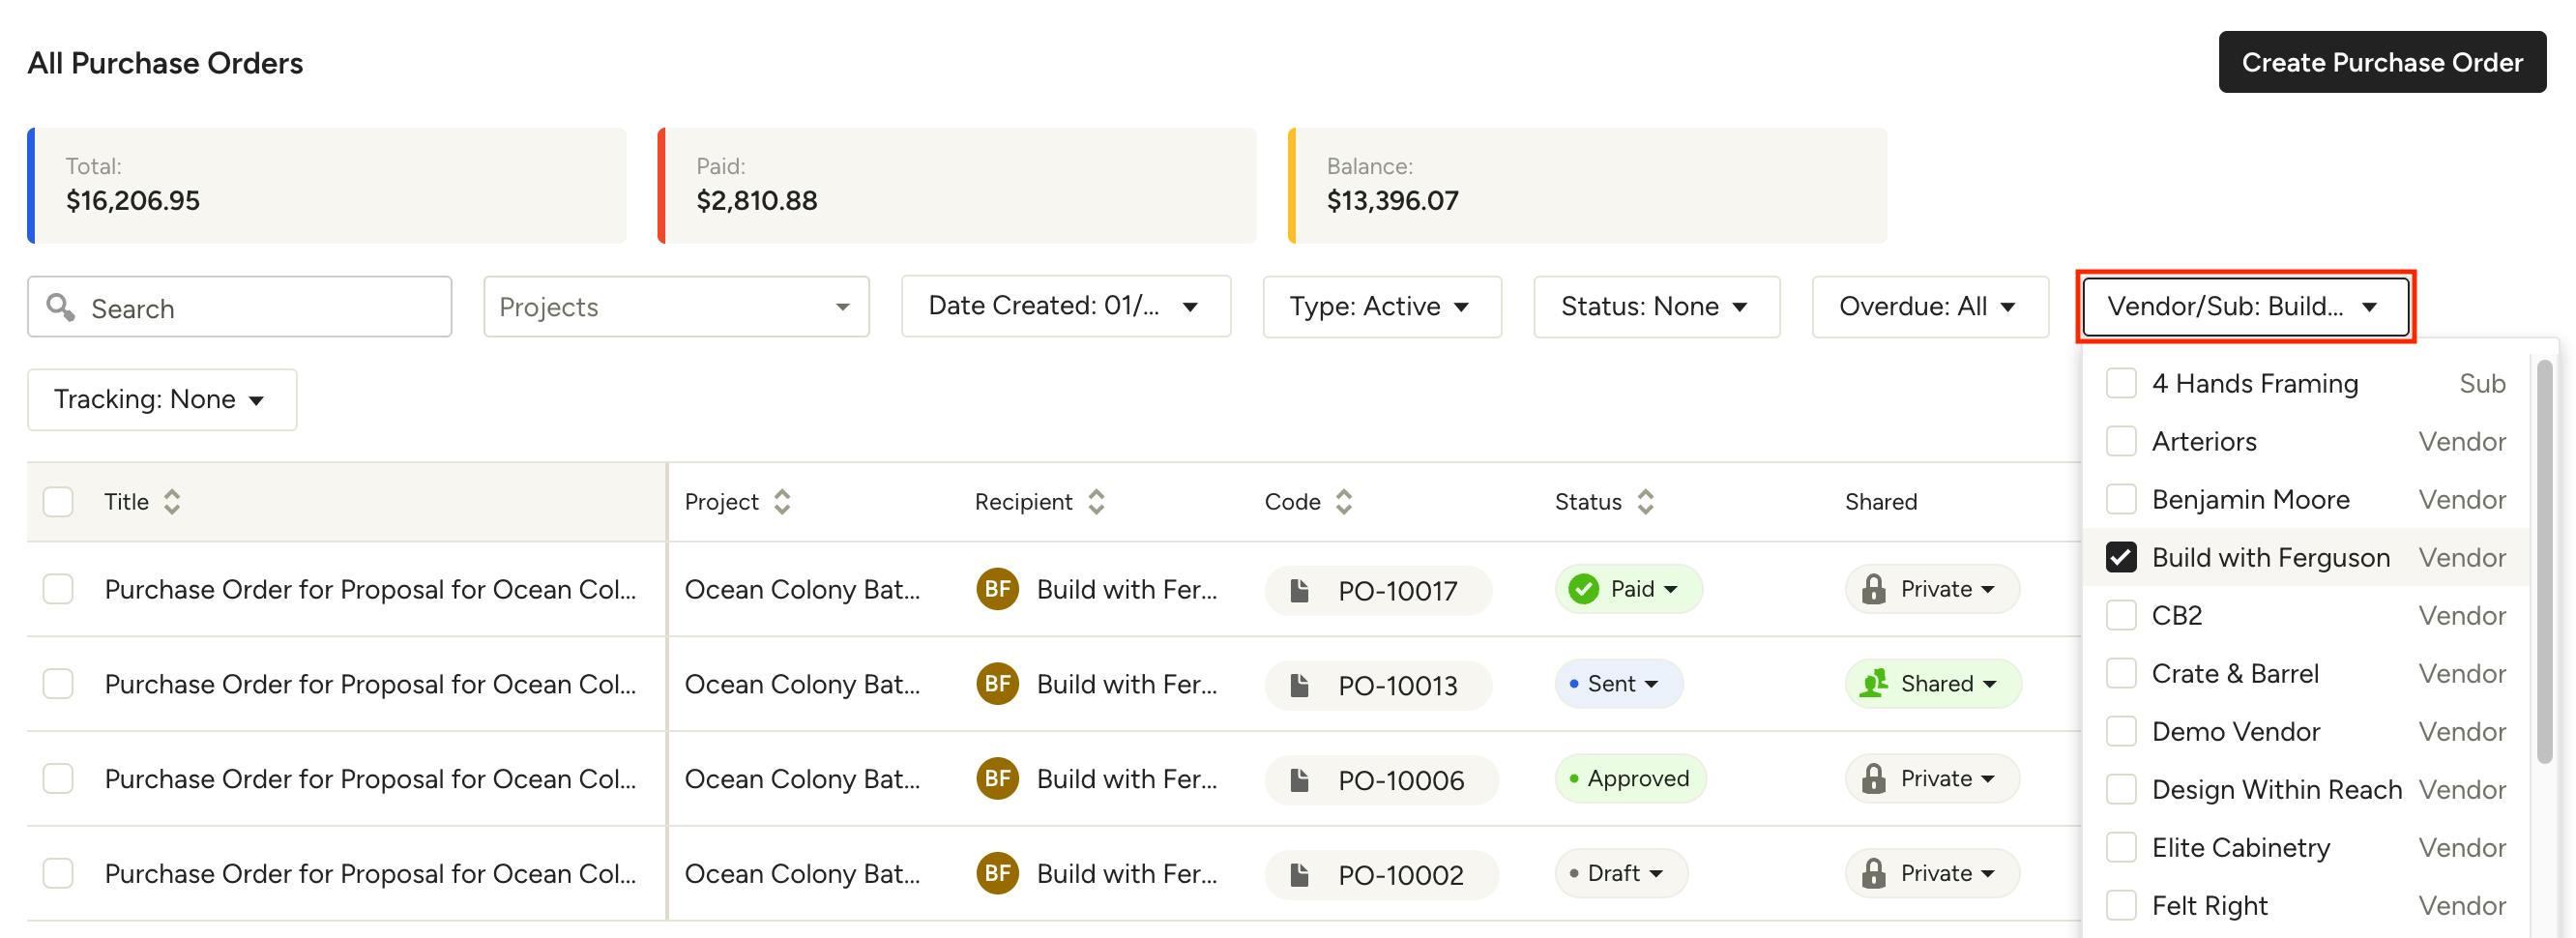
To track outgoing payments per vendor, assign a vendor to each expense entry and purchase order. When expenses are billed and purchase orders are paid, these will feed into the project budget and financial reports, so you always know exactly where the money went.
Access Vendors
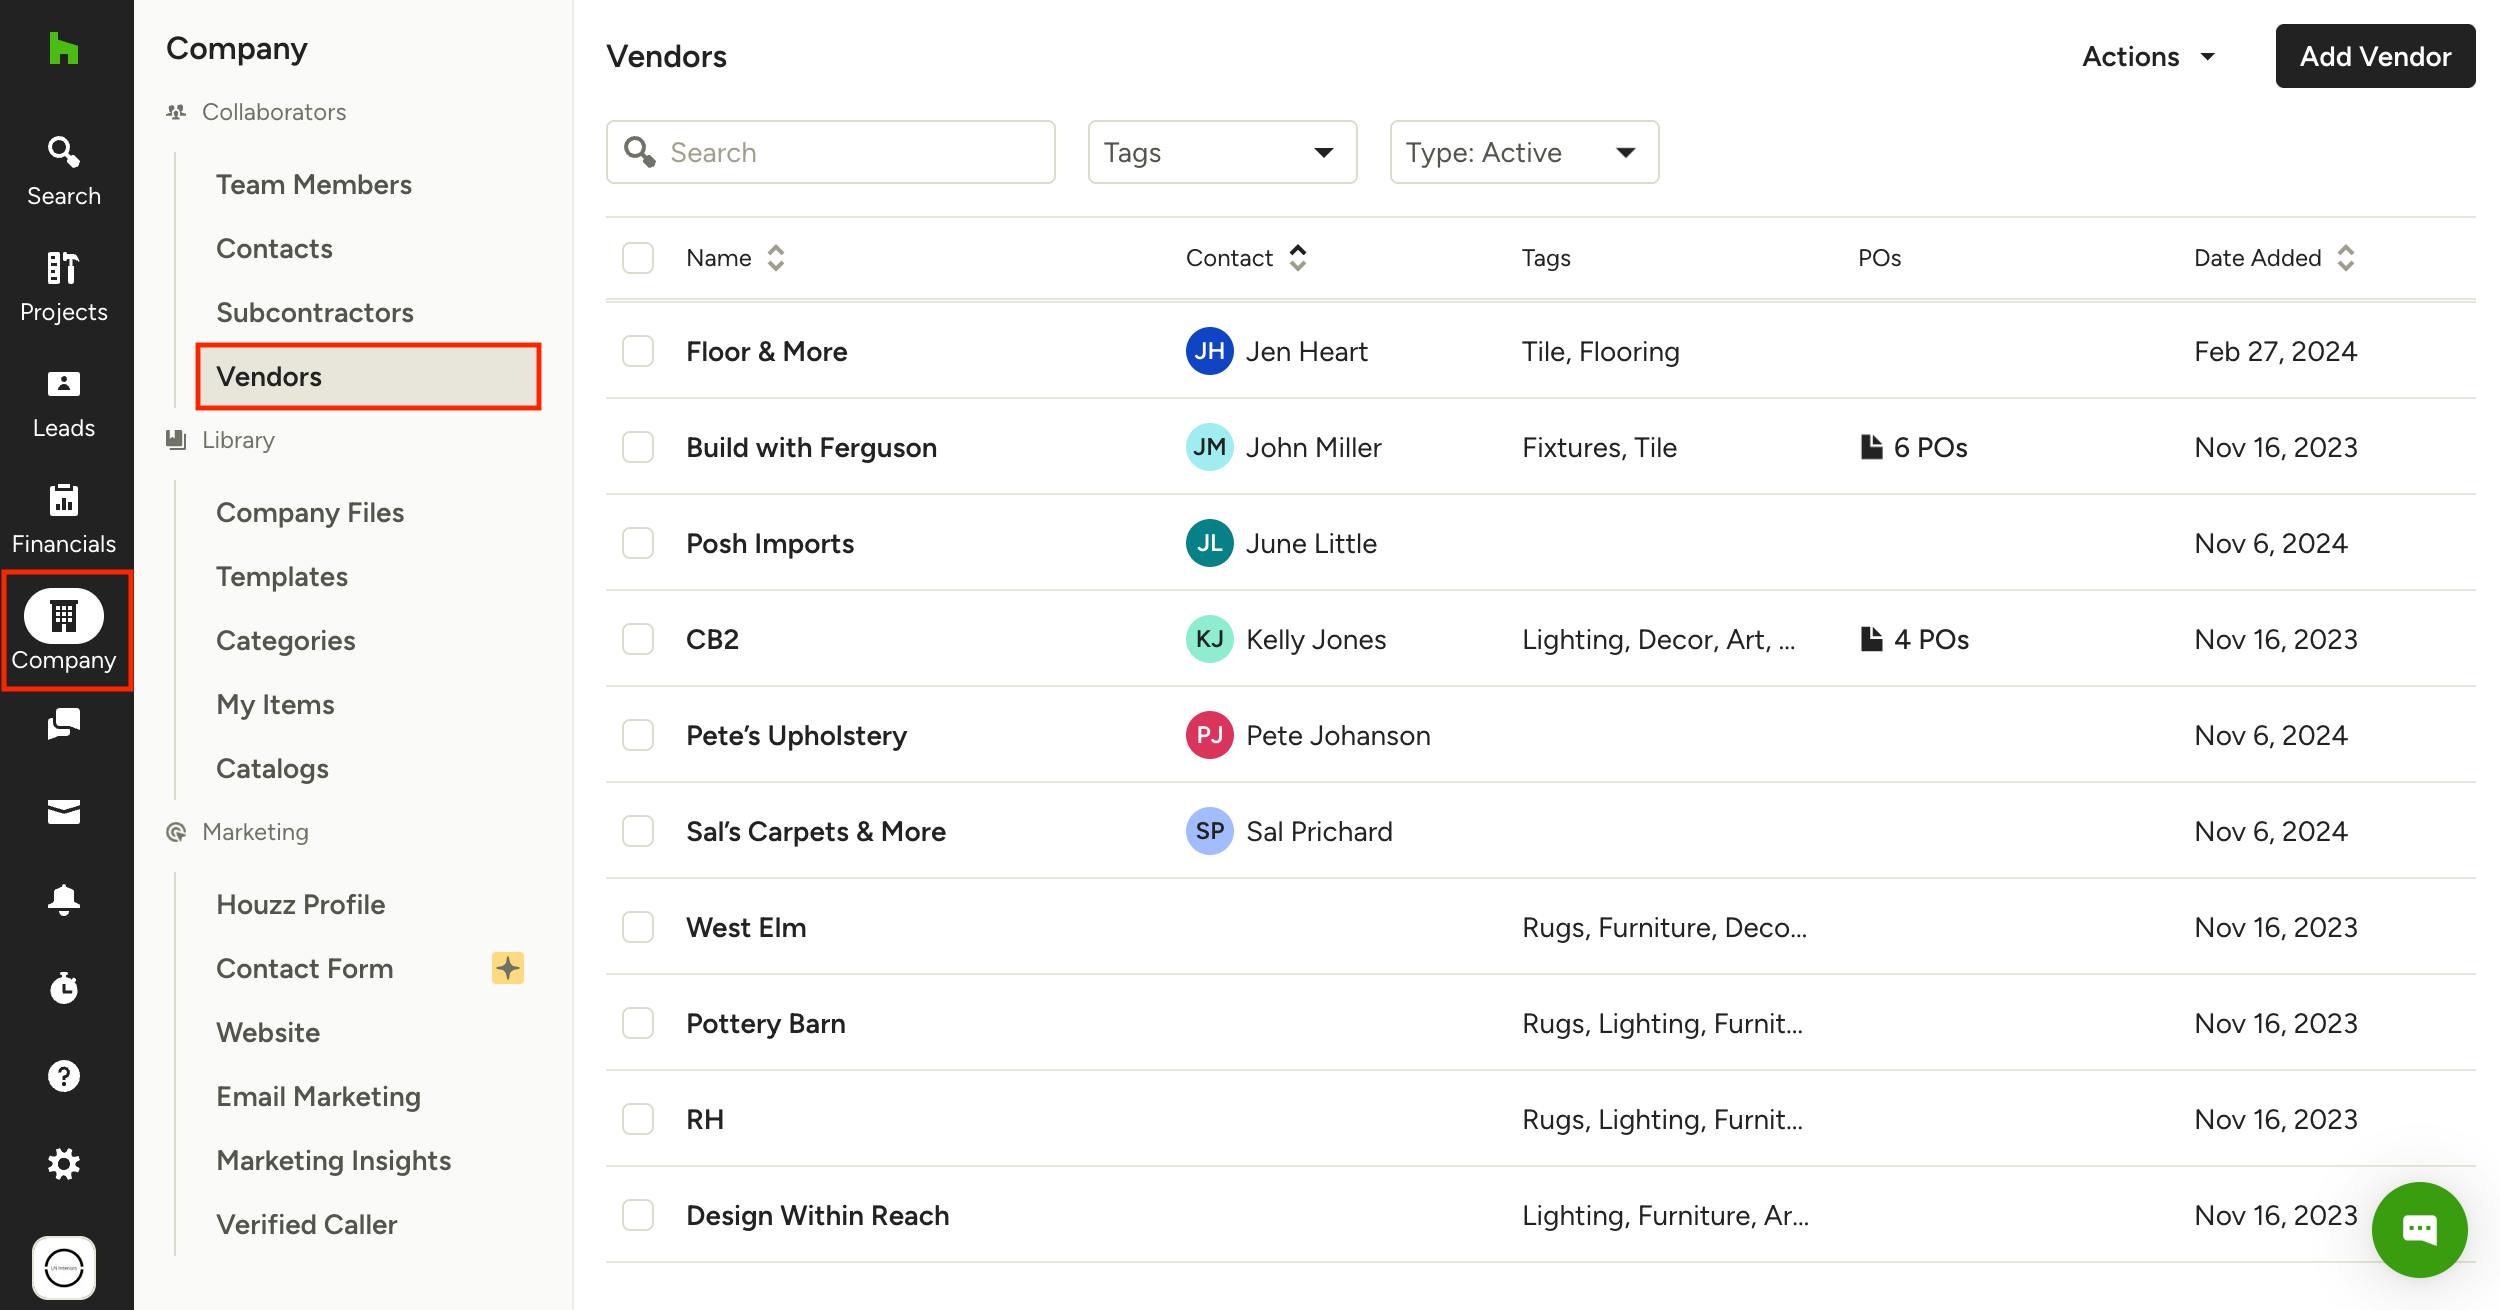
You can view and access your full vendor list by clicking the Company icon in your left navigation, then selecting Vendors. This will bring you to a comprehensive list of all your vendors, neatly organized so you can quickly see key details at a glance.
Within the vendors list, you will find:
- Name: The name of the vendor's business.
- Contact: The primary point of contact at the vendor.
- Tags: Custom tags used to categorize vendors by trade, product type, or any other criteria that fits your workflow. Learn More.
- POs: The number of purchase orders assigned to the vendor.
- Date Added: The date the vendor was added to your account.
You can use the search bar and filters at the top of the page to quickly find a specific vendor, or sort your list by Name, Contact or Date Added to find what you need. Click a vendor's name to view or edit their information.
Add a New Vendor
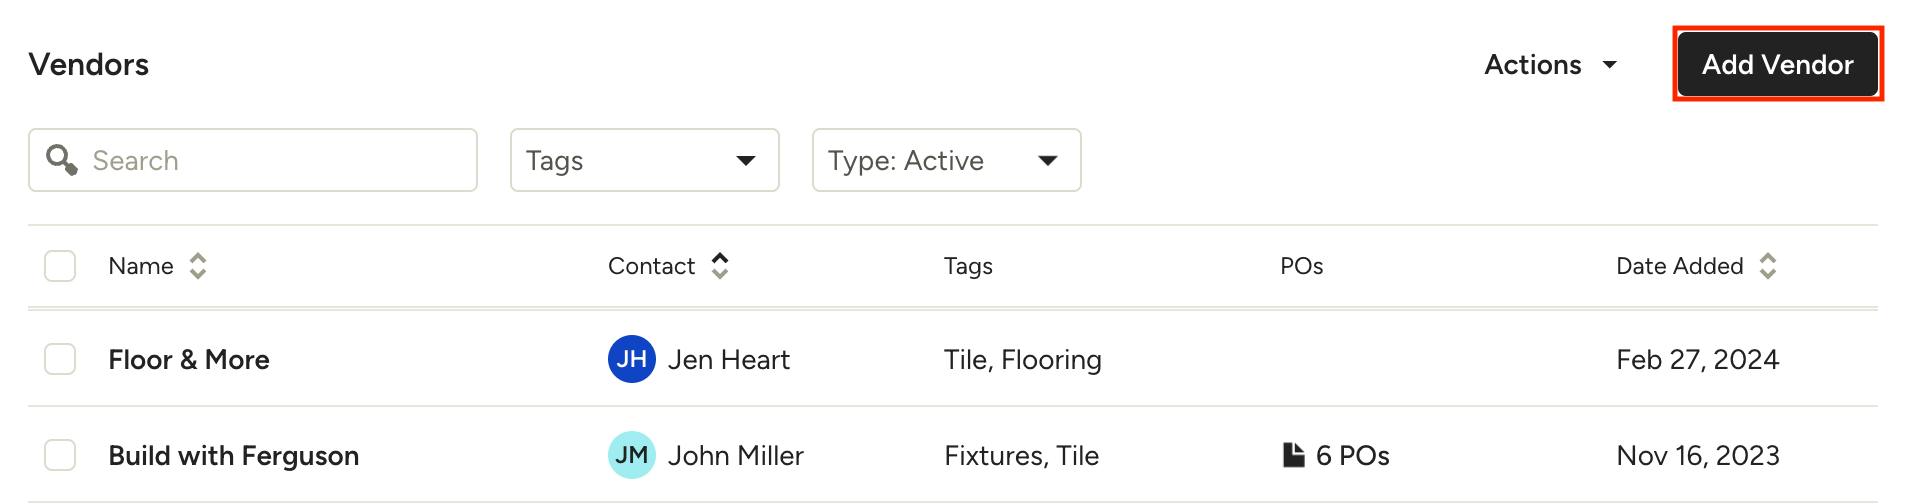
To add a new vendor, click the Add Vendor button at the top right of your vendors page.
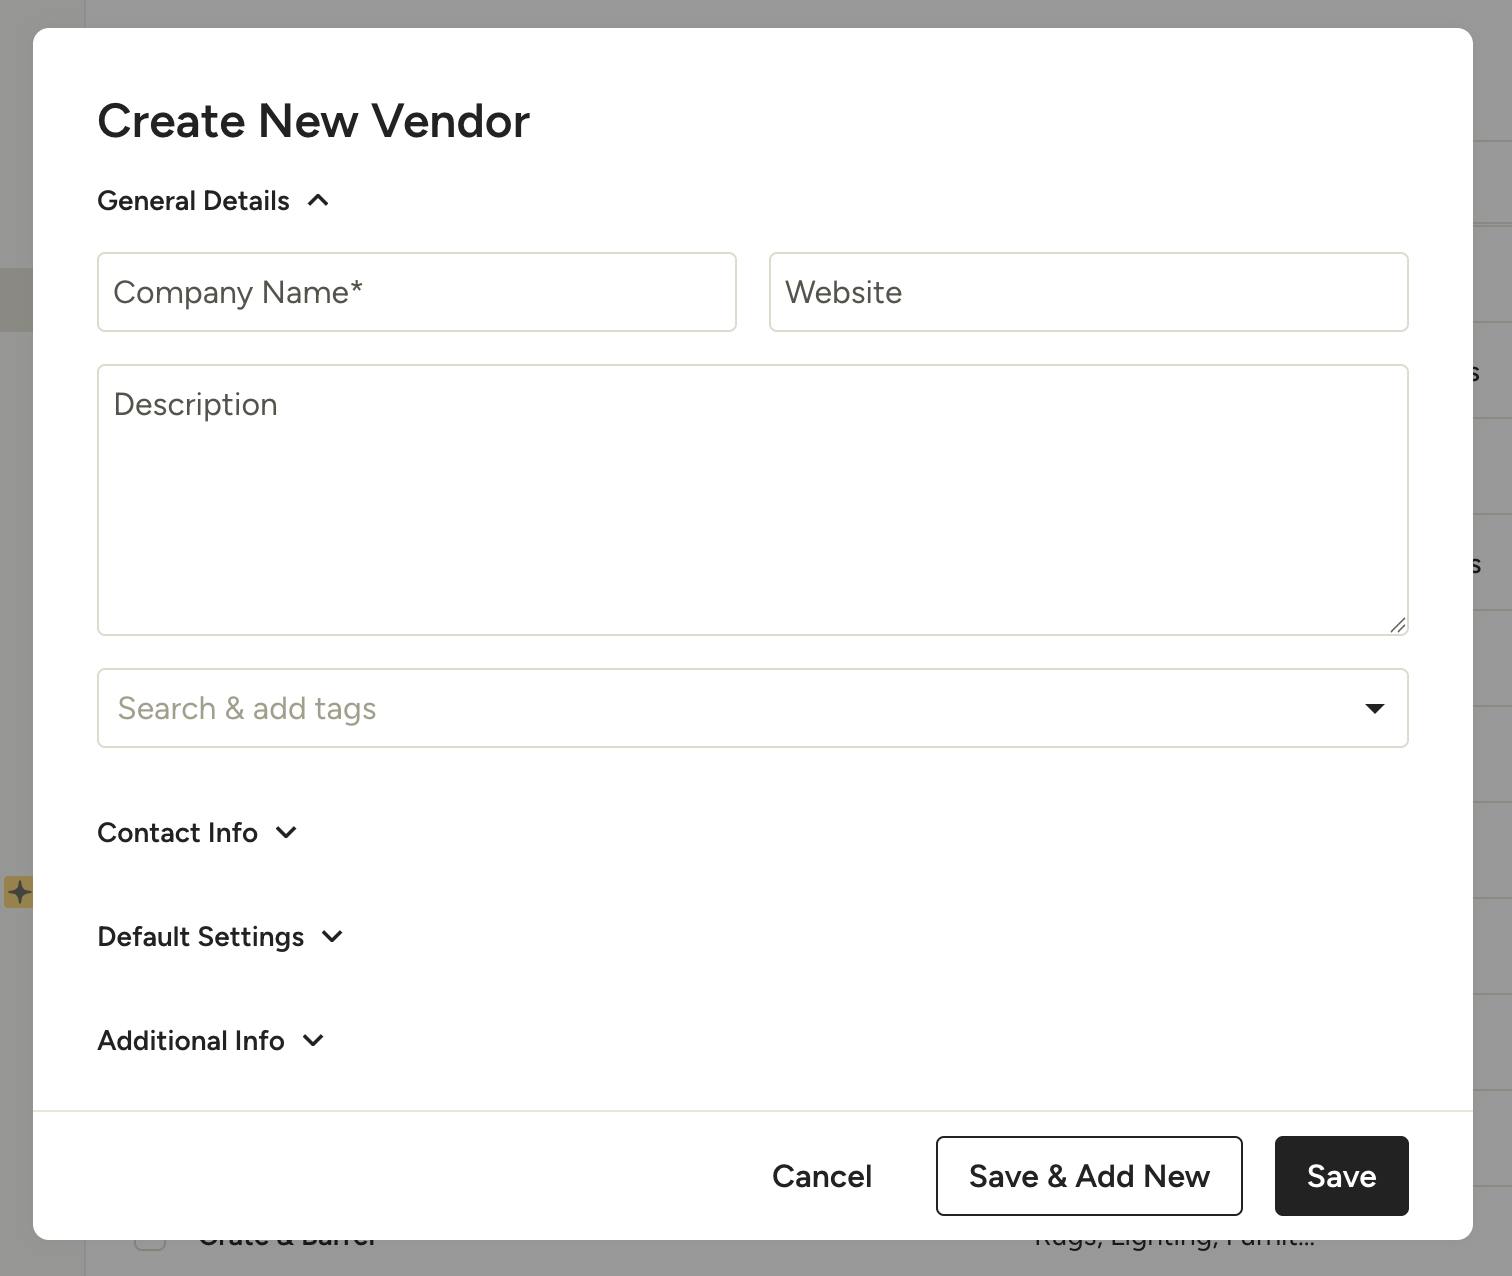
In the Create New Vendor modal, input the vendor's information — Company Name is the only required field, so you can add as much or as little detail as you have available and fill in the rest later.
You can store the following information for each vendor:
General Details:
- Company Name (required)
- Website
- Description
- Tags (Use this to organize vendors — learn more.)
Contact Info:
- First and Last Name
- Email Address
- Phone Number
- Fax Number
- Address
Default Settings:
- Default Payment Terms (populates on purchase orders)
- Charges Tax (Selecting this indicates that all purchases from this vendor are qualified tax deductible.)
Additional Info:
- Account Number
- EIN
- Internal Notes
Attachments:
- Upload Files
Import Vendors From File
If you already have an existing list of vendors — whether from a spreadsheet or another platform like QuickBooks Online — you don't need to add them one by one. Read How to Import Your Vendors to learn how to bring in your full list at once using a CSV file.
Edit Vendor
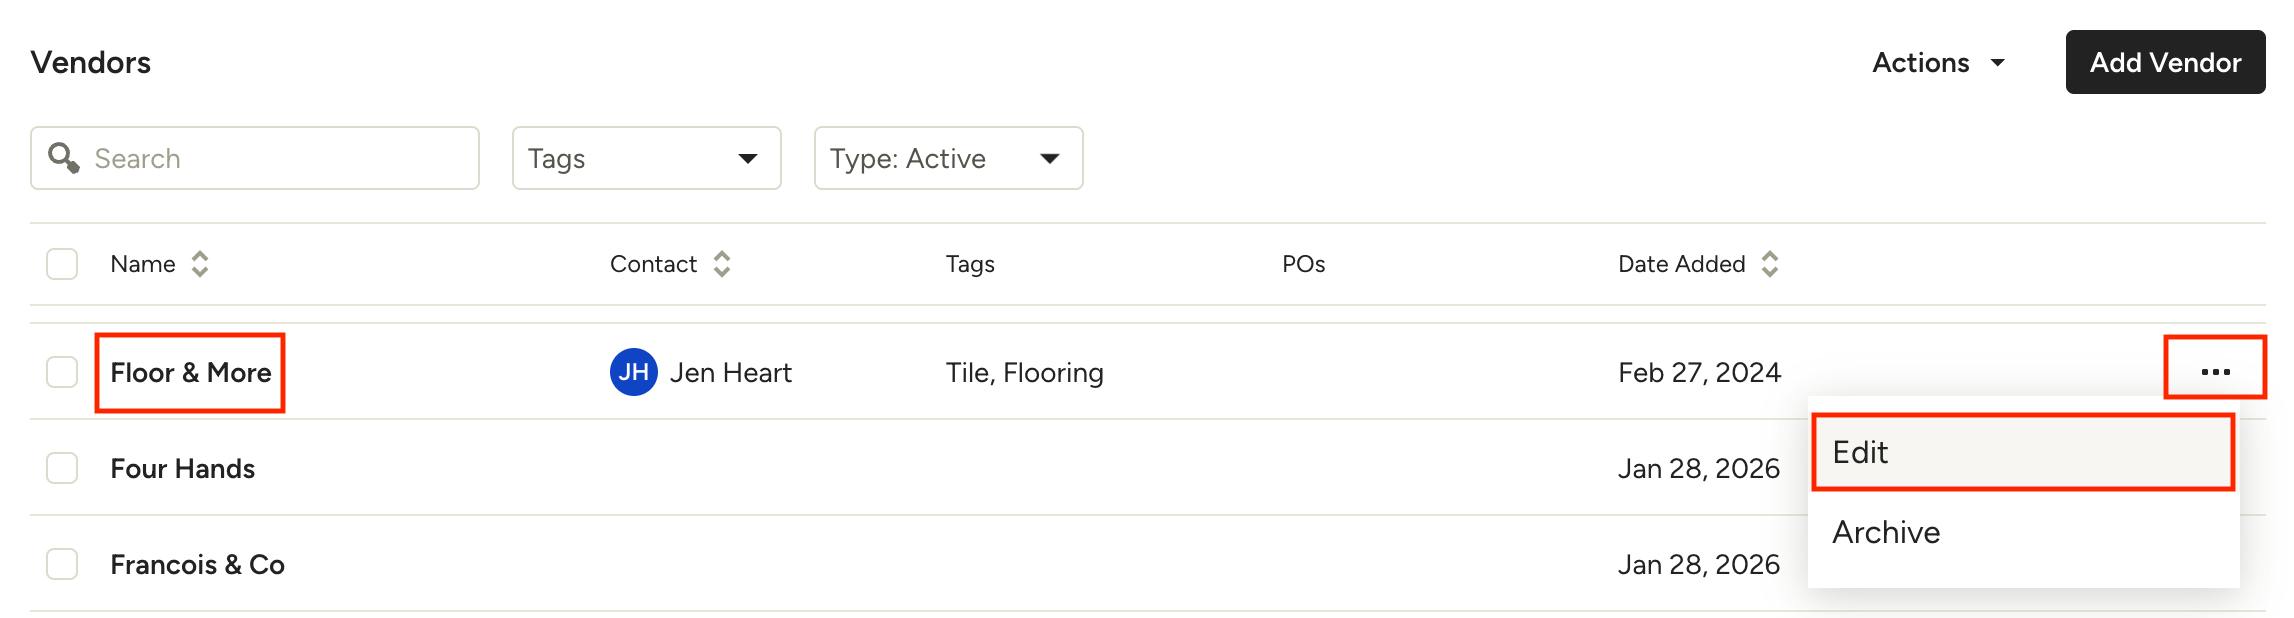
To edit a vendor's details, click directly on their name from the vendors list, or select the three dots icon to the right of their row and choose Edit.
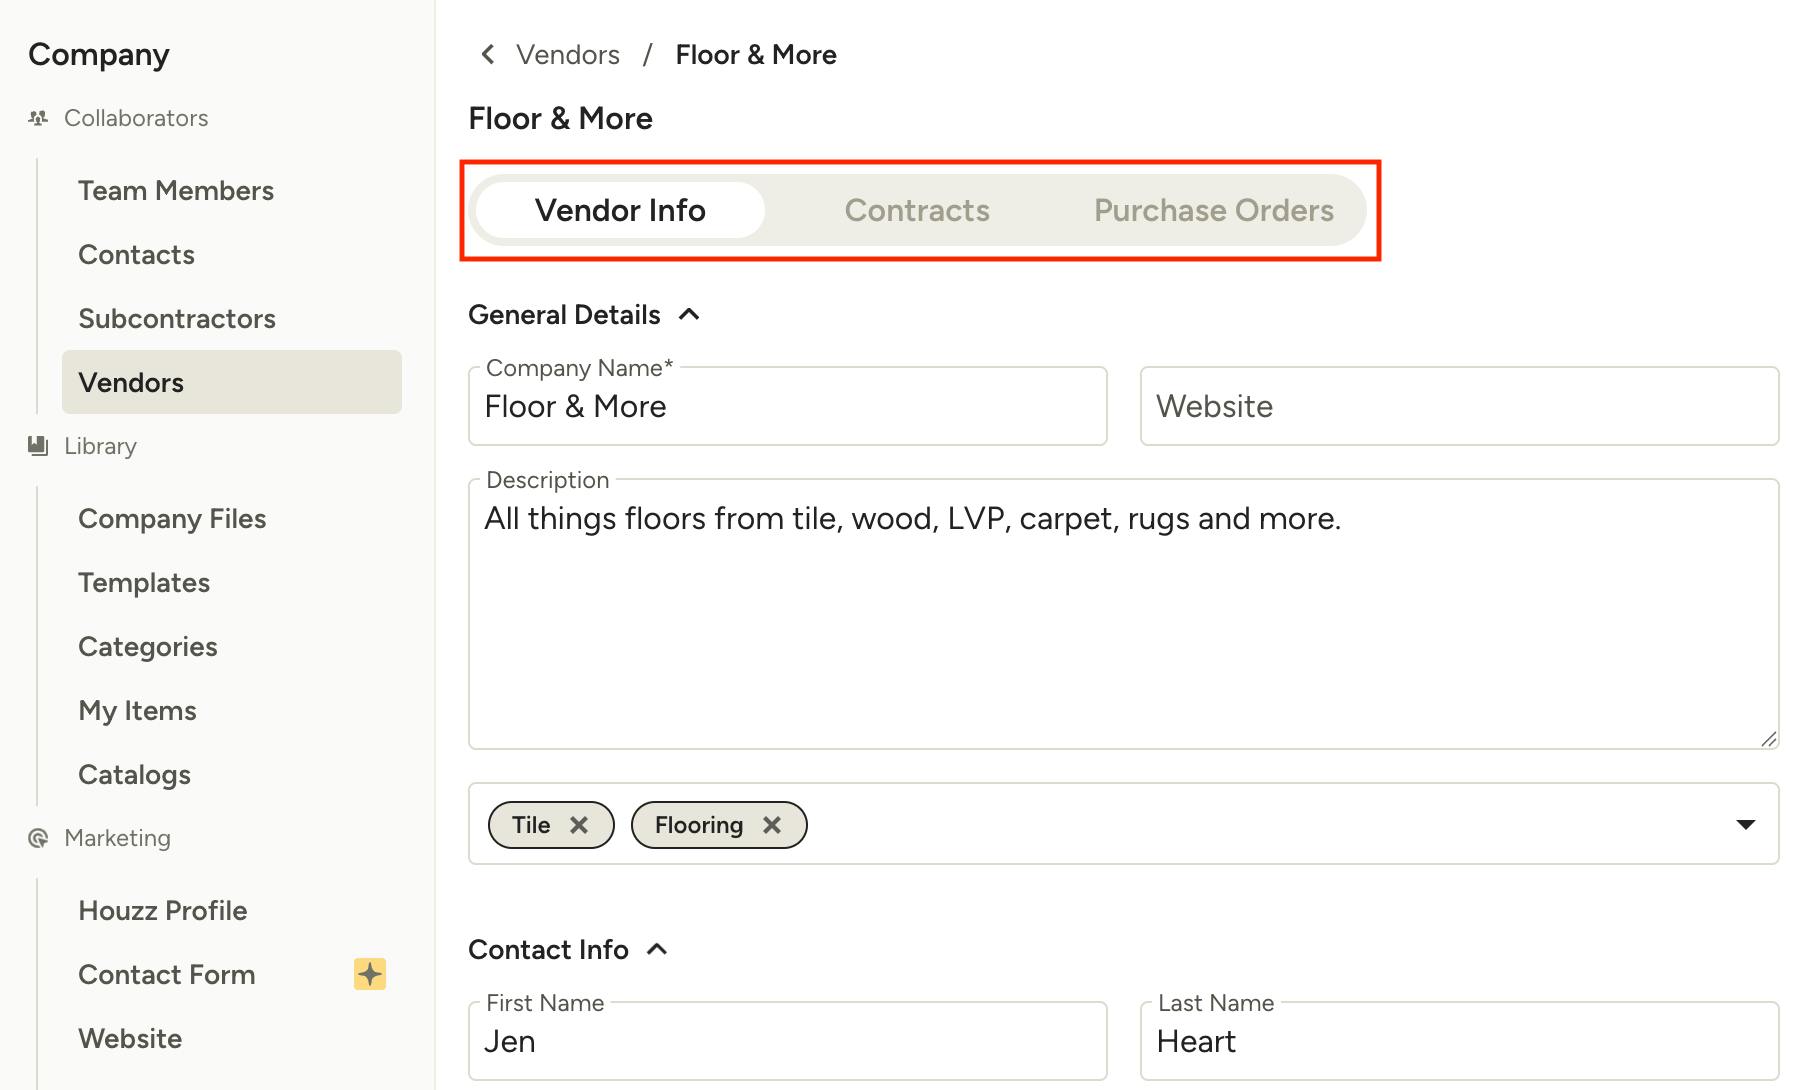
From here, you can update any of their vendor information or tags, or view any contracts or purchase orders assigned to them by clicking the relevant tab at the top.
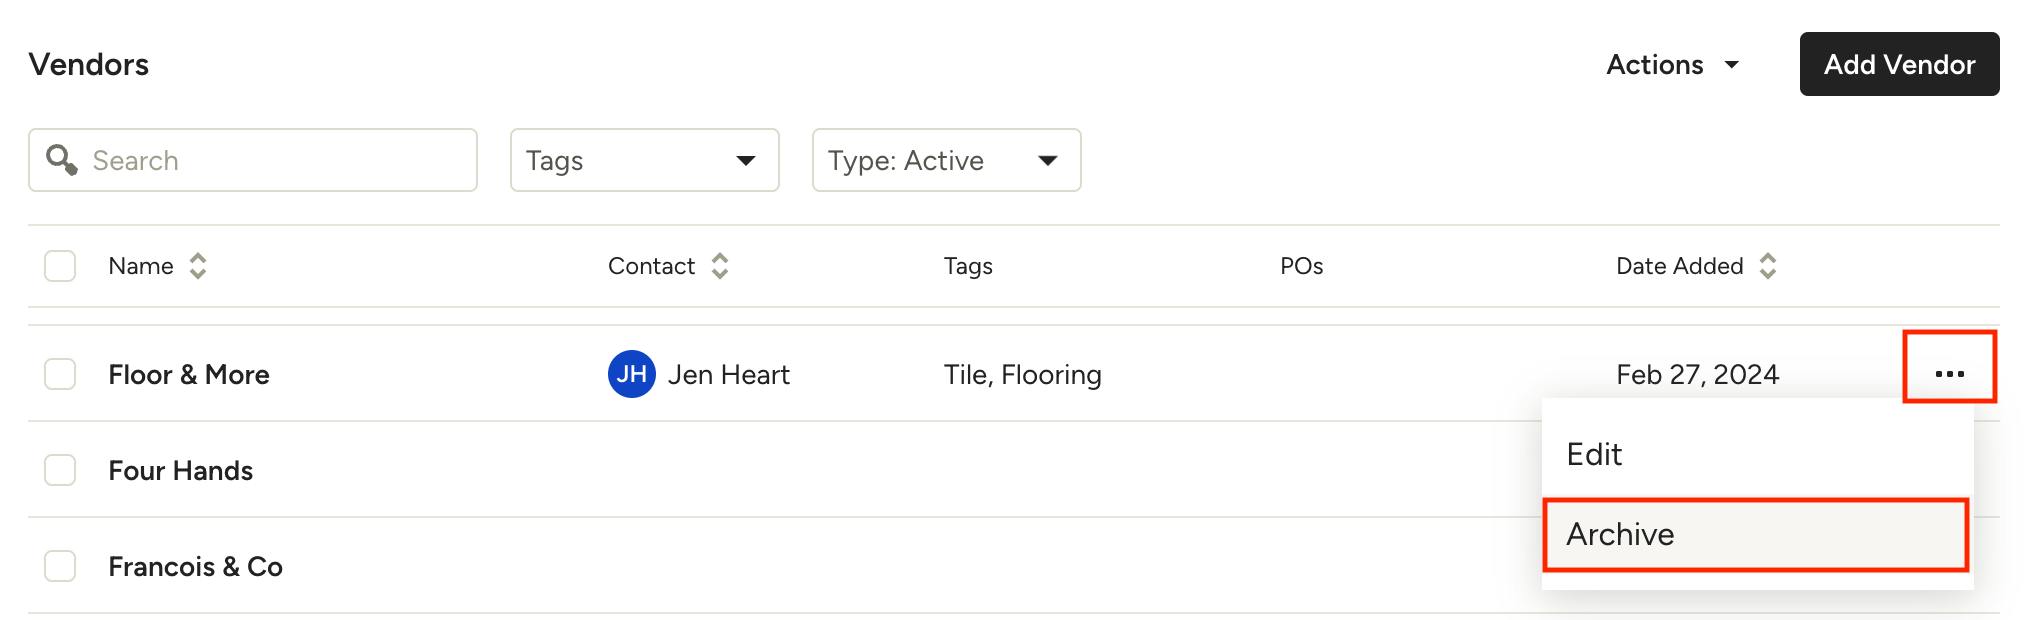
Archive Vendor
To archive a vendor, select the three dots icon next to their row and choose Archive. You'll be asked to confirm before the vendor is archived. Archiving a vendor hides all their details, but you can unarchive at any time.
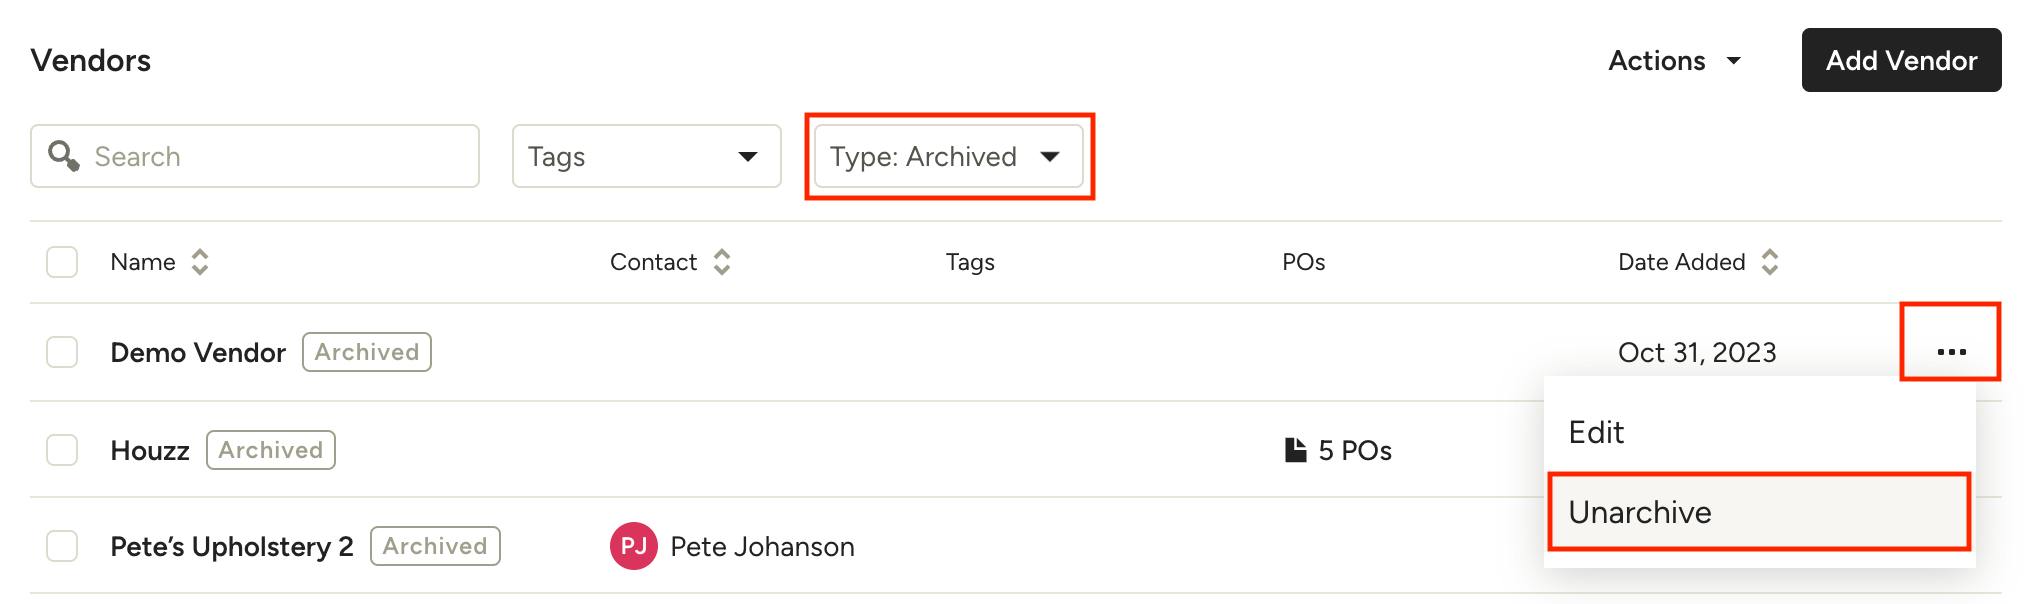
To view archived vendors, select Archived from the Type filter at the top of the Vendors list. From here, you can use the three dots menu to the right of a vendor to unarchive them.
Assign Vendor to Item
From My Items
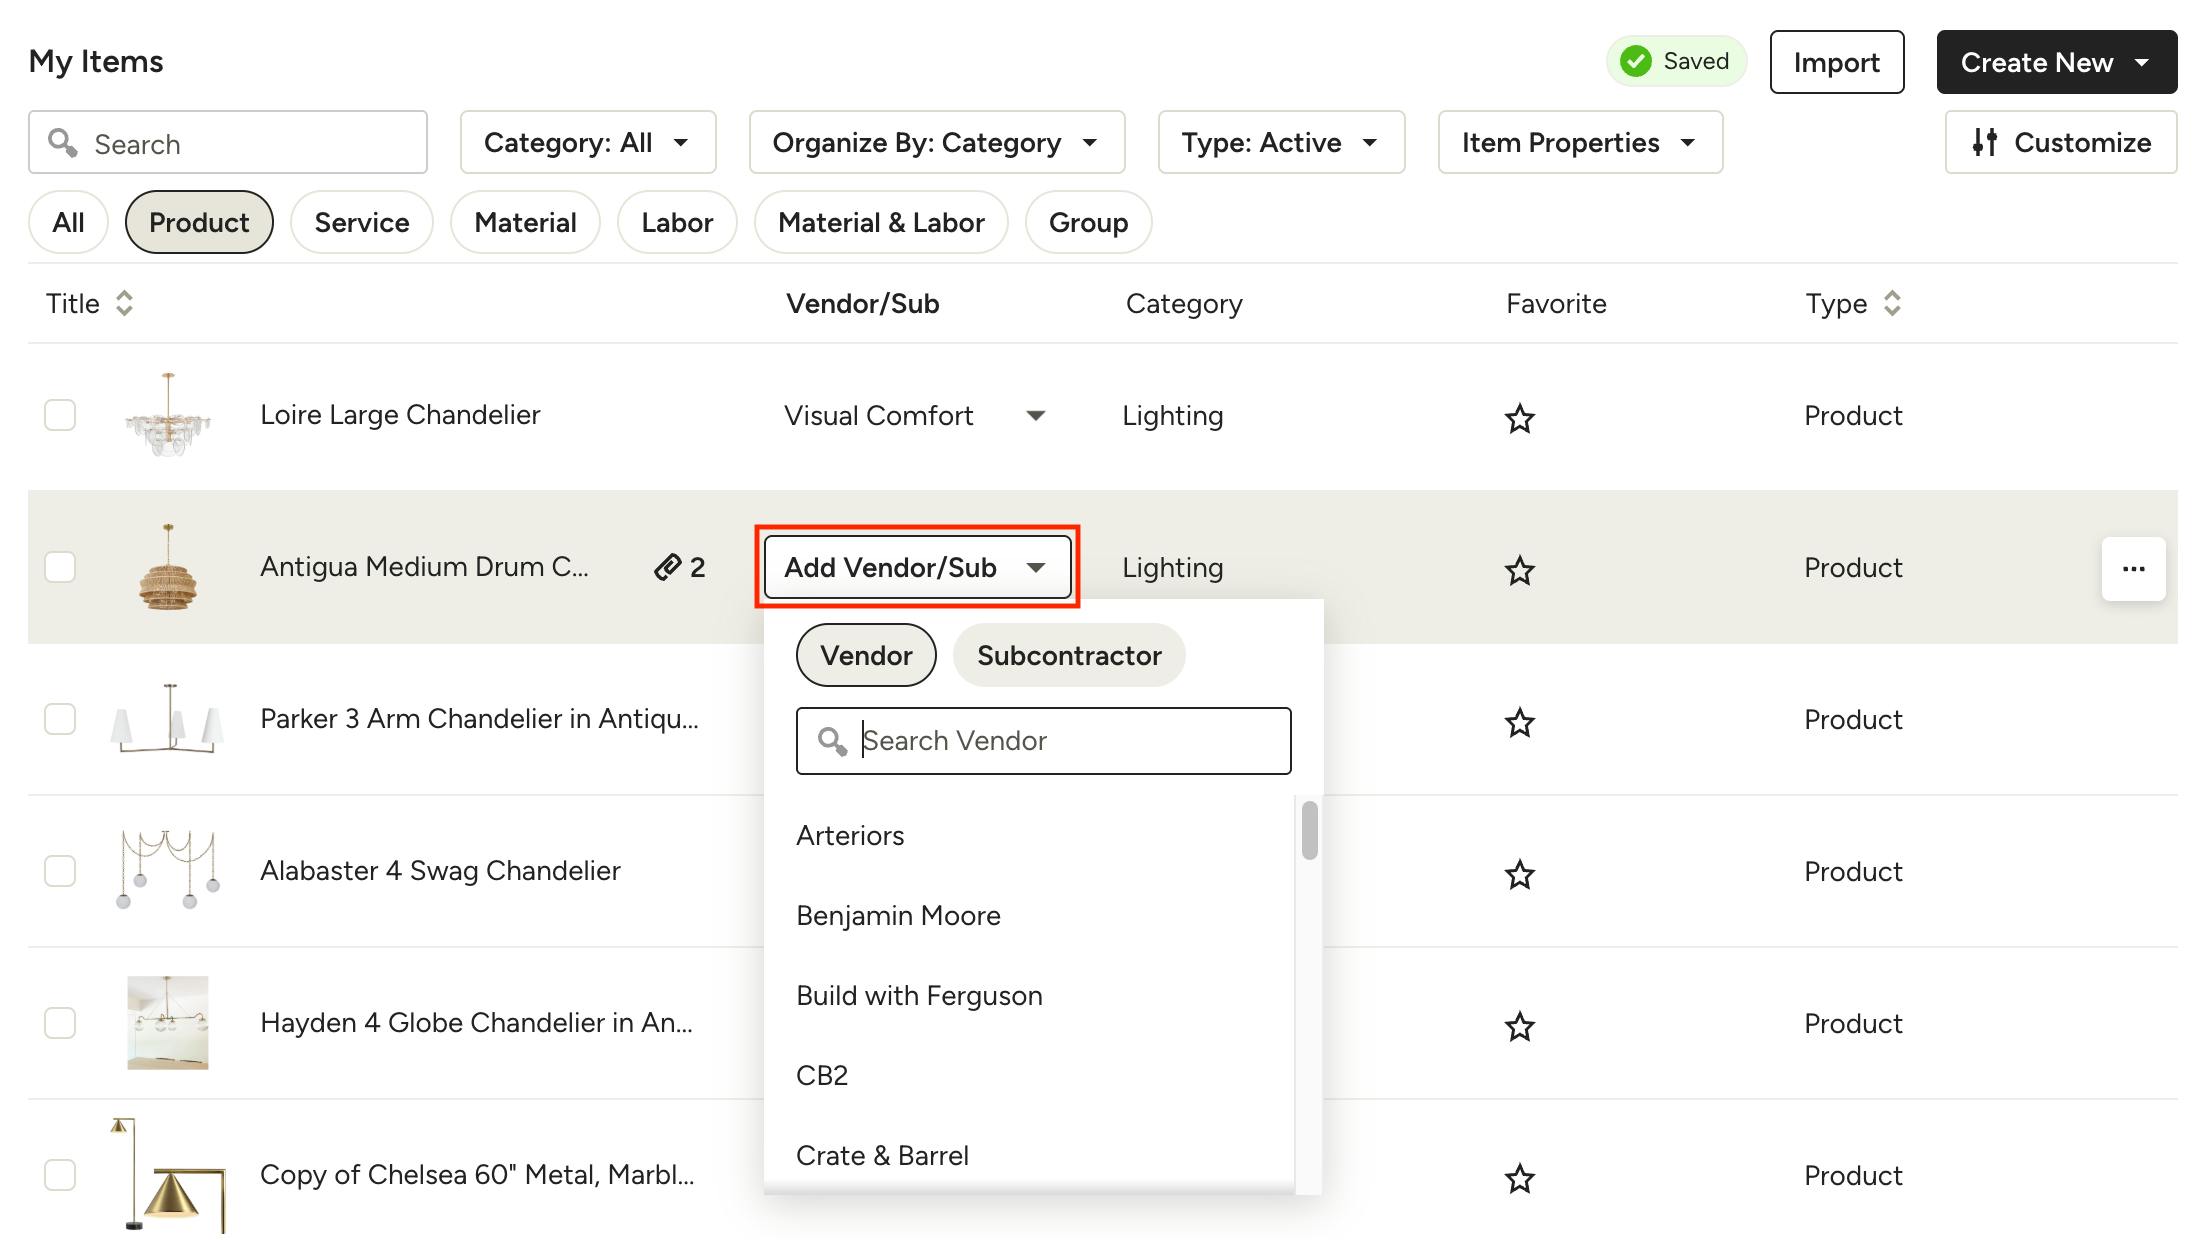
You can quickly assign or edit an item’s vendor directly from the My Items page. To do so, click in the Vendor/Sub column on a line item to open the dropdown. Select the correct vendor, or type in a new one and click “Add New Vendor”.
Note: This will only update the item's vendor for future uses of the item. If the item is currently added to projects, those instances will remain unchanged.
From Documents
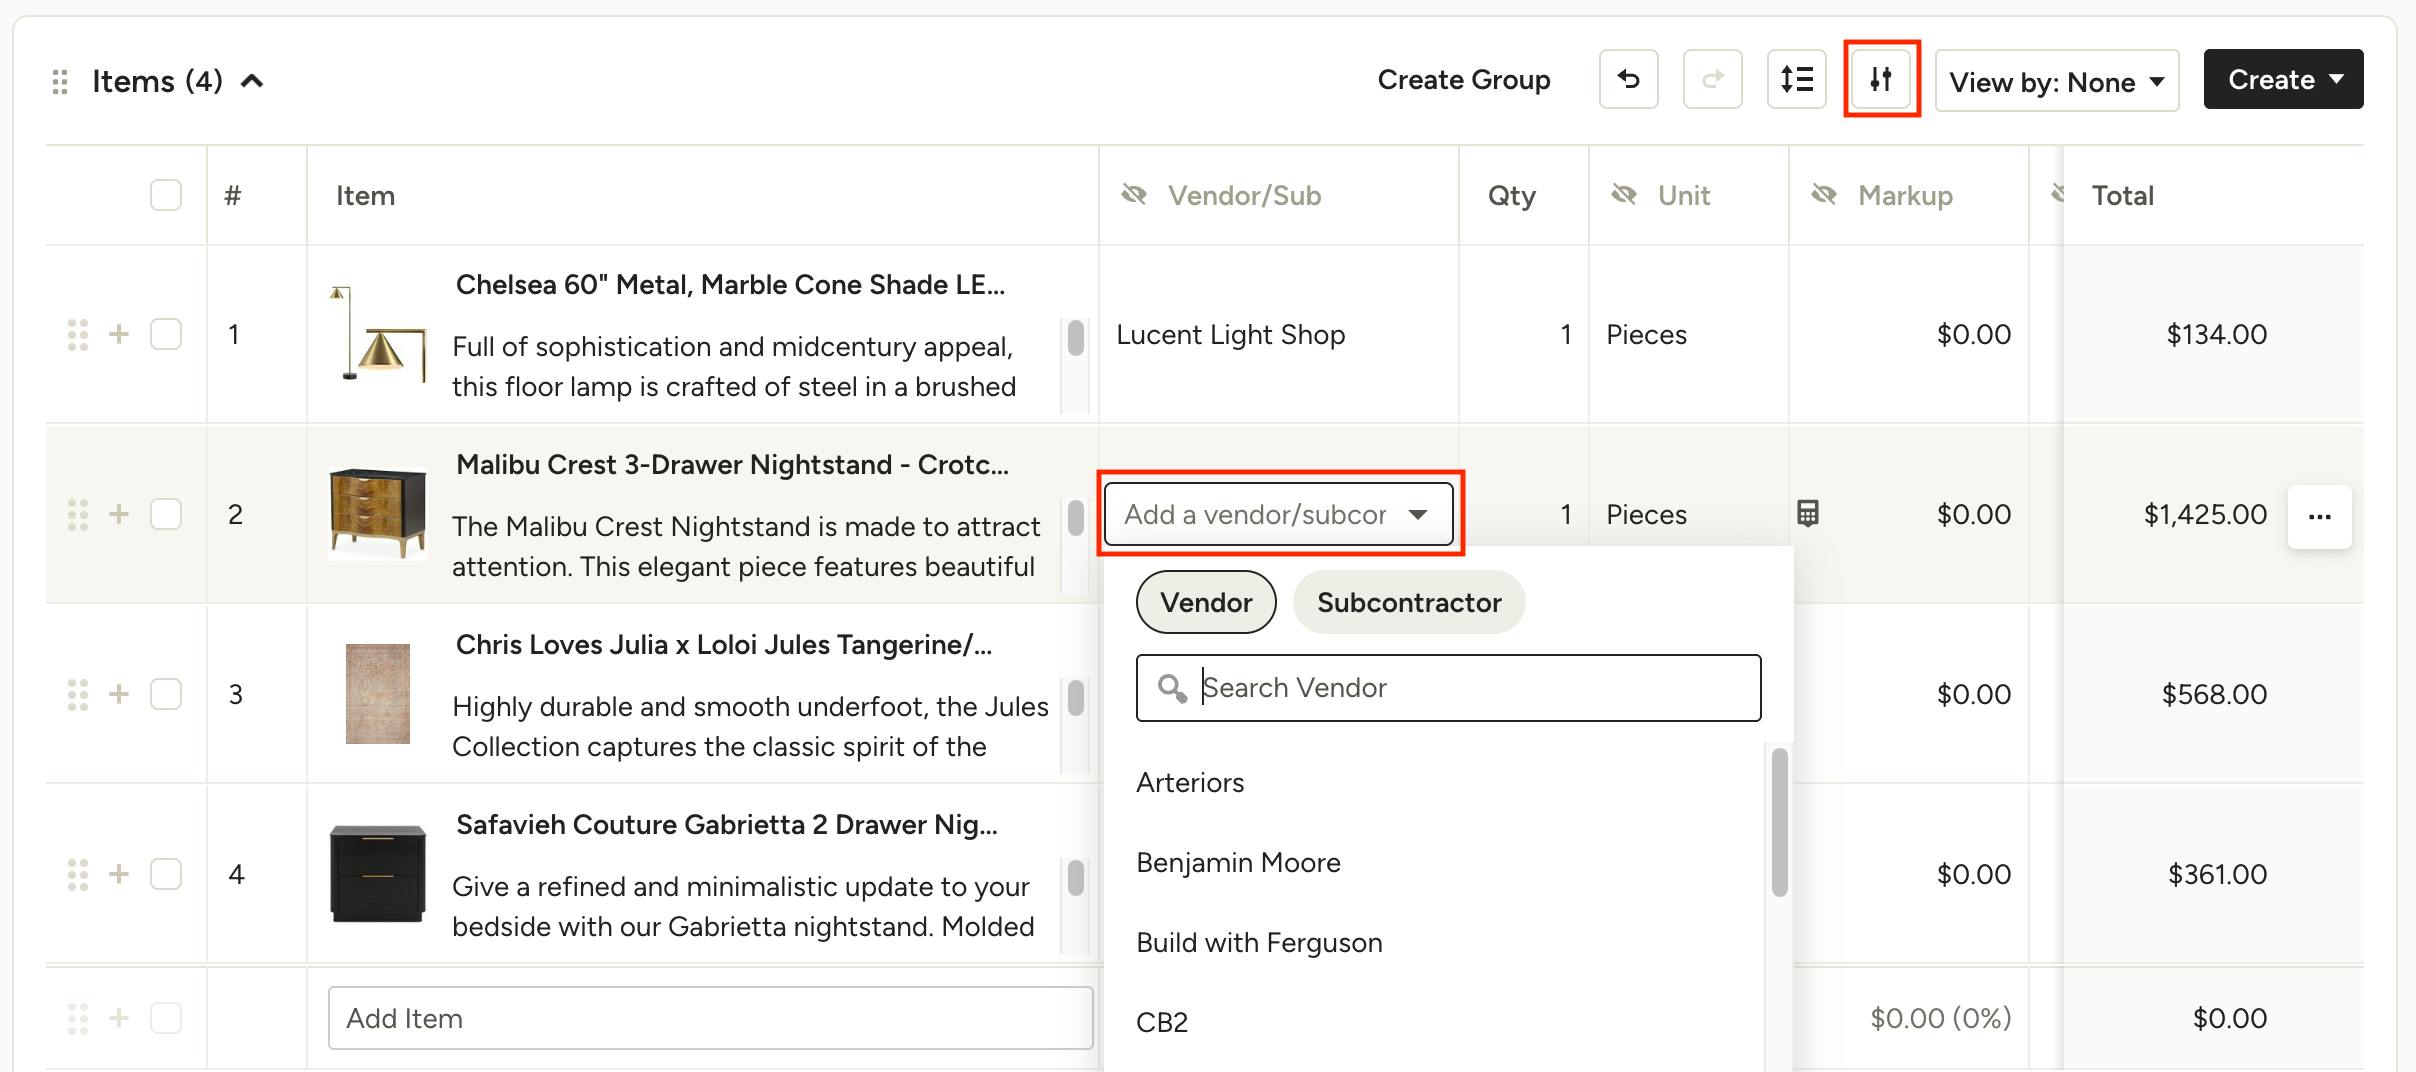
To assign or edit an item’s vendor directly in a document, click in the Vendor/Sub column on a line item to open the dropdown. Select the correct vendor, or type in a new one and click “Add New Vendor”.
Note: This will only update the item's vendor in the document. If the item exists in your My Items library, that vendor will remain unchanged.
If you don't see the Vendor/Sub column, you need to enable it. Click the Customize button at the top of the items section and toggle on Vendor/Sub.
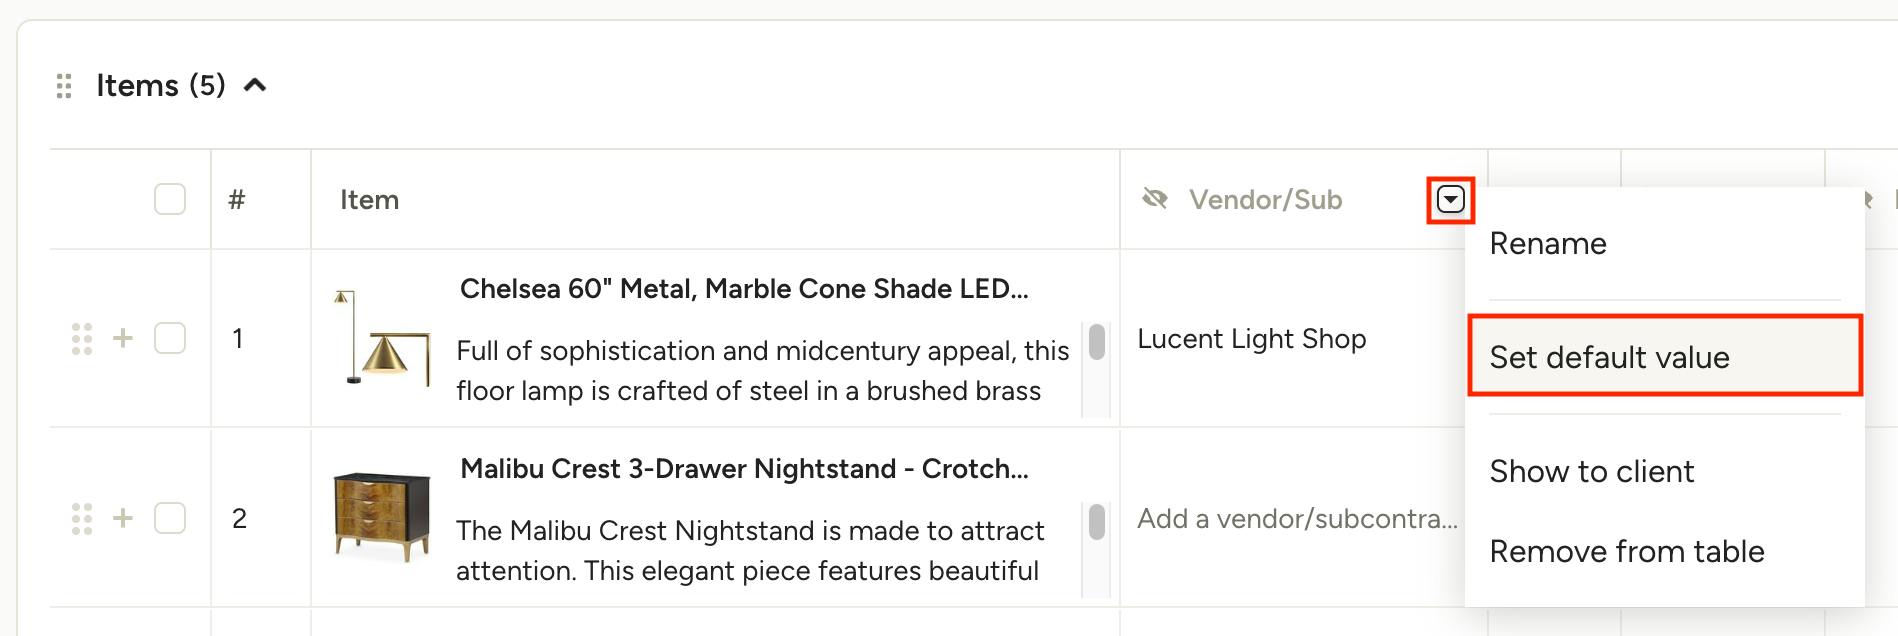
Pro tip: Need to assign a single vendor to all or most items on a document? Use the Set Default Value option from the menu at the top of the Vendor column to set a vendor, then make individual adjustments as needed.