How to Change Project Status
As you make progress on a project, you can easily adjust the project status to keep track of where you are in the process. While there are default status options in Houzz Pro, you can also create custom statuses to better fit your workflow.
Project status options include Open, In Progress, Done and Closed. Open, In Progress and Done are for active projects that will appear in your All Project's list. Closed is for inactive projects that will not appear in your All Project's list.
Please Note: Changing the project status (even Closed status) will not delete the project — read How to Delete a Project to learn more about the deletion process.
There are several ways to view and change the project status within Houzz Pro — you can either adjust the status on your All Projects page, or from an individual project page.
Change Project Status on All Projects Page
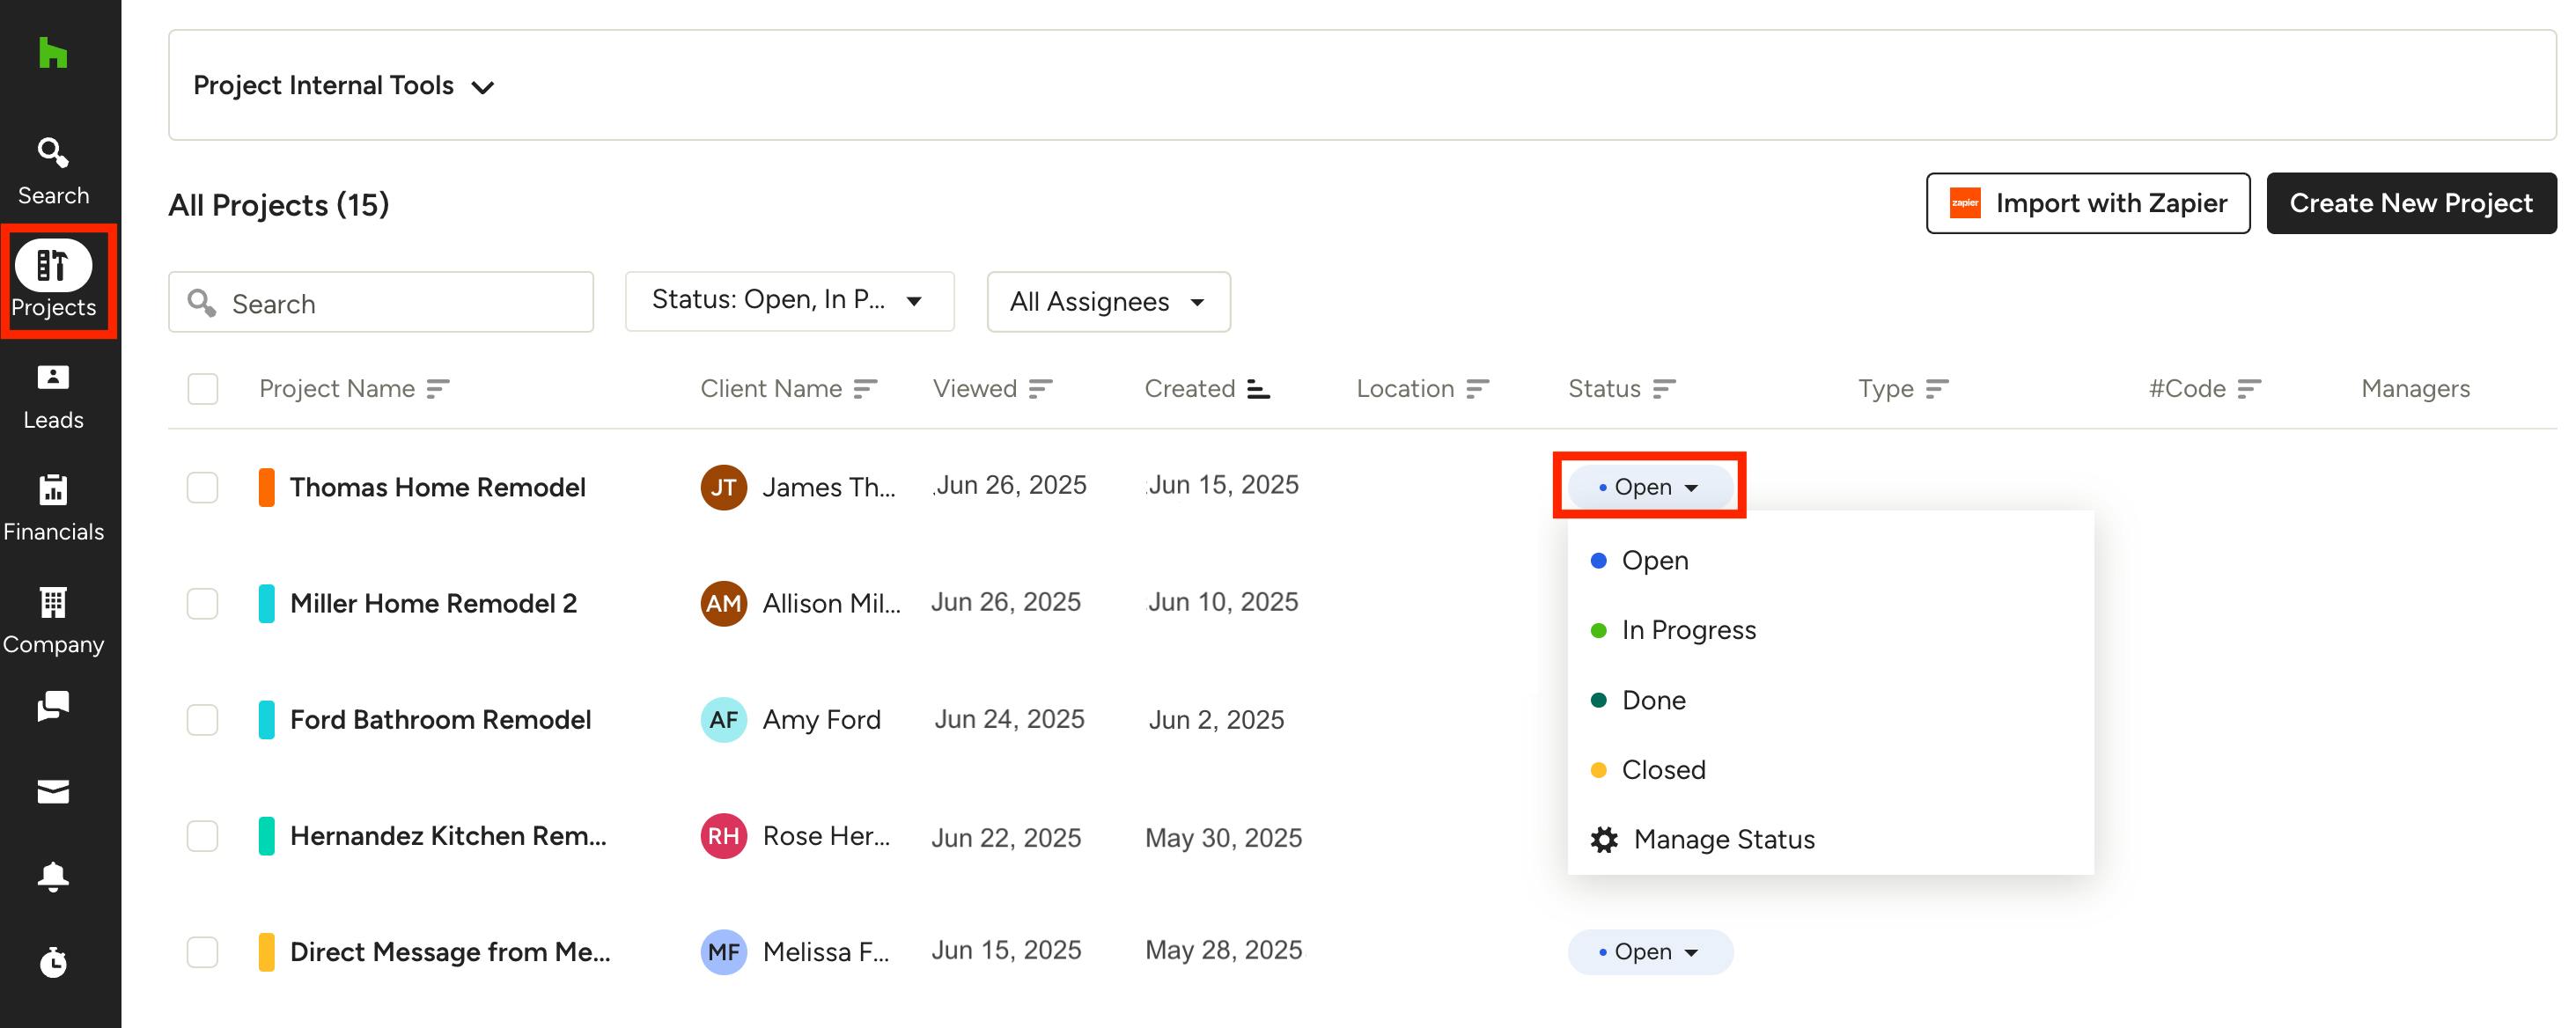
You can view the status of all your projects in one place on the All Projects page. To access, click the Projects icon in the left navigation.
Once on the page, change the project status by clicking the status dropdown for that project, then select the relevant option. Your changes will auto-save.
Change Project Status on Individual Project Page
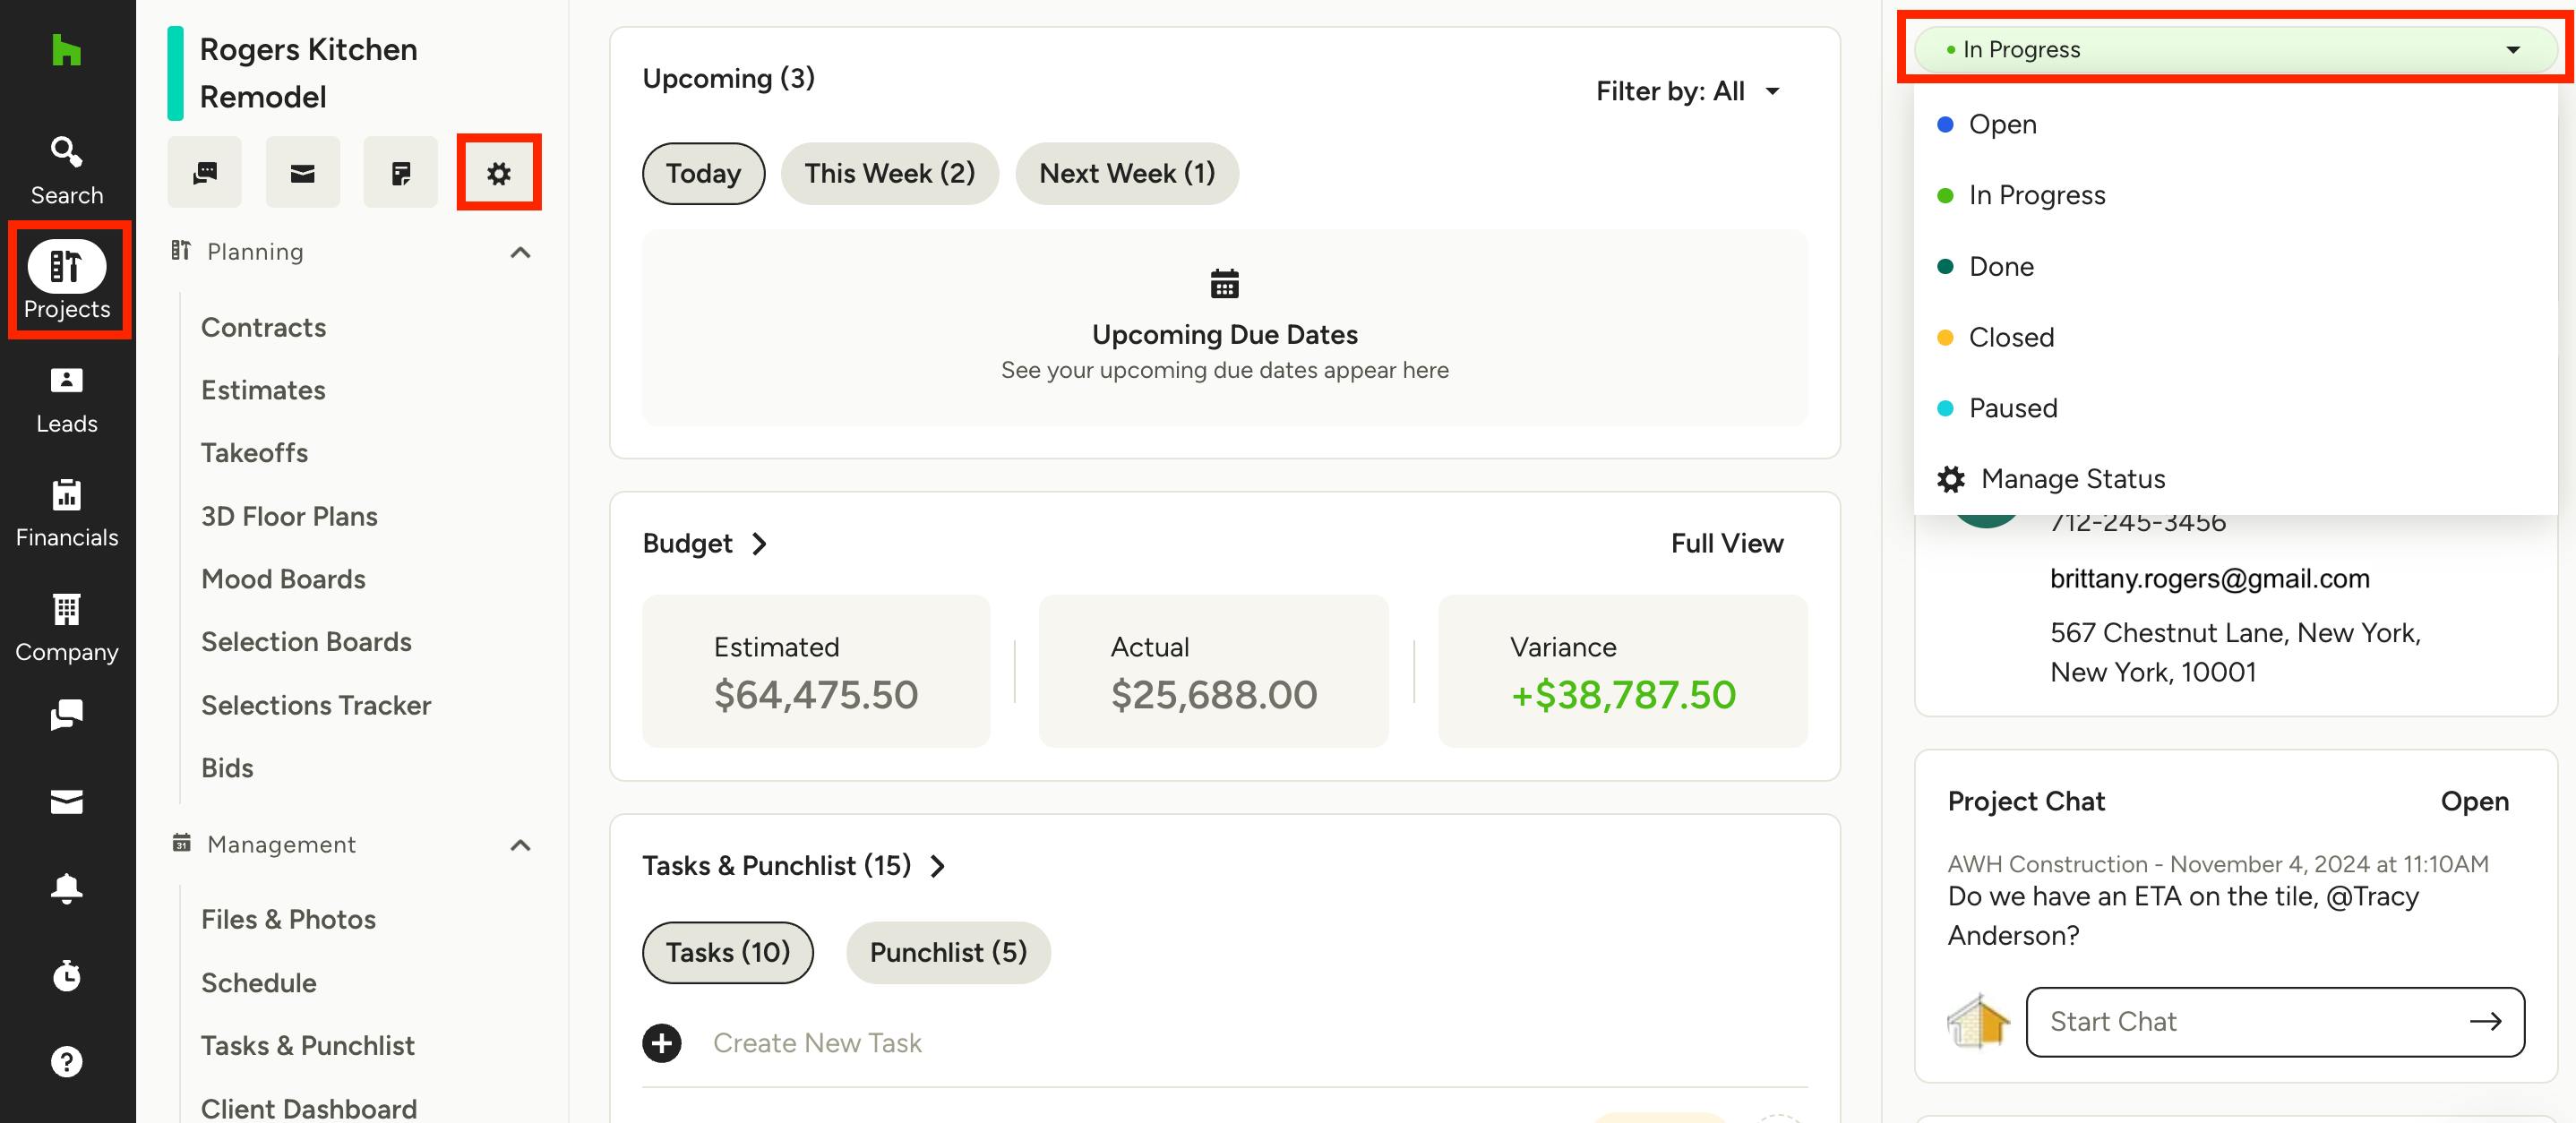
You can also open up an individual project to adjust the project status. To access, click on the Projects icon in the left navigation, then select the relevant project.
Once on the project overview page, there are two ways to view your project status:
- View and edit in the status dropdown at the top right of the project page
- View and edit by clicking the Gear icon and updating in project details
To adjust the status on the project page, just select the relevant status from the dropdown — your changes will auto-save.
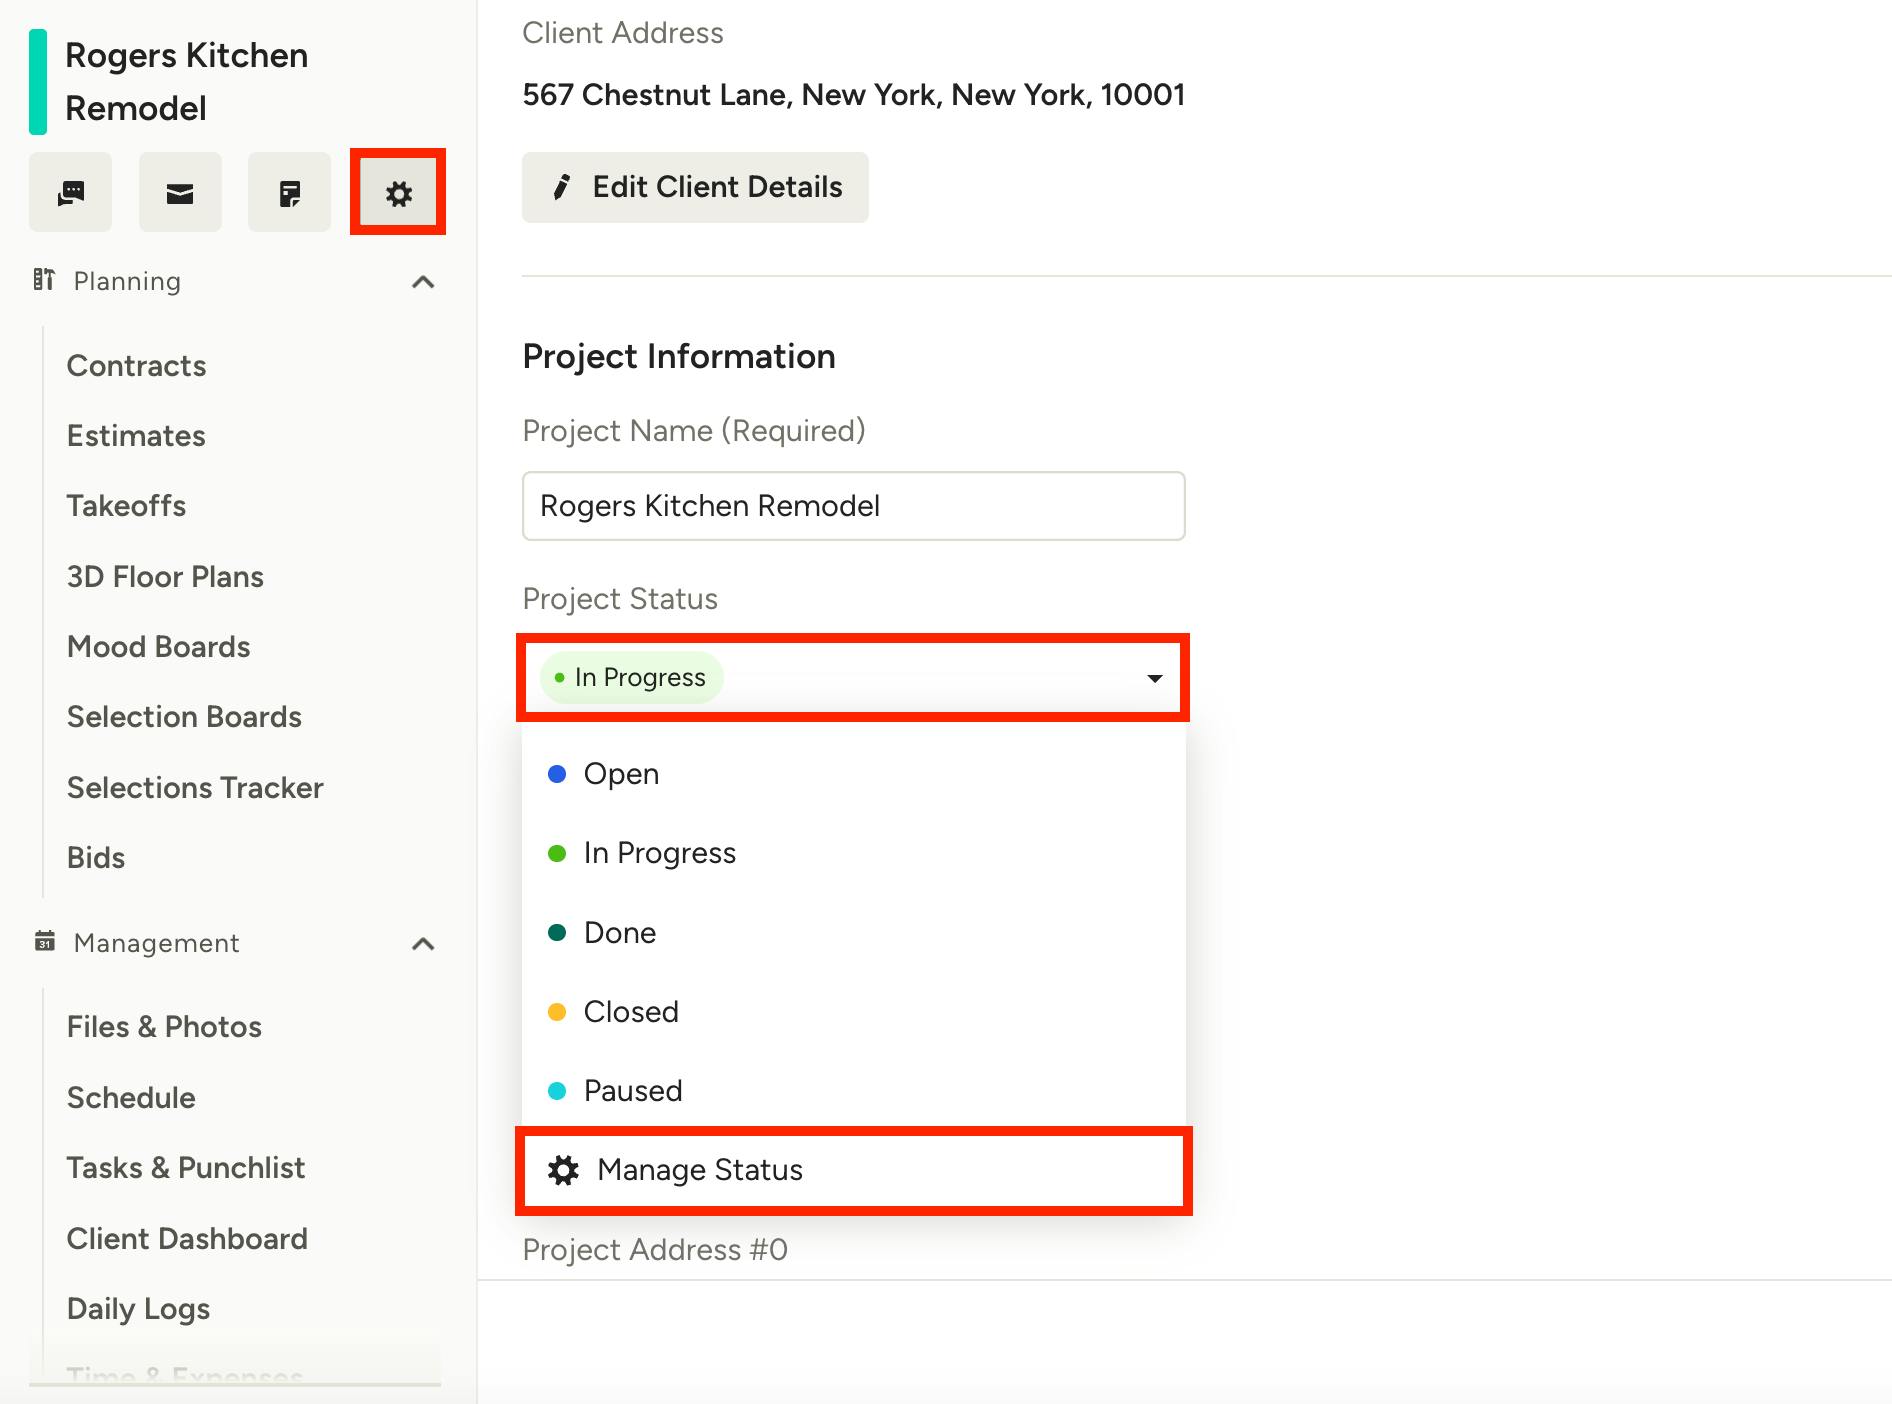
To adjust within the project details page, click the gear icon, then scroll down to find Project Status. Select the relevant status from the dropdown — your changes will auto-save.
Create Custom Project Status
If you would like to create a new custom status (or edit an existing one), select Manage Status at the bottom of the dropdown (as shown above). This is accessible from both the All Projects page as well as an individual project page.
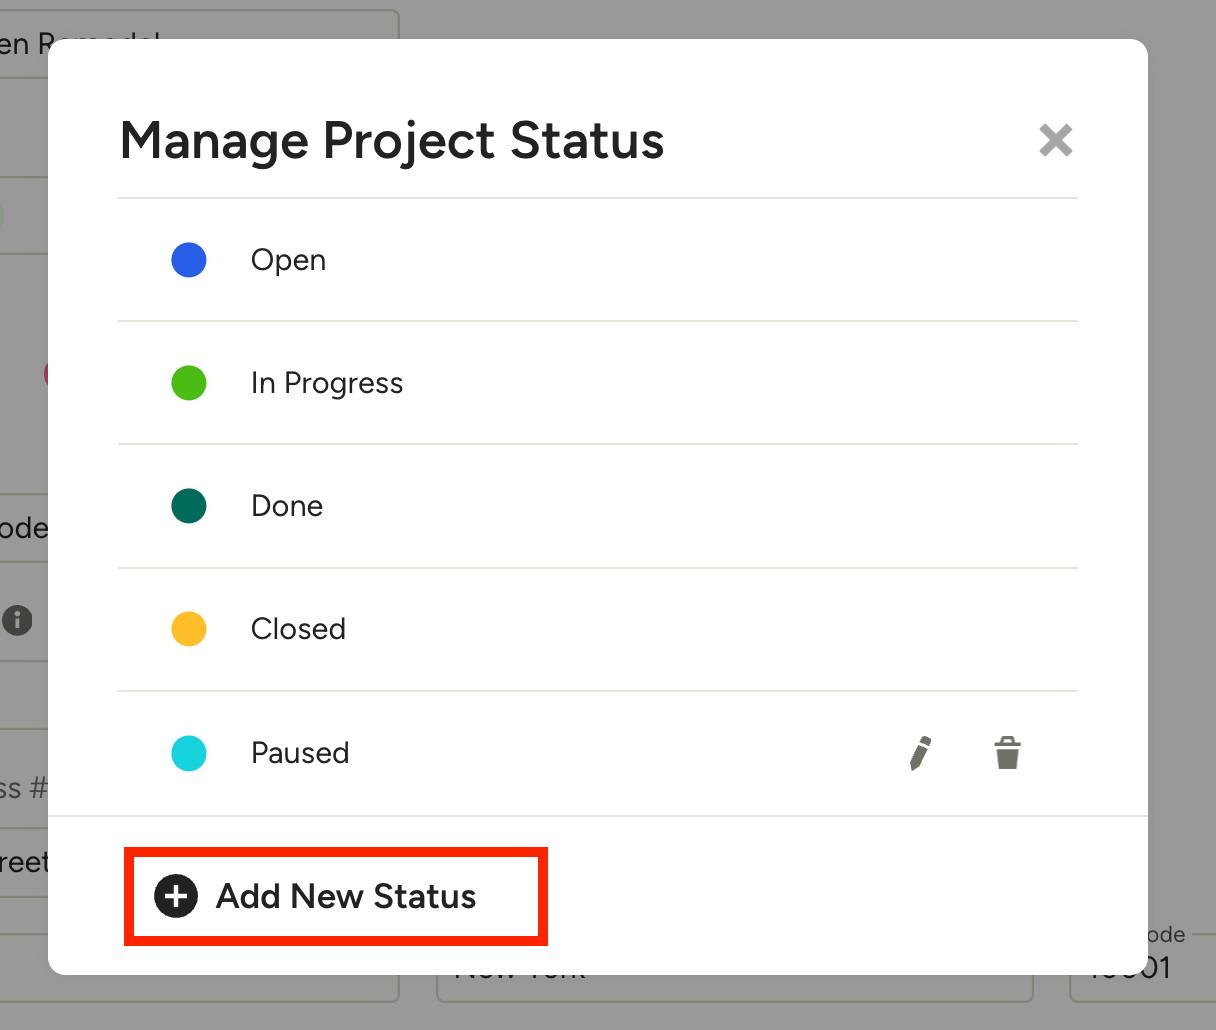
Once you click Manage Status, a new screen will appear. To create a new status, click Add New Status, type in the status name, then select the checkbox button or click Enter/Return on your keyboard to save.

Your new status will now appear for all projects. Click the dot to the left of the status to customize the color. To edit the status name, click the pencil icon. To delete the status, click the trash can icon.