How to Use the Dispute Management Portal
As a business owner, there are times when a client might dispute a payment transaction with your company when using Houzz Pro online payments. It is always recommended to try to resolve a dispute directly with the client first. Fighting a dispute can take up to three months to resolve, and neither Houzz nor Stripe has control over the process (read more about the dispute process and FAQs here).
If your client does file a dispute with their bank, it's important that you have all the information you need to successfully and quickly resolve it. Within the Dispute Management Portal on Houzz Pro, you can view any disputes against your company, accept a dispute, or counter a dispute by uploading relevant documents to support your case.
Let's go over how to access the portal and how to upload relevant documentation to help with a fast resolution.
Dispute Management Portal Overview
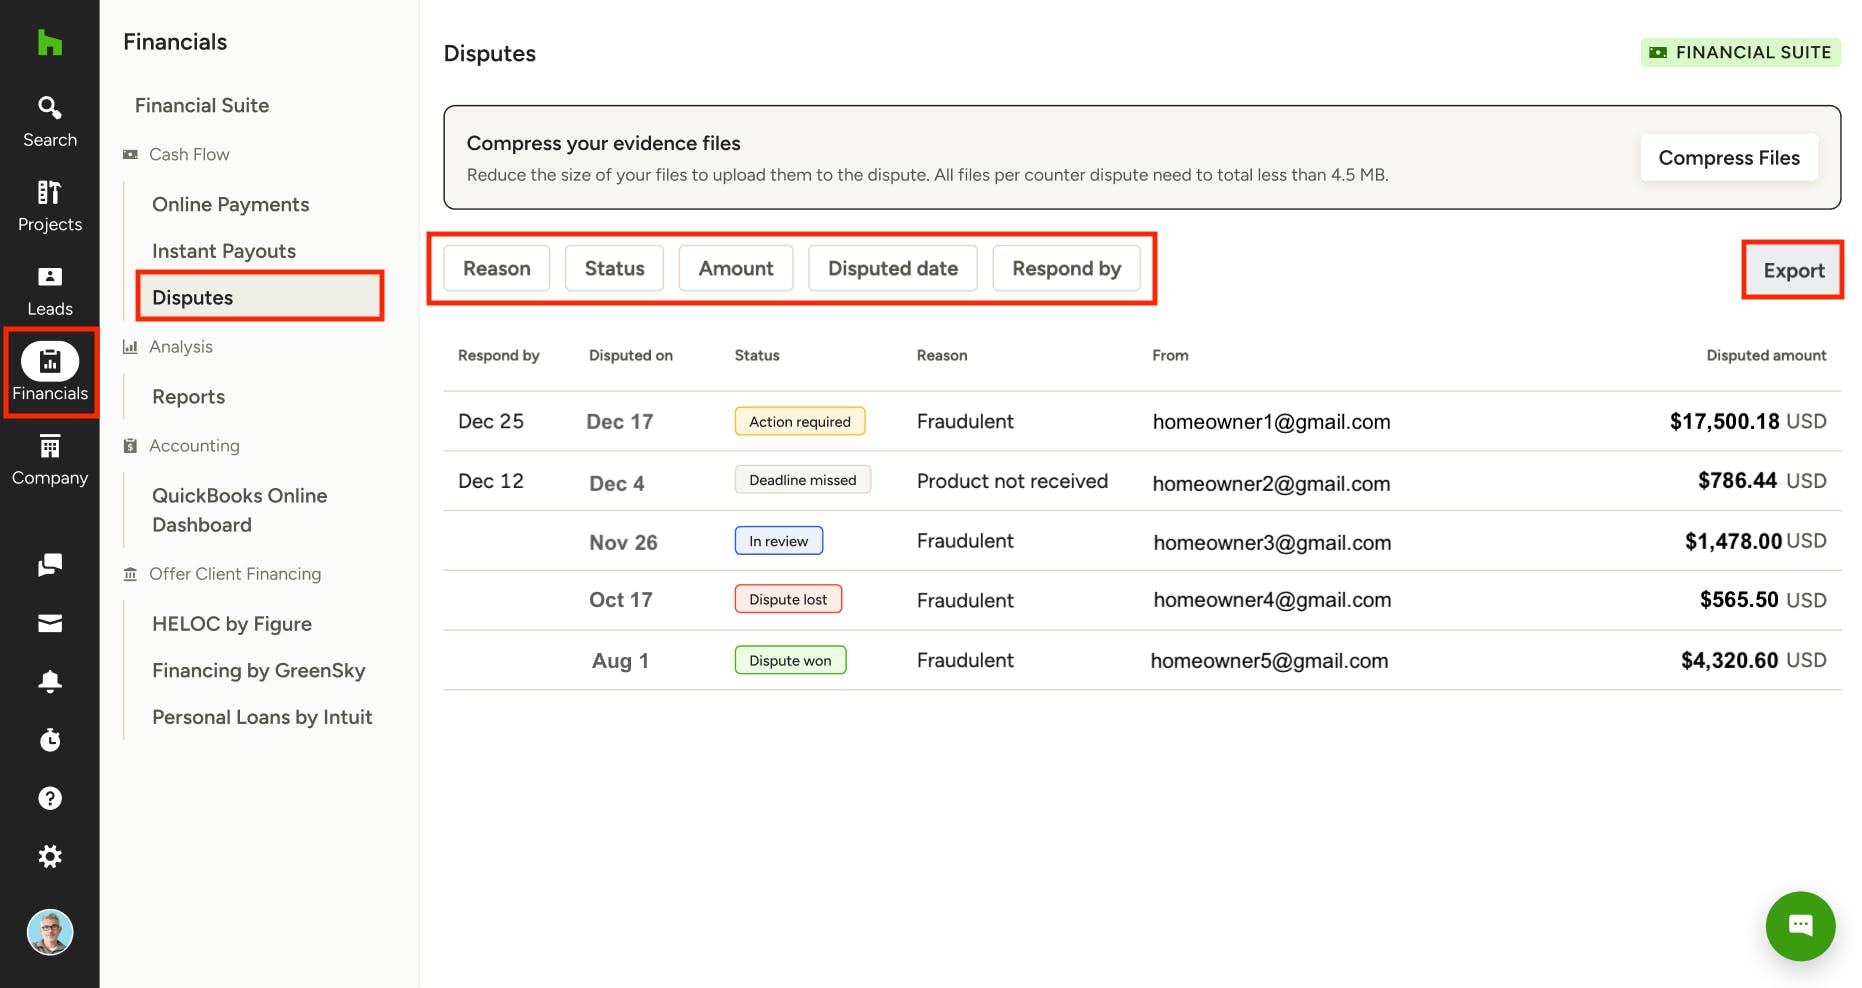
When a new dispute is filed, you will receive an email notification from payment-disputes@houzz.com with a link to the Dispute Management Portal for more details. You can click on the link to access the portal, or select the Financials icon from your navigation, then click on Disputes in the left menu.
Within the Disputes Management Portal, you can view previous and current client disputes. Please Note: Disputes that occurred before the portal's launch will not be shown.
For each case, the columns include:
- Respond By: If any action is required on your end, this is your deadline date for submitting a response.
- Disputed On: This is the date that the dispute was submitted by the client.
- Status: This is a current update on where the dispute is in the process. This can include Action Required, Deadline Missed, In Review, Dispute Lost, and Dispute Won.
- Reason: This explains why the client filed the dispute.
- From: This is the email address for the client who filed the dispute.
- Disputed Amount: This is the monetary amount the client filed the dispute for.
At the top of the portal, you can filter disputes by specific information. You can also select Export to download and save a summary of the disputes to your computer.
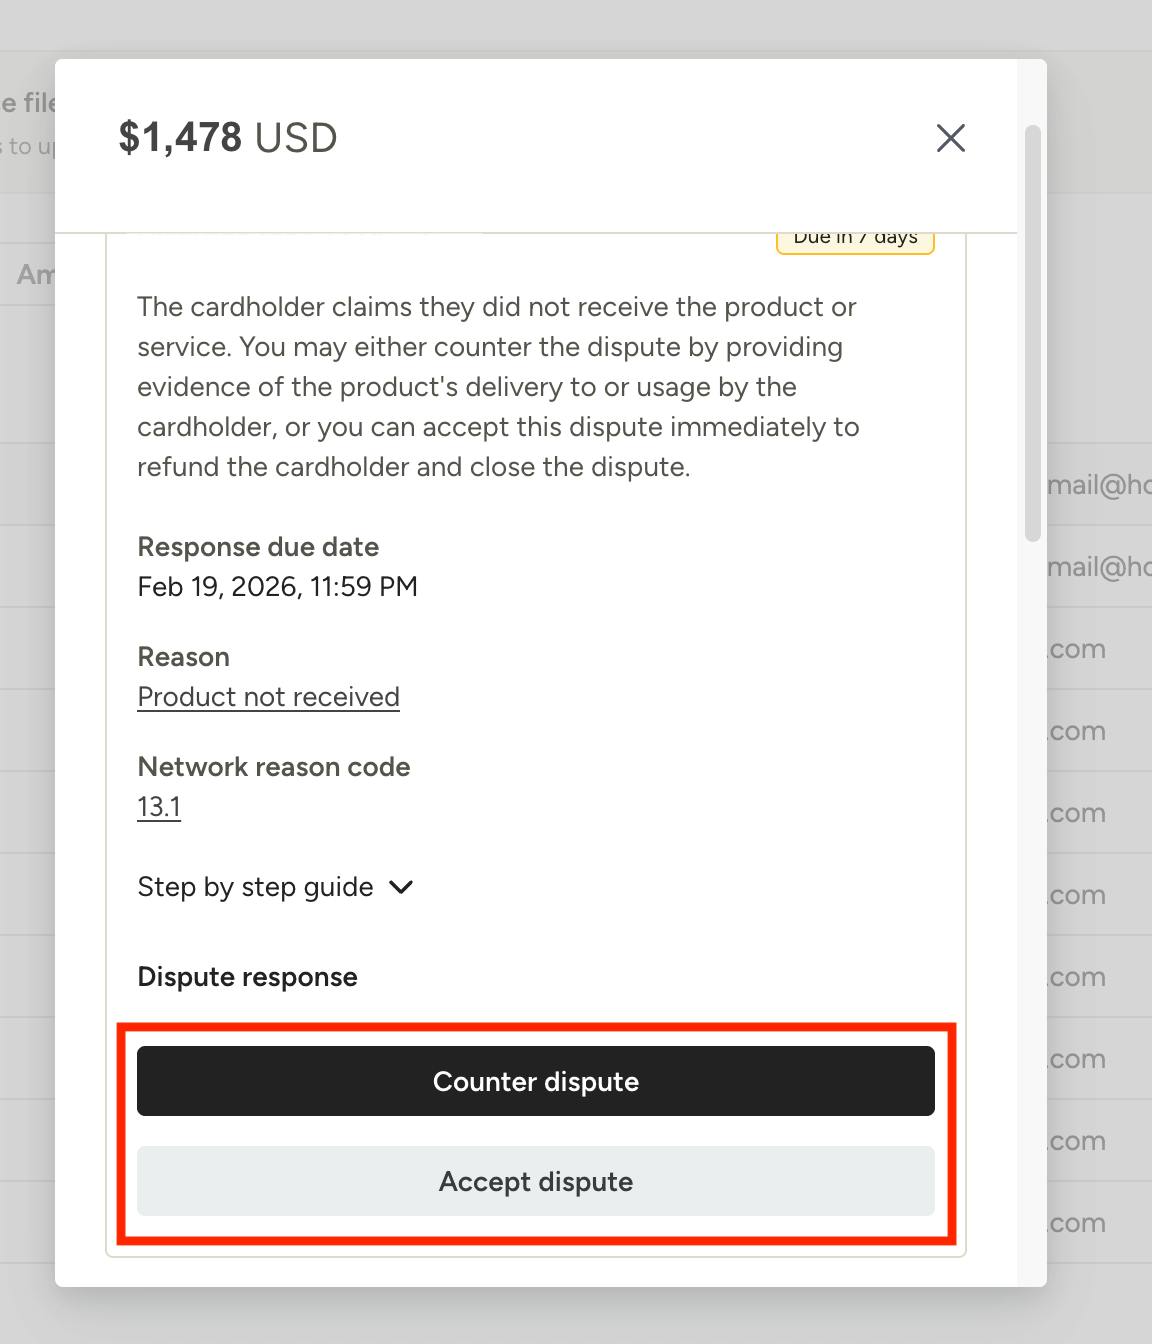
You can click on each dispute to view more details, such as dispute amount, payment method, and overall timeline. From here, you can also accept or counter a client’s payment dispute (as shown below).
Accept Dispute
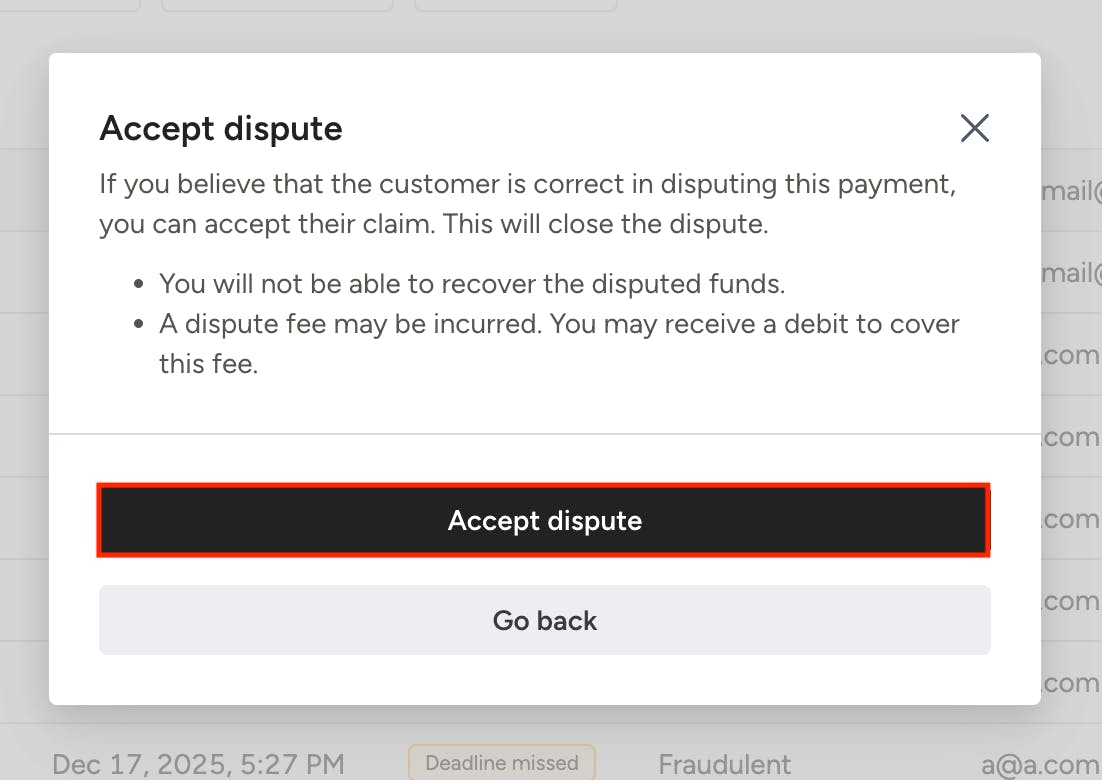
If you believe your client is correct in disputing this payment, you can accept the claim by clicking Accept Dispute.
A new screen will appear asking you to confirm. If you decide to accept, you will not be able to recover the deposited funds. A dispute fee may also be incurred, so you may receive a debit to cover this fee.
Click Accept Dispute to complete.
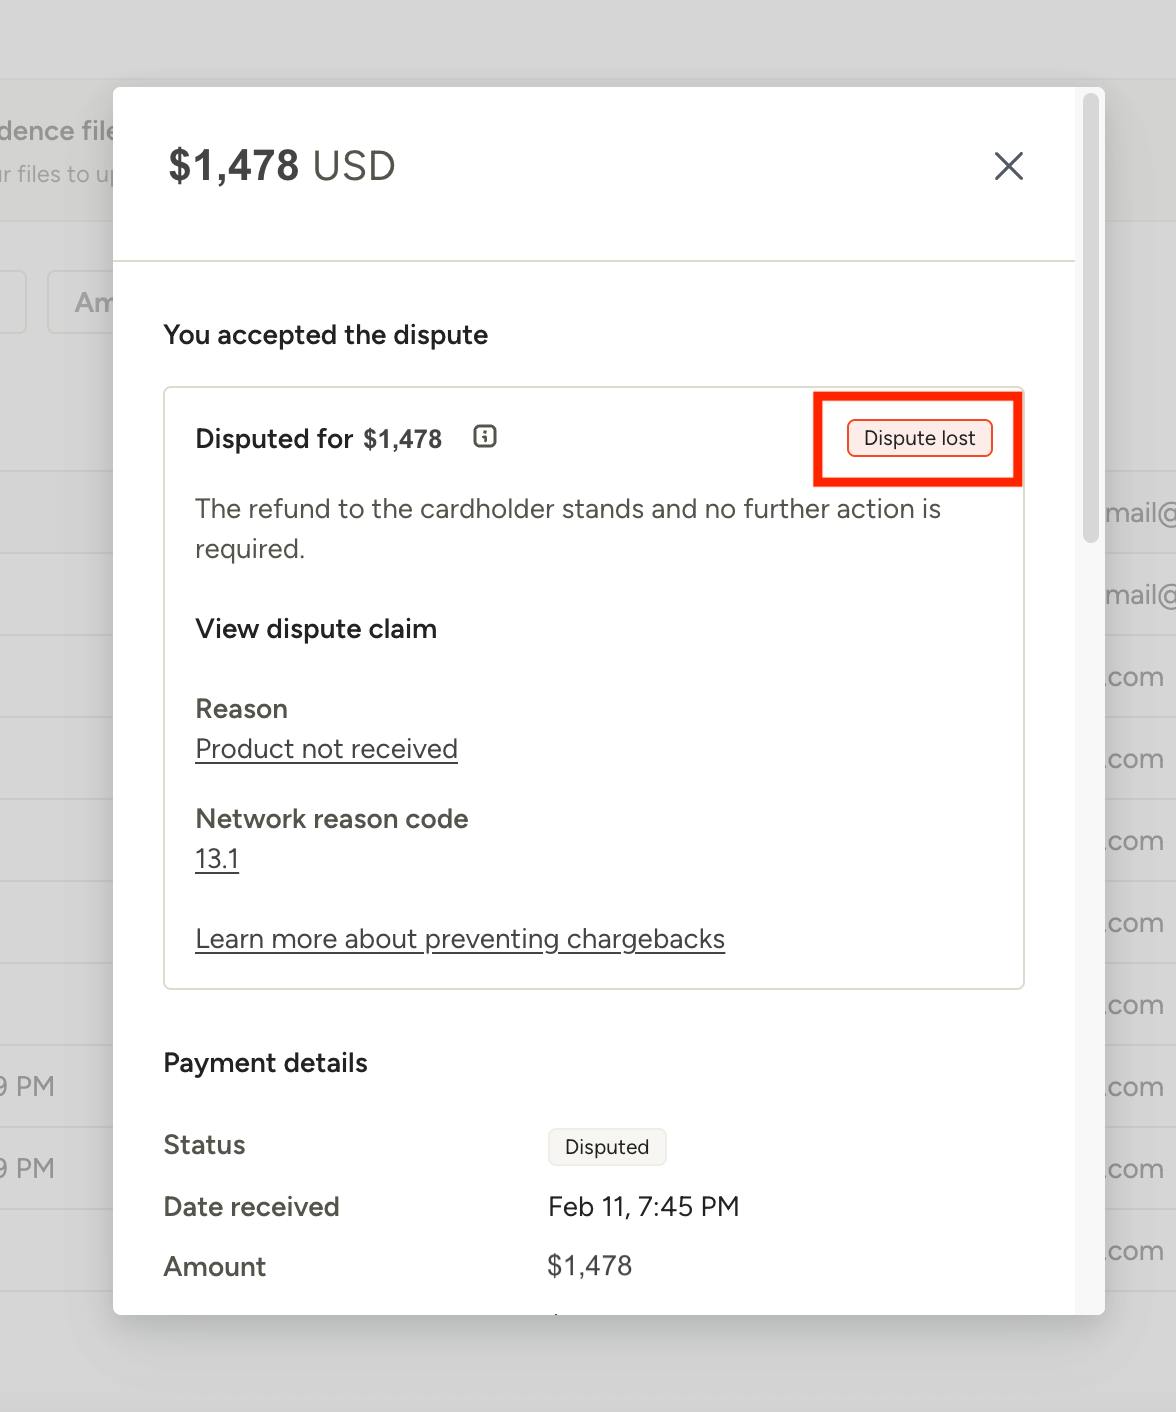
This will close the dispute, and it will show as Dispute Lost in the portal and in the dispute details.
If you decide to counter a dispute, you will need to provide details and upload PDF documentation for evidence. This process often requires you to compress files before you upload them, since there are file size restrictions from Stripe. Let's go over that process.
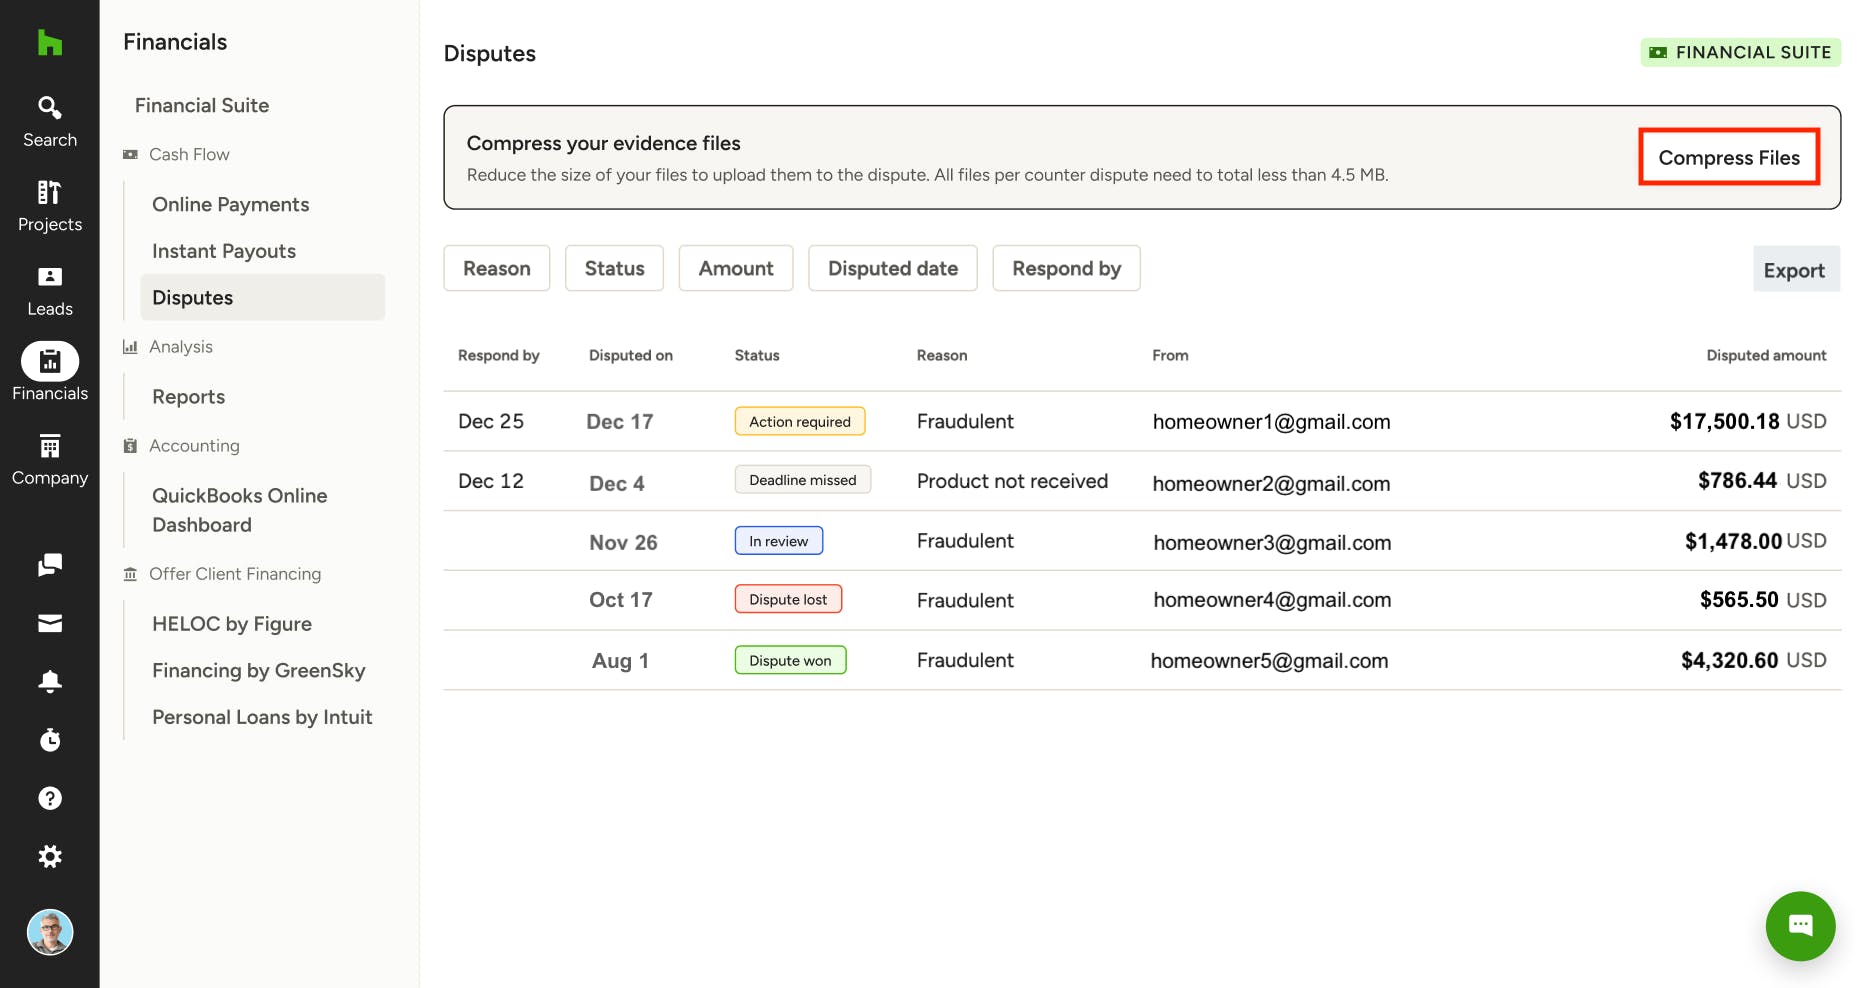
Compress Files and Counter Dispute
To compress files you would like to use as evidence in your counter dispute, select the Compress Files button.
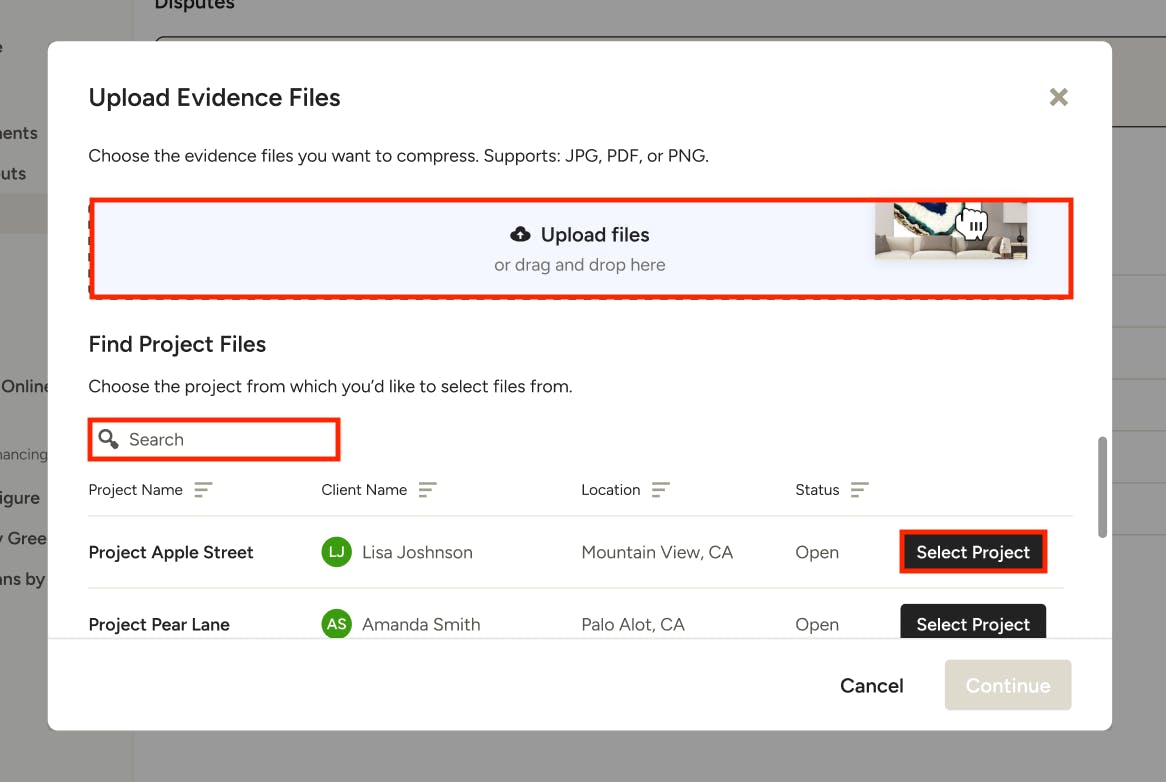
A new screen will appear. Here, you can upload a new file from your computer using the Upload Files button.
You also have the option to include a file that's already part of a project in Houzz Pro. Use the search bar at the top to find the project name, or click Select Project next to the relevant project. Click Continue.
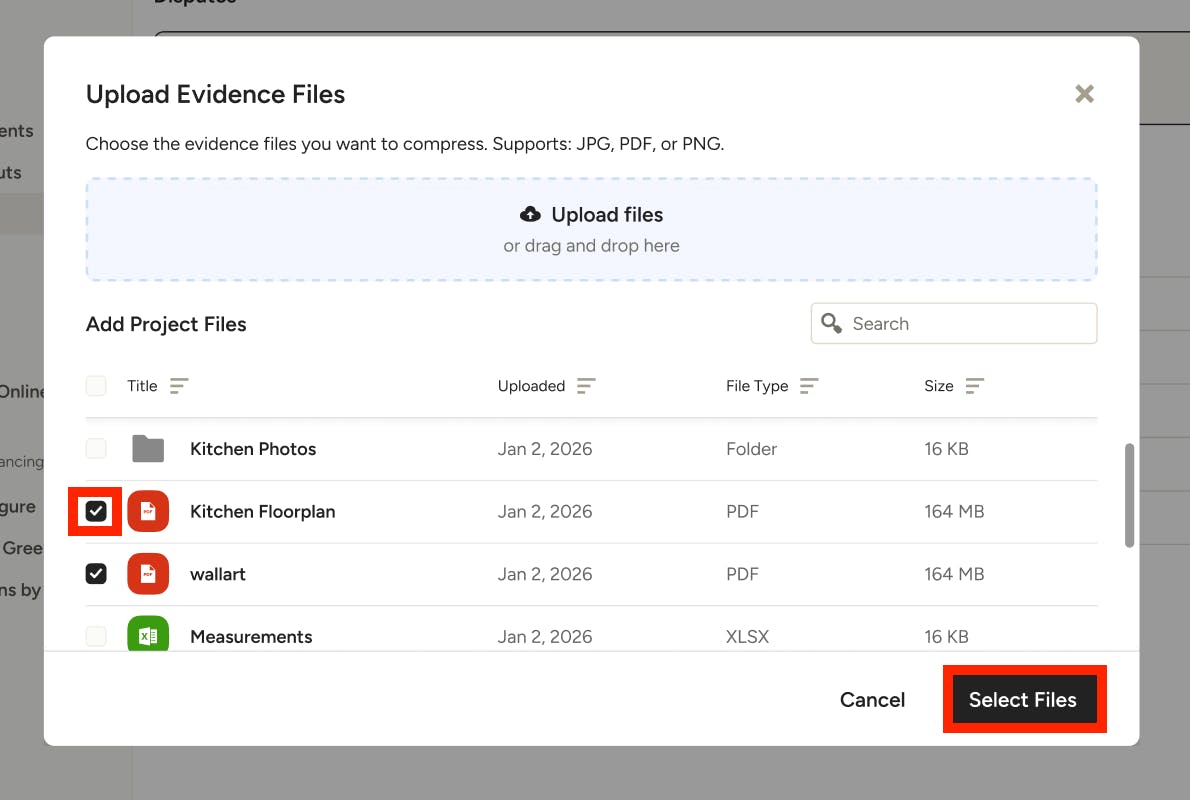
If you select a project, a new screen will appear where you can click the checkbox next to the relevant file(s) you want to include. Be sure to click Select Files once complete.
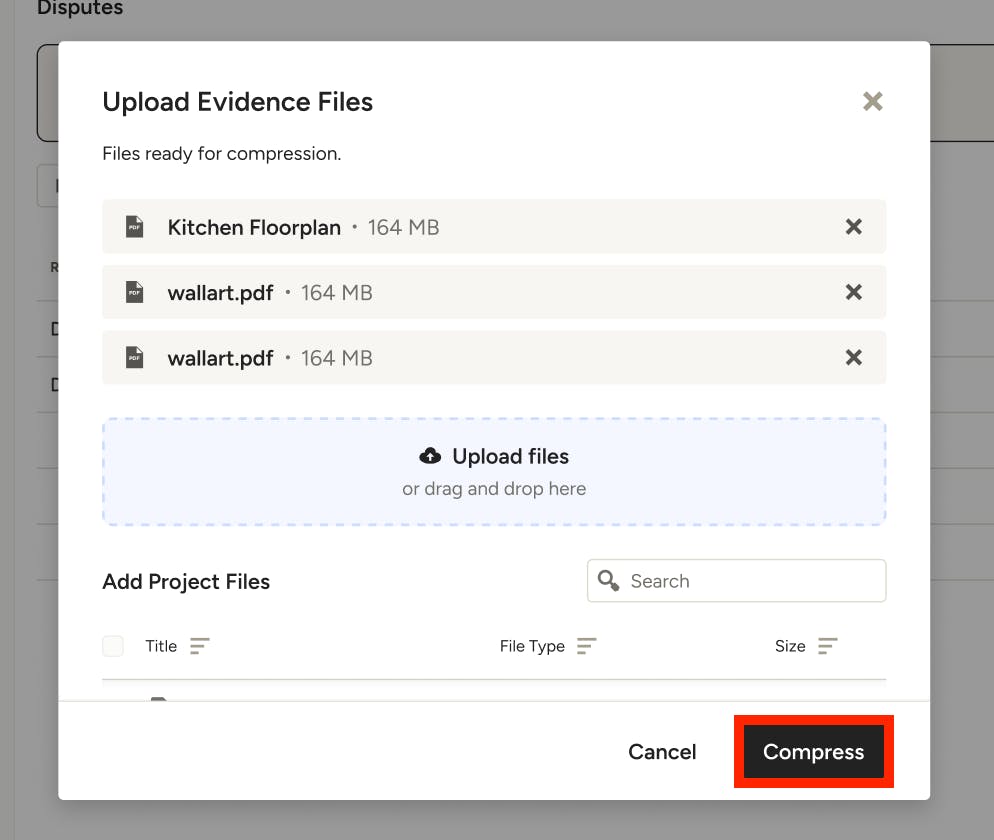
Your selected files will appear. Click Compress.
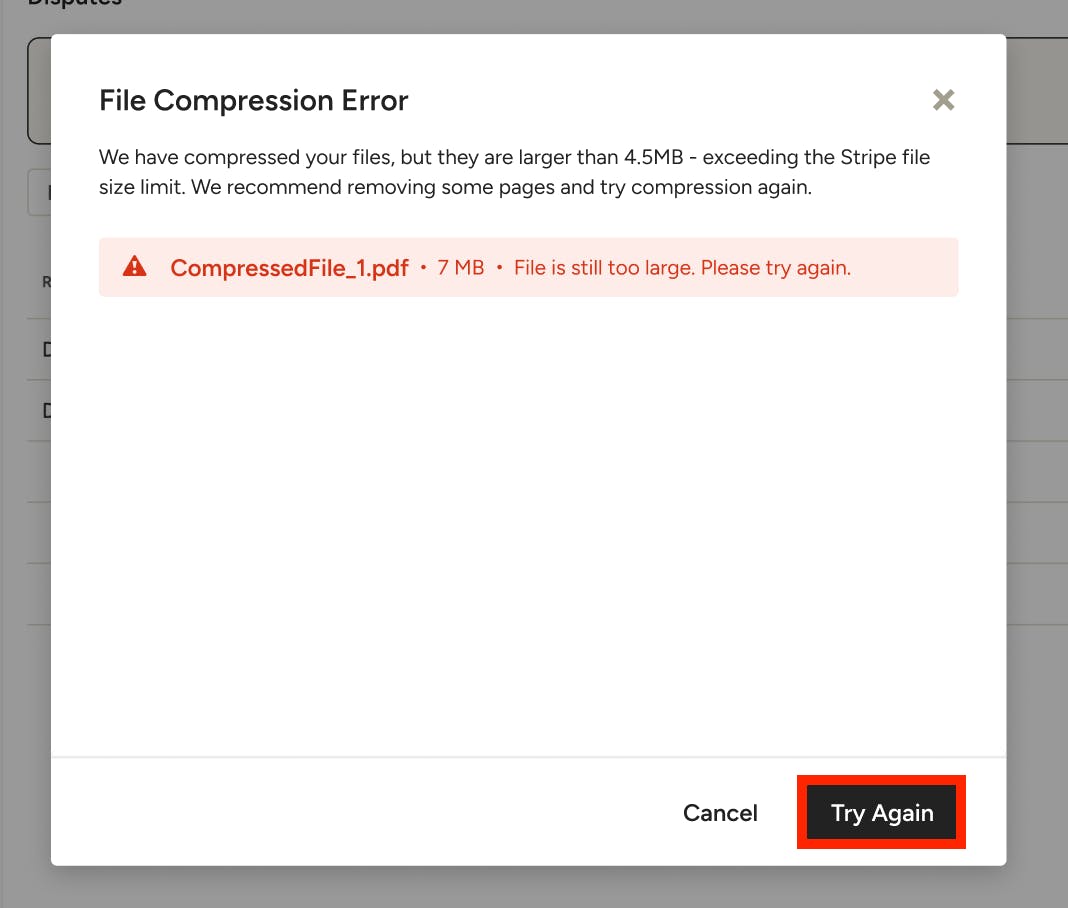
If the file compression is not successful, you will see a note that there was an error with the compression. Select Try Again to make adjustments.
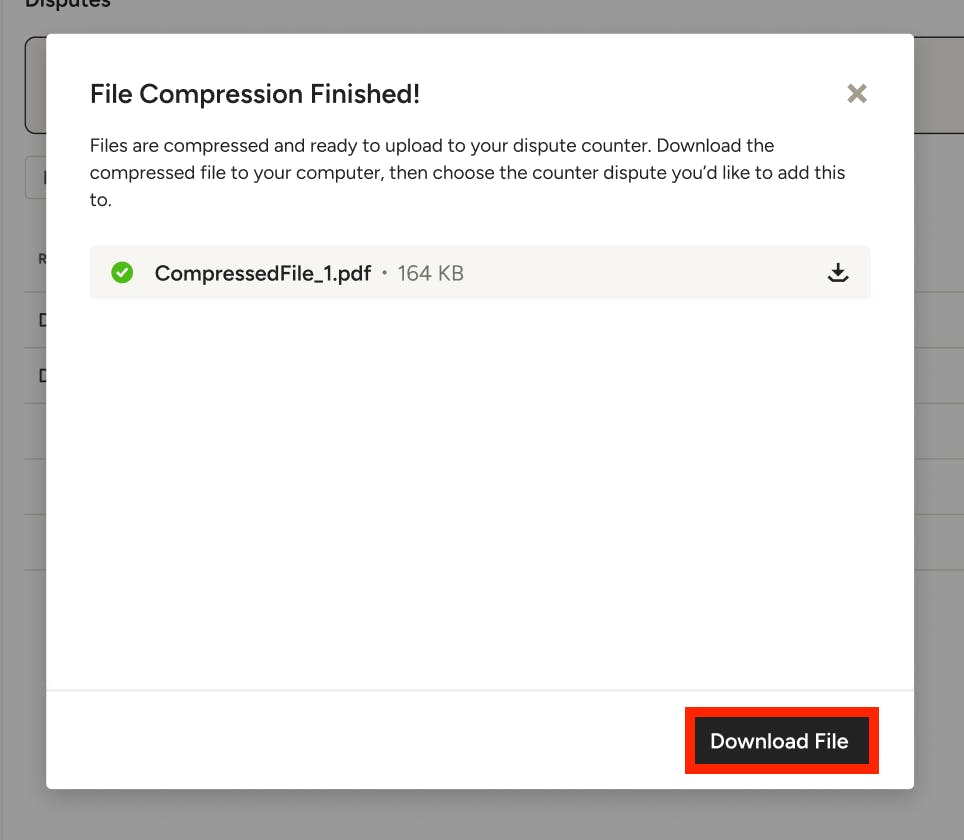
If the file compression is successful, you will see a note that the compression is complete.
You will then need to download the compressed file. Click Download File, then save to your computer.
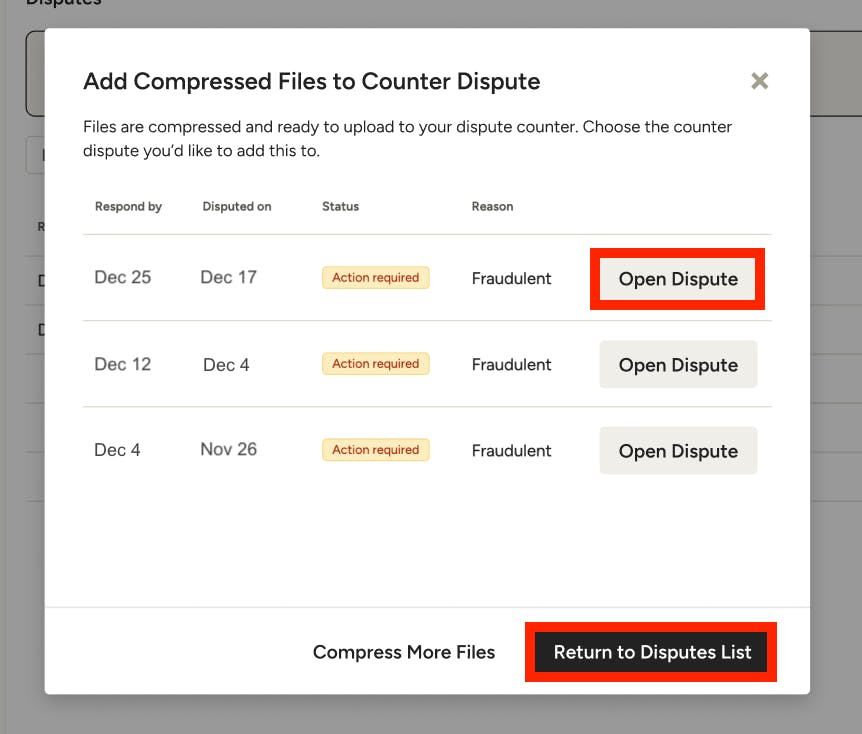
After download, click Next. On this screen, you can either directly add the compressed file to an existing dispute, or you can click Return to Disputes List to counter the dispute later on from the portal itself (more details below).
To add the compressed file now, find the relevant dispute in the list, then select Open Dispute.
The dispute details will appear. Select Counter Dispute to start the process.
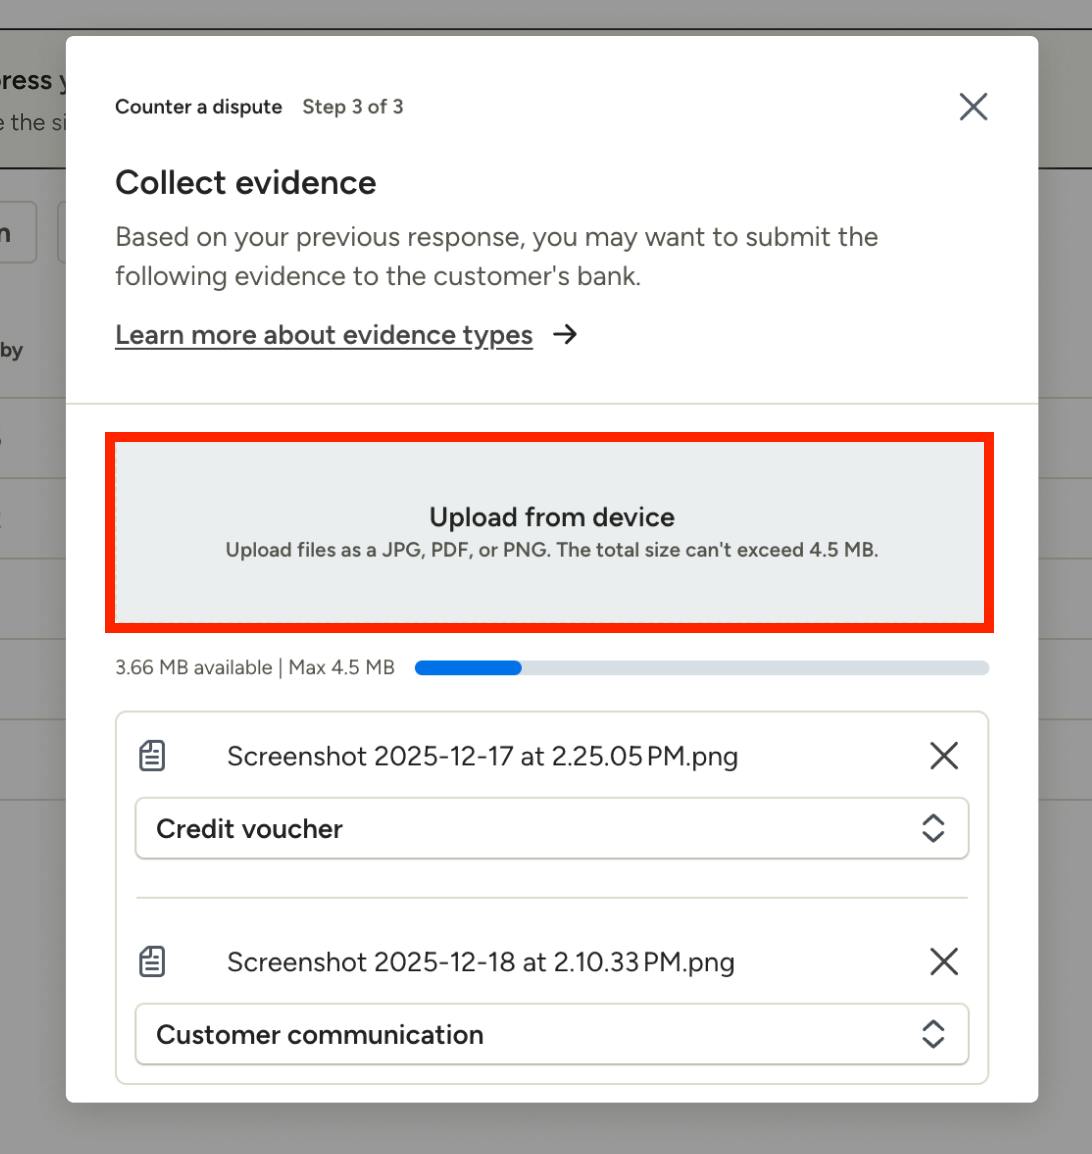
You will then need to answer some questions about the dispute, as well as attach the compressed file you created (it will not automatically populate).
Please Note: You are only able to submit evidence to the client’s bank one time, so be sure to double check that all the information is correct and compelling.
Click Review, then Submit.
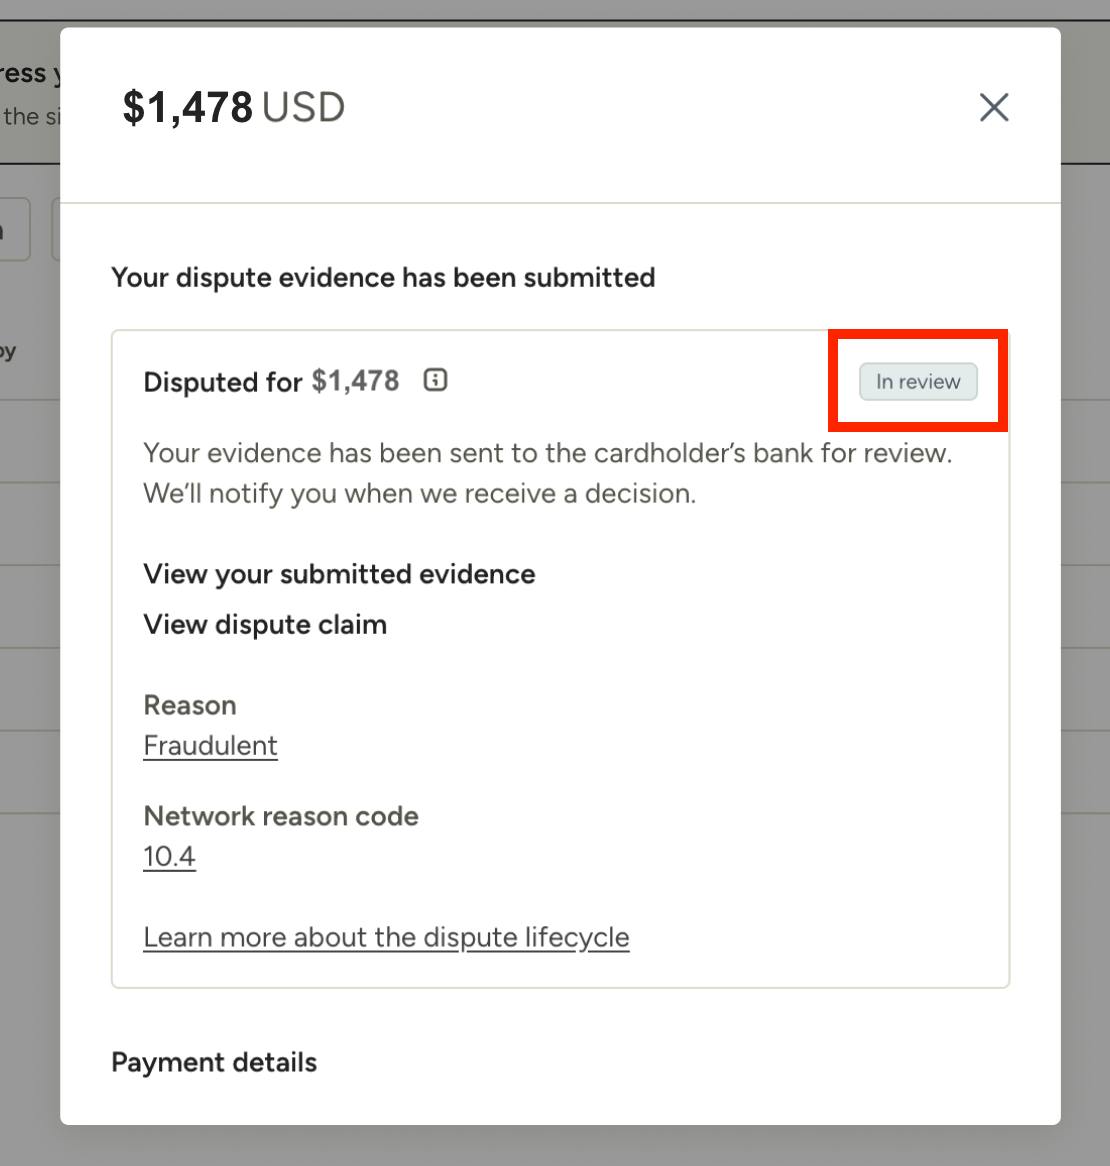
You will receive a submission confirmation with all the details, as shown below. The dispute details page will show it is In Review, as well as in the portal itself. You can return to the portal at any time to check the dispute status.
Counter Dispute From Portal
You also have the option to start the counter dispute process from the portal itself. To start, click on the dispute to open up the dispute details. Select Counter Dispute to start the process.
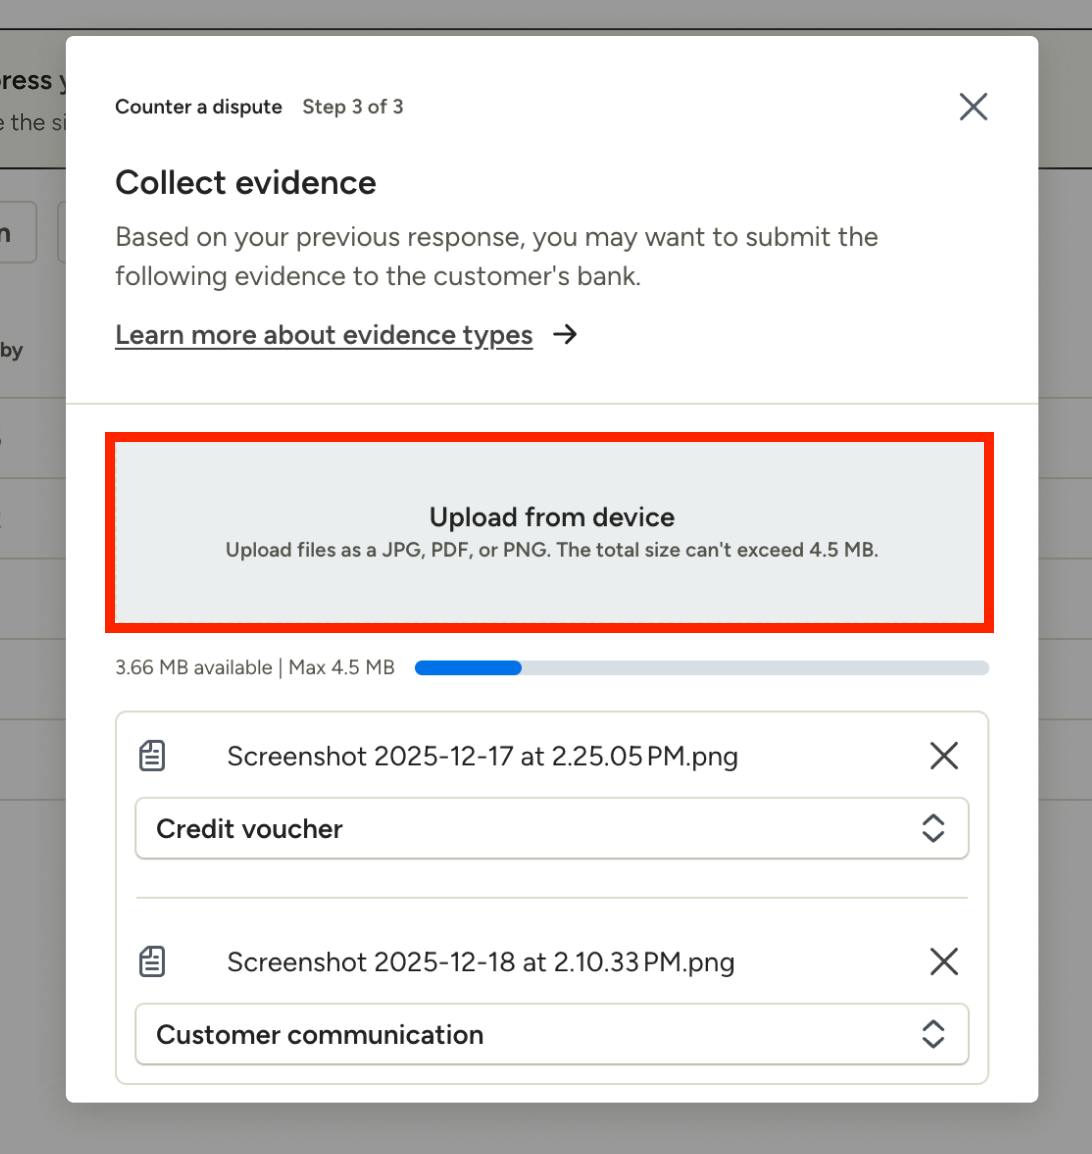
You will then need to answer some questions about the dispute, as well as attach the compressed file you created (it will not automatically populate).
Please Note: You are only able to submit evidence to the client’s bank one time, so be sure to double check that all the information is correct and compelling.
Click Review, then Submit.
You will receive a submission confirmation with all the details, as shown below. The dispute details page will show it is In Review, as well as in the portal itself. You can return to the portal at any time to check the dispute status.