How to Use AI to Convert an Estimate to a Schedule
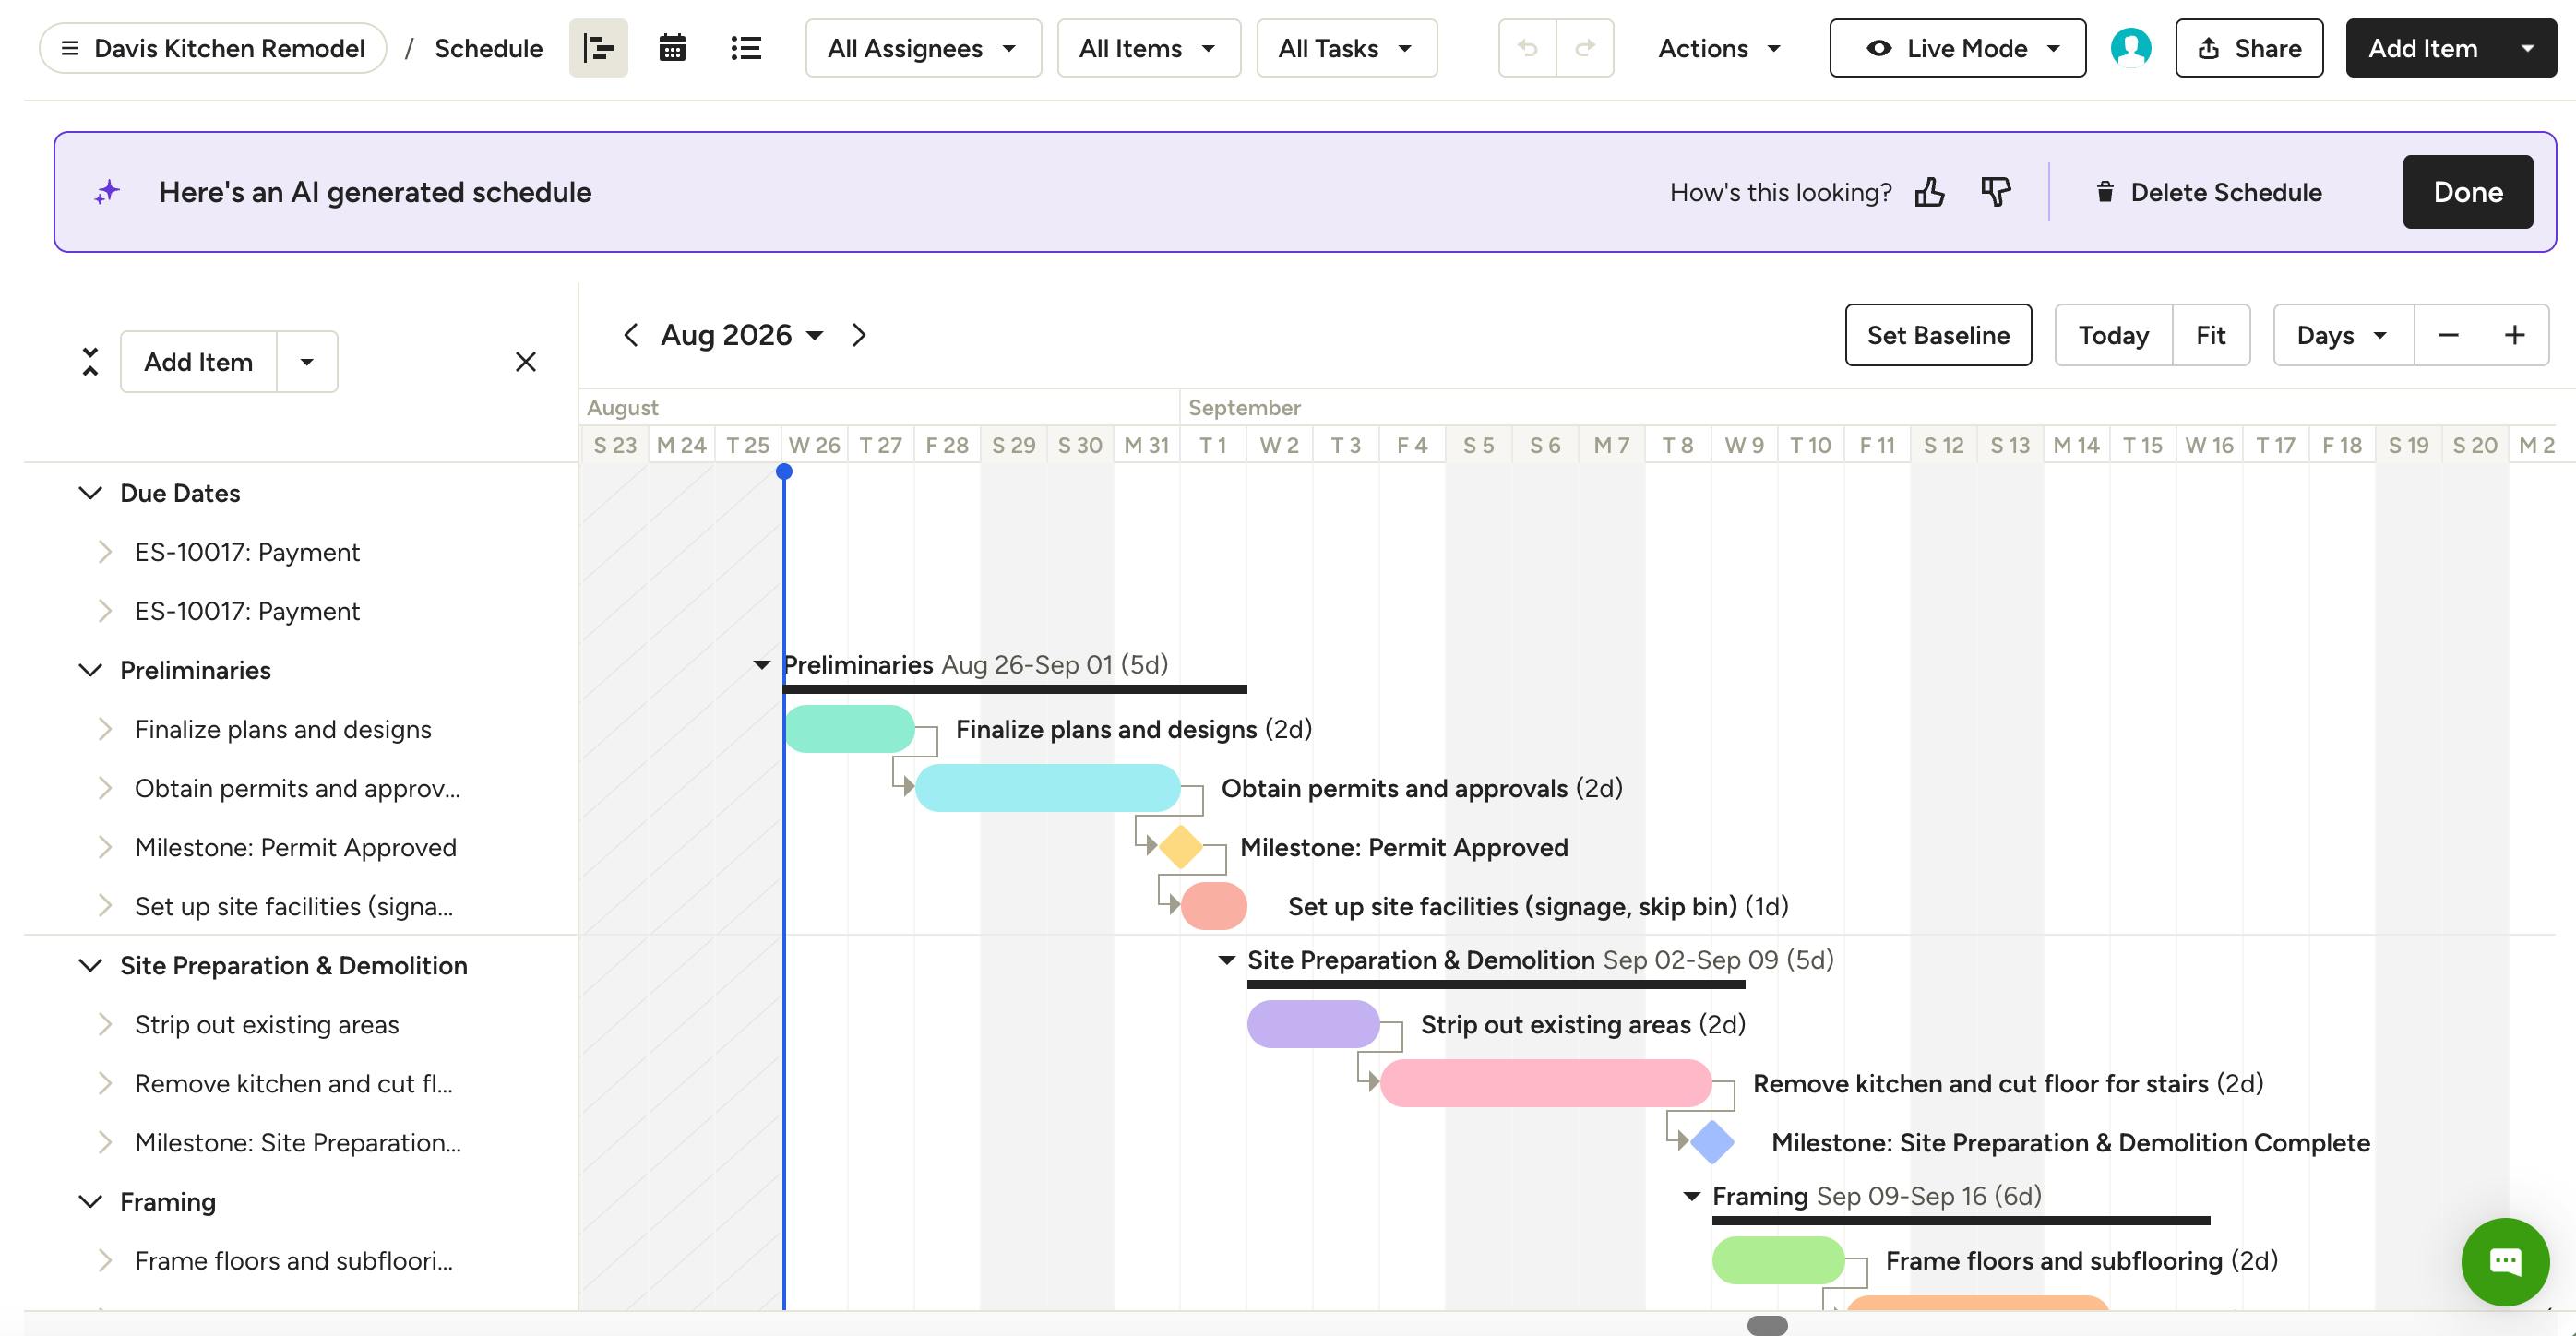
Building a project schedule from scratch can be a tedious task, but with Houzz Pro AI, it doesn't have to be. Save time and increase efficiency by using AI to quickly convert your project estimate to a project schedule.
How it Works
Once you have created an estimate for your project, you can quickly convert it to a project schedule using Houzz AI. Our AI will scan your estimate, use your line items as a foundation, then build out more complex phases and items based on a typical project timeframe. It will even pull out important milestones and due dates — such as payment due dates — and note those within your schedule.
If the AI-built schedule doesn't match your needs, you can easily edit the schedule details, delete the schedule and start from scratch, or skip AI completely and just use your estimate as a schedule starting point.
If a project already has a schedule, you can choose to either fully replace your existing schedule, or you can update the existing schedule and add new items.
There are two ways to convert an estimate to a schedule — from the estimate, or from the schedule itself.
Convert from Estimate
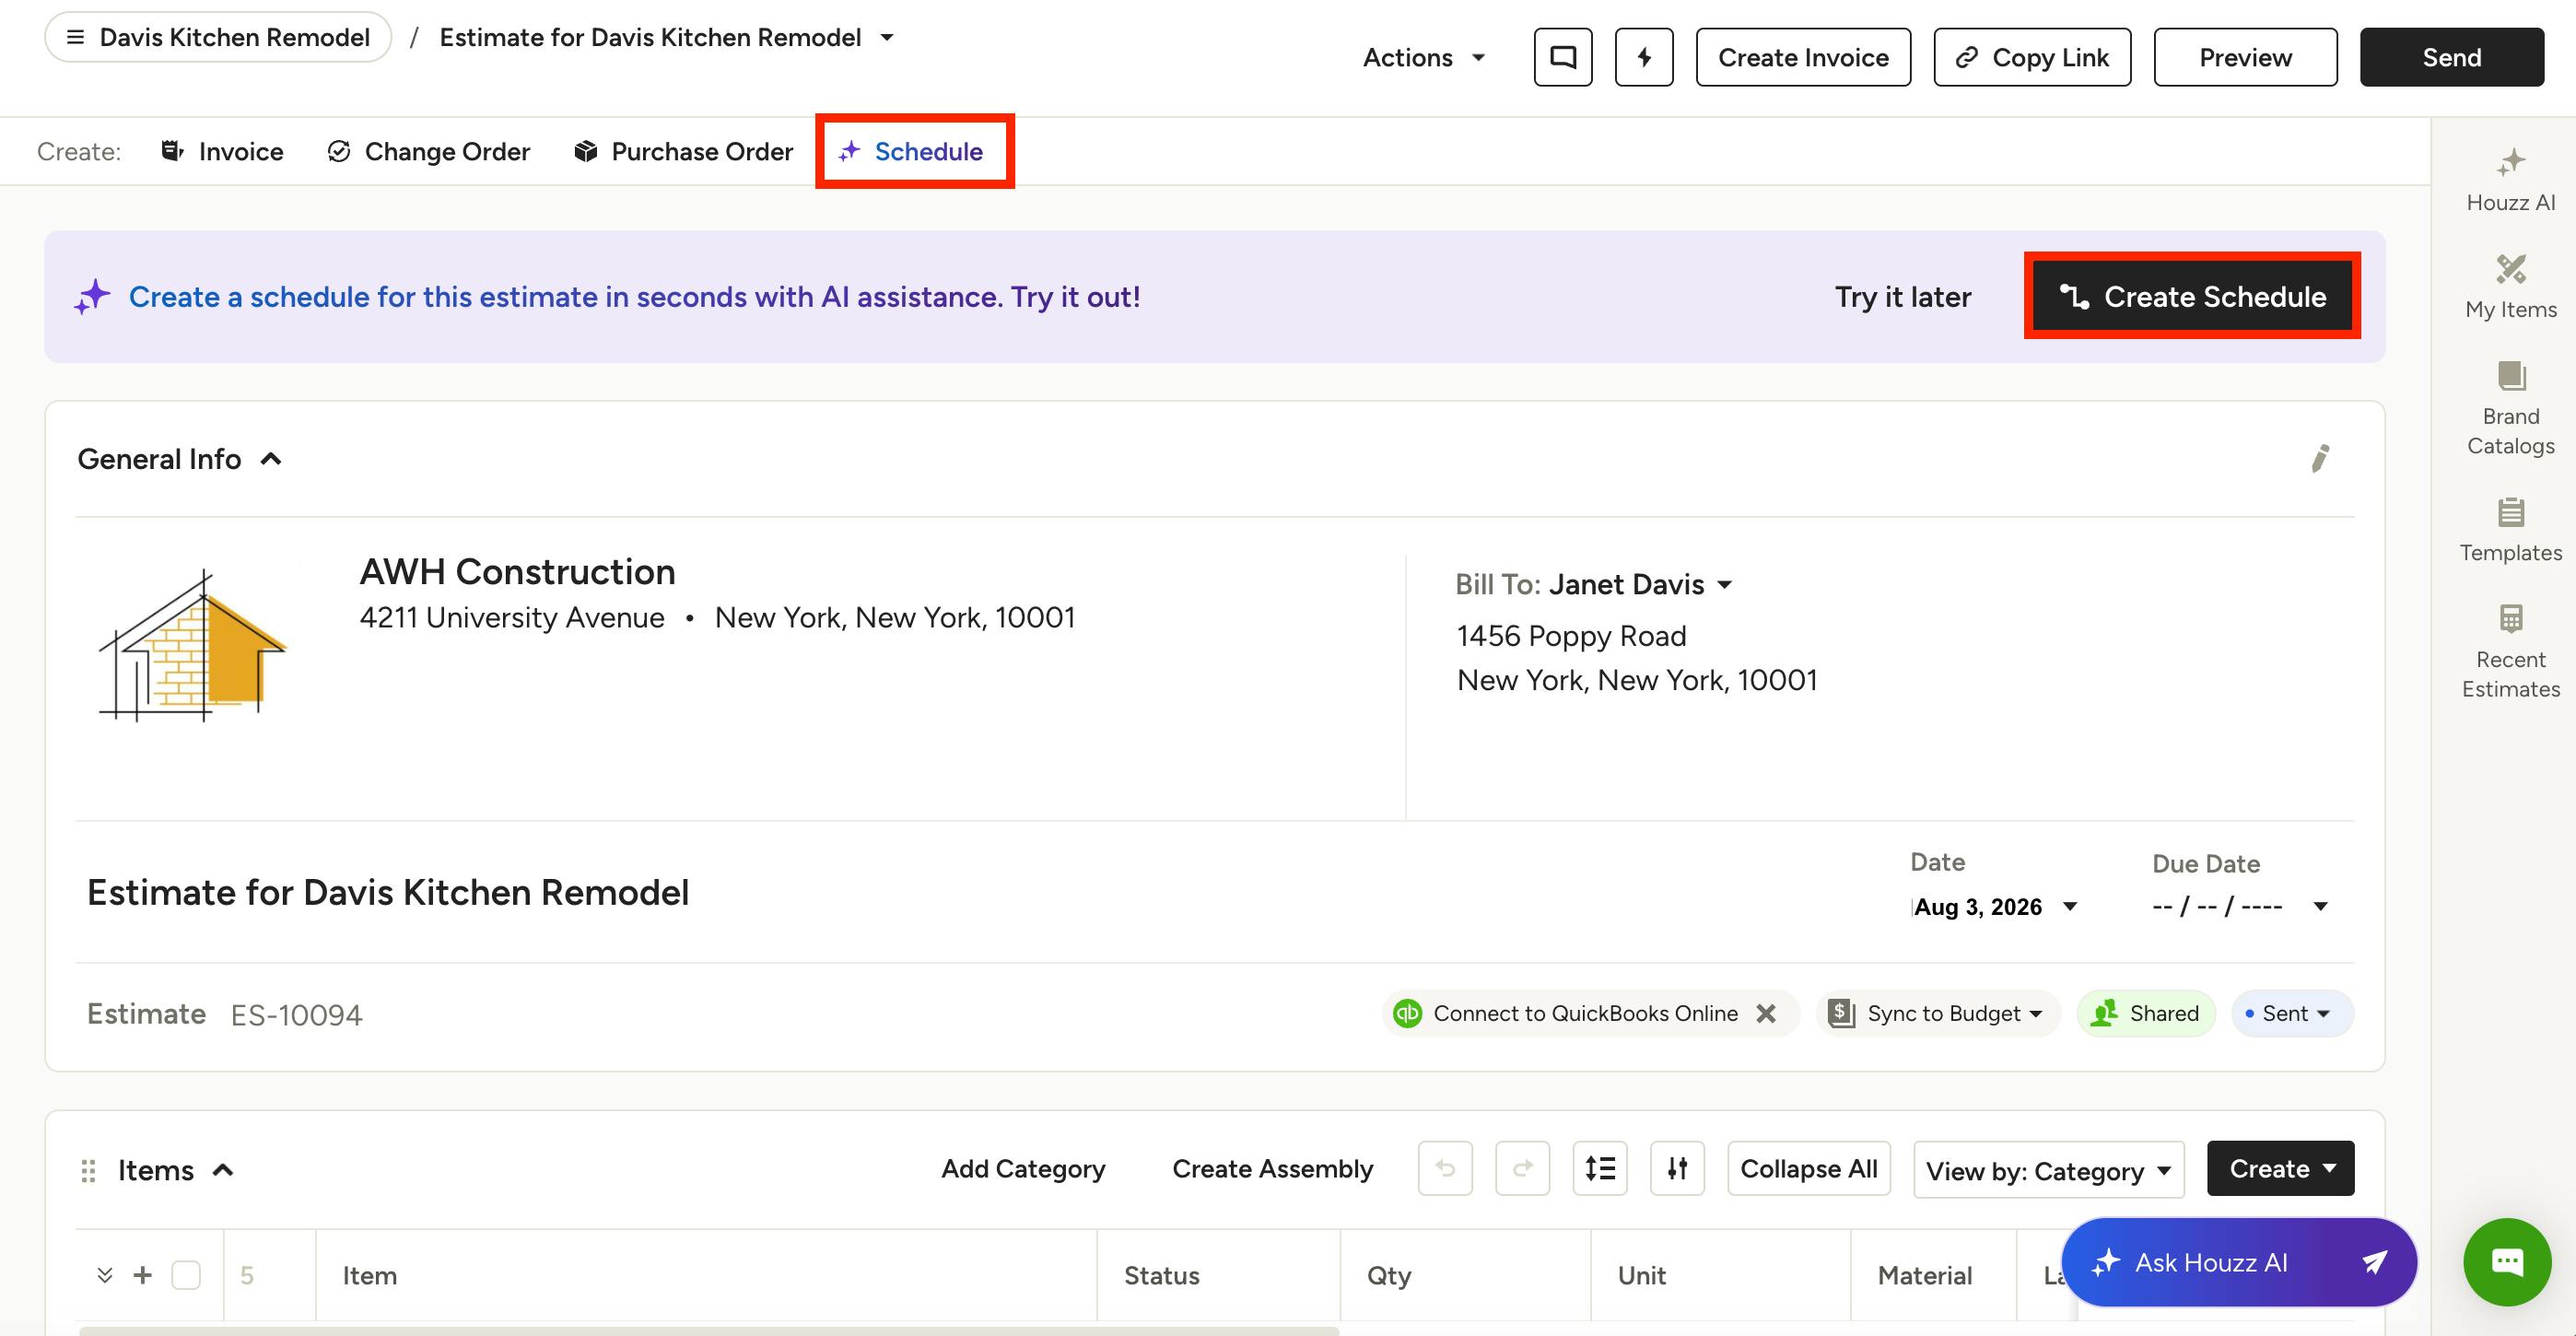
To start, open up your project's estimate. In order to use this AI feature, your estimate needs to have at least 8 line items, or needs to have been shared, approved or paid by the client.
If your estimate meets one of these requirements, you will notice an AI Schedule option in your top menu, as well as a banner at the top of your estimate. Click either of these options to create a schedule.
Please Note: If you have an existing project schedule, the banner will say Update Schedule instead of Create Schedule.
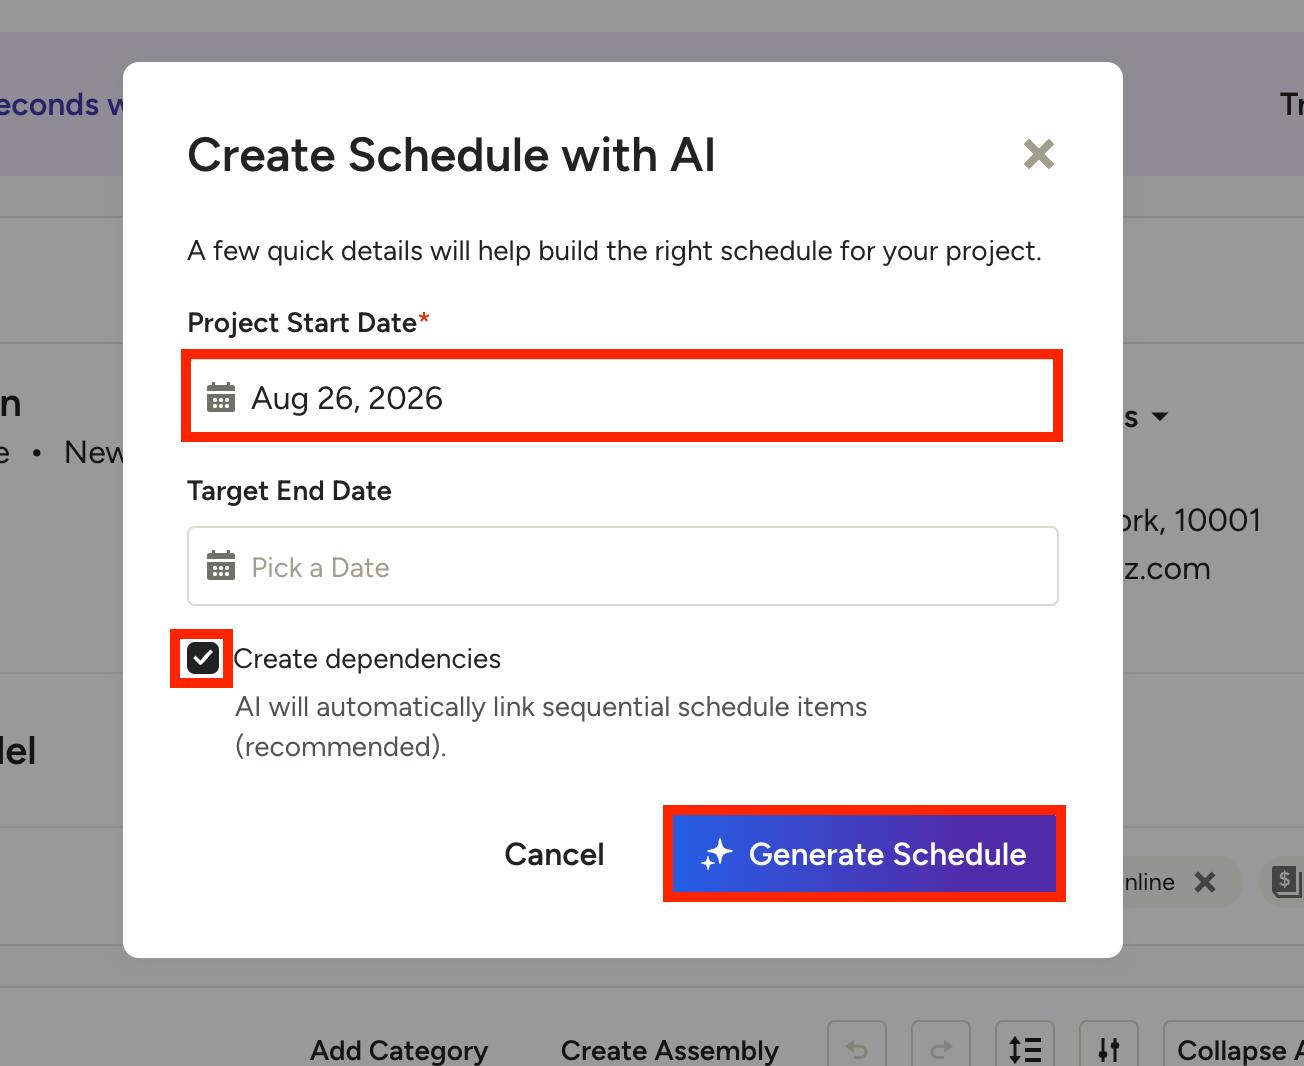
A new screen will appear where you can set the Project Start Date and Target End Date. You can also check the box next to Create Dependencies (on by default). This automatically links sequential schedule items so that adjusting one item shifts any dependent items accordingly.
Click Generate Schedule. If you don't have an existing schedule, AI will analyze your line items and create the schedule.
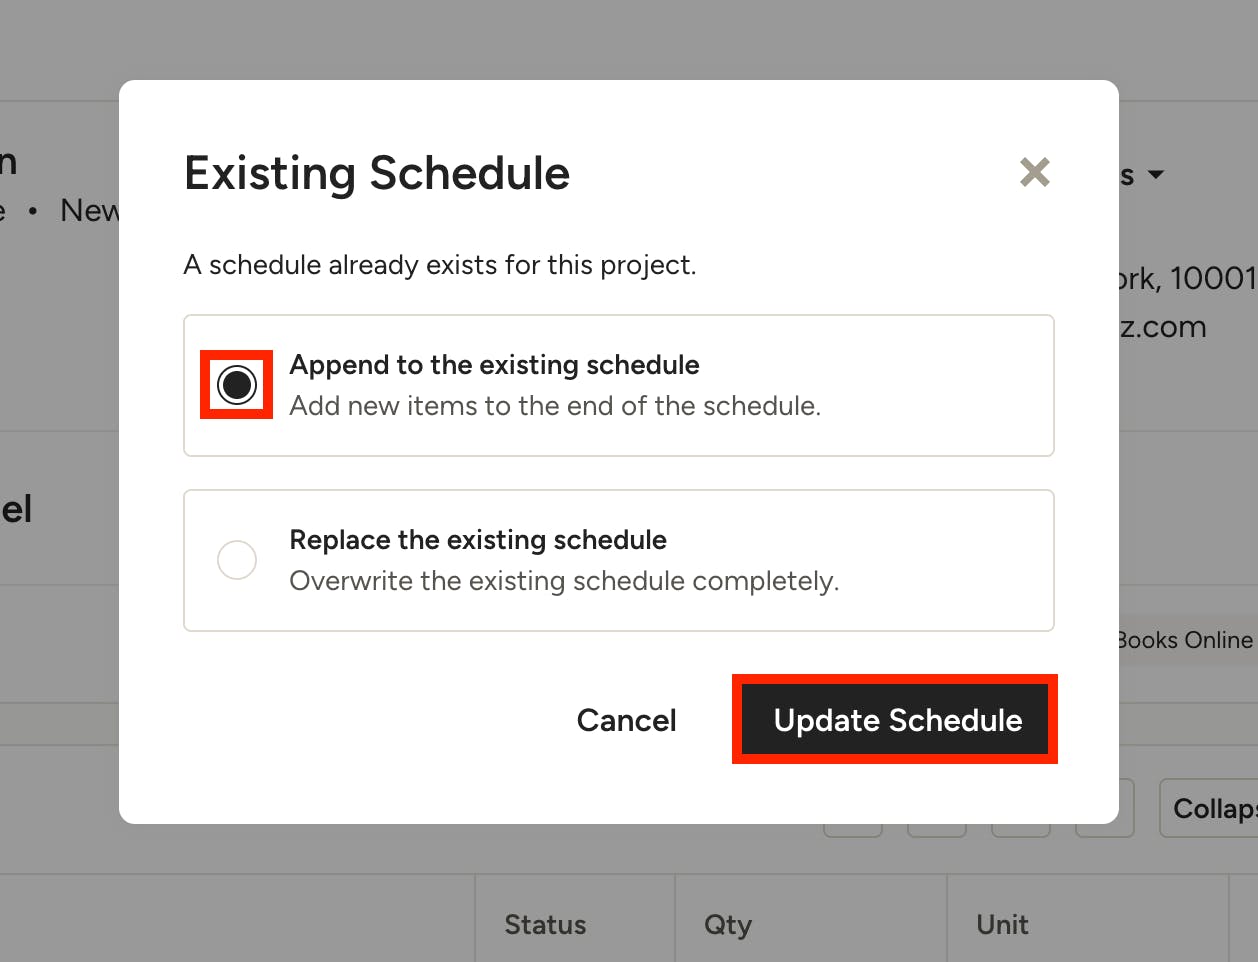
If you have an existing schedule for that project, you will be asked if you would like to:
- Append to the existing schedule — add new items to the end of schedule
- Replace the existing schedule — override the existing schedule completely
Select the relevant option, then click Update Schedule to make the change.
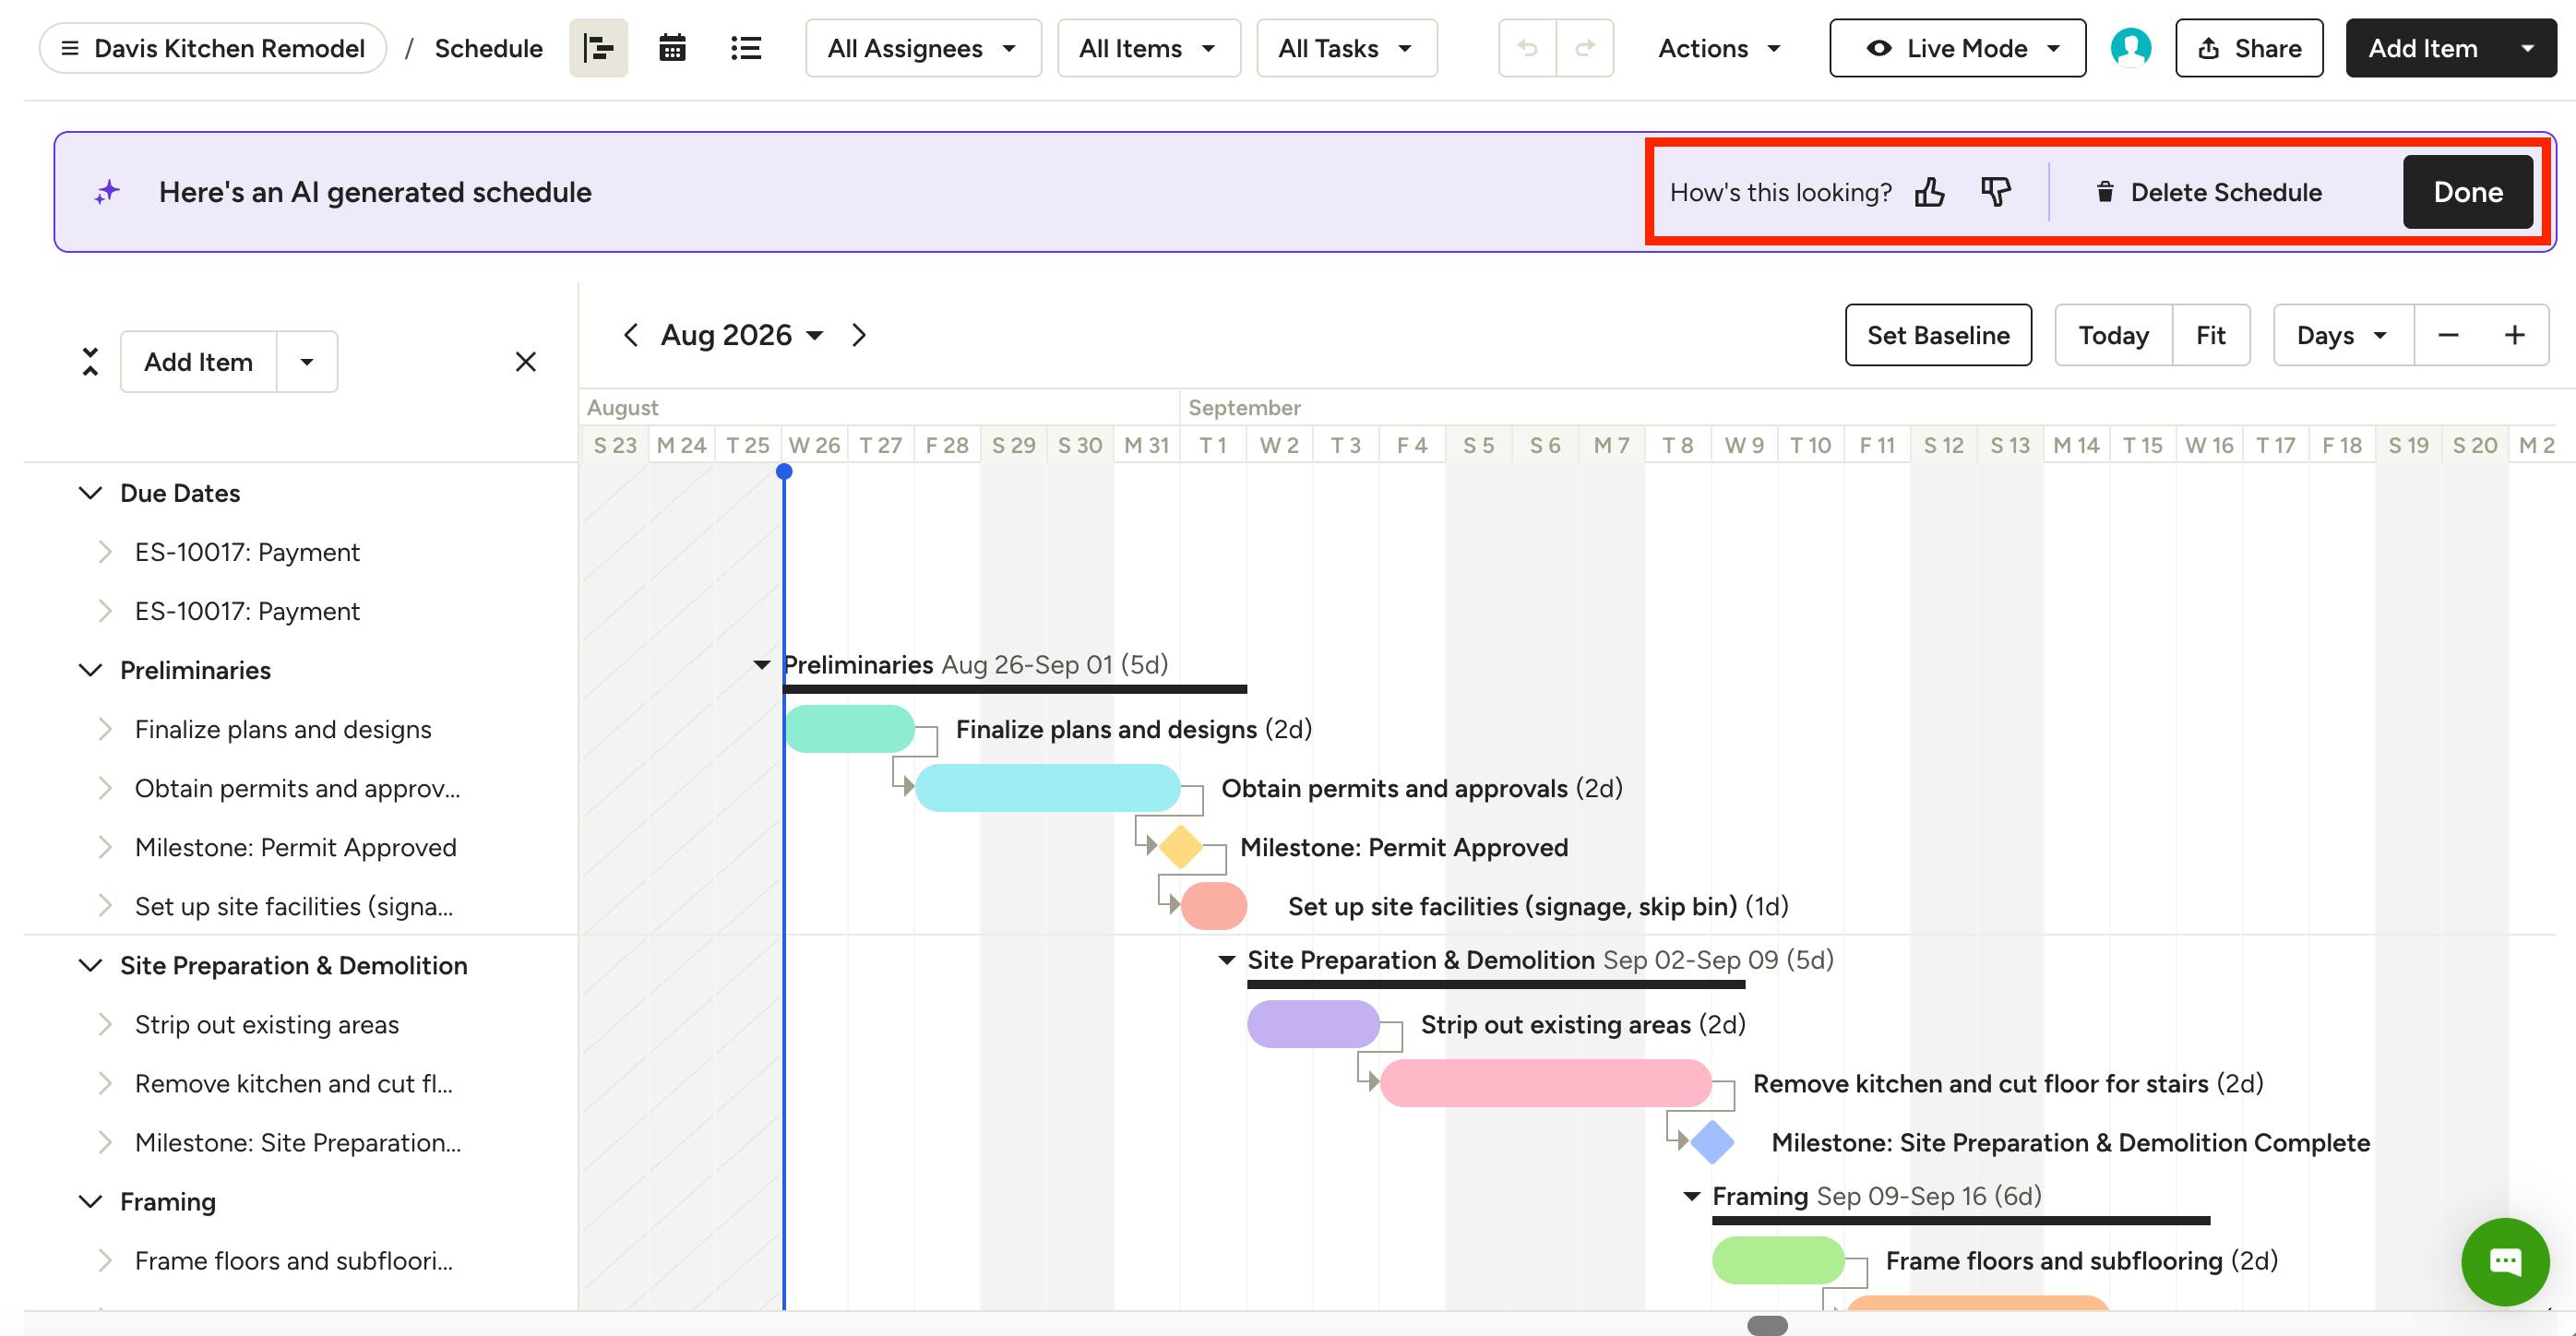
Once complete, Houzz Pro will send you directly to your project schedule to view the details. Your AI-built schedule will use your estimate as a foundation and use typical project timeframes to add relevant phases, items and milestones.
You will see a banner at the top of the page that confirms your schedule was generated from an estimate. Here, you can give feedback on the quality of the AI schedule, or delete the schedule if the AI schedule didn't turn out as expected. Click Done to update and remove the banner.
You can continue to make changes to your schedule as needed, including adding or removing any phases, items or tasks. Read How to Create Your Project Schedule to learn more about schedule editing capabilities.
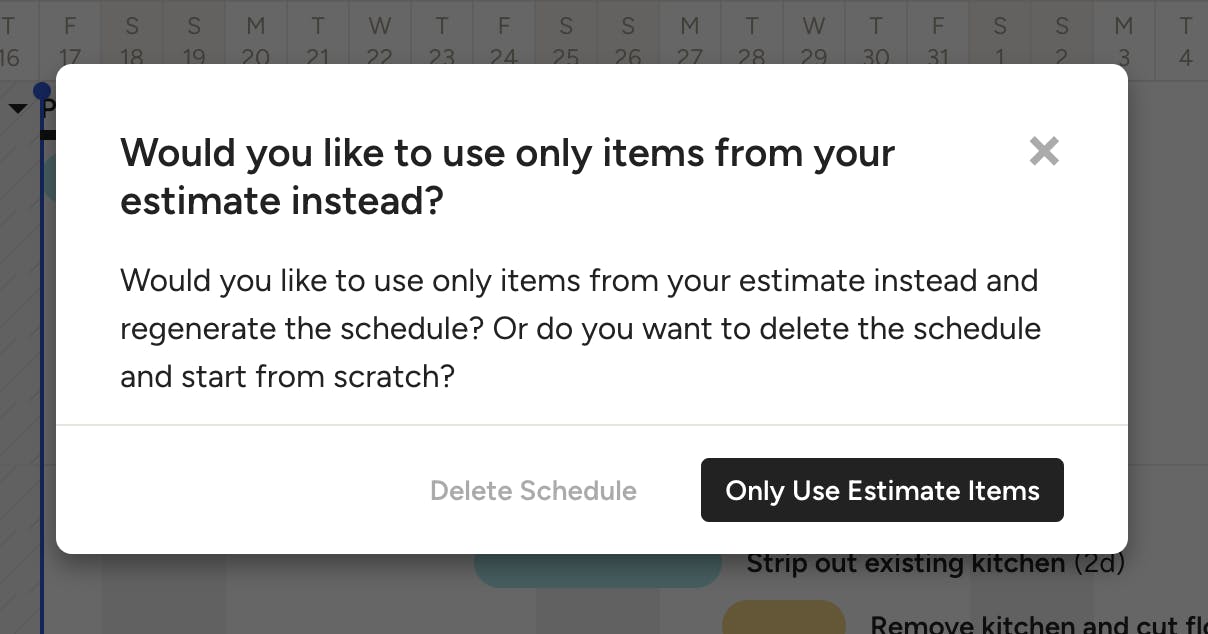
Delete AI Schedule
If you decide to delete your AI schedule, you can completely delete the schedule and start from scratch, or you can remove the use of AI and use only items from your estimate instead.
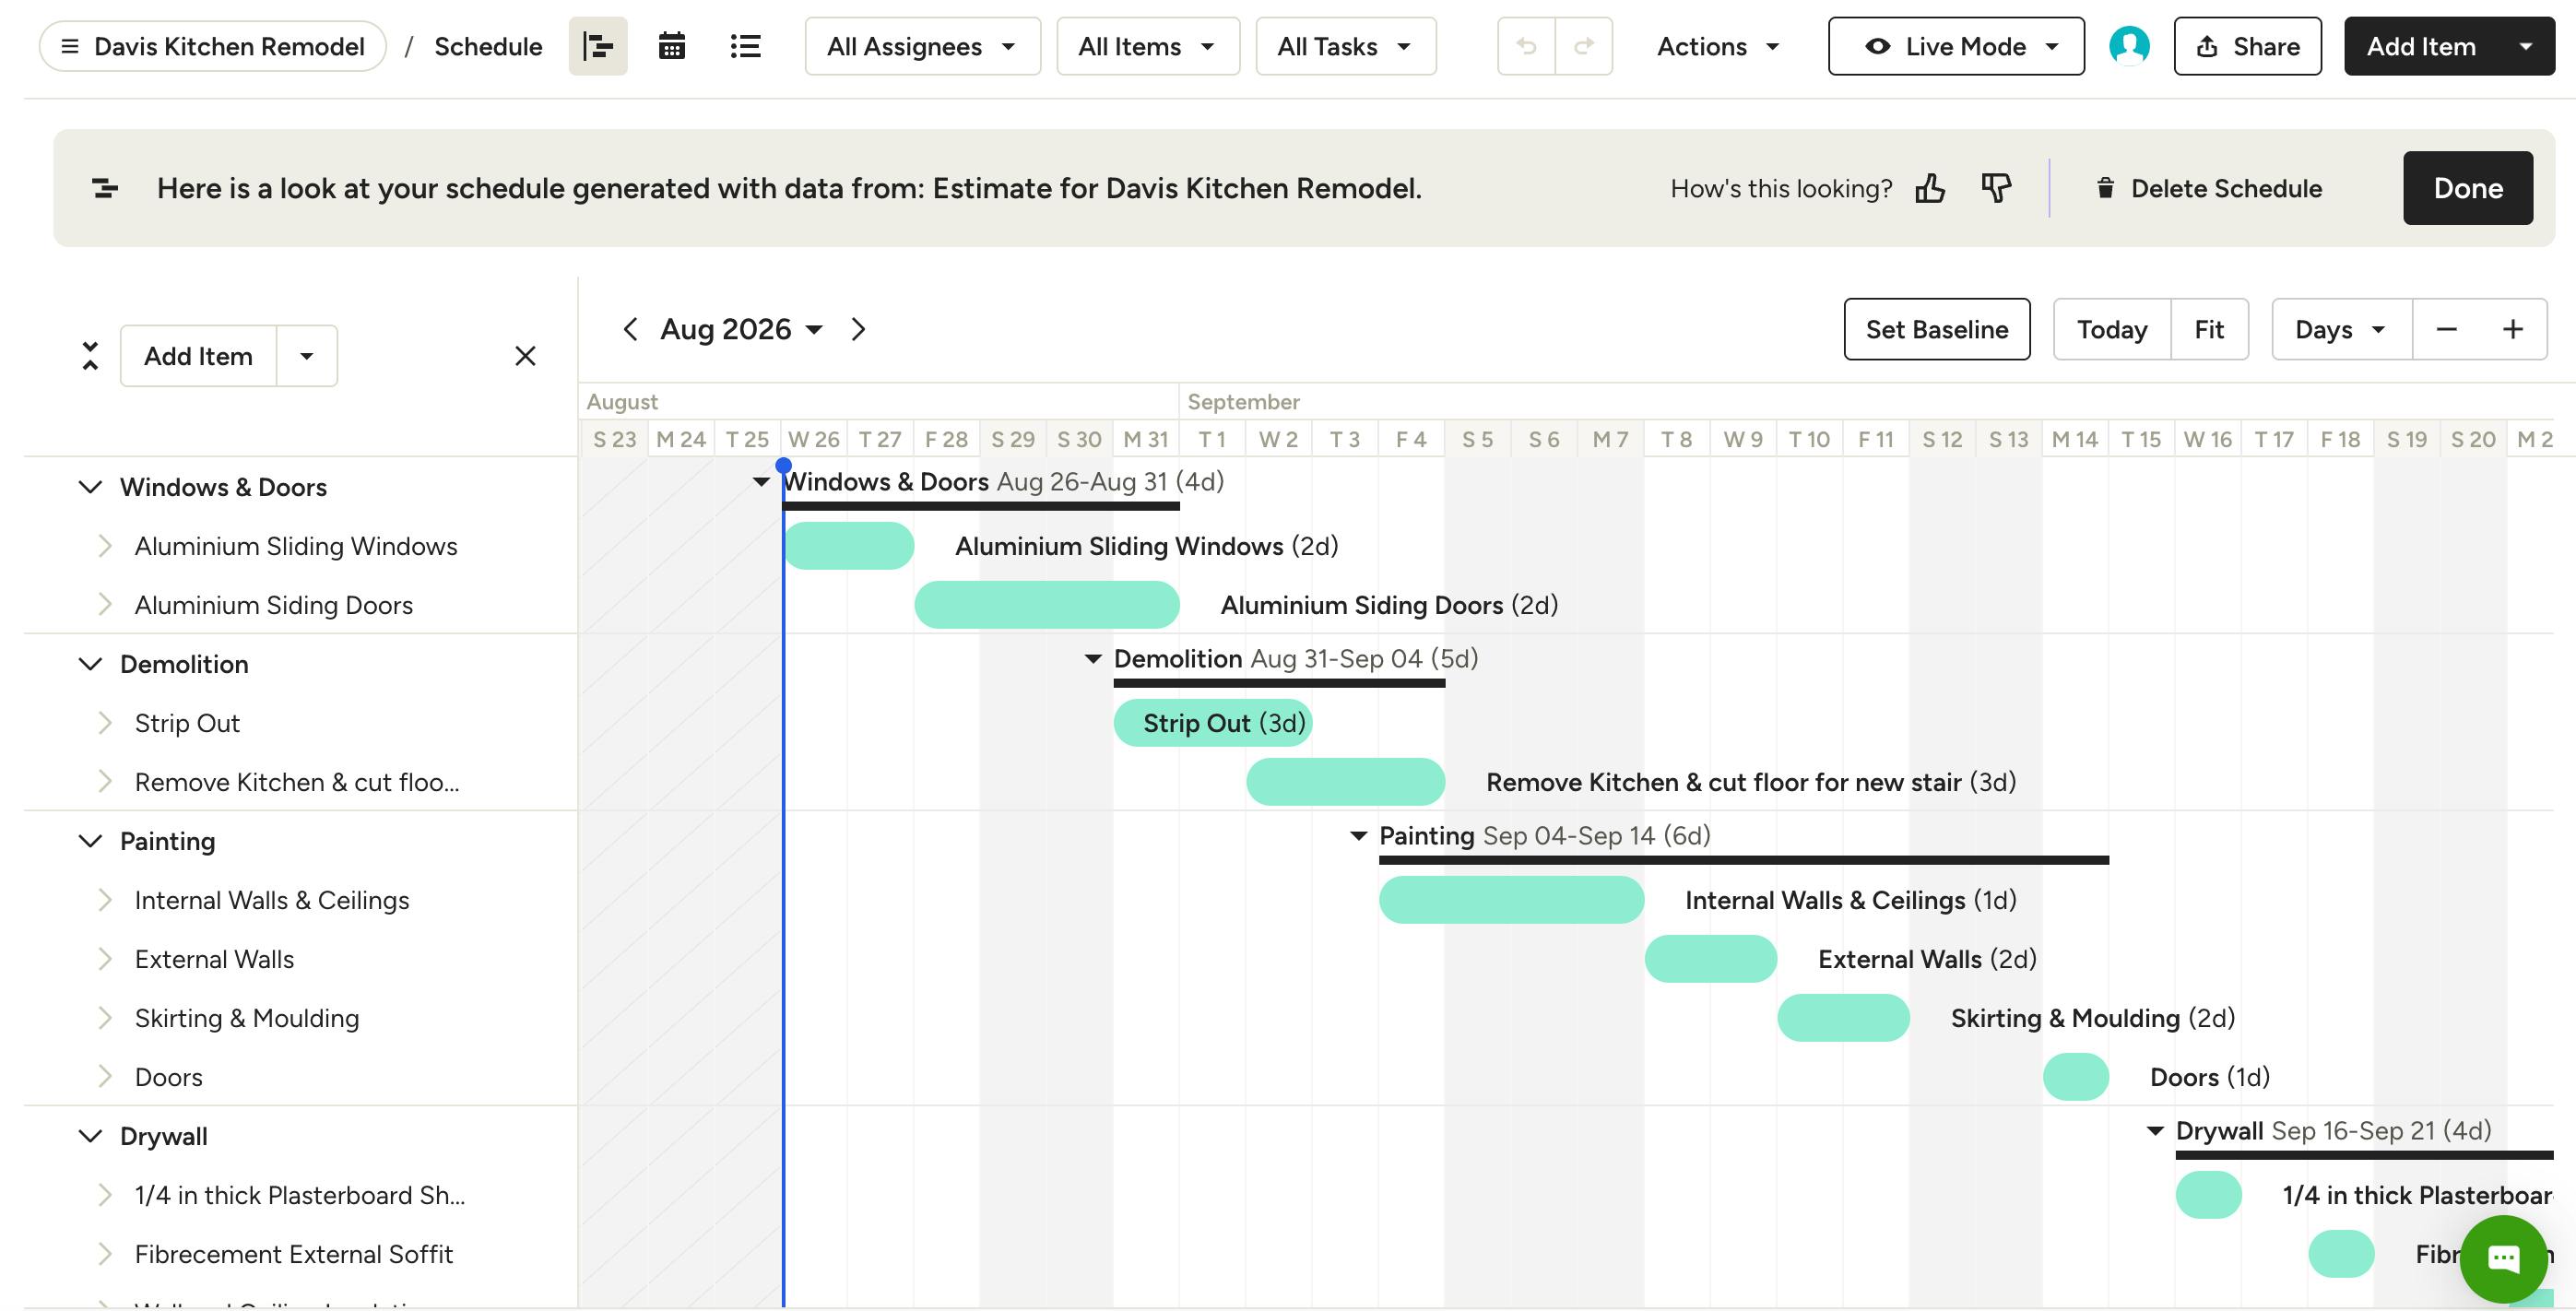
With Only Use Estimate Items, your schedule will copy your estimate line items verbatim, instead of using AI to further build out and create a more comprehensive schedule. Here is the estimate-only version of the same schedule shown above.
Convert from Schedule
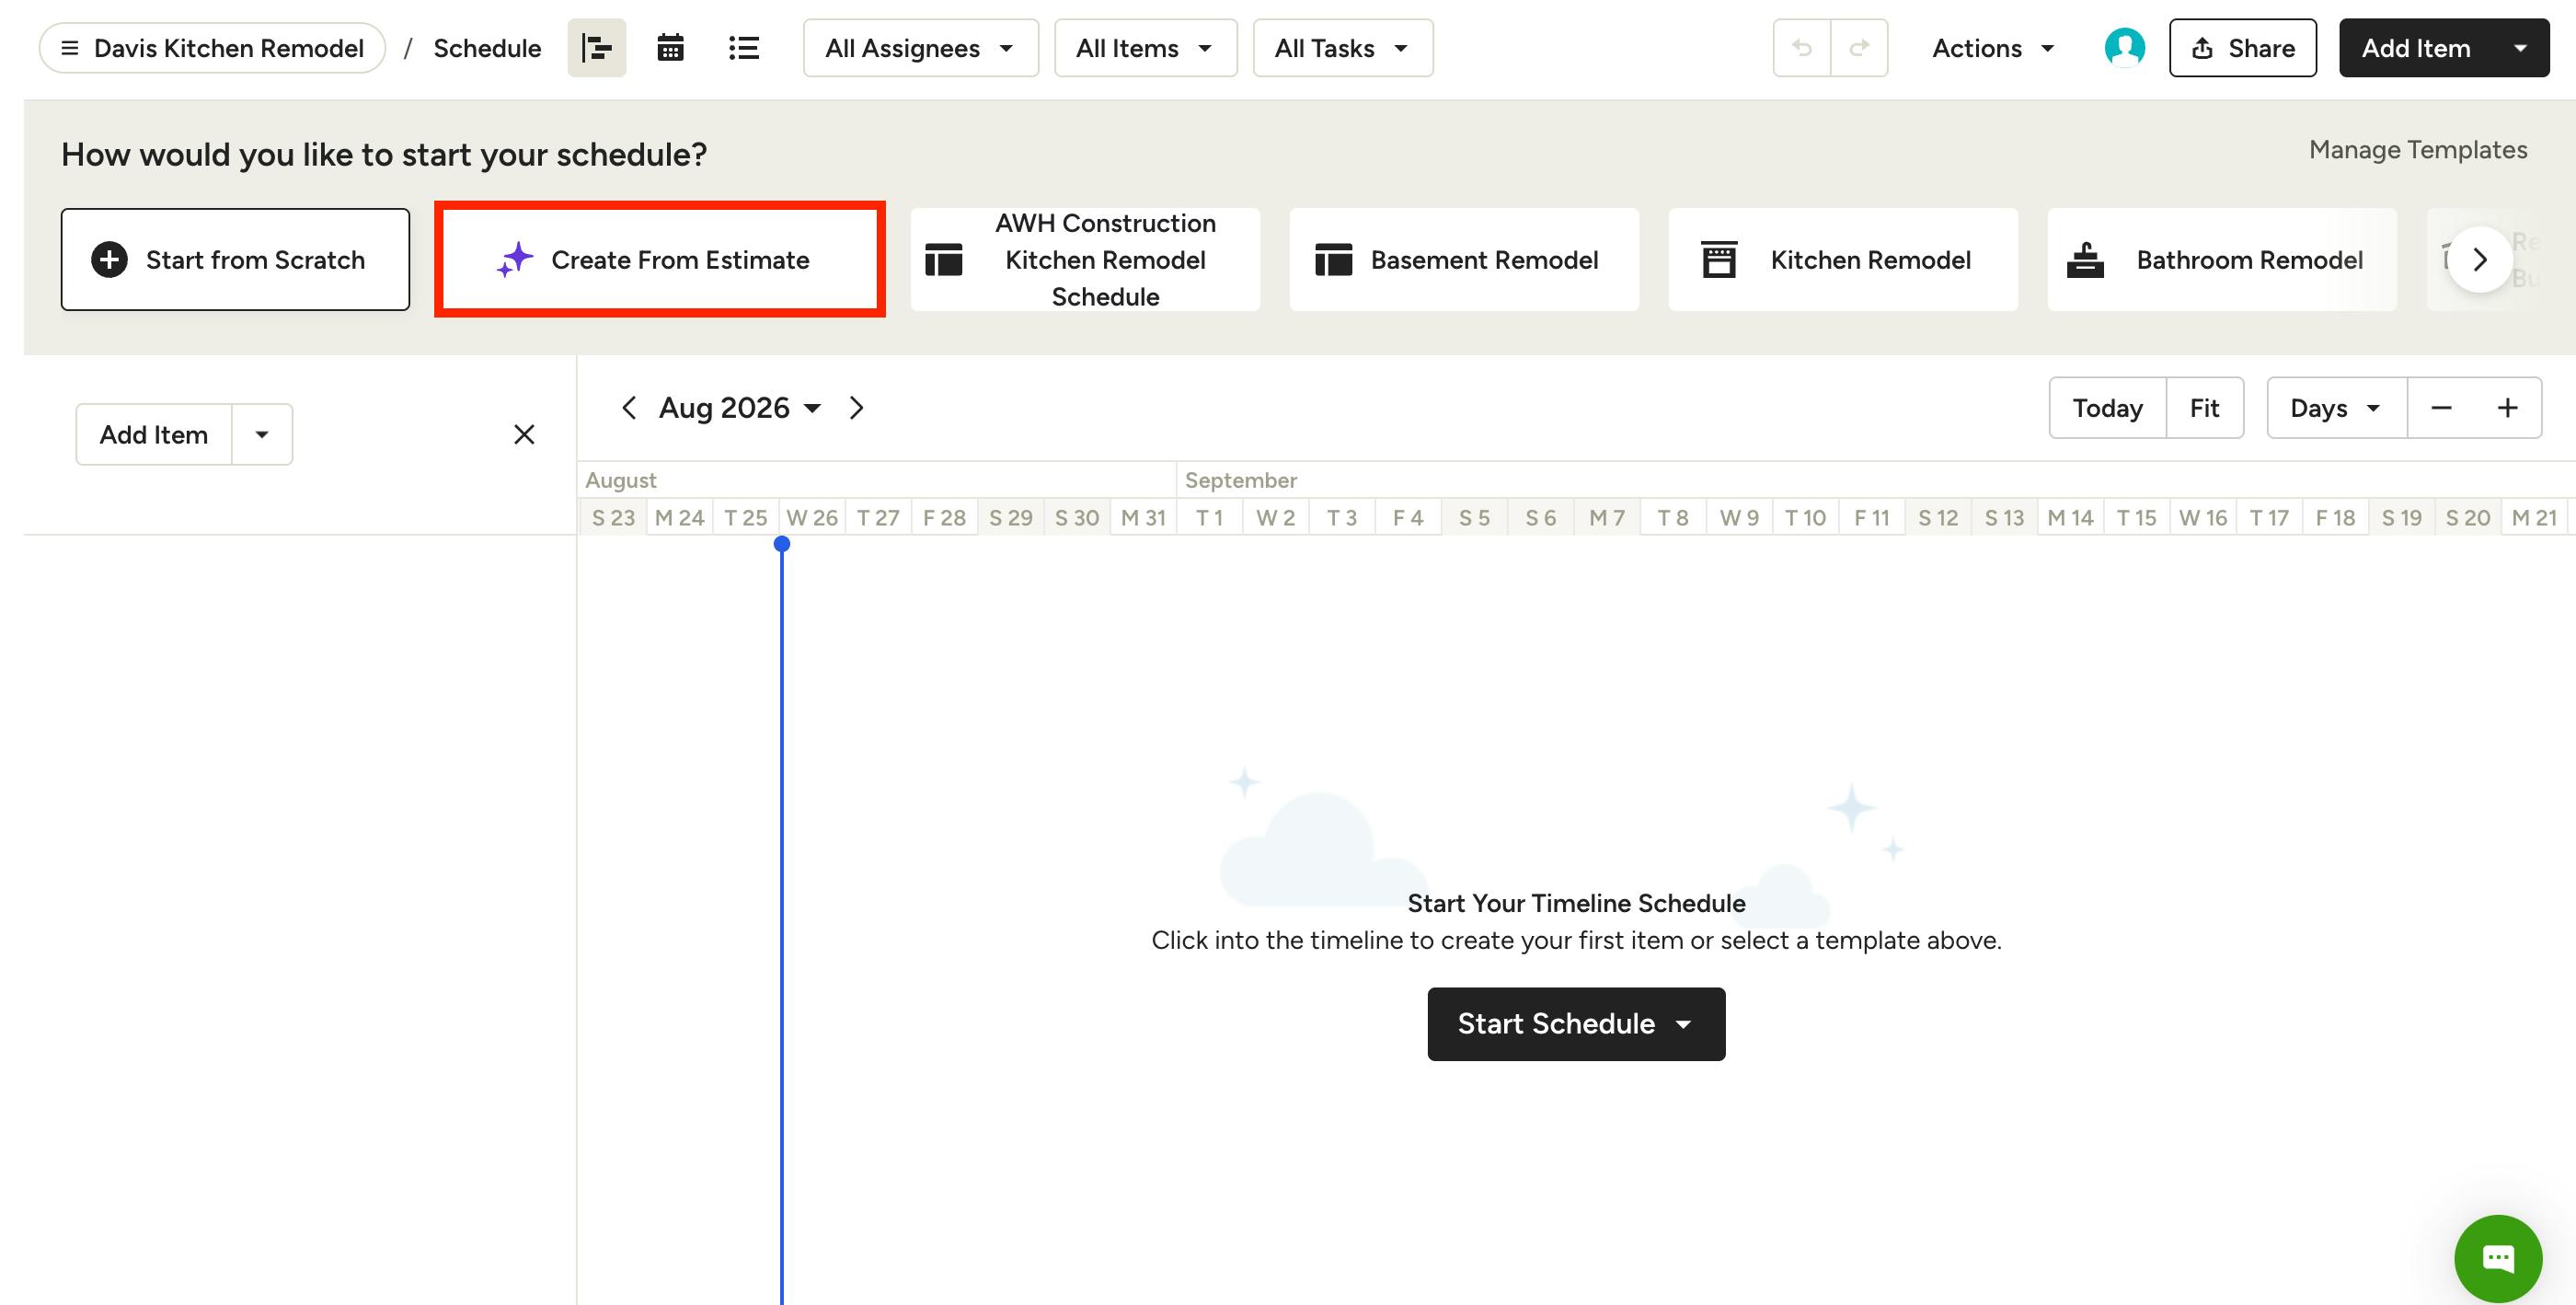
To start, open up your project's schedule. In order to use this AI feature from the schedule section, you must have an empty schedule page. If you have an existing schedule and would like to override or update it with an estimate, please convert from the estimate page instead (as shown above).
At the top of your schedule, you will be prompted to create a new schedule. To convert an estimate to a schedule, click Create from Estimate.
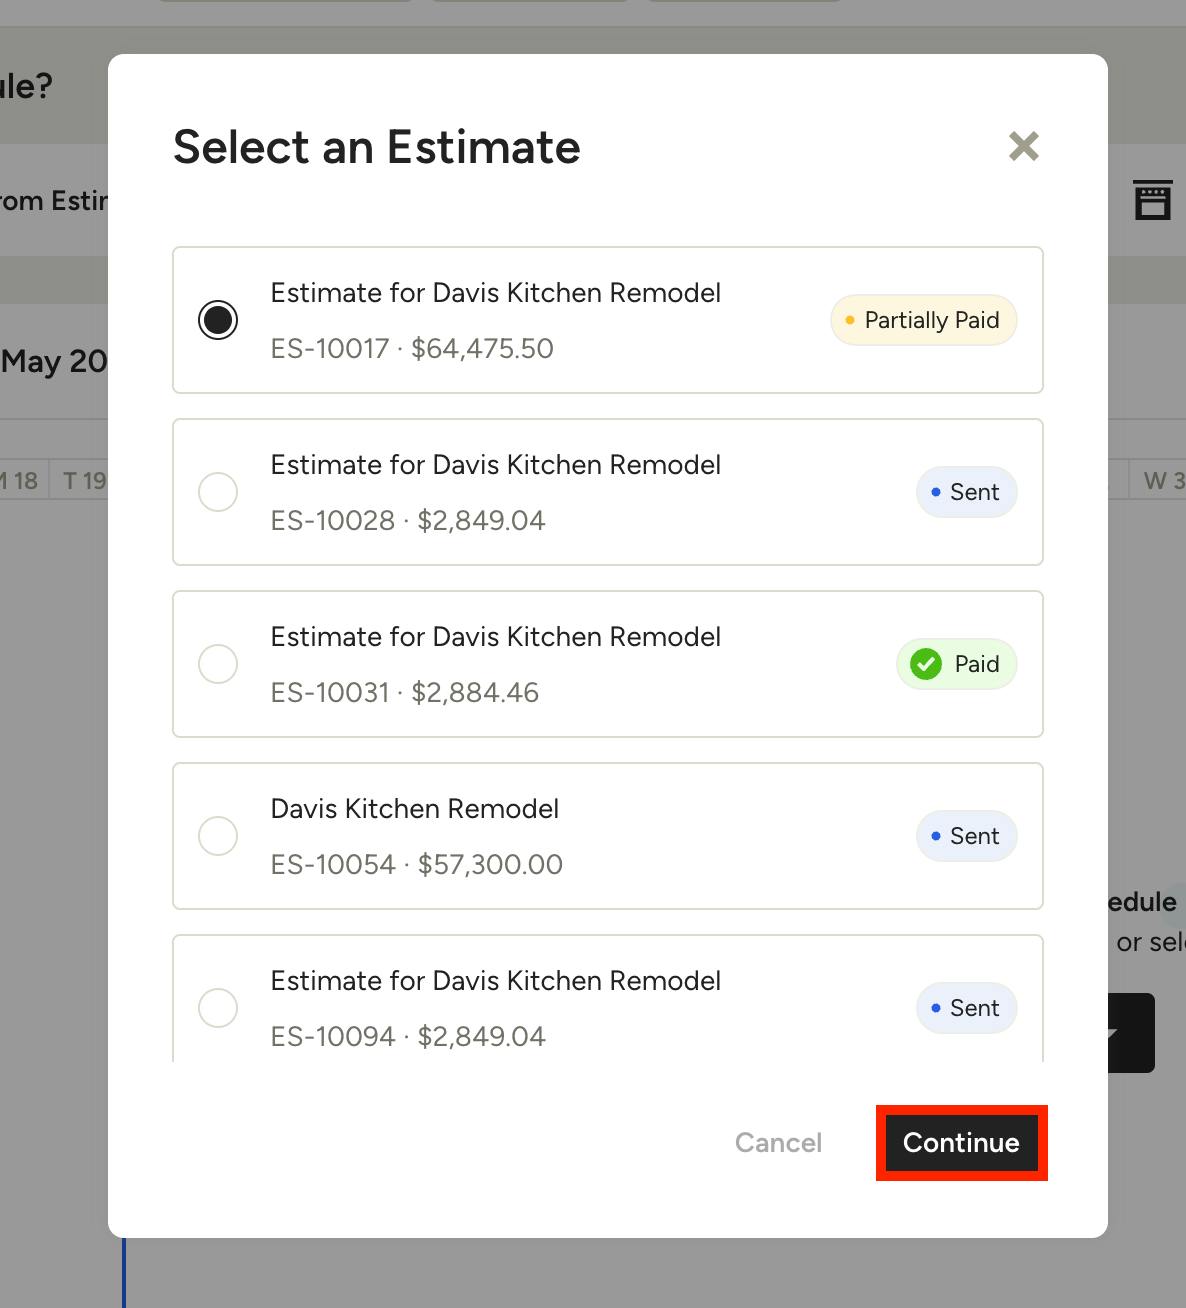
A screen will appear where you can select the relevant estimate from the dropdown. Click Continue.
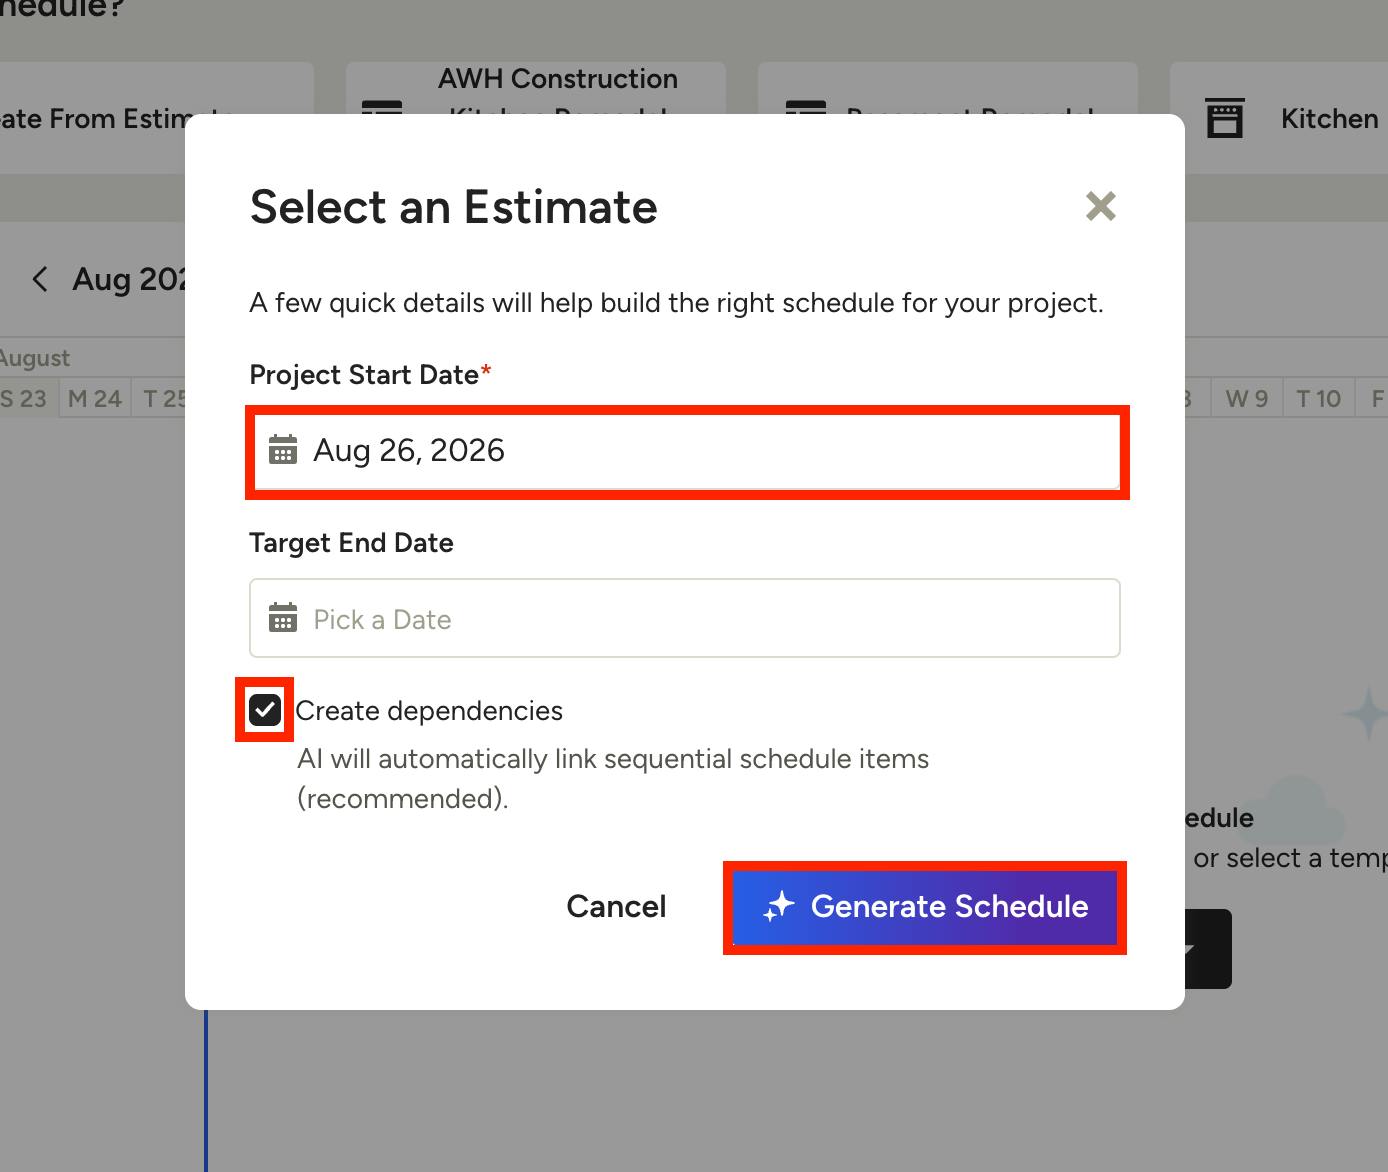
In the next screen, you can set the Project Start Date and Target End Date. You can also check the box next to Create Dependencies (on by default). This automatically links sequential schedule items so that adjusting one item shifts any dependent items accordingly.
Click Generate Schedule. AI will analyze your line items and create the schedule.
Once you create your schedule, you will see a banner at the top of the schedule page that confirms your schedule was generated from an estimate. Here, you can give feedback on the quality of the AI schedule, or delete the schedule if the AI schedule didn't turn out as expected. Click Done to update and remove the banner.
You can continue to make changes to your schedule as needed, including adding or removing any phases, items or tasks. Read How to Create Your Project Schedule to learn more about schedule editing capabilities.
Delete AI Schedule
If you decide to delete your AI schedule, you can completely delete the schedule and start from scratch, or you can remove the use of AI and use only items from your estimate instead.
With Only Use Estimate Items, your schedule will copy your estimate line items verbatim, instead of using AI to further build out and create a more comprehensive schedule. Here is the estimate-only version of the same schedule shown above.