How to Set Tax Rates for Canada
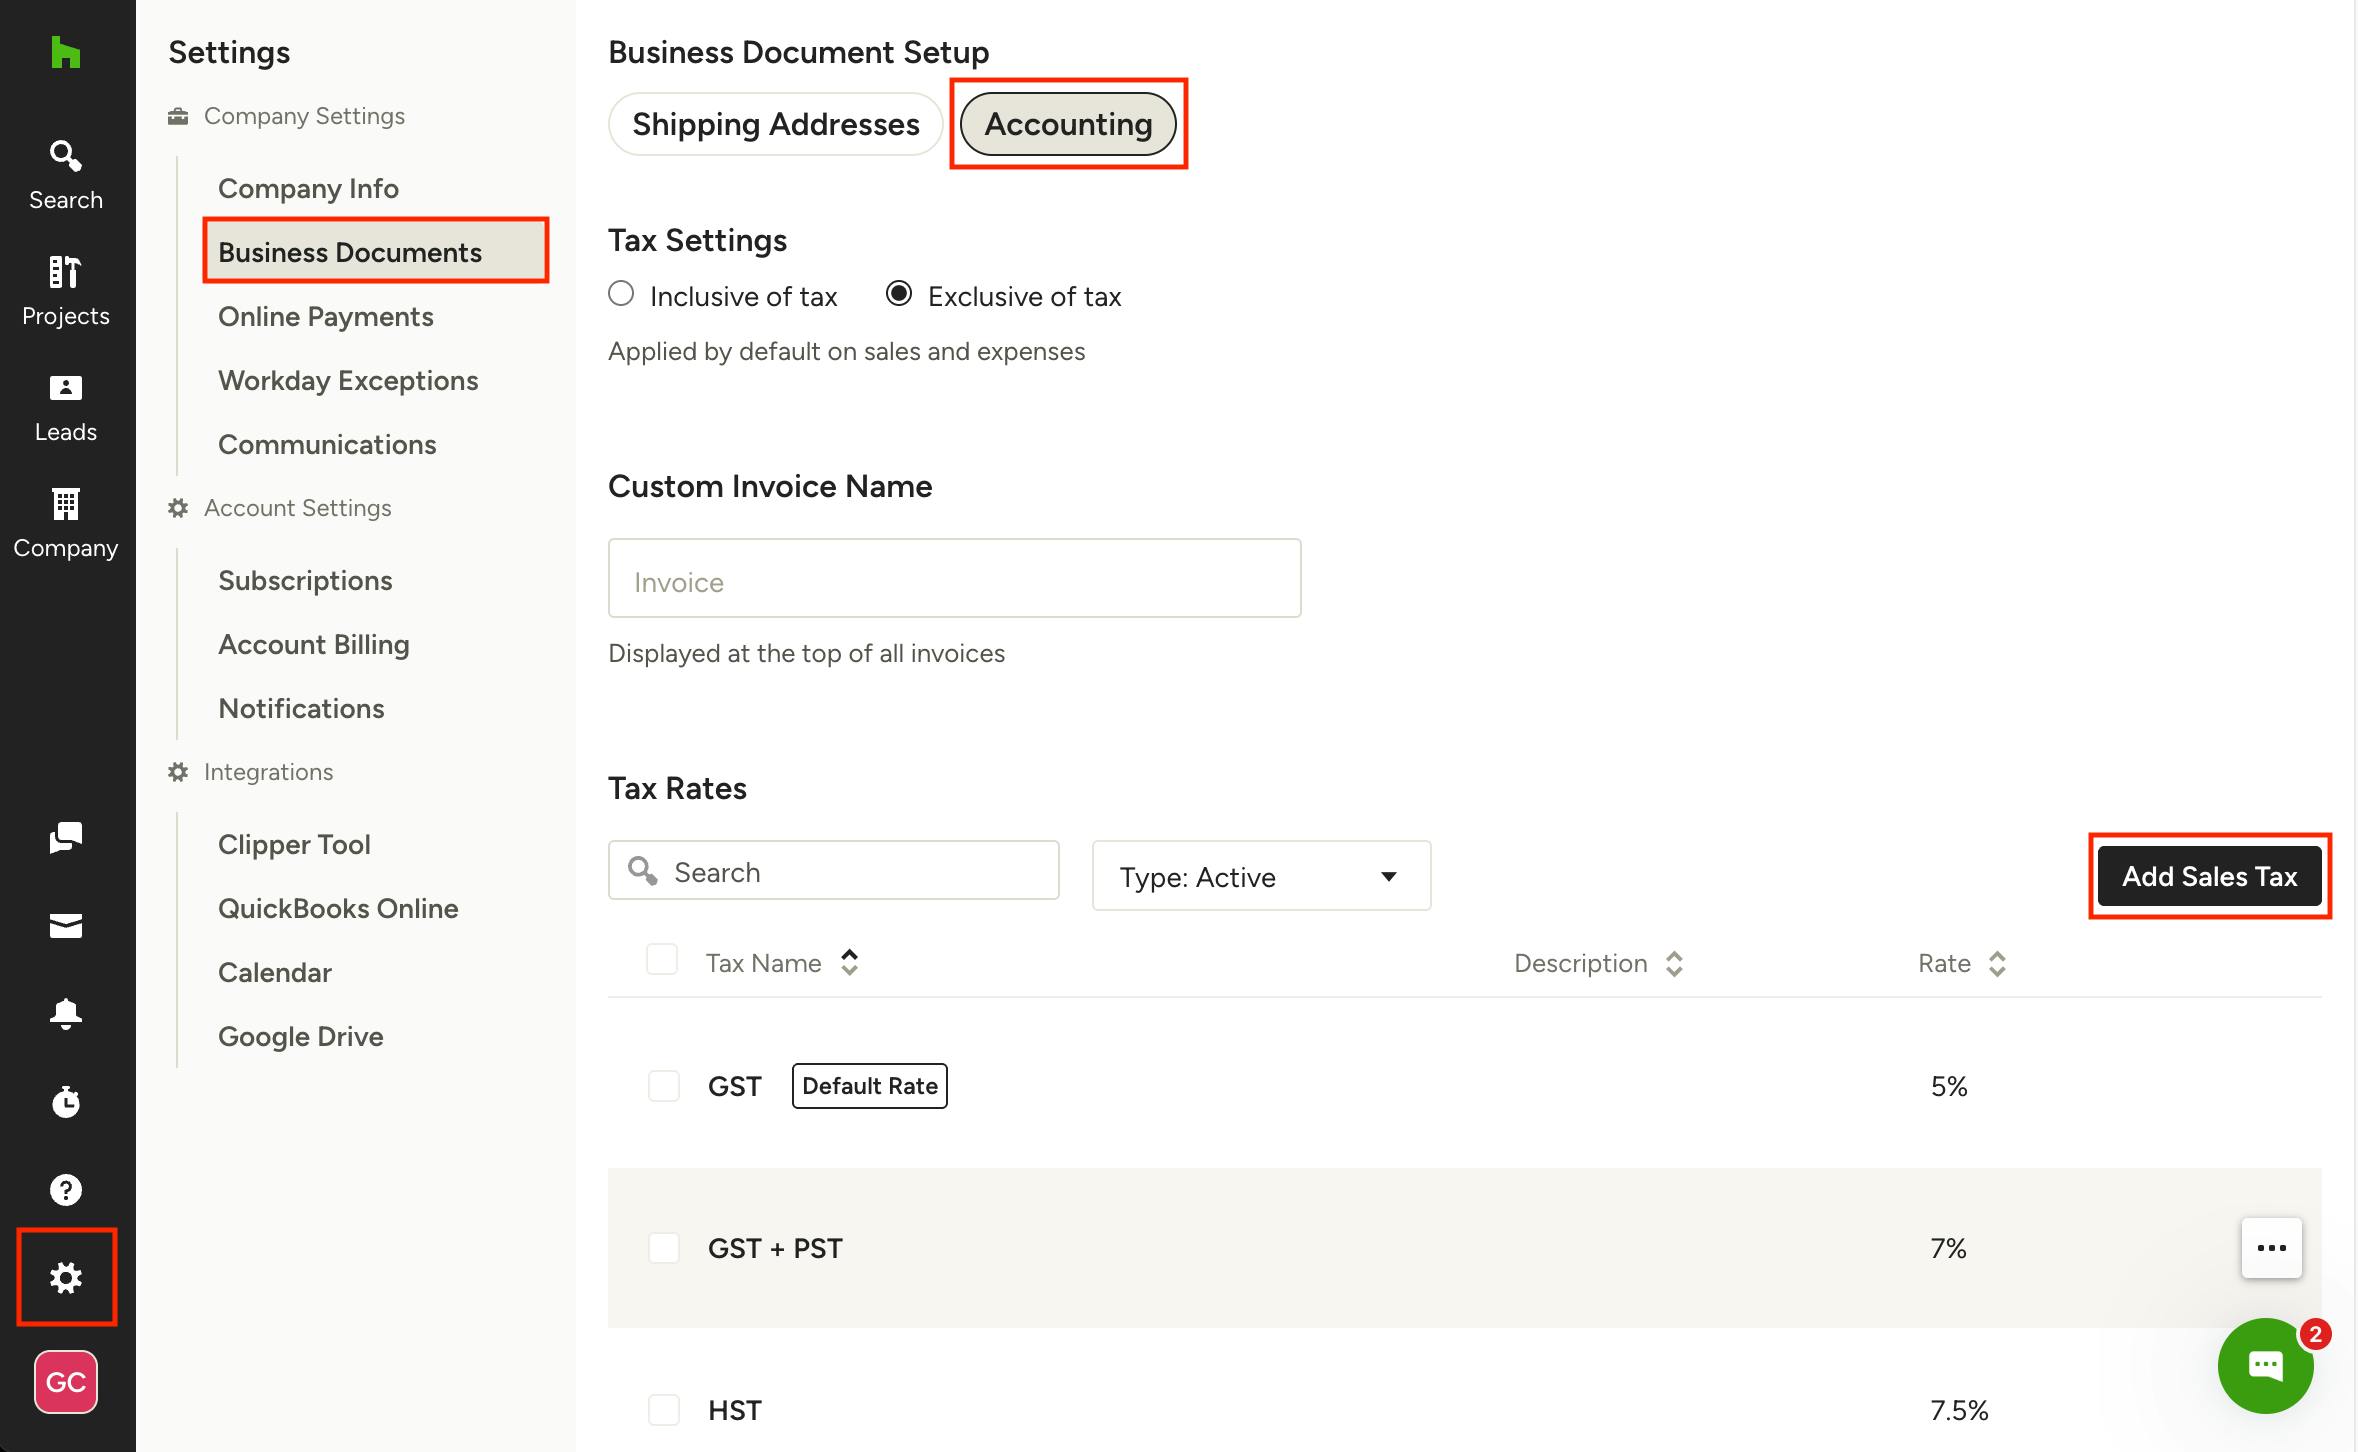
In your Houzz Pro Settings, you can create and save multiple sales tax rates to use as needed in your projects. Here's how to set that up.
To start:
- Select the Settings icon near the bottom of your left navigation, then click on Business Documents in the menu.
- Under Business Document Setup at the top of the page, select Accounting.
- Click Add Sales Tax to add a new tax.
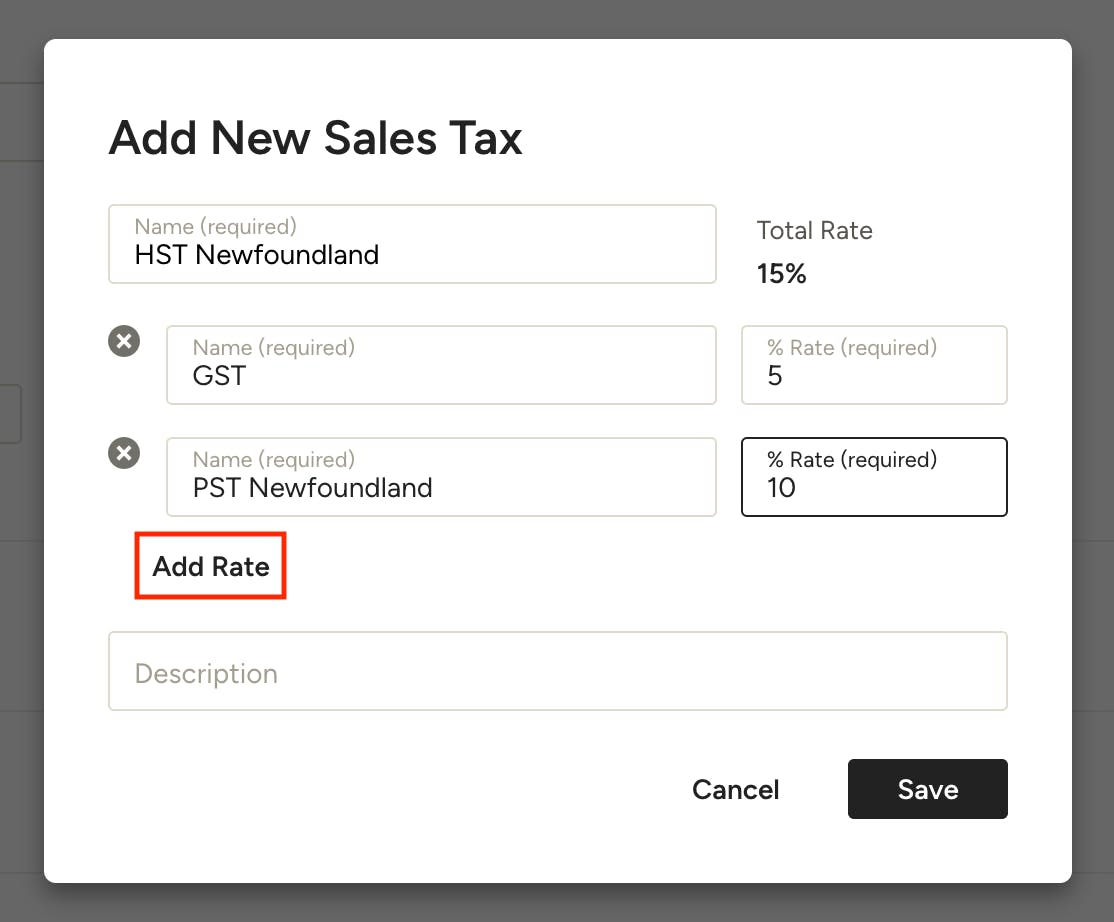
- Give the tax a name, enter the % rate, and add a description if needed. If you have multiple tax rates to include in one – for example, GST and PST – select Add Rates and they will be totalled at the top to give you one rate.
- Once you save the new sales tax, you’ll be able to start using it in your estimates or proposals.
How to Account for Multiple Tax Rates
Only one tax rate can be applied to each line item in your documents, so to account for multiple tax rates in Canada, like Goods and Services Tax (GST), Provincial Sales Tax (PST), or Harmonized Sales Tax (HST), you will need to create combined tax rates that include any relevant taxes specific to what you're selling and where you are doing business. You'll do this using the Add Rate button shown in the image above, inputting each individual rate that will add up to the overall tax you need to calculate. The example above is for HST in Newfoundland, which includes both GST and PST. Once you create these, you can apply the single combined rate to line items and account for all necessary taxes.
Set Default Tax Rate
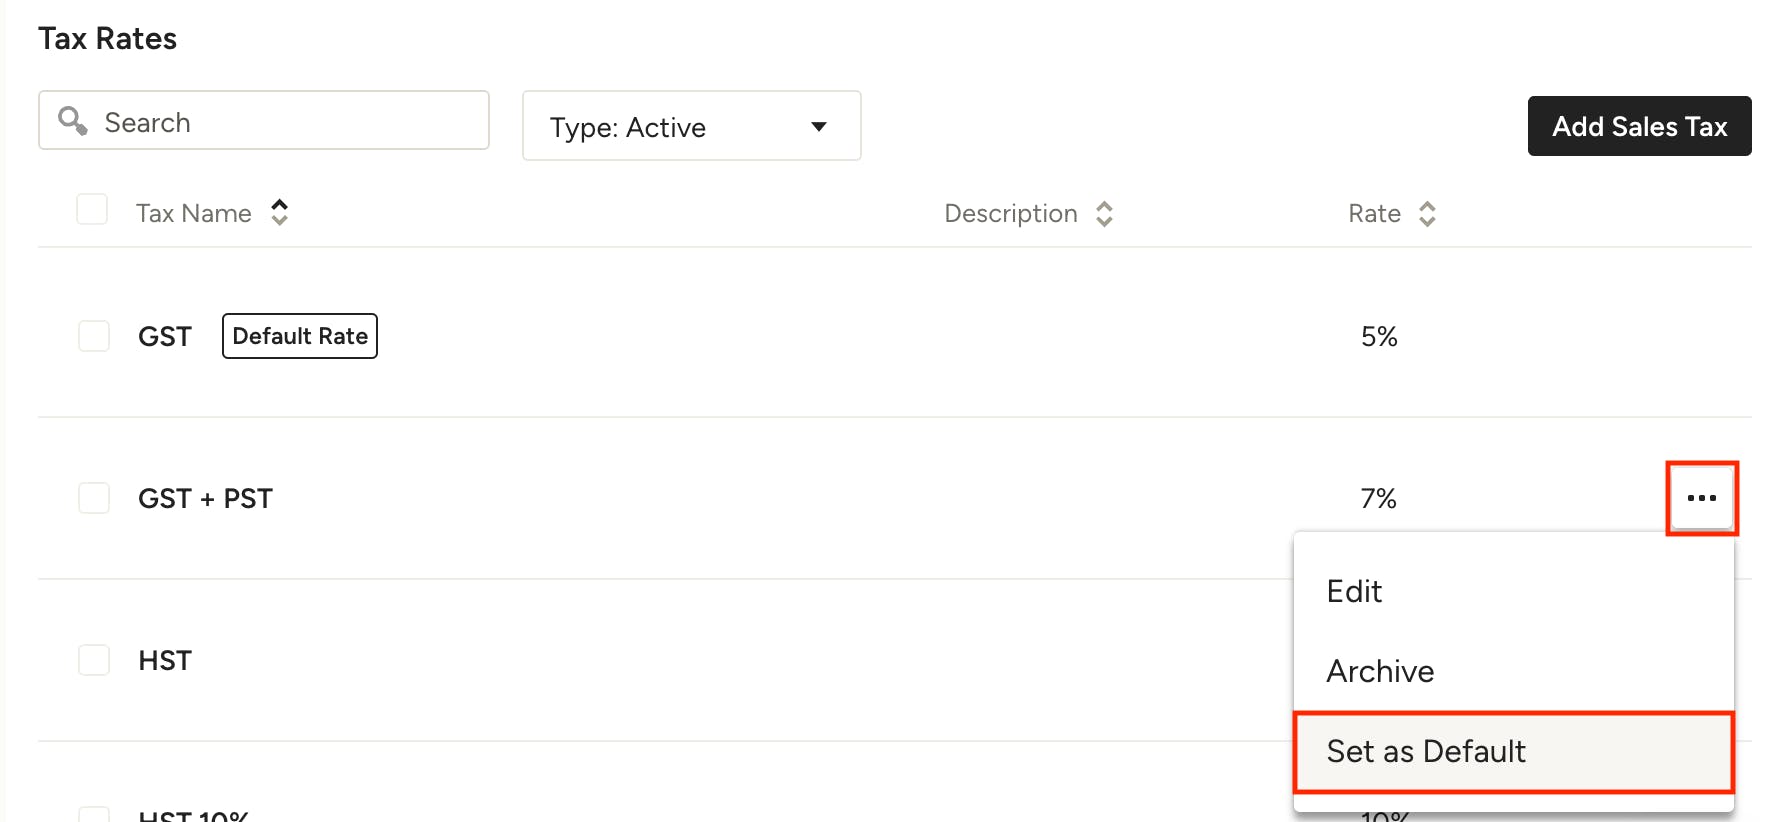
If you only have one tax rate entered, this will be the default rate. If you have more than one tax rate in your Houzz Pro account, you can choose which one you want to set as the default tax rate for all projects. To do so, click the three dots to the right of the desired rate and select Set as Default from the menu.
Inclusive/Exclusive Tax Setting
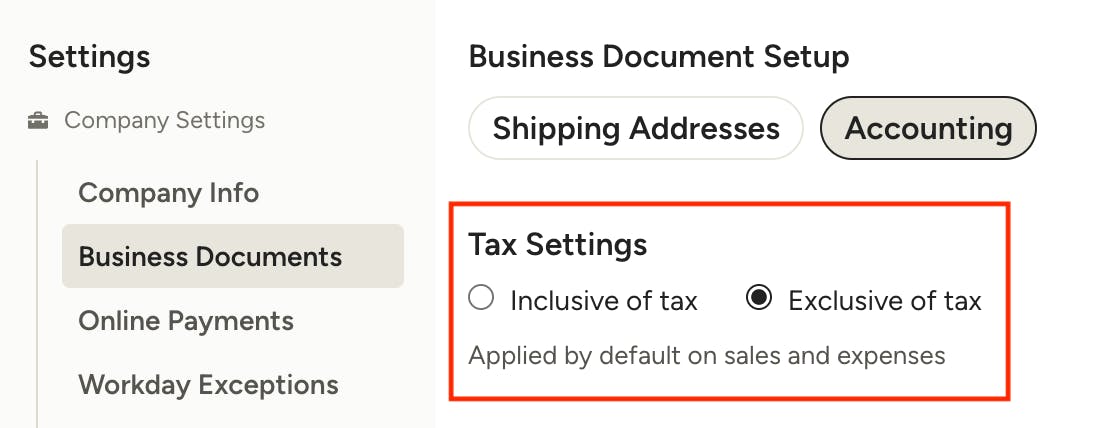
To give you flexibility on how you run your business, you have the option to adjust your tax settings to be inclusive or exclusive of tax by default on sales and expenses. What does that mean?
- Inclusive of tax means the tax has already been calculated and is included in the advertised sales price.
- Exclusive of tax means the tax is not included in the advertised sales price. Any applicable tax would need to be added as needed.
To set the default tax settings for sales and expenses, navigate to the Accounting tab on the Business Document Setup page, located in your Settings section. Under the Tax Settings header, select Inclusive of Tax or Exclusive of Tax. Changes will be automatically saved and applied to future documents.
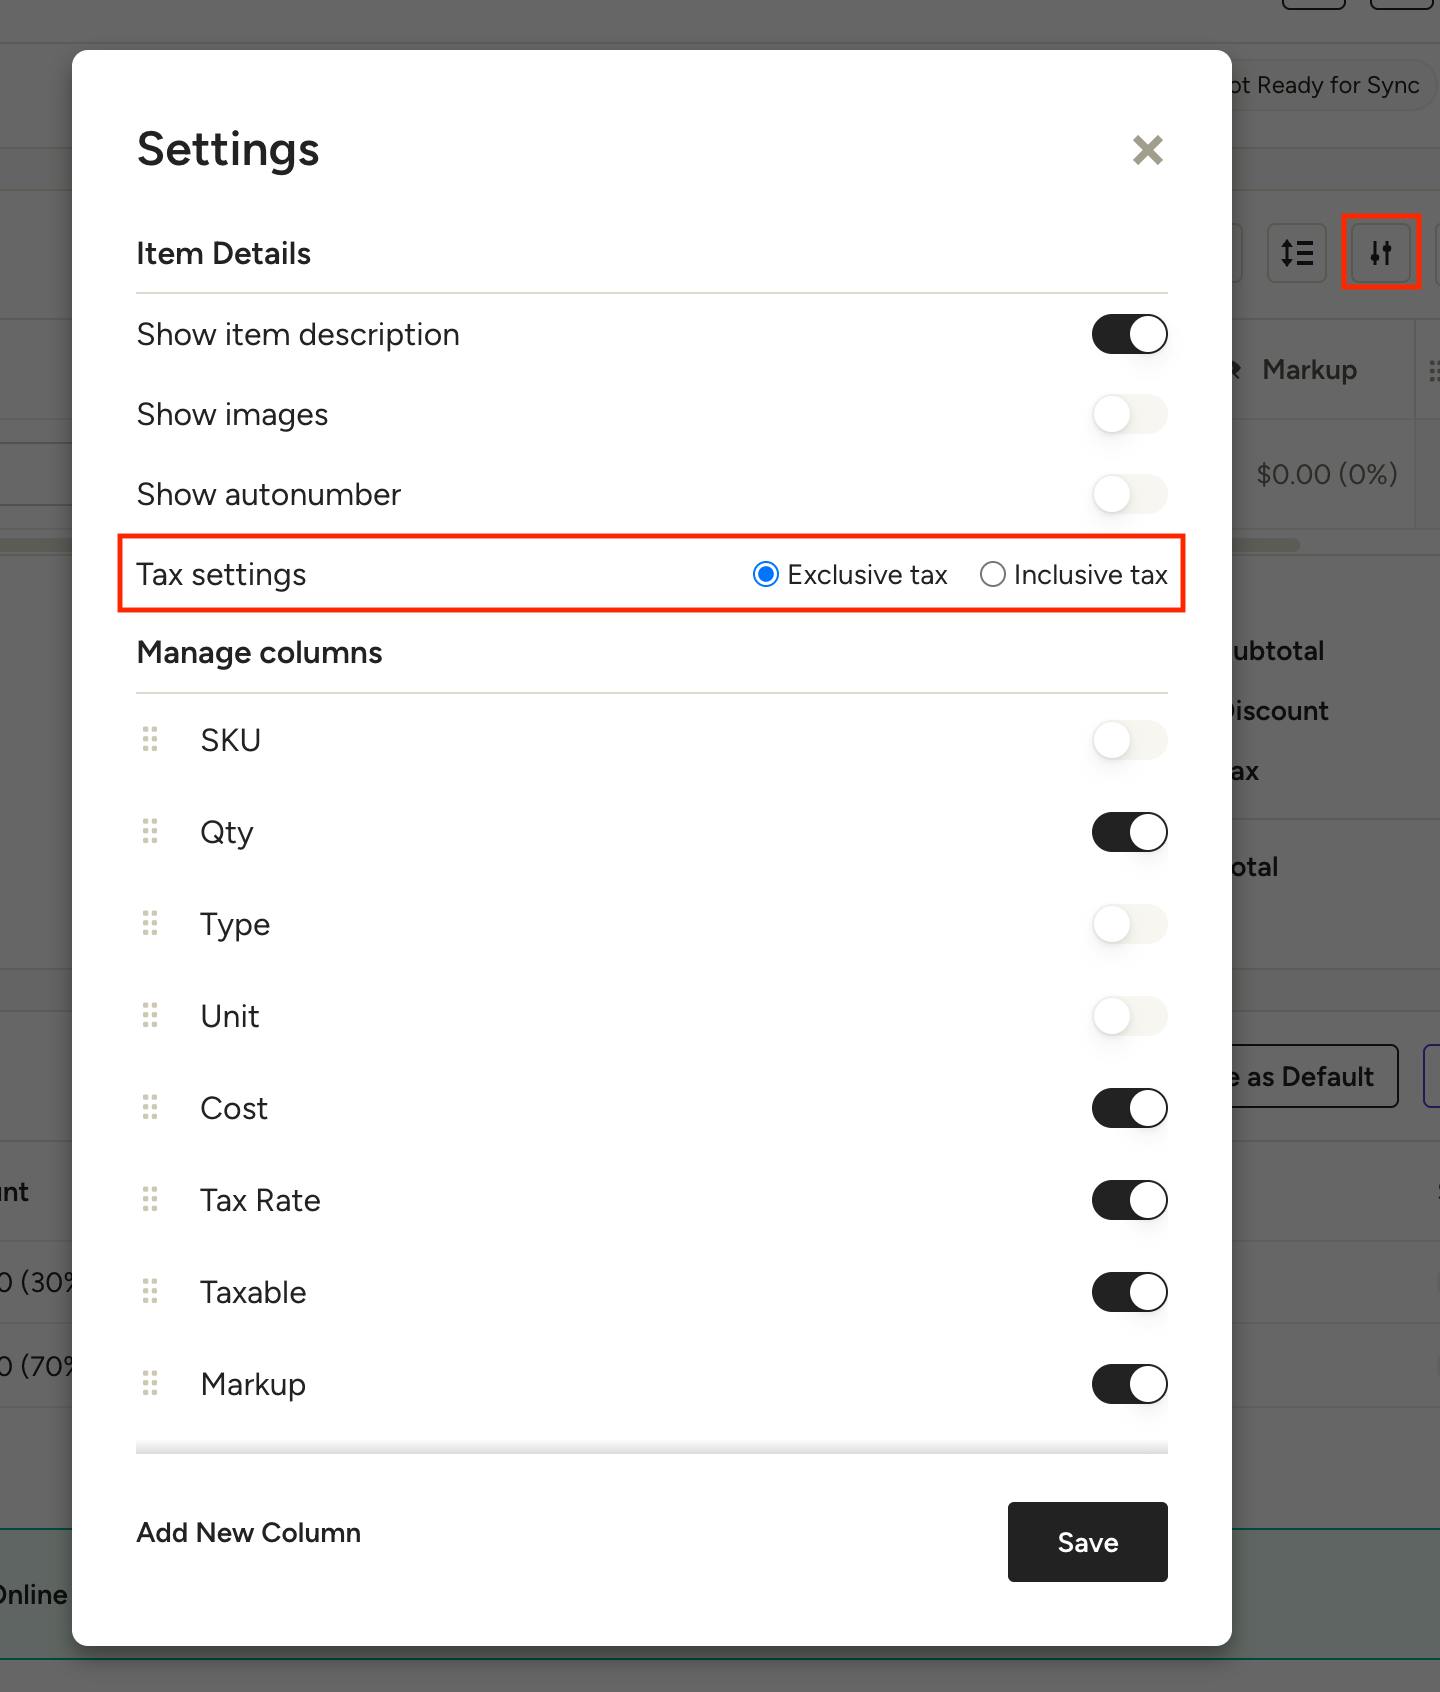
You can also adjust this option on each document – just click on Settings icon within the document and choose the appropriate option next to Tax settings.
Note: This option will only appear when the document is empty and doesn't contain any items.
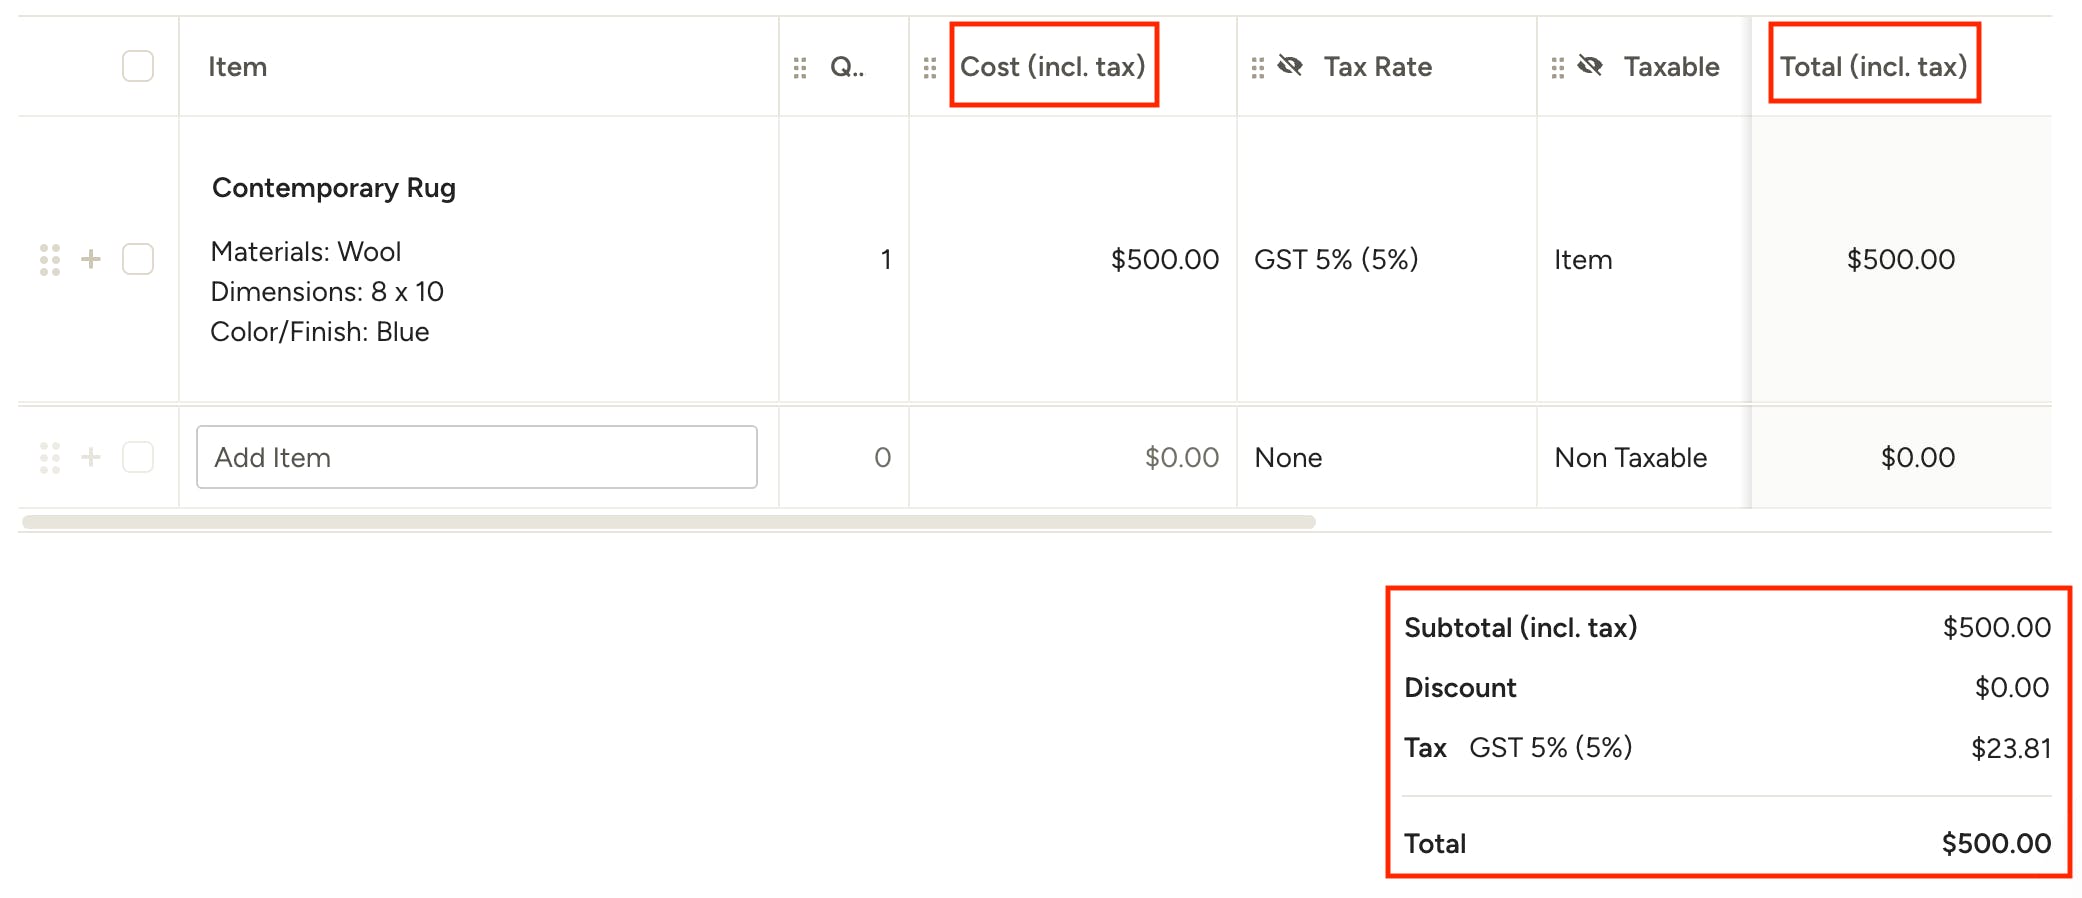
How does that impact financial documents?
If your default setting is Inclusive of tax, you will see this denoted throughout your financial documents as (Incl. tax), specifically in the Cost and Total columns, and Subtotal at the bottom of the item list. This lets your clients know that the tax is already calculated into the item totals they see. They will see a breakdown of the included tax at the bottom, if you choose to show them this detail in the client view settings.
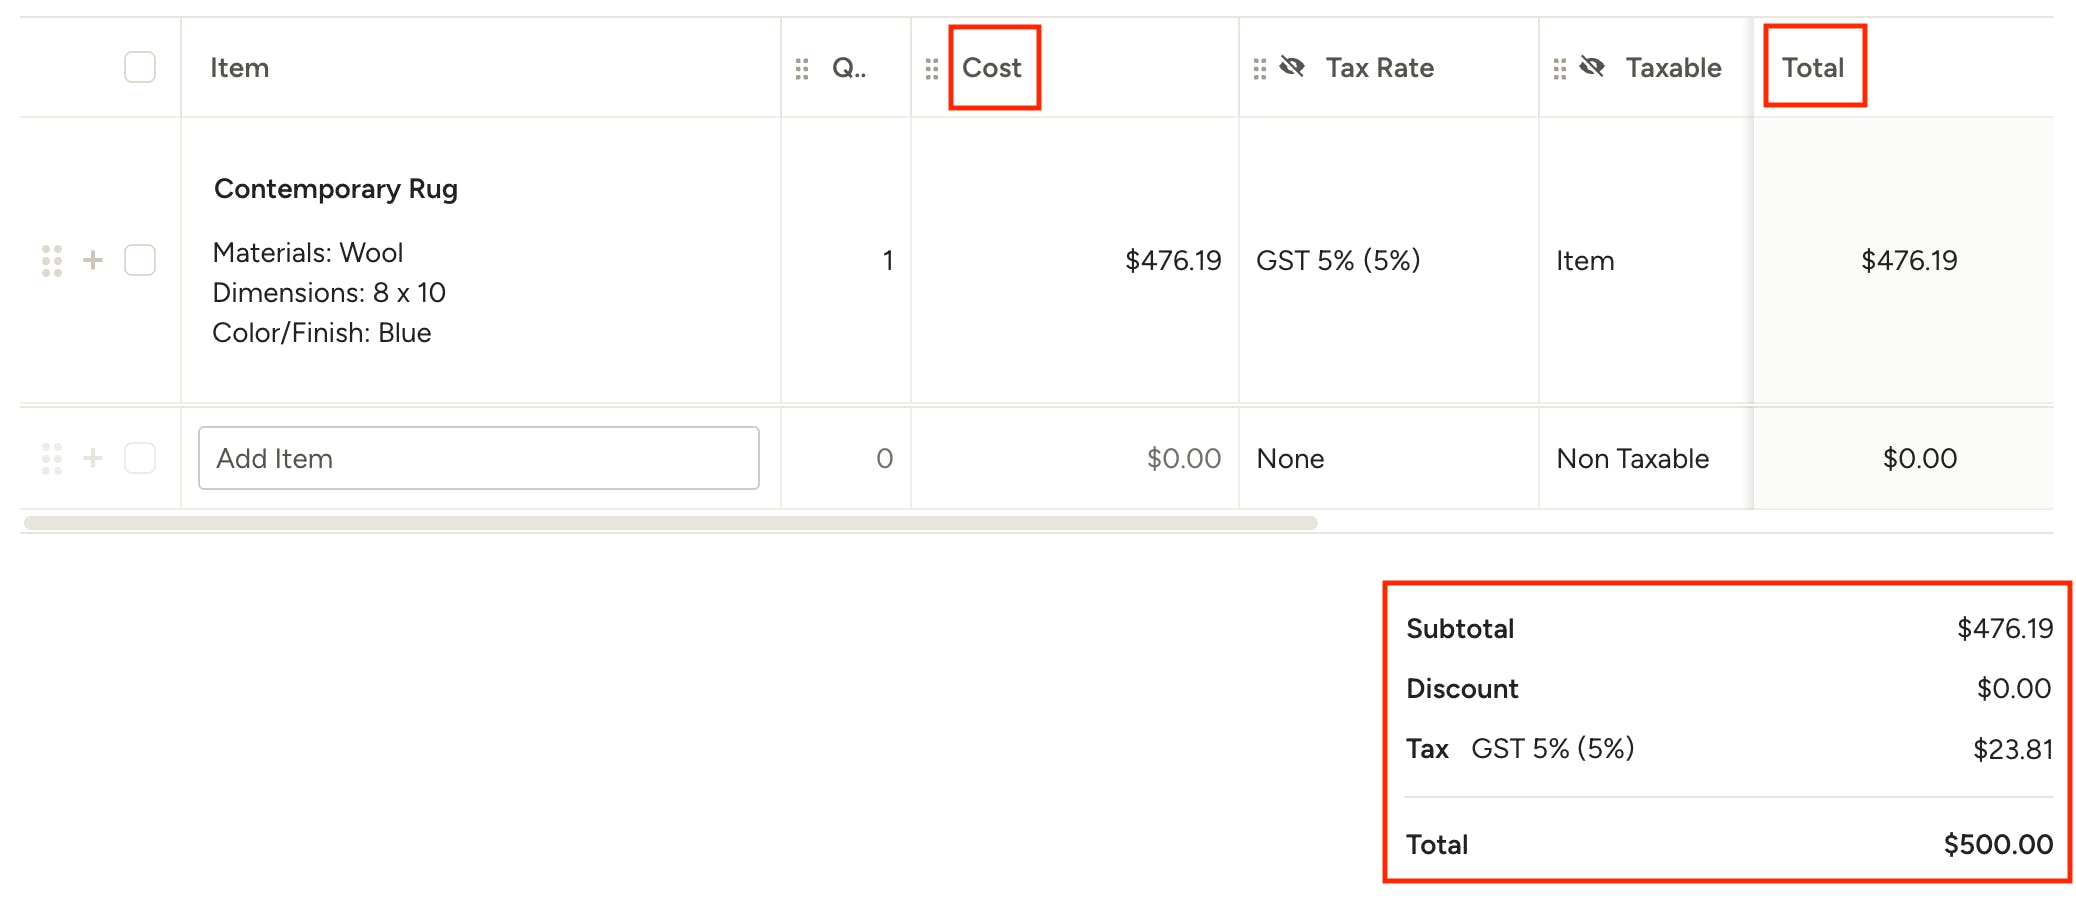
If your default setting is Exclusive of tax, the item Cost and Total columns, and Subtotal at the bottom of the item list, will show the client's cost, excluding tax. Any applicable tax is calculated and shown in the breakdown at the bottom, then added in the overall Total. Your client will see a breakdown of the subtotal and tax at the bottom, if you choose to show them this detail in the client view settings.
Set Default Tax Rate Per Project
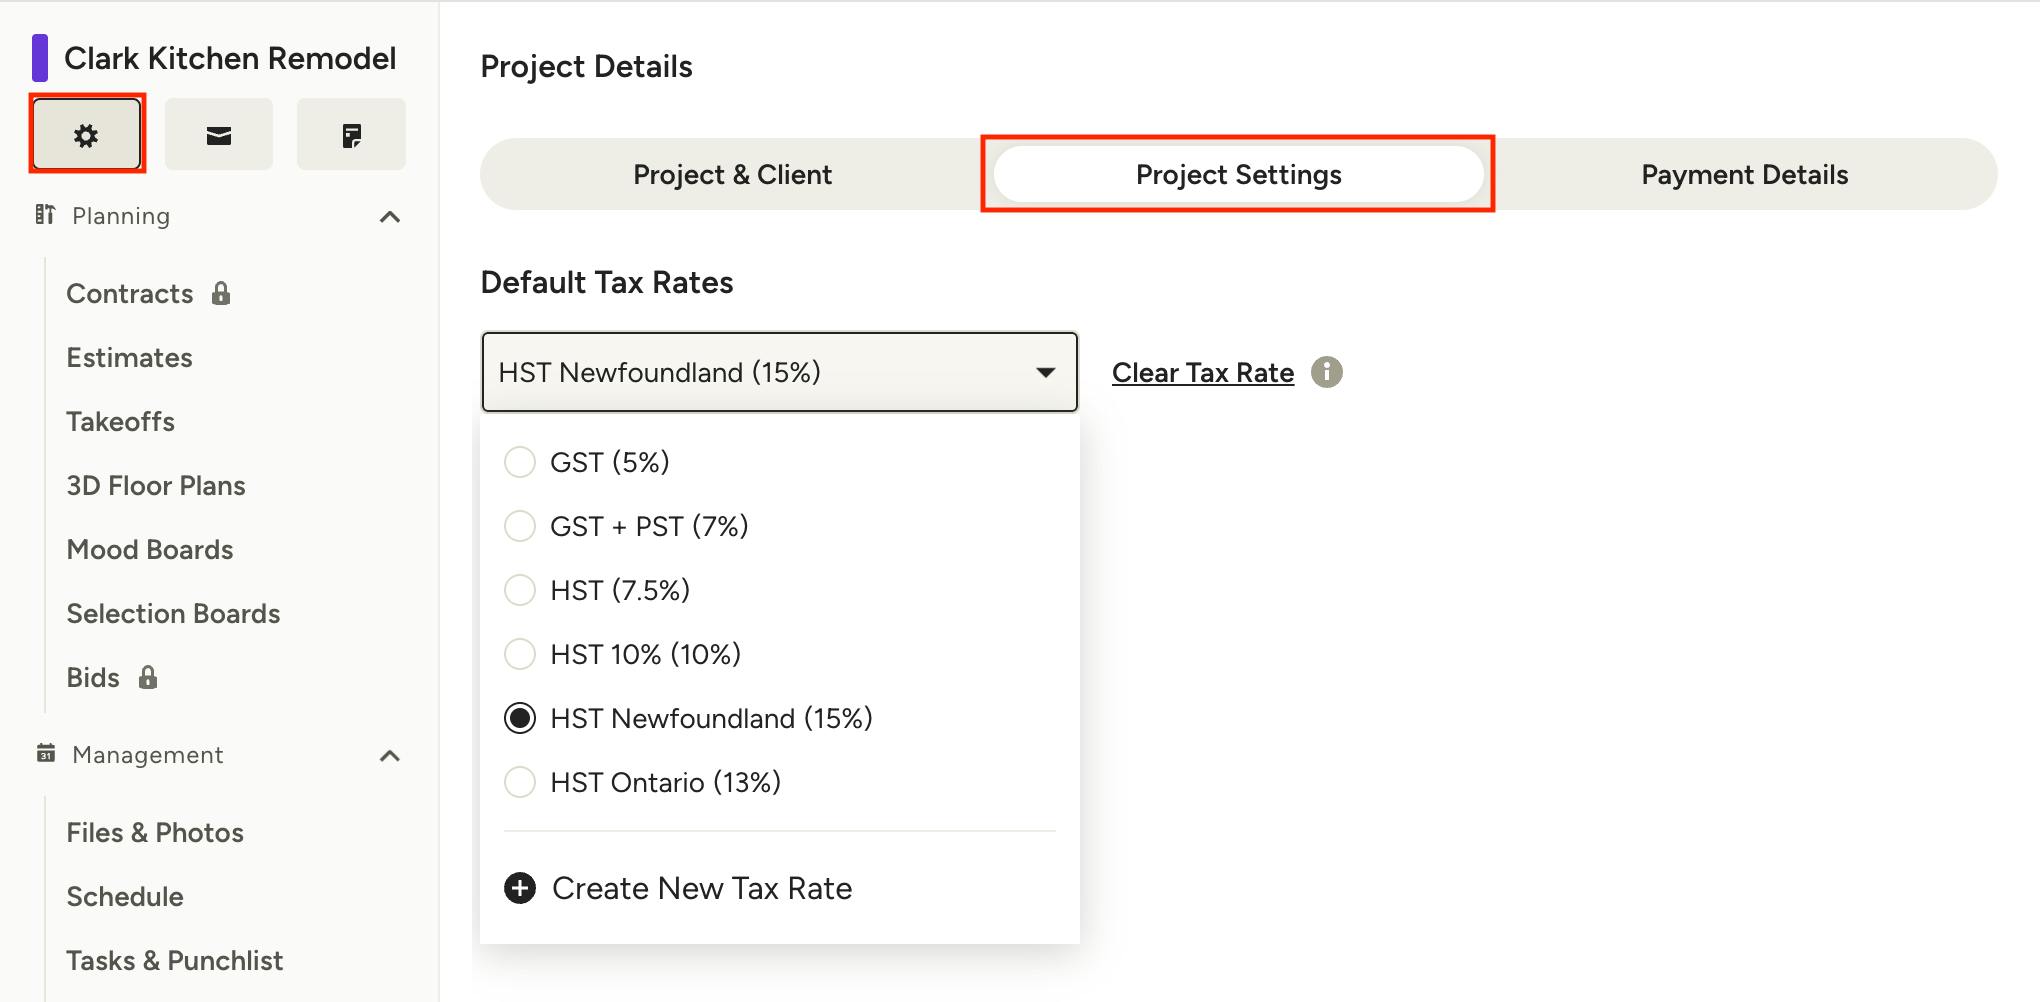
You can also set default tax rates on a project basis, allowing you to use a tax rate other than the company default for all documents in a specified project. To do so, click the Project Details icon on a project overview page, then choose the Project Settings tab at the top. Here you can use the dropdown to select from your existing rates, or create a new one. Make sure to click Save Changes at the bottom when you're done.
This tax rate will be the default for all new documents in that project, including those created from templates. You can click Clear Tax Rate to revert project documents back to the company default rate.
Set Tax Rates for Estimates
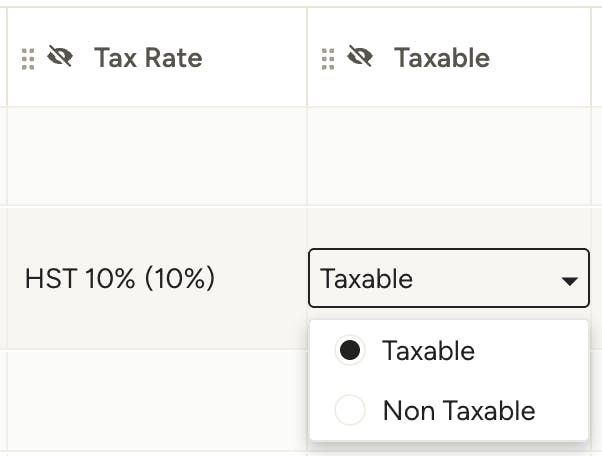
Each line item on your estimate has two tax-related columns: Tax Rate and Taxable. If you don't see either, you will need to enable them in the Customize Settings at the top of your line items section. You can adjust the Taxable column as needed per item, depending on the item type. Material, Labor, Product, and Service types can be marked Taxable or Non Taxable. Items with the Material & Labor type can be taxed on Material, Labor, both or neither.
To make changes, click the arrow in the Taxable column for the desired line item and a dropdown will appear. Choose the type of tax that applies to the item.
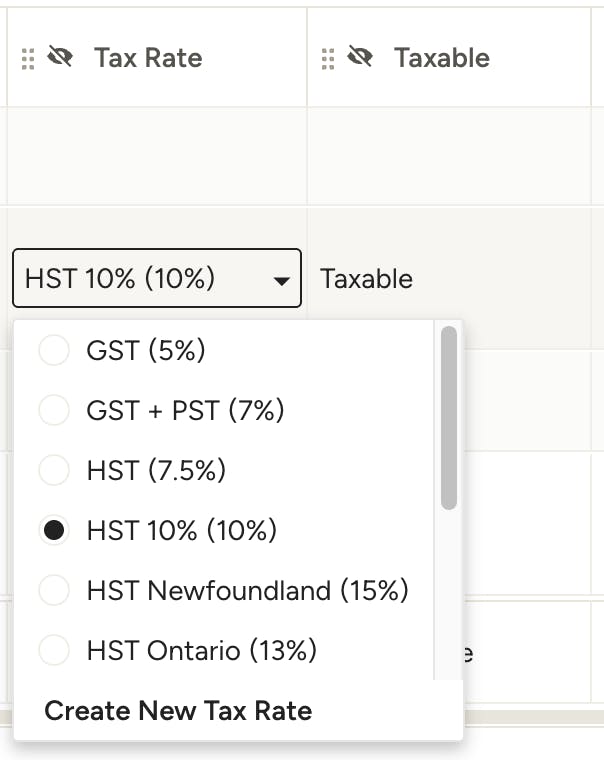
Once you’ve set the taxability for your line items, you can determine which tax rate should apply to each line item. By default, it will be the rate that you set at the account level or project level.
To set a different tax rate on a specific item, click the dropdown in the Tax Rate column on said line item to choose one of the tax rates saved in your account settings.
If you’re already working on an estimate and you need a tax rate that doesn’t yet exist in your account, you can create that new tax rate from within the estimate — just select Create New Tax Rate from the dropdown. The tax rate will be saved in your account and can be used on future projects and estimates.
Set Tax Rates for Proposals
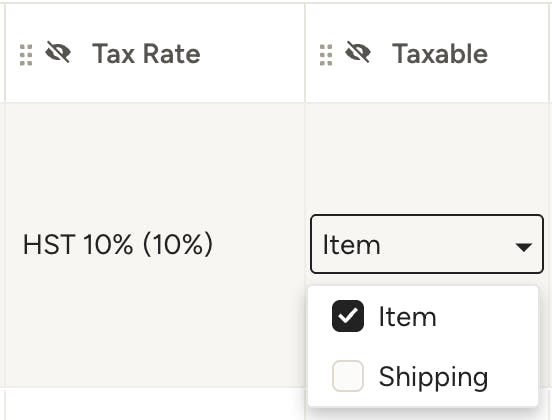
Each line item on your proposal has two tax-related columns: Tax Rate and Taxable. If you don't see either, you will need to enable them in the Customize Settings at the top of your line items section. You can adjust the Taxable column as needed per item, allowing you tax the Item, Shipping, both or neither. Items with the Material & Labor type can be taxed on Material, Labor, Shipping, a combination of the three, or none.
To make changes, click the arrow in the Taxable column for the desired line item and a dropdown will appear. Choose the type of tax that applies to the item. If neither Item nor Shipping are selected, it will show Non Taxable. If both are selected, it will show Taxable.
Once you’ve set the taxability for your line items, you can determine which tax rate should apply to each line item. By default, it will be the rate that you set at the account level or project level.
To set a different tax rate on a specific item, click the dropdown in the Tax Rate column on said line item to choose one of the tax rates saved in your account settings.
If you’re already working on a proposal and you need a tax rate that doesn’t yet exist in your account, you can create that new tax rate from within the proposal — just select Create New Tax Rate from the dropdown. The tax rate will be saved in your account and can be used on future projects and proposals.