How to Organize Tasks with Tags
Staying organized across multiple projects is key to running a smooth and efficient operation. Within Houzz Pro, using tags when building out your project tasks and punchlists gives you an extra level of control and clarity. Tags allow you to customize how tasks are grouped and managed based on your company's unique workflow.
Here's how it works: You create custom tags that match the way your team works, whether it’s by phase, trade, priority, or even crew assignments. Once created, you can quickly apply these tags to relevant tasks or punchlists throughout your projects — you can even filter or sort to find exactly what you need.
Let's take a look at how to create, manage and filter tags for your tasks and punchlists.
Access Tasks and Punchlists
To add tags, you will need to first access tasks and/or punchlists. You can access tasks in multiple places throughout Houzz Pro — within the Task Center, within an individual project, or within an individual lead. To learn more about adding tasks to your projects, read How to Create and Manage Your Tasks.
Within Task Center
The Task Center combines all projects and leads in one place and gives you a general overview of where all your tasks stand. Please Note: The Task Center does not include punchlists, since those are project-specific lists.
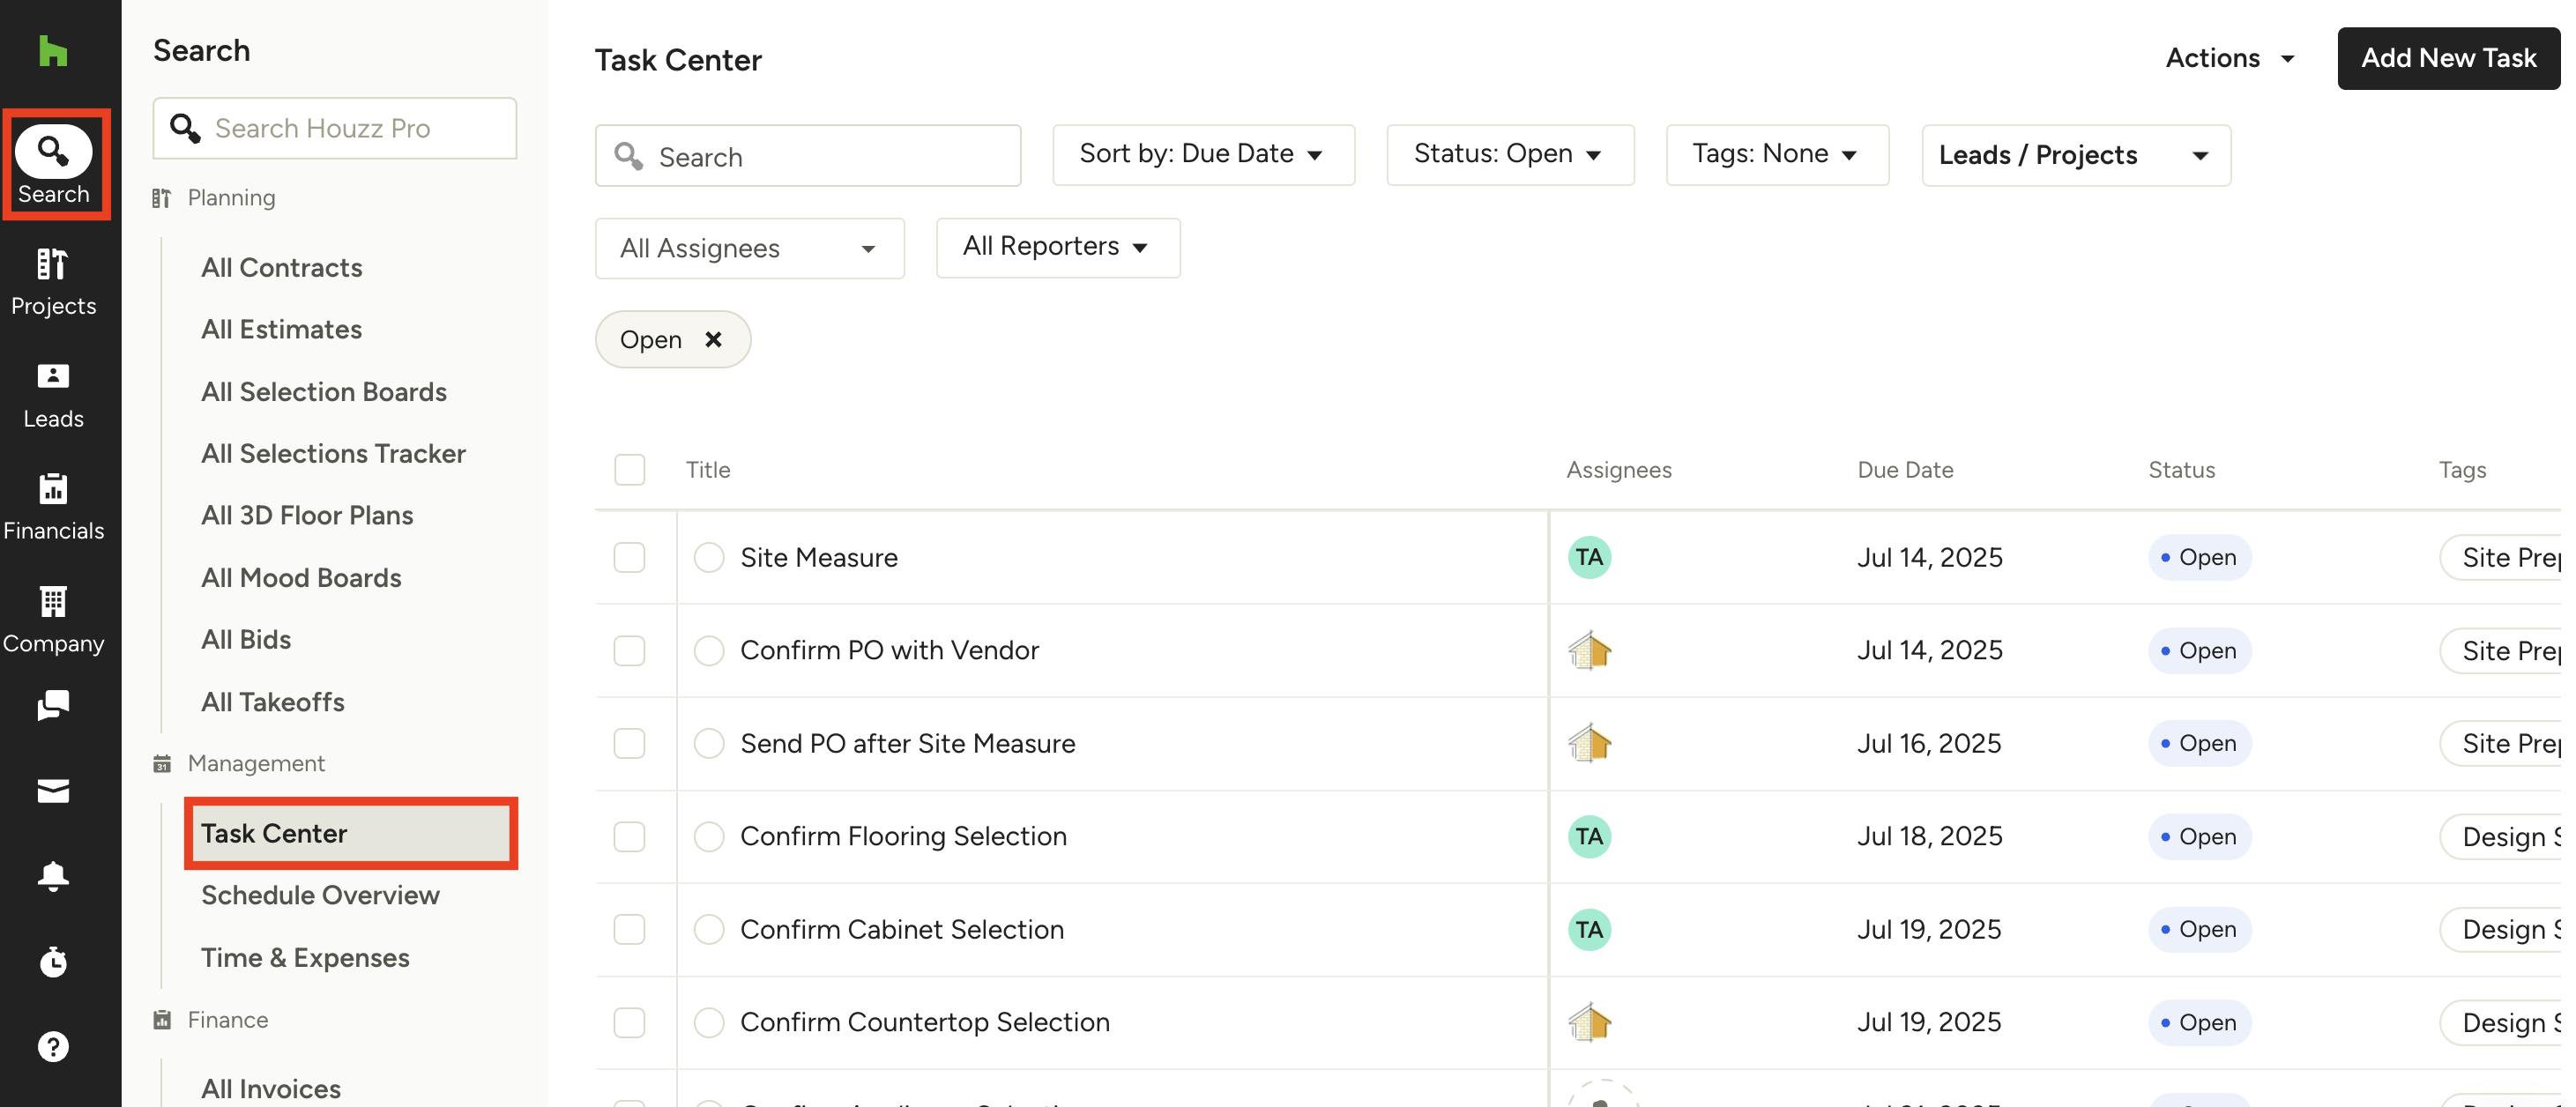
To access the Task Center, click the Search icon from your left navigation and select Task Center under Management.
Within Projects
If you prefer to focus on a specific project instead, you can easily manage your tasks within the project overview page as well.
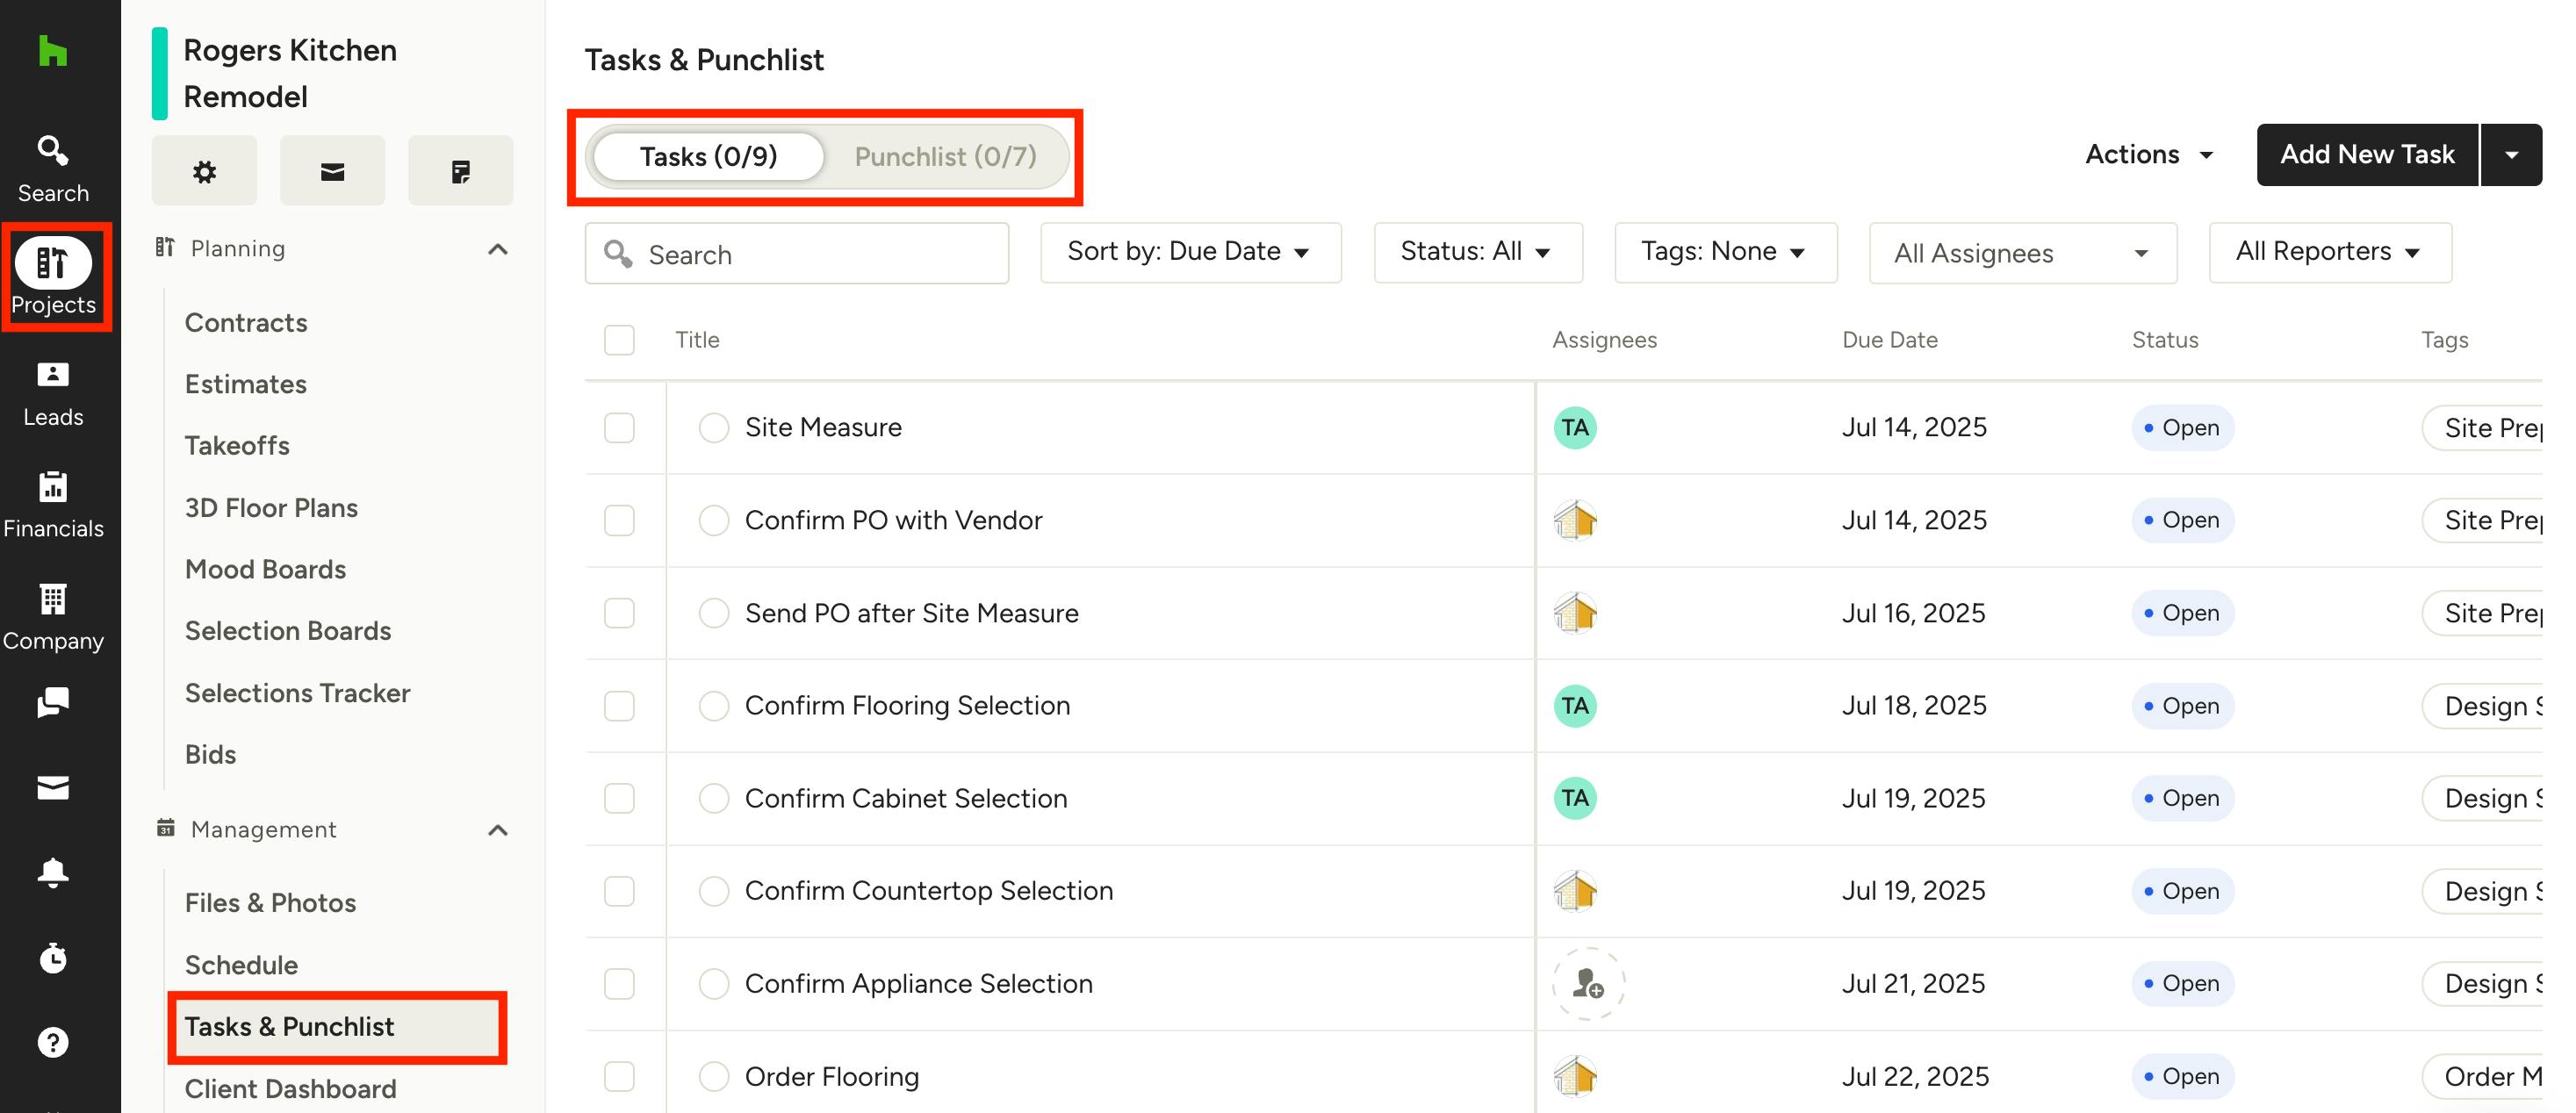
Find the Projects icon in your left navigation, and select the relevant project. Once in the project, select Tasks & Punchlist from the left menu.
On this page, you can select to view Tasks or Punchlist in the toggle at the top. To learn more about punchlists, read How to Create a Punchlist.
Within Leads
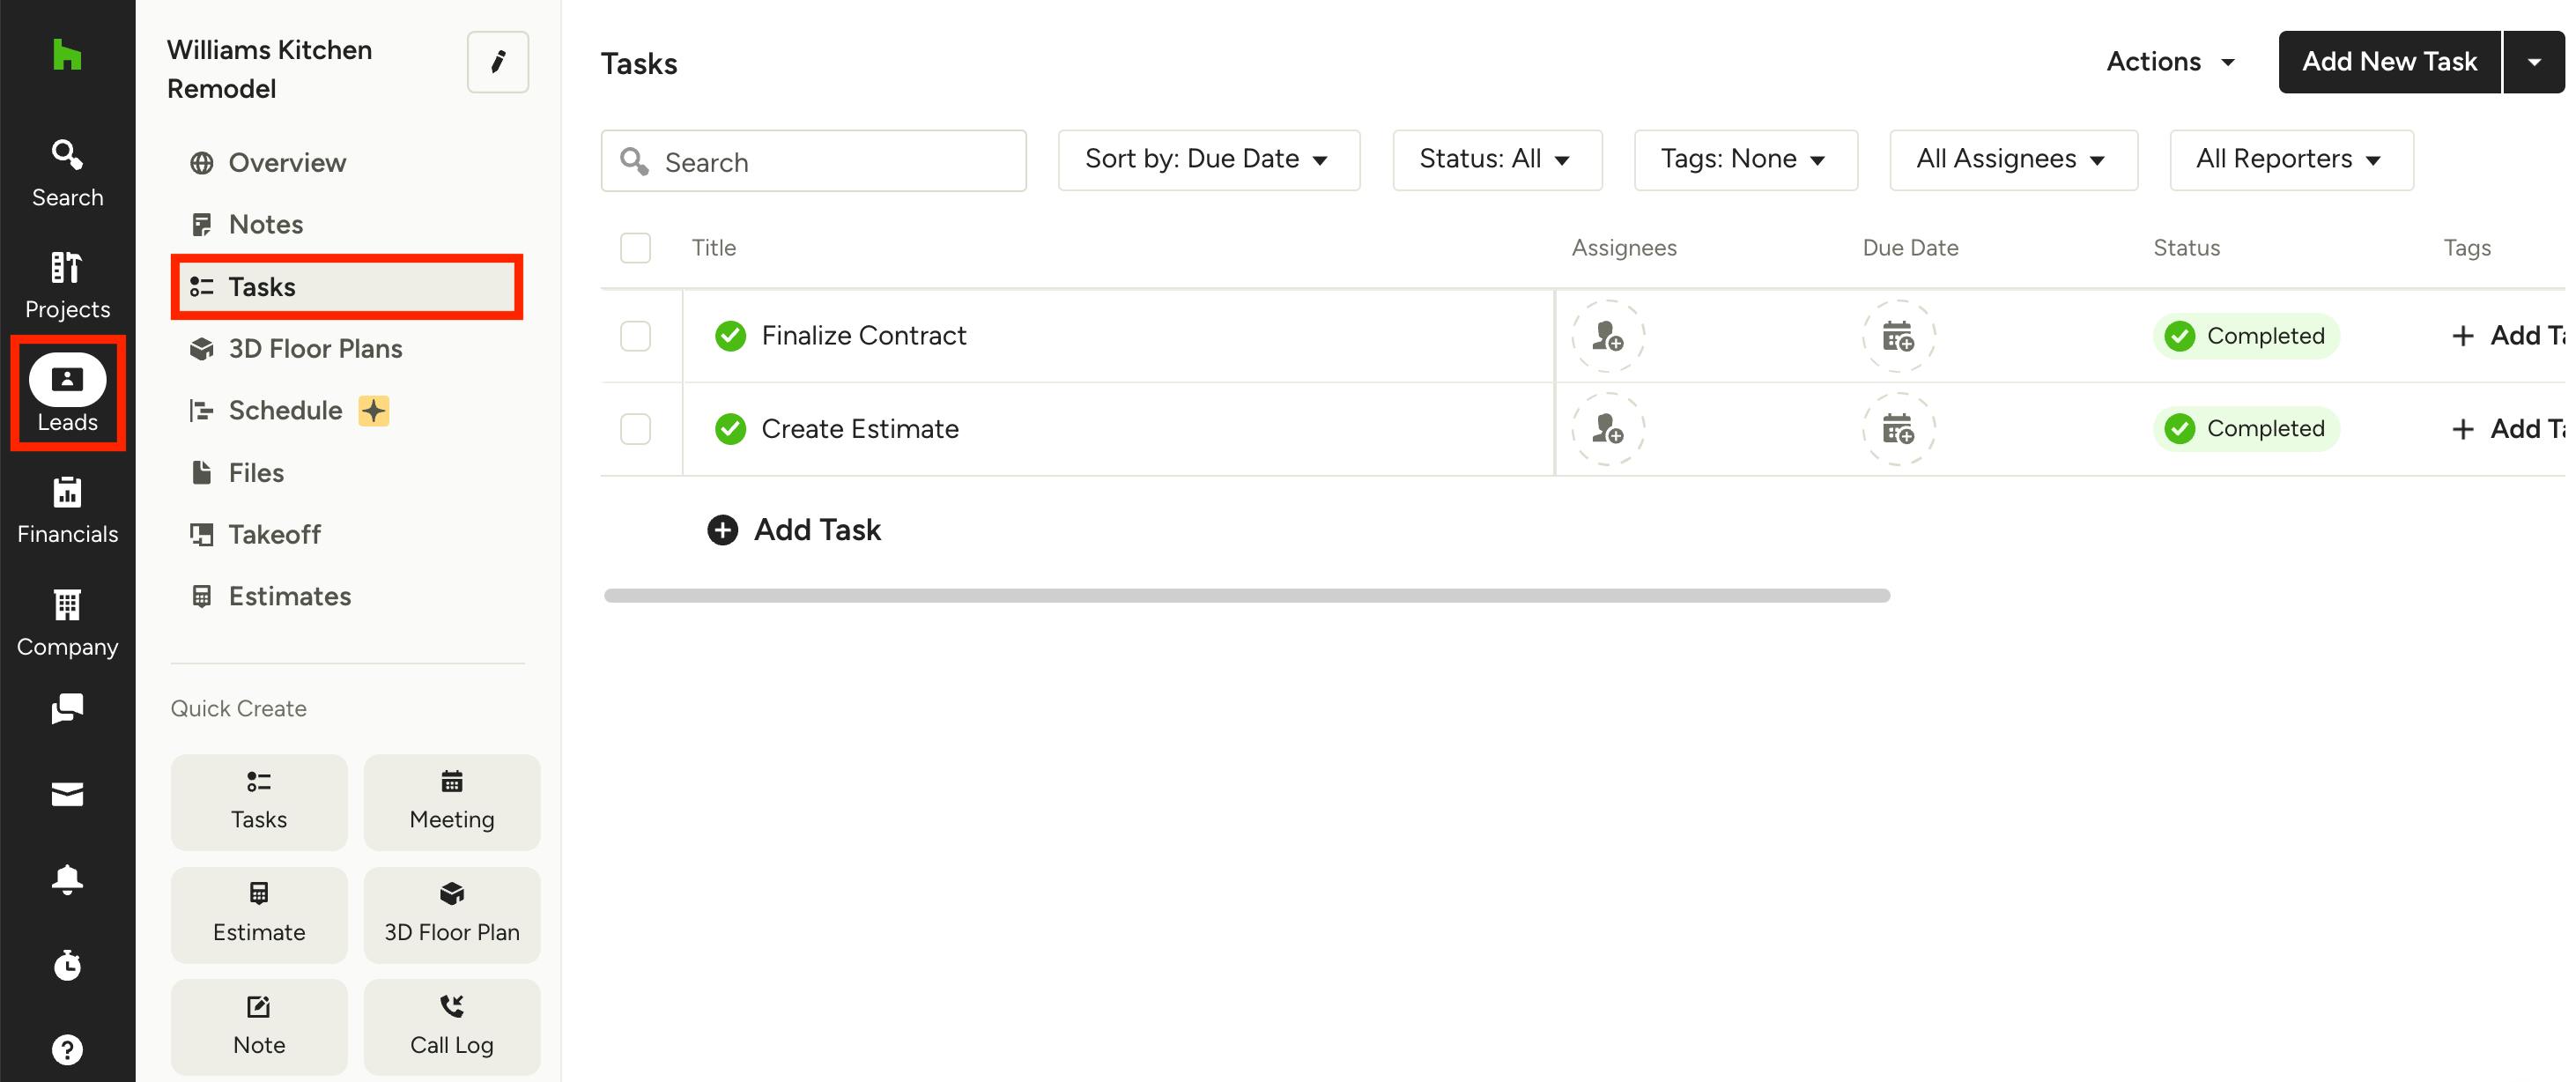
To see tasks for a specific lead, find the Leads icon in your left navigation, and select the relevant lead. Once in the lead, select Tasks from the left menu. Please Note: Punchlists are not available for leads.
Create New Tags
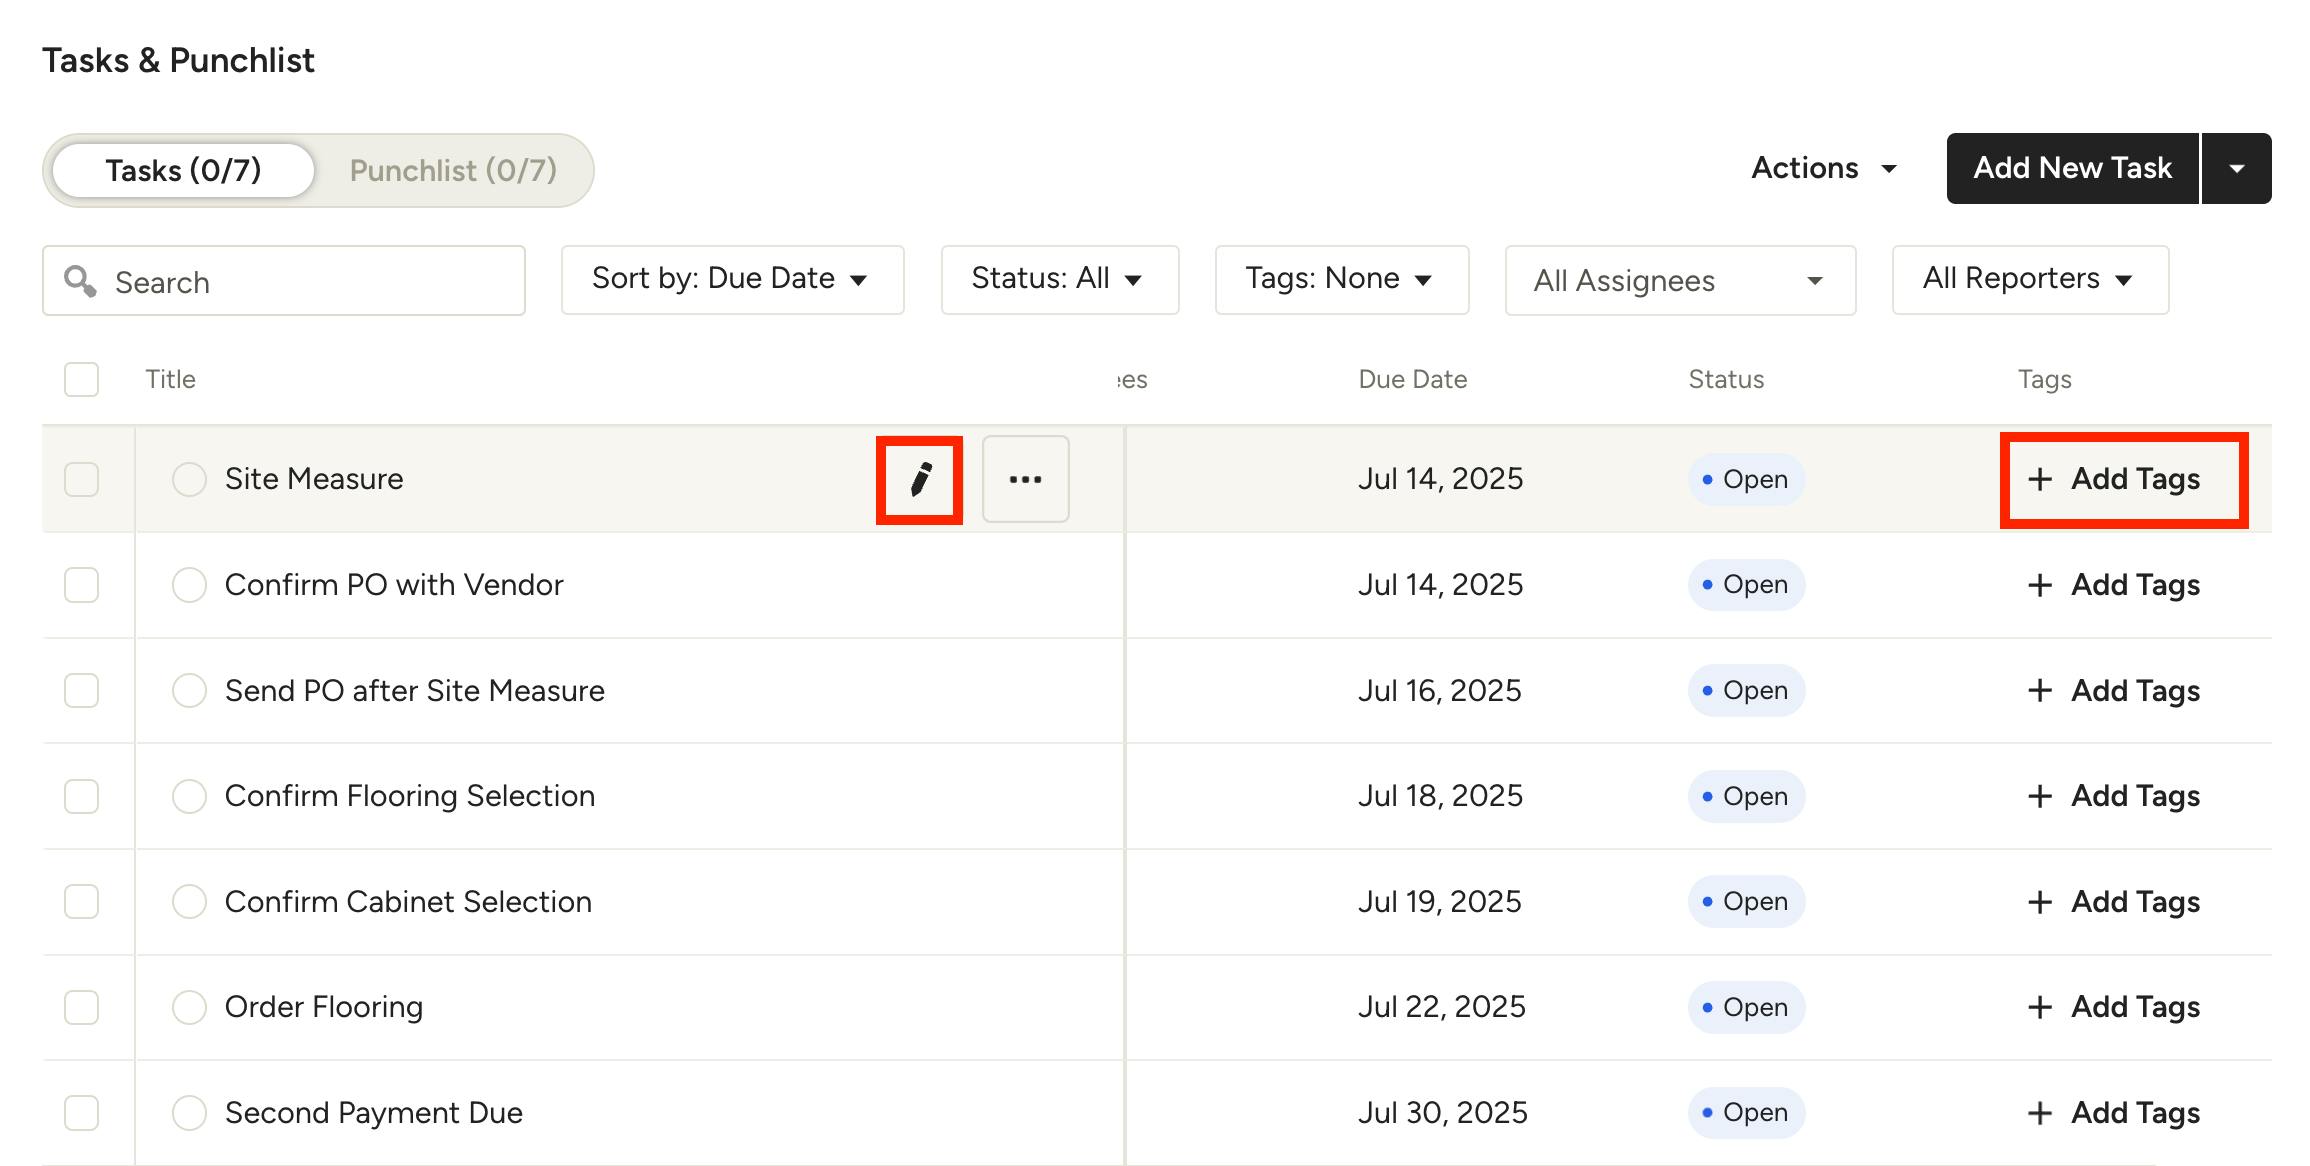
You can create new tags in both the Task Center or within the task or punchlist section of an individual project/lead. To start, find the relevant task, then click either the Pencil icon or the Add Tags button.
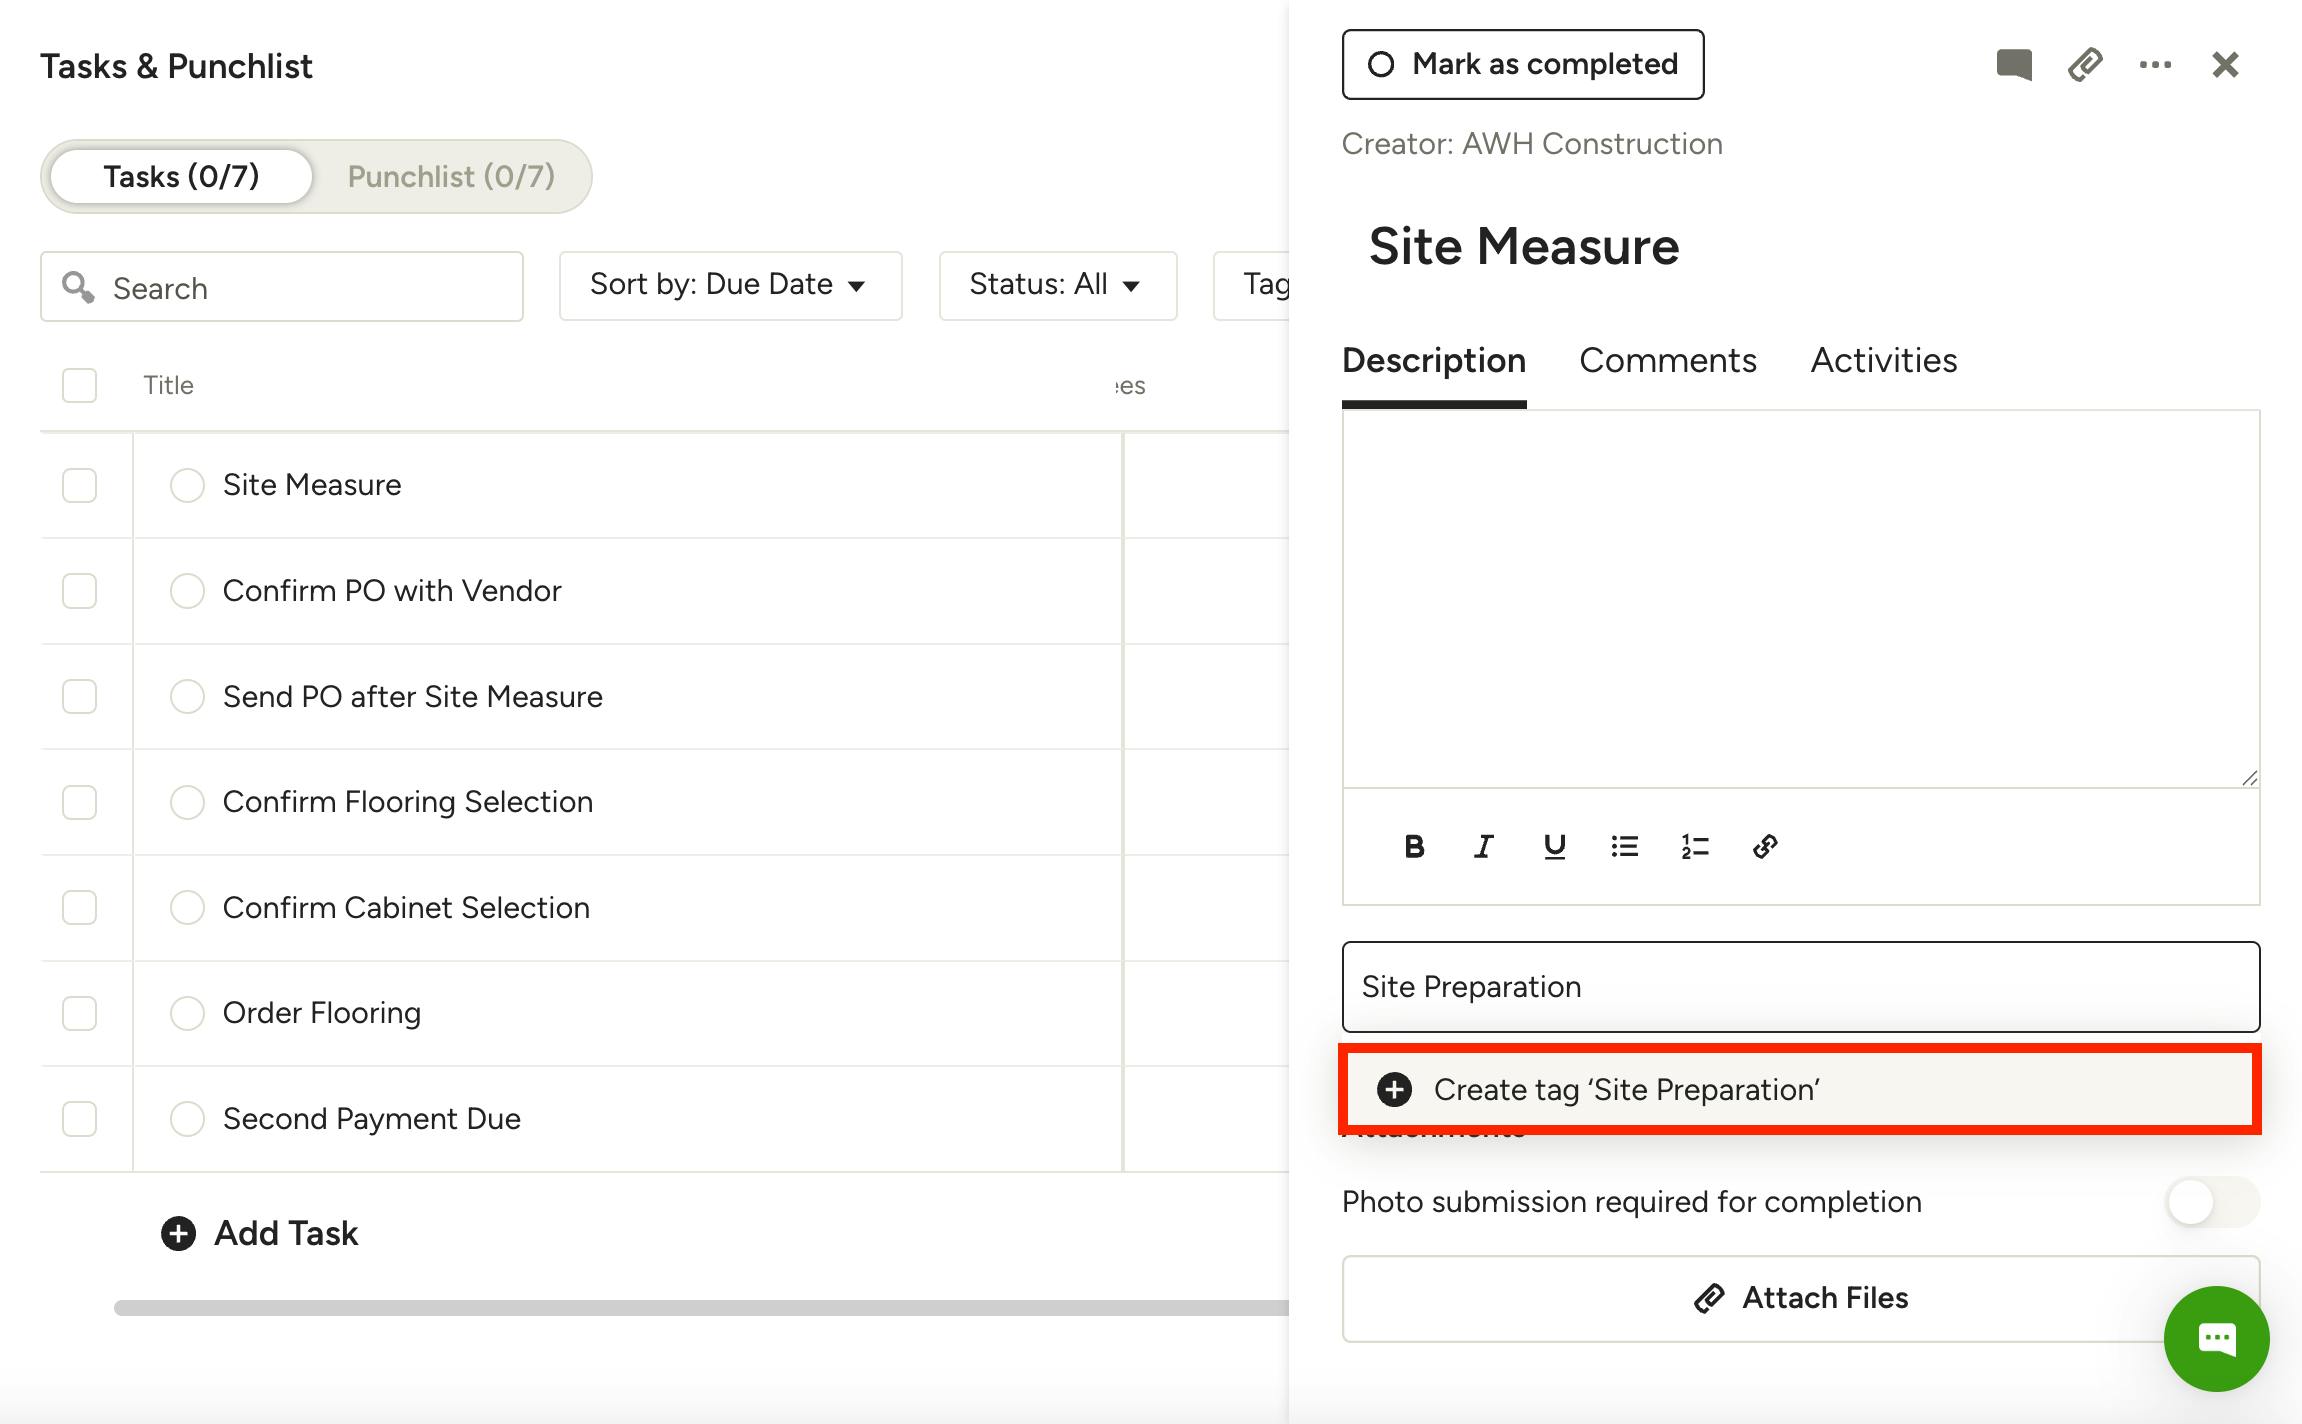
A new screen will pop up on the right side — scroll down and click Add Tags underneath the description. If you are creating tags for the first time, this list will be empty. Type in the name of the tag you want to add, then click Create Tag to save. You can add multiple tags per task if needed.
The new tag will now appear for use across all your projects and leads.
Add Existing Tags
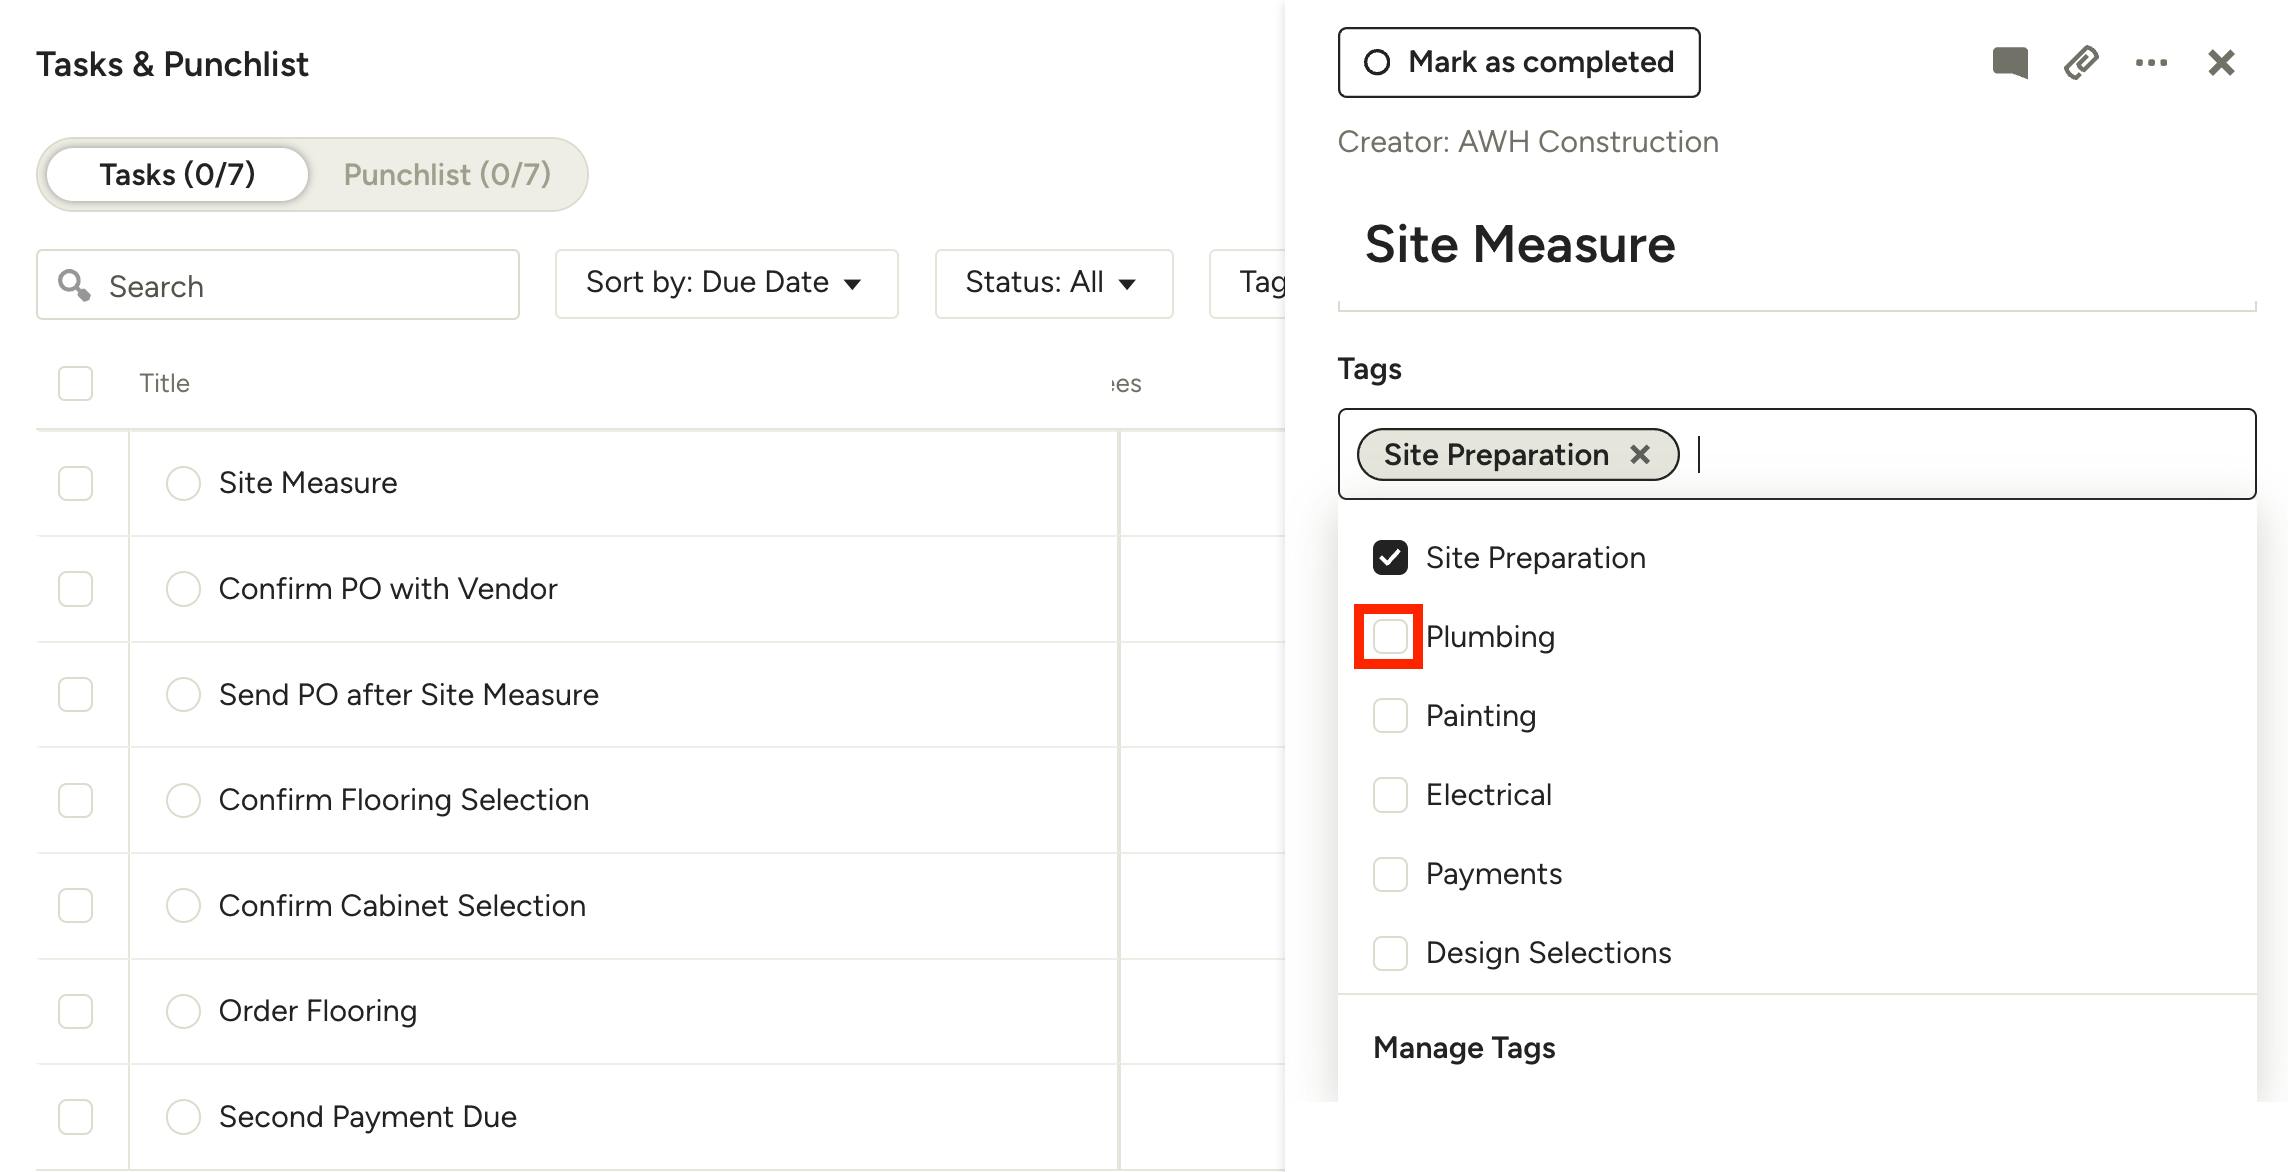
If you have already created tags and would like to add one to a task, the tags dropdown for that task will list all the existing options (as shown below).
To add an existing tag, just click the checkbox next to it — you can add multiple tags if needed. You can remove the tag by de-selecting the checkbox.
Manage Tags
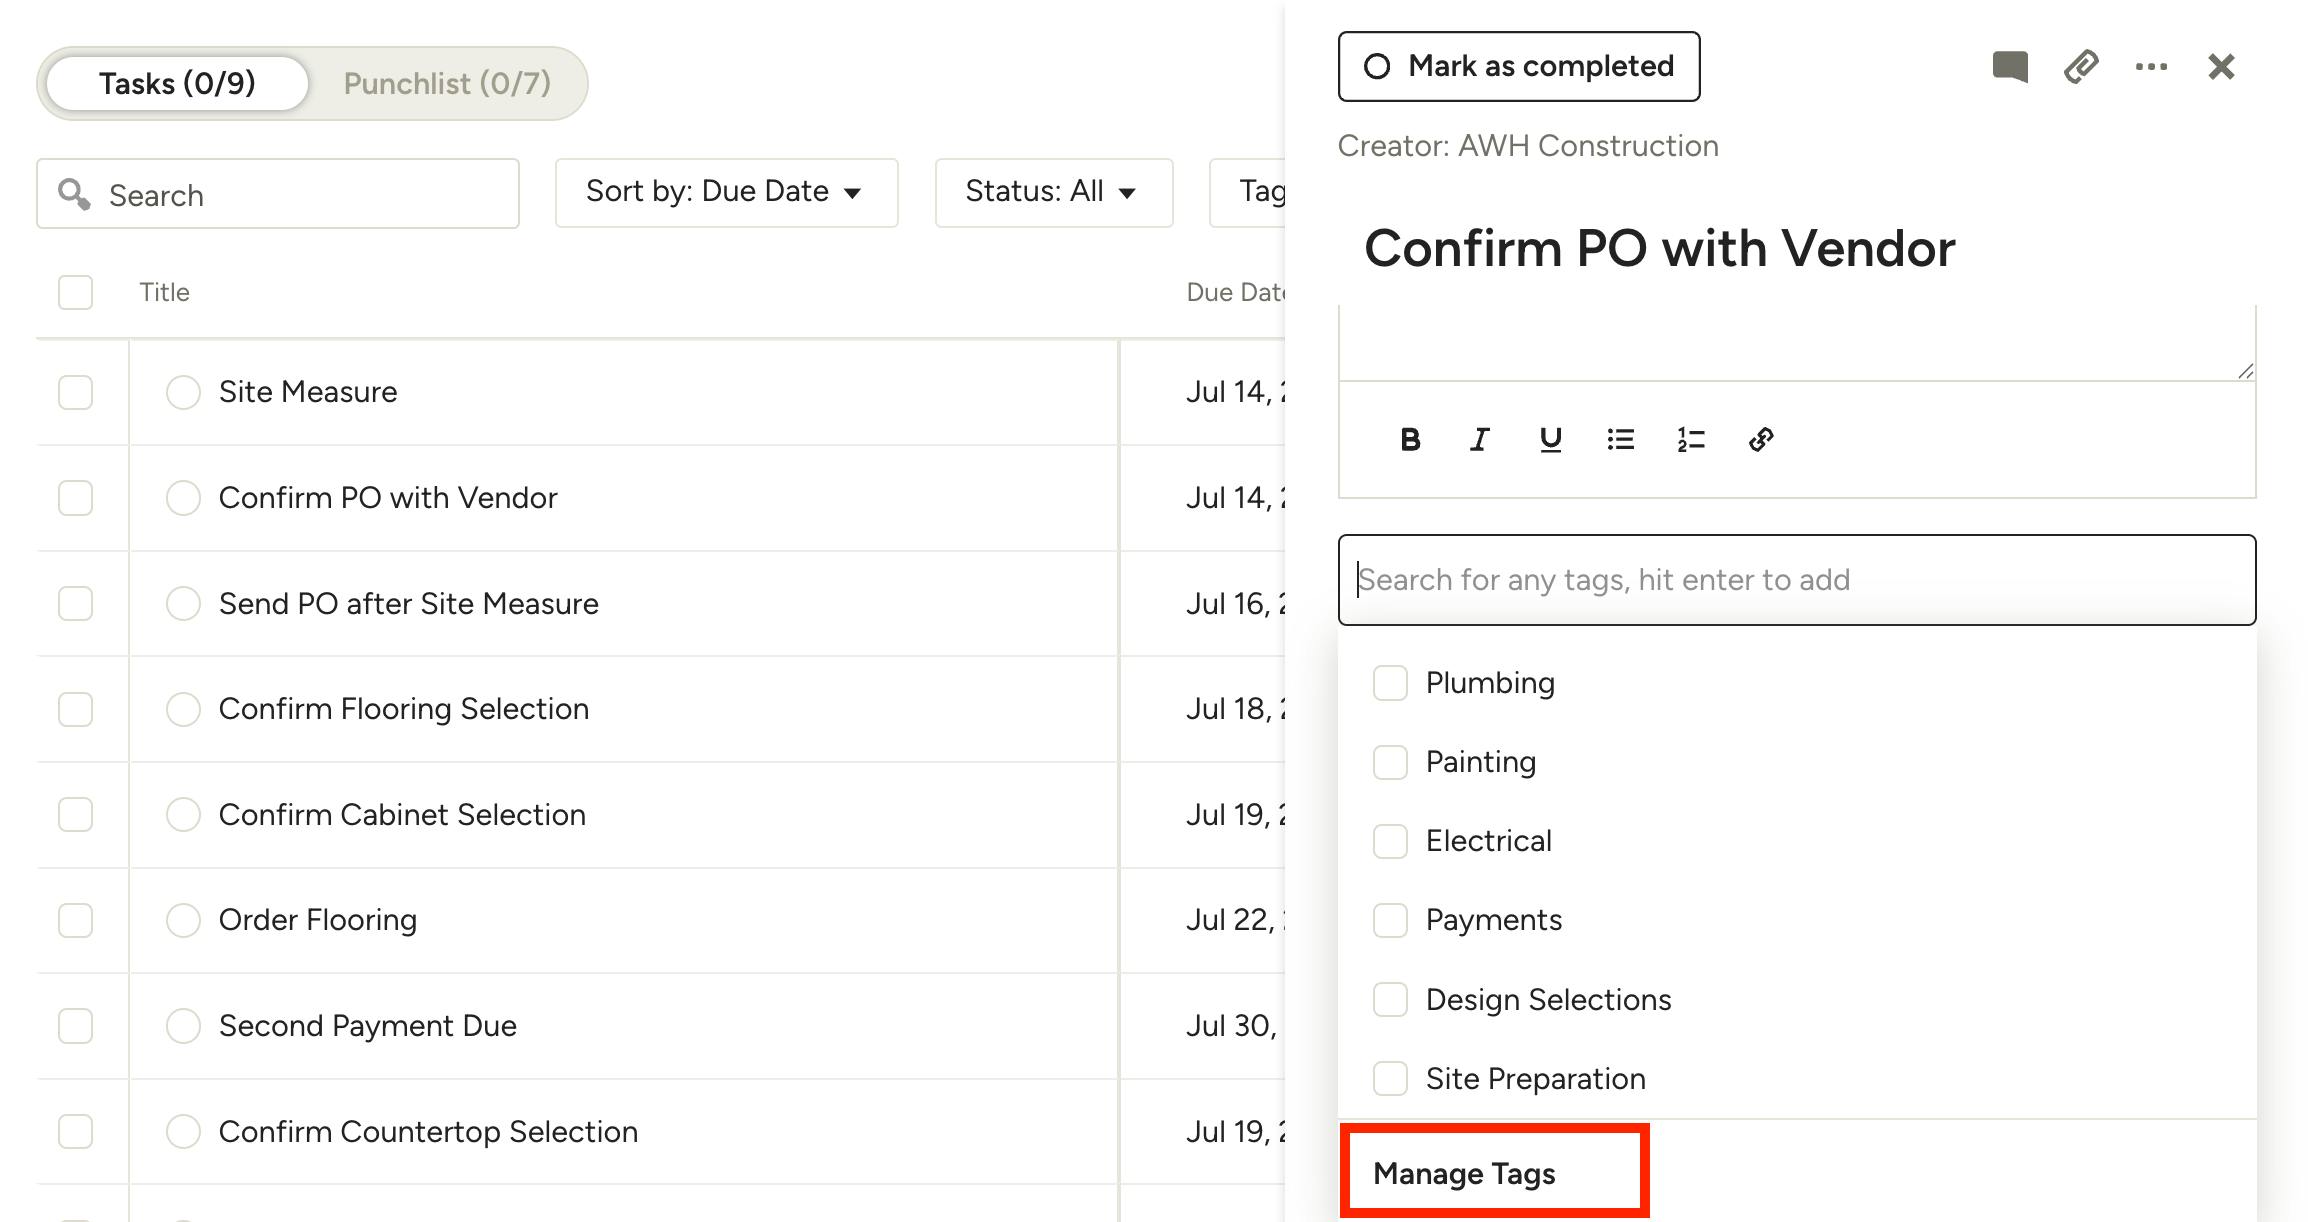
To edit or delete a task tag, select Manage Tags from the tags dropdown.
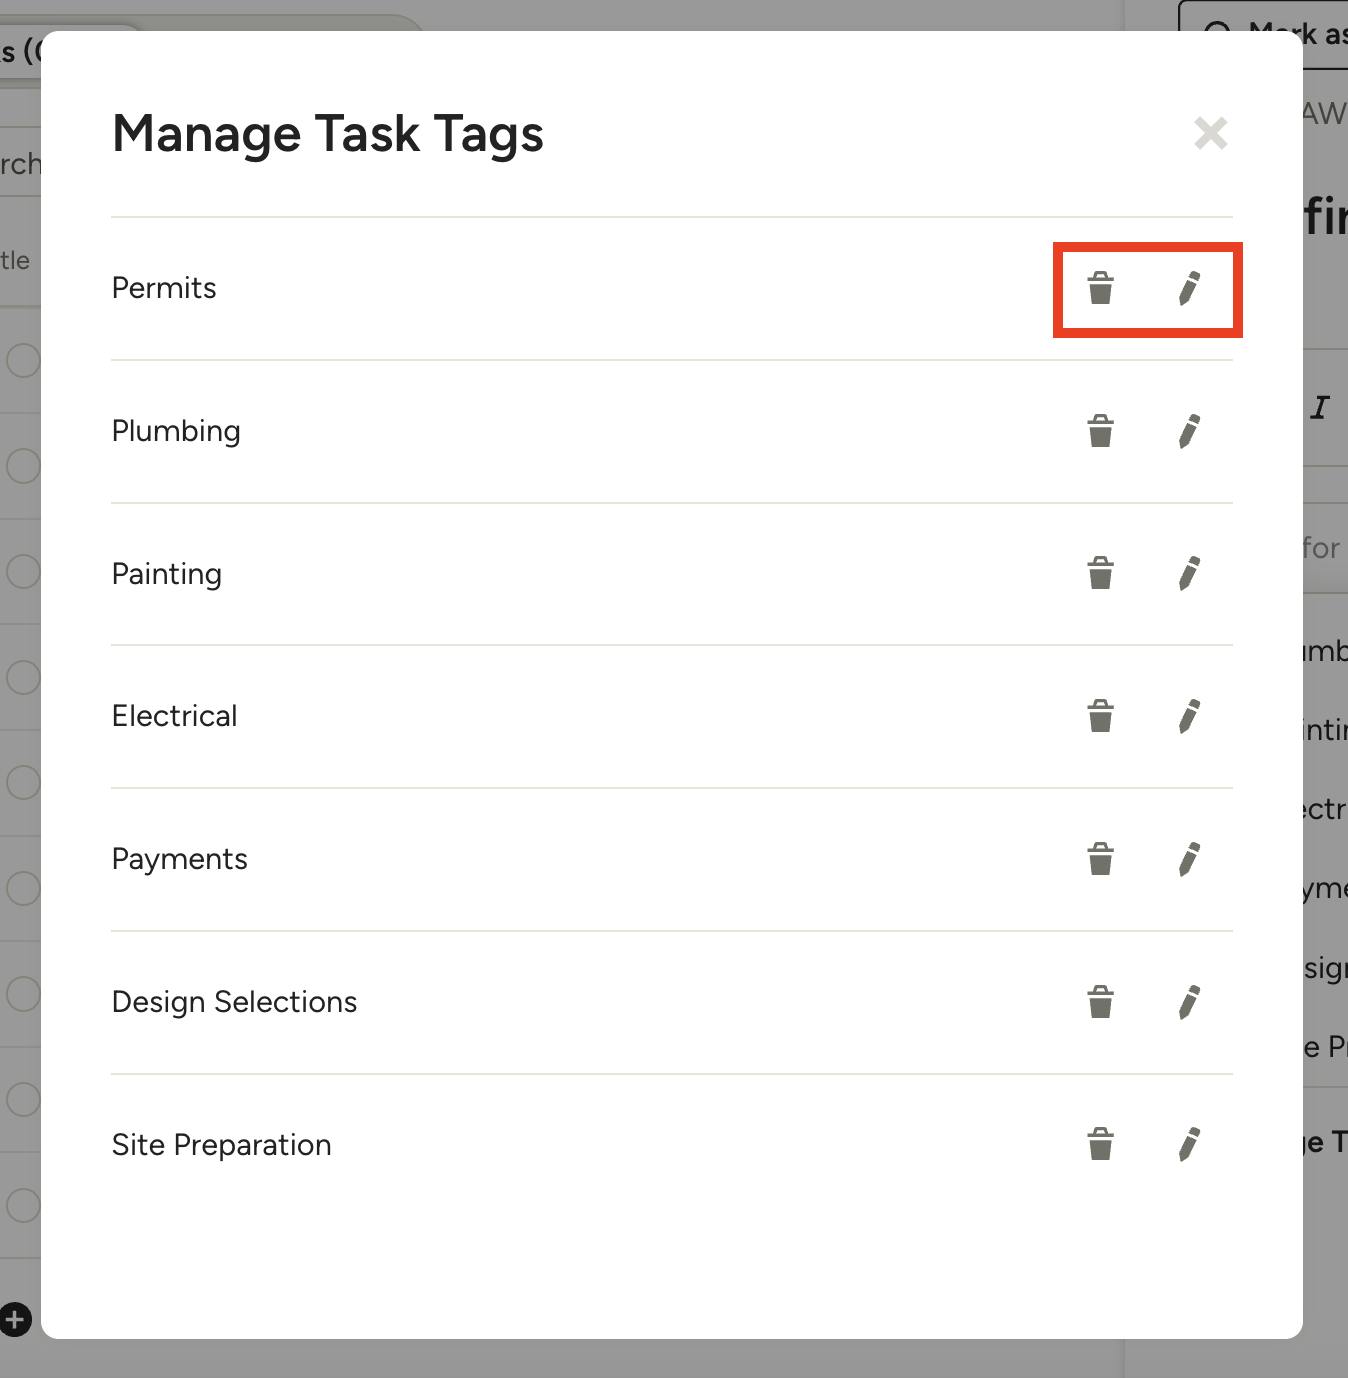
A list of all your existing tags will appear. To edit the name of a tag, click the Pencil icon. To delete a tag, click the Trash icon. Please Note: Deleting a tag will remove it from tasks it is currently applied to and cannot be undone.
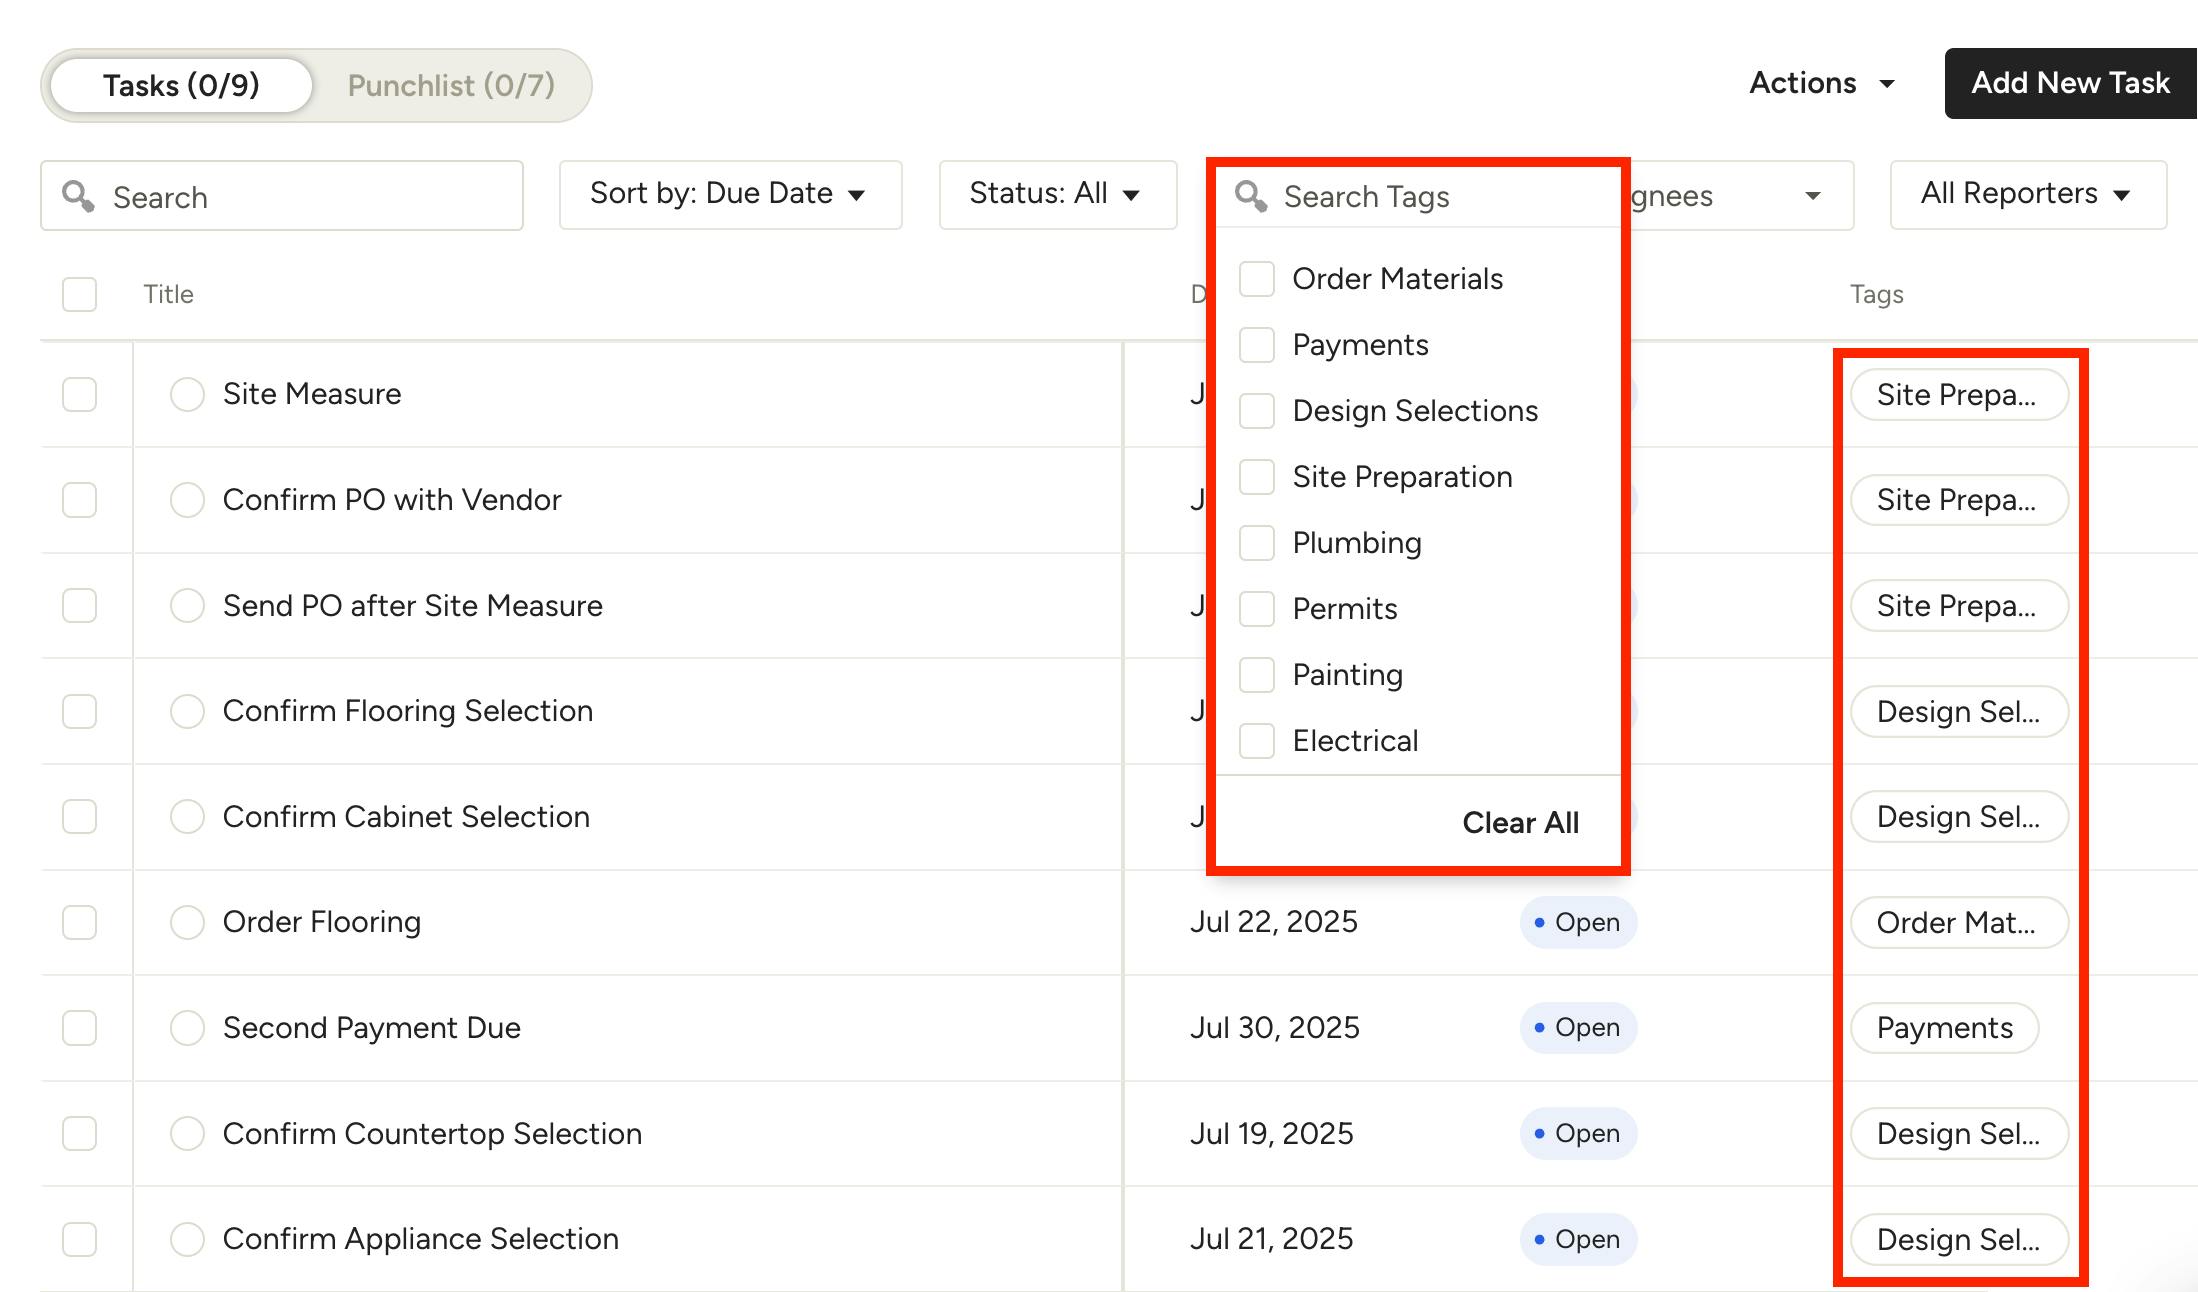
Filter Tasks by Tags
Once you apply one or more tags to a task, you will see them in the Tags column in the Task Center or in an individual project/lead. To quickly filter your tasks by a single tag, click directly on the desired tag and your results will be automatically filtered. You can also use the Tags filter at the top of the list to apply one or more tag filters.